An object with overhangs over 45 degrees normally requires supports to be added before 3D printing. Choosing the right support settings and structures is a skill that needs to be learned when using desktop SLA and FDM 3D printers. In this post we will look at a few examples for comparison and give you some ideas.
Table of Contents
- Cura – Tree Support and Custom Support Plugin
- Simplify3D – Add/Remove Existing Supports Option
- PrusaSlicer – Support Blockers and Enforcers
- Meshmixer – Custom Support Generator
- Chitubox – For Resin 3D Printers (SLA)
Support Settings in 3D Printing – General Tips and Tricks
– Overhangs. When 3D printing an arch-shaped area, layers may sag. Adding extra layers on top makes things worse. Being warm and soft the whole structure will end up looking quite deshaped. FDM 3D printers may be able to deal with some non-extreme overhangs. For example, support settings in a slicer software can be changed to make the layers thicker.
– Layer Height. Simply changing layer height from 0.1 to 0.2 mm can sometimes help with round corners. But of course, it depends on which printer and filament you are using, ABS will show better results than Flex/TPU, for example.
– Speed. Print speed is also a factor here. The lower the speed – the better the result, because cooling (if enabled) does its job in some non-extreme cases.
– Temperature. Temperature plays a major role here. Lowering the temperature can help to cool down the filament and it will set quicker. Some 3D printers have additional cooler fans installed. But please be aware that, if the temperature is too low, it may get in the way of effective extrusion. Always check the filament manufacturer’s guidance.
– Filament Quality. Also, different filaments have different qualities. The properties of the filament may vary even for different color filaments from the same manufacturer. On top of that, if the filament has absorbed too much water due to the wrong storage arrangement, the results would be predictably worse.
– Supports Brim. When supports come from the build plate, having a brim greatly improves their adhesion to the bed.
– Z-hop Setting. Is recommended. Usually, it is 0.5 mm high. The nozzle, while moving, may knock down any supports, no matter how good the bed adhesion is. In the loop video, a nozzle knocks down the support with a 20-layer wide brim.
Cura Support Settings – Tree Support and Custom Supports Plugin
There are 33+ different support settings in Cura slicing software. You can find them by selecting an “all” option in “≡”. We will briefly look at just a few of them.
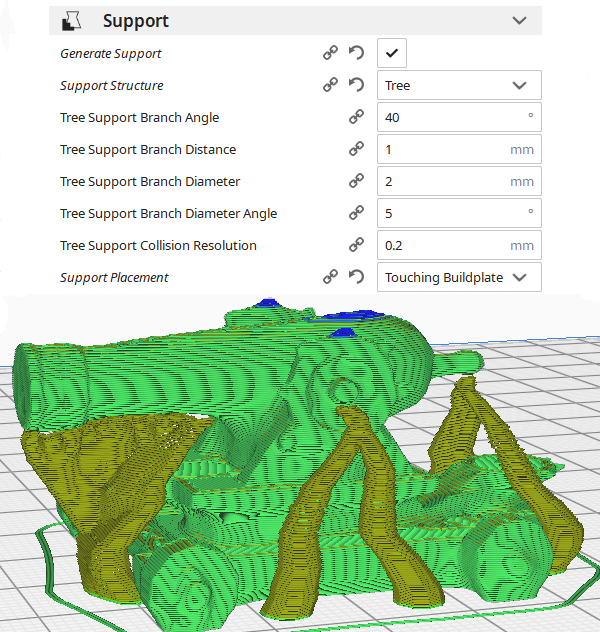
– Support Structure: Normal and Tree Structures. “Normal” is an old way to place supports automatically when “Tree” is a novelty. These supports are generated in a form of the tree. The tree support structure is recommended not just to reduce support material volume but also to reduce post-processing, like removing them. Branches of such a “tree” can lean without touching the base and the walls of the model.
– Support Placement: Touching Build Plate and Everywhere. “Everywhere” may be a bit too much and excessive cleaning and polishing are required to perfect the result. This can leave marks on your object. “Touching Build Plate” option, together with the “tree support structure”, may work very efficiently in some cases.
– Support Pattern. There is also a possibility to choose Grid, Line, Triangles, Concentric, Zig Zag, Cross or Gyroid structures when adding the supports. We guess, such a wide variety of patterns was implemented to make the postprocessing process easier. In some post-processing cases, removing the supports from the model in one big chunk makes sense.
– Custom Supports Plugin. To get the plugin installed, go to Marketplace (right upper corner) – Plugins – Custom Supports by Krasimir Stefanov. After installing, restart the Cura software and untick the Generate Support Settings.

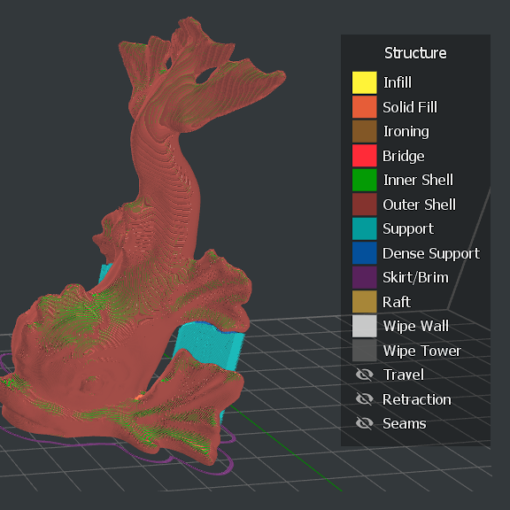
Cura Support Settings – Custom Supports Plugin – Preview and Sliced Preview
(Image: Cura Software Screenshot)
Simplify3D Support Settings – Add/Remove Existing Supports Option
This is a paid software. The ability to quickly add/remove supports in a desired location made Simplify3D an unbeatable leader in this department for a long time. Manually adding supports saves a lot of time during post-processing and the quality of the object only wins from this.

Custom Supports in Simplify3D – Add/Remove Feature
(Image: Simplify3D Software Screenshot)

(Image: 3DWithUs)
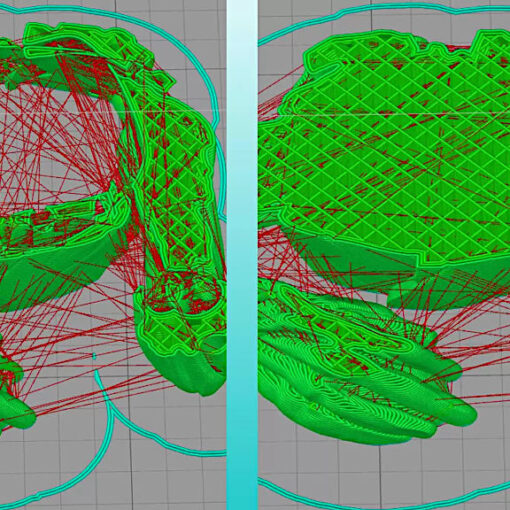
For some designs, like in the picture above, Simplify3D’s “Add new support structures” (or “remove existing supports”) is the optimal way.

(Image: 3DWithUs)
We would recommend a particular support placement workflow to avoid the disaster similar to the wrestlers above. Instead of manually adding the supports from scratch, we would recommend to choose “Generate Automatic Supports” first, and after that to start removing existing excessive parts. Otherwise, it can be easy to miss a place where a support needed. In the case above, we accidentally overlooked the fist area.
PrusaSlicer Support Settings – Blockers and Enforcers
This slicer software was revamped in the recent years. MMU and SLA options were introduced. We wrote about the color-changing features in the past. In the support settings department, Prusa Research team introduced support blockers and enforcers. In a particular case below, we managed to reduce support structures under the arms and in many other places.

Meshmixer Support Settings
Autodesk Meshmixer is a powerful tool. If you came across a model with pre-existing support structures, then more likely it was pre-made in Meshmixer. When other slicer software support features were less sophisticated in the past, Meshmixer often came to rescue, not simply pre-setting the supports, but repairing the meshes in general.
After uploading your model to Meshmixer, go to Analysis – Overhangs. Support structures can be added/removed manually. As adding them is slightly more complicated than removing, we would recommend a simple trick. Increase “Angle Threshold” setting instead and after this, select “Generate Support” and start removing excessive supports.
Then a file, together with the supports, can be exported as STL file and uploaded to any slicer software from what we mentioned above. If you plan to scale the model, we would recommend to do it in Meshmixer before generating the supports.

Custom Support Generator in Meshmixer
(Image: Meshmixer Software Screenshot)
Meshmixer also comes to help to the users of SLA machines.
Chitubox Support Settings for Resin 3D Printers
Chitubox is the only slicer software for SLA machines that we had a chance to play with. And we can say it is extremely fast and straight forward. If earlier, Meshmixer helped to prepare files for SLA 3D printing by hollowing and generating support structures, Chitubox could do it specifically for resin 3D printers (SLA, LCD, DLP) in mind.
Add/remove supports options and many other settings are available to play with.
Please bear in mind that for SLA machines object placement is slightly different. The main reason is having to avoid large areas to attach to a FEP sheet in order to protect both the model and the FEP sheet.
– Island rule. The general rule is to check the preview for the “islands” and make sure they have supports at their tips. This is the rule that applies to both FDM and Resin printers when custom supports placement occurs.

Auto and Custom Supports Settings in Chitubox
(Image: Chitubox Software Screenshot)
Support Other Ideas
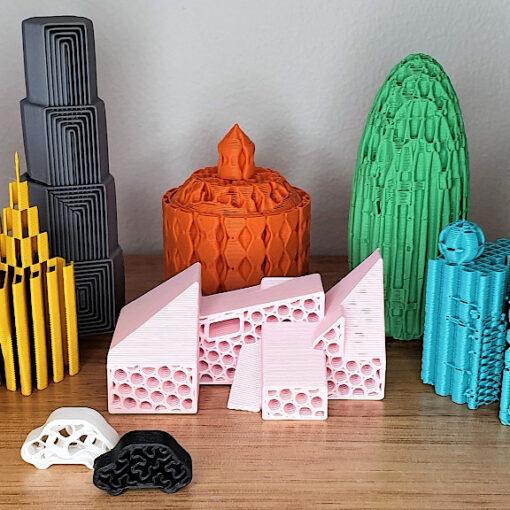
Experimenting with different support layouts may bring some interesting results and good ideas. In the image below, the TPU filament formed a flexible brush.

(Image: 3DWithUs)

(Image: 3DWithUs)
Learn How To 3D Design for 3D Printing Without Supports
During a 4-week course, you learn how to design your own models in Blender and to 3D print them. Simplistic at the first glance, the featured in this course, design ideas actually teach us how to use all the tools and the mods we may need. 45-degree rules and other tips and tricks applied in some unimaginable cases.

(Image: 3DWithUs)