Hexagon shapes are the ideal geometrical objects for many DIY projects. We see them sold in bulk in various sizes and materials. In this guide, we are going to show you how to custom design and then laser-cut hexagons from wooden and acrylic sheets. Also, knowing that a vast collection of such customized and themed hexagons already exists for 3D printing, we have recently realized that such models are easy to laser cut as well. Let’s take a look at the results.
This Guide Covers
- Honeycomb Murals – Ideas
- Laser Cutting vs 3D Printing
- Laser Cutting Wood
- General Tips & Tricks
- How to Design Hexagons
- Laser Cut Hexagon in Acrylic
- Snapmaker Luban Template Collection
Hexagons and Honeycomb Murals
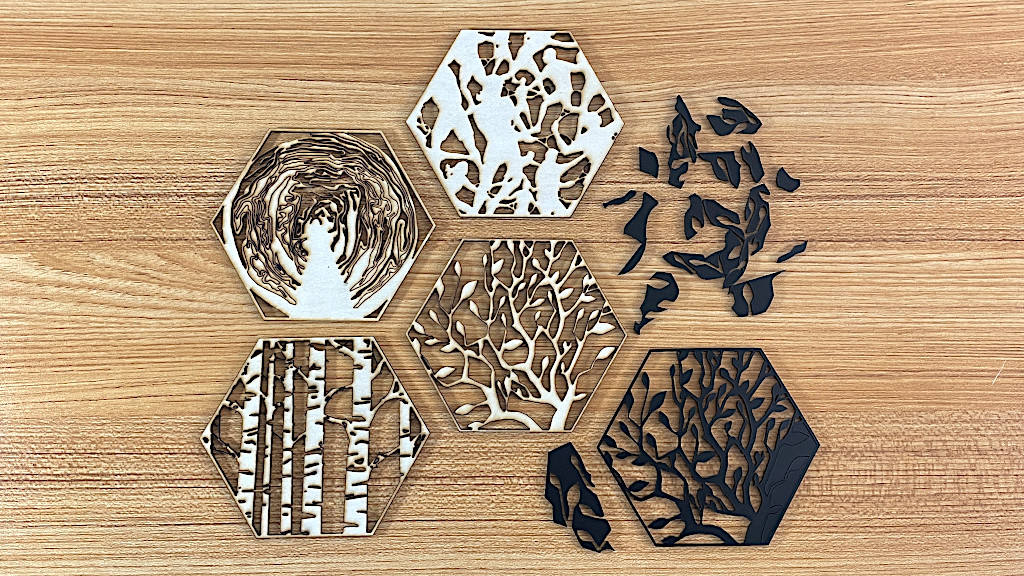
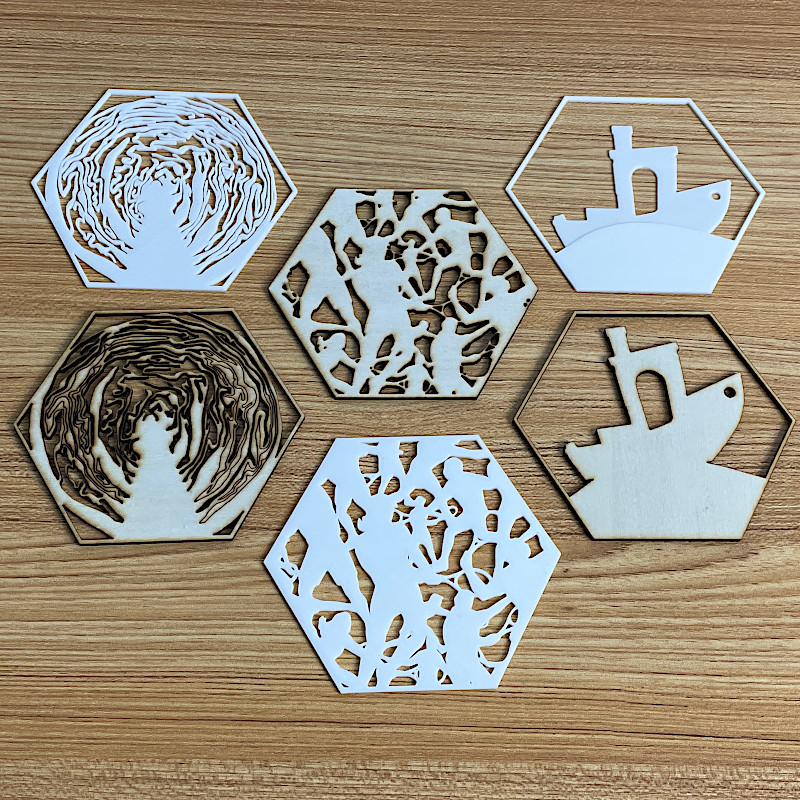
Each custom-cut hexagon can be a piece of art, silhouette-like artwork, or it can feature some memorable event. Thanks to the shape, these single hexagons can be put together into big murals and such, resembling a honeycomb, murals can be themed.
There is a vast collection by María Loureiro who initially created a lot of customized themed hexagons for 3D printing. A lot of people joined her in expanding the collection even further. The project @100hex, which initially started on Thingiverse, was moved to the dedicated website where all hexagons are neatly labeled and are much easier to find.
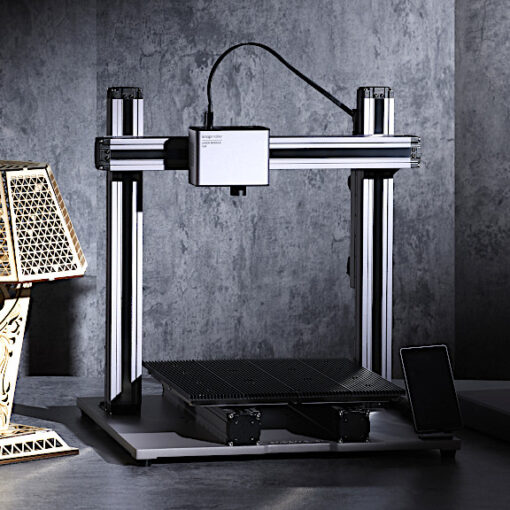
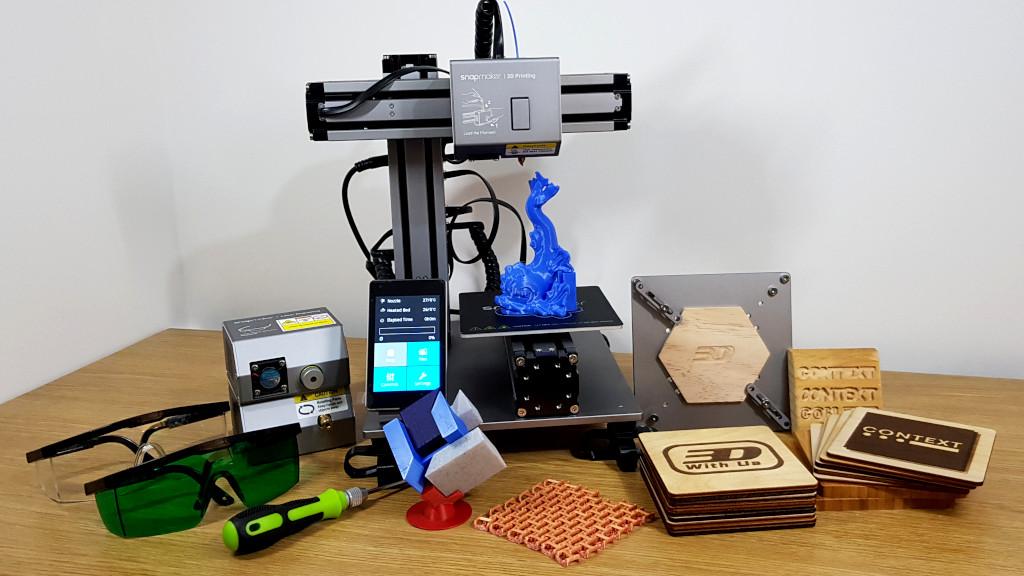
My recent surprising discovery is that such hexagons are good for laser cutting as well. For this guide, I will laser cut a few hexagons from plywood and black acrylic sheets on Snapmaker 2.0 A350T using a 10W laser module.
Laser Cutting vs 3D Printing
There are big collections of themed hexagons that we featured in our 3D printed hexagon guide. The biggest advantage of the laser-cut hexagons is the material. You cannot beat the wood feel and smell of the burnt wood. It gives the feel of the natural material and the scent of a fireplace nearby. Here are some comparison points:
©3DWithUs – Photo: Max Funkner
©3DWithUs – Photo: Max Funkner
Pros and Cons are as follows:
– Material feel. Wood vs Plastic. It is hard to beat the feel of the real wood. It is possible to 3D print hexagons in wood PLA on a well-tuned printer with perfect bed adhesion, but printed pattern will quickly expose the “forgery”. Also, wood 3D printing material is tricky to deal with.
– Smell. Burnt wood smell vs PLA. PLA really doesn’t smell much. On the other hand, wood PLA with 10-20% wood particles smells nice. But again – tricky to deal with.
– Time. To complete a laser cutting job takes approx. 3-25mins while about 1-2 hours to 3D print. Time greatly depends on the designs. Here laser cutting is definitely a winner.
– Post Processing. If both laser and 3D printer jobs are tunned well, there should be no post-processing. Also, a lot depends on the quality of the material. A heat gun may be needed to get rid of excessive stringing in the 3D printing case and sanding in the laser cutting case.
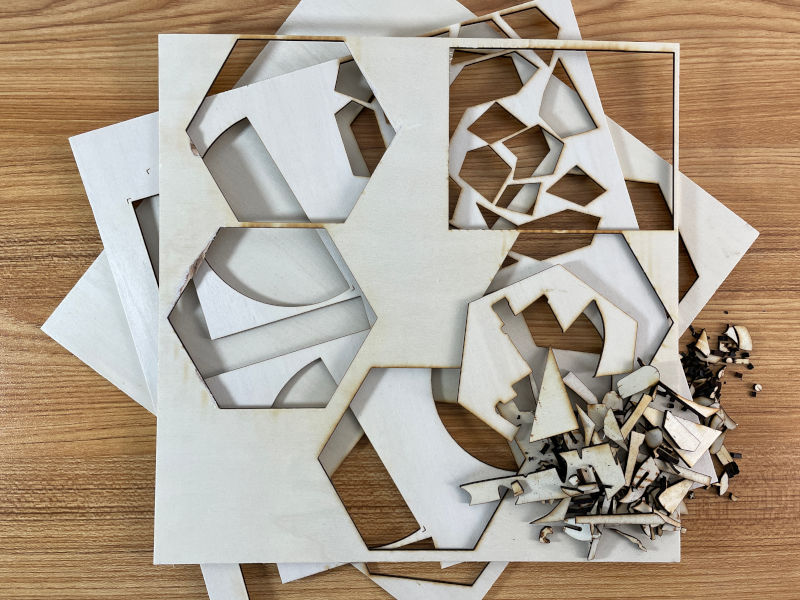
– Material waste. When hexagons are 3D printed, there will be no waste. Laser-cut hexagons produce a lot of waste in form of leftover sheets and cut-off pieces.
©3DWithUs – Photo: Max Funkner
Laser Cutting Wood – Material Choice
I got attracted to laser cutting, partially because of the possibility to create nice wooden objects. But it is important to know that some types of wood and composites are easier to laser cut than others. This mostly depends on how much industrial glue and natural glue are inside the material. The best choice for the laser is softwood like Basswood. Materials like plywood and MDF have a lot of glue in them which may be an issue for the laser. Laser may also stain the object or leave unfinished cuts. All this will require some post-processing such as sanding or coating.
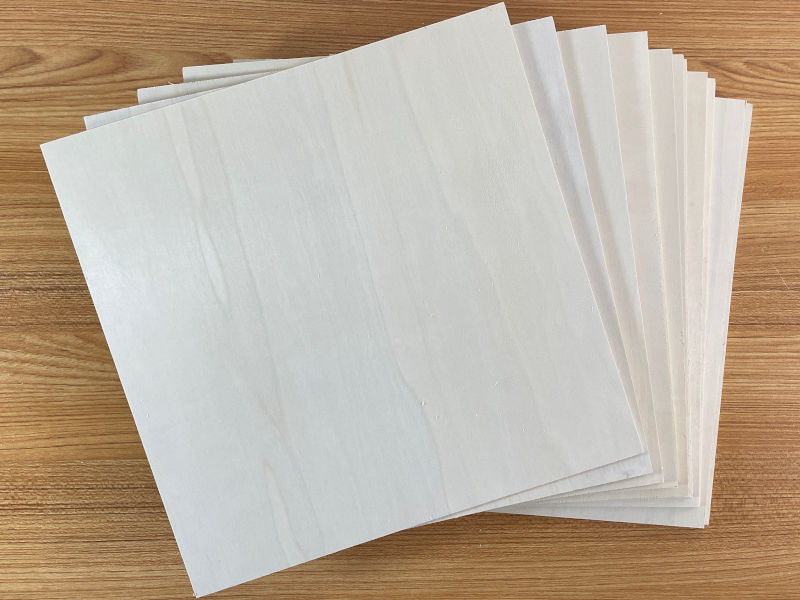
Area: 300x300mm, Thinkess: 3mm
©3DWithUs – Photo: Max Funkner
So far I tested laser cutting on high-quality wood sheets that came together with the Snapmaker products and the ones I bought on Amazon. I had some issues with the 3mm White Birch Plywood I bought on Amazon. Ten 300×300 sheets had some of them with uneven, slightly bent surface and the laser failed to cut through the material in random places. I had to do some post-processing to remove the cut-offs from the objects. Here is one of my favorite tools – Cordless Rotary Tool from Amazon that came to help.
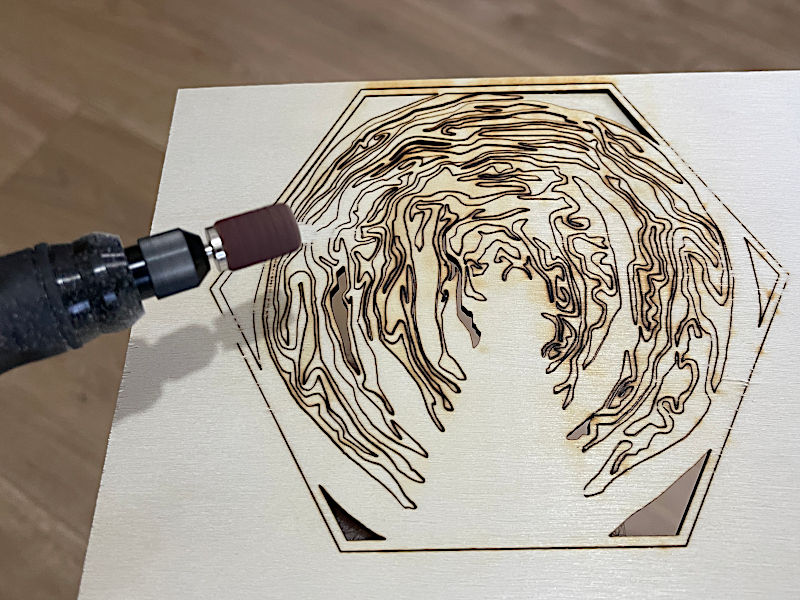
©3DWithUs – Photo: Max Funkner
General Tips & Tricks
In order to laser cut hexagons, we have to keep in mind the following:
– Thin Elements. One of the biggest disadvantages of laser-cut wooden hexagons compared to 3D printed are thin elements. The laser may just burn them down. What is possible with 3D printing may not be possible with laser cutting.
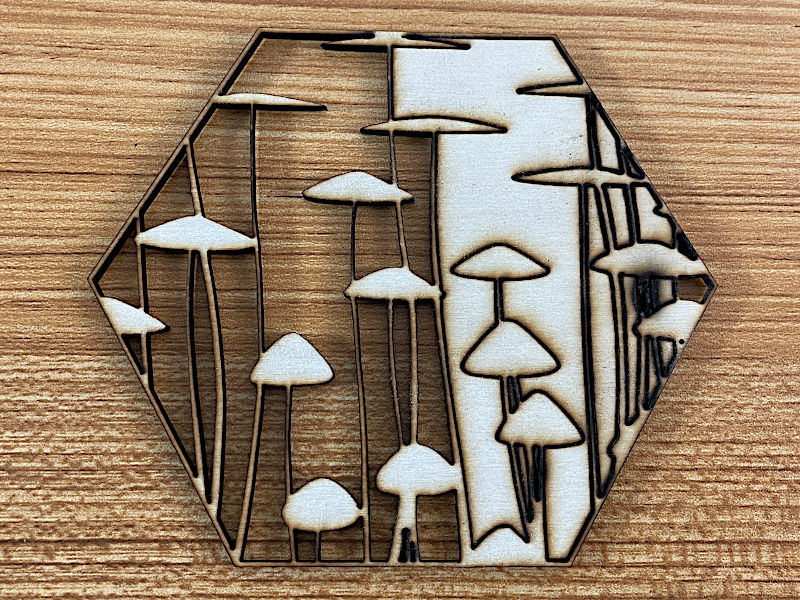
©3DWithUs – MP4: Max Funkner
It is important to tune laser cutting settings well to avoid similar burns. Snapmaker Luban’s profiles generally worked well for me. But as soon I tried to play with the speed, which resulted in misconfigured settings, the wood material burned.
– Brittle Wood. Sometimes wood can just snap without any reason. Spraying such models with various wood treatments would help to preserve hexagons for much longer. Some features can be altered and made thicker.
– Tree branch knots. It may happen some design elements may fall on the tree rings or branch knots of the wooden sheets. Then either laser may not cut it or the design element may snap without reason.
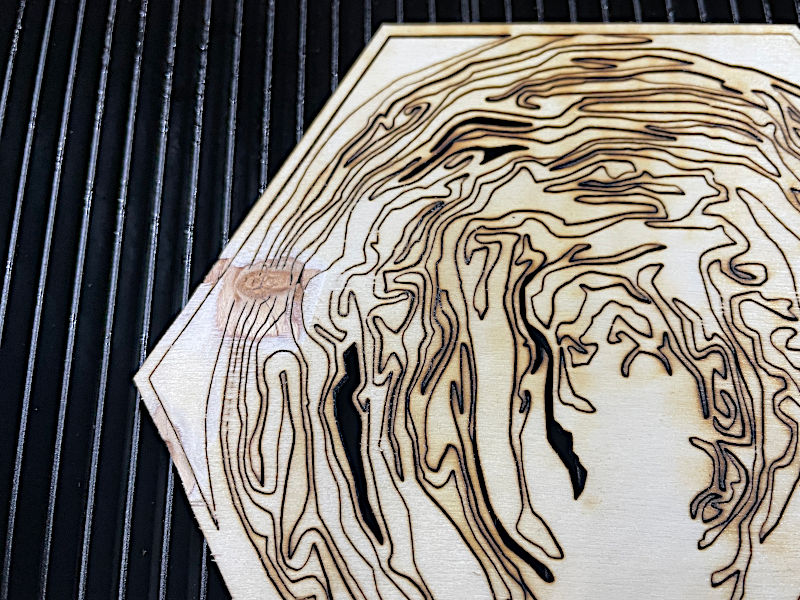
©3DWithUs – Photo: Max Funkner
It is always good to be prepared for a possible failure. Basically, the same as with filament in 3D printing, there needs to be certain knowledge and the feel of wood material for laser cutting. Softwood? Hardwood? How much glue is in it? Is the sheet bent? Etc., etc.
How to Design Hexagons for Laser Cutting
The general rule of thumb for designing is, when filling a hexagon with elements, all parts should be attached to one another. Compared to 3D printing, I would recommend giving design elements more body. Mind thin objects as they will highly likely burn and fall off when removing the cut off pieces. If your hexagon has some big and heavy design elements attached to the frame with only a thin part, it is good to make sure it is replaced by the thicker parts to hold them in place, otherwise it can be easily snapped off.
Hexagon base/frame is very easy to prepare in any 3D design software. In Tinkercad, for example, take the basic item “polygon” shape, turn it 30 degrees and change the dimensions to 120 x 103.92 x 2 mm if you want to stay within the dimensions recommended by María.
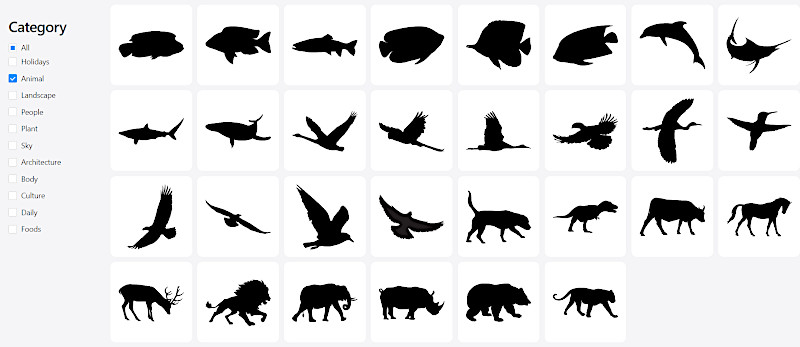
Image to .SVG
There are many online and downloadable tools available to turn images to the SVG format. Such tools will allow us to capture silhouettes and contours from images. The technique is similar to what 3DPrintBunny uses to capture silhouettes for her silhouette art projects. One of the available online tools is the Online Converter, and another option is to use GIMP’s Fuzzy Select Tool.
In GIMP:
– Select the model with the Fuzzy Select Tool
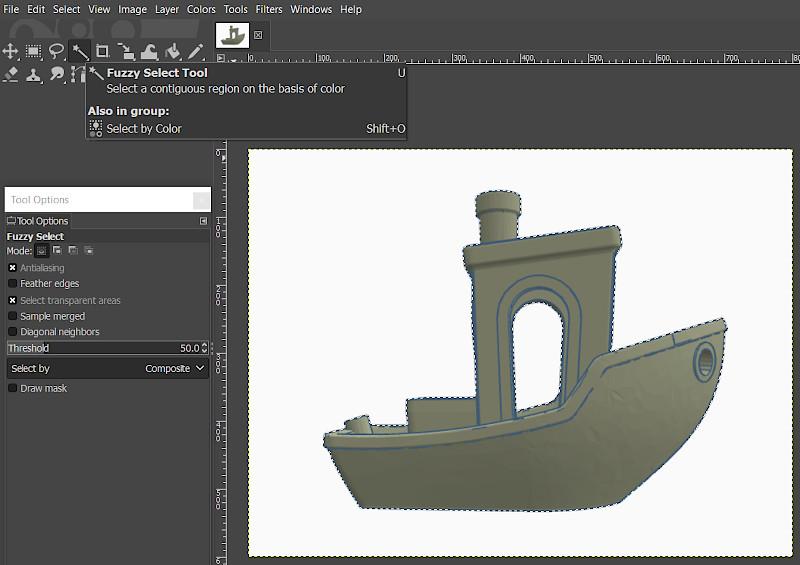
Screenshot: GIMP
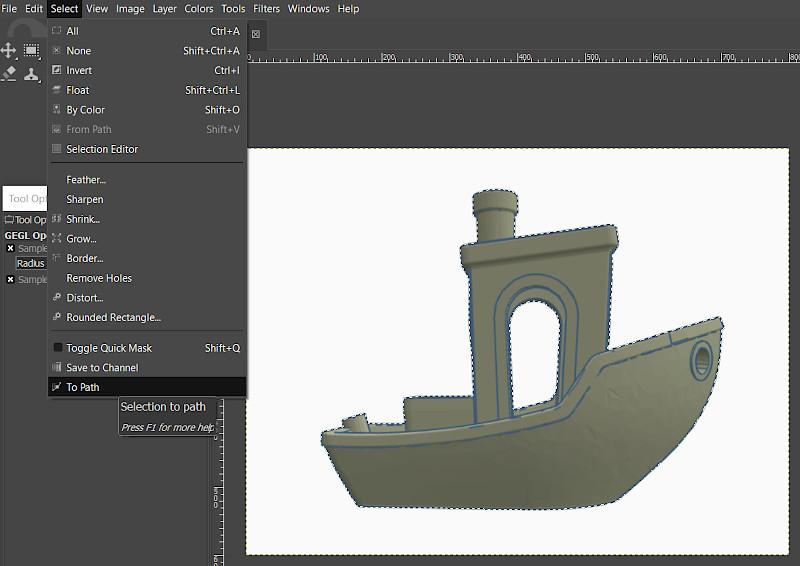
– With the “To Path” option create an SVG
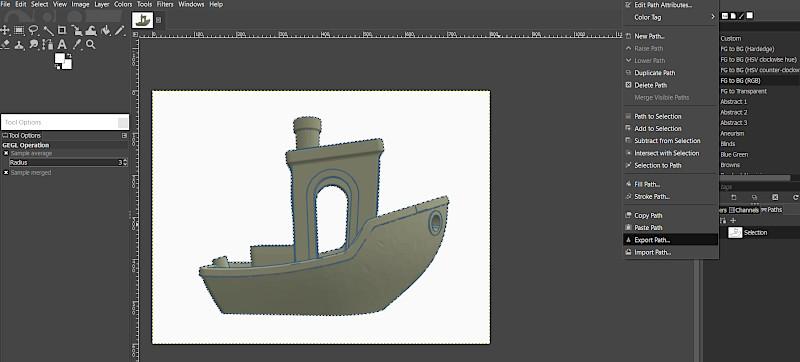
– “Paths” tab will appear on the right-hand side. Export Path/Selection as SVG (don’t forget to add the extension .svg to the file name).
In Tinkercad:
– Upload SVG
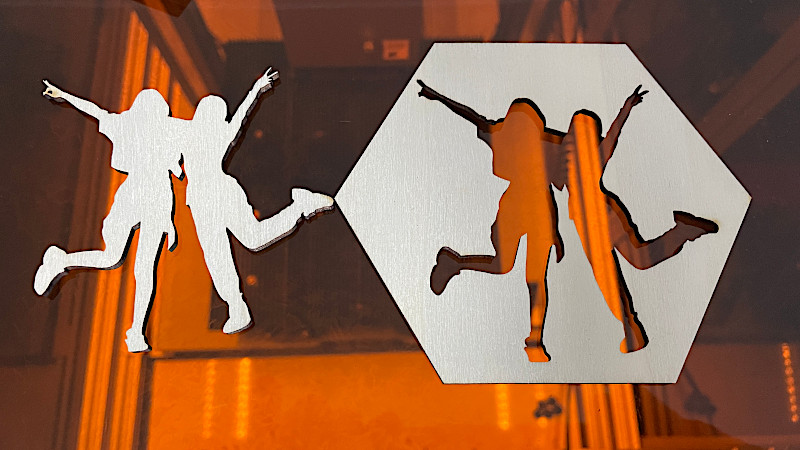
– Connect to the frame and add other features according to the design idea.
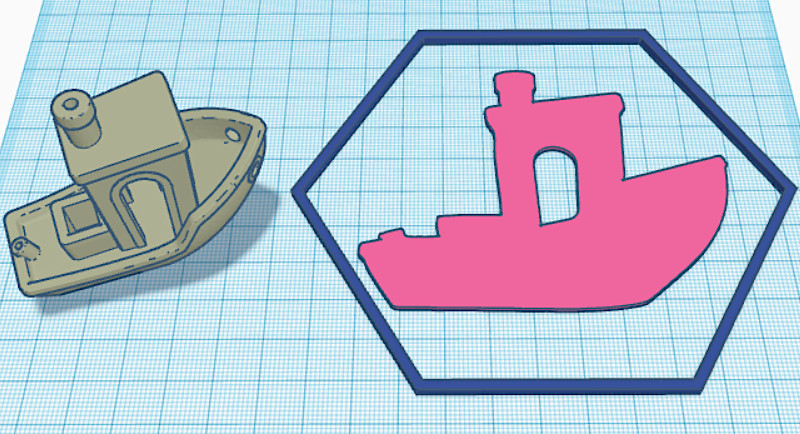
Screenshot: Tinkercad
– Export as .SVG for laser cutting when the hexagon is ready. This file should be accepted by any laser cutting and engraving software.
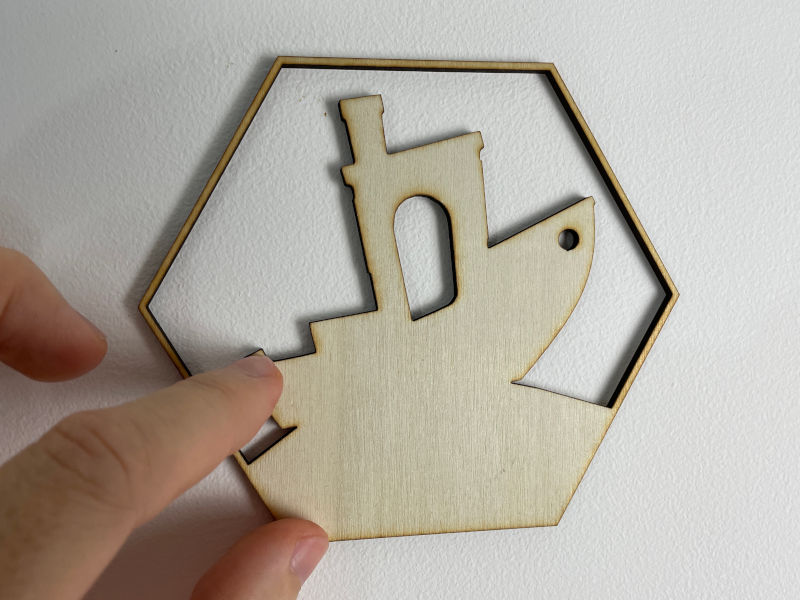
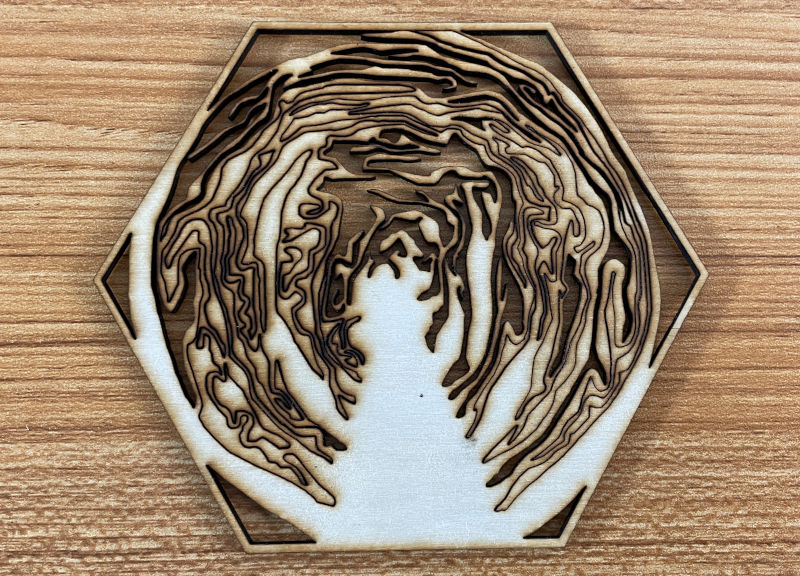
©3DWithUs – Photo: Max Funkner
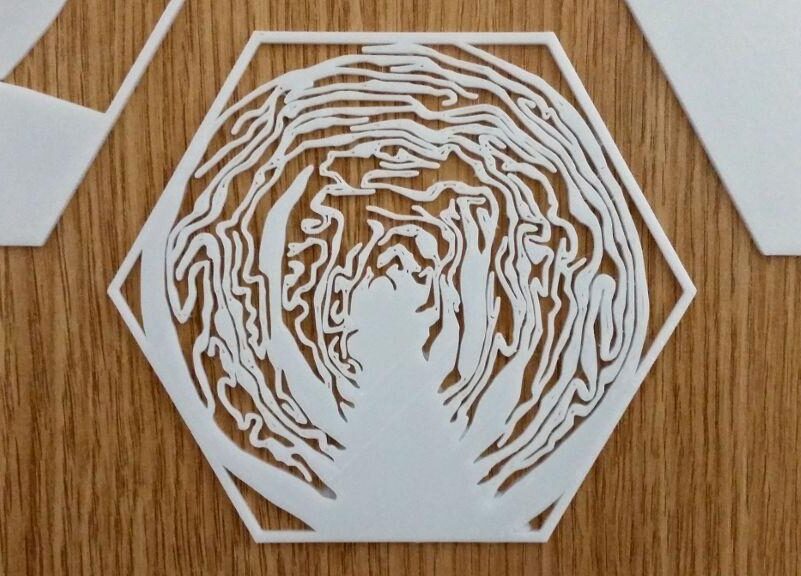
In more complex cases, like with the image of a red cabbage, for example, I had to Threshold it in GIMP, clean it, and connect loose design elements before I could convert the image to SVG.
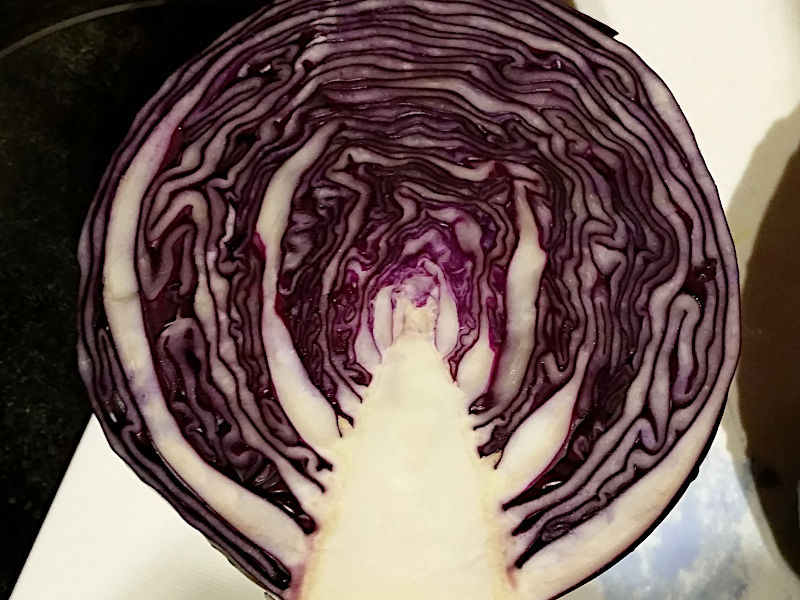
©3DWithUs – Photo: Max Funkner
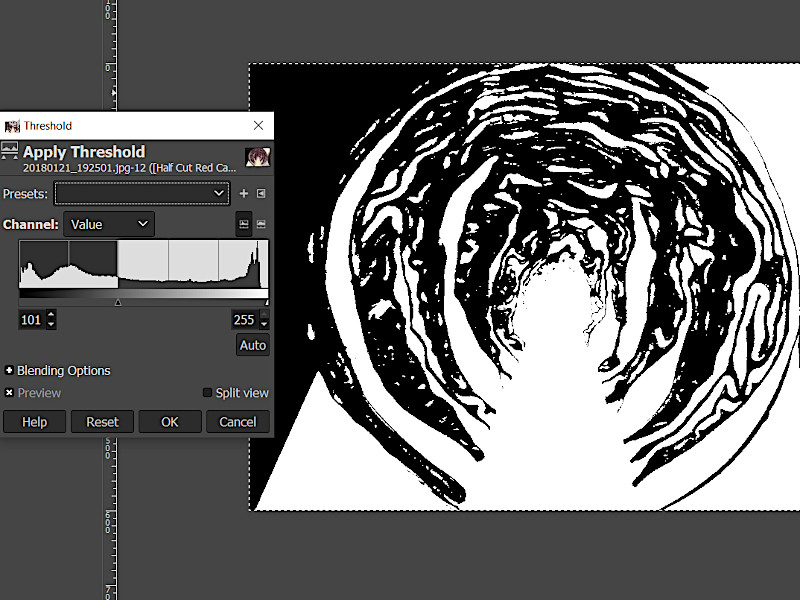
Screenshot GIMP
I prefer using the free software GIMP as it lets me have more control over the image.
Preview in Color in Tinkercad
And again, it is easy to not only turn an existing hexagon STLs to SVGs but also to preview the models in the desired color and see what a 3D printed or laser-cut end result may look like. For example, if I wanted to create a mural using black acrylic, I would see how it looks in advance. Or if I have plywood sheets, I would pick the color to resemble my material the most.
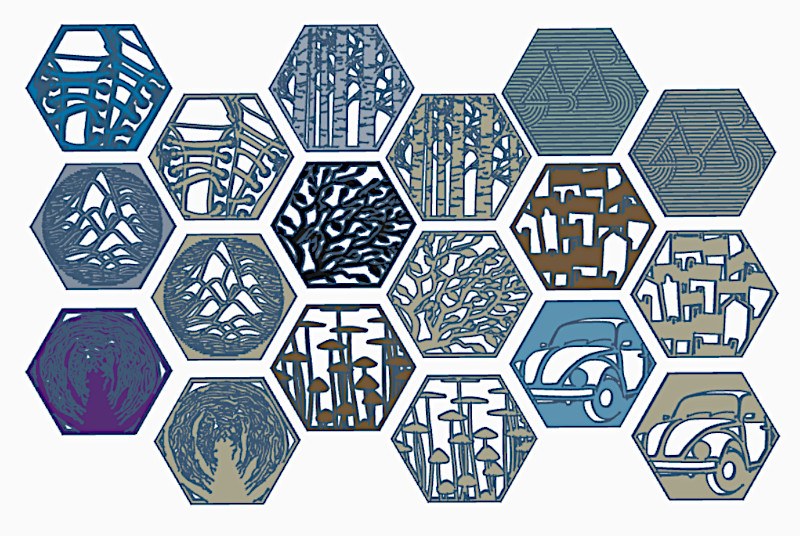
Screenshot: Tinkercad
Plywood vs Black Acrylic
Of course, it is possible to laser cut hexagons using other than wood-related materials. Black acrylic, for example. It is a predictable and much easier to deal with material compared to plywood, for example, as it is consistent and the sheets are straight. I had a small piece of such material as it came together with a 10W laser module. Laser cut hexagon came out flawlessly. In fact, it worked so well that I kept all the laser cut-off pieces so I could play with them as a jigsaw puzzle.
©3DWithUs – MP4: Max Funkner
Laser Cut Hexagon – Black Acrylic – Jigsaw Puzzle
SVG and STL files:
You can find Half-cut Red Cabbage, Tennis, 2DBenchy both STL and SVG files on Gumroad. Also, hexagon frame (120 x 103.92 x 2mm) file for custom designs if you want to stay within the dimensions.
For the rest of the featured models please refer to María Loureiro’s collection.
©3DWithUs – Photo: Max Funkner
Luban – Templates for Laser and CNC Jobs
In my latest Snapmaker 40W Laser Module review, I featured a massive .SVG collection in Luban, Snapmaker Software. This includes quick templates and designs ideal for creating logos and banners. The full collection is readily accessible via ‘Insert Shape – Online Library,’ allowing you to add designs to your workspace effortlessly.
Screenshot: Luban
And of course, I quickly created a file by placing two templates together and applying the right size to the hexagon. Then it took me less than a minute to laser cut it. Here is the result:
©3DWithUs – Photo: Max Funkner
Related Guides:
- How to Design and 3D Print Hexagons
- Silhouette Art – How to Design and 3D Print
- 3D to 2D – How to Create a Sticker
- Best and Budget Laser Cutters and Engravers

2 thoughts on “How to Design Hexagons for Laser Cutting”
Thank you for this great article & information. Where did you get your black acrylic from? Want to try this with my laser without wasting money on crap materials.
It comes with a 10W Snapmaker Laser Module. However, it’s possible to purchase them from the Snapmaker website. Five sheets for $29 is a bit pricey, though! On the other hand, all Snapmaker materials I tried were of exceptional quality.