Marcidy
Authors
-
Joined
Everything posted by Marcidy
-
Thanks! Feel free to link it. Nice article! I didn't even know you covered this topic!
-
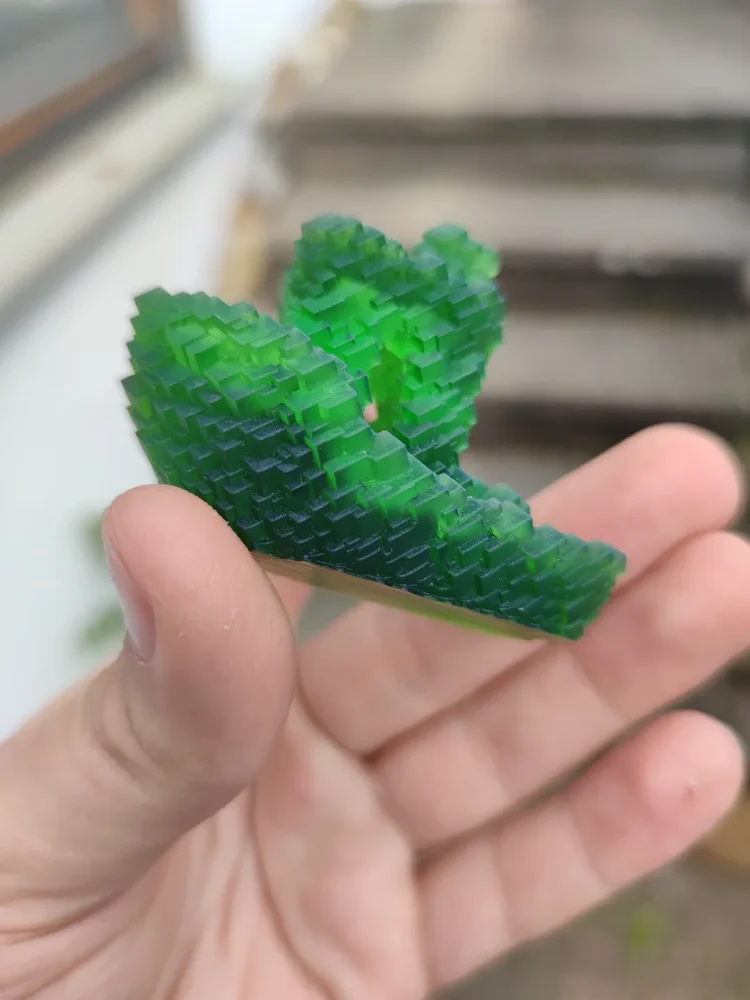
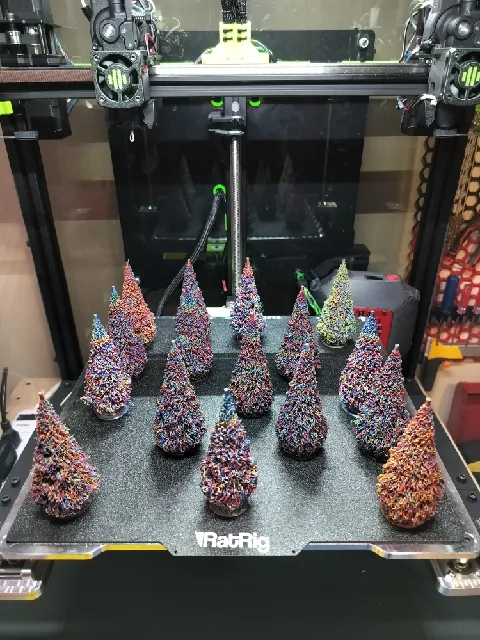
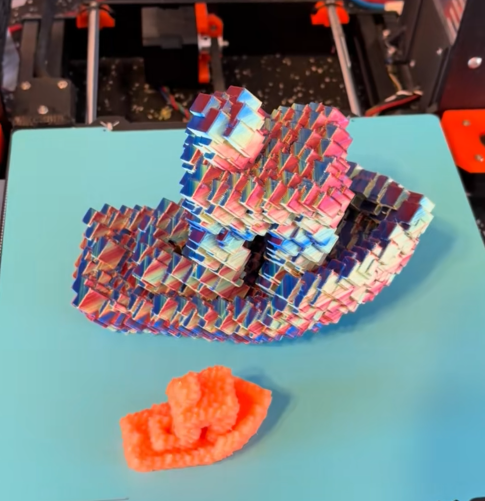
I reached 10,000 downloads on Printables and I wanted to say thank you to everyone who supported me and my models! Moreover, I wanted to share a few things about my journey and what comes next. I started making and uploading 3D models in October 2025. I made my first designs in TinkerCAD and Blender. Then I discovered FreeCAD, and I have been using it ever since. I have been designing all kinds of decorative, functional and miscellaneous things with them. I have also been taking part in contests and community challenges alike, while uploading some of my personal projects as well. In the future, I plan to keep extending my current collections with new or better designs, like: Glitch models Fidgets and toys Accessories for the Honeycomb Storage wall (I will also keep adding some of my personal projects to the mix and keep participating in contests as well!) So, here are some of my most favorite makes of my models: Glitch Benchy make by @LegoRJ35 I love the radioactive look, the green resin shows! Christmass Tree make by @Agit68_226454 They are just so colorful! I love them! Another Glitch Benchy make by @dominic_301362 That Silk Twist PLA just looks astonishing (and the size of it — wow)! Thank you again to everyone, who helped me with likes, downloads and makes on Printables! (This post was mainly focused on my Printables journey, but I am active on other platforms as well: linktr.ee/marcidy)

-
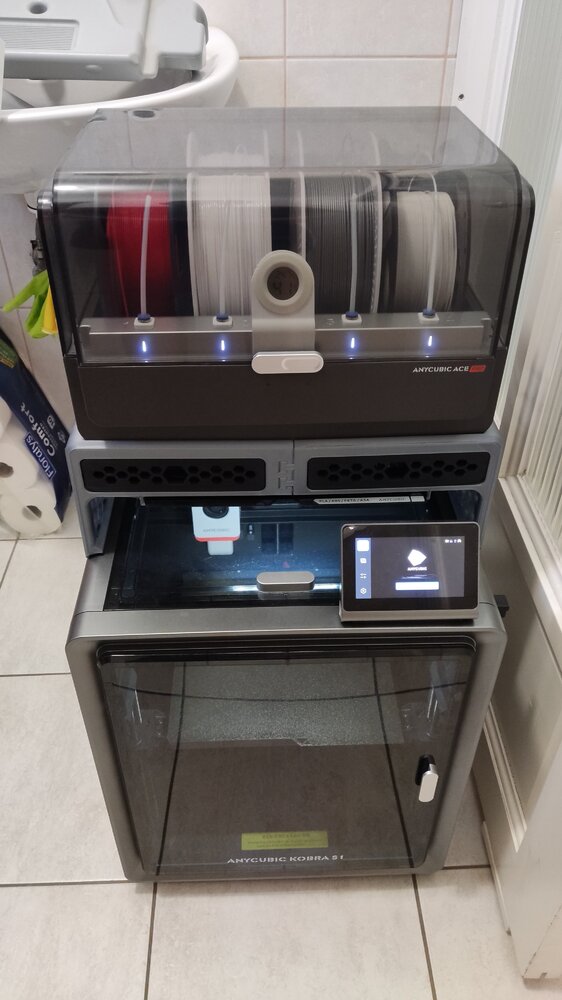
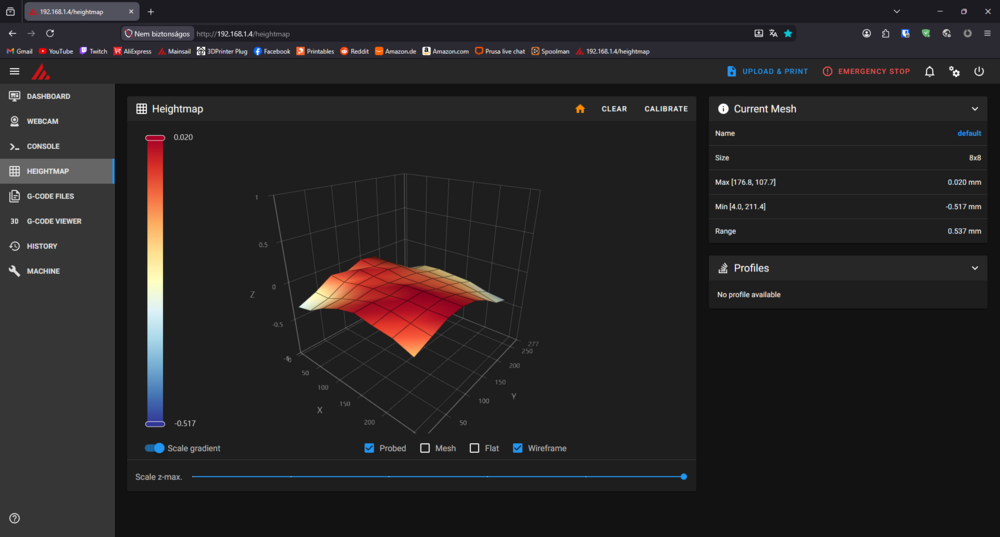
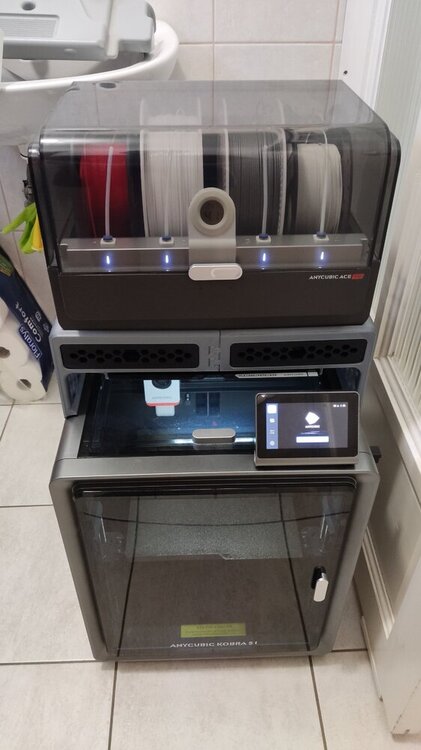
Hi! Just saw this topic/review while browsing the forum and I wanted to share my experience as well. I got the printer in 2025/June and I had it printing for more than 500 hours. I mostly printed with all kinds of PLA (silk, matte, coextrusion, gradient, glow in the dark, etc...) and recently PETG (occasionally I tried TPU as well). The default print profiles from Orcaslicer work really well and there is not much more to calibrate. I tried modding it as well, but that wasn't a smooth run: I tried out different hotends and nozzles (even two diamond ones), but all of them underperformed and the original brass nozzle came out on top. What actually improved the printing experience was the Rinkhals community firmware. It grants you full access to the printer: You can change the config (Speed up the color change for the ace pro), see your bed mesh, remote print with Orcaslicer, Mainsail/fluuid webUI, etc... Here is my bed mesh with custom leveling: 8x8 bicubic as opposed to the original 5x5 lagrange method. I also changed the leveling speed. Another really good mod is the Ace Pro riser: It gives you more space to work with. You can also remove the top cover with it. The side panels are even compatible with the Honeycomb storage wall project! (You can check out more about that here) At last but not least, You can check out my prints with the machine here. Most of those makes were printed on this printer (check the tags). Overall it is a great printer for an even greater price and that's why I chose this machine as my first 3d printer. The only downside i can think of is the warped bed (This is the most common problem for users): It has some really low points near the back corners. Edit: I posted about my setup on SUNLU's new community event if you are interested: https://www.sunlu.com/community/posts/323/a-humble-workspace-1-printer-but-60-kg-filament
-
Hi! Thank you, thats very kind of you! I would absolutely love some PETG instead of PLA! I got way too many PLA at home now :D (30+ kg). Also after I finished the project I redeemed my points from bambulab for some PETG. Unluckily they just announced 1-2 days later, that they are renewing their PETG Basic with more colors and additives (They pulled the rug on their PETG-HF project). As for request i don't know if SUNLU has them on stock, but bambulab didn't have any orange/green available at the time. So maybe one of those colors? But it's perfectly fine if they send some random filament they have at the ready :) Thank you for the giveaway!
-
Hi! 3DWithUs has a list of ongoing giveaways related to 3D printing: https://3dwithus.com/3d-printer-giveaways You could try your luck in one of them.
-
Nice article about the topic. Personally i find 3d printed shoes a little bit pricey. But printing them at home is very interesting. Especially now, when consumer level tool changers are available. You can now print it in multicolor (even with the new technology: color mixing) and with perfect supports without waste. Still wont be a perfect quality, but i would love to have my own 3d printed flip-flops at home :D What would really interest me is, how does PEBA, TPU and SBS compare to each other in this regard.
-
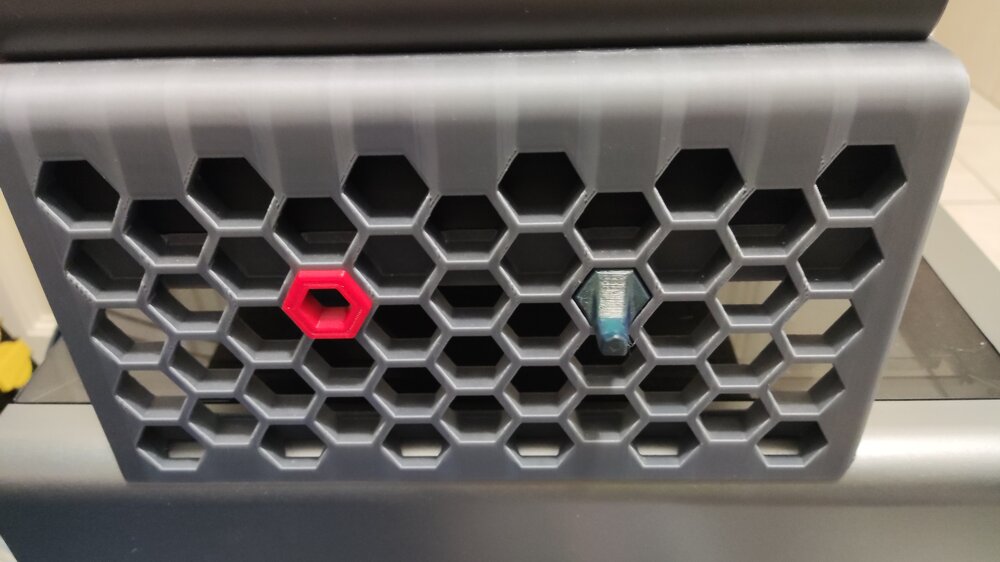
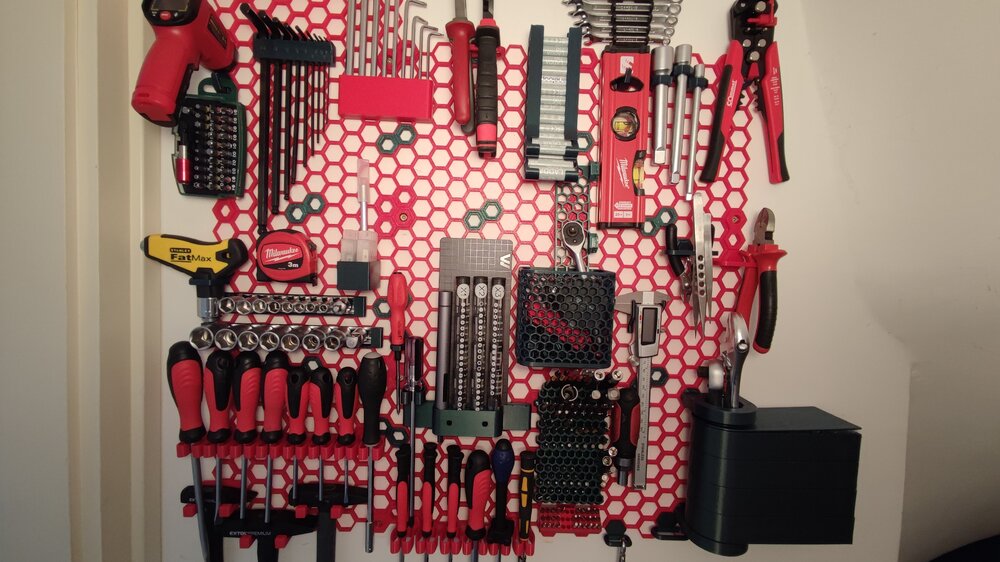
This was my very first time trying out PETG to print something that needs to be more durable than PLA. I suggested this Honeycomb Storage Wall project to my father and we aggreed to try it out with PETG. It went much easier than excpected. A little bit of stringing here and there, but the final result was good and worth it. Now we are thinking of printing another one for the garage wall as well :D I used CR-PETG for the red parts. Green one is from 3dk.berlin. After i ran out of both I started to use SUNLU PLA+ red (Yes, the one i got from the giveaway :D), PLA+ still does the job, altough it feels a little bit weaker than PETG. I took most of the models from Printables. Some i modified, some i made myself (i didn't publish all of them yet): Honeycomb storage wall Parametric HSW Hook Parametric HSW Multipurpose Holder for plier cutter and other tools Parametric HSW Multipurpose Holder for Screwdriver and other Cylindrical tools 100x70x100 Container with HSW Adapter Swivel Trays for Honeycomb Storage Wall (HSW) Battery holder for AA+AAA, honeycomb storage wall (HSW) HSW Multi-purpose Holder Hex Allen key holder for Honeycomb storage Smaller Screwdriver holders HSW M3 Insert - Heatset Insert For Mounting. HSW Wowstick Holder Screw driver holder (all-in-one) Multiboard/HSW tape measure mount (for any tool with a belt clip) HSW IR Pyrometer / Infrared Thermometer holder for Honeycomb Storage Wall HSW Hook Honey Comb Wall remixes and introducing my Screw Wall!!! HSW Caliper and CR2032 Holder HSW Vise Grip Wire Stripper Hanger Pliers Holder HSW HSW Hammer holder Hex Bit Holder (Honeycomb storage wall Compatible) HSW Tiny Bit Holder 36 holes Screwdriver Holder I can recommend this project for anyone who wants some modular storage on the wall. The base project has over 3000+ remixes and still counting. Also it is not just for tools, it can hold anything you can imagine, Just find/make the right model for it :D. I hope this post inspires someone to give this project and PETG a try :)
-
Yes, it is. I use it when i want to estimate the leftover filament on a spool, but i dont have an empty spool of that brand. I see you marked me as the contributor (Thanks :D), but as you can see on the link, the catalog is not mine, i didn't publish it on Printables. The author is @Scuk_253012. I don't want to take credit for his work (Sorry for not pointing it out in my original comment).
-
Cool! If anyone needs empty spool weight info: https://www.printables.com/model/464663-empty-spool-weight-catalog Edit: Credit for the spool catalog goes to @Scuk_253012
-
Hi! I don't know much about Apple laptops (Macbooks), but what I would recommend is (if it is possible) to install custom drivers/firmwares or configure the current ones: Most laptops allow you to disable the touchpad completely With the right firmware you can also disable parts of the keyboard or remap it to a different action, write macros, etc... About 3D printing the parts: I found these that might give a good starting point for what you need: https://www.printables.com/model/171235-macbook-keyboard-cover https://www.printables.com/search/models?q=laptop+stand (Also, it would be helpful if you could share the build volume of your printer, so people can take that into consideration) I wish you the best and hope you will achieve your goals!
-
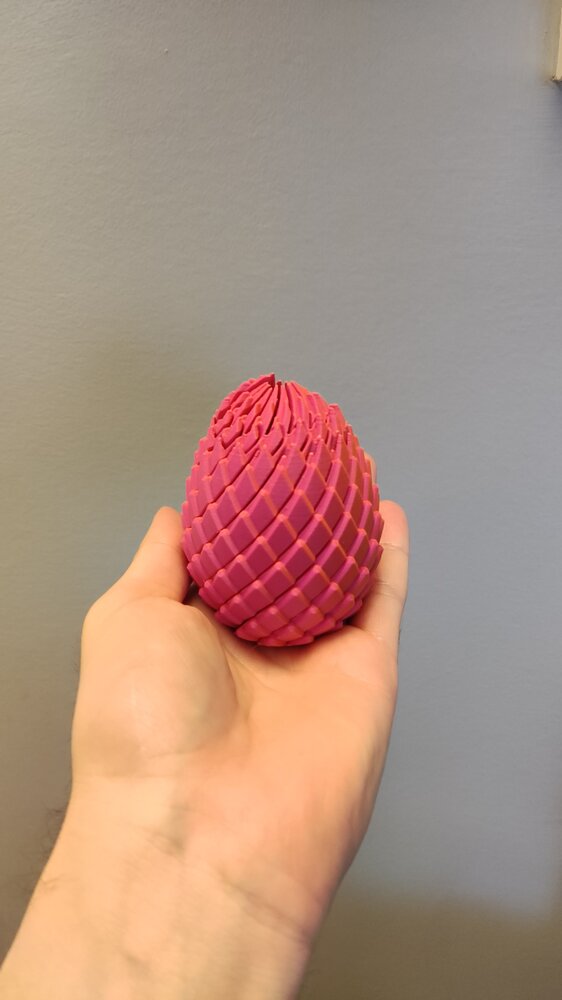
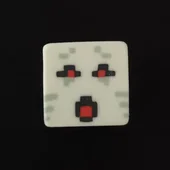
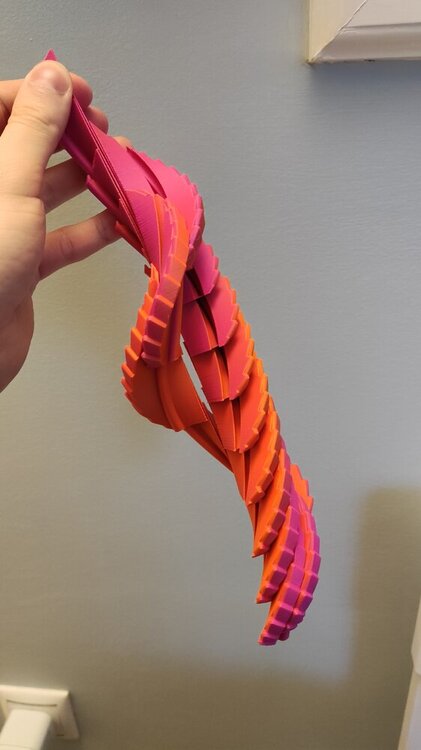
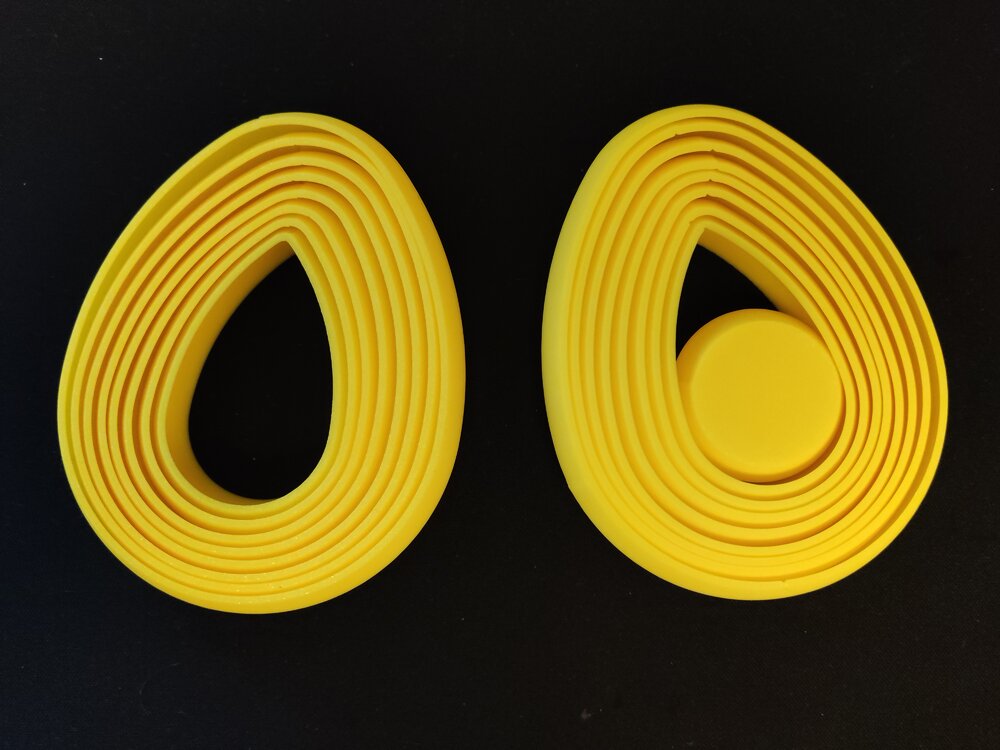
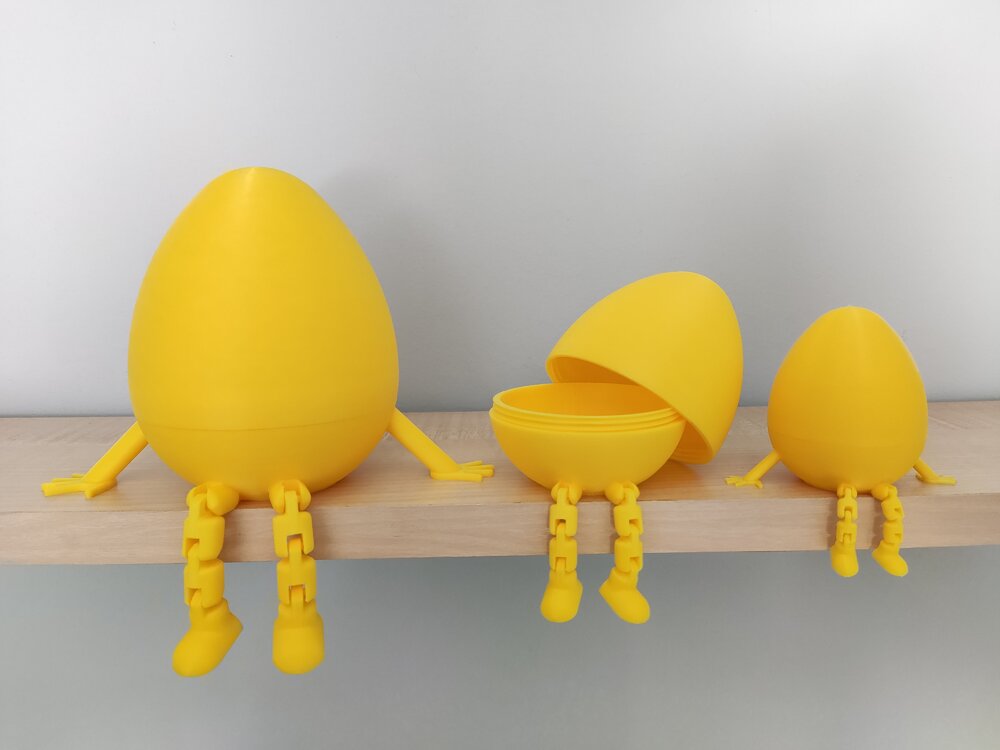
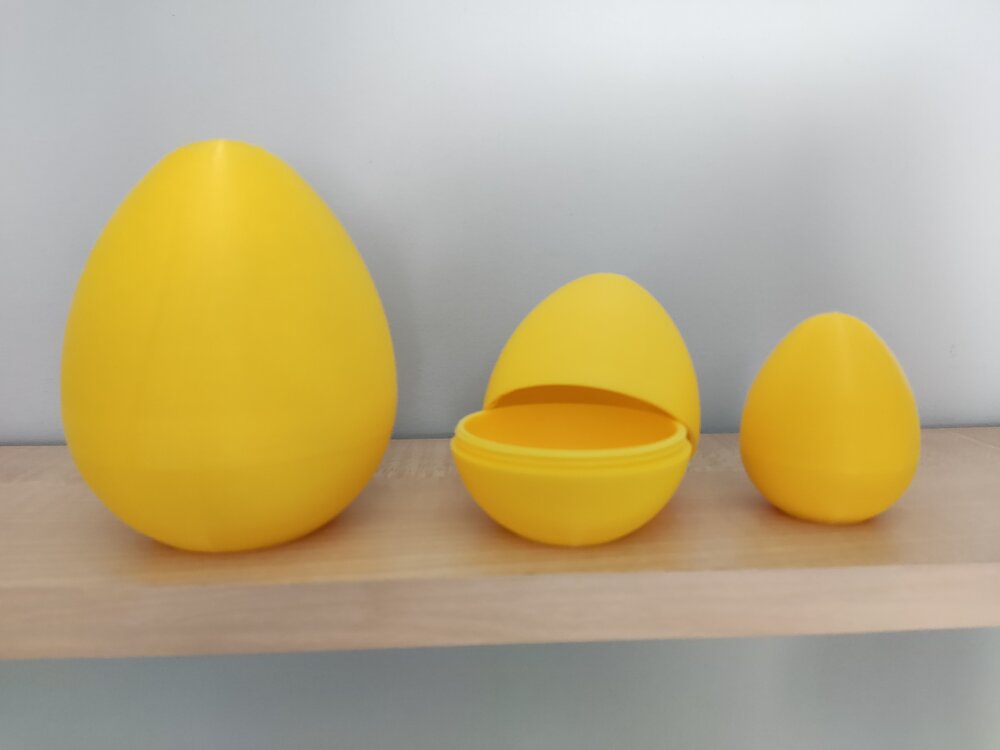
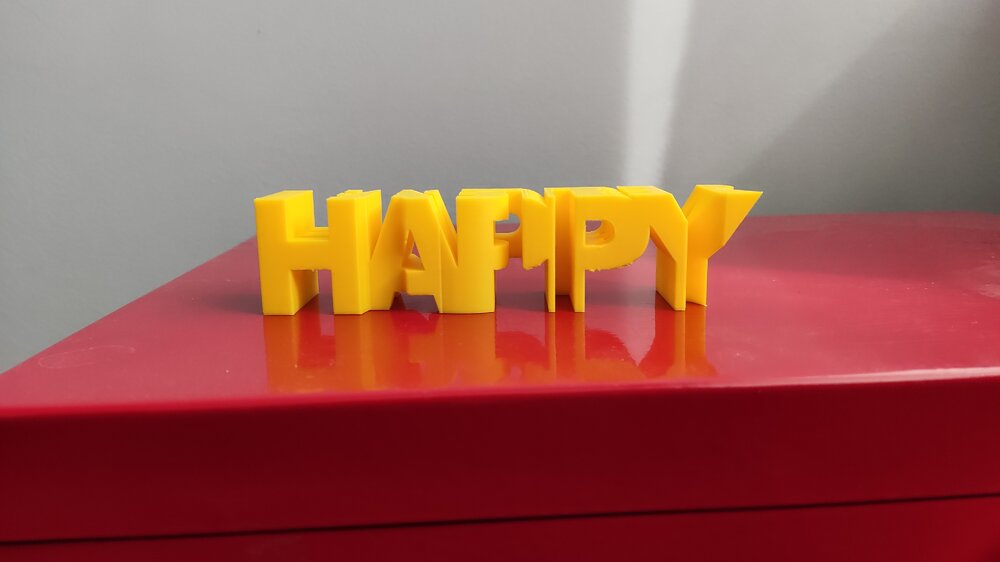
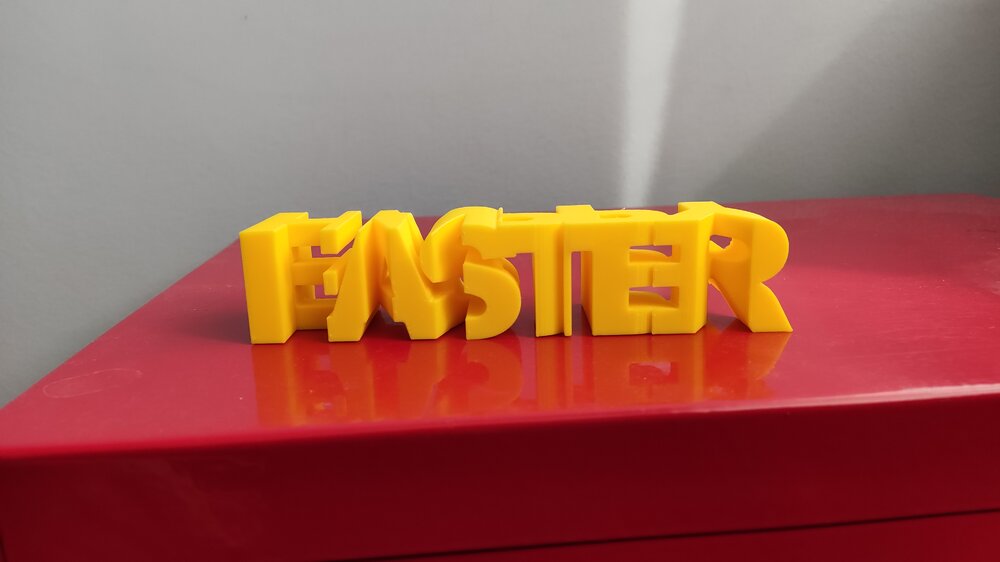
I both designed and printed some models for easter. Mine are a little bit simpler than others, but they came out well and as expected: These first 3 are my designs: Layered Egg Fidget: Articulated Twist Open Egg Containers: I made a mistake while modeling them. The left hand is backwards as you can see on the picture. Since then i updated the design and the issue is fixed. Simple Twist Open Egg (Original version): This was my first time modeling threads for 3D printing. They came out acceptable. The smallest one can slip but still holds the egg together securely. Other sizes are fine. Twisty Dragon Egg Fidget: (This design is not mine) I also made a showcase video for this to enter Snapmaker's easter giveaway: https://x.com/Marcidy_3D/status/2037489182990385450 (The theme might be familiar to some people :D) Happy Easter!

-
Really cool! The tutorial is great as well and easy to follow. I downloaded one of your models to try it out. It came out great. The supports were a little bit inconvenient to remove, but i managed. Thanks!
-
Yes, it is a native, Kobra S1 time-lapse video. The inbuilt camera is not the best in terms of quality, but speeding up the timelapse (30s -> 5s) makes it look a little bit better (Also cut it to match the 9:16 aspect ratio of my phone). I didn't share it on socials, so feel free to do so if you like :)
-
Made another vase as well. I wanted to use this video for a giveaway submission, but later realised it needs easter themed designs. So i edited it a little and I am uploading it here. 0315.mp4 Sources: 3D Model: Scaled to 250mm tall (Only Z-Axis Scale) Filament: SUNLU dual-color Orange+Red Matte Video Editor Background Music Thank you again SUNLU and 3DWithUs!
-
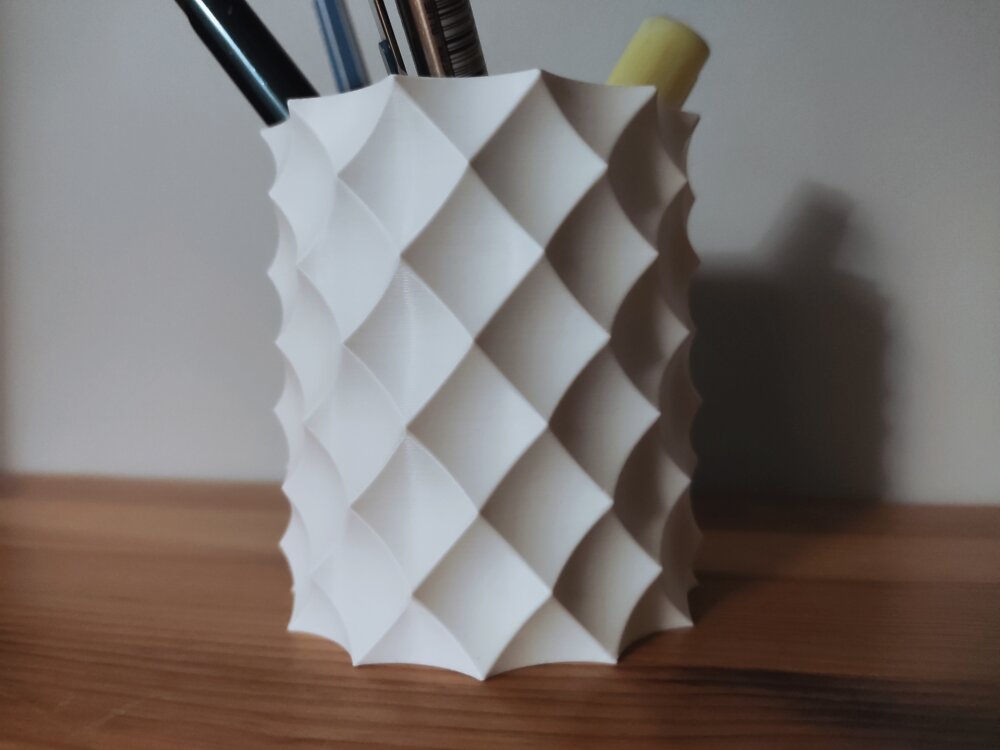
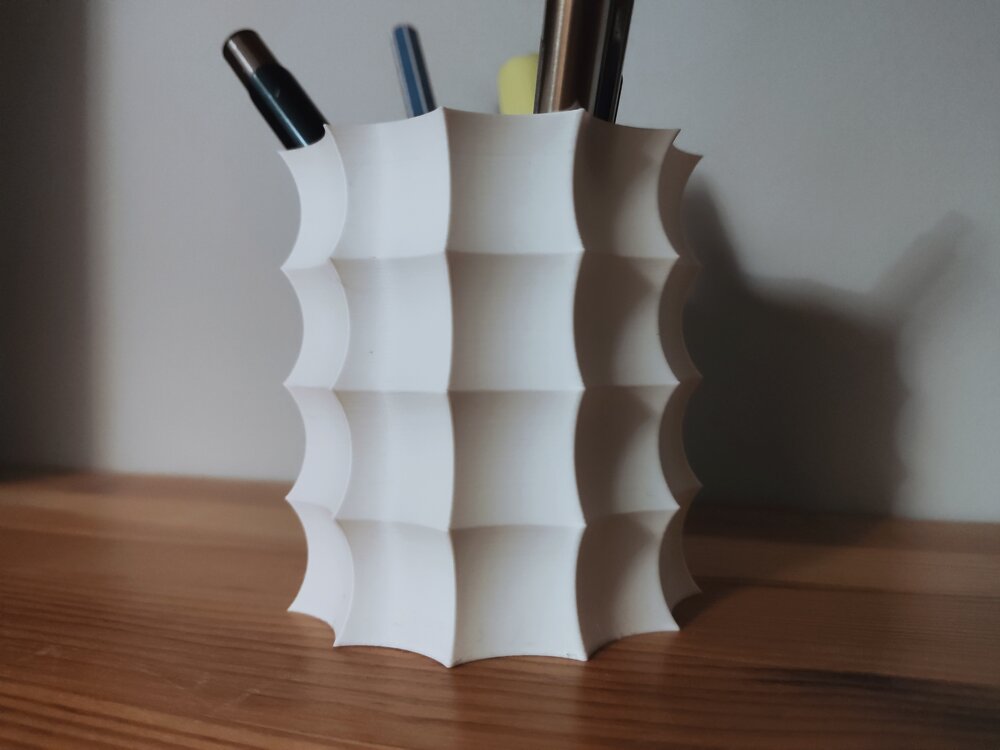
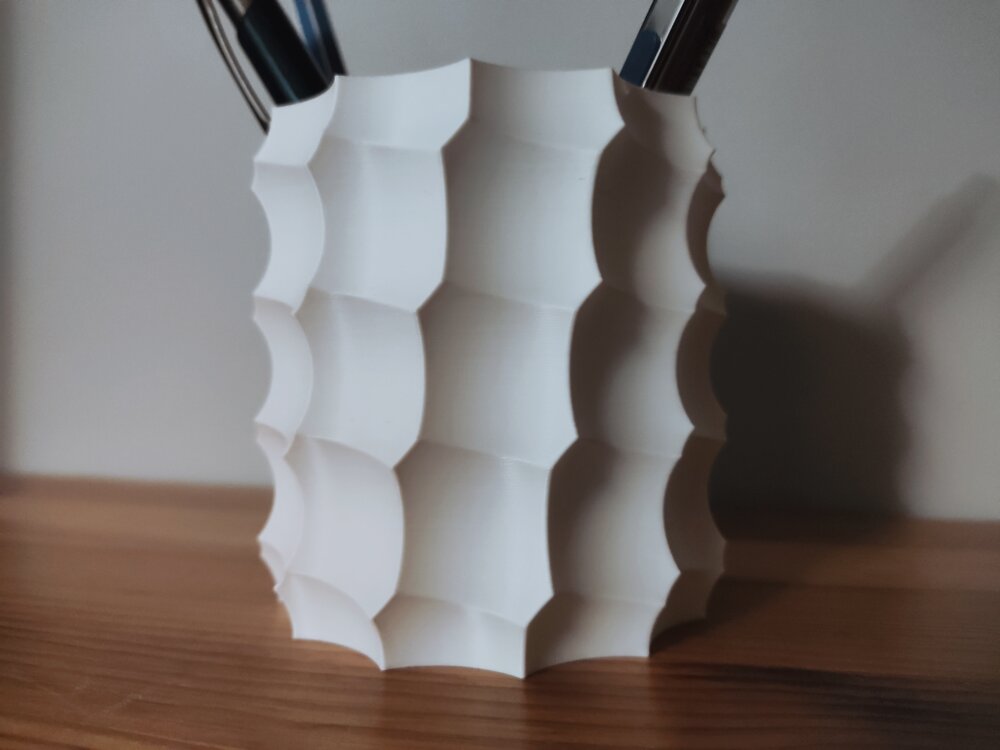
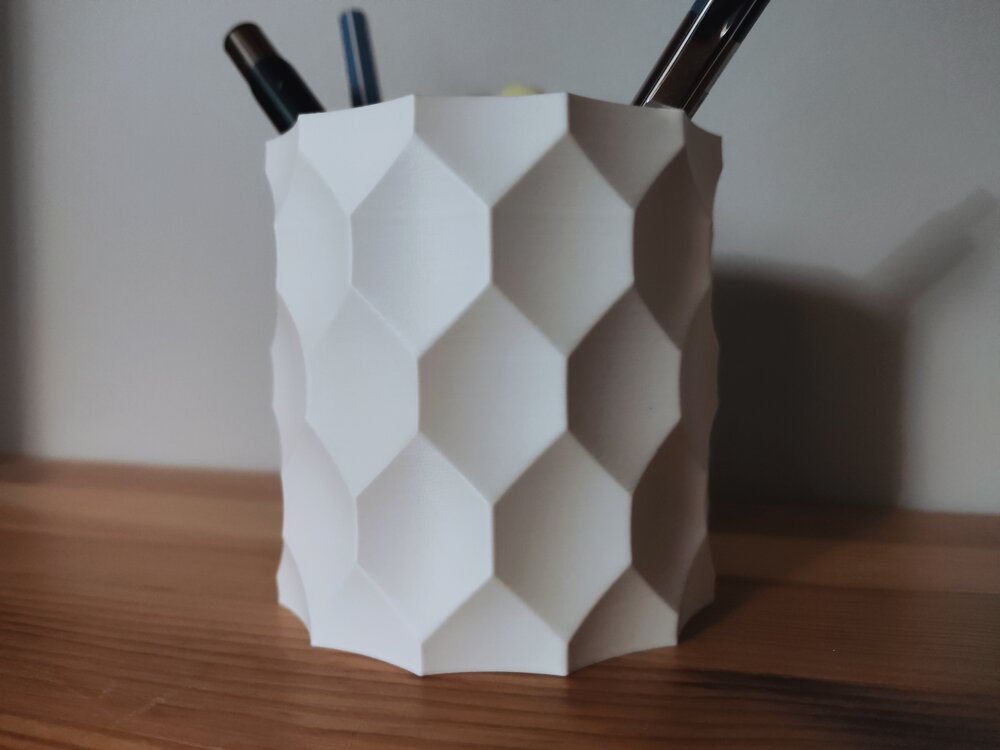
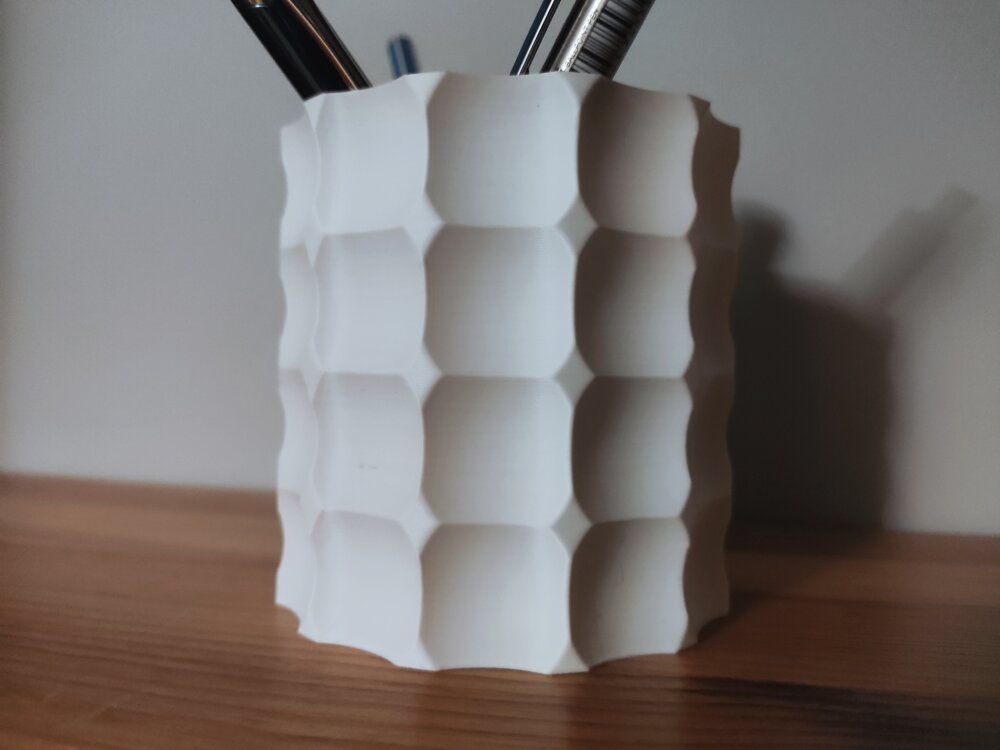
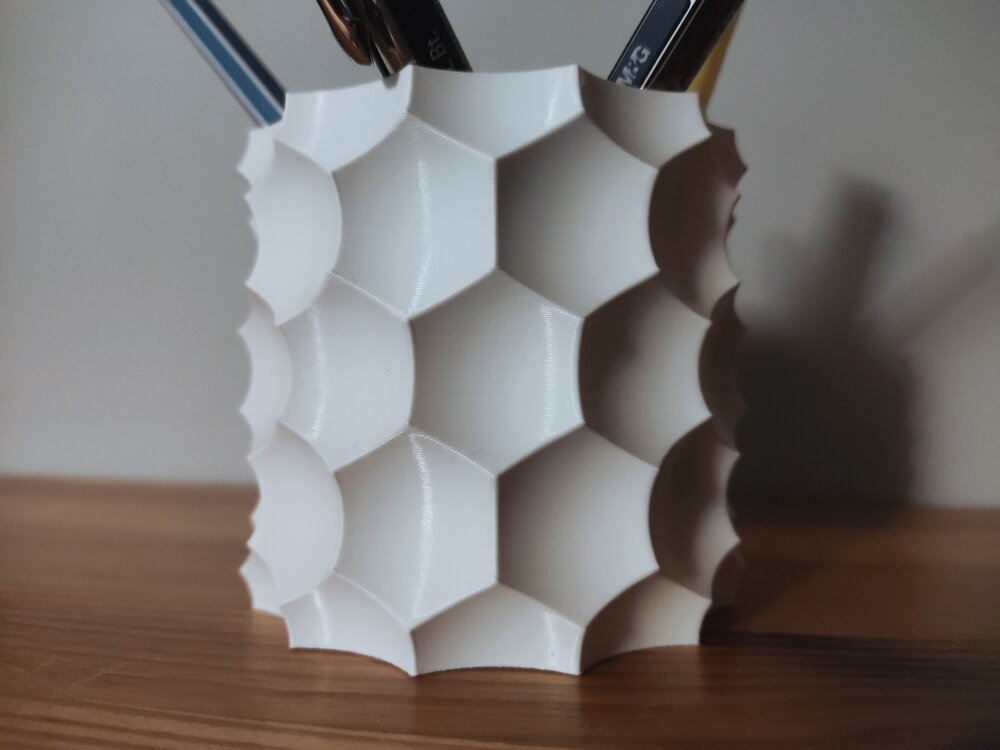
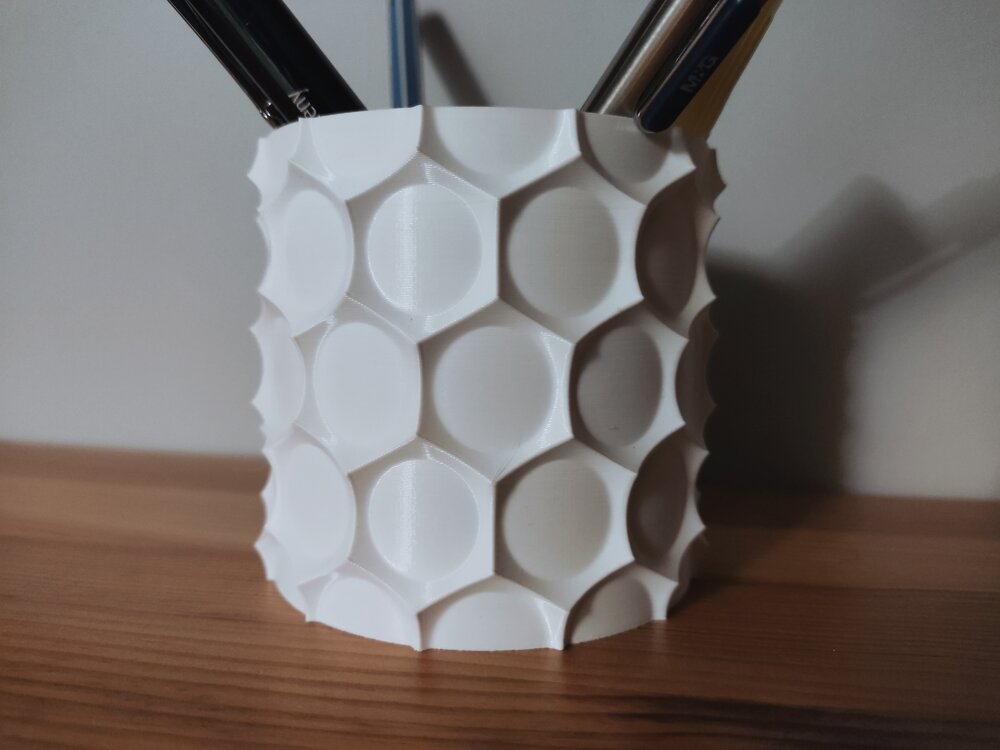
The dual color indeed looks cool! Printed some pen holders with it. The models are not mine: https://www.printables.com/model/108872-pen-holder https://www.printables.com/model/198641-hex-vase-cup

-
Will do! I just already have too many filaments opened up and waiting to be used. I am still waiting for some reusuable vacuum bags to arrive, so i can store them efficiently after printing.
-
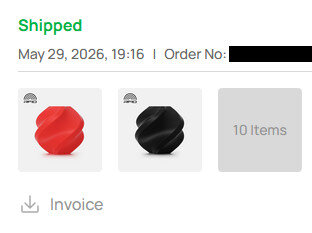
Giveaway filament arrived!I got: Refill PLA+ Red Matte Dual-Color Orange-Red Thanks you SUNLU and 3DWithUs! (I am starting to run out of storage space :D)

-
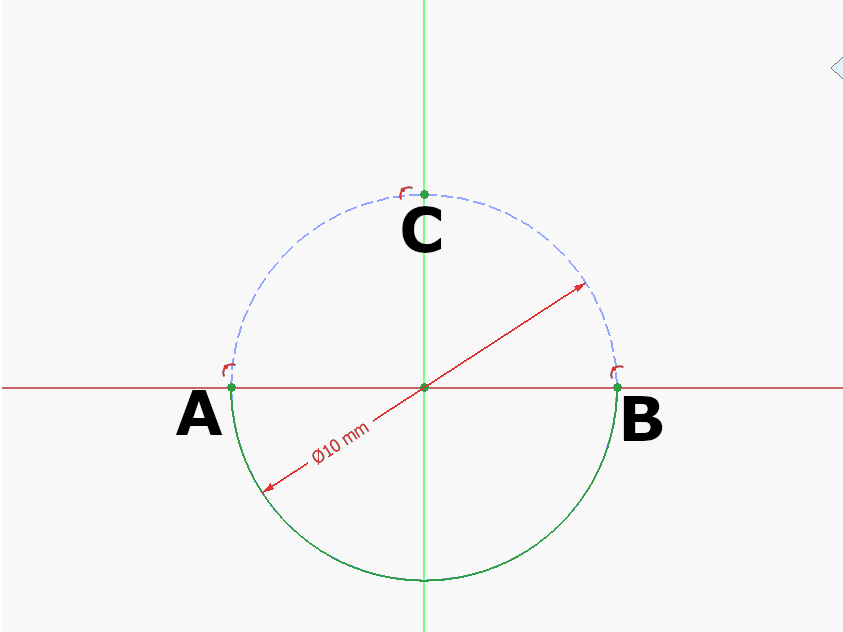
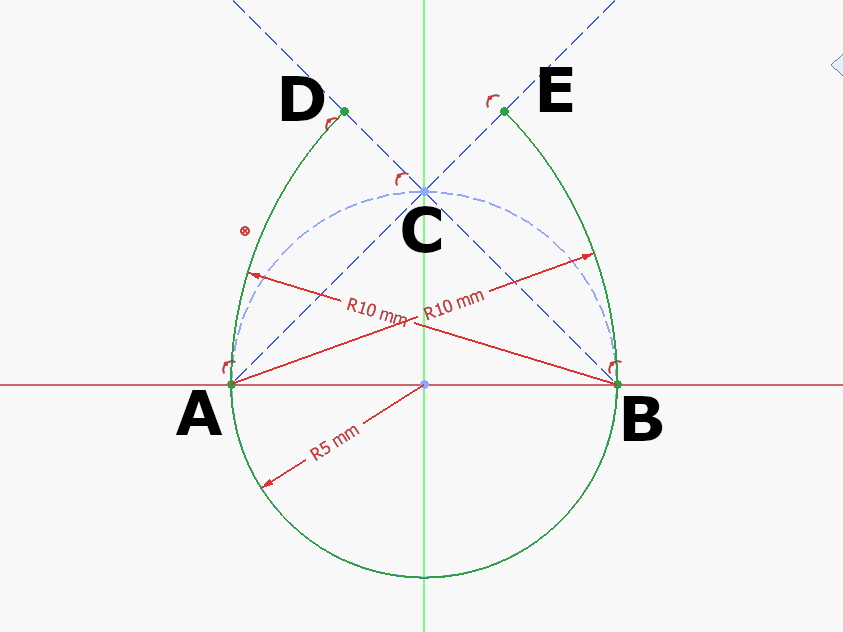
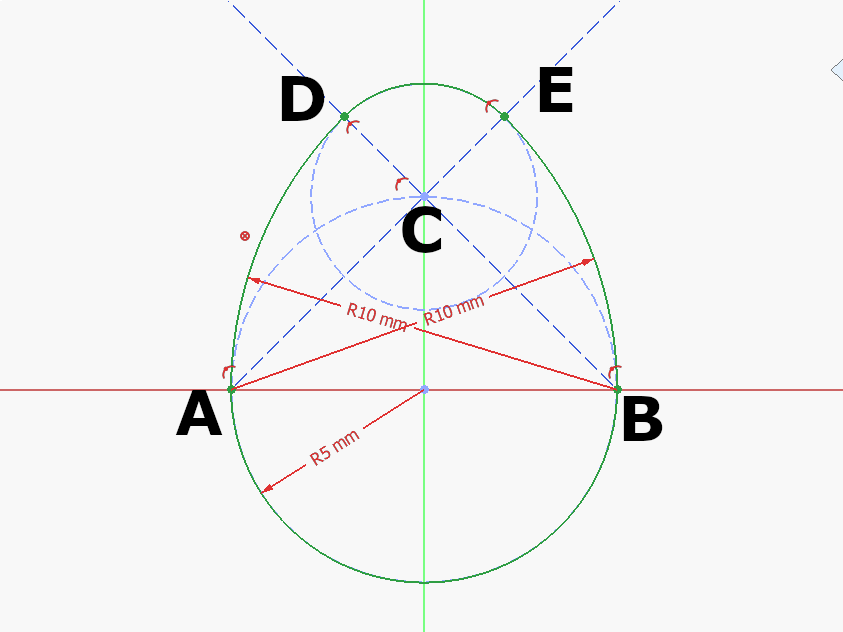
Step 1: Draw a construction circle at the Origin. Mark A, B, C where the circle meets the Y and Z Axis as seen above. Draw the half circle at the origin between A and B. Step 2: Draw a construction circle at the Origin. Mark A, B, C where the circle meets the Y and Z Axis as seen above. Draw the half circle at the origin between A and B. Step 3: Draw an arc centered at C between D-E: 🥚 Good job!The full tutorial project is available at Printables with the finished 3d model and FreeCAD file: https://www.printables.com/model/1615557-egg-tutorial-model
-
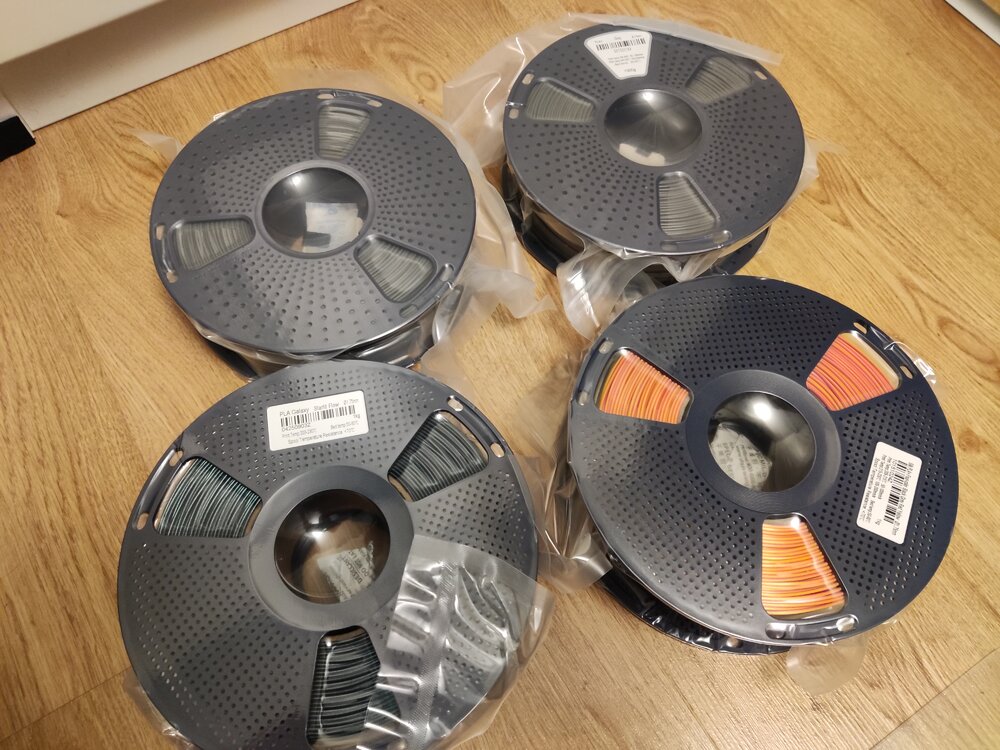
Just received my giveaway spools from SUNLU and 3DWithUs! Thank you for this amazing gift! I got: 2 kg PLA+ | Grey 1 kg PLA galaxy | Starlit Flow 1 kg Silk PLA+ | Four-color | Black-Grey-Red-Yellow I haven't printed with them yet, but i can't wait to try them out :) Thank you SUNLU and 3DWithUs!
-
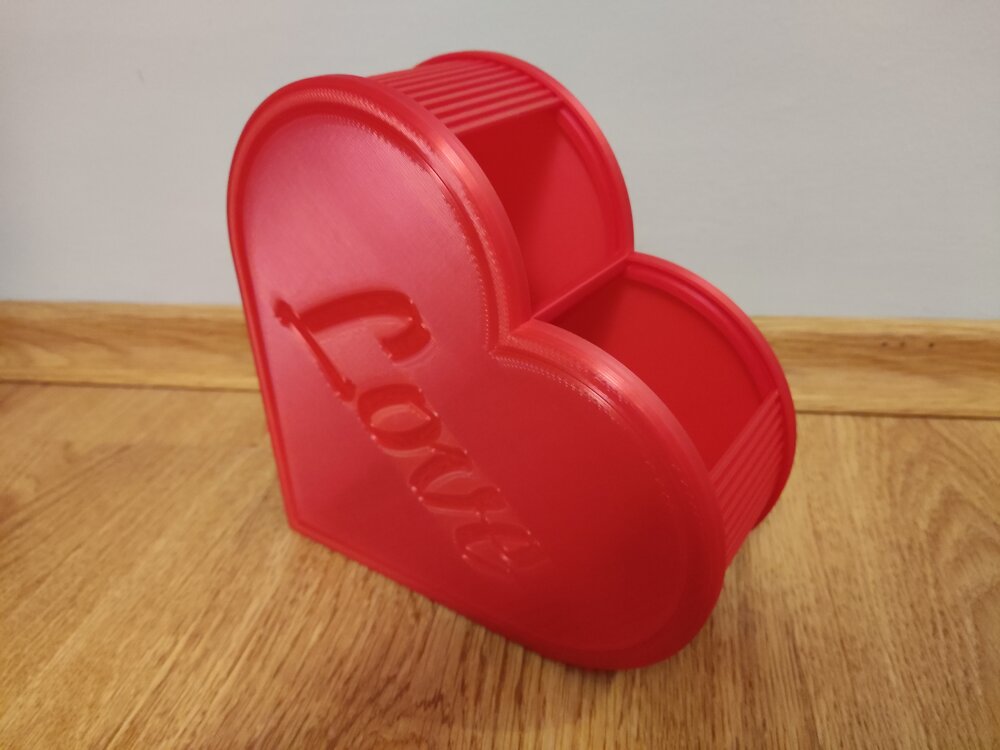
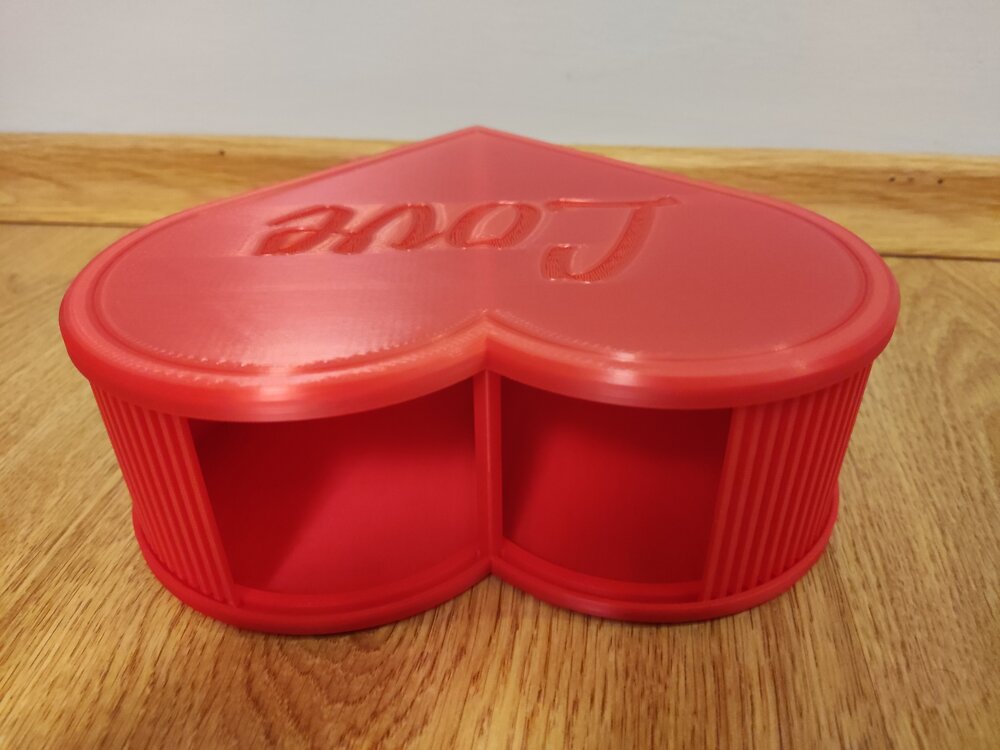
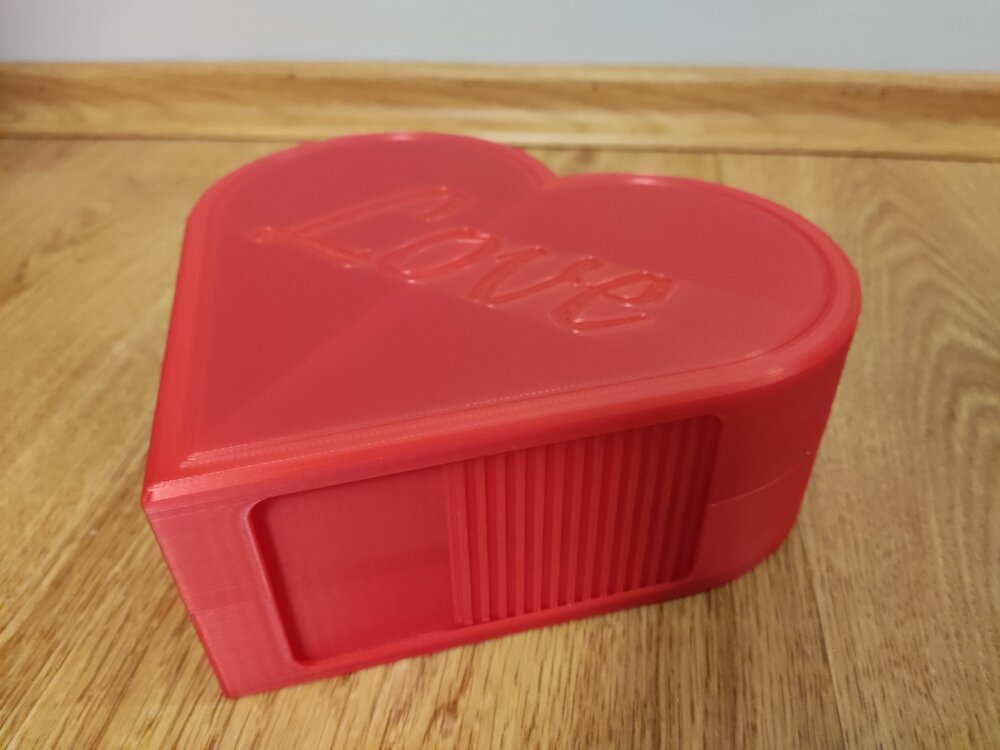
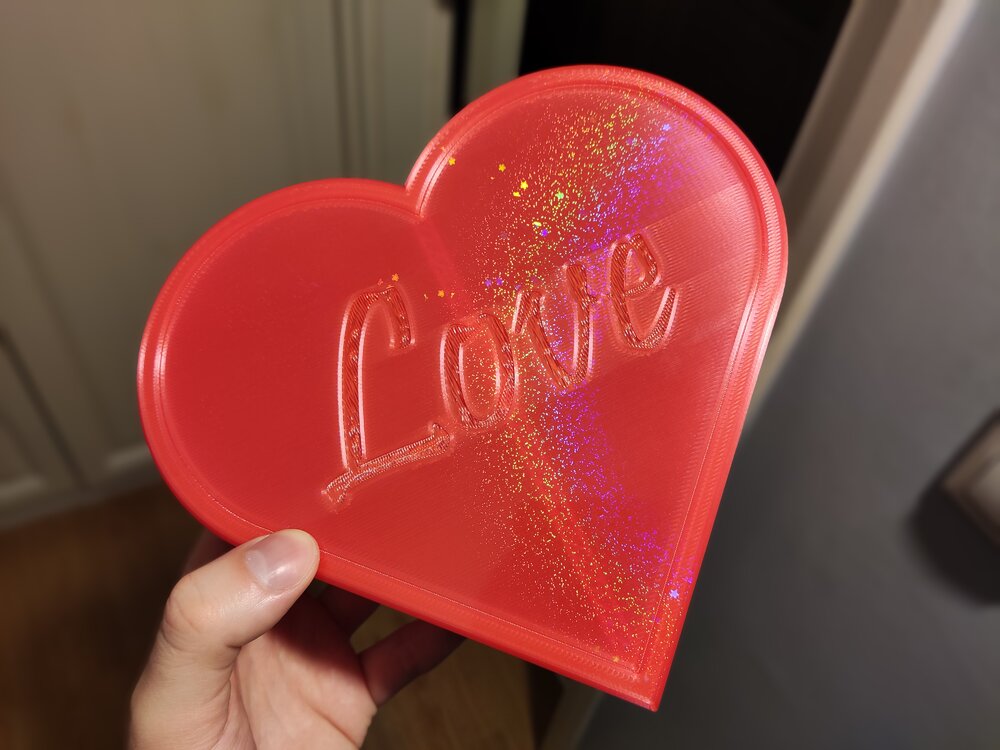
I made 3D Printy's Shutter Box parametric in FreeCAD! It features 2 storage compartments and it is an ideal container for Valentine gifts! You can now freely scale it to your preferred size, the tolerances and wall widths will stay the same! I recommend printing it on holographic plates (Check the last picture for an example), it makes the look unqiue! The full project is available for free (FreeCAD project file included): https://www.printables.com/model/1586458-parametric-shutter-box-heart-shaped I found the original design small, so i loaded up FreeCAD and made it again from zero. The Pictures show the large version i created (XY Scale: 1,5 and Z Scale: 2,0). I hope you like it! Happy Valentine's day!
-
Looks really interesting. Did you try any other 3d scanning applications before this? I would be curious how competitive can be a 3d scanner app for a phone that makes 3d models from 2d photos (using AI or not). I heard good reviews about both 3d scanners and apps as well. But i would give the apps a try before scanners, because the price is too steep (1500$) compared against a free web tool or AI that may make a similar quality 3d model using 2d photos of it. Nonetheless great review!
-
Hi! The FreeCAD Macro for generating these pots is done and published: https://www.printables.com/model/1565610-parametric-anti-sphere-plant-pot-pen-holder-plante Happy customizing :)
-
Hi Everyone! I would like to showcase the result of my latest project: A parametric Anti Sphere Pot They are made by carving out a cylinder using spheres placed in circular and linear patterns. These patterns can also be twisted around the Z-axis, resulting in some truly unique designs! Here are some of the pots i created with it: You can check out and download the demo models on Printables for free. I hope you like it :)
-
Thanks! The die wasn't meant to be printed in multicolor :D, I printed it out in 1 color and then colored the shapes in with a sharpie. But yours came out great!
-
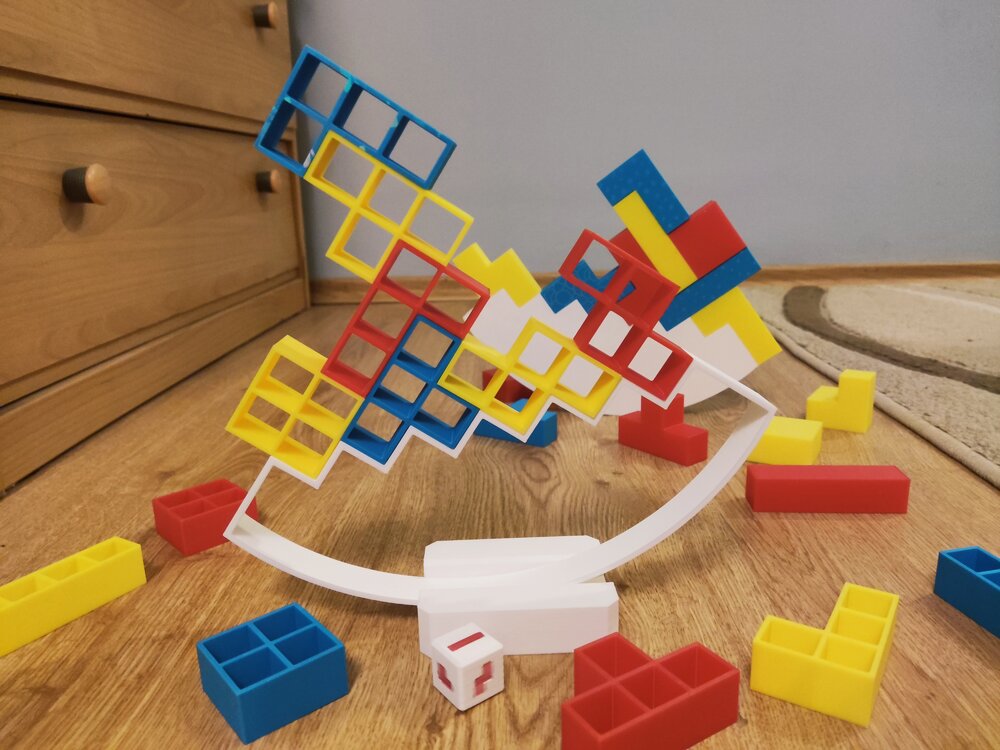
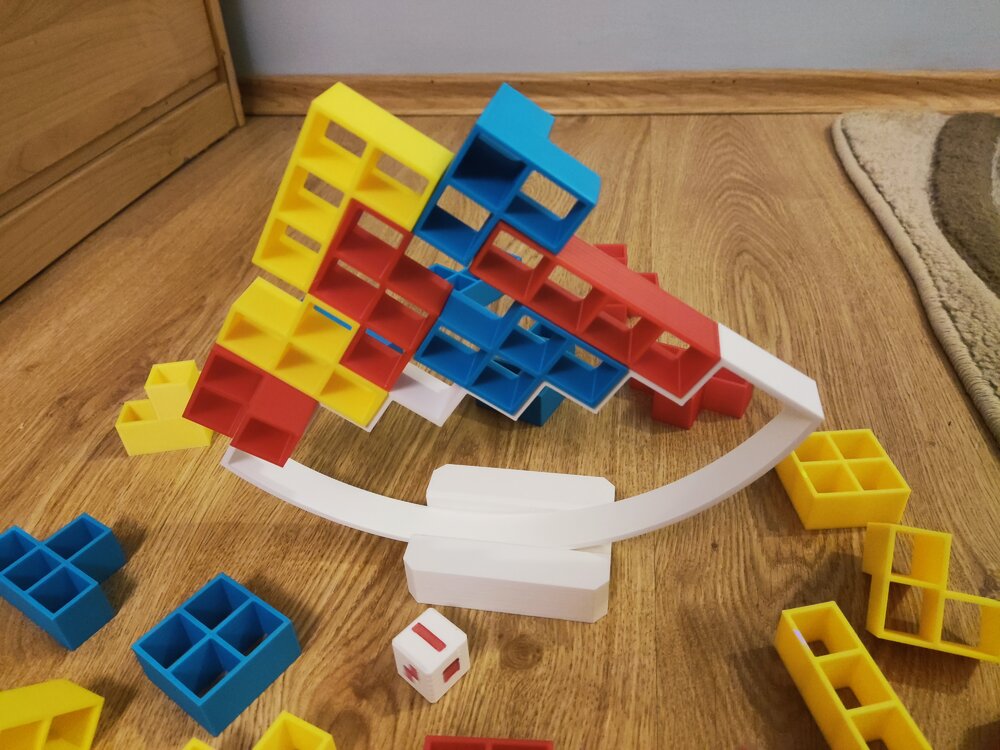
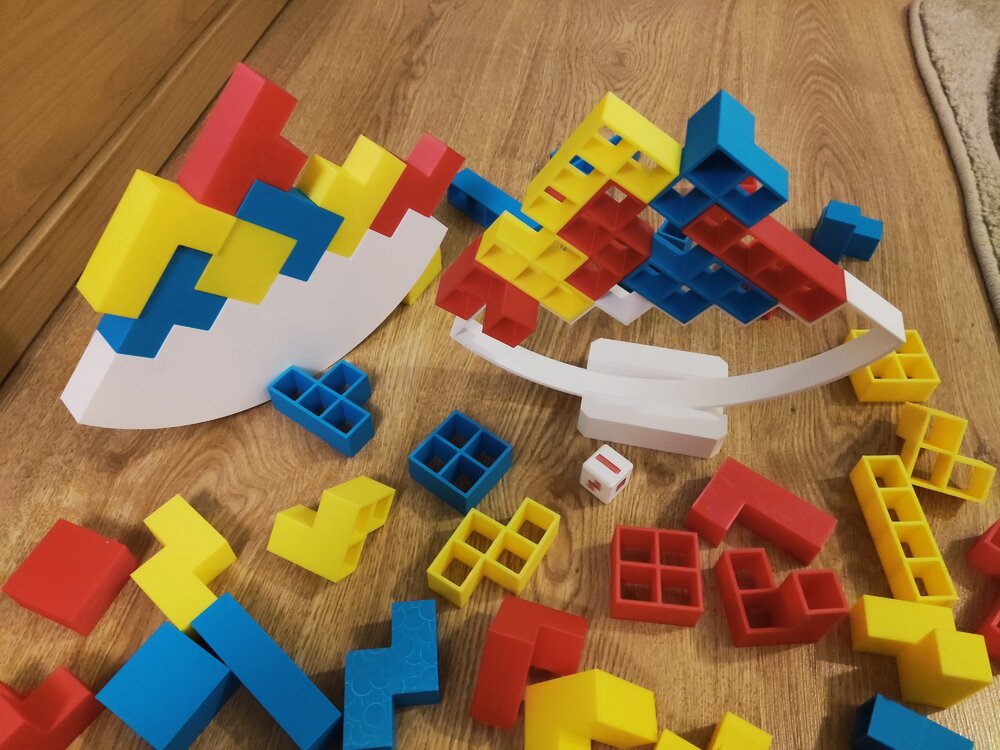
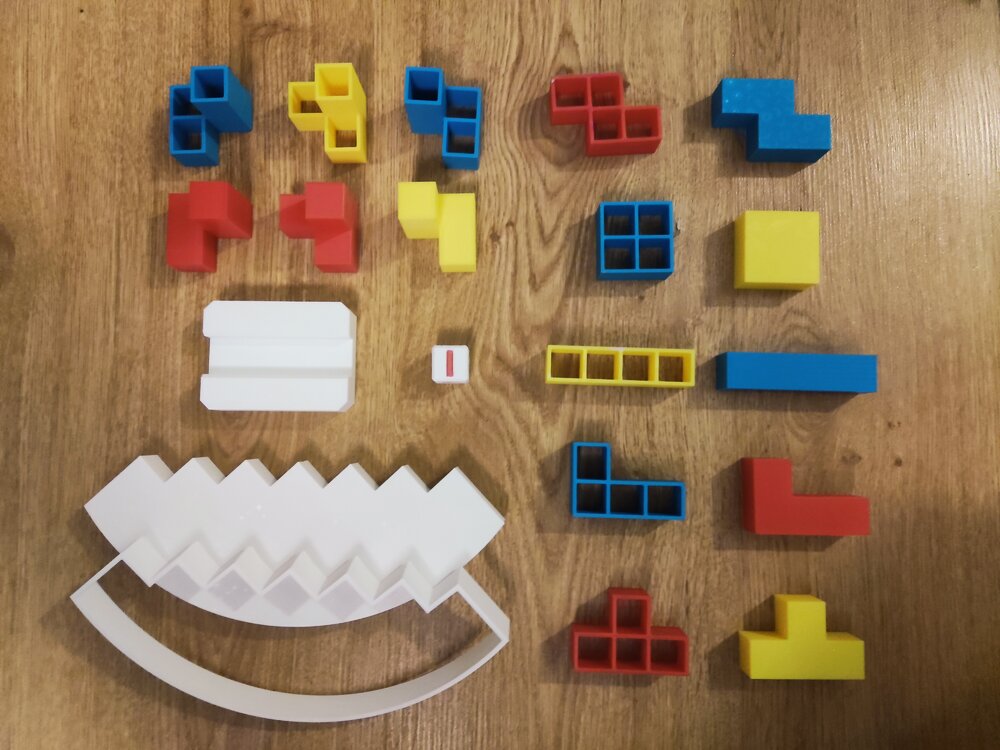
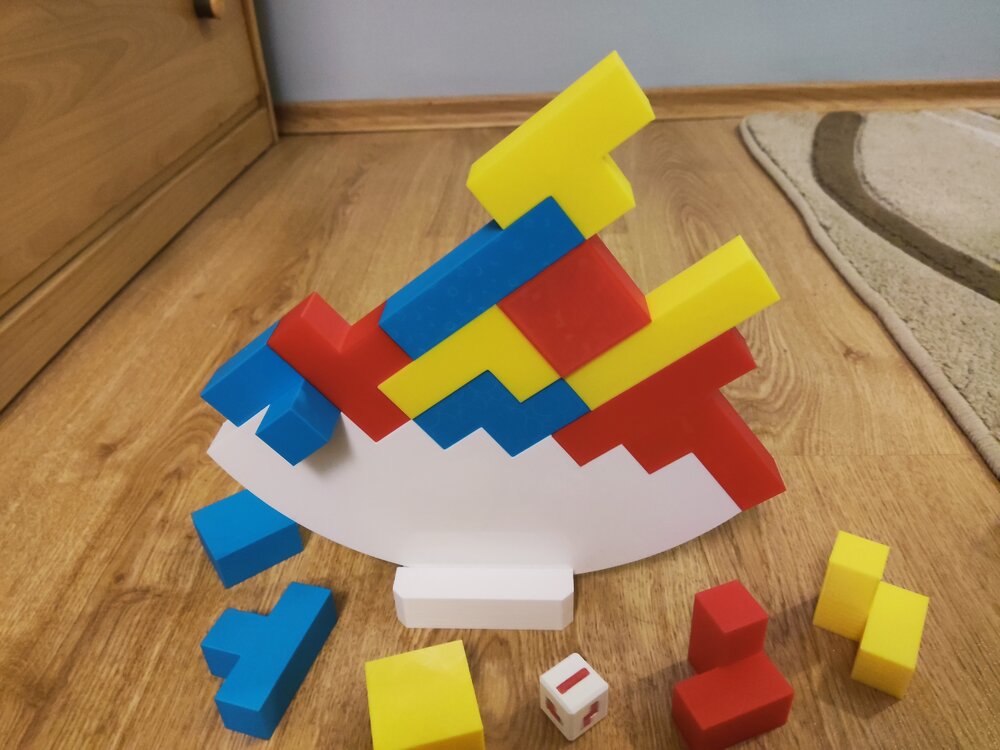
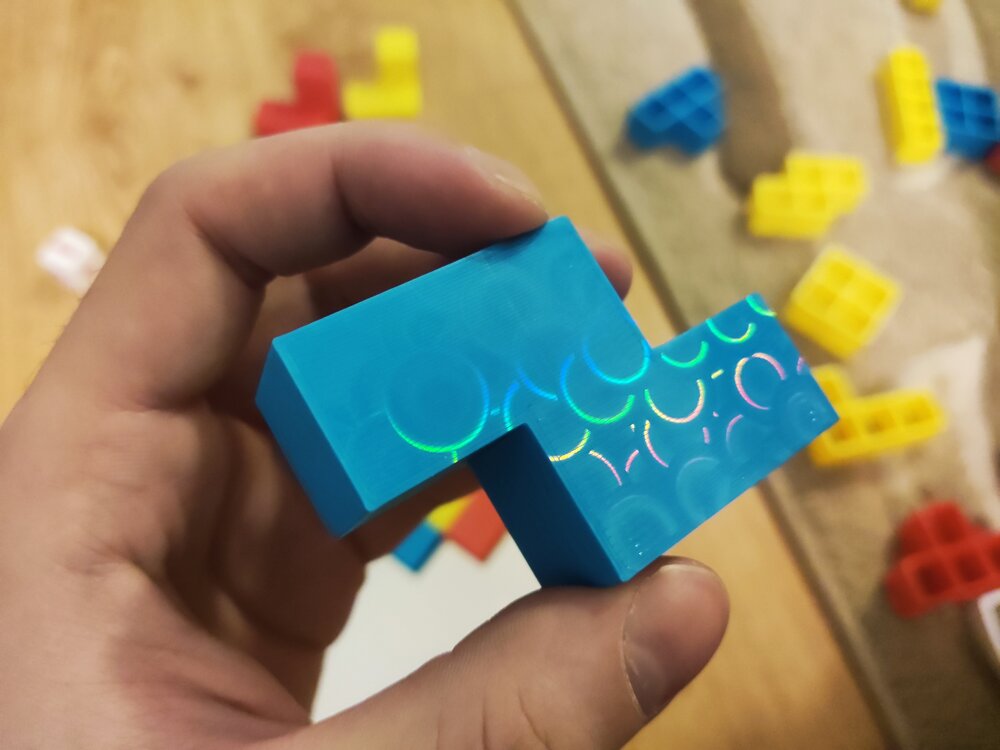
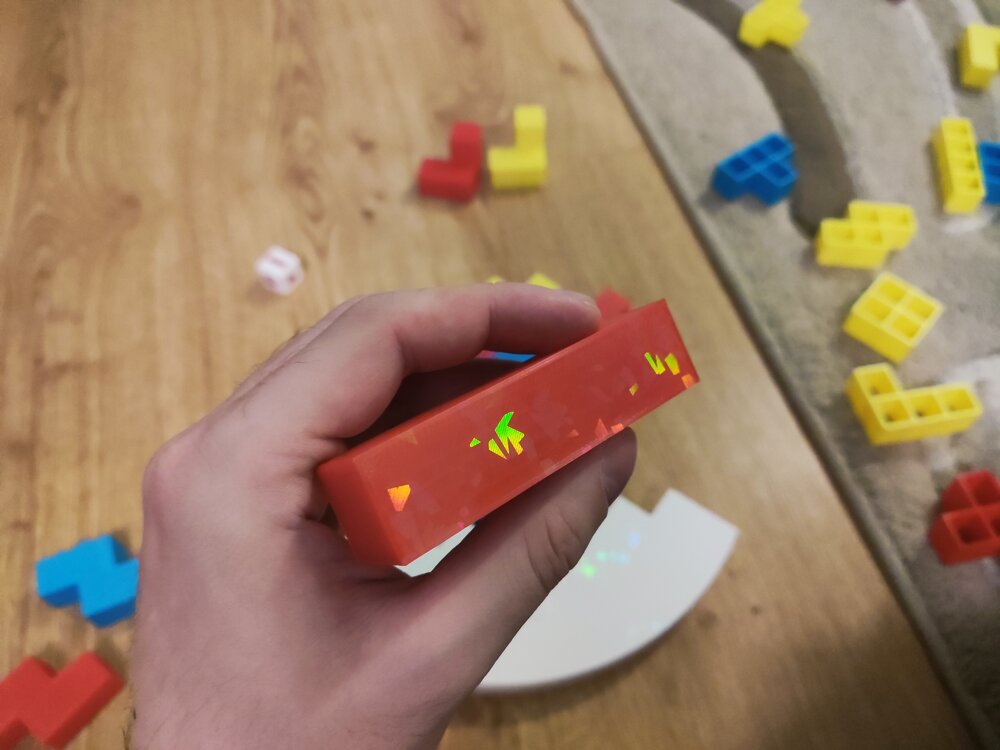
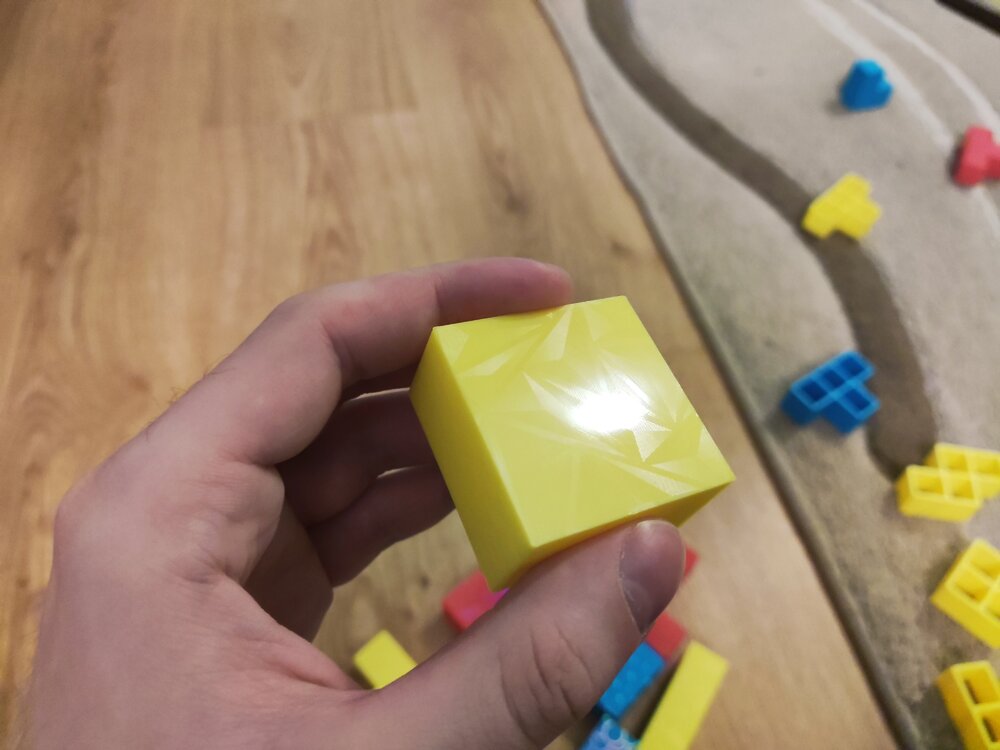
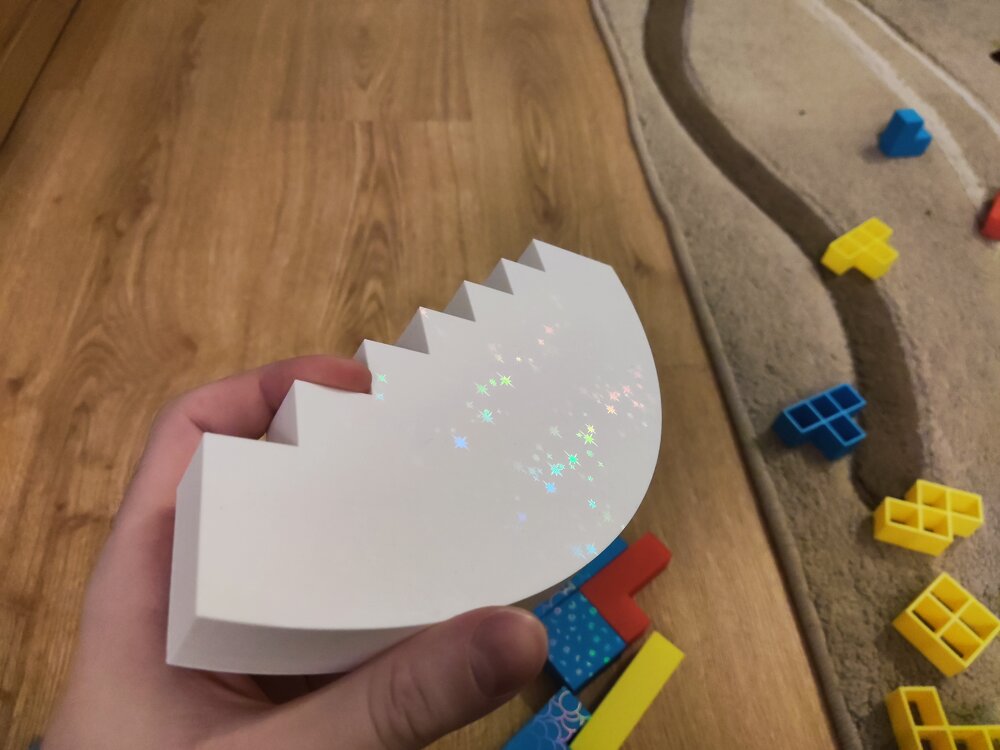
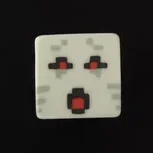
Hi! I would like to showcase another project of mine: A Balance Tetris Game! How to play?Take turns by placing blocks on the base by either rolling the die for it or choosing a preferred block. If the tower collapses on your turn, you lose! Printing tips:Different wall count and infill % have great impact on the game. I used 2 walls and 15% for every piece. You can print the base with 0 infill, 0 top/bottom layers. Scale it to your preferred size! 50% works just fine as well! I also recommend scaling the tetris die up to 133% (20mm). I recommend printing the solid blocks and the base on a holographic plate. It gives them a great look (Check out the last few pictures)! How to customize your own:To use the project files (.FCStd) you will need FreeCAD, a free to use/download CAD software. After opening the project you will see on the left side all the folders with the models and parameters. When you are done just export the models one by one: Select one of the models, then press Ctrl + e or Top menu > File > Export... The parameters:BaseArcOffset: Offsets the (circle's) arc on the base piece. BaseTeethCount: The number of teeth (slots) on the base piece. EdgeLength: The size of the blocks. GridWallWidth: The wall width of the Grid Blocks. (Solid blocks are not affected) DiceEmbossDepth: The depth of the emboss on the dice PedestalLength: The horizontal length of the pedestal. (The width is always 3 * EdgeLength) PedestalSlotDepth: The depth of the slot the base goes into. PedestalHeight: The height of the pedestal. The project is not foolproof, setting negative/incorrect parameter values might mess up the geometry completely! Happy printing and customizing!I hope you like it! The project is available here: https://www.printables.com/model/1549635-balance-tetris-customizable Other pictures: