

Leaderboard
-
Max Funkner
Authors6Points133Posts -

3DWithUs
Administrators3Points59Posts -
Marcidy
Authors3Points35Posts -
Roger
Members3Points2Posts



Popular Content
Showing content with the highest reputation since 09/07/26 in all areas
-
2 pointsHello everyone, My name is Krzysiek Gorsiak and I’m from Poland. I’m a professional international truck driver working across Europe, an active firefighter with 19 years of service, and a former Army serviceman. I run a Polish project called Kierowca Wyklęty, focused on real everyday life for professional drivers, practical equipment, and long-term testing in actual working conditions. Modular 3D-Printed Truck Cabin SystemI am currently developing a modular equipment system for truck cabins, designed around 3D printing. The idea came directly from everyday work in a truck. Cabin space is limited, while every driver carries different equipment: phones, cups, flashlights, radios, documents, tools, and many other small items. My goal is to create one modular base system with interchangeable 3D-printed modules that can be configured depending on the driver’s needs. The project is already beyond the concept stage. I have created several designs in Fusion 360 and am developing the system step by step through prototyping, correction, and further design work. I am still learning 3D design and additive manufacturing, and that is part of the project itself: design → print → test → find problems → improve → repeat. Real-World TestingThe finished parts are intended to be tested during real international trucking work, including: vibration during driving temperature changes repeated installation and removal long-term daily use load from real equipment use across different truck cabins For now, I am deliberately not publishing CAD files, exact mounting geometry, or sensitive construction details, as the system is still under development. Looking for an FDM Printer / Hardware PartnerI am looking for an FDM printer manufacturer or hardware partner interested in supporting the long-term development of the project. This is not intended as a one-off unboxing or short-term test. The printer would remain in active use for: developing new modules printing prototypes testing design changes improving existing parts creating follow-up content documenting long-term real-world development Ideally, I am looking for a reliable and relatively user-friendly FDM printer suitable for functional parts and repeated prototyping. About the ProjectThe development will also be documented through my existing channels, where I cover real trucking work and practical equipment testing. One of my recent videos has already passed 59,000 views. YouTube: [Kierowca Wyklęty] TikTok: [Kierowca Wyklęty] Instagram: [Kierowca Wyklęty] Spotify: [Kierowca Wyklęty] I will update this thread as the project develops and further modules move from design to physical testing. If any manufacturer, distributor, or member of the 3D-printing community thinks this could be a good match for cooperation, I would be happy to discuss it. Krzysiek Gorsiak Kierowca Wyklęty – Poland2 points
-
2 pointsHi everyone, I am new here and new to 3D printing so I don't know anything. I bought a used printer and I'm having some difficulty with my machine. First what happened is this, the screen would be lite up but it would be blank, nothing showing on the screen. After some research I found that it more than likely is a short somewhere in the heater wiring and probably at the heater head. So I started moving it around it the screen lite up with letters again. Next I started taking it off and the belt came apart where the two ends connect. My question is this, there are two metal clips on the ends of the belt but how do I connect them back together? Is there some sort of clip that came off of it because I can not find out how it is suppose to attach together. The belt seems to be in good shape but if I can put it back together and get it going now I won't have to wait for a new one. Thank you for your help. Have a great! By the way, its the old Ender 3 3D printer.2 points
-
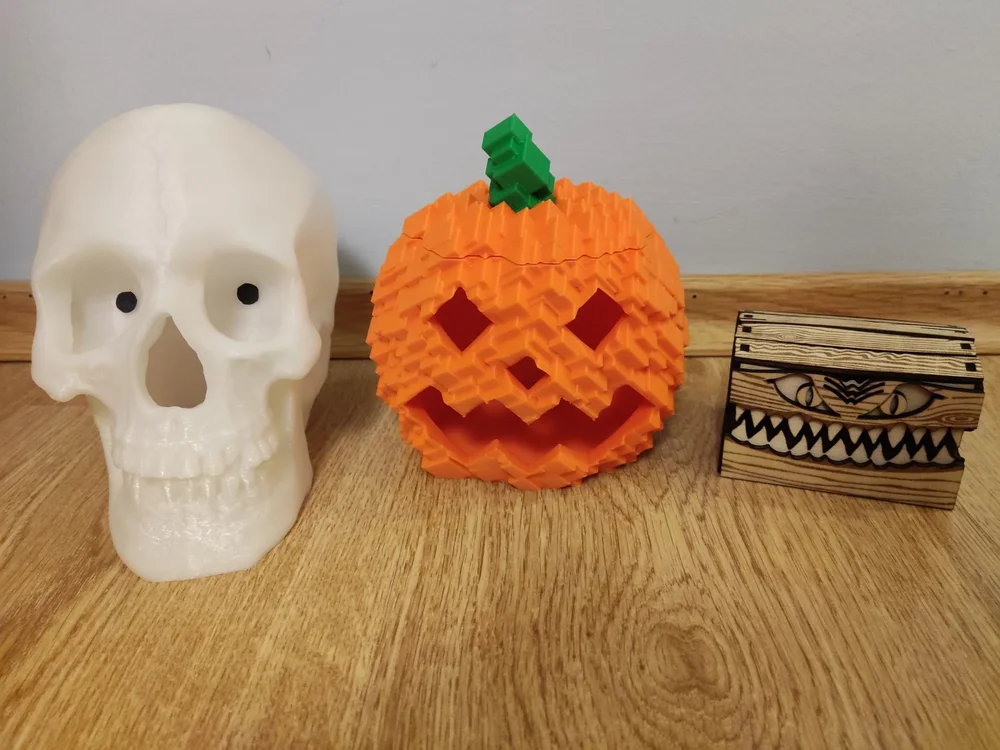
1 pointHaving a 3D printer and a laser engraver really makes events like Halloween special. I had a blast making these projects and I wanted to share them with the community: Staring Skull with eyes that follow by me: I used two thin paper pieces for the eyes. I colored them black using a marker and attached them with Blu Tack. For the model, I used glow-in-the-dark PLA. Miniaturized Halloween candy box by @Laserjeffery: I used my Carverall X1Pro to make it out of basswood sheets. Glitch Pumpkin by me: (Don't put real candles inside) And how are you preparing for Halloween?
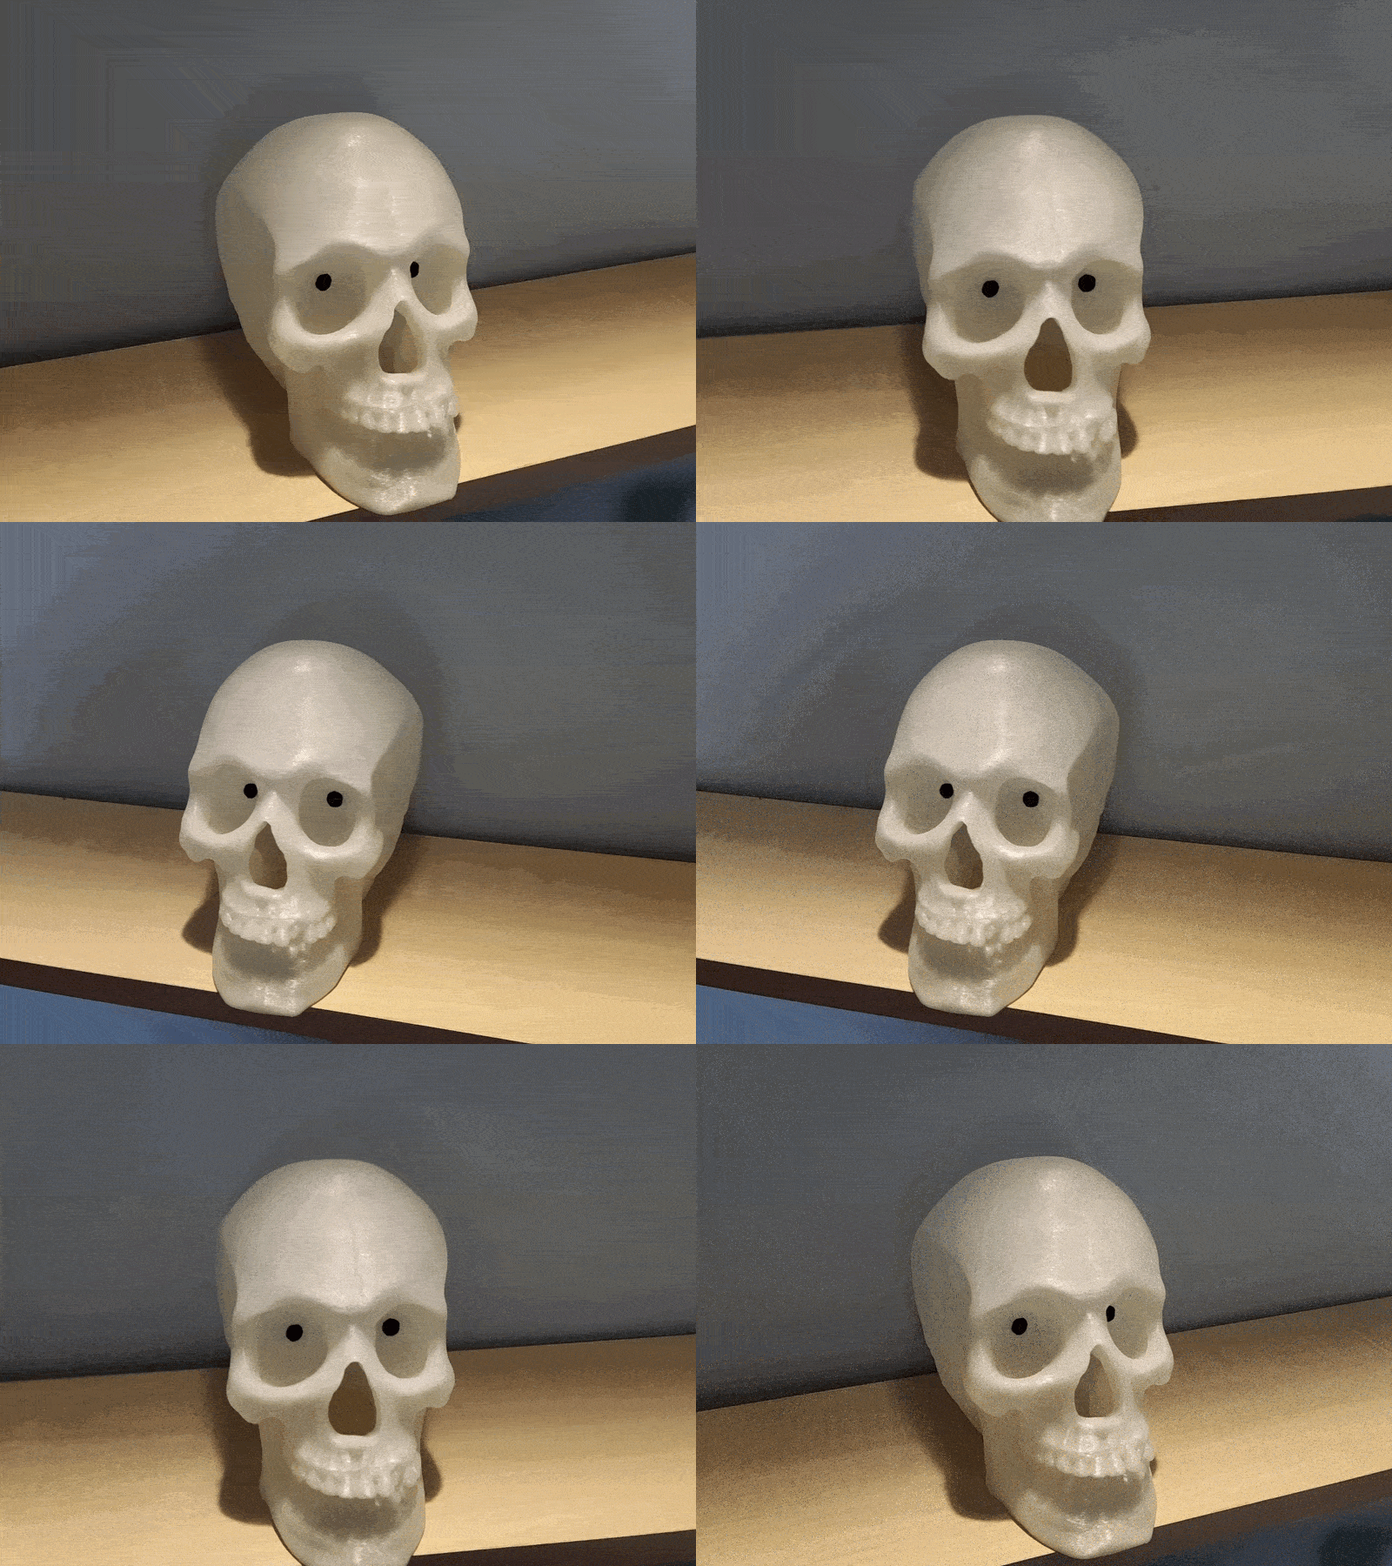
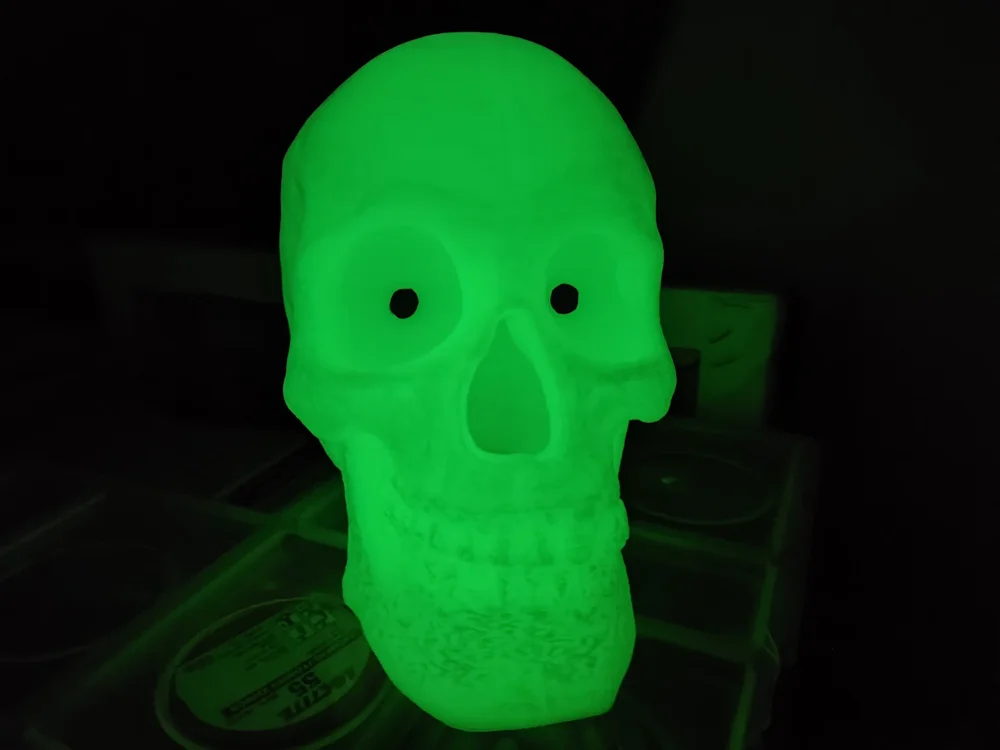
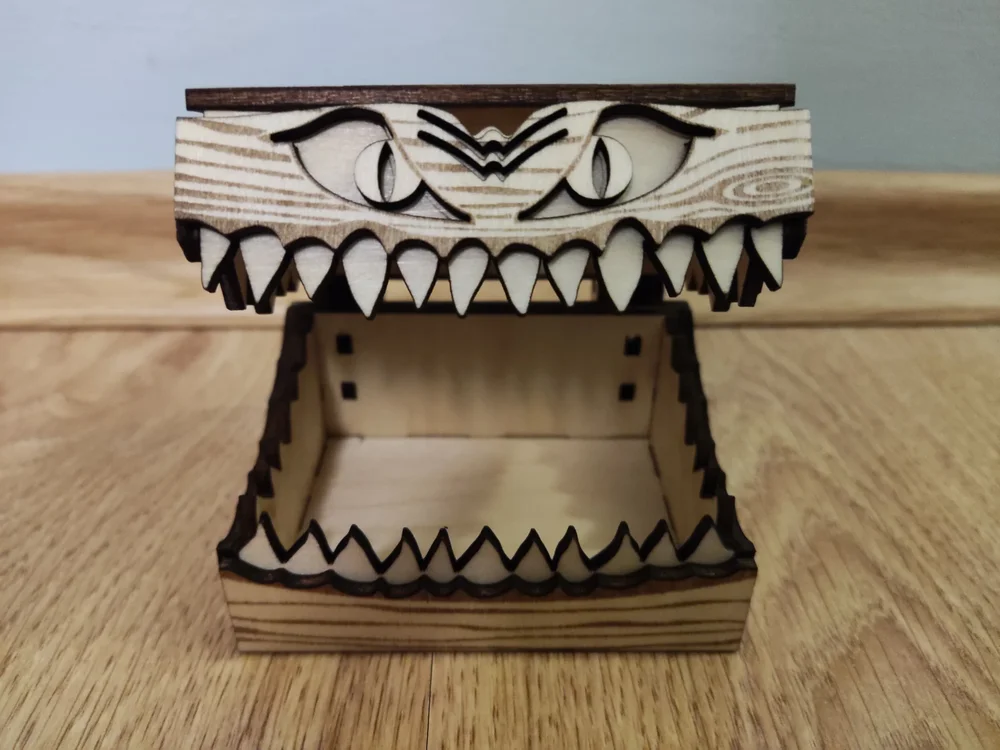
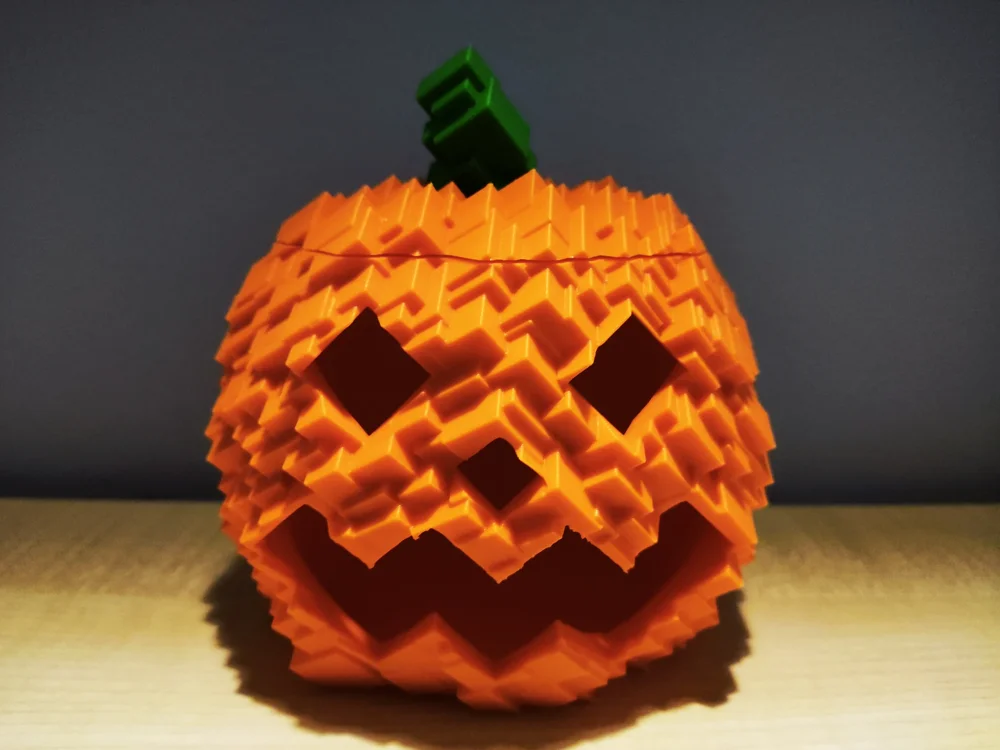
 1 point
 -
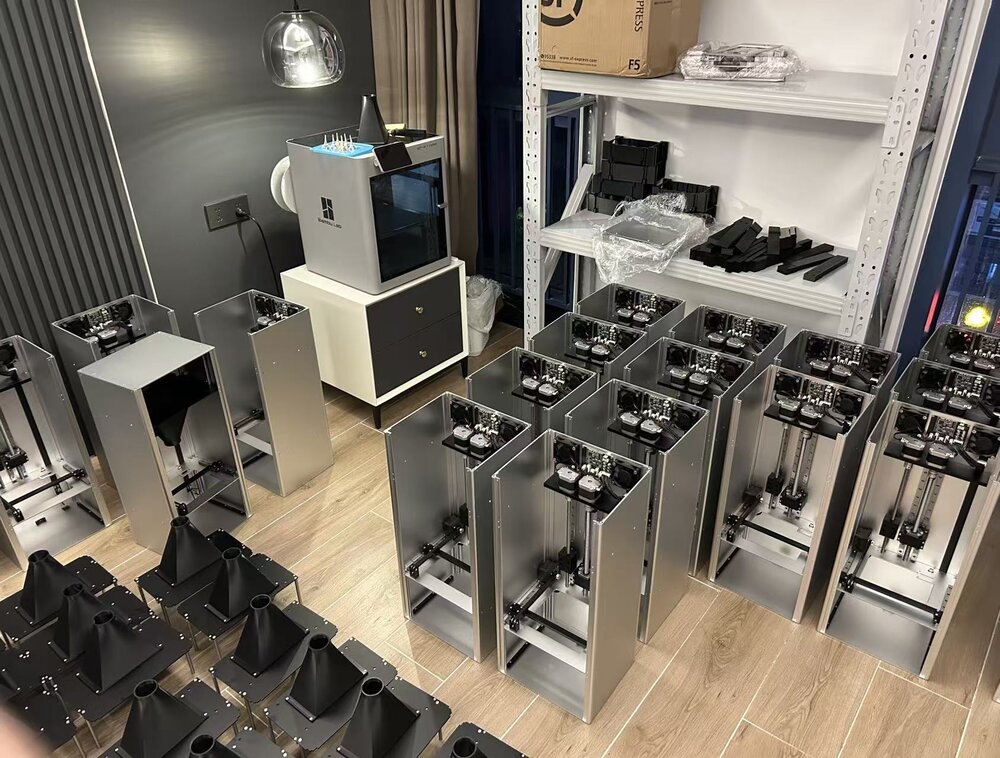
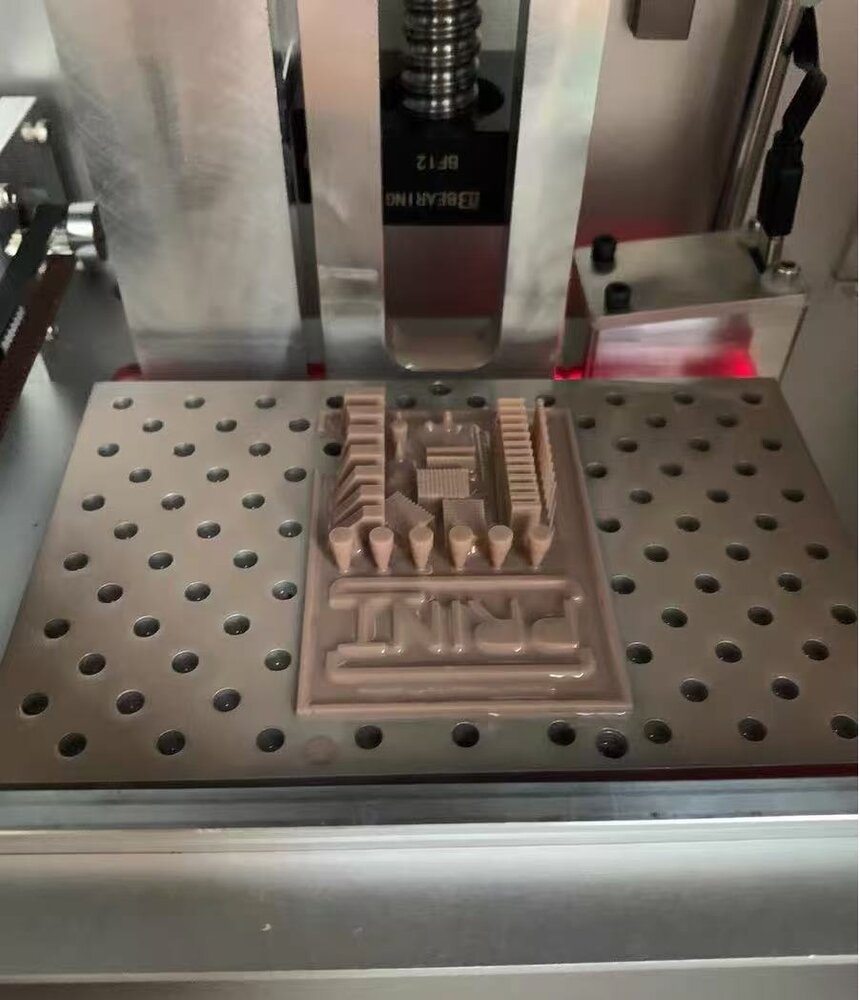
I'm part of the team developing LUOYING A1, a compact top-down resin printer. I'd like to share a few physical photos and ask which print sample would make the hardware easier to evaluate. The platform moves down into the vat, with layers formed at the resin surface. Our design combines resin replenishment, laser level feedback and blade recoating, without a release-film peeling step. The attached photos show front-view assembly, parts in the workspace and a physical test piece on the platform. These are separate from our design renders and animation. For a future sample set, I'm considering showing the same small part at several positions on the platform, together with the actual resin, orientation, settings and post-processing used. I'd also include close-ups with a scale reference. That is a proposed comparison, not a repeatability or accuracy result. Which features would you find most informative in that sample: holes, thin walls, raised lettering or a combination? If there is a part you routinely use to reveal a resin printer's limitations, I'd be interested in what it helps you observe. Disclosure: this is our own product project. Project context and more photos: https://luoying3d.pages.dev/ The photos are ours; this English text was prepared with AI writing assistance. No dimensional accuracy, resin compatibility or completed-test claim is being made.
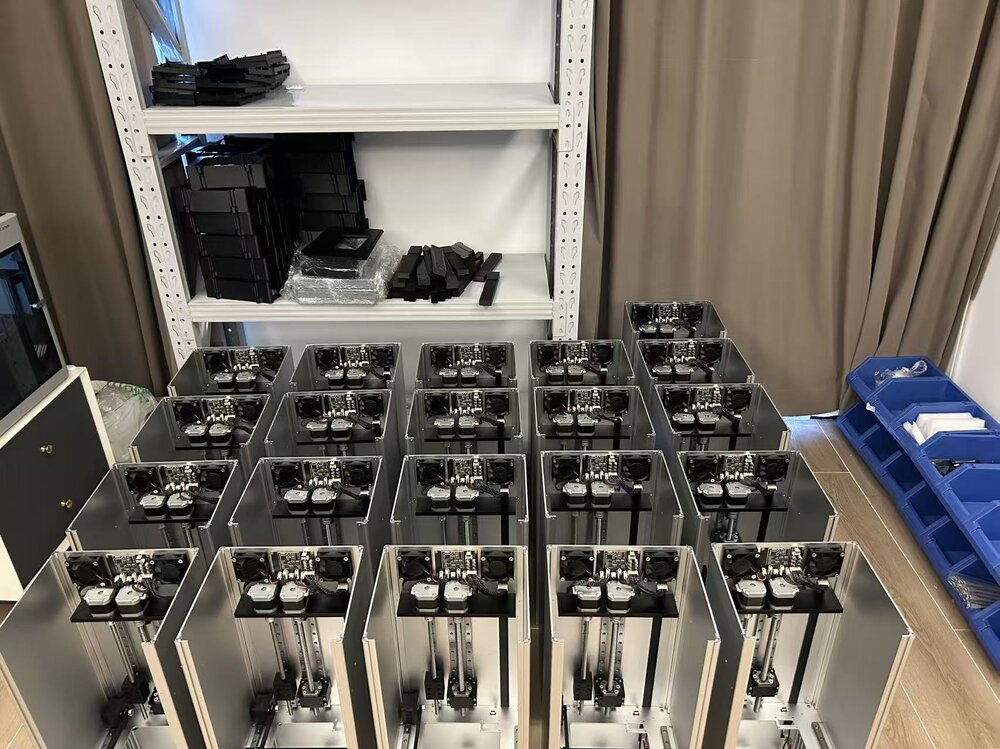
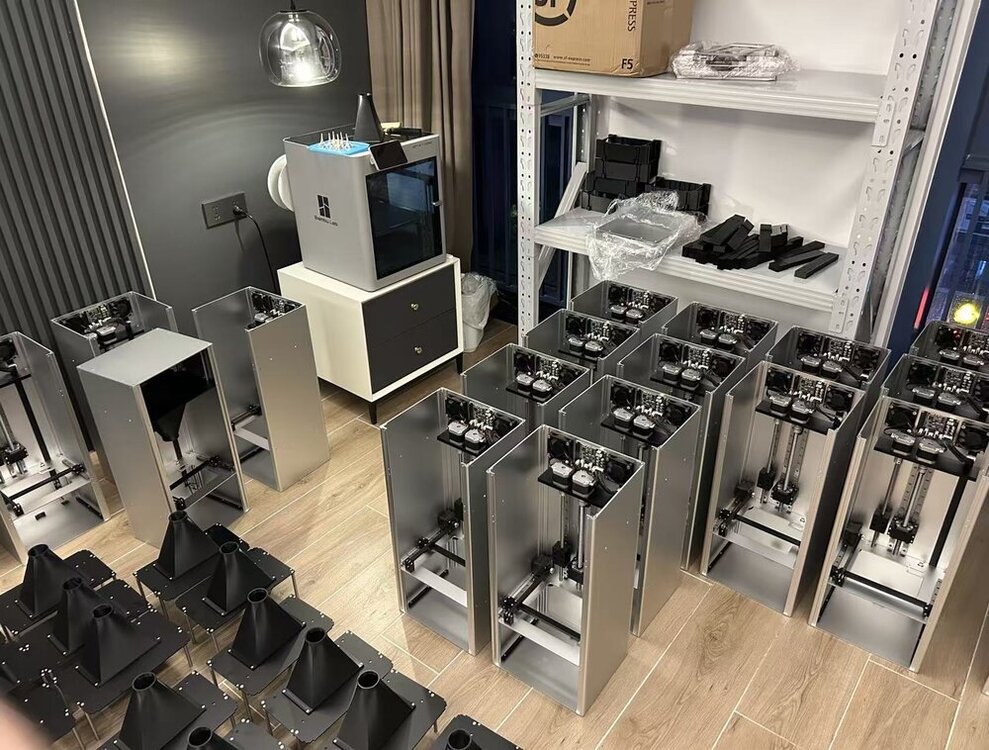
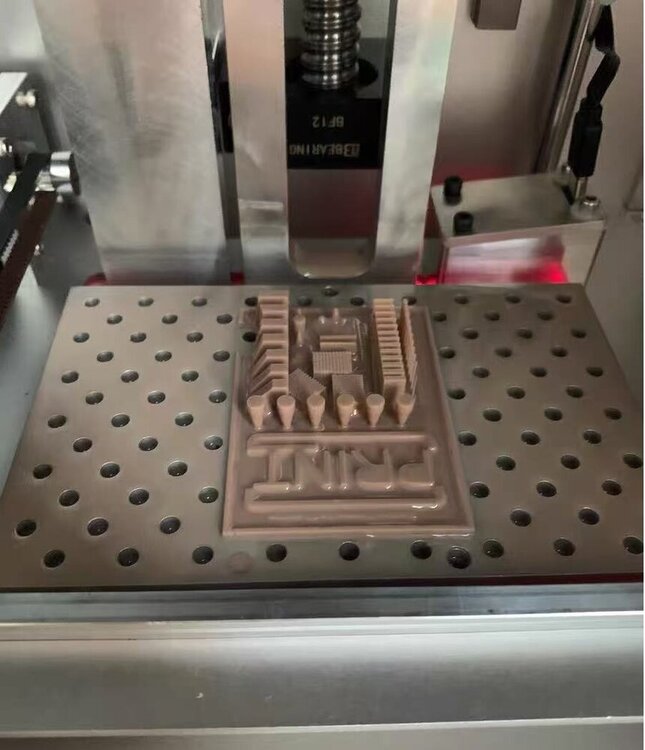 1 point
 -
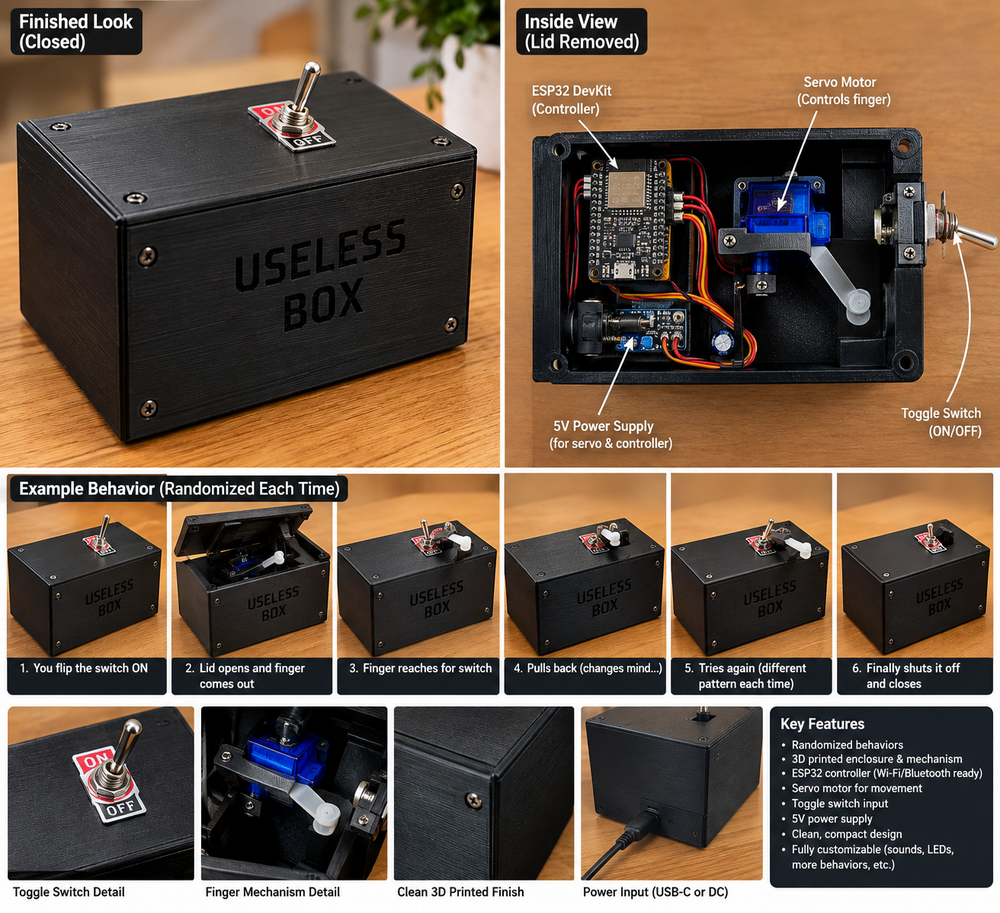
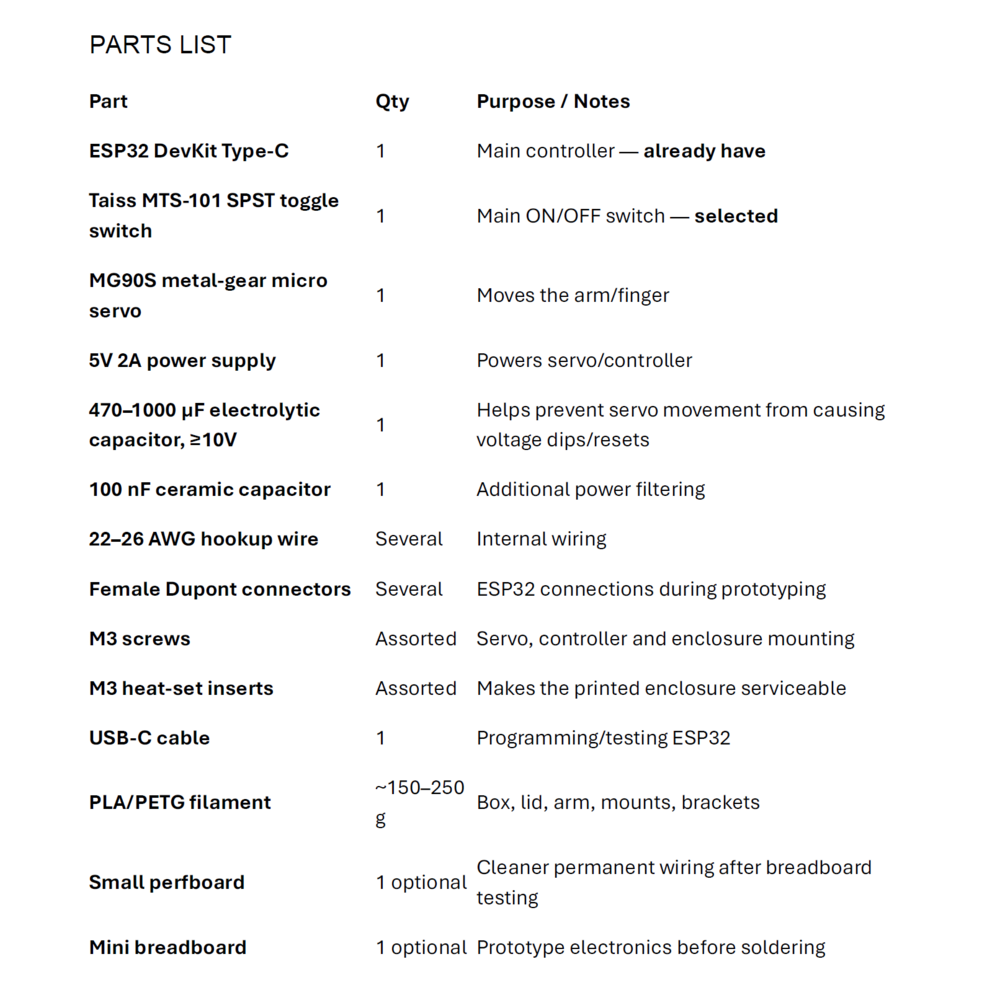
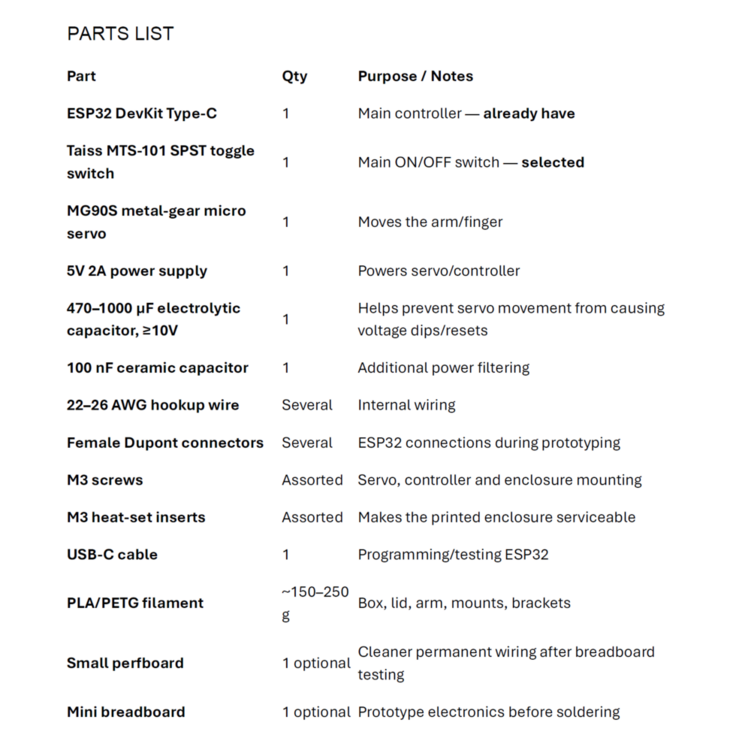
1 pointI’ve been into 3D printing for a few years now, and I’ve picked up a decent amount of 3D modeling along the way. I’ve also dabbled in coding, but I’ve never really had a project that forced me to put all of those skills together. So I decided to build something completely unnecessary: a Useless Box. 😂 The idea is pretty simple—a box with a switch that, when you turn it on, has a motorized mechanism come out and turn the switch back off. It serves absolutely no useful purpose, which honestly makes it the perfect project. What makes it interesting to me is that it gives me a way to dip my foot into programming without jumping straight into something overwhelming. I get to combine the 3D modeling and printing skills I already have with learning how to program a microcontroller, control a servo motor, read a switch, deal with timing, and eventually make the thing actually behave intelligently. Instead of just writing code that prints something on a screen, I get to write code that physically makes something happen in the real world. I think that makes it a pretty good way to break the ice with coding, electronics, motors, and all the little problems that come with making hardware and software work together. The plan is to start simple, get the basic version working, and then keep improving it. I don't want it to do the exact same thing every time I flip the switch, so I'm already planning different random behaviors and reactions. Then I'll keep adding things as I learn—better mechanisms, more servos, lights, sounds, sensors, different movements, and whatever other ridiculous ideas I come up with. The ultimate goal is to take a simple box whose entire purpose is to turn a switch off and progressively turn it into a completely over-engineered monstrosity that requires an unreasonable amount of engineering to accomplish absolutely nothing. And that's exactly why I think it's going to be a fun project. 😂 I am just getting started and I have never really posted anything I do online, then I found this site and thought WTH. Any thoughts would be appreciated. Please be gentle I'm not an expert at any of this.
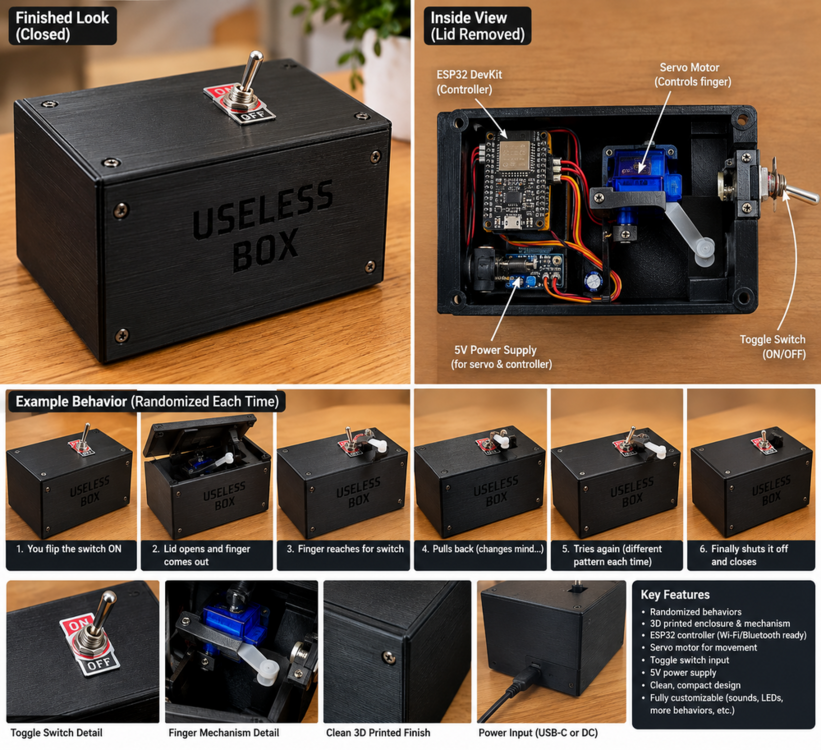
 1 point
 -
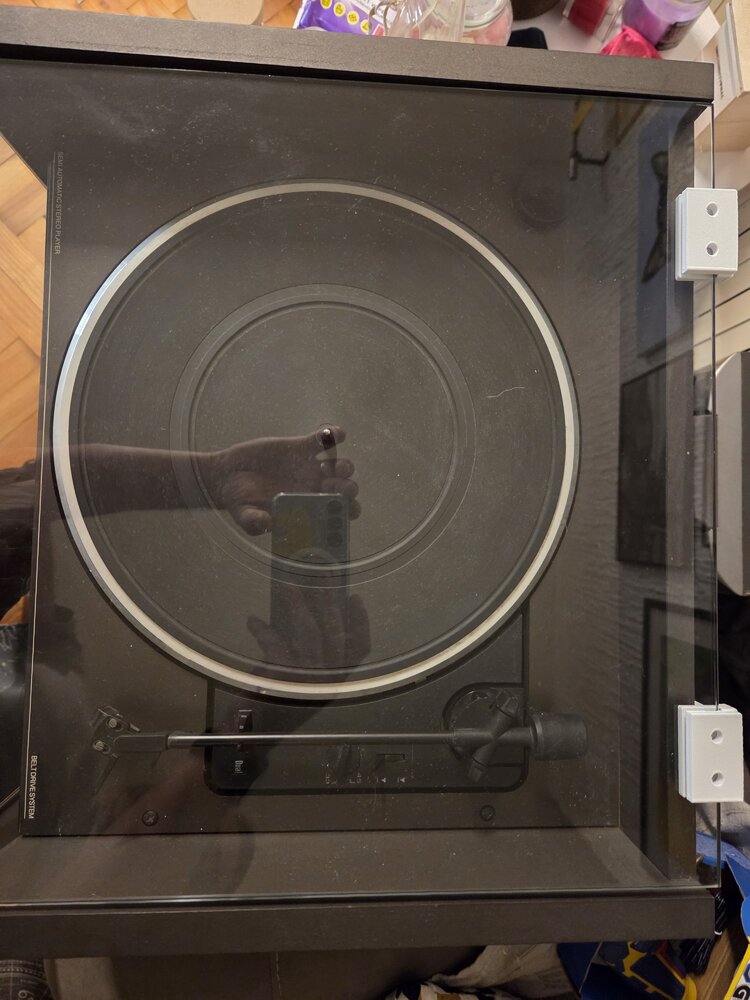
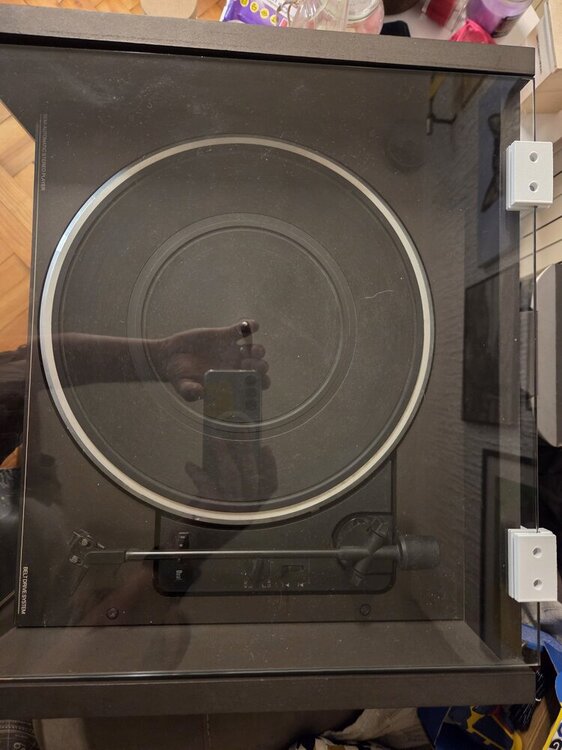
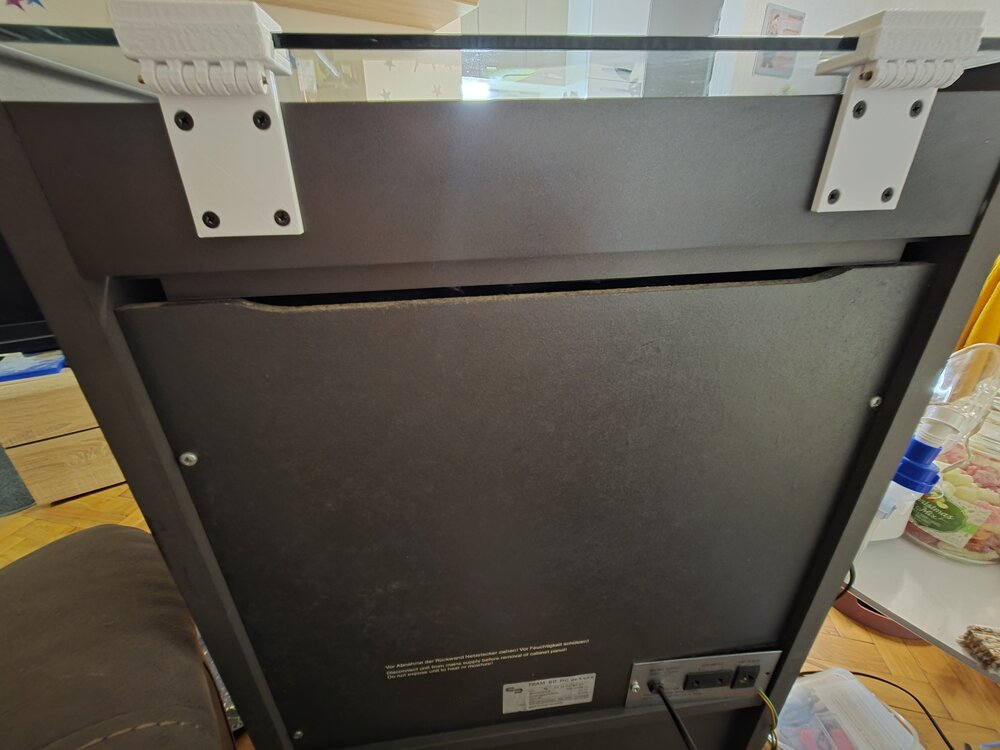
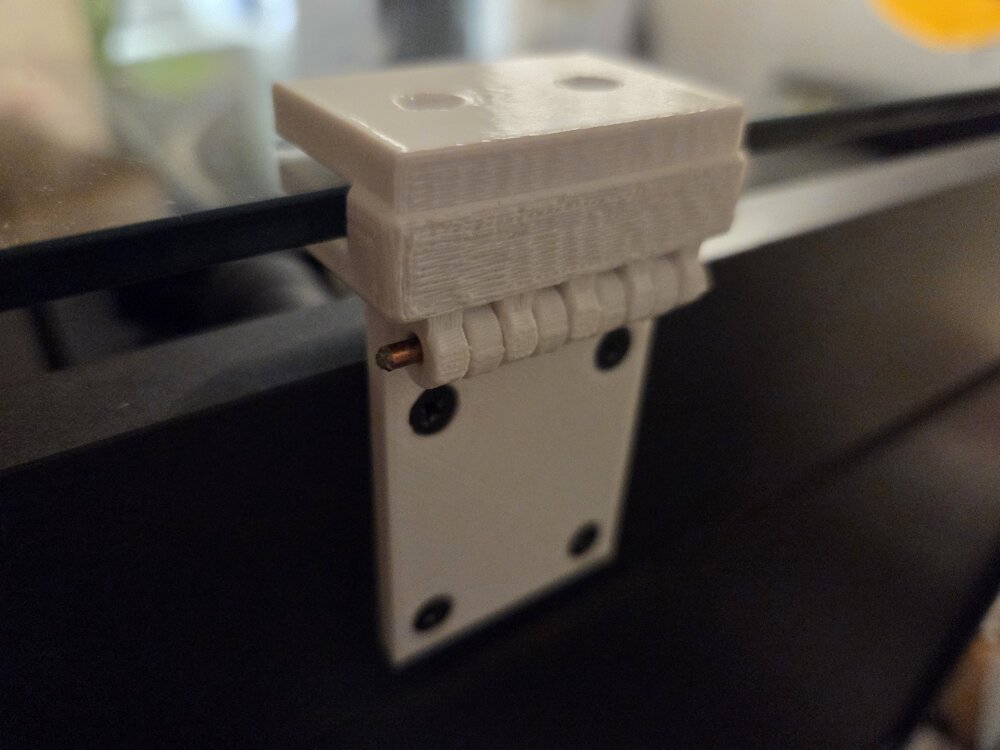
I needed a replacement hinge for the glass lid of my turntable, but the original design was too weak for the job. I redesigned and tested the hinge through several iterations. The final version was strengthened around the load-bearing areas, uses five interlocking hinge tabs, a 3 mm hinge pin, and a 5.3 mm slot for the 5 mm glass panel. One of the biggest challenges was getting the glass clearance right while keeping enough material on the opposite wall for strength. I also added a 5 mm solid reinforced section at the bottom of the glass slot and redistributed material between the two sides of the hinge. A few prototypes were necessary before everything fitted correctly, but the final print now fits the glass properly, moves smoothly and feels significantly stronger than the first version. This is exactly why I enjoy functional 3D printing: instead of searching for an unavailable replacement part, you can measure, redesign, print, test and improve it until it works. I’ll add photos of the printed hinge and the final installation on the turntable.
 1 point
 -
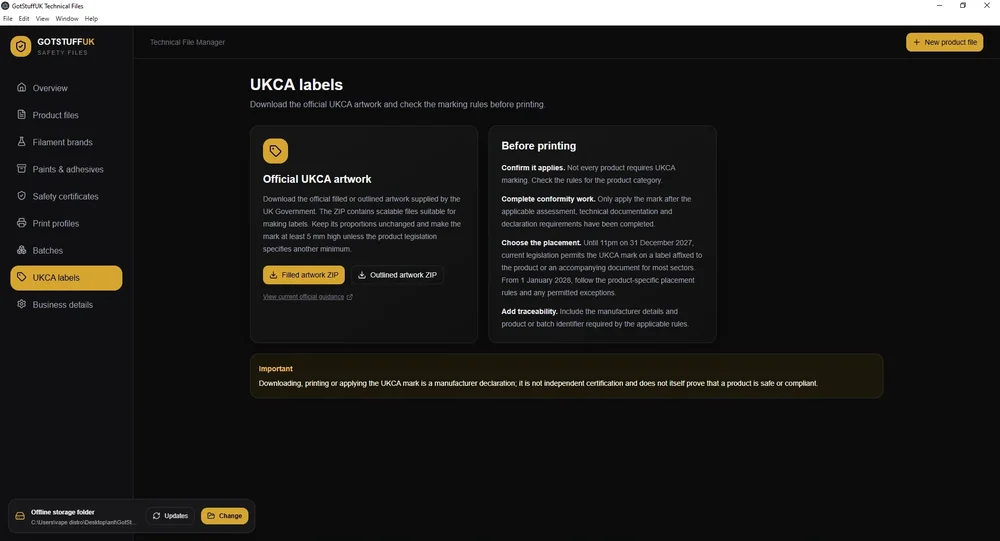
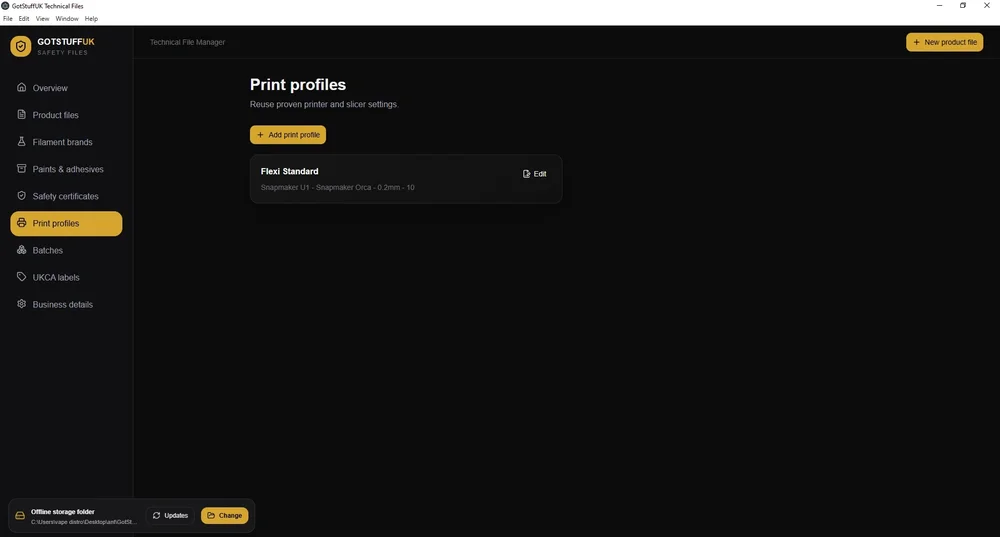
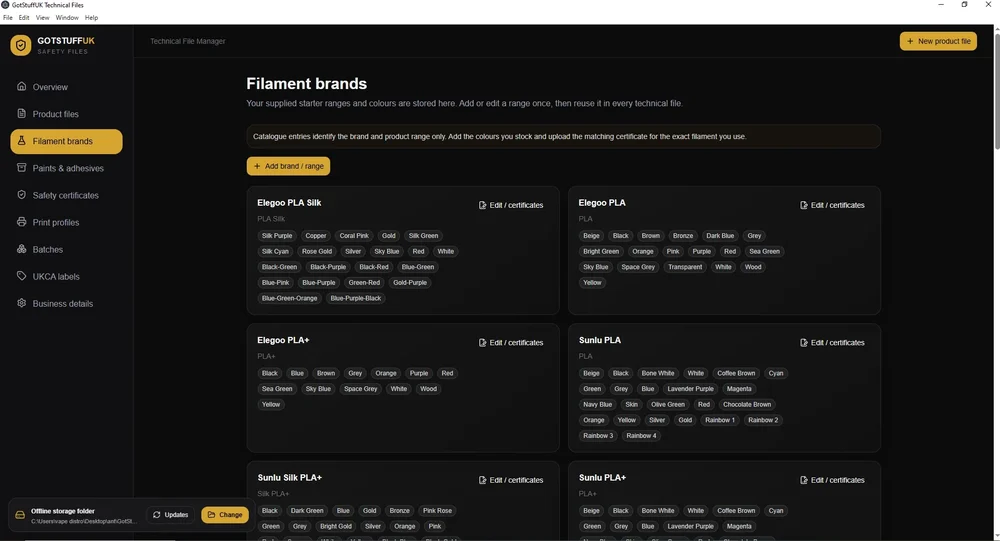
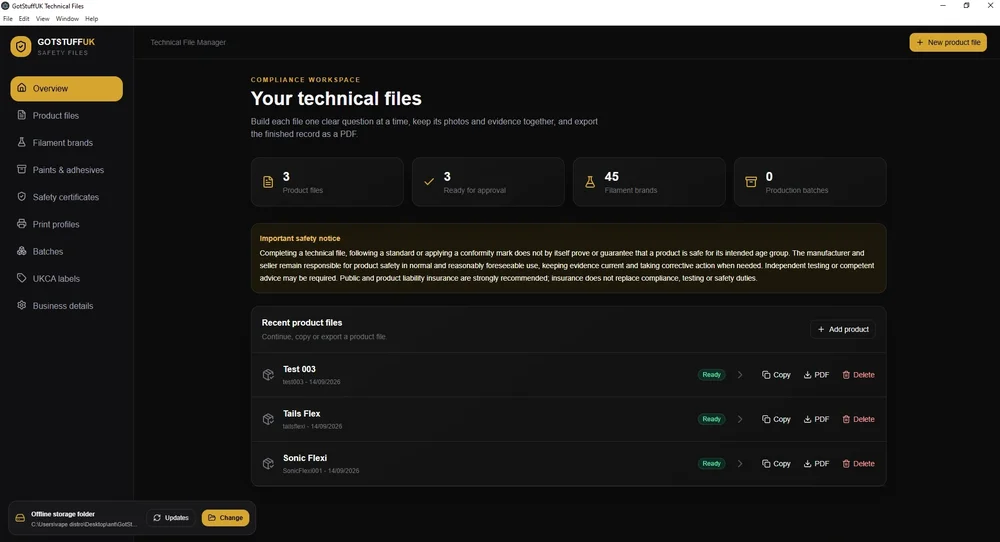
Hi all, a little introduction, i've been 3D printing for around 3 years now as a hobby but over the last 12 months turned this into a small business, As i did markets as well as online i was informed about the UKCA regulations, having looked into this further i seen that you have to have tech files for 3D printed products that are either Articulated or appeal to under 14 year olds. This kind of made me panic a bit thinking 95% of my products are aimed at adults, but some may appeal to under 14's, So i looked into how to test and age grade your products and create these tech files, i found an app but is subscription based and some what complicated, i wanted something that would ask the questions and you give it the answers, Make the whole process simple, So i had the idea and yes i used AI to help code the app as i can't do that, but i gave it all the relevant info, pointed it to the relevant .gov web sites for all the requirements, created the app tested it, refined it a few times, And well i have an app that i use now to create the required tech files incase trading standards etc turn up. The App allows you to enter printing profiles and save them so when creating your tech file you can just select the printing profile you used to save time keep typing it out. You can save as a PDF, Go back an edit your tech file anytime, Copy your tech file and just change Filament colours or brands for quick and easy production. It also allows you to add Glue or paints that you may use, And also add any EN-73 certificates you have to Tech File Folder keeping everything in 1 place and adding in your tech file that you have the EN-73 Certificate for that filament. You can even add Videos of any tests you have done, Such as Drop Tests. You can manually add more filament and colours, i've add some already and plan adding more full sets in the next update. This does not give you the EN-73 Certificate yo can purchase them elsewhere, just google and you will find them to buy. The App is available here, GotStuffUK Tech File Desktop And a full UK guide here If i add any updates it checks on startup for any new versions out and allows you to download it, Main updates coming are adding new filament brands and colours. Any update just extract over your existing app and all your current files remain intact. I'd appreciate any feedback either here or via email.
 1 point
 -
1 point
-
1 pointCongratulations! 🎉 This post won 1 filament spool in the Contribute to Win - September 2026 giveaway. We will contact you shortly to arrange the delivery of the SUNLU filament spool. Giveaway Rules: https://3dwithus.com/forum/topic/973-contribute-to-win-monthly-giveaway
 1 point
 -
1 pointCongratulations! 🎉 This post won 1 filament spool in the Contribute to Win - September 2026 giveaway. We will contact you shortly to arrange the delivery of the SUNLU filament spool. Giveaway Rules: https://3dwithus.com/forum/topic/973-contribute-to-win-monthly-giveaway
1 point
-
Client's Requirement:The customer required a fully customized trophy sculpture based on a reference design featuring two characters. In addition to the trophy image, the customer supplied photographs of two individuals whose faces needed to be accurately incorporated into the trophy characters. The key challenge was to translate real human facial characteristics onto stylized trophy forms while maintaining recognizability, aesthetic balance, and manufacturability. The customer also required a premium gold finish and a custom nameplate, making the project both technically and visually demanding. Technical Challenges Accurately adapting real facial features to pre-defined character geometry Maintaining facial detail and expression after 3D printing and post-processing Ensuring feature clarity despite surface finishing and metallic coating Achieving a high-end, uniform gold finish suitable for an award presentation Delivering a completely personalized final product within design constraints trophy scan Solution:Our engineering and design team developed a custom 3D sculpting workflow to integrate the provided facial references into the trophy characters. Facial proportions, contours, and expressions were carefully refined through multiple design iterations to ensure a natural fit with the original character design. The model was then optimized for high-resolution 3D printing, with special attention given to facial depth, edge definition, and surface continuity to preserve detail after finishing. Post-printing, the trophy underwent professional surface preparation followed by a premium gold coating. A custom nameplate was added to complete the personalization. 3d printed trophy Results Delivered a fully customized, high-quality trophy sculpture Facial features remained clearly recognizable and well-defined after printing Premium gold finish enhanced durability and visual appeal Final product met the customer’s aesthetic, personalization, and quality expectations Technologies Used High-resolution 3D modeling and digital sculpting Design for additive manufacturing (DfAM) Precision 3D printing Surface finishing and metallic gold coating Custom nameplate integration Value to the CustomerThis project demonstrates our ability to combine engineering precision with artistic detailing, enabling the production of bespoke, presentation-grade components. The customer received a one-of-a-kind trophy that accurately reflected individual identities while maintaining a premium, professional finish. Published by: CAD Deziners https://caddeziners.com.au/1 point
-
1 pointGreat project! These “useless boxes” are always fun, especially when you start adding more movements and random behavior. I’ve seen a few versions online before where, instead of just an arm coming out, a little creature actually crawls out of the box, gets annoyed and switches the switch OFF. 😂 There is definitely plenty of room to make your own version unique. One small recommendation: if you’re planning to participate in our monthly filament giveaway, I’d suggest changing your username from Award0586 to something a little more personal or recognizable. Generic-looking usernames can sometimes be mistaken for automated or promotional accounts. 🙂1 point
-
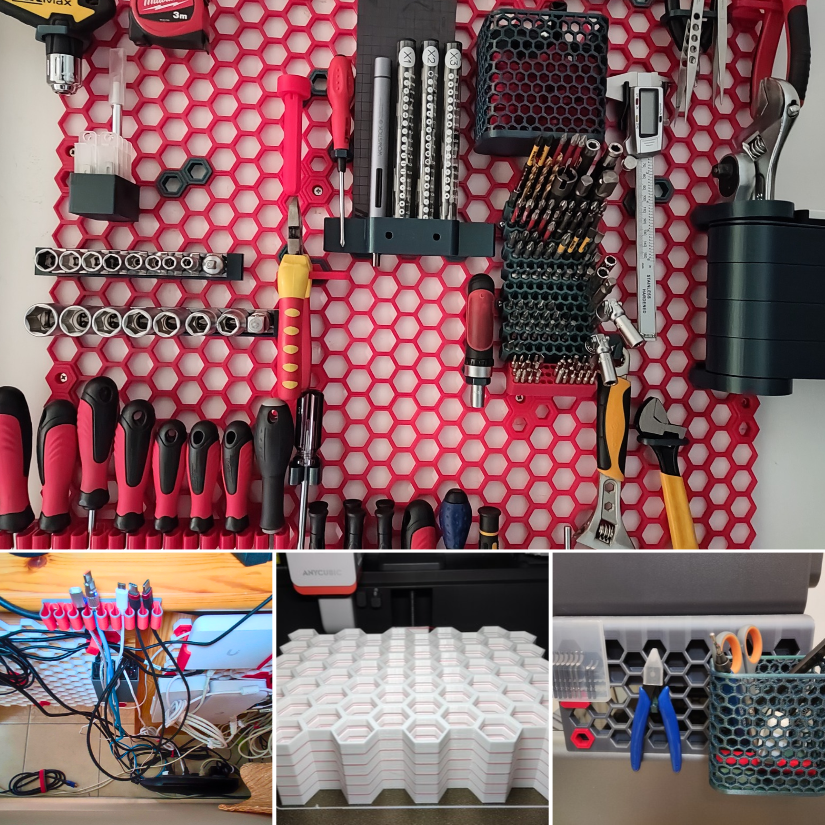
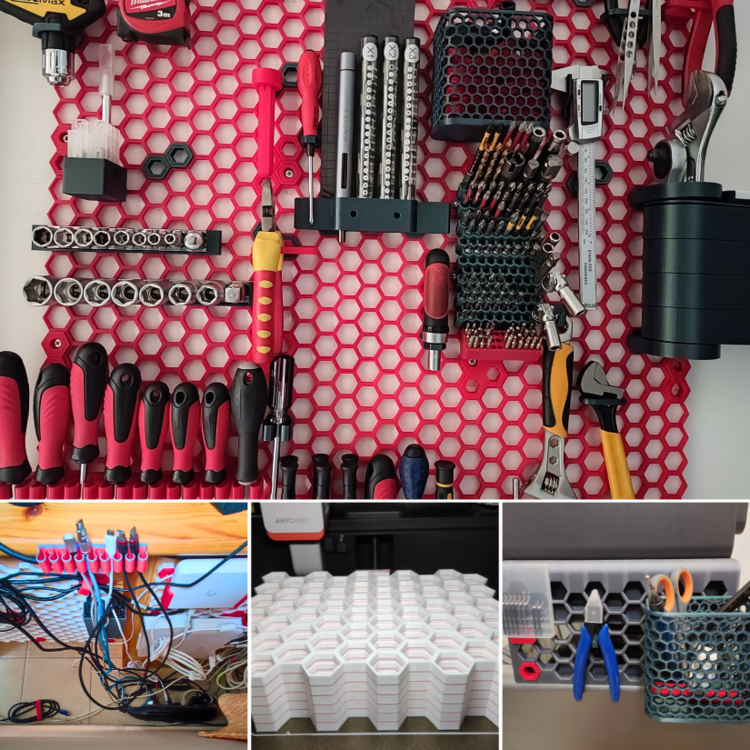
Updated: We added new hands-on examples, including batch-printed HSW tiles, cable management, and an HSW-compatible setup on the Anycubic Kobra S1. https://3dwithus.com/honeycomb-storage-wall-guide-3d-printed-tool-organization
 1 point
 -
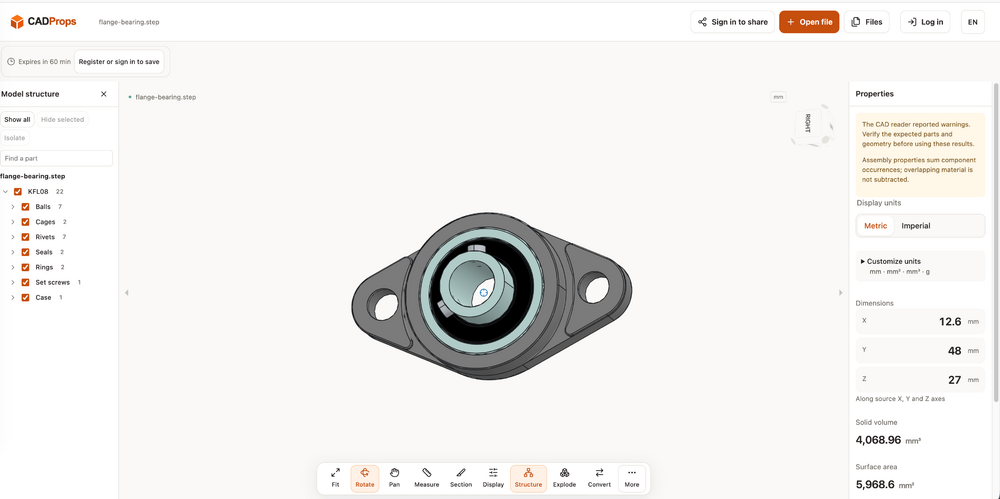
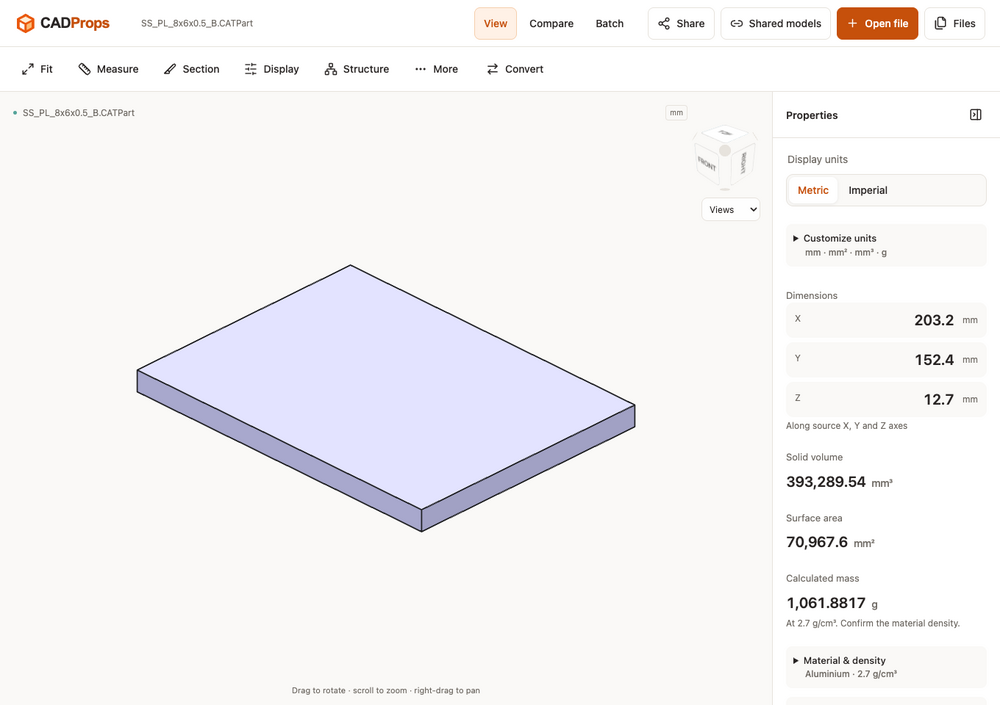
Hi everyone — we’re the team behind CADProps. We built it for those moments when someone sends you a CAD file and you want to inspect the model and check its dimensions without installing another desktop application. For example, you can open a STEP file, rotate the model, check its units and overall dimensions, and inspect geometry properties. CADProps also opens STL and other supported mesh formats, which can be useful when checking a model received for a 3D printing project. If you’d like to try it with a known sample, we’ve put public STEP and STL files here: https://www.cadprops.com We’d be interested to hear what you usually check first when receiving someone else’s model. Are dimensions, units, geometry properties, or comparing versions the most useful to you? — CADProps
 1 point
 -
I’ve used turnkey PCB assembly for projects where saving time is important. Having fabrication, component sourcing, assembly, inspection, and delivery handled together can make the process much simpler than managing everything separately. For small and medium production runs, PCBCool also finds this approach quite practical.1 point
-
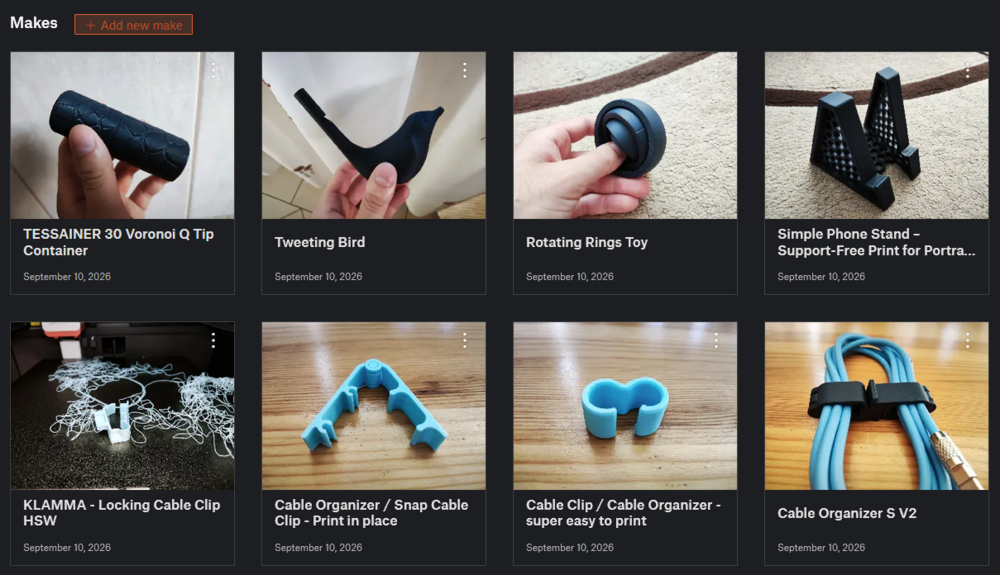
1 pointGreat makes and designs - good job! I will add these to the existing guide for extra publicity!1 point
-
Thanks for sharing this, Antony. I imagine many small 3D printing businesses aren't sure where they stand on UKCA/CE requirements, so it’s useful to have the process explained by someone actually working through it. Interesting idea with the app as well. Hopefully this thread can become a useful reference as you continue developing it.1 point
-
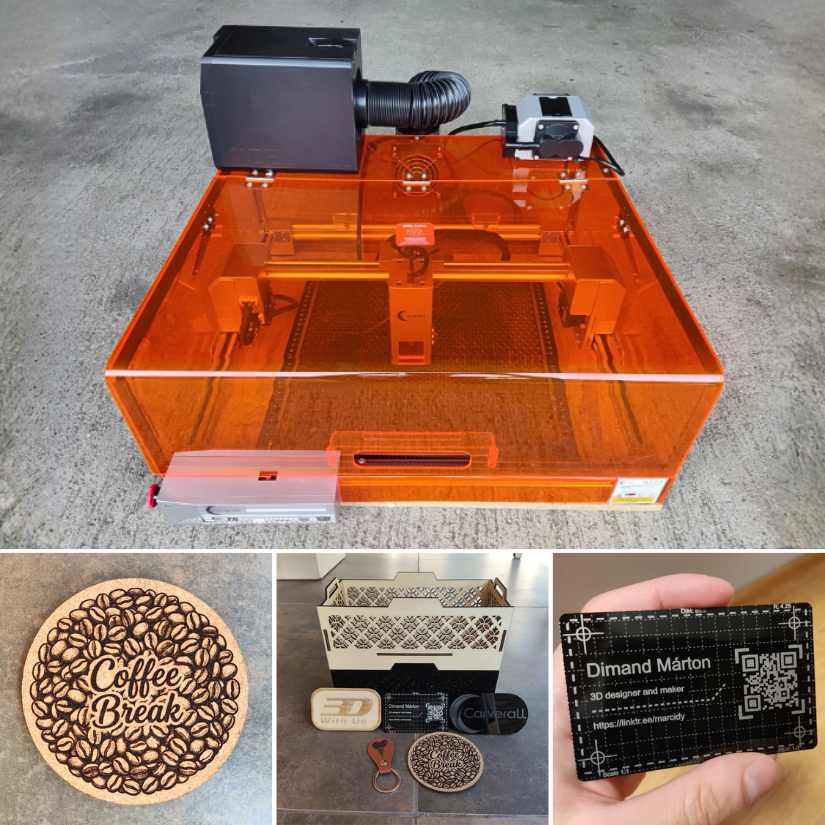
1 pointIt was a pleasure working with the X1Pro! Thank you, 3DWithUS and Carverall!1 point
-
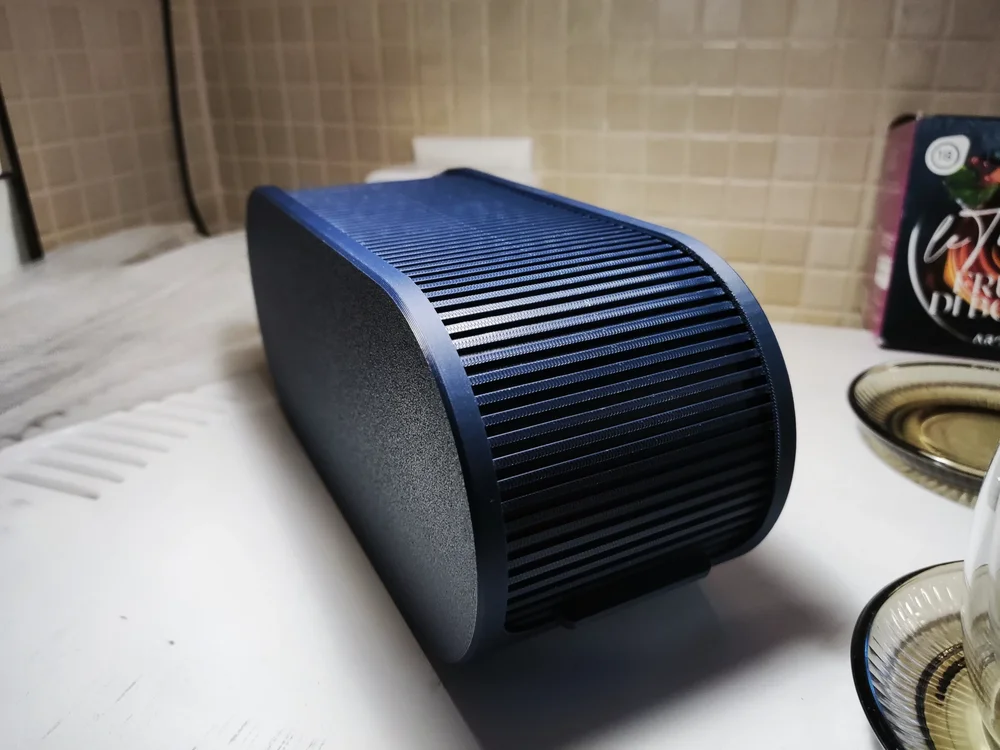
After some work, here are my next batch of printing examples: Modular Locker Storage (model by me): Stacking Storage Tray and Basket (model by @PenguinPrototypes): Shutter Box (model by @3DPrinty): Stackable Sunlu Spool Organizer (model by @3DAlex_SPB): I also printed some smaller things as well, which you can find on my Printables profile: Most of the filaments I used: Sunlu PLA - Midnight Sunlu PLA Matte - Sprout Green Sunlu PLA Matte - Ocean Blue Sunlu PLA+ Gray Sunlu PLA+ Red The matte filament sticks a little bit harder to the PEI plate, but looks very appealing. Additionally, PLA+ and plain PLA prints the easiest. Currently I am trying out the silk variants. I will post about them later!
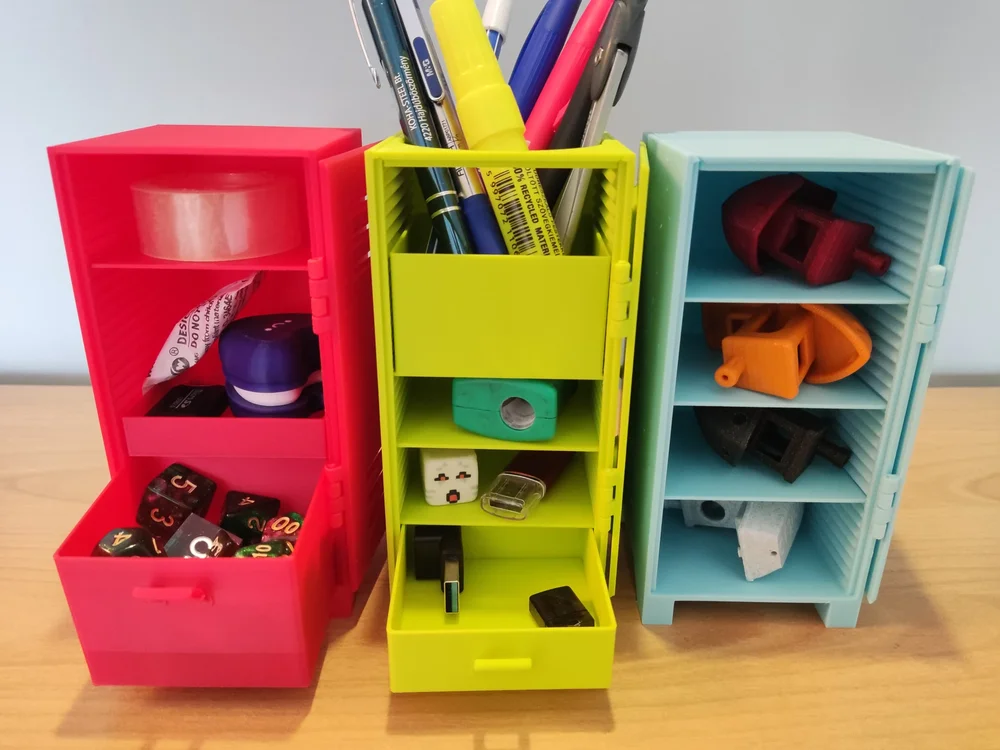
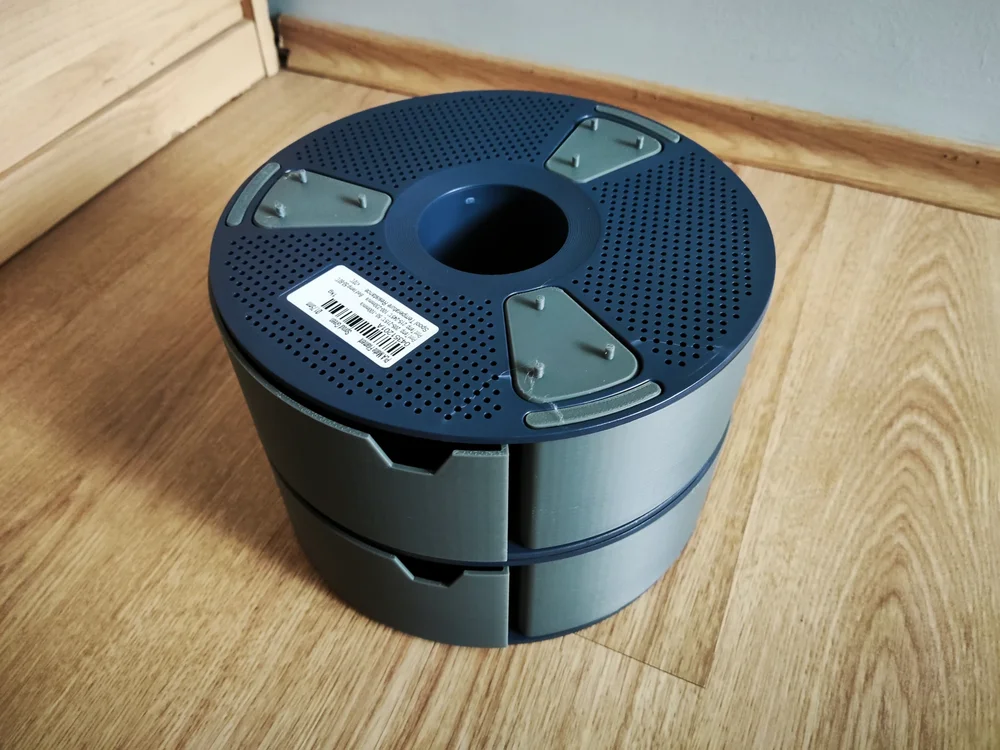
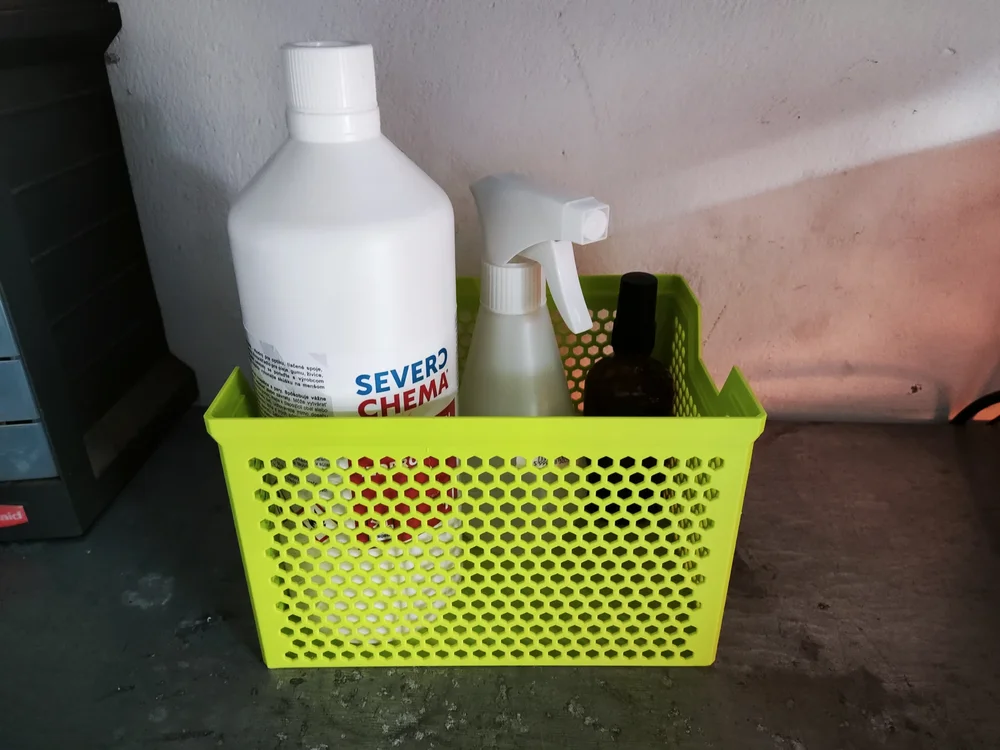
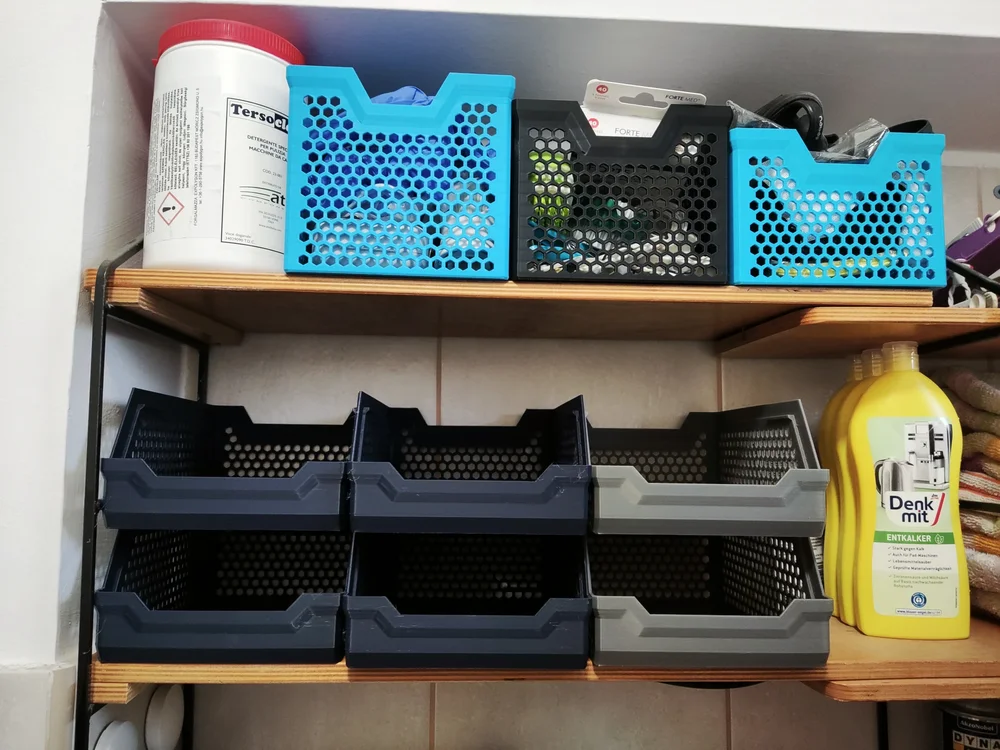
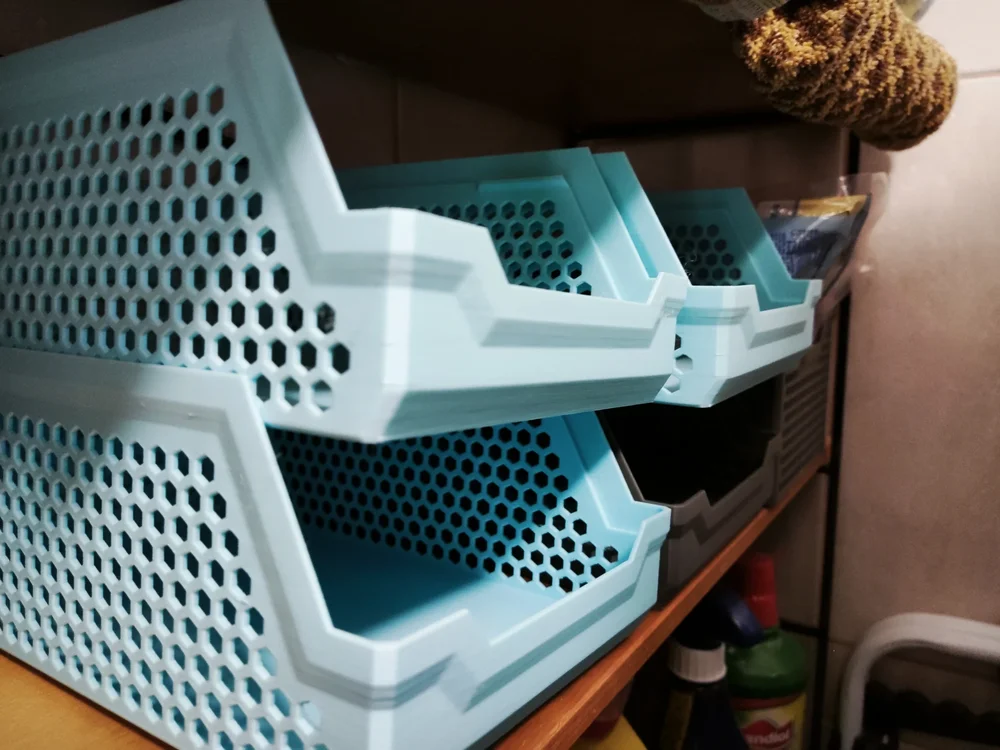
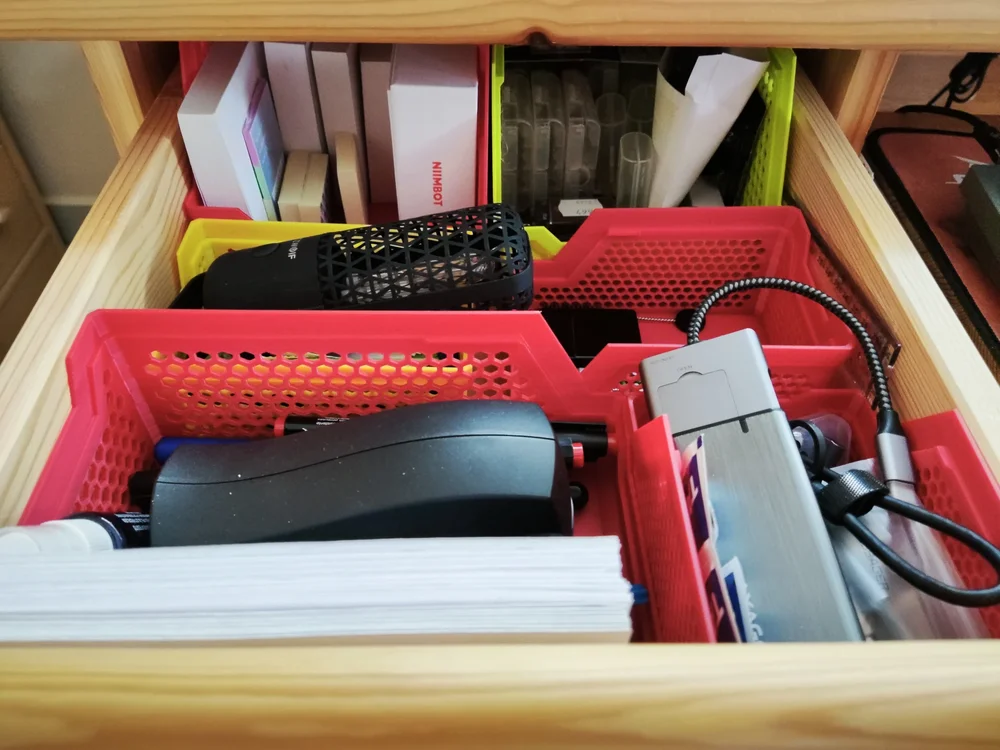
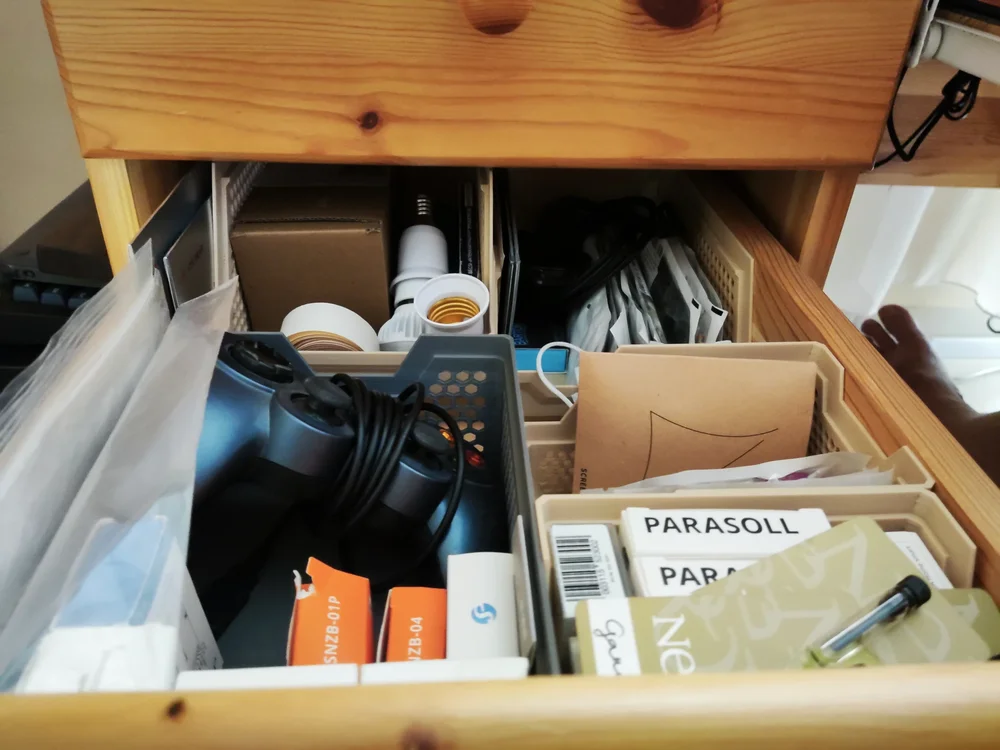
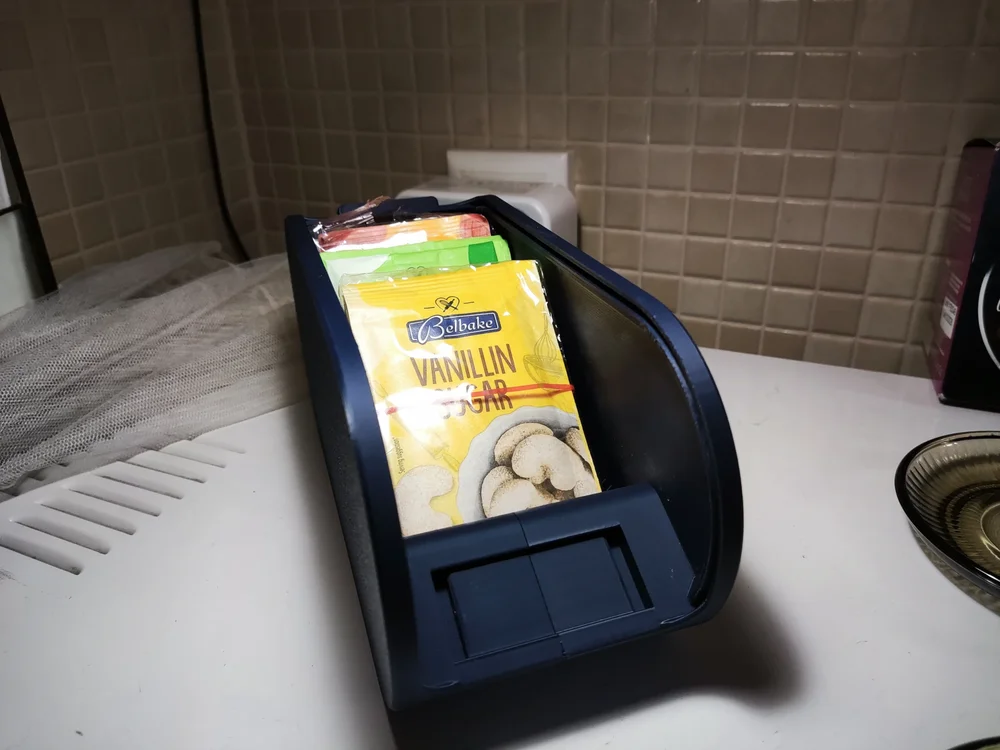
 1 point
 -
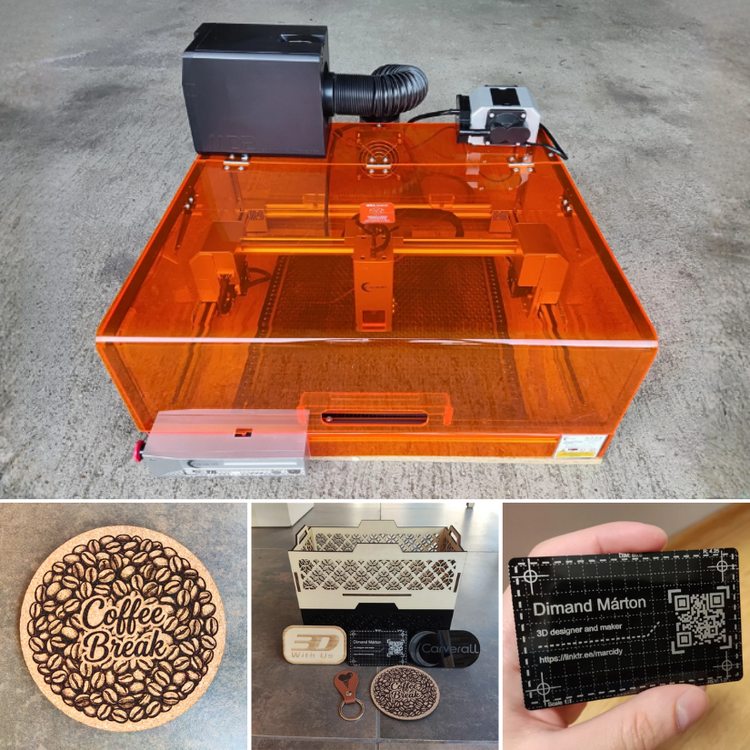
1 pointWoohoo, the Carverall X1Pro hands-on testing article is live: https://3dwithus.com/carverall-x1pro-review-testing
 1 point
 -
1 pointTo learn the Ender 3, I’d start on YouTube and search for “original Ender 3 setup” or “Ender 3 beginner guide.” CHEP and Teaching Tech both have many older Ender 3 videos that are still useful. For an electrician, getting to grips with 3D printing should be pretty straightforward. Good luck with the machine!1 point
-
1 pointThanks for responding, Max. I have been wanting to get into 3D printing for some time because at times, I have needed a part that I could not find and if I could learn 3D printing, I could make it myself. If I can't get it going, I've only lost $50. BTW, where would I find some good video's on how to learn to use this machine and start printing. I'm an electrician by trade so I'm not very good at this stuff.1 point