Leaderboard
-
Marcidy
Members9Points8Posts -
Max Funkner
Members7Points58Posts -
lilyclark
Members7Points8Posts -

Phil Macey
Authors4Points16Posts


Popular Content
Showing content with the highest reputation since 04/15/25 in Posts
-
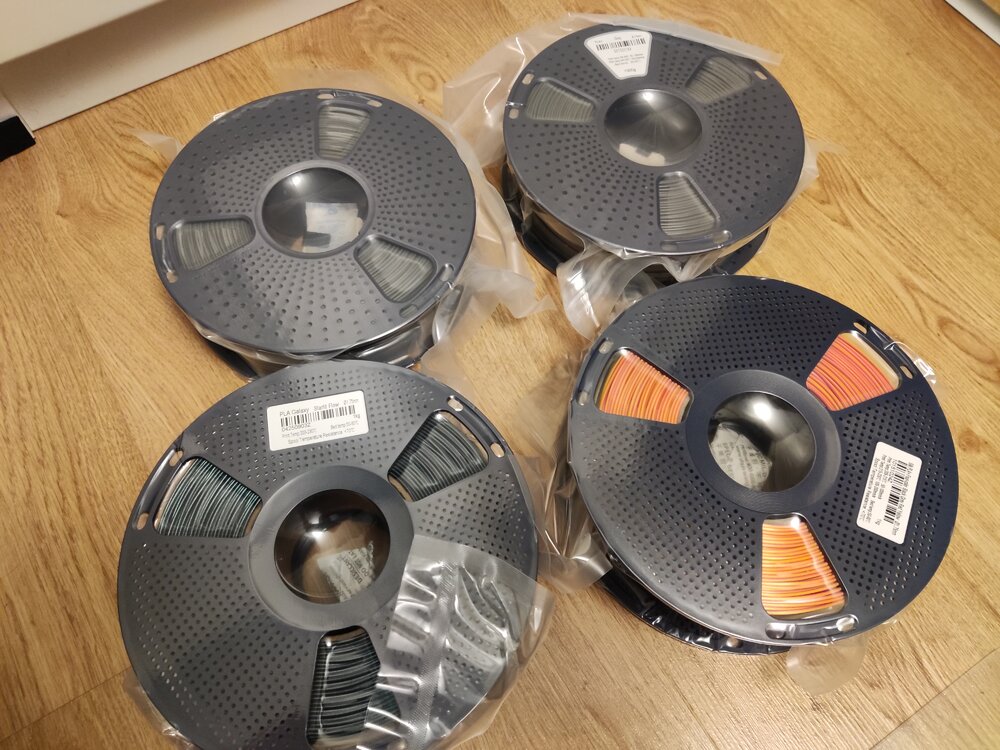
2 pointsJust received my giveaway spools from SUNLU and 3DWithUs! Thank you for this amazing gift! I got: 2 kg PLA+ | Grey 1 kg PLA galaxy | Starlit Flow 1 kg Silk PLA+ | Four-color | Black-Grey-Red-Yellow I haven't printed with them yet, but i can't wait to try them out :) Thank you SUNLU and 3DWithUs!
 2 points
 -
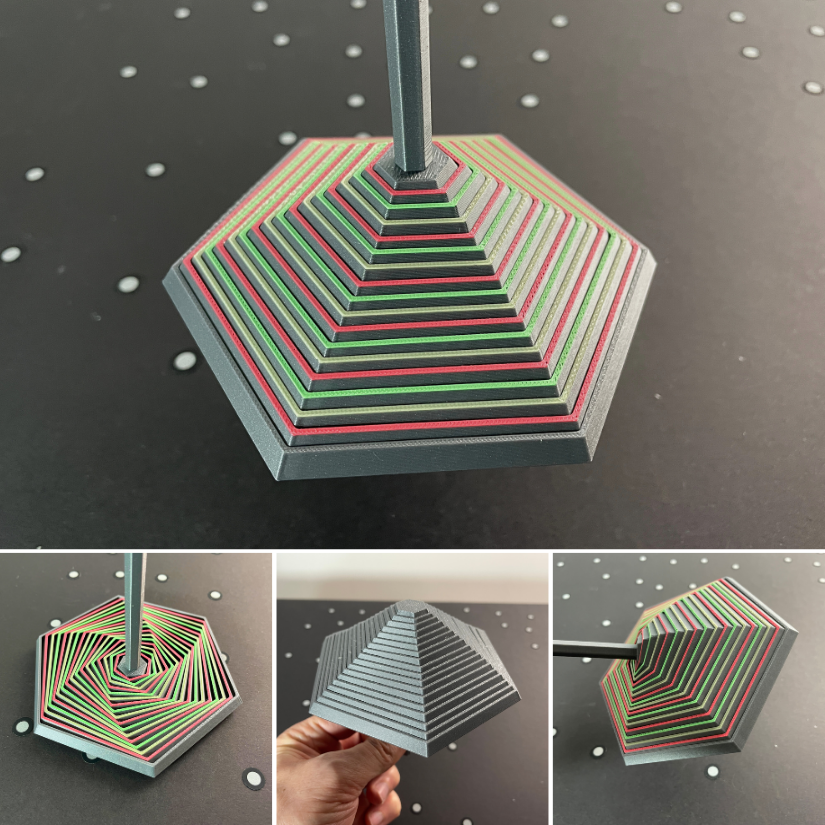
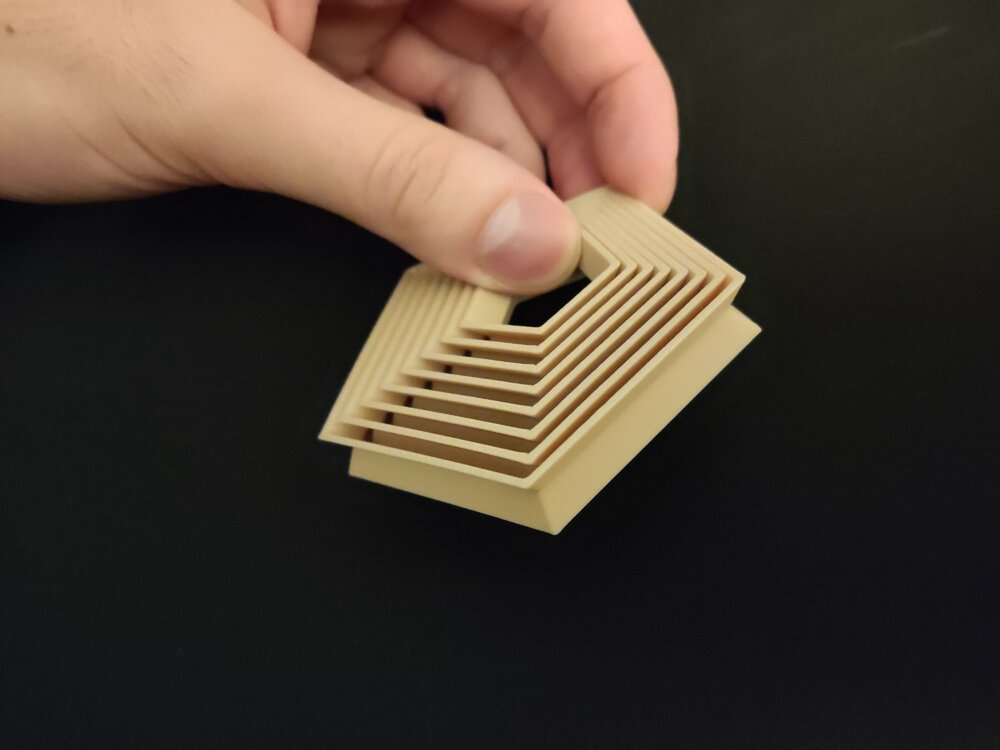
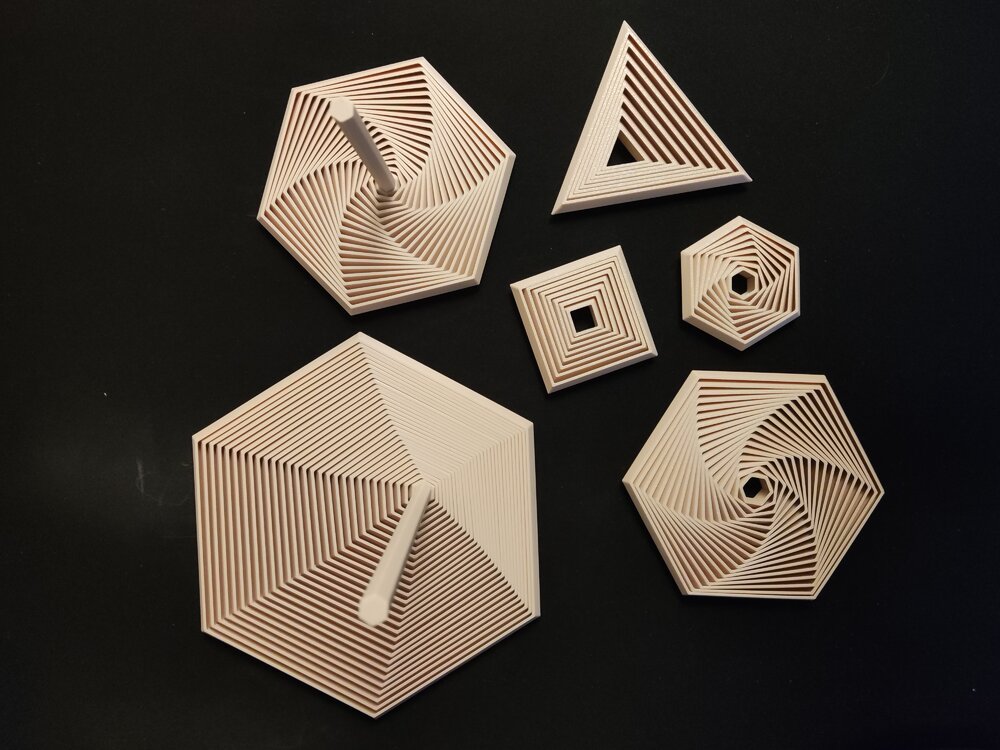
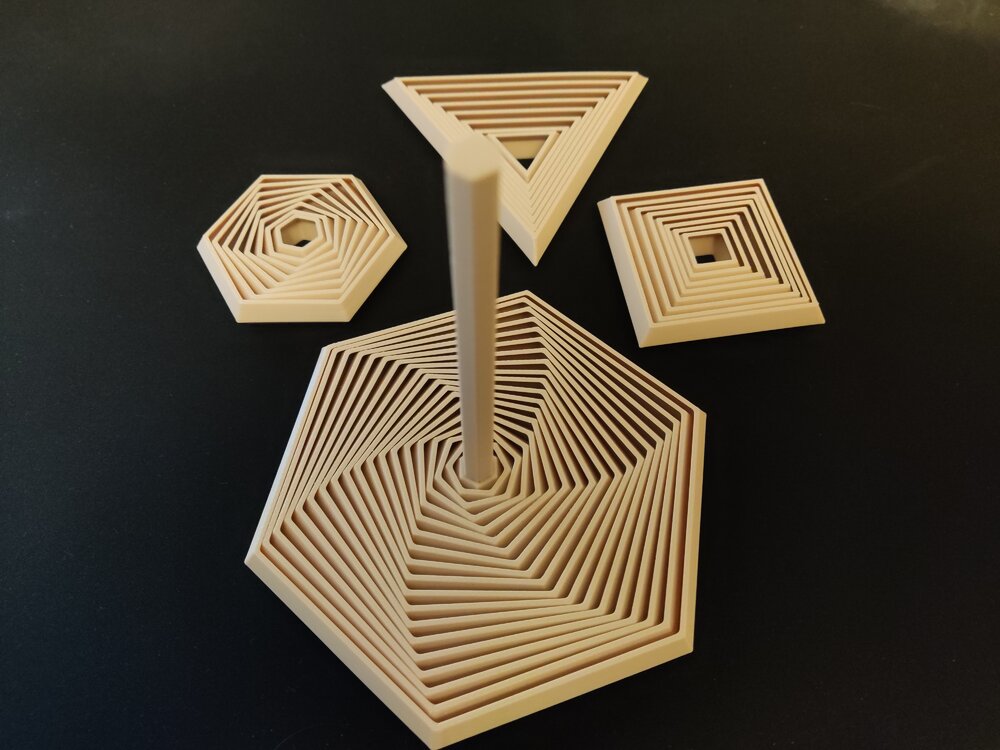
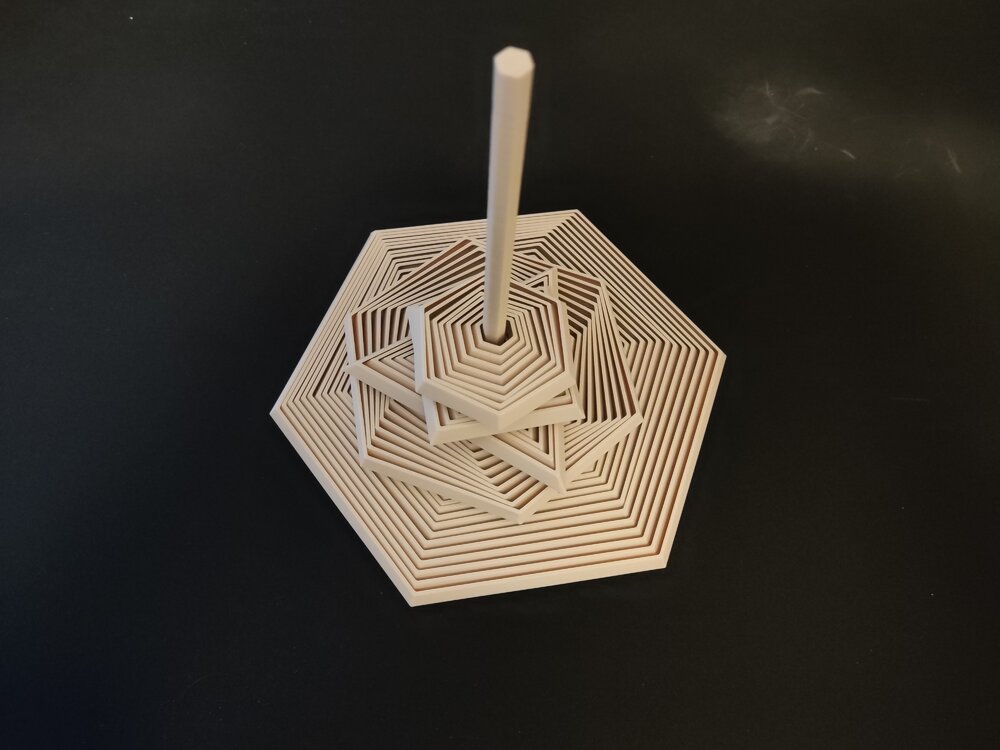
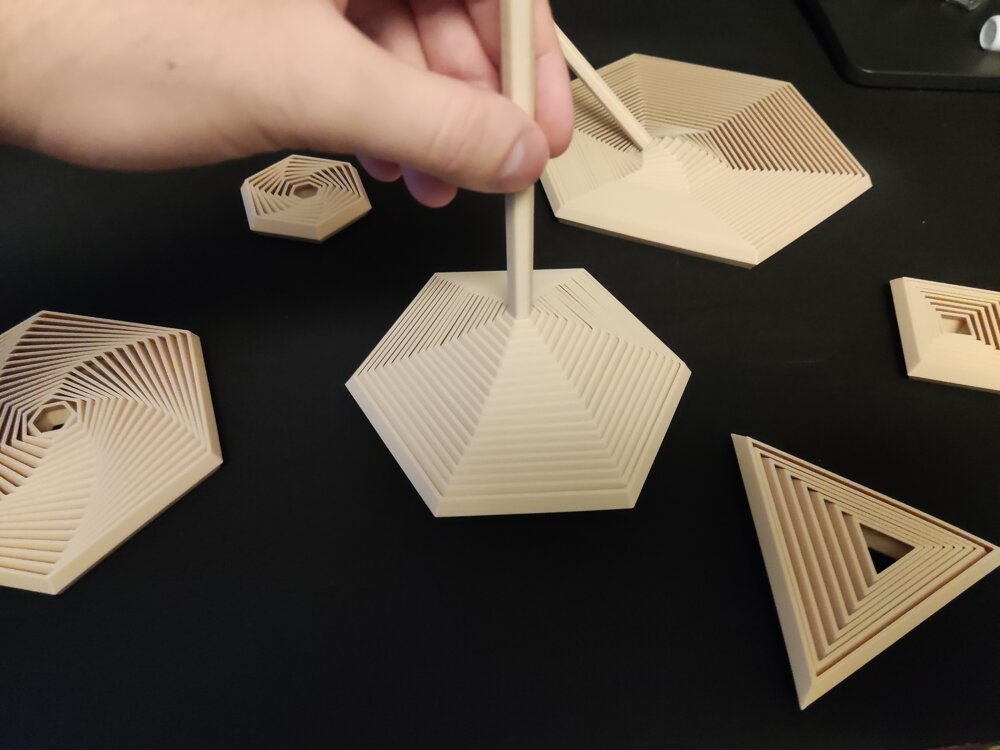
2 pointsHi everyone! I would like to share one of my recent projects with you: A Parametric Polygon Fidget It is fully customizable in FreeCAD and contains some premade ones as well if you don't feel like creating your own. The project is available here. So what can you customize?Number of sides for the polygon Segment/layer count of the fidget Wall width Wall angle Spacing Overall size: Height, Width Handle size (The handle is optional) (You can make insideout fidgets as well with it! See last 2 attached pictures!) Happy printing and customizing!The project is available on Printables: https://www.printables.com/model/1537410-polygon-fidgets-fully-customizable-trianglesquarep Showcase pictures:

 2 points
 -
Hi all, I’ve been looking into automated 3D scanning with robots for repetitive scanning tasks. Manual scanning works, but consistency can be an issue when doing the same part again and again. Recently I came across a robotic scanning setup called MetroHub, which combines a 3D scanner with a robotic arm. I’m curious if anyone here has experience with robot-assisted 3D scanning or similar systems. Is it mainly about consistency, or does it really improve overall efficiency in real use? Just trying to understand whether robotic scanning is practical outside large factories. Would love to hear your thoughts.2 points
-
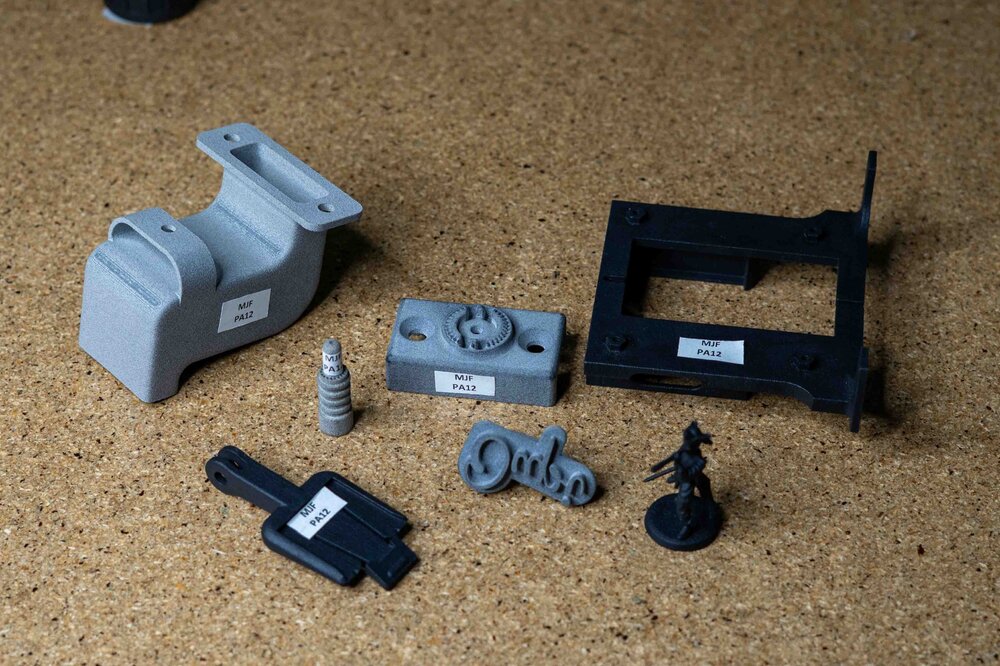
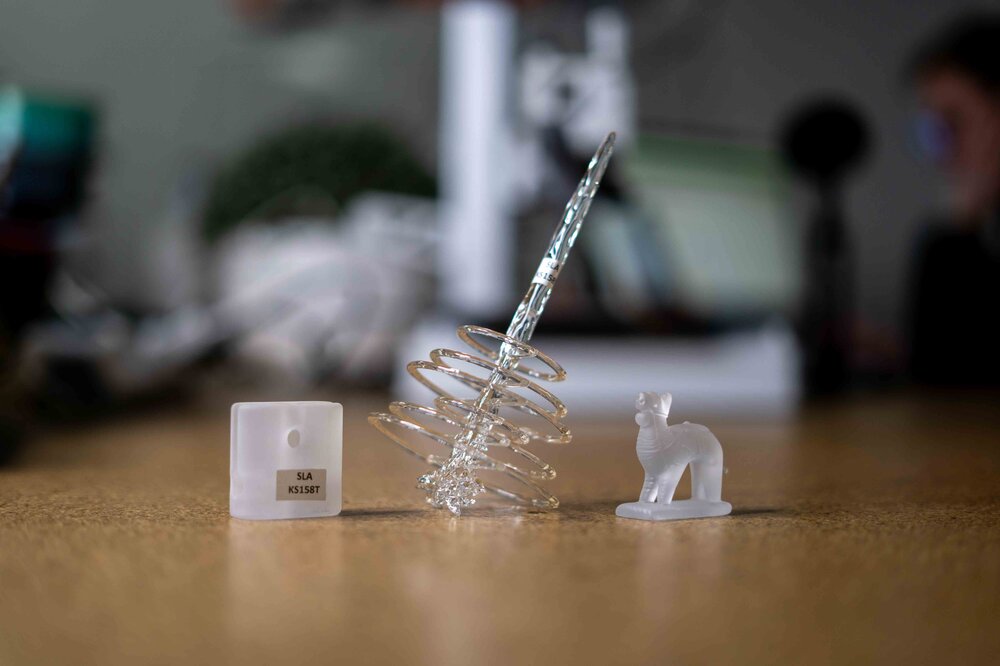
Who We AreKAD3D is a Melbourne-based 3D printing and design company specialising in rapid prototyping, end-use parts, and short-run manufacturing. Established with a focus on precision, reliability, and speed, we’ve grown to become Australia’s highest-rated 3D printing service, with over 300 five-star Google reviews and a reputation for delivering outstanding results. Our CapabilitiesWe provide a full suite of modern fabrication and design services, including: FDM 3D Printing – strong, affordable parts for prototypes and end-use applications. SLA Resin Printing – high-resolution parts with smooth surface finish. SLS and MJF Nylon Printing – durable, functional components ideal for production runs. SLM Metal 3D Printing – stainless steel, aluminium, and titanium parts for industrial use. Vacuum Casting & Injection Moulding – small-batch manufacturing with production-grade finishes. CNC Machining & Laser Cutting – precision engineering for metals, plastics, and composites. Our team also offers CAD design, 3D scanning, and reverse engineering, allowing clients to turn physical parts, sketches, or ideas into fully manufacturable 3D models. Industries We ServeKAD3D works with a wide range of clients, from individuals to large enterprises, across sectors including: Automotive & Motorsport – replacement brackets, custom parts, and tooling. Aerospace & Defence – lightweight functional components and prototype assemblies. Architecture & Construction – scale models and display pieces. Education & Research – hands-on teaching aids and engineering prototypes. Product Development & Consumer Goods – concept models and pre-production samples. Why Choose KAD3DAustralian-made: All core printing technologies are produced locally at our Melbourne facility. Fast turnaround: 24-hour express service available for FDM printing. Expert support: Our engineers and designers assist from concept through to production. End-to-end solutions: From initial idea to finished part, we handle design, manufacturing, and finishing in-house. Get in TouchFor quotes or project discussions, visit kad3d.com.au, email [email protected], or call (03) 8400 8869. You can also visit us at 781 High St, Reservoir, VIC 3073. We’re always happy to help you choose the right material or technology for your next project. You can also view our location, photos, and 300+ verified customer reviews on our Google Business Profile here: https://share.google/b1WfW188zvSkUkmOP

 2 points
 -
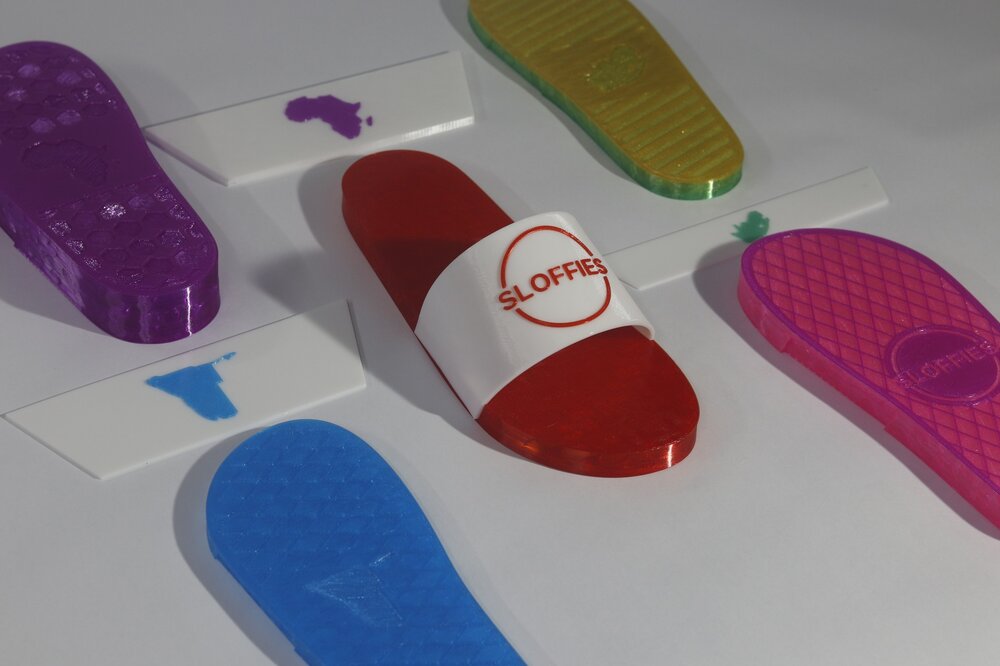
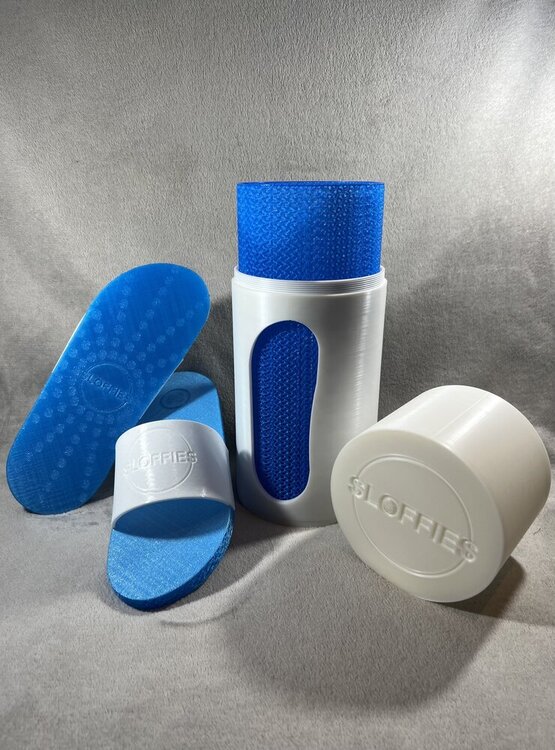
2 points"Sloffies" is an Afrikaans nickname for slides and flip-flops. I have designed Sloffies to be parametric so anyone can customize them for their feet using the customizer on MakerWorld. You can also download the script on GitHub and use the OpenSCAD customizer to customize them; the UI is just not as intuitive as the customizer on MakerWorld. Where it started I designed the slides and accompanying packaging as part of a shoe design competition. The competition, unfortunately, didn't work out for a variety of reasons, but it was honestly a blessing in disguise. It is my most popular design, and thanks to the 3D printing communities of Facebook, Reddit, Twitter, and Thangs, it was featured in a Hackaday article, which opened a lot of doors for me. Parametric slides The design was only available in select sizes required by the competition, and as requested by a few people in the community, I redesigned Sloffies to be fully parametric. You are able to customize the strap’s width, length, and thickness and import a logo. You are able to customize the sole's width, length, and thickness; add a patch; import a logo; and choose from five available sole patterns, which you can further customize to your liking. Designing your own Sloffies is a really involved process. I have included a PDF guide on MakerWorld and GitHub. I hope it will simplify the process. I have also uploaded a YouTube playlist that takes you on a walkthrough of the various sections of the design on MakerWorld and how changing one parameter changes the design. Open Source I have Open sourced Sloffies, and the OpenSCAD script is available on GitHub. You are free to remix and improve upon the design. There are a lot of improvements that could be made, like adding arch support, a contoured footbed, etc. I see the sole as a basis from which more shoes can be designed. The future I would like to learn Blender and design Sloffies with Blender, as OpenSCAD really limits what I would like to do with the design. I would like to establish Sloffies as an international brand. The first step would be redesigning the logo, the slides, and the packaging. I would love to incorporate an augmented reality app that allows people to try on their slides before printing or ordering.
 2 points
 -
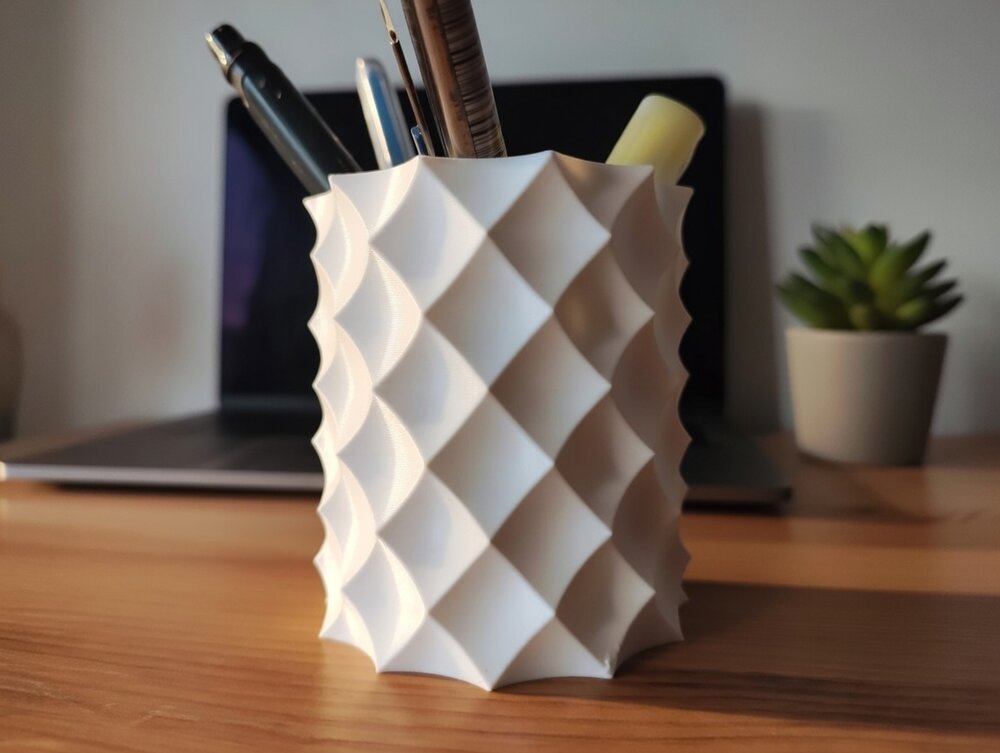
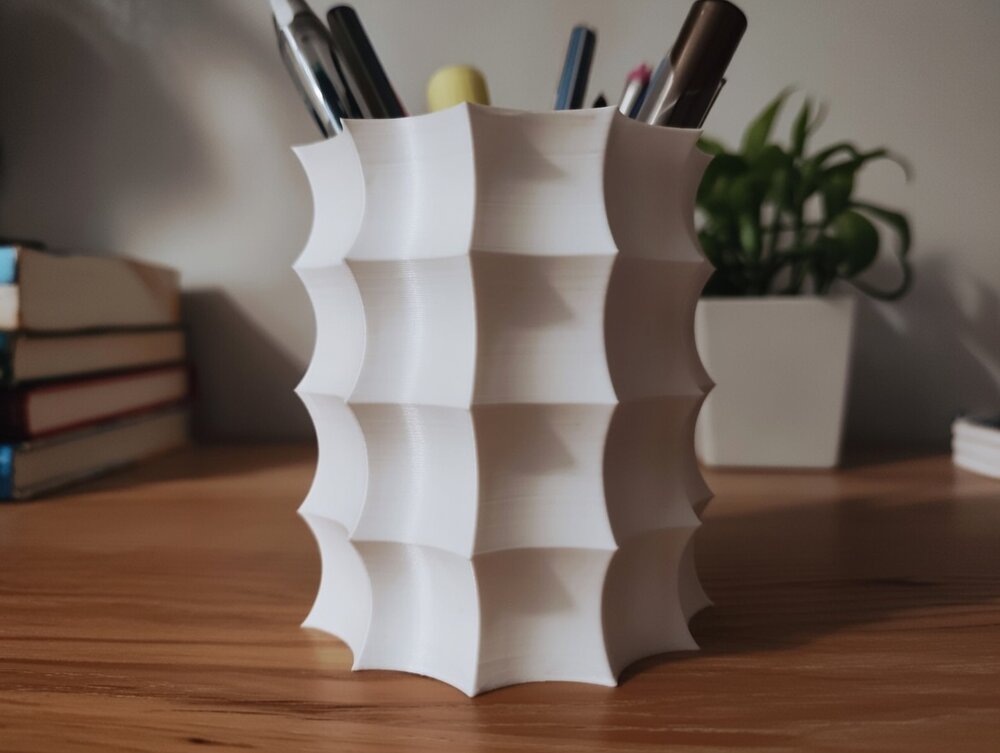
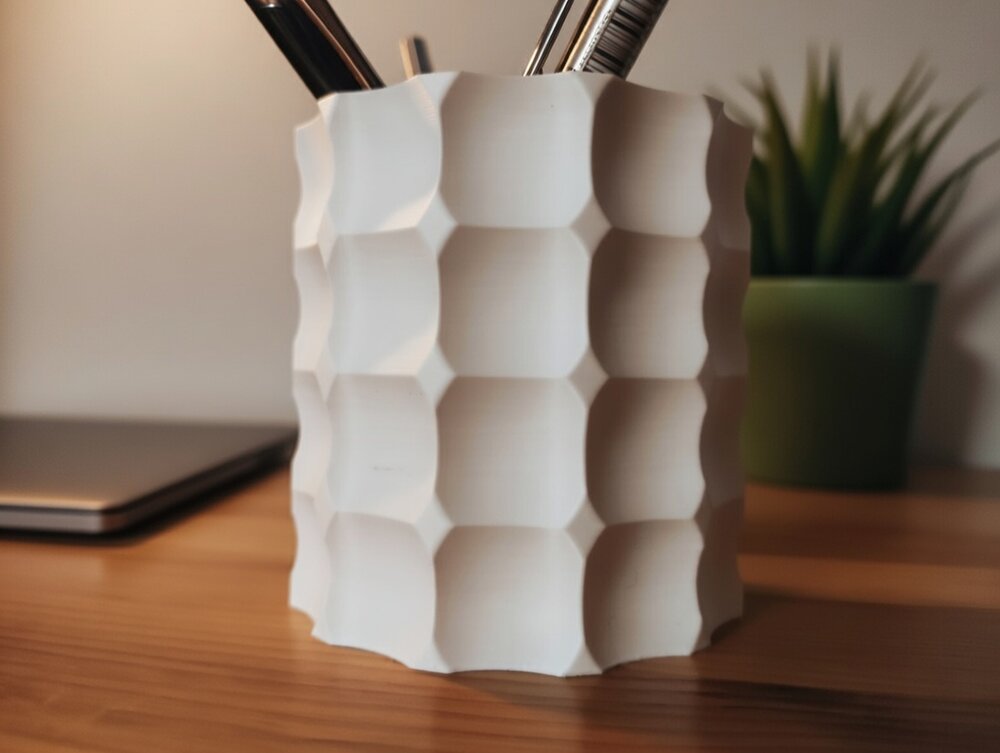
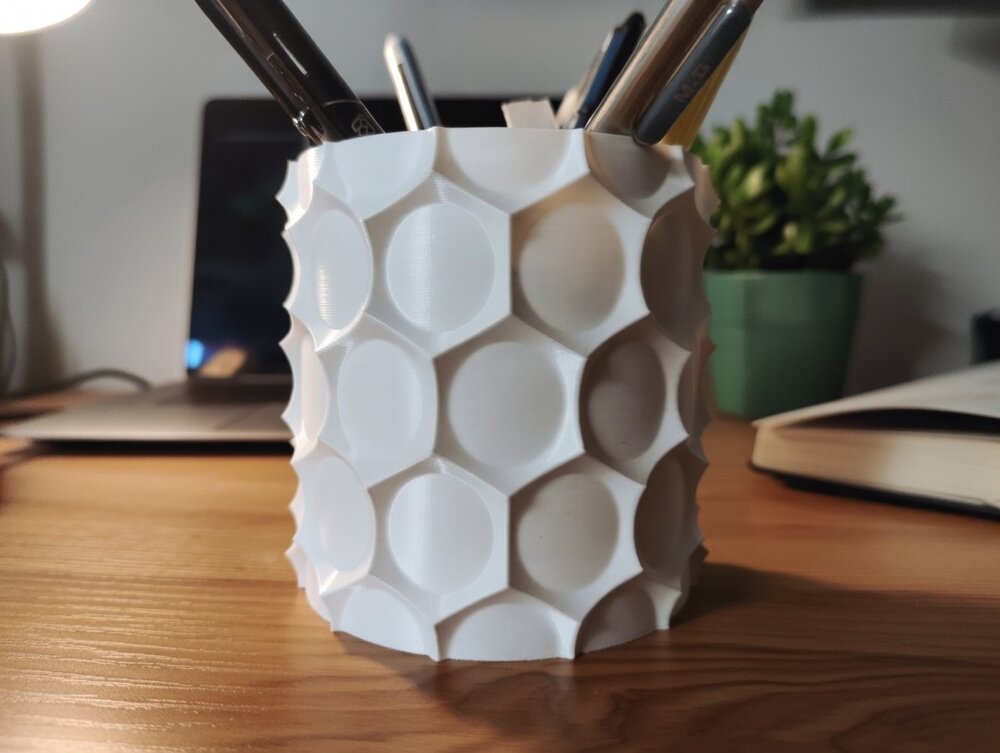
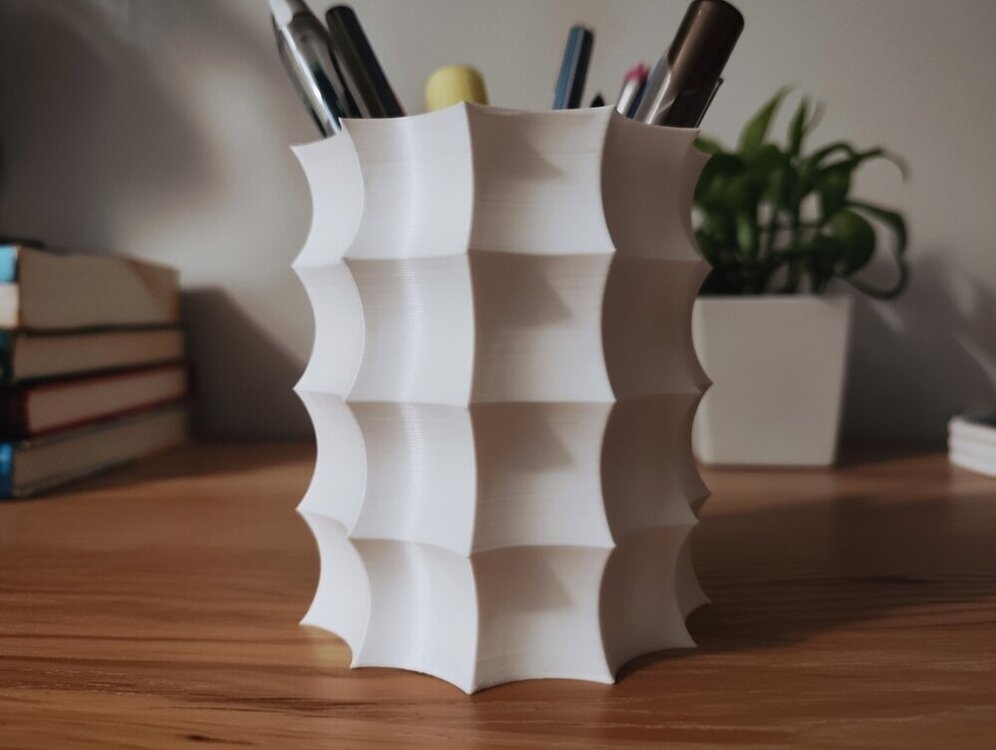
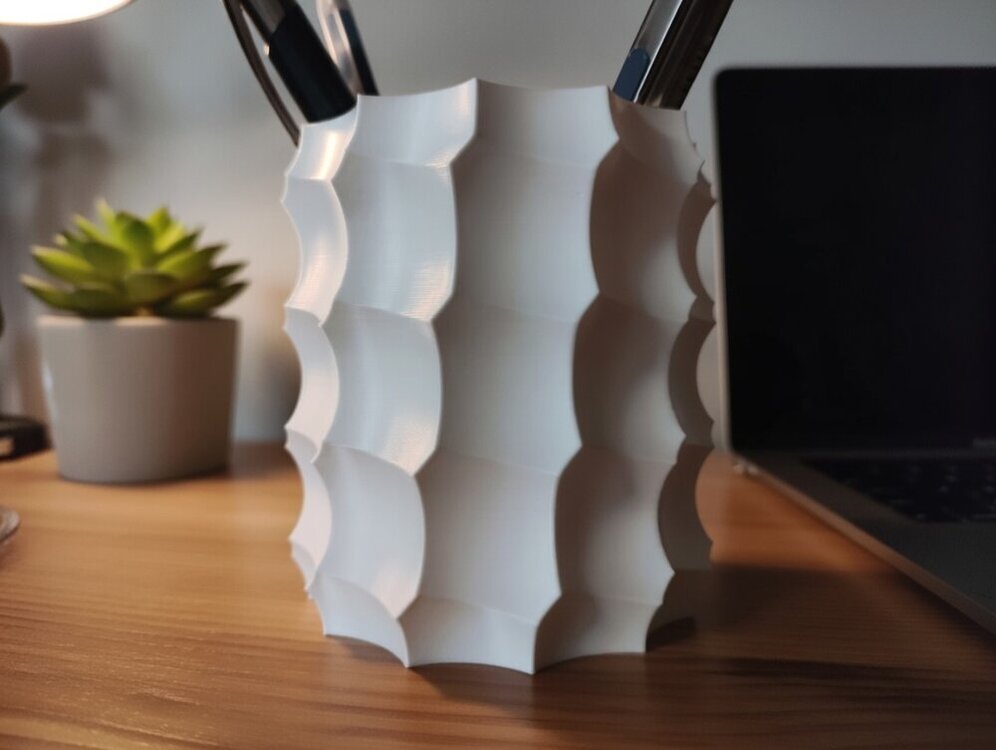
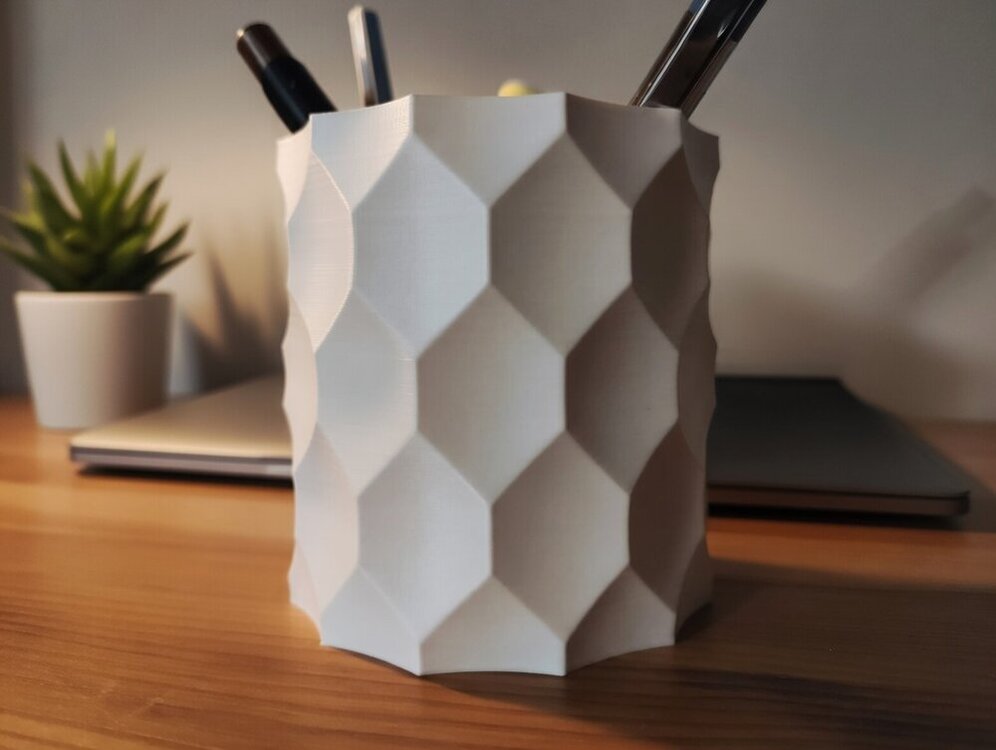
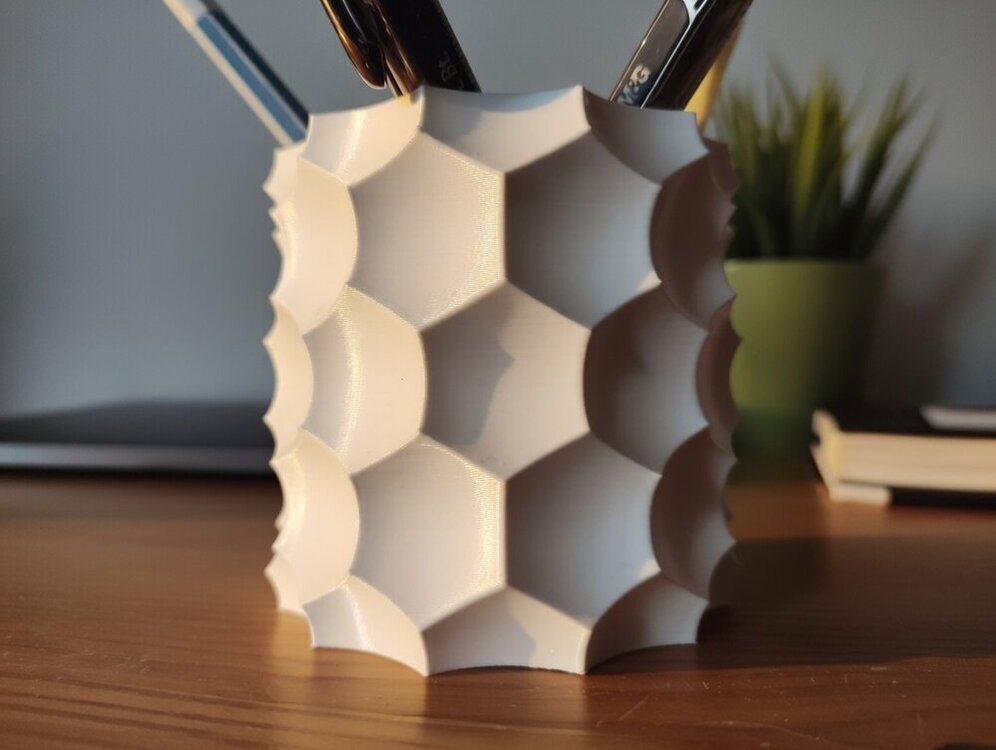
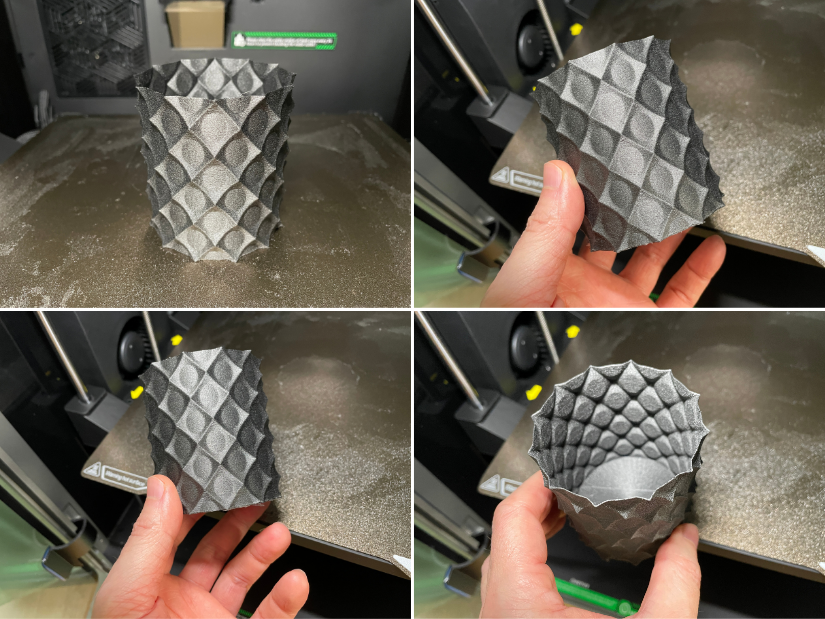
Hi Everyone! I would like to showcase the result of my latest project: A parametric Anti Sphere Pot They are made by carving out a cylinder using spheres placed in circular and linear patterns. These patterns can also be twisted around the Z-axis, resulting in some truly unique designs! Here are some of the pots i created with it: You can check out and download the demo models on Printables for free. The FreeCAD project file is not yet available (needs some polishing). Since i am not a good photographer, i edited these pictures with the help of AI. You can still view the original photos on the demo's page. I hope you like it :)


 1 point
 -
Here is one of the models, 3D printed on Creality K2 Pro in engineering-grade material PA12-CF. Looks nice, and the finish resembles popular galaxy composite filaments. This Anti Sphere - looks great. This is the default size. For functionality, I would print it bigger and with a larger nozzle.
 1 point
 -
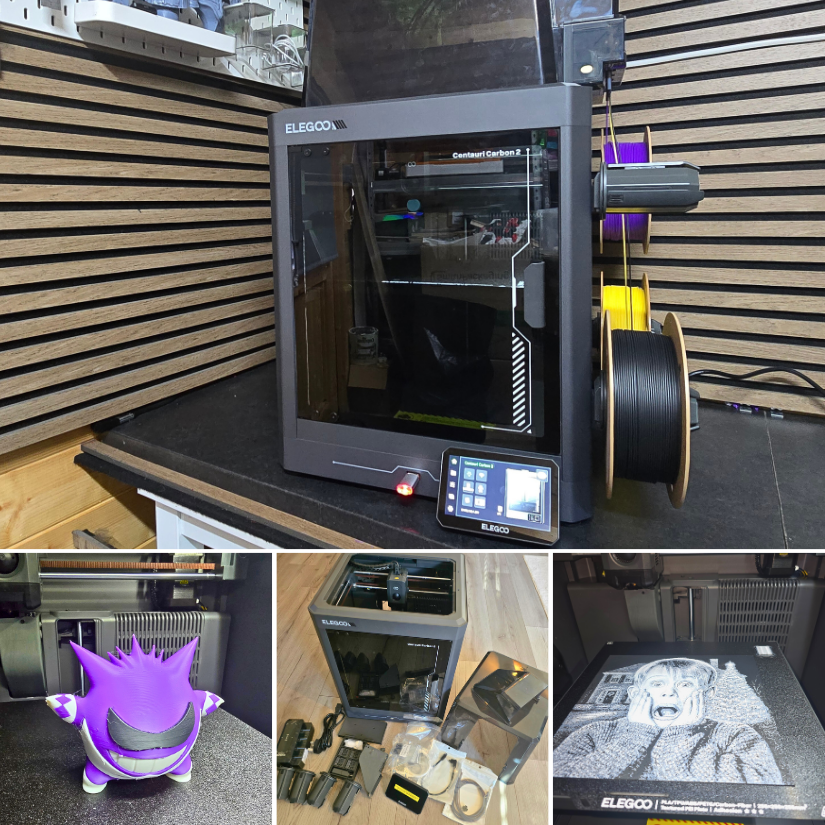
Here is the Elegoo Centauri Carbon 2 Combo evaluation guide and video. 📝 https://3dwithus.com/elegoo-centauri-carbon-2-combo-3d-printer-review 📹 https://youtu.be/f98-ntl3xb8 Featured: Nostalgic3DModels, 3DGlow If you have thoughts, questions, or want to share your own print results with the Centauri Carbon 2 Combo, feel free to post below.
 1 point
 -
1 pointLess than one month to go until SMRRF 2026 in Manchester. I hope the most challenging part is done. Wish me luck! Apart from downloading files and a guide from Printables I used a few good videos to help me with my process: https://www.printables.com/model/1134616-piranha-death-racer The DeathRacers Builders Group on Facebook was immediately helpful, answering my questions: https://www.facebook.com/share/g/1Zekw3spkx/?mibextid=wwXIfr
 1 point
 -
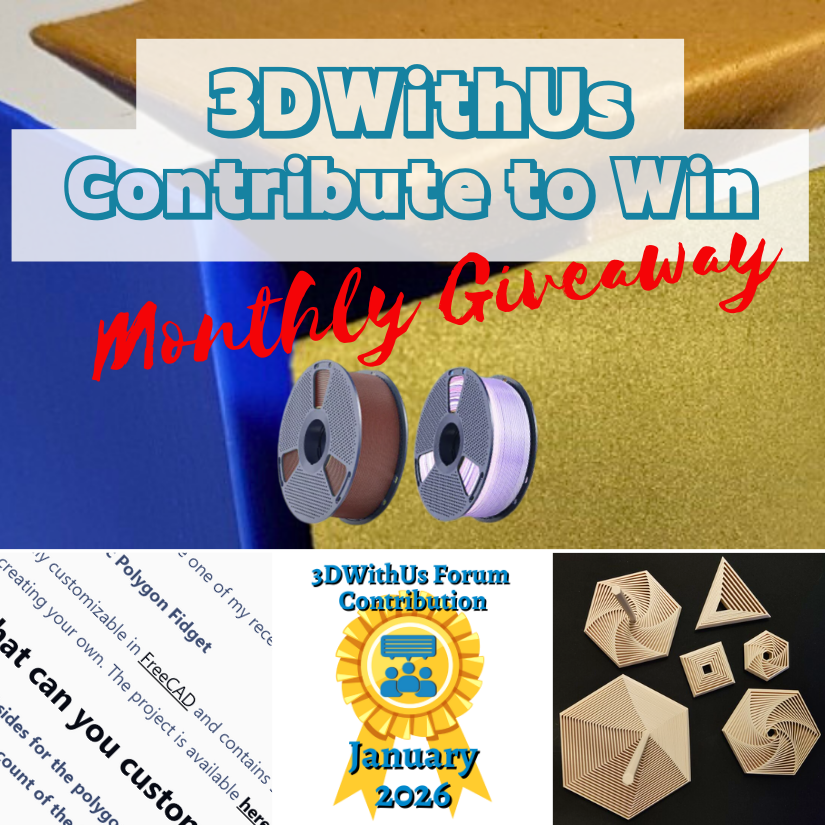
🎉 January Giveaway Completed — February Giveaway Is On The Way! Huge thanks to our early forum supporters! We're excited to award our filament prize to forum contributors 🙌 🏆 Winning contributions: A Parametric Polygon Fidget: https://3dwithus.com/forum/topic/991-parametric-polygon-fidget Four SUNLU filament spools are now on their way 🎁 What's Next✅ The February giveaway is live ✅ 2 × SUNLU filament spools will be awarded (Best Post or/and Best Comment) ✅ All helpful & creative contributions count Share your projects, tips, questions, fails & wins. Every contribution helps grow the community and puts you in the running. If you were considering posting but haven’t jumped in yet, this is the perfect time to start. Sign Up Here https://3dwithus.com/forum/register/
 1 point
 -
1 pointCongratulations! 🎉 This thread won 4 filament spools in the Contribute to Win - January 2026 giveaway. We will contact you shortly to arrange the delivery of two SUNLU filament spools. Giveaway Rules: https://3dwithus.com/forum/topic/973-contribute-to-win-monthly-giveaway
 1 point
 -
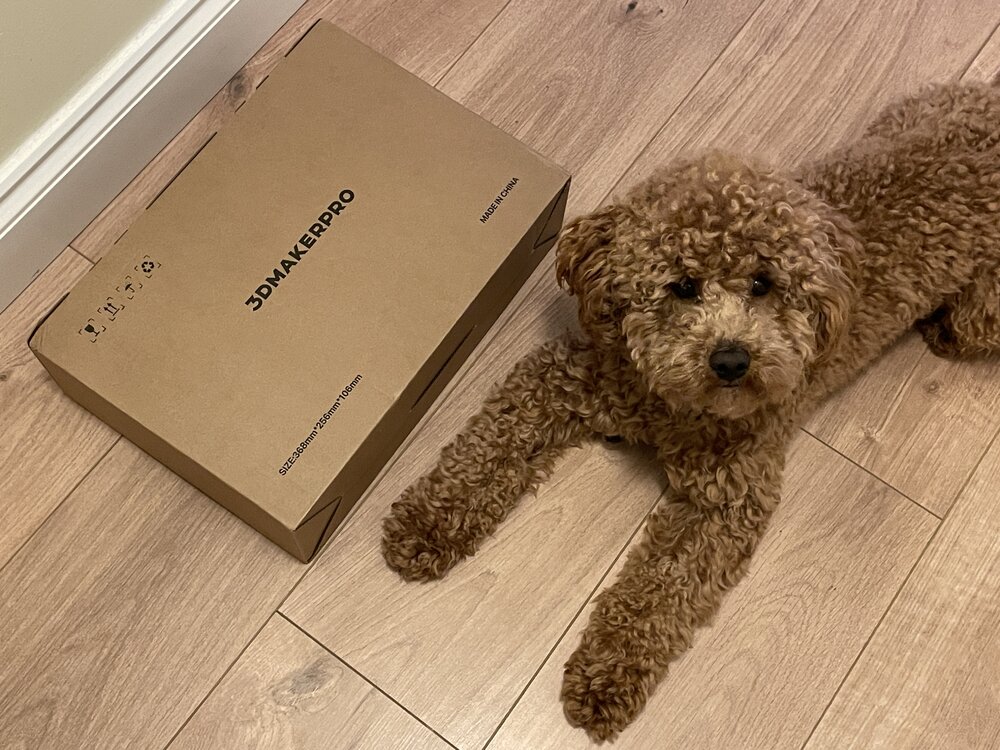
1 pointThe 3DMakerPro Toucan has arrived. The box was received and inspected by our very strict quality control officer, Teddy 🐶 Unboxing, and the first scans will be coming soon. Have you tried this scanner? Share your experience with us.
 1 point
 -
1 pointThanks! Yes, I tried a few mobile scanning applications in the past and wrote detailed guides featuring them. Here is the main thing to consider. Mobile LiDAR scanning (on phones/tablets) may not be that precise. Photogrammetry/Object Capture can be OK, but the workflow includes uploading files to the cloud, which may be a limitation for privacy, turnaround time, or frequent re-scans and refinements. 3D scanners offer a range of workflow solutions and greater precision. Stone Pillar 3D Scan Taken by Polycam: LiDAR Texture and Mesh vs Photo Mode Texture and Mesh Here is Andrew Sink's "The Best 3D Scanning Apps" would be a good guide to explore. LiDAR and Photogrammetry, Object Capture features offered by such apps can be enough for casual scanning for a 3D printing workflow.1 point
-
1 pointLooks really interesting. Did you try any other 3d scanning applications before this? I would be curious how competitive can be a 3d scanner app for a phone that makes 3d models from 2d photos (using AI or not). I heard good reviews about both 3d scanners and apps as well. But i would give the apps a try before scanners, because the price is too steep (1500$) compared against a free web tool or AI that may make a similar quality 3d model using 2d photos of it. Nonetheless great review!1 point
-
Hi! The FreeCAD Macro for generating these pots is done and published: https://www.printables.com/model/1565610-parametric-anti-sphere-plant-pot-pen-holder-plante Happy customizing :)1 point
-
1 pointLove it! Here is printed MediumHexagon_WithHandle I added color to it (four colors total). To my delight, it took me only a little over two hours to print on my Creality K2 Pro, with just a few color changes. I forgot to paint the base; it would have been a rainbow umbrella then. I was surprised at how many positions I could take with it. It was enlightening.
 1 point
 -
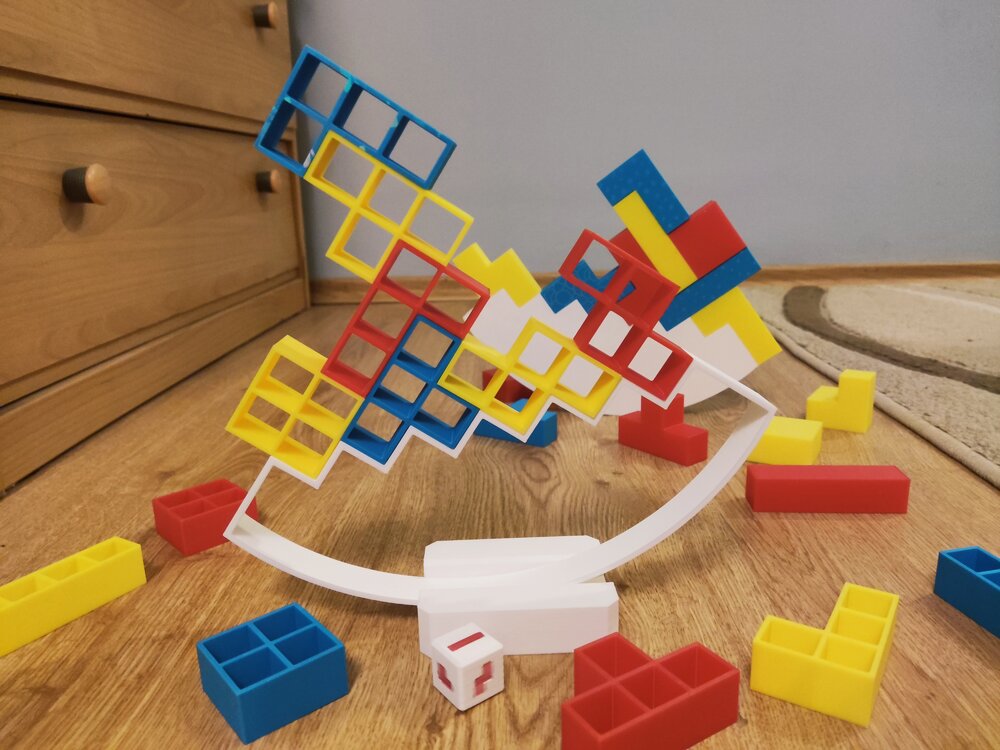
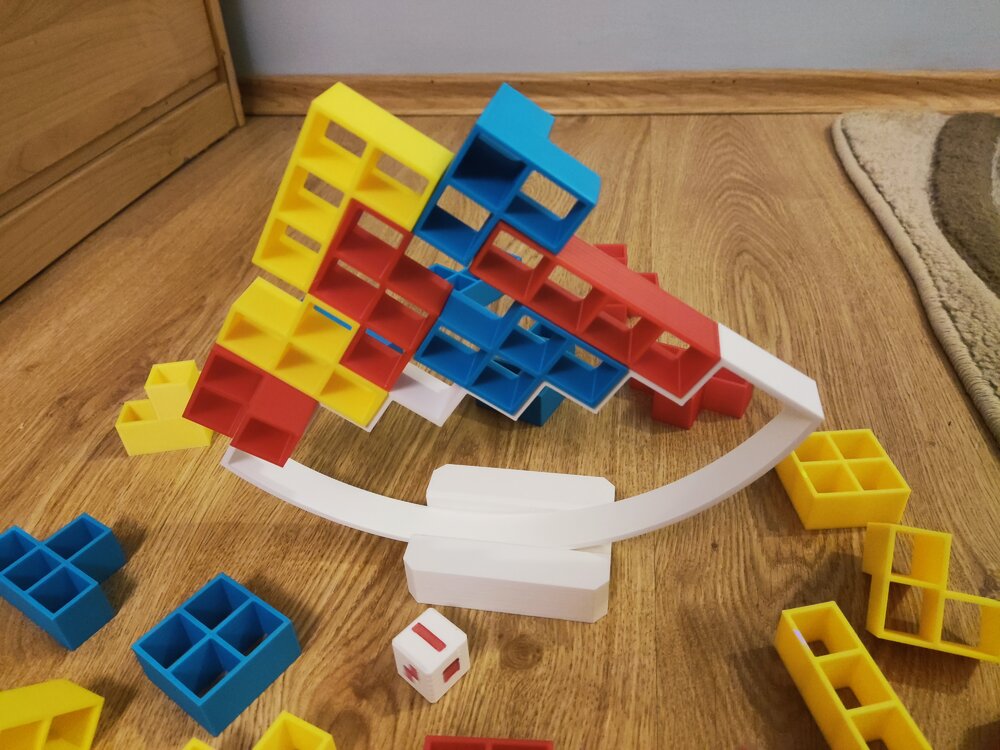
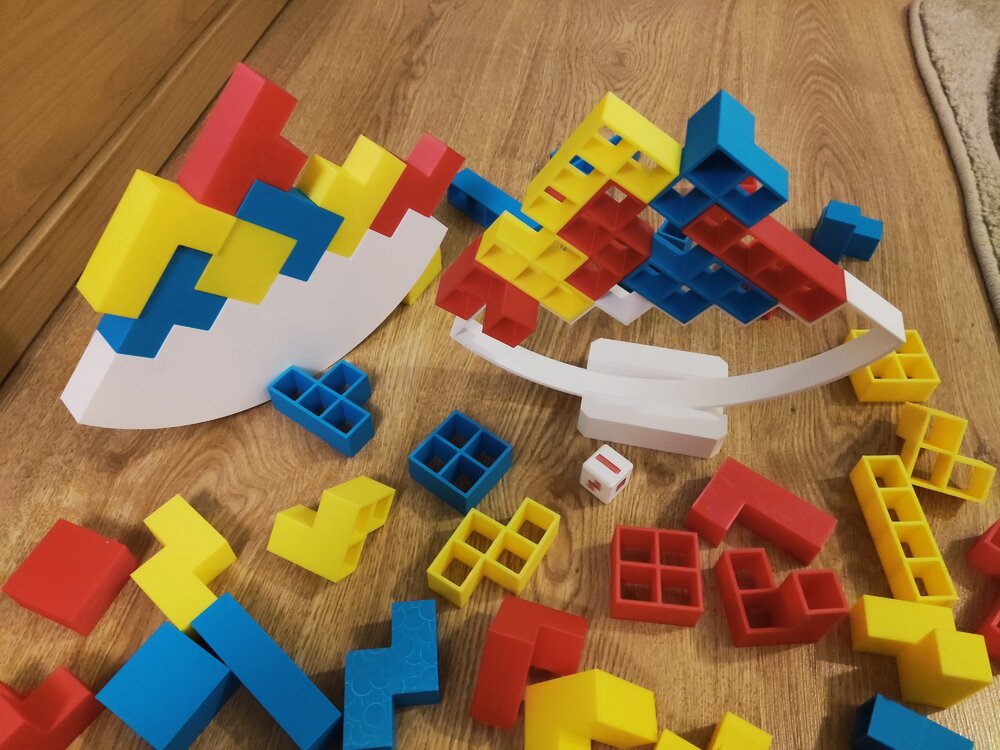
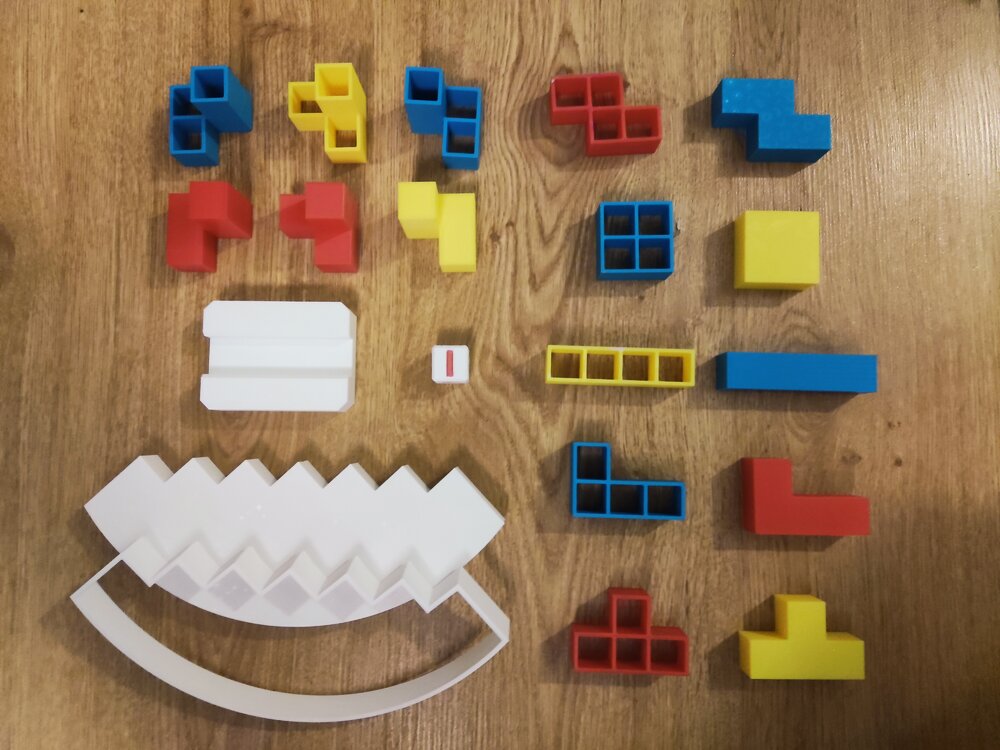
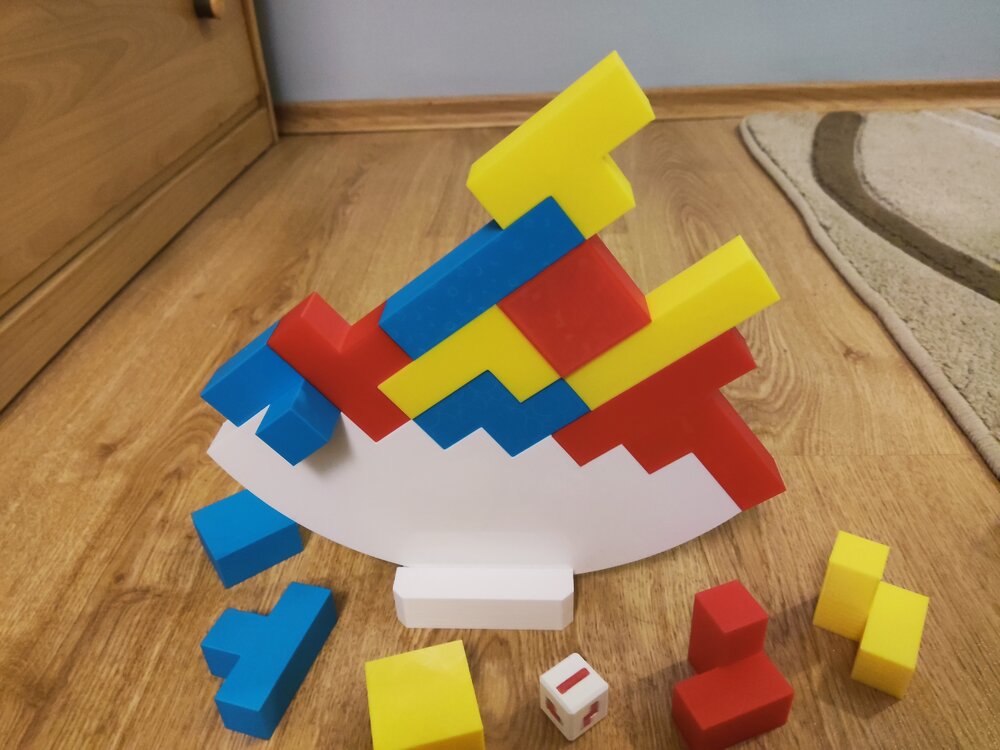
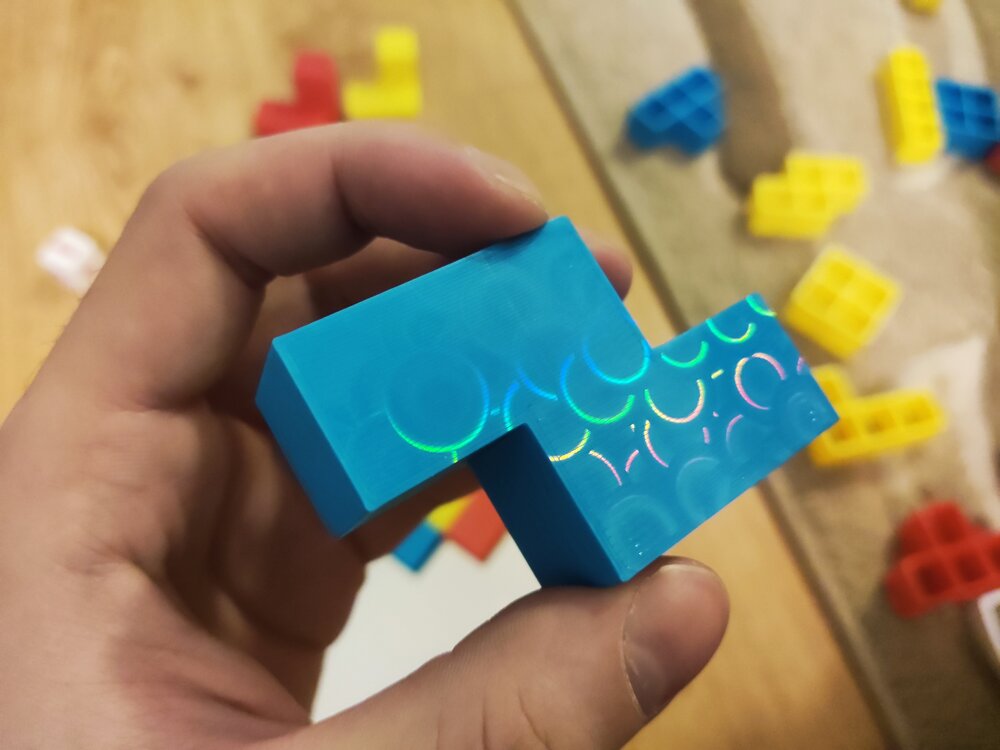
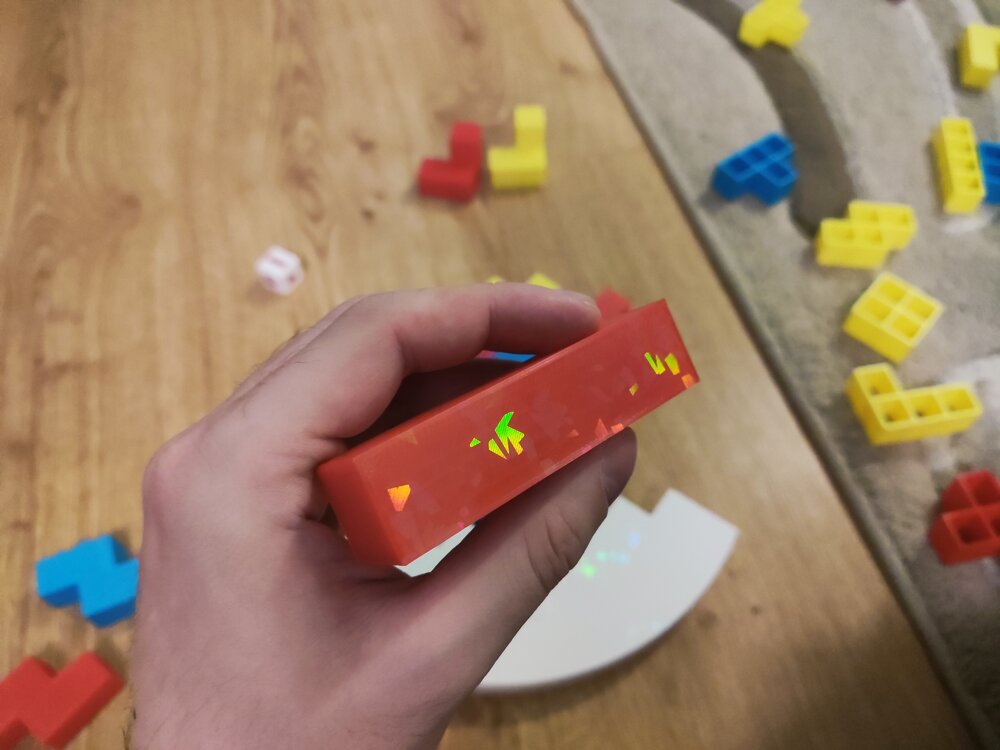
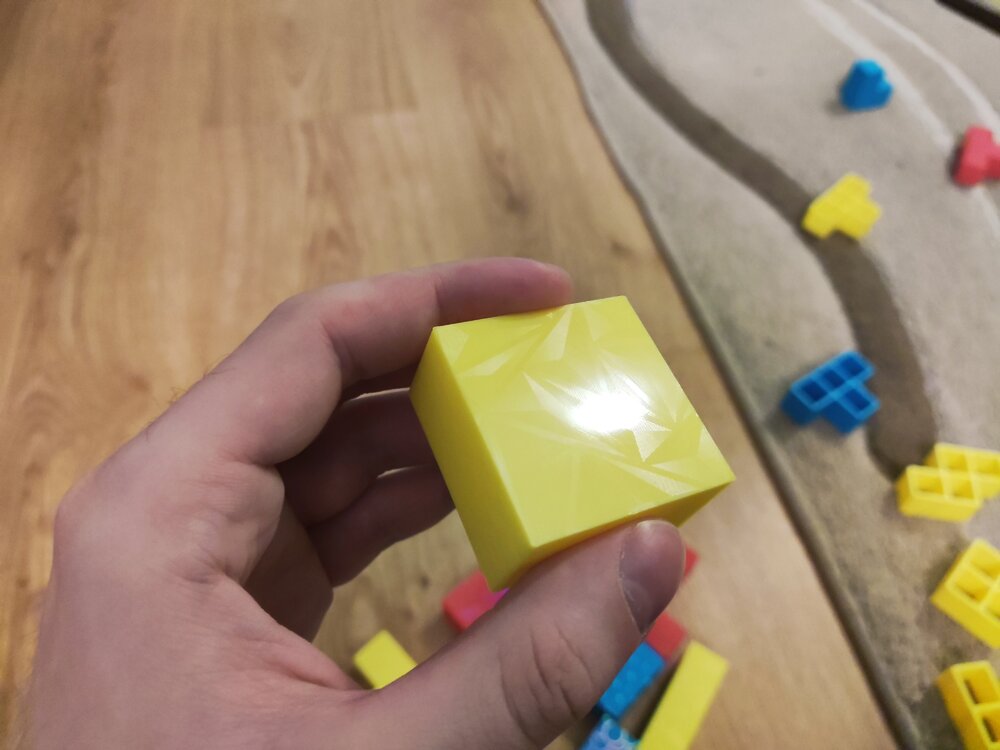
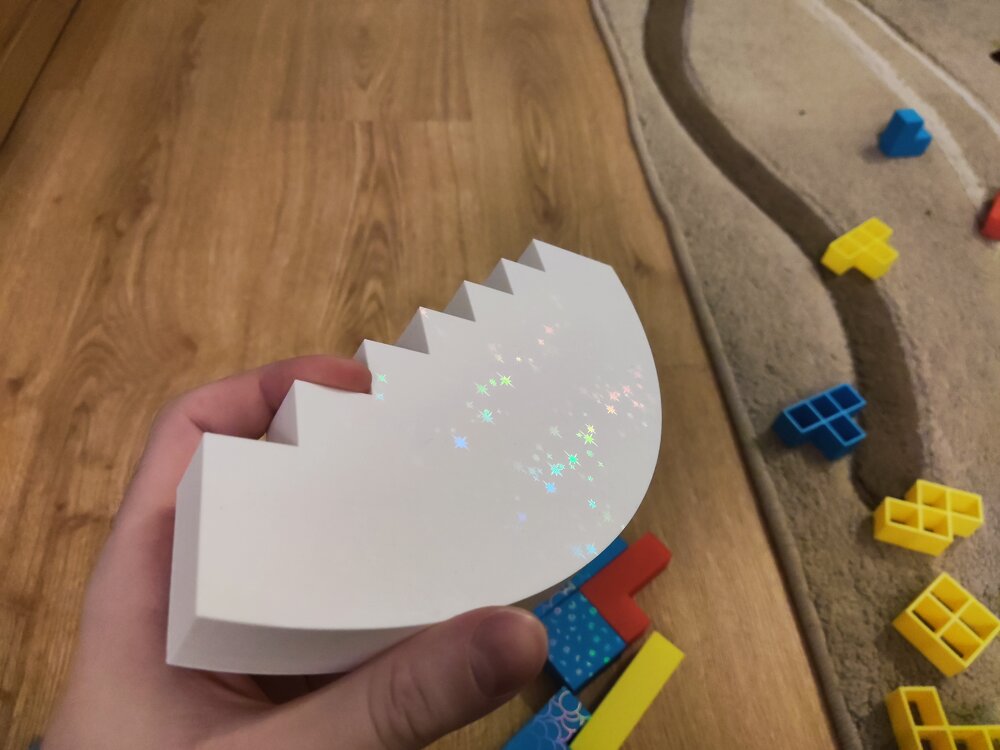
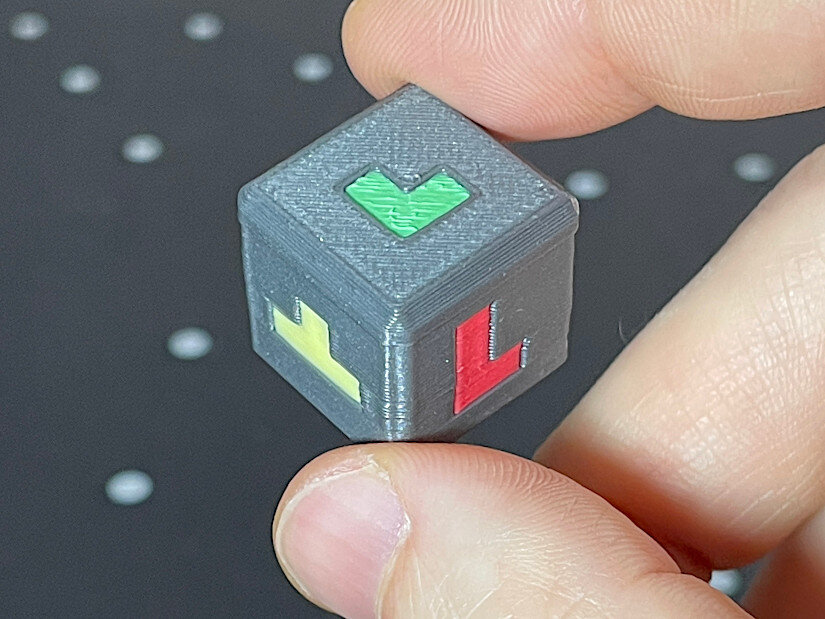
Hi! I would like to showcase another project of mine: A Balance Tetris Game! How to play?Take turns by placing blocks on the base by either rolling the die for it or choosing a preferred block. If the tower collapses on your turn, you lose! Printing tips:Different wall count and infill % have great impact on the game. I used 2 walls and 15% for every piece. You can print the base with 0 infill, 0 top/bottom layers. Scale it to your preferred size! 50% works just fine as well! I also recommend scaling the tetris die up to 133% (20mm). I recommend printing the solid blocks and the base on a holographic plate. It gives them a great look (Check out the last few pictures)! How to customize your own:To use the project files (.FCStd) you will need FreeCAD, a free to use/download CAD software. After opening the project you will see on the left side all the folders with the models and parameters. When you are done just export the models one by one: Select one of the models, then press Ctrl + e or Top menu > File > Export... The parameters:BaseArcOffset: Offsets the (circle's) arc on the base piece. BaseTeethCount: The number of teeth (slots) on the base piece. EdgeLength: The size of the blocks. GridWallWidth: The wall width of the Grid Blocks. (Solid blocks are not affected) DiceEmbossDepth: The depth of the emboss on the dice PedestalLength: The horizontal length of the pedestal. (The width is always 3 * EdgeLength) PedestalSlotDepth: The depth of the slot the base goes into. PedestalHeight: The height of the pedestal. The project is not foolproof, setting negative/incorrect parameter values might mess up the geometry completely! Happy printing and customizing!I hope you like it! The project is available here: https://www.printables.com/model/1549635-balance-tetris-customizable Other pictures:

 1 point
 -
Thanks! The die wasn't meant to be printed in multicolor :D, I printed it out in 1 color and then colored the shapes in with a sharpie. But yours came out great!1 point
-
Great project! Good luck in the Balancing Games contest. I printed the dice so far. It came out nicely. It’s a shame it takes so many color changes for the multicolor version (four colors). It took me 120 color changes and over seven hours to print, with a lot of purging. Hopefully, the next generation of tool- or nozzle-changing printers will make printing multicolored dice more feasible. I can imagine that in this game, if you print many more objects, there could be two dice — one for the shape and another for the color code.
 1 point
 -
Hi everyone, If you're interested in upgrade kit for Prusa Mini+, you can view the Full installation video here: 📦 Notes about the kitYou’ll need an existing Prusa Mini or Mini+. Some printed plastic parts are required (G-code is provided, or you can order printed parts separately). Shipping is handled via Amazon FBA, and it comes with free returns, which is reassuring for a DIY upgrade. 🎁 Discount for forum membersIf you’re interested in this upgrade, here’s a 40% off promo code: Promo Code: 9DQEI7MN Product Link: https://www.amazon.com/dp/B0FM76L72M Feel free to share your thoughts or ask questions below!1 point
-
Thanks to @SamPrentice, I’ve got the special opportunity to unbox, assemble, and test the Prusa XL with all five tool heads and its enclosure! Full coverage coming to the 3DPUK TECH YouTube channel, along with a written article for 3DWithUs. Stay tuned!
 1 point
 -
As the title says, I’ve been wanting to try 3D printing a part recently. Its edge is damaged, but the seller says I have to replace the whole thing, which feels like such a waste. If there are any online tutorials available, please share them with me for reference. Thanks, everyone. Update:I finally decided to purchase the same type of material, haha, but I still welcome any related learning resources if you’d like to share them.1 point
-
I’m very sorry that I can’t provide a picture at the moment as I’m away on a business trip and don’t have the item with me. However, it’s a gear — a part from my child’s toy train. My plan is to buy various models of similar gears and see which one fits best. Thanks again for your reply.1 point
-
1 pointThanks for the reply! I’ve decided to go ahead and get one in the end. Even though it’s just for home use, it’s still pretty frustrating to spend several hours printing something only for it to fail.1 point
-
1 pointGreat attempt! I’ve been wondering whether it’s really necessary to get a filament dryer — have you ever used one?1 point
-
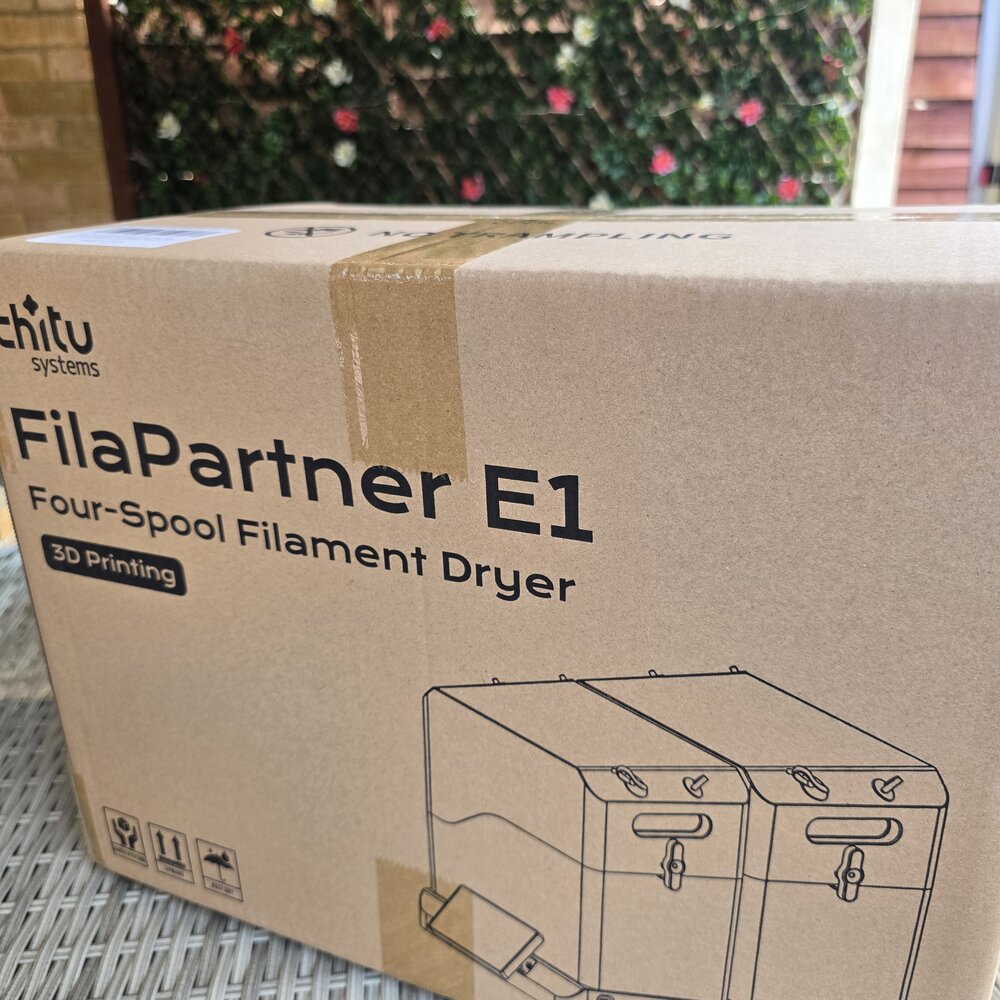
So the ChiTu Systems Marketing FilaPartner E1 four spool Filament dryer has arrived, Full unboxing and review coming soon 📹 https://youtube.com/@3dpuk-tech-channel ✍️ https://3dwithus.com #3d #chituststems #review
 1 point
 -
1 pointHahahaha, the puppy loves it—he really seems to like that big guy! I also recently noticed that the filament at home has become damp; the printed parts are coming out darker in color. I'm currently thinking about whether to buy a filament dryer. Looking forward to your feedback!1 point
-
Yes, it is highly likely that when the wires were cut, they momentarily touched (created a short circuit), which damaged a small component on the printhead board where the fan connects. Since you've confirmed the fan itself works, the problem is almost certainly with the board that provides power to it.1 point
-
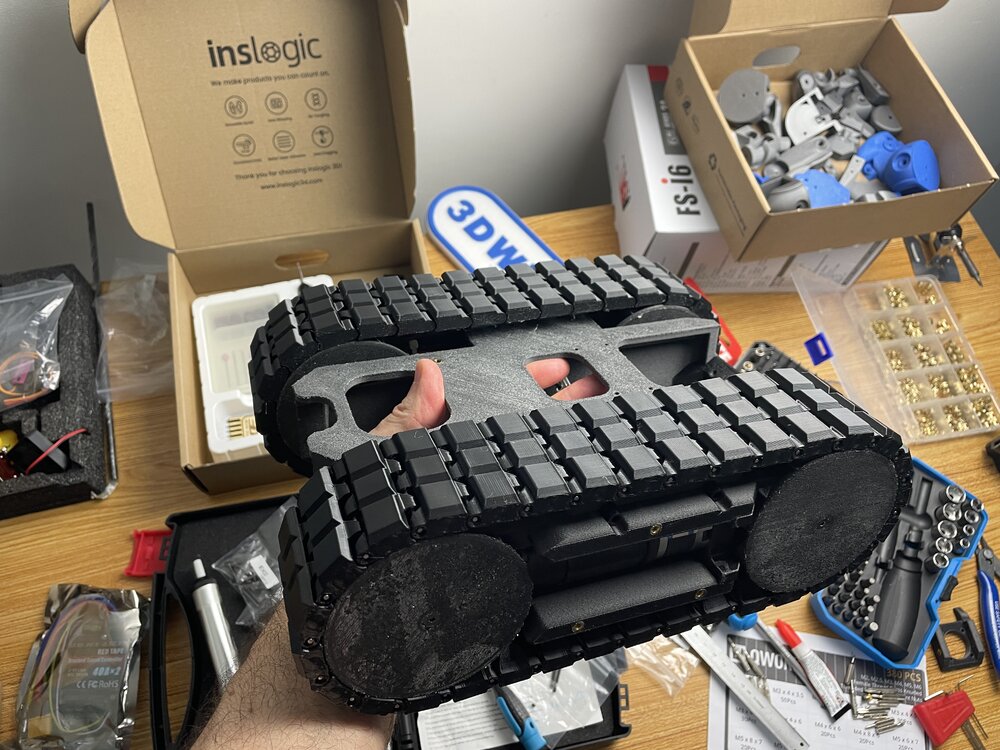
In the 3D printing community, these tank-like models are very popular. Many members have already printed them and compete with each other. I’m also trying to complete my DeathRacers for the next community gathering.1 point
-
Great post! I just printed a toy tank for my niece with PLA the other day, and she absolutely loves it. I had never considered adding motorized parts inside, though. She would probably be even happier if it could be remote-controlled. Thanks!1 point
-
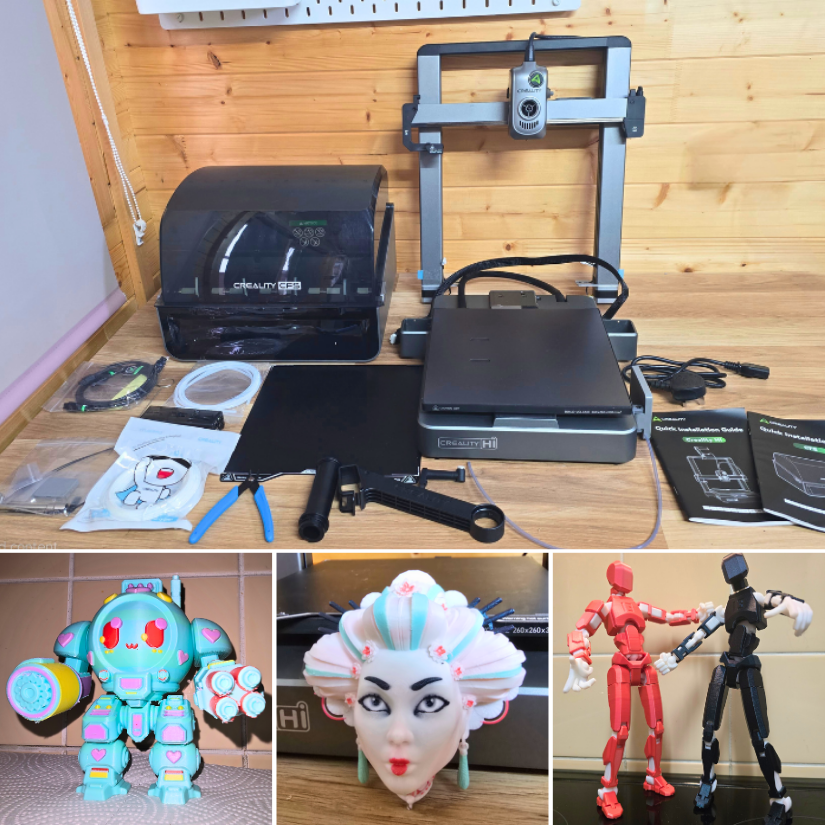
Read more – unboxing, testing, and print examples: Creality Hi Combo Review. In the video below, I take a deep dive into the Creality Hi Combo – a multicolor 3D printer setup that really caught my attention. Creality kindly sent this unit over for review, and while it was provided free, everything I share is my honest opinion. I’ll walk through the unboxing, setup, and testing of the 4-color CFS unit (expandable to 16!) and share some early print results and thoughts. Check it out below! There’s a lot to like about the HI Combo – especially its ease of assembly, multi-color capabilities, and built-in camera. Of course, multicolor printing has its learning curve, especially with slicer settings, but the hardware itself performed great. Let me know your thoughts, tips, or questions in the comments under the video, on this forum, or in a full written review. Please share your Creality Hi Combo experience here, or start a new thread under the FDM 3D Printers forum.
 1 point
 -
1 pointMy first visit to SMRRF, a local event in Manchester, was a delightful experience. It was a melting pot of seasoned users and novices, offering a diverse range of booths to explore, unveiling some remarkable new products, and featuring influential figures who shared their knowledge through talks and fundraising activities. No matter your level of expertise, there was something for everyone at SMRRF. Read the full article with links, photos, and past coverage here: https://3dwithus.com/smrrf-sanjay-mortimer-reprap-festival-highlights#SMRRF%202024
 1 point
 -
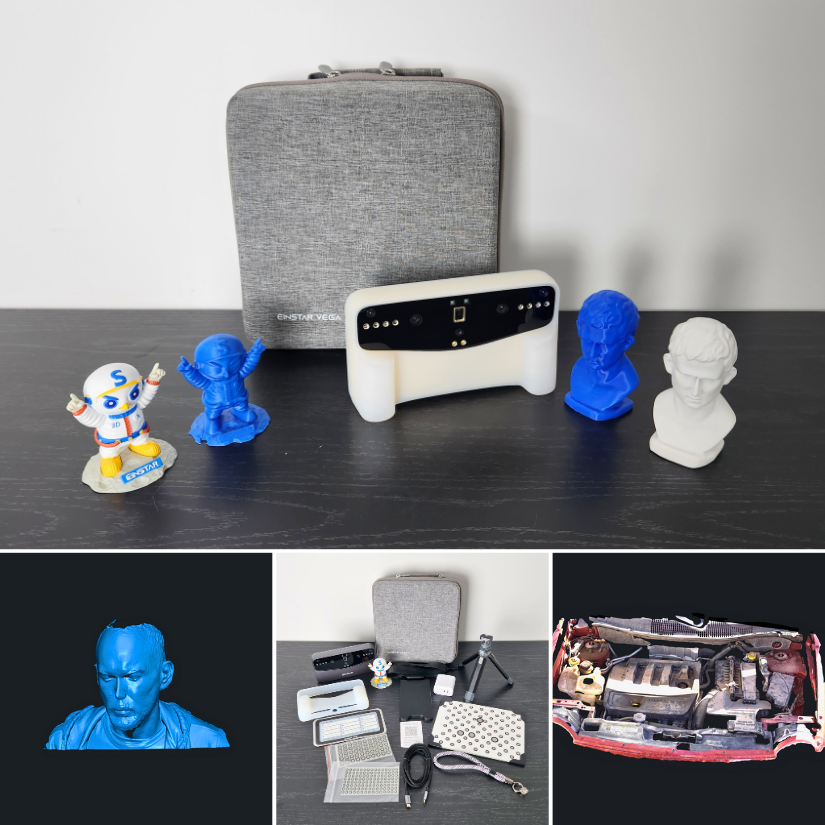
Welcome to our ongoing thread dedicated to the Einstar Vega 3D Scanner! We’ve recently tested the scanner and shared our full review, complete with scan examples, settings, and tips. If you're exploring structured light scanning or curious about how Einstar Vega compares to other scanners, you’re in the right place. 🔗 Full article with tips & test scans: 👉 Einstar Vega Review – 3D Scanner Testing, Tips & Settings 📺 Quick YouTube Short – Sample Scan: 👉 Watch on YouTube 💬 Got your own scan results? 👉 Please share your experience here, or start a new thread under the Einstar by Shining3D forum.
 1 point
 -
Having an issue with my brand new Toucan. Had it on for about 15 minutes total. Fan seemed quite loud and 'grindy' from first turn on, grindy noise less noticeable at 100%. Not sure if it was the update @ 12/26/25 but since then the fan does not come on at all no matter what percentage it is set at. Not good. Any ideas?0 points
-
Hello everyone. I have a problem with the Anycubic Cobra S1 combo. While I was accidentally removing the front cover on this printer, I cut the wires that are used for the fan that cools the model, and since then that fan hasn't been working when I reconnect it to its place. I tested the fan itself, and it works without any problems, but when I reconnect it to its place, it won't start at all when I begin printing. I'm wondering if anyone understands whether a short circuit might have caused some damage to the board behind the hotend where the fan connects, or if the problem is something else?0 points
-
0 pointsWelcome to the 3DWithUs Forum — a space for makers, tinkerers, designers, and 3D printing enthusiasts to connect, share, and learn together. To keep the community helpful and enjoyable for everyone, please follow these guidelines: ✅ 1. Be RespectfulTreat all members with kindness and respect. Constructive feedback is encouraged, but personal attacks, hate speech, or harassment will not be tolerated. 💬 2. Stay On TopicPost in the appropriate category and keep discussions relevant. Use clear titles and provide enough context so others can understand and help. 🚫 3. No Spam or Self-Promo (Without Value)Promotions or personal site links are allowed only if they provide value to the community (e.g., a tutorial, resource, or detailed review). Otherwise, they may be removed. Affiliate links are not allowed. 🔄 4. Search Before PostingBefore starting a new topic, use the search bar to check if your question has already been answered. 🏷️ 5. Use Tags & DescriptionsHelp others find your posts! Use tags, images, and short descriptions, especially for projects, troubleshooting, or tutorials. 🧩 6. Respect CopyrightsOnly share files, models, images, or designs that you have the right to distribute. Give credit where it’s due. 🛡️ 7. No NSFW or Inappropriate ContentKeep all content family-friendly. Inappropriate or offensive content will be removed. 📢 8. Reporting & ModerationSee something off? Use the report button or contact a moderator. We reserve the right to edit or remove content that violates these rules. 🤝 9. Contribute to the CommunityAnswer questions, share your projects, give feedback, and celebrate other makers. The more you give, the more you’ll get from this space. This is your space to connect with fellow 3D printing enthusiasts, designers, DIY tinkerers, and tech explorers. Whether you're just starting out or you've got years of experience, there's a place for you in our community. Sign Up Here https://3dwithus.com/forum/register/0 points