

Leaderboard
-
Marcidy
Authors45Points31Posts -
Max Funkner
Authors29Points122Posts -

3DWithUs
Administrators23Points53Posts -

Phil Macey
Authors9Points24Posts



Popular Content
Showing content with the highest reputation since 09/10/25 in Posts
-
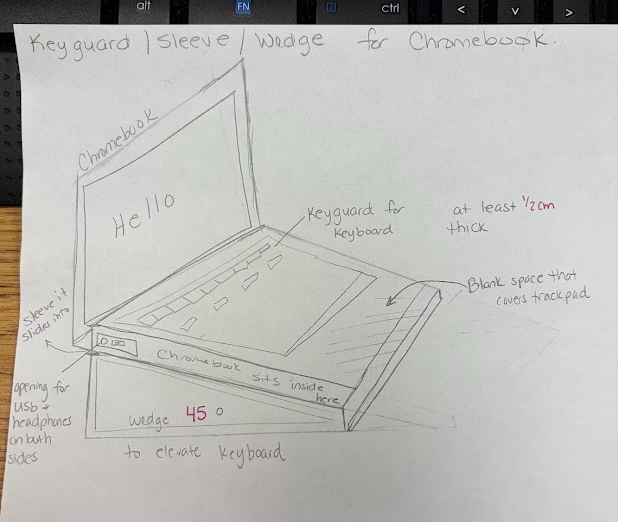
Hi everyone—I'm reaching out in hopes of finding someone in this amazing community who might be willing to help us design a custom 3D-printable adaptive device for a student. I’m a PreK special educator working with a kindergarten student, “E,” who has a rare form of muscular dystrophy called Pelizaeus-Merzbacher leukodystrophy (a genetic condition that affects the brain and spinal cord, leading to challenges with muscle control, coordination, and movement). We’re hoping to create a combined Chromebook sleeve/keyguard/wedge for his device (model N20Q10) that would support greater independence and access to learning and communication. The idea includes: A wedge to angle the keyboard so he can better see the keys A keyguard to help isolate individual keys A protective sleeve with a keypad blocker to reduce unintended key presses due to uncontrolled movements Our goal is simple but meaningful: give E more independence, improve his ability to communicate, and help him more fully access his education. We do have access to a 3D printer, but we need help with designing and creating the model file. I’ll attach a visual to help illustrate what we’re envisioning. If anyone is willing to collaborate or even point us in the right direction, we would be incredibly grateful. This could make a huge difference for a really special kid. Thank you so much 💛
 3 points
 -
Hey fellow makers! 👋 By day, we’re a group of aerospace engineering students at TU Delft, but by night, we’re makers who have been in the 3D printing space since 2016. Like many of you, we’ve always struggled with one existential problem: the air quality in our workspaces. We noticed that printing with materials like ABS, PETG, and even PLA releases fumes, ultrafine particles (UFPs), and VOCs that linger in the room. We searched for a solution, but most enclosures on the market were either niche to specific printers, sacrificed build quality, or were simply too expensive. So, we decided to build our own. Meet Clura—a modular, smart, and completely open-source 3D printer enclosure. This awesome project is now live on kickstarter (fully funded in 58 minutes!) This is the link: https://www.kickstarter.com/projects/clura/enclosure We wanted to create something that actually protects your health while optimizing the printing process. Here is what we integrated into the design: Air Filtration: It uses high-performance fans with dual-layer HEPA and carbon filtration, capable of filtering the entire enclosure volume in just 60 seconds. Smart Sensors & Fire Safety: We packed it with a dedicated sensor suite. It uses a BME680 for temp/humidity/VOCs and a PMS5003 for particle tracking. For safety, it combines an MQ2 gas sensor with MEMS and optical smoke sensors to detect thermal runaway or fires instantly. Filament Weight Tracking: We integrated HX711-based load cells into the spool holders to track filament weight in real-time. No more guessing if you have enough plastic to finish a print! Universal Fit: Because it's modular, it currently fits the Prusa MK3/MK4, Bambu Lab A1/Mini, Prusa Mini, Ender 3 style bed slingers and so much more... Our 100% Open-Source Promise We are firm believers in the open-source community. Every CAD file, software component, and build guide is free and released under the CC BY-NC license. (links on docs.clura.dev) You can self-source the parts and build it yourself, customize it, and even submit your own mods to our Community Upgrade Center. You own it completely. No vendor lock-in, ever. The kits we offer are just a convenient way to assemble it by supporting the project while saving time and money in the process. We'd love to hear your feedback! Happy printing! 🛠️
(1).thumb.jpg.7a7c10c46d410ddbcab89422b2389a0b.jpg) 3 points
3 points -
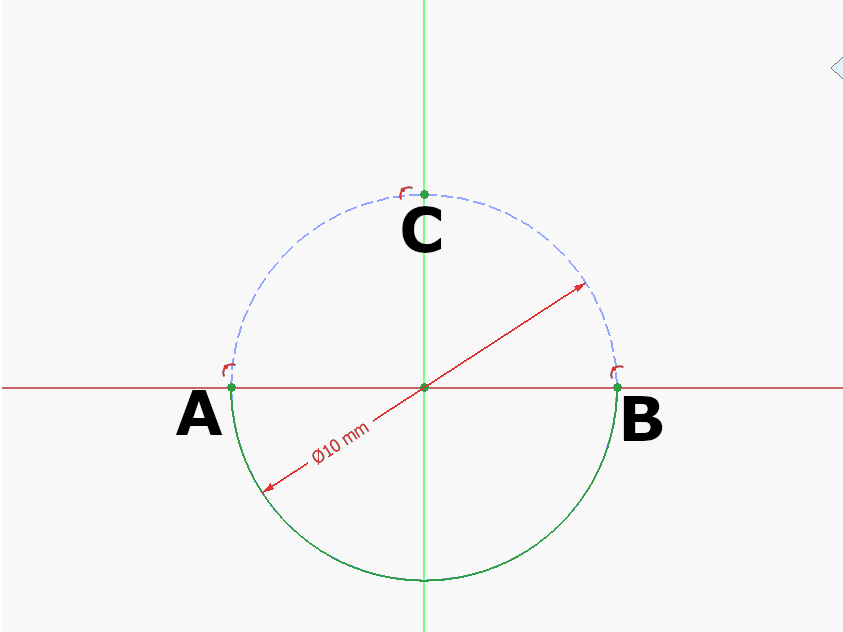
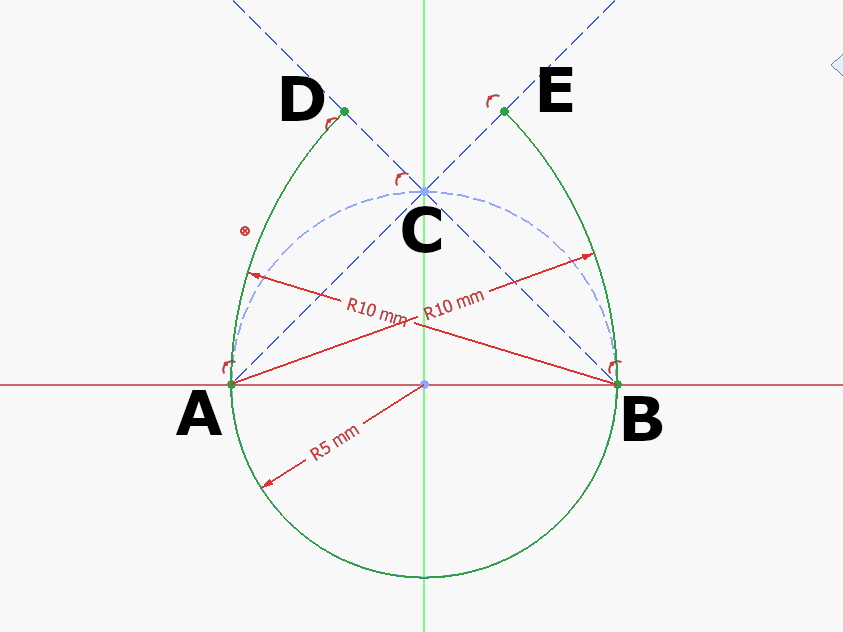
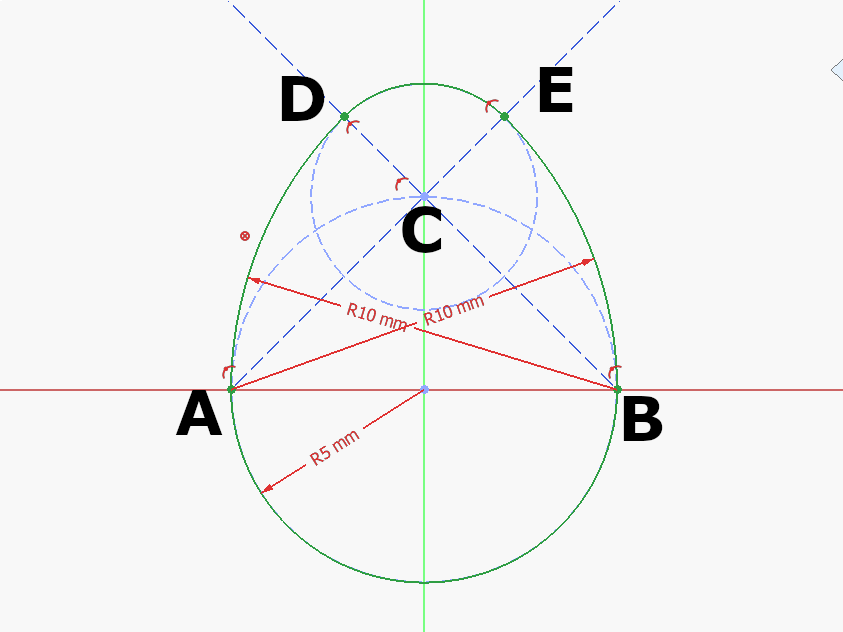
3 pointsStep 1: Draw a construction circle at the Origin. Mark A, B, C where the circle meets the Y and Z Axis as seen above. Draw the half circle at the origin between A and B. Step 2: Draw a construction circle at the Origin. Mark A, B, C where the circle meets the Y and Z Axis as seen above. Draw the half circle at the origin between A and B. Step 3: Draw an arc centered at C between D-E: 🥚 Good job!The full tutorial project is available at Printables with the finished 3d model and FreeCAD file: https://www.printables.com/model/1615557-egg-tutorial-model
 3 points
 -
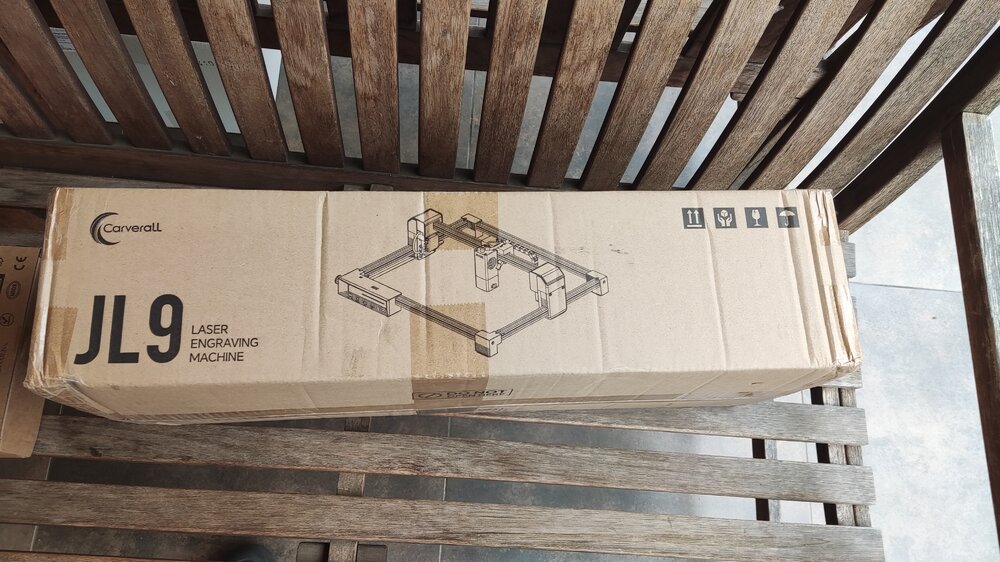
2 pointsJust received these packages recently. Assembly is still in progress as I am waiting on some accessories and materials, but hopefully, the work can start soon! I am really excited to be part of this collab with 3DWithUs and Carverall!
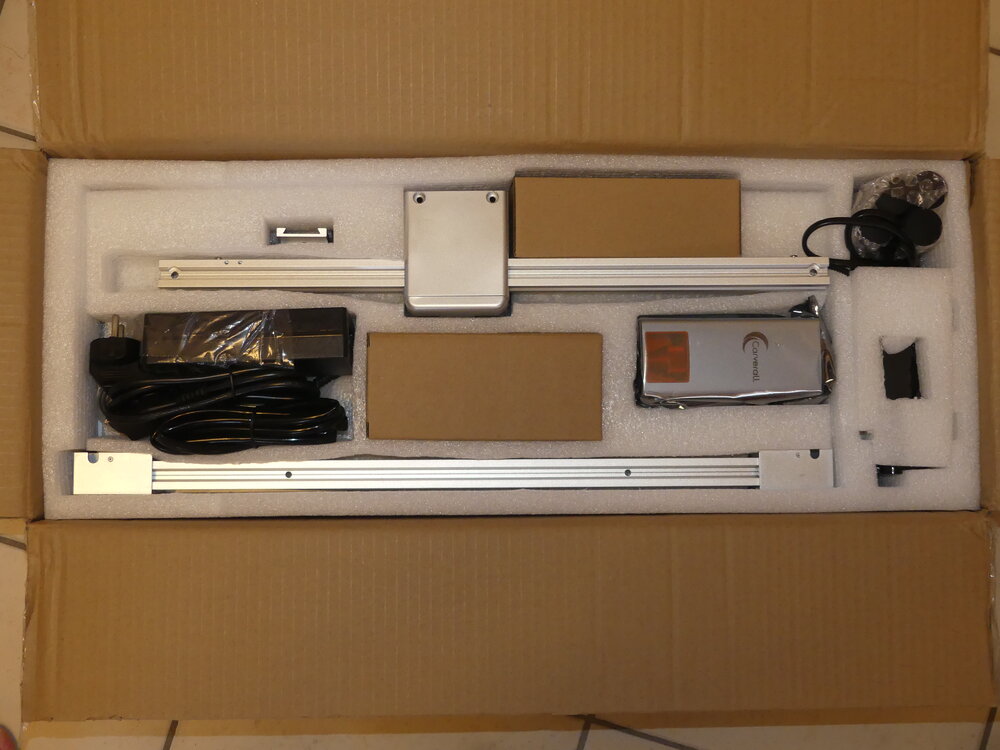
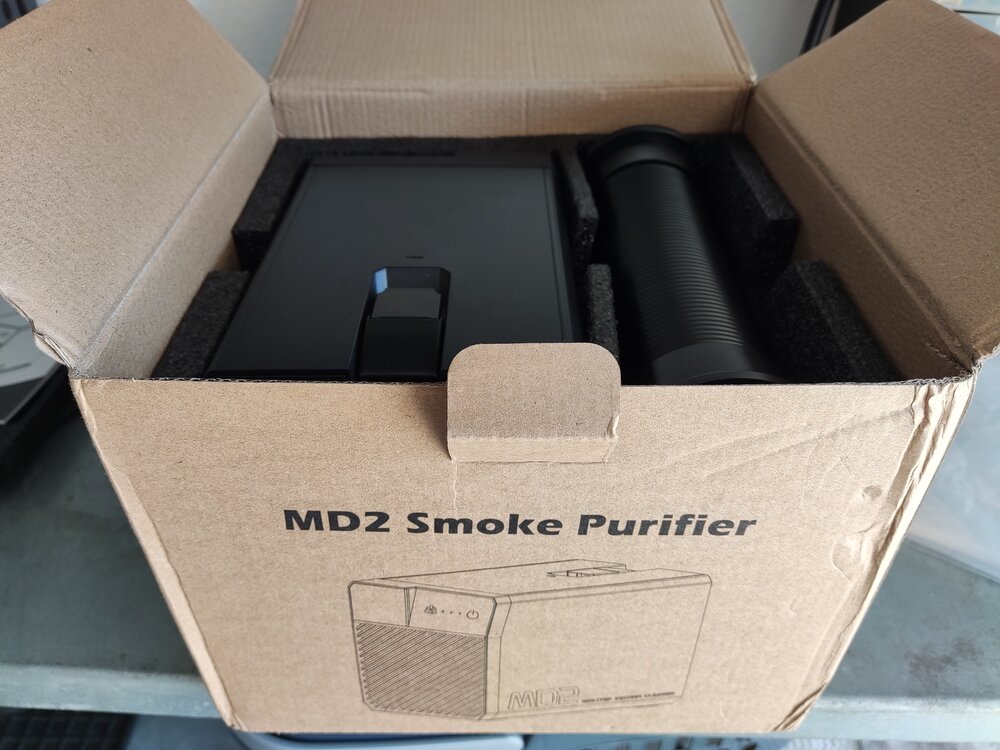
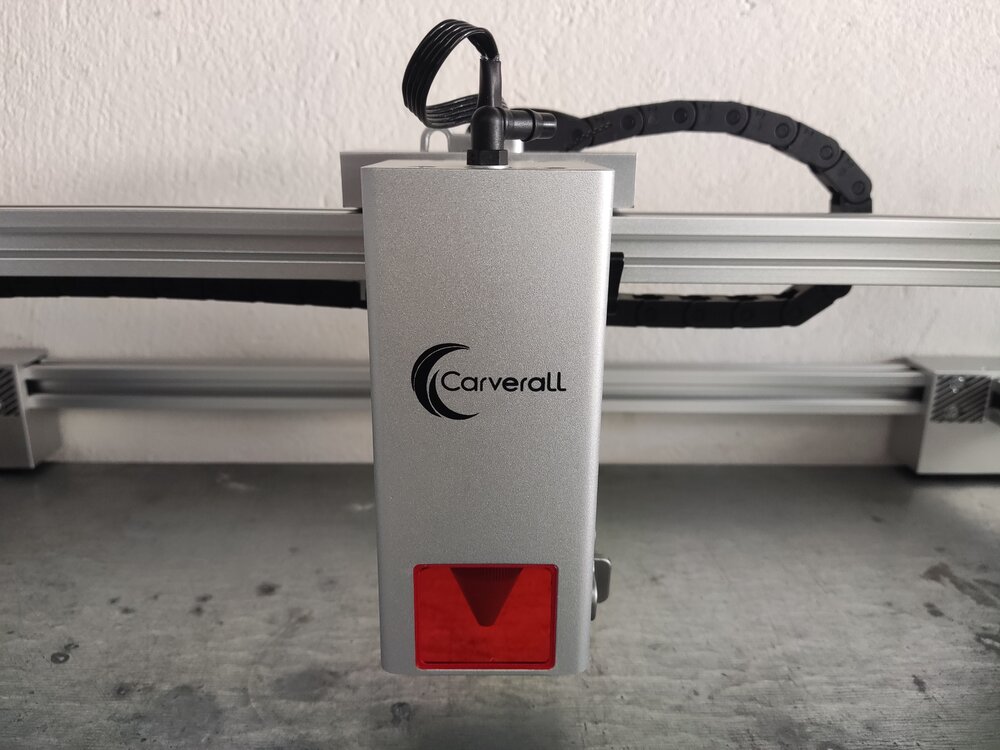 2 points
 -
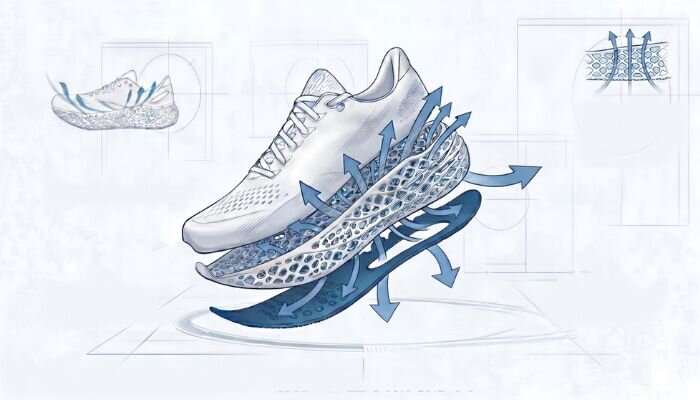
TPM3D announced that it has reached a significant milestone with the industrial-scale integration of selective laser sintering (SLS) and high-performance PEBA elastomers for footwear manufacturing. https://www.3dnatives.com/en/tpm3d-sls-peba-footwear-18052026/#! Durability and long-term mechanical degradation have remained significant challenges for 3D-printed midsoles in high-performance sports applications. TPM3D says it has worked to address this “durability gap” through rigorous engineering and testing. According to internal testing, the company’s SLS PEBA components demonstrate a compression set of 22% to 26%, with no irreversible deformation observed after 200,000 dynamic flex cycles.

 2 points
 -
Hi everyone, I'm curious how people here calculate the real cost of their 3D prints, especially those who sell prints regularly. Filament cost and print time are easy enough to calculate, but once I started looking deeper, there were many other costs that can easily be overlooked — electricity, machine wear, failed prints, labor, packaging, marketplace fees, maintenance, etc. That's what led me to build a small Excel-based 3D Printing Profit & Pricing System that combines these costs and calculates selling price, profit and margin. I've recently finished it and I'm looking for feedback from people who actually sell 3D prints. If you'd like to take a look: Calculator on Gumroad: https://aipowersystems.gumroad.com/l/rvmwhm I'd also be interested to hear how you currently price your prints. Do you use a spreadsheet, an online calculator, or just a fixed markup over material/print time?2 points
-
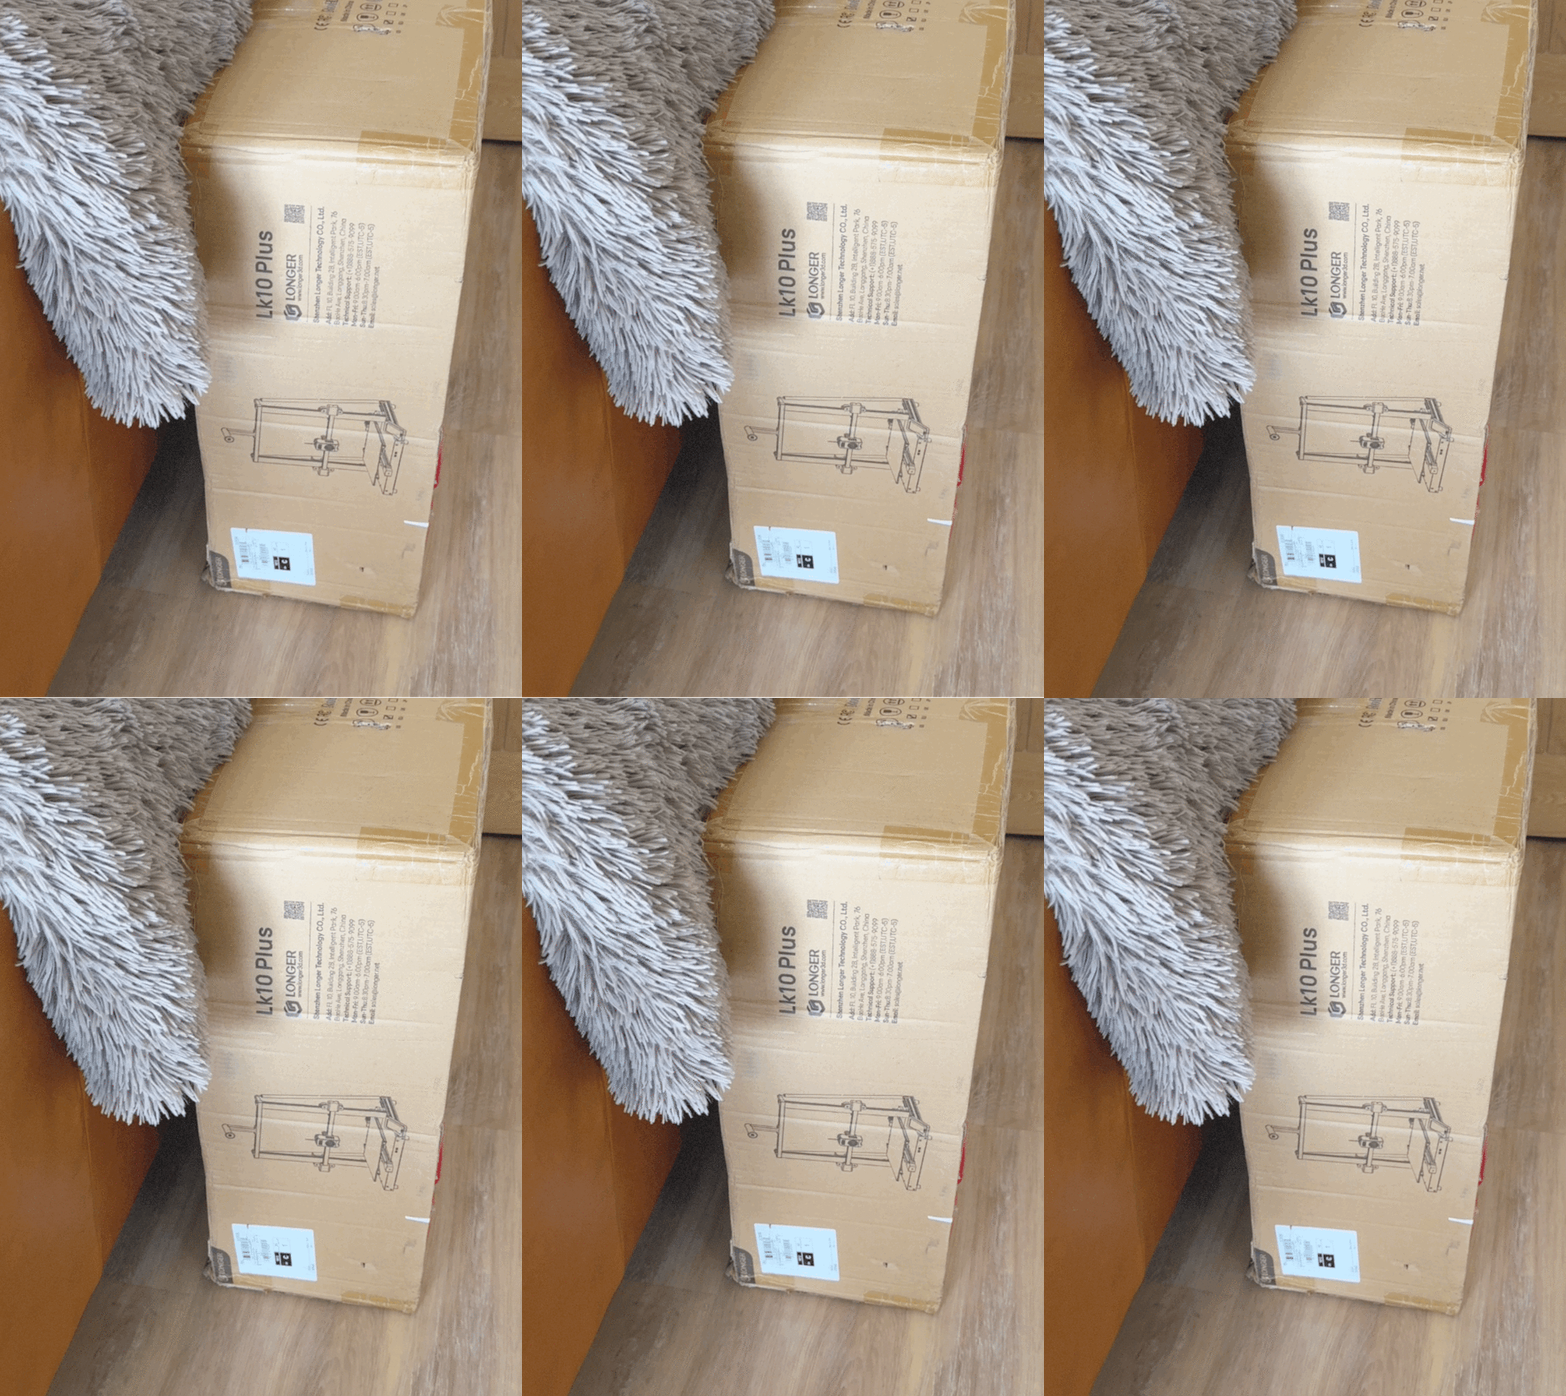
2 pointsLonger LK 10 plus in for test and review the LK 5 series was a good printer when they first came out a couple of years. So let’s see if it has evolved to fit in with the new 3D printers that are available.
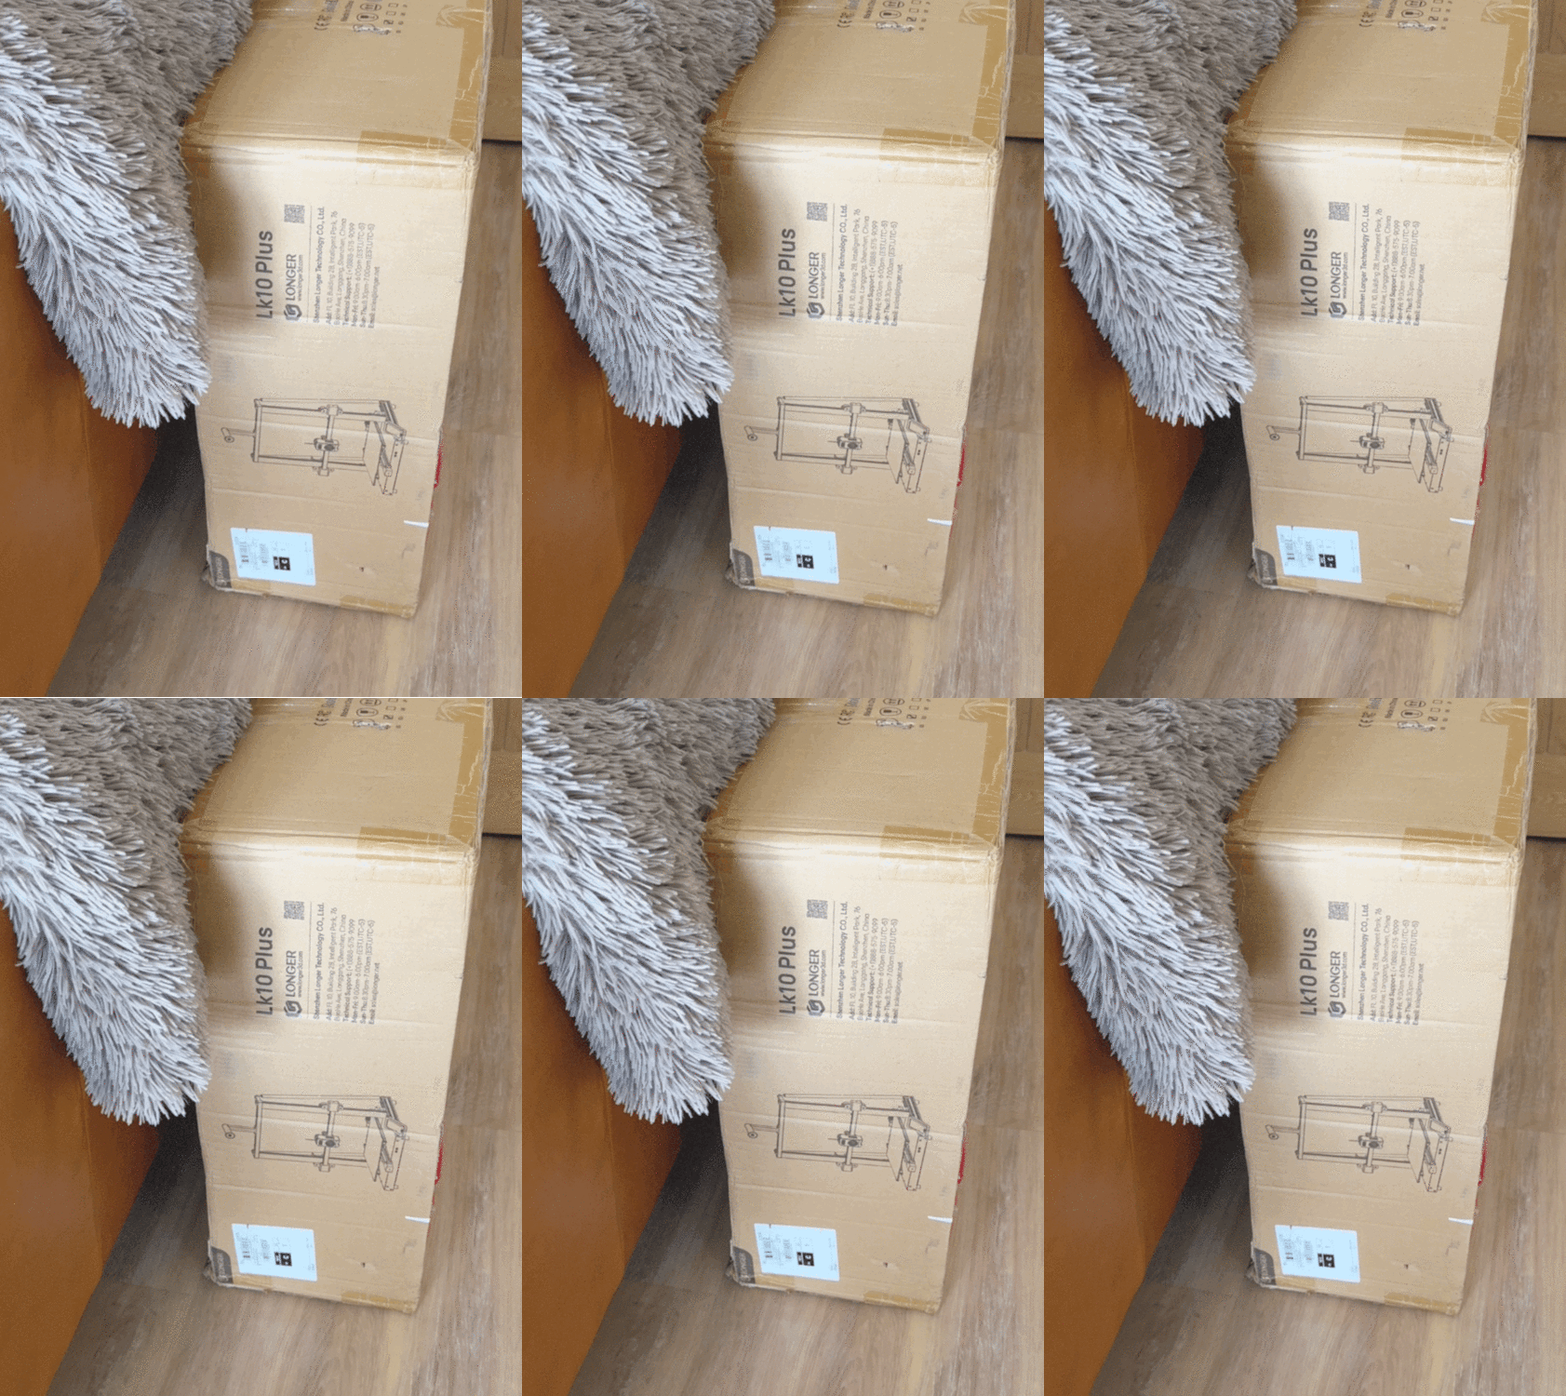 2 points
 -
2 pointsAnd the work has begun... (Engraved anodized aluminium card) I am still waiting for a few accessories and materials to arrive, but I just couldn't wait any longer, so I ran my first project. It came out pretty nice and sharp :)
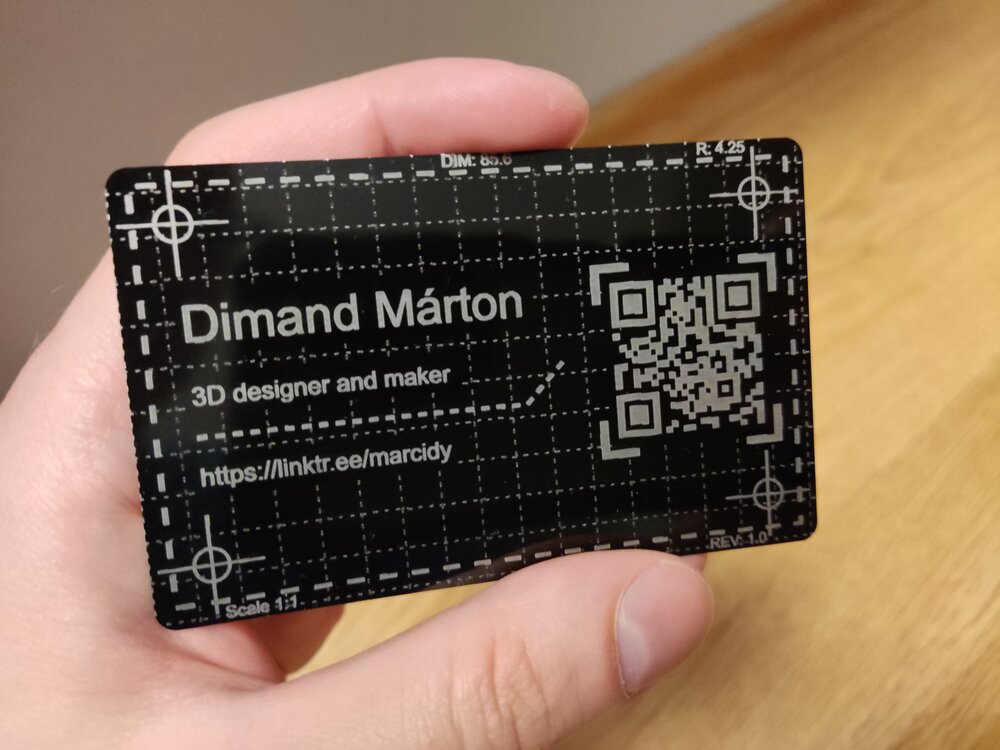 2 points
 -
Giveaway filament arrived!I got: Refill PLA+ Red Matte Dual-Color Orange-Red Thanks you SUNLU and 3DWithUs! (I am starting to run out of storage space :D)
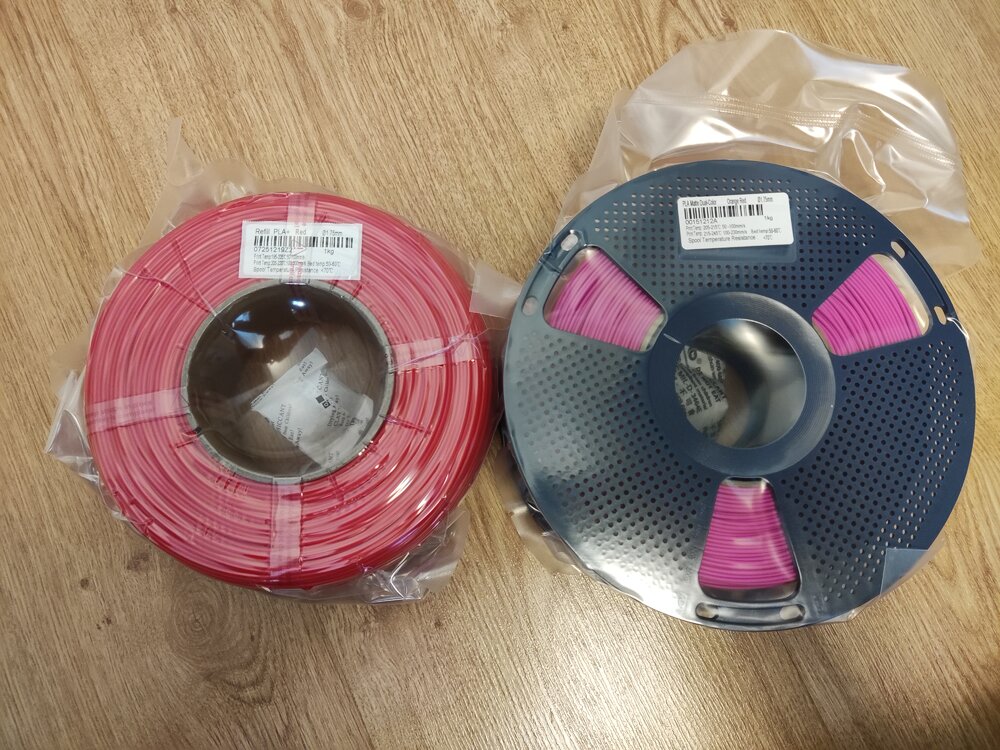 2 points
 -
It's been a while since I posted here, so here is the new batch of giveaway filament prints :D The PLA+ Red and Gray were really good. They are definitely tougher than regular PLA (not PETG levels, but perfect for my applications): They are perfect for HSW inserts, holders and cable organizers. Also, these were all of the giveaway filaments I received in recent months: Sunlu PETG - Red Sunlu PETG - Black Sunlu PLA Matte - Yellow Sunlu PLA - Midnight Sunlu PLA Matte - Sprout Green Sunlu PLA Matte - Ocean Blue Sunlu Silk PLA+ - Rainbow Sunlu Silk PLA+ - Blue When I posted about my HSW setup, Sunlu was kind enough to let me choose PETG over PLA (love you Sunlu ❤️). I have quite a lot of filament rolls open, so I didn't have the heart to open these as well for a test print, but as soon as my supply diminishes, I will post a follow-up about them! I highly recommend participating in the monthly giveaways! You can earn some wonderful filament rolls! Thank you 3DWithUs and SUNLU for the giveaway!
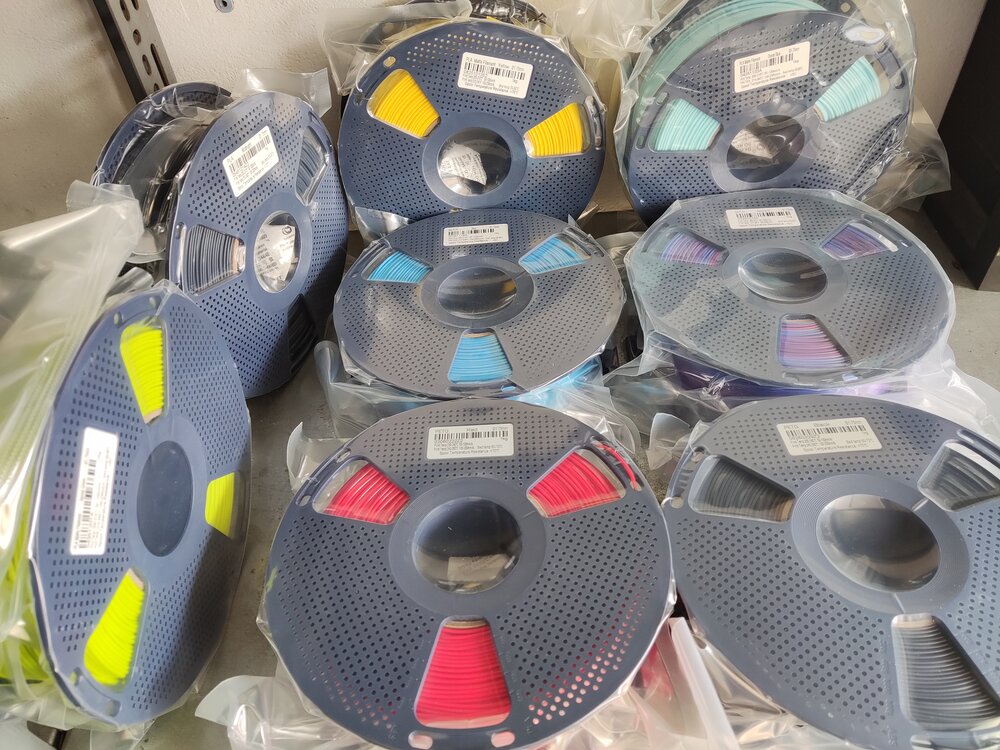 2 points
 -
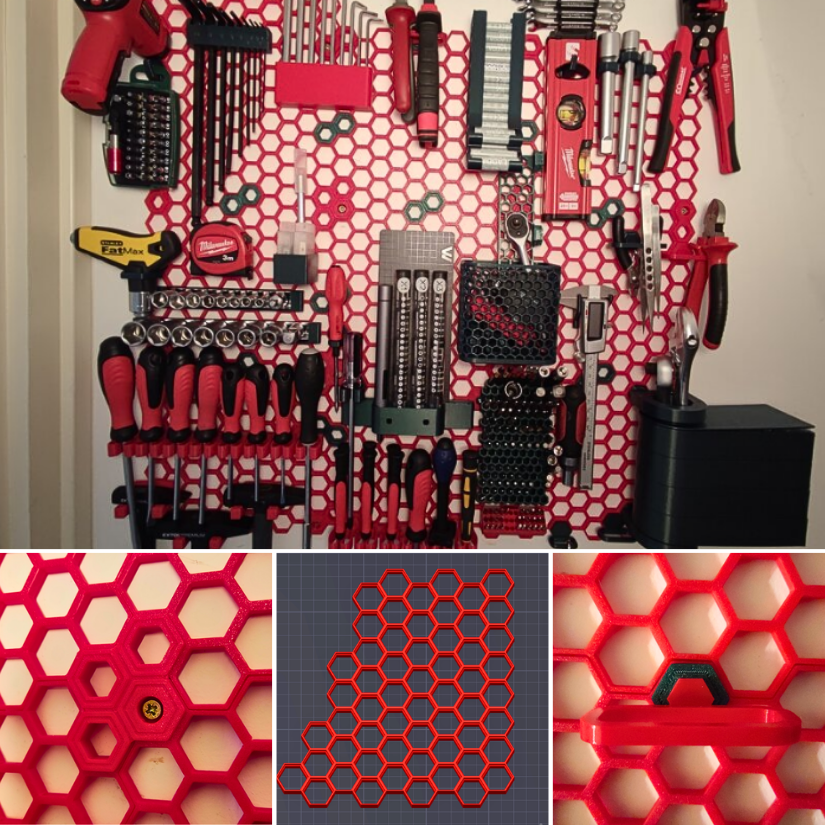
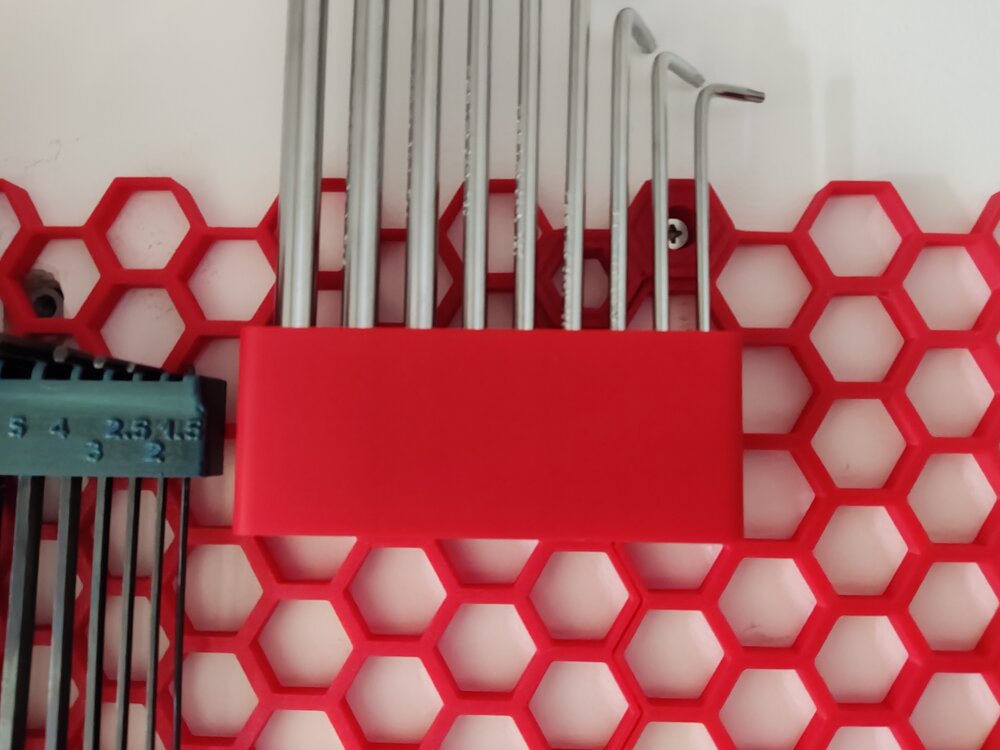
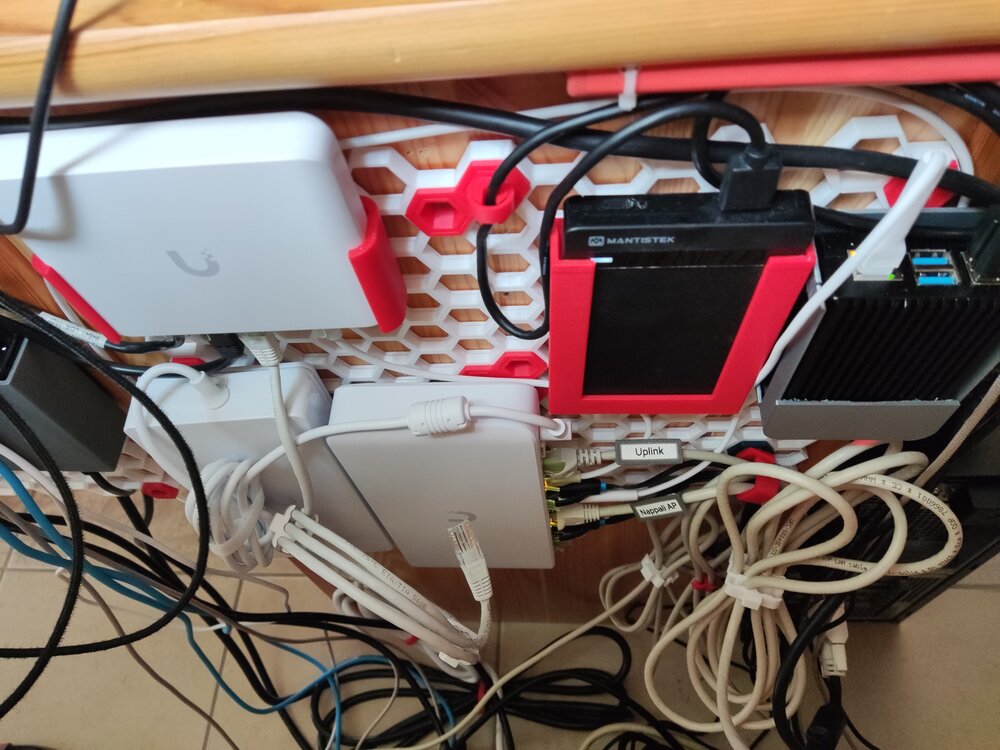
This was my very first time trying out PETG to print something that needs to be more durable than PLA. I suggested this Honeycomb Storage Wall project to my father and we aggreed to try it out with PETG. It went much easier than excpected. A little bit of stringing here and there, but the final result was good and worth it. Now we are thinking of printing another one for the garage wall as well :D I used CR-PETG for the red parts. Green one is from 3dk.berlin. After i ran out of both I started to use SUNLU PLA+ red (Yes, the one i got from the giveaway :D), PLA+ still does the job, altough it feels a little bit weaker than PETG. I took most of the models from Printables. Some i modified, some i made myself (i didn't publish all of them yet): Honeycomb storage wall Parametric HSW Hook Parametric HSW Multipurpose Holder for plier cutter and other tools Parametric HSW Multipurpose Holder for Screwdriver and other Cylindrical tools 100x70x100 Container with HSW Adapter Swivel Trays for Honeycomb Storage Wall (HSW) Battery holder for AA+AAA, honeycomb storage wall (HSW) HSW Multi-purpose Holder Hex Allen key holder for Honeycomb storage Smaller Screwdriver holders HSW M3 Insert - Heatset Insert For Mounting. HSW Wowstick Holder Screw driver holder (all-in-one) Multiboard/HSW tape measure mount (for any tool with a belt clip) HSW IR Pyrometer / Infrared Thermometer holder for Honeycomb Storage Wall HSW Hook Honey Comb Wall remixes and introducing my Screw Wall!!! HSW Caliper and CR2032 Holder HSW Vise Grip Wire Stripper Hanger Pliers Holder HSW HSW Hammer holder Hex Bit Holder (Honeycomb storage wall Compatible) HSW Tiny Bit Holder 36 holes Screwdriver Holder I can recommend this project for anyone who wants some modular storage on the wall. The base project has over 3000+ remixes and still counting. Also it is not just for tools, it can hold anything you can imagine, Just find/make the right model for it :D. I hope this post inspires someone to give this project and PETG a try :)
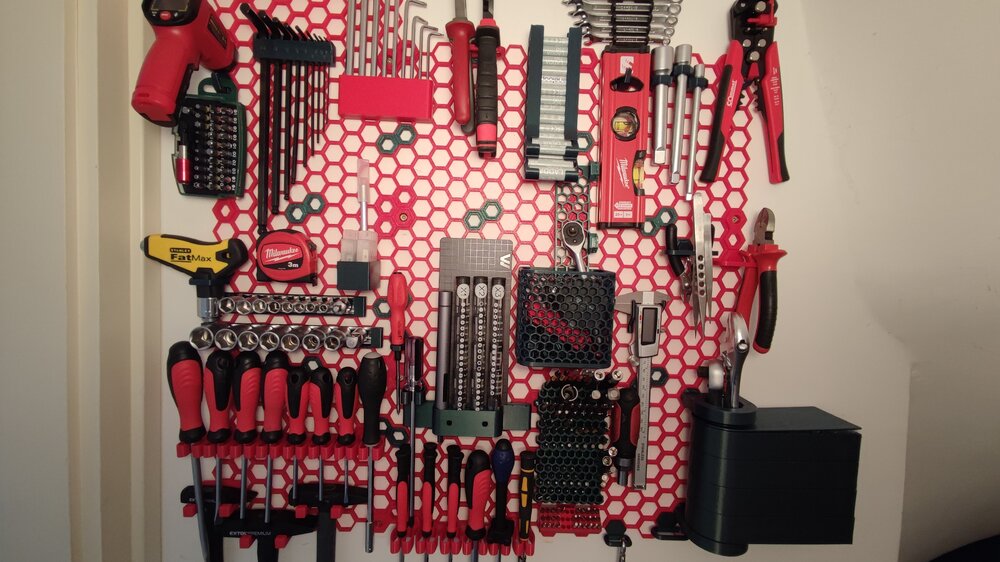 2 points
 -
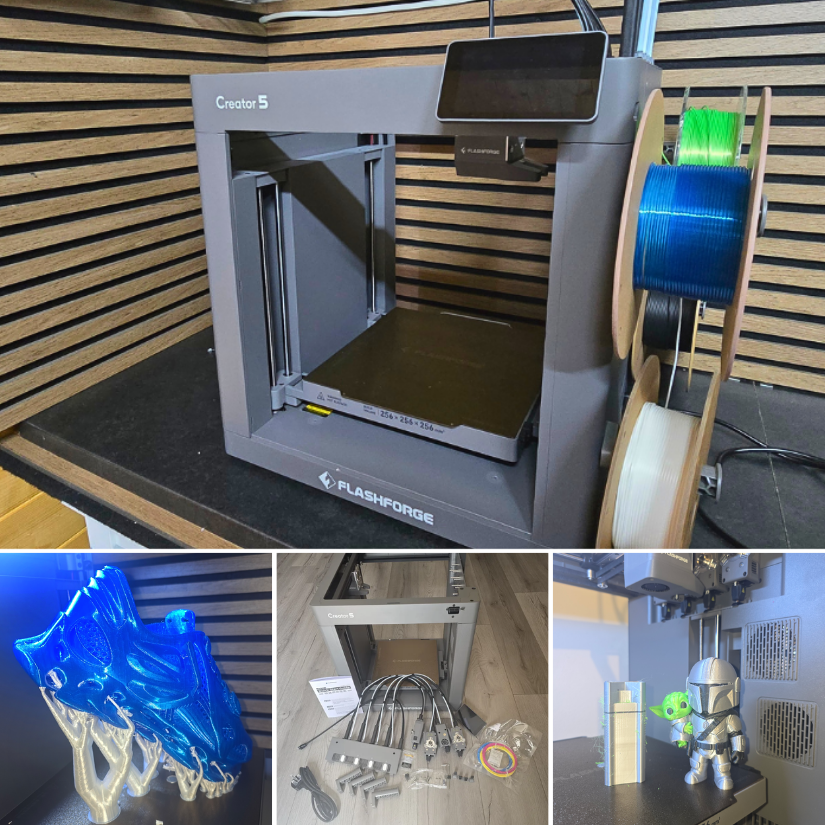
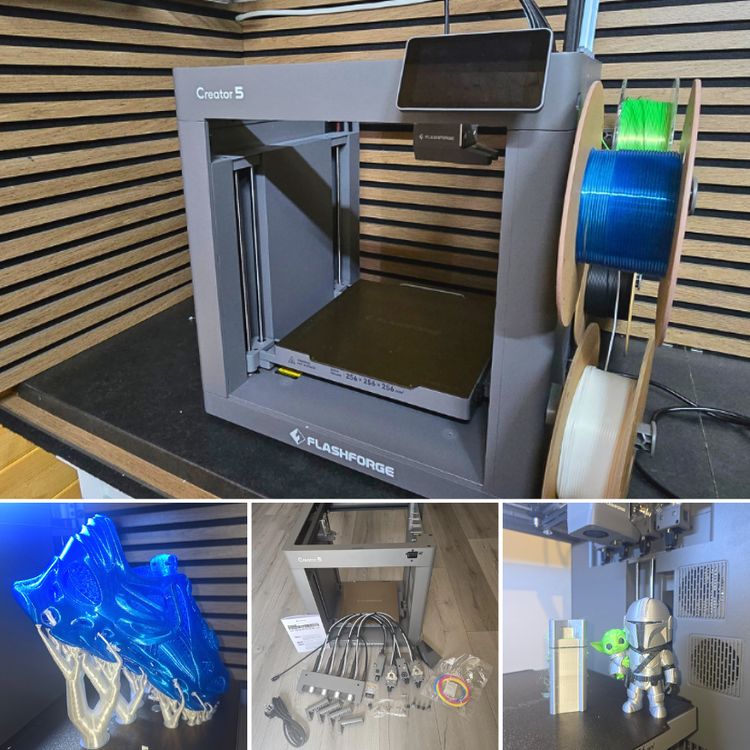
2 pointsFlashforge Creator 5 Hands-On: 4-Toolhead 3D Printer, TPU Shoes, and Multi-Colour Test Prints We have just published a new hands-on article on 3DWithUs featuring the Flashforge Creator 5. This is a 4-toolhead FDM 3D printer designed for multi-colour and multi-material printing with reduced filament waste compared with many traditional colour-changing systems. In this test, we covered setup, calibration, Orca-Flashforge slicer workflow, multi-colour prints, TPU printing, and even a pair of 3D printed shoes. 📹 https://youtu.be/1DOy4EUQpK0 ✍ https://3dwithus.com/flashforge-creator-5-hands-on-review-4-toolhead-3d-printer Featured: MAXSIMO, CloudBerry Toolchangers and nozzle-changing systems are becoming a very interesting area in desktop FDM 3D printing. Machines like the Flashforge Creator 5 show how this technology is moving into a more affordable range, making multi-material workflows more accessible to makers. What do you think about this approach compared with AMS-style colour systems? Feel free to start a new thread or post your C5 makes or questions here.
 2 points
 -
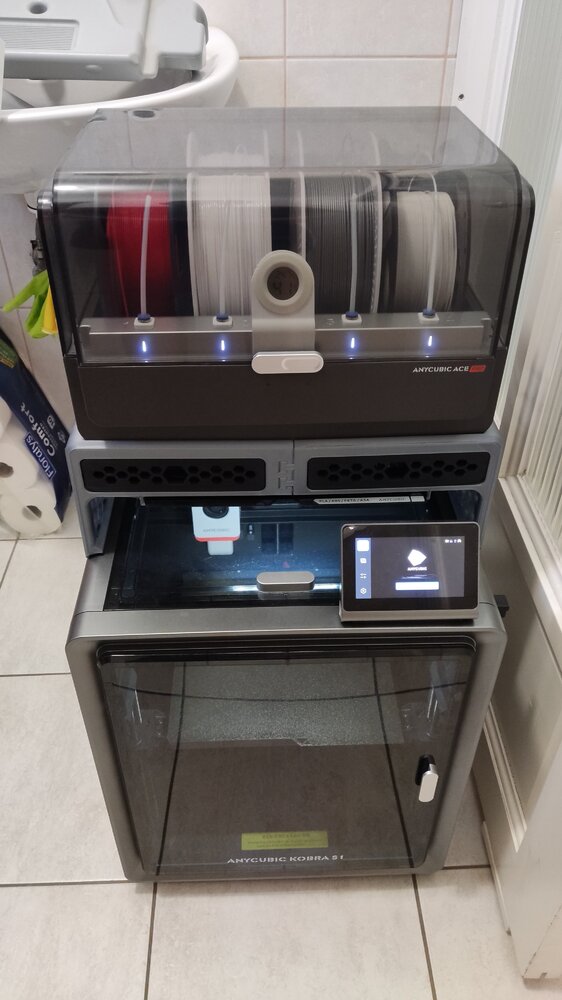
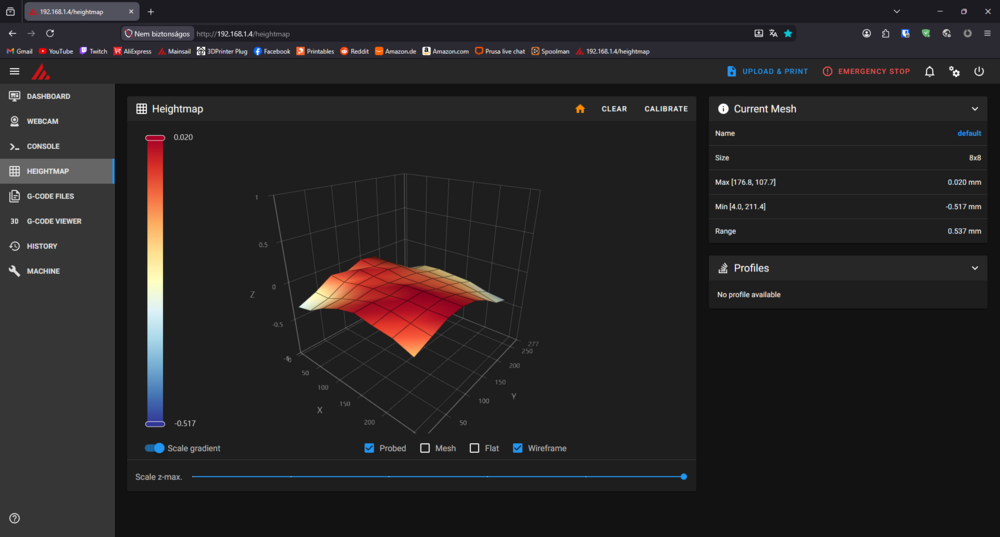
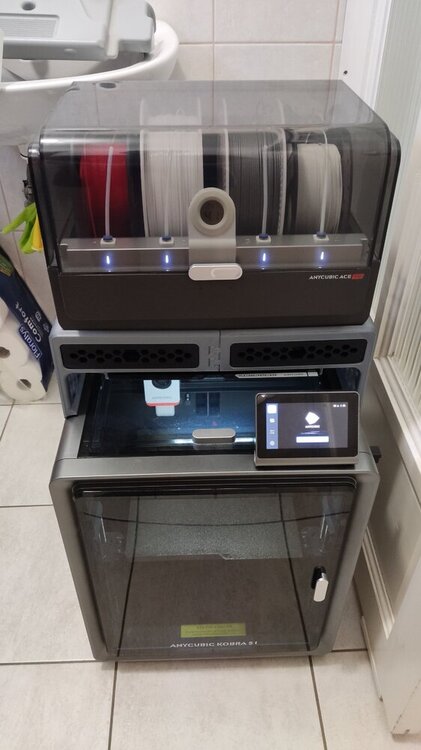
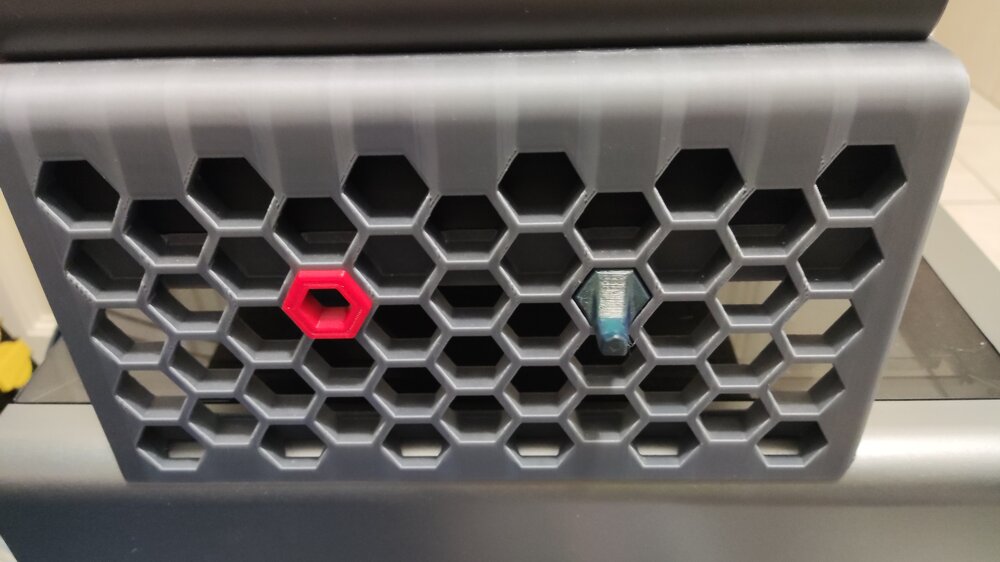
Hi! Just saw this topic/review while browsing the forum and I wanted to share my experience as well. I got the printer in 2025/June and I had it printing for more than 500 hours. I mostly printed with all kinds of PLA (silk, matte, coextrusion, gradient, glow in the dark, etc...) and recently PETG (occasionally I tried TPU as well). The default print profiles from Orcaslicer work really well and there is not much more to calibrate. I tried modding it as well, but that wasn't a smooth run: I tried out different hotends and nozzles (even two diamond ones), but all of them underperformed and the original brass nozzle came out on top. What actually improved the printing experience was the Rinkhals community firmware. It grants you full access to the printer: You can change the config (Speed up the color change for the ace pro), see your bed mesh, remote print with Orcaslicer, Mainsail/fluuid webUI, etc... Here is my bed mesh with custom leveling: 8x8 bicubic as opposed to the original 5x5 lagrange method. I also changed the leveling speed. Another really good mod is the Ace Pro riser: It gives you more space to work with. You can also remove the top cover with it. The side panels are even compatible with the Honeycomb storage wall project! (You can check out more about that here) At last but not least, You can check out my prints with the machine here. Most of those makes were printed on this printer (check the tags). Overall it is a great printer for an even greater price and that's why I chose this machine as my first 3d printer. The only downside i can think of is the warped bed (This is the most common problem for users): It has some really low points near the back corners. Edit: I posted about my setup on SUNLU's new community event if you are interested: https://www.sunlu.com/community/posts/323/a-humble-workspace-1-printer-but-60-kg-filament
 2 points
 -
2 pointsHi! 3DWithUs has a list of ongoing giveaways related to 3D printing: https://3dwithus.com/3d-printer-giveaways You could try your luck in one of them.2 points
-
2 pointsHey do you think I could somehow get a free Elegoo Centari Carbon? I've just been wanting a 3d printer since my other toy box 3d printer broke and I couldn't fix it. I spent almost all of the money I could spend on that little 3d printer and when It broke I gave it to a friend. But now I want a new 3d printer that cant break and so that I can make some money. You don't have to do this at all, you don't even have to read this, but if you do I would be so HAPPY and filled with thanks for you giving me a free 3d printer. I hope this comment finds you well. Have a blessed day!2 points
-
Need fast and accurate 3D printing services? We print your 3D model or help you design it from scratch - 100% online. ABS, PETG, ASA, PA6, PA12, tough resin. Free consultation in under 2 hours. About us : We are a Romania-based 3D printing and cad design company specializing in plastic,resin and powder PA12 3d printing. You Upload the file in our app, choose the material and you get parts delivered in just 24 hours. We offer free consultancy in maximum 2 hours. We worked with multiple well known companies from EU zone but also local companies. We mostly serve clients from Romania and Germany for cad modeling and prototyping services. Trusted partner for industry leaders and engineering : We deliver on time, cover the entire process - from design to manufacturing - and maintain fast and constant communication. We offer 3D CAD design and 3D scanning - a complete solution for product development. We have experience with projects in fields such as woodworking, metallurgy, automation, medical, robotics and education. Services Capib.ro provides : FDM 3D Printing Functional parts, high resistance Plastic - PETG, ABS, ASA NYLON PA6 -PA12 SLA Resin Printing High precision, smooth surface finish Resin - ABS, NYLON SLS PA12 POWDER Strength, precision & chemical resistance Powder - PA12 3D SCANNING From technical parts to works of art. We scan everything ensuring scans are accurate. - CAD DESIGN We turn your idea into a 3D model ready to be printed or manufactured. - Portfolio : Check out our portfolio featuring both international and local projects. Discover what our customers are saying and see more of our work on Linkedin and Instagram. Contact : We speak both German and English, so communication is simple and efficient. We’re just a click away and ready to assist you with anything you need. Feel free to reach out anytime at contact or visit us at capib.en or capib.de Best regards, Ruben Dragan

 2 points
 -
2 pointsGet custom 3D printing services in Chennai for prototypes, functional parts, and low-volume production in Chennai, India. We offer top-notch accuracy and quick turnaround, helping you bring ideas to life with ease.
 2 points
 -
Hi! I don't know much about Apple laptops (Macbooks), but what I would recommend is (if it is possible) to install custom drivers/firmwares or configure the current ones: Most laptops allow you to disable the touchpad completely With the right firmware you can also disable parts of the keyboard or remap it to a different action, write macros, etc... About 3D printing the parts: I found these that might give a good starting point for what you need: https://www.printables.com/model/171235-macbook-keyboard-cover https://www.printables.com/search/models?q=laptop+stand (Also, it would be helpful if you could share the build volume of your printer, so people can take that into consideration) I wish you the best and hope you will achieve your goals!2 points
-
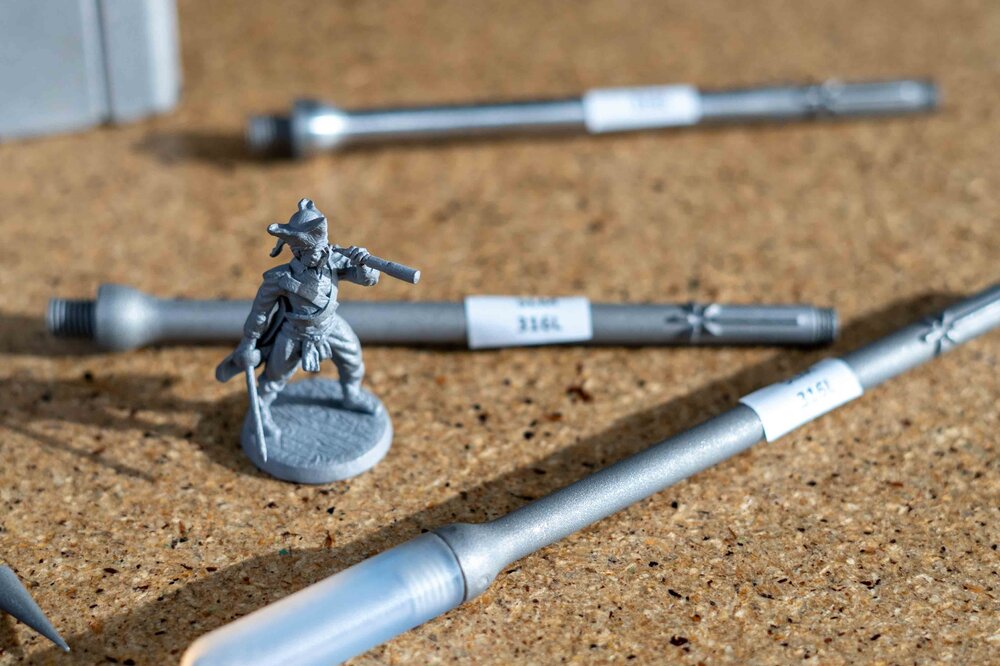
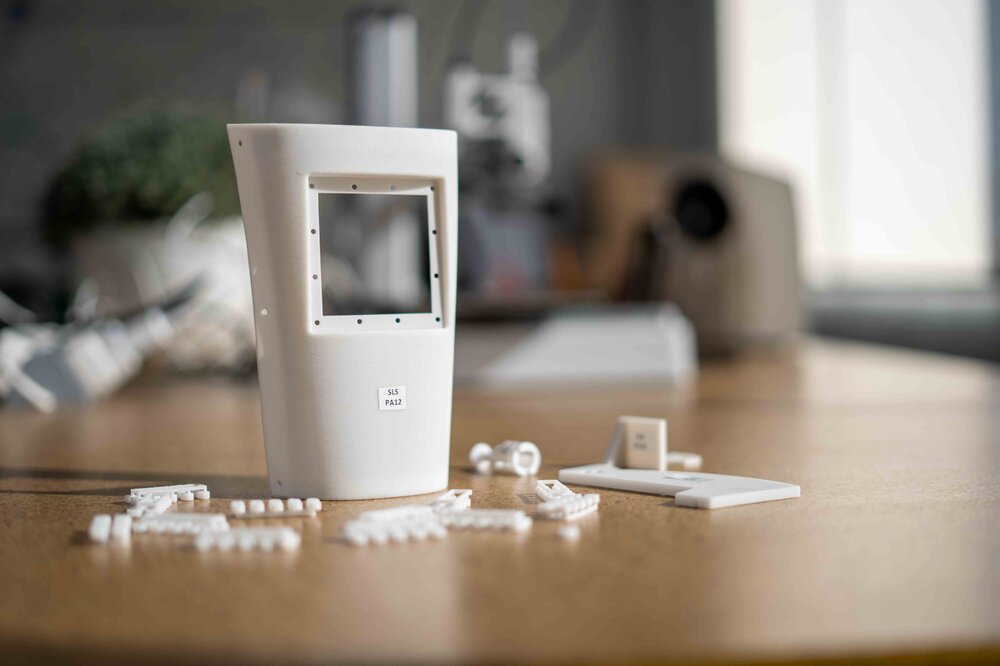
Who We AreKAD3D is a Melbourne-based 3D printing and design company specialising in rapid prototyping, end-use parts, and short-run manufacturing. Established with a focus on precision, reliability, and speed, we’ve grown to become Australia’s highest-rated 3D printing service, with over 300 five-star Google reviews and a reputation for delivering outstanding results. Our CapabilitiesWe provide a full suite of modern fabrication and design services, including: FDM 3D Printing – strong, affordable parts for prototypes and end-use applications. SLA Resin Printing – high-resolution parts with smooth surface finish. SLS and MJF Nylon Printing – durable, functional components ideal for production runs. SLM Metal 3D Printing – stainless steel, aluminium, and titanium parts for industrial use. Vacuum Casting & Injection Moulding – small-batch manufacturing with production-grade finishes. CNC Machining & Laser Cutting – precision engineering for metals, plastics, and composites. Our team also offers CAD design, 3D scanning, and reverse engineering, allowing clients to turn physical parts, sketches, or ideas into fully manufacturable 3D models. Industries We ServeKAD3D works with a wide range of clients, from individuals to large enterprises, across sectors including: Automotive & Motorsport – replacement brackets, custom parts, and tooling. Aerospace & Defence – lightweight functional components and prototype assemblies. Architecture & Construction – scale models and display pieces. Education & Research – hands-on teaching aids and engineering prototypes. Product Development & Consumer Goods – concept models and pre-production samples. Why Choose KAD3DAustralian-made: All core printing technologies are produced locally at our Melbourne facility. Fast turnaround: 24-hour express service available for FDM printing. Expert support: Our engineers and designers assist from concept through to production. End-to-end solutions: From initial idea to finished part, we handle design, manufacturing, and finishing in-house. Get in TouchFor quotes or project discussions, visit kad3d.com.au, email [email protected], or call (03) 8400 8869. You can also visit us at 781 High St, Reservoir, VIC 3073. We’re always happy to help you choose the right material or technology for your next project. You can also view our location, photos, and 300+ verified customer reviews on our Google Business Profile here: https://share.google/b1WfW188zvSkUkmOP
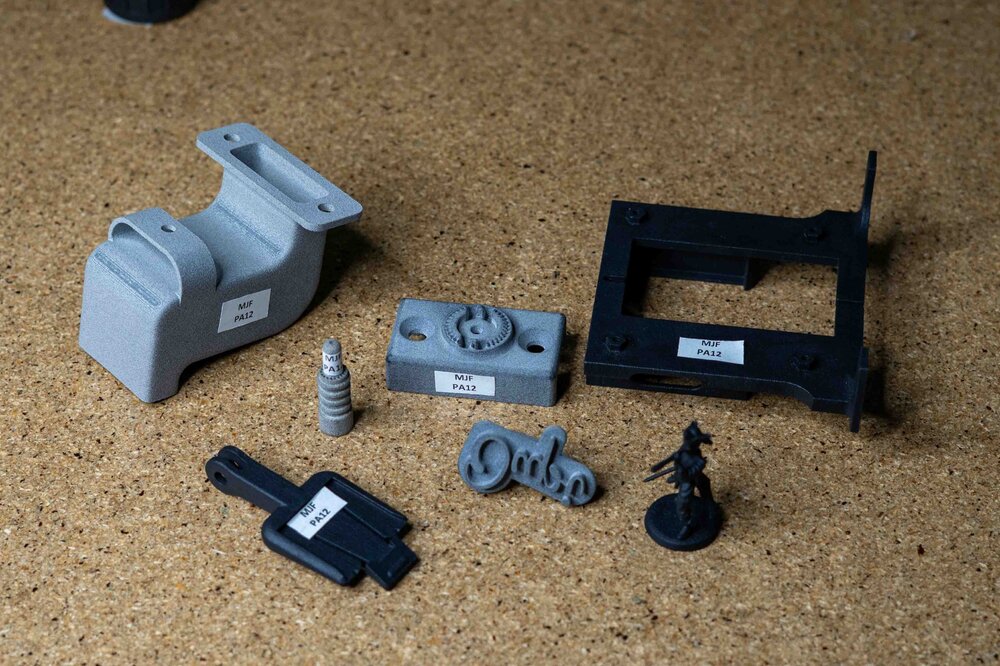
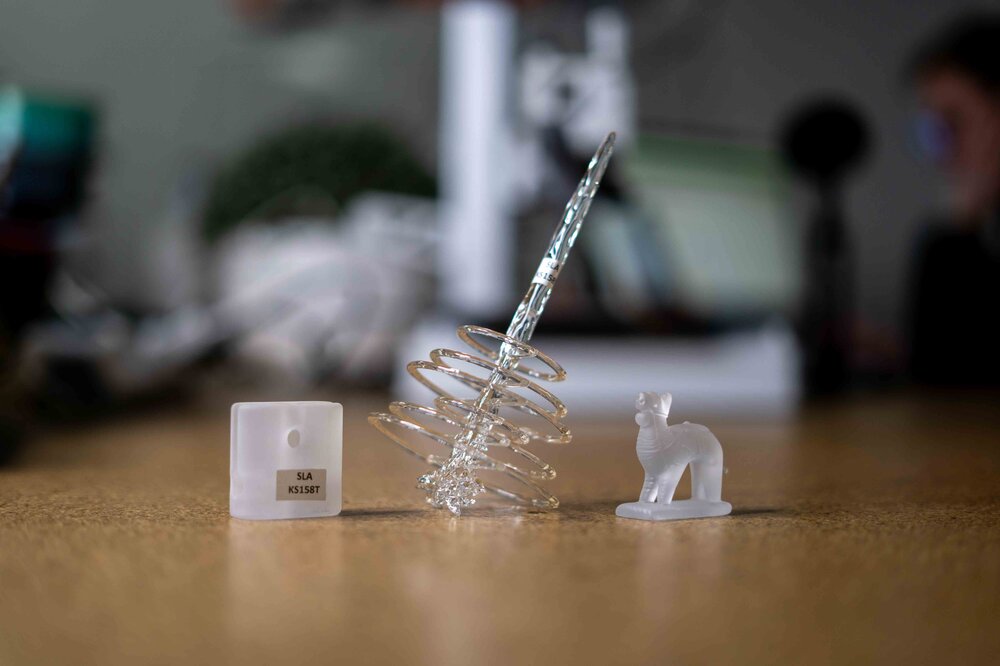
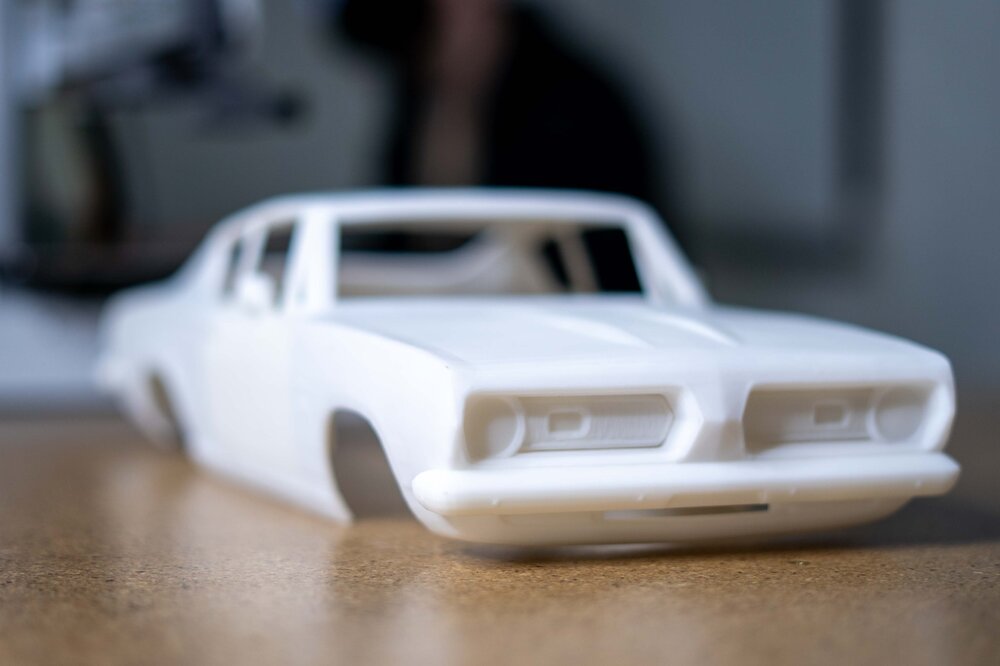
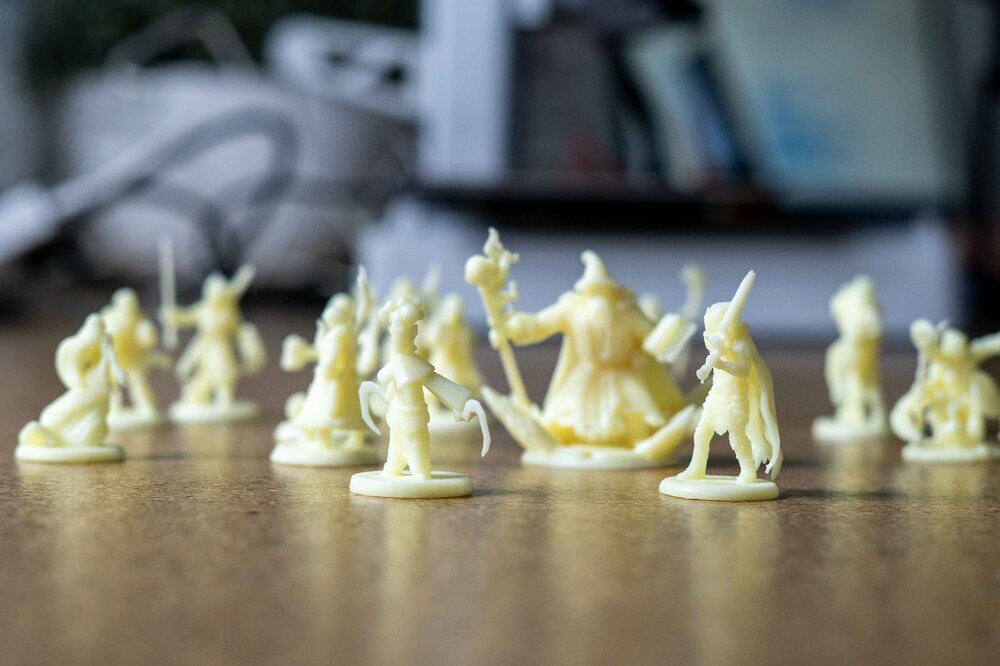
 2 points
 -
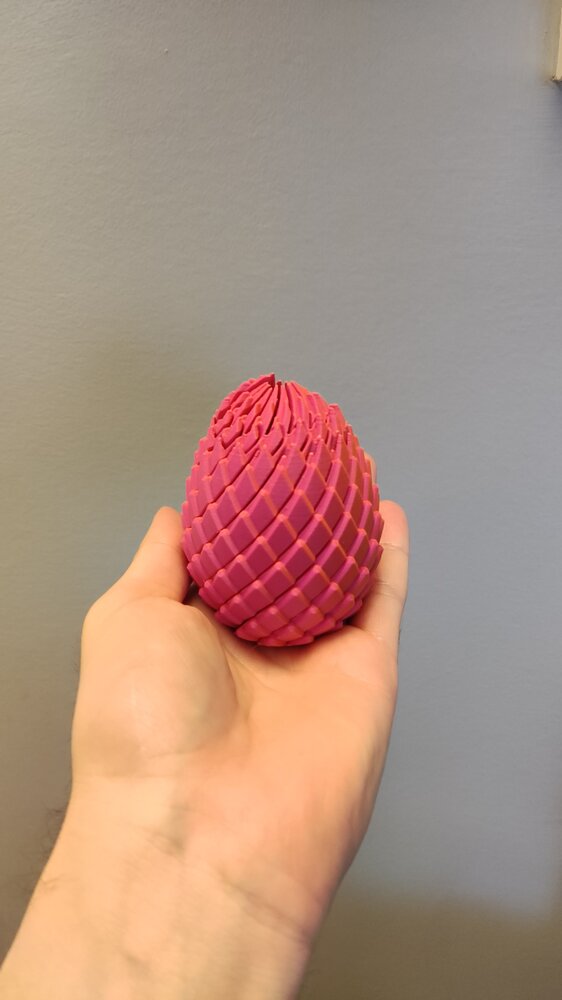
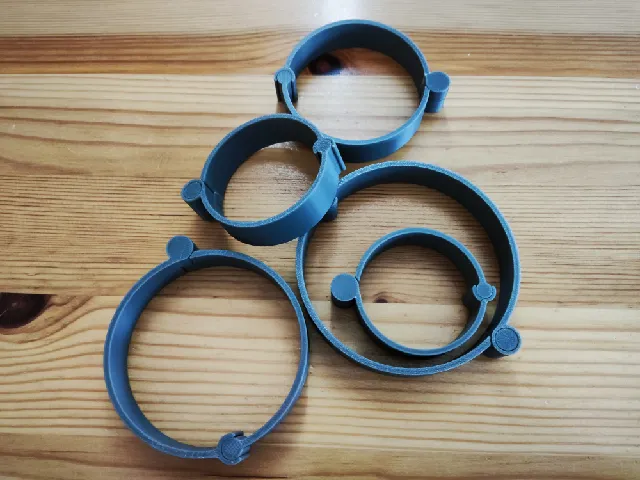
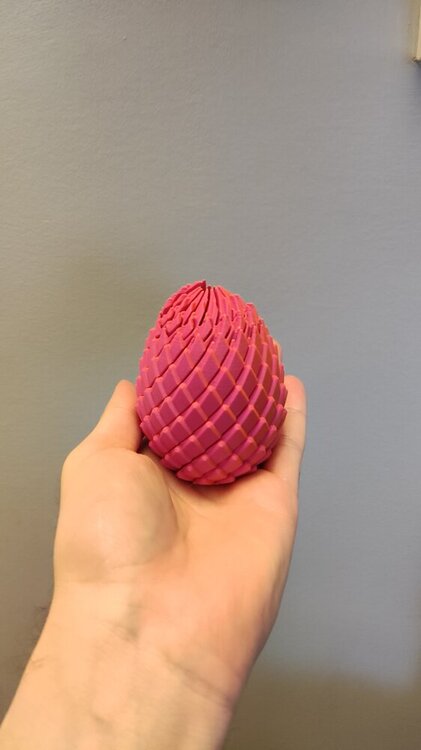
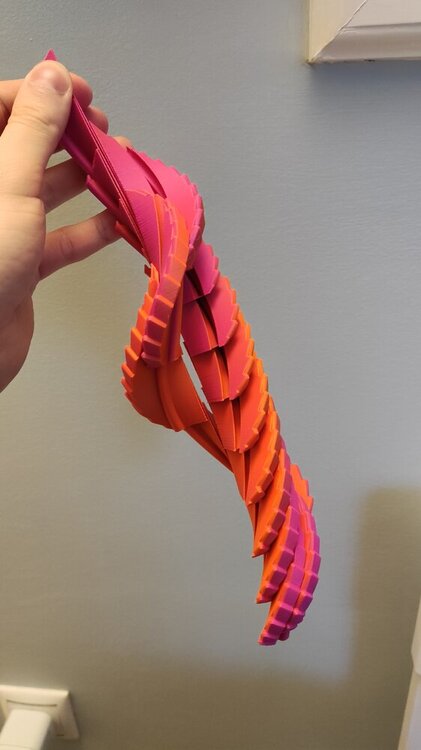
2 pointsI both designed and printed some models for easter. Mine are a little bit simpler than others, but they came out well and as expected: These first 3 are my designs: Layered Egg Fidget: Articulated Twist Open Egg Containers: I made a mistake while modeling them. The left hand is backwards as you can see on the picture. Since then i updated the design and the issue is fixed. Simple Twist Open Egg (Original version): This was my first time modeling threads for 3D printing. They came out acceptable. The smallest one can slip but still holds the egg together securely. Other sizes are fine. Twisty Dragon Egg Fidget: (This design is not mine) I also made a showcase video for this to enter Snapmaker's easter giveaway: https://x.com/Marcidy_3D/status/2037489182990385450 (The theme might be familiar to some people :D) Happy Easter!
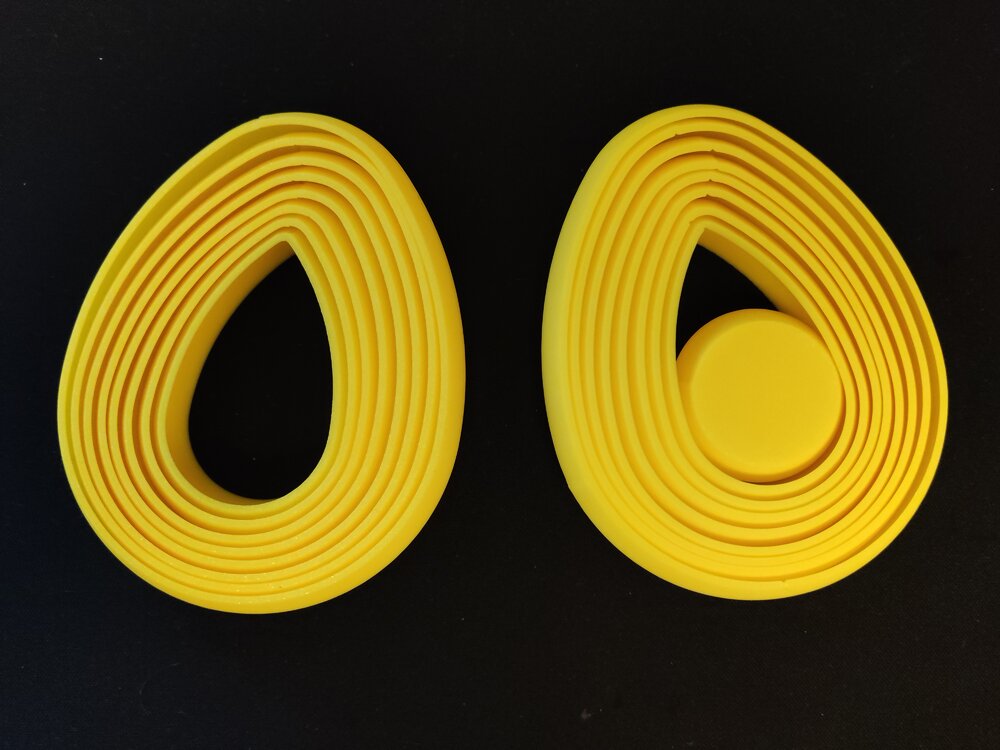
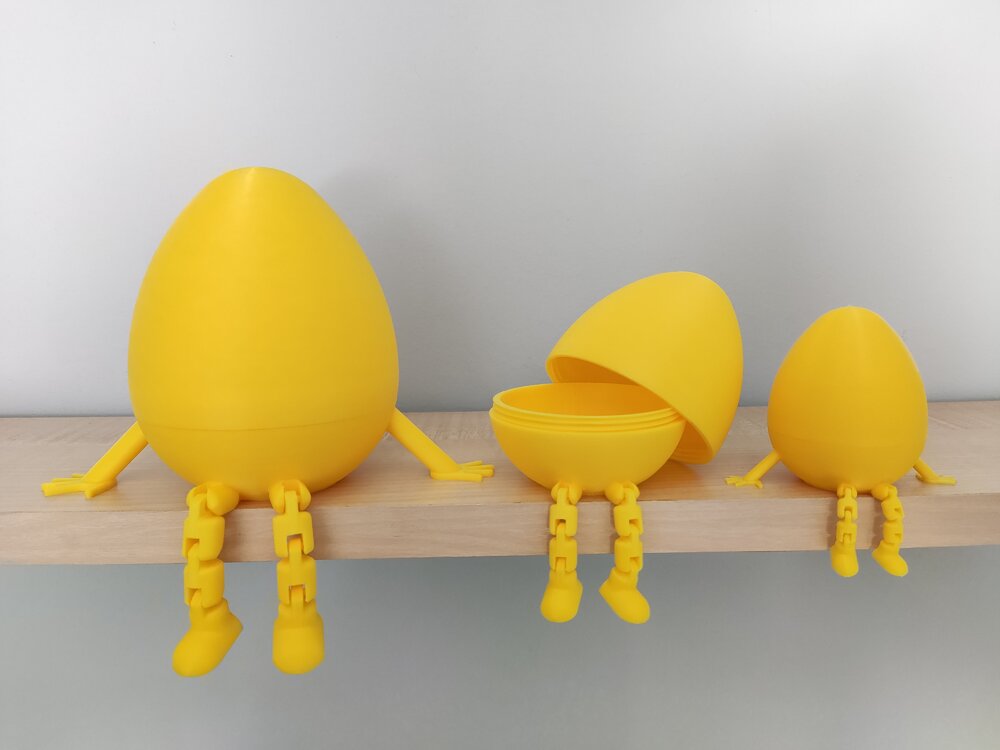
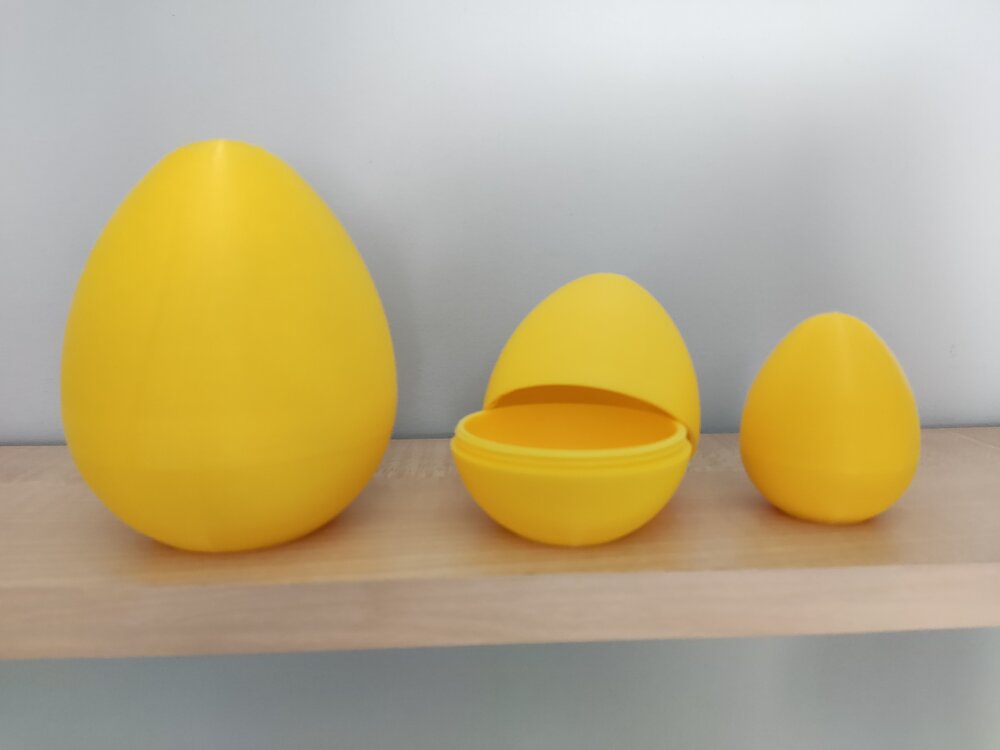 2 points
 -
2 pointsI've put almost 1400 hours on my AD5X since November. I've had some great prints off of it and really like the machine...but I've also had 4 different tech tickets open that resulted in replacement parts. How has your experience been?2 points
-
2 pointsCongratulations! 🎉 This post won 2 filament spools in the Contribute to Win - March 2026 giveaway. We will contact you shortly to arrange the delivery of two SUNLU filament spools. Giveaway Rules: https://3dwithus.com/forum/topic/973-contribute-to-win-monthly-giveaway
 2 points
 -
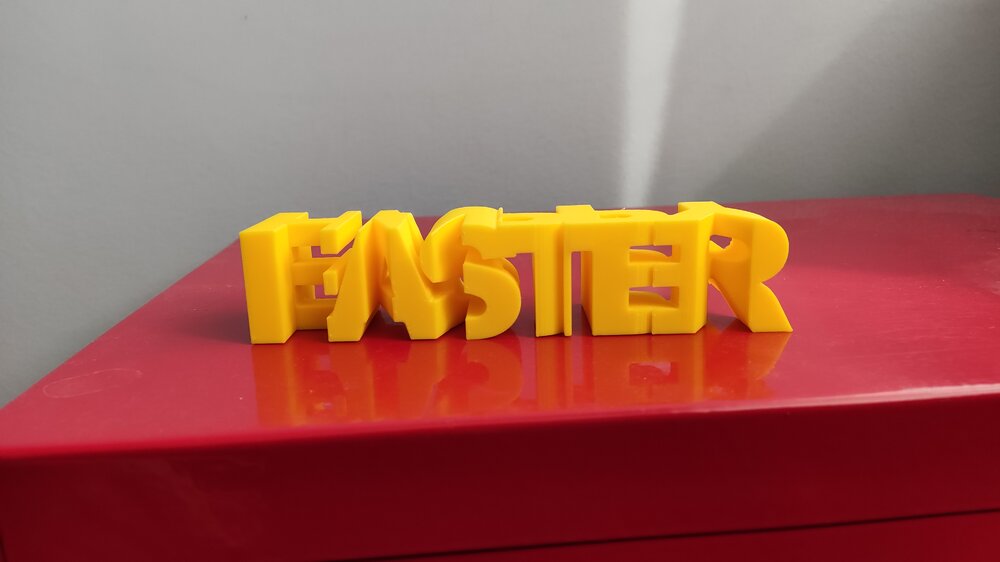
2 pointsThank you very much for your really kind words and support. I sincerely appreciate it. I am really happy to hear the tutorial was easy to follow, and I hope it helps you design your own text-flips. Your print and photos are great, and I am really sorry about the supports; they are unfortunately a byproduct of this type of design and this model especially.2 points
-
2 pointsReally cool! The tutorial is great as well and easy to follow. I downloaded one of your models to try it out. It came out great. The supports were a little bit inconvenient to remove, but i managed. Thanks!
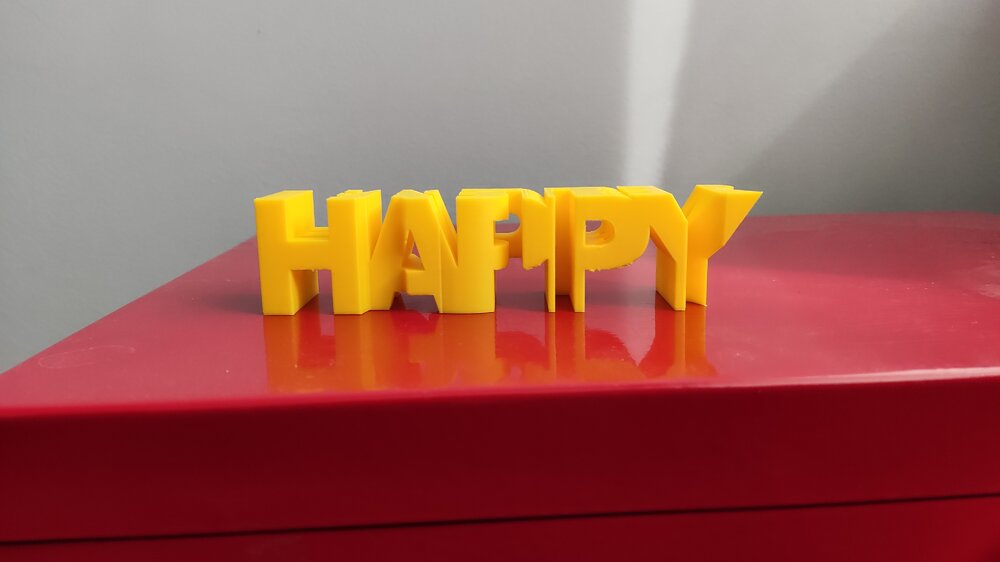
 2 points
 -
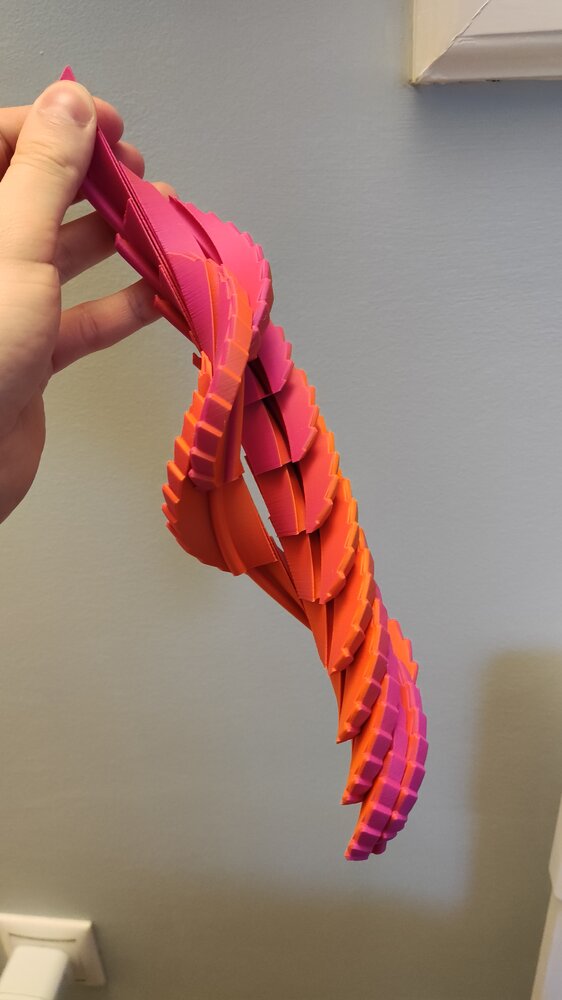
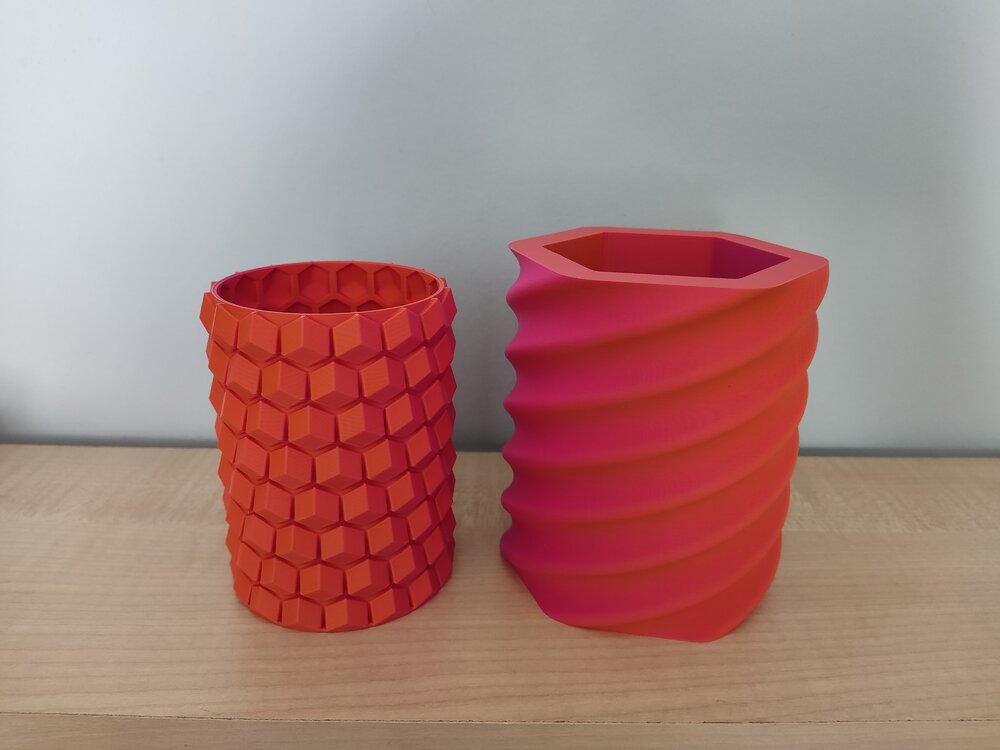
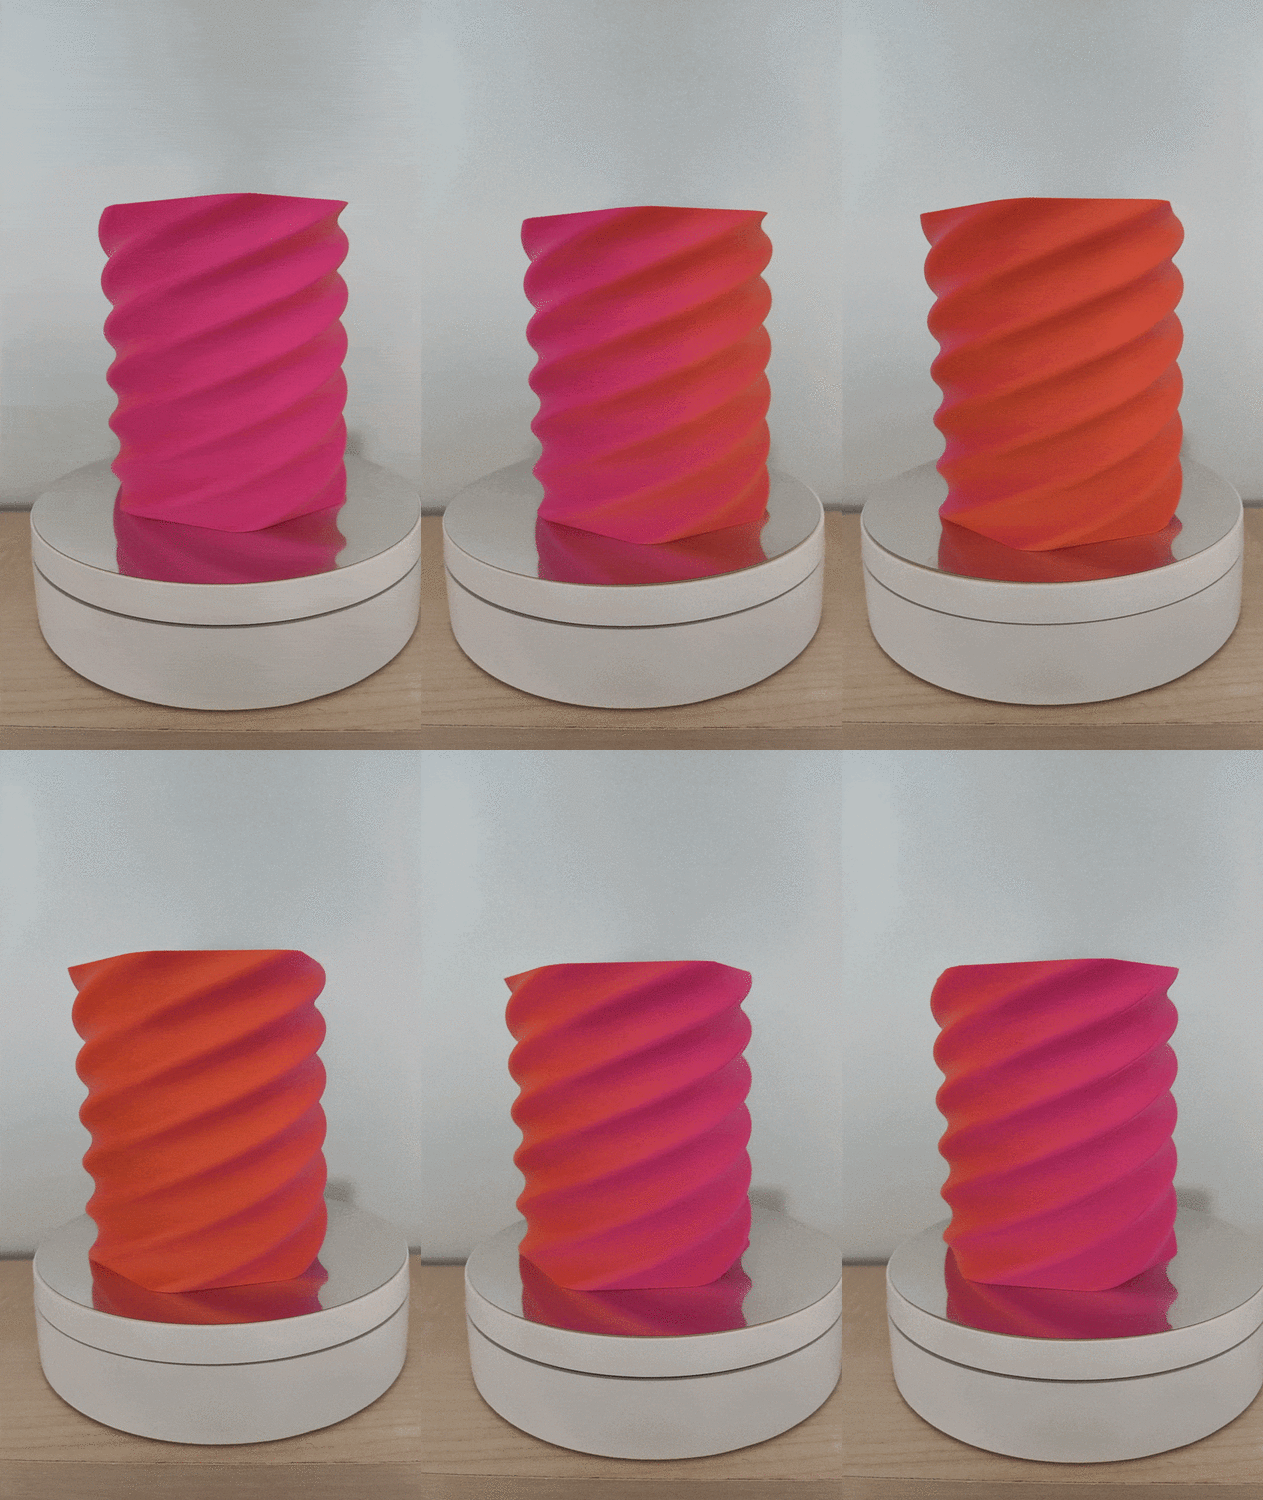
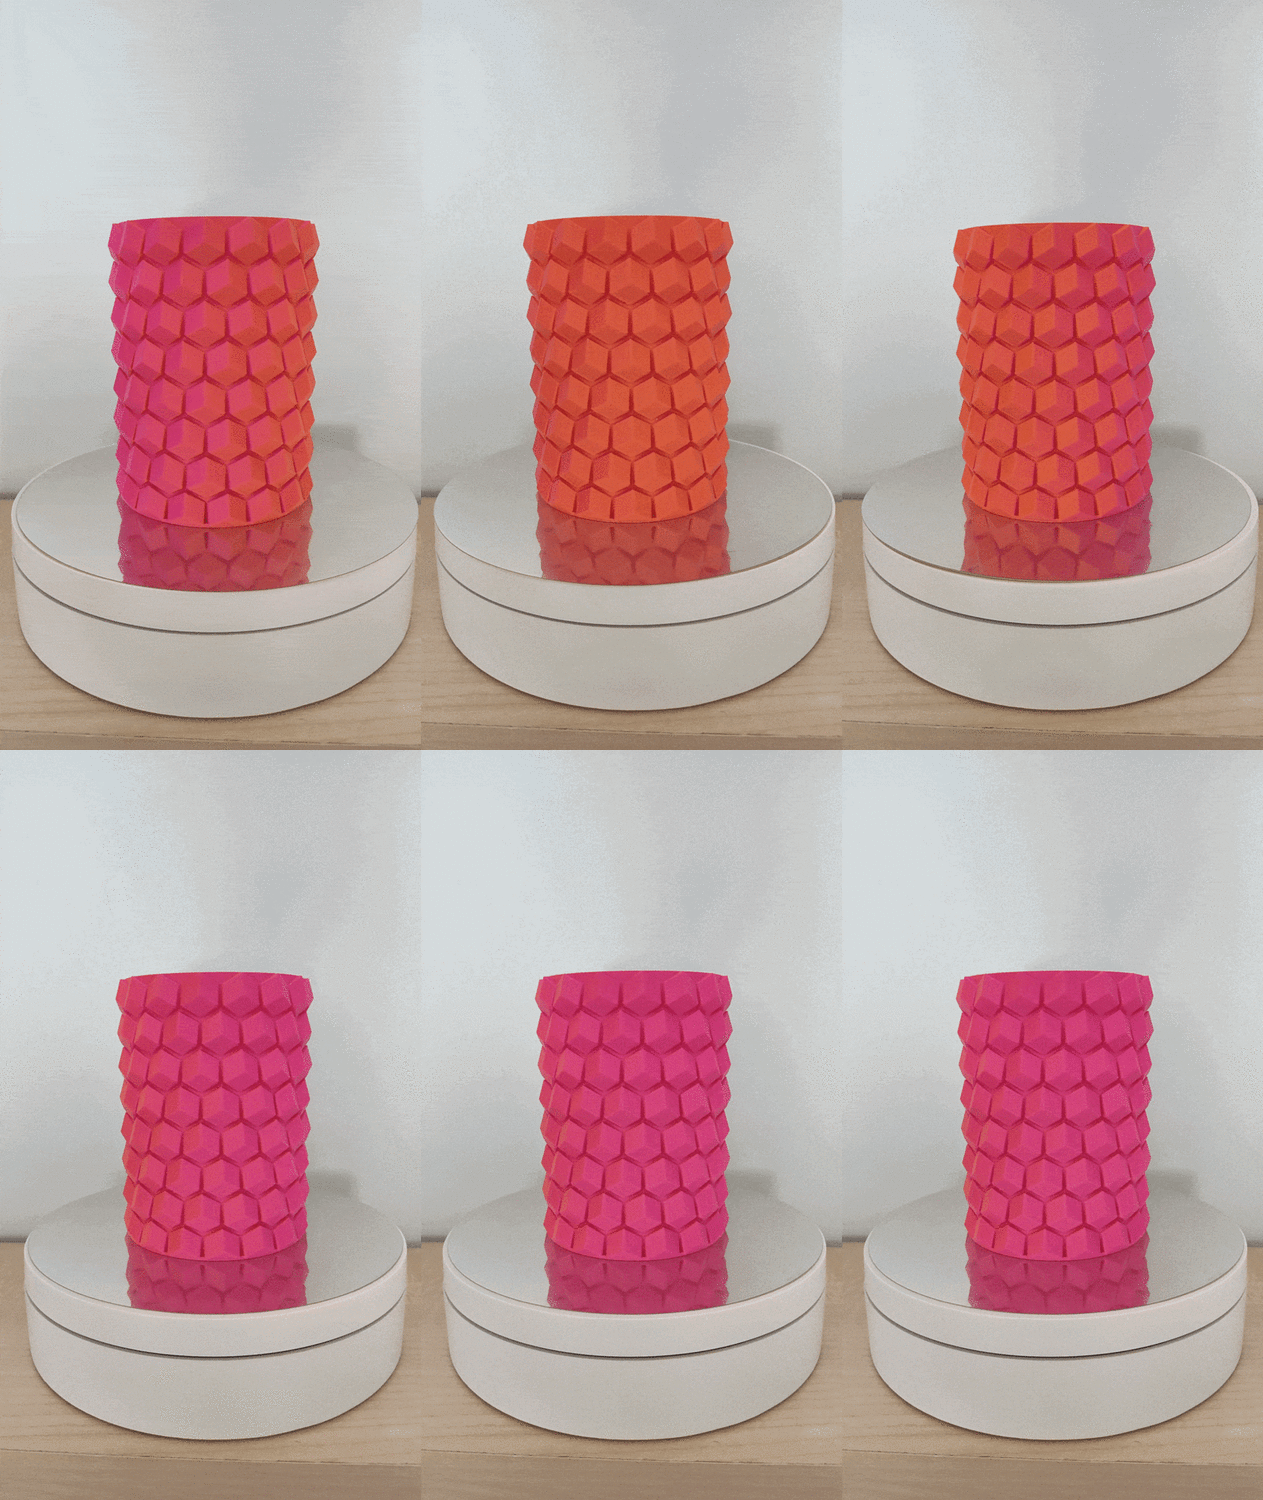
The dual color indeed looks cool! Printed some pen holders with it. The models are not mine: https://www.printables.com/model/108872-pen-holder https://www.printables.com/model/198641-hex-vase-cup
 2 points
 -
Love dual color filaments ♥️ You'd better print something. Not sure how SUNLU feels about it 😅2 points
-
2 pointsCongratulations! 🎉 This thread won 2 filament spools in the Contribute to Win - February 2026 giveaway. We will contact you shortly to arrange the delivery of two SUNLU filament spools. Giveaway Rules: https://3dwithus.com/forum/topic/973-contribute-to-win-monthly-giveaway
2 points
-
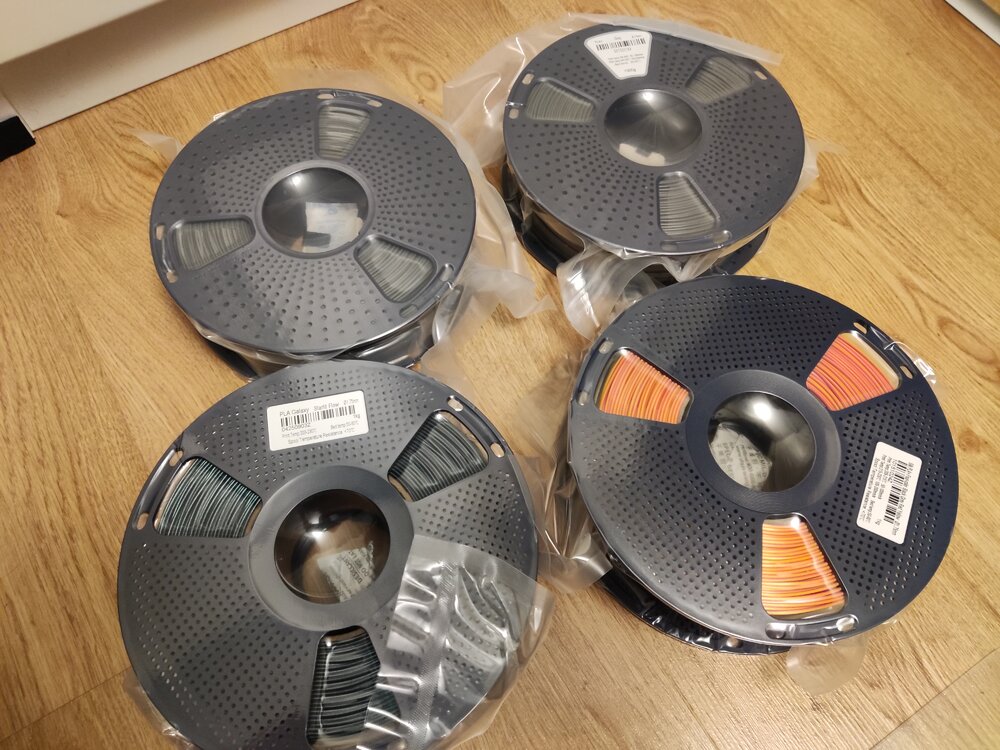
2 pointsJust received my giveaway spools from SUNLU and 3DWithUs! Thank you for this amazing gift! I got: 2 kg PLA+ | Grey 1 kg PLA galaxy | Starlit Flow 1 kg Silk PLA+ | Four-color | Black-Grey-Red-Yellow I haven't printed with them yet, but i can't wait to try them out :) Thank you SUNLU and 3DWithUs!
 2 points
 -
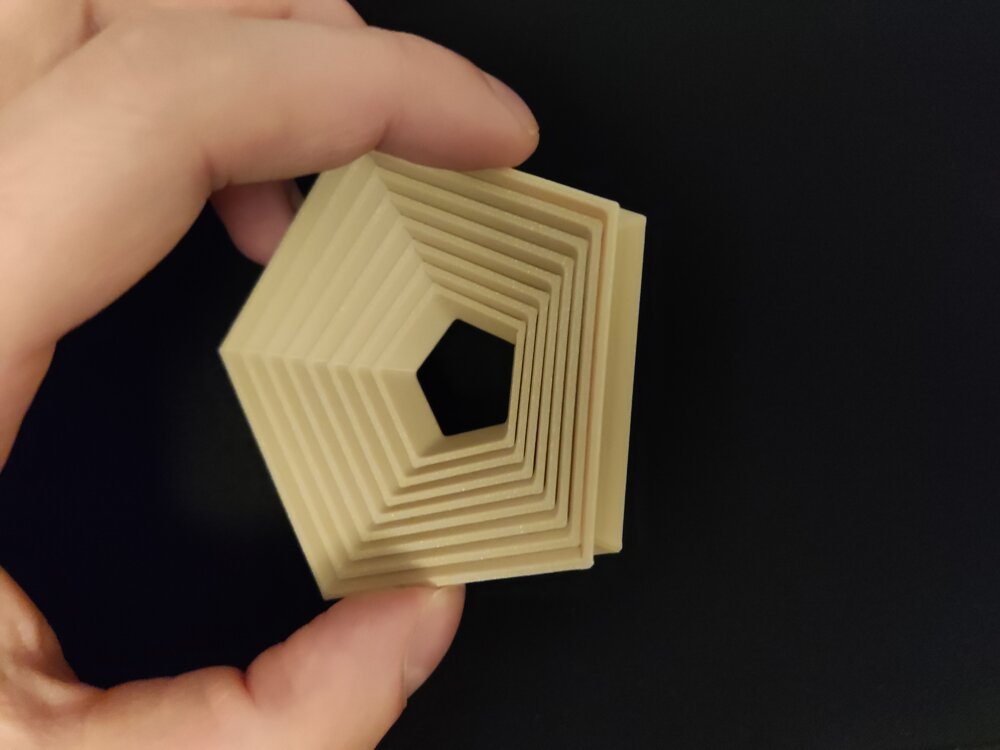
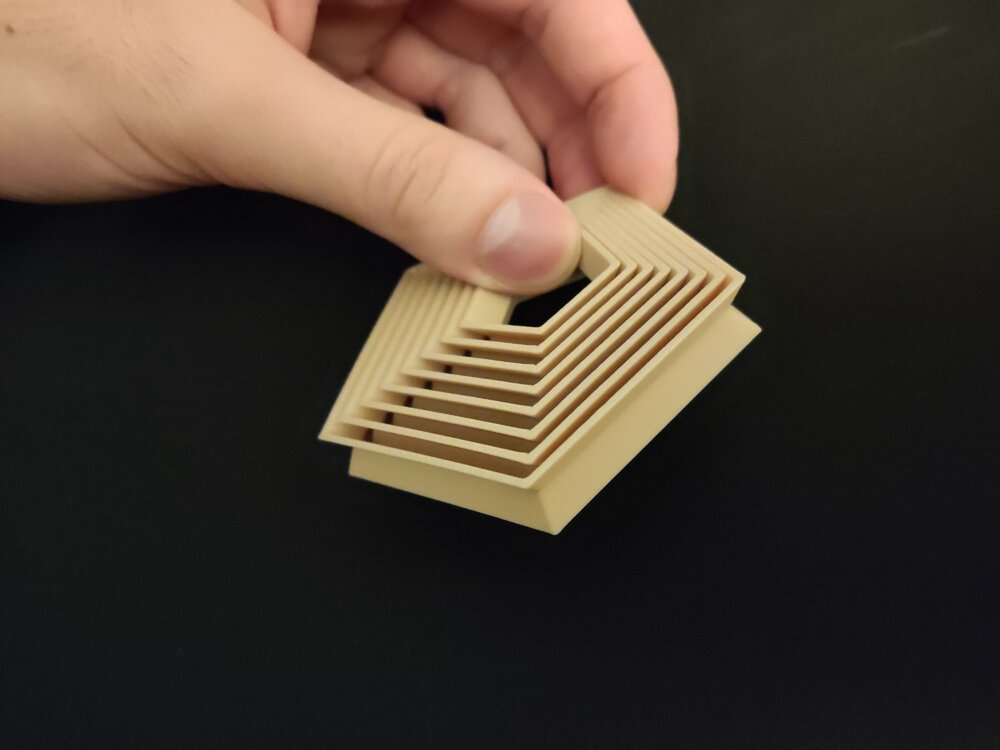
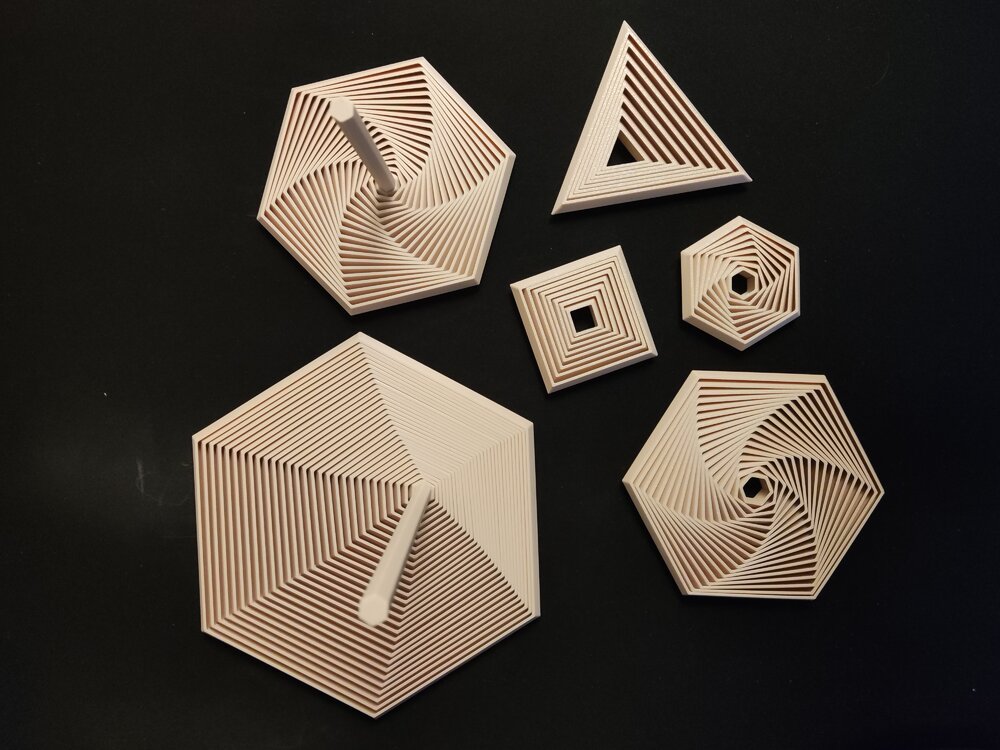
2 pointsHi everyone! I would like to share one of my recent projects with you: A Parametric Polygon Fidget It is fully customizable in FreeCAD and contains some premade ones as well if you don't feel like creating your own. The project is available here. So what can you customize?Number of sides for the polygon Segment/layer count of the fidget Wall width Wall angle Spacing Overall size: Height, Width Handle size (The handle is optional) (You can make insideout fidgets as well with it! See last 2 attached pictures!) Happy printing and customizing!The project is available on Printables: https://www.printables.com/model/1537410-polygon-fidgets-fully-customizable-trianglesquarep Showcase pictures:
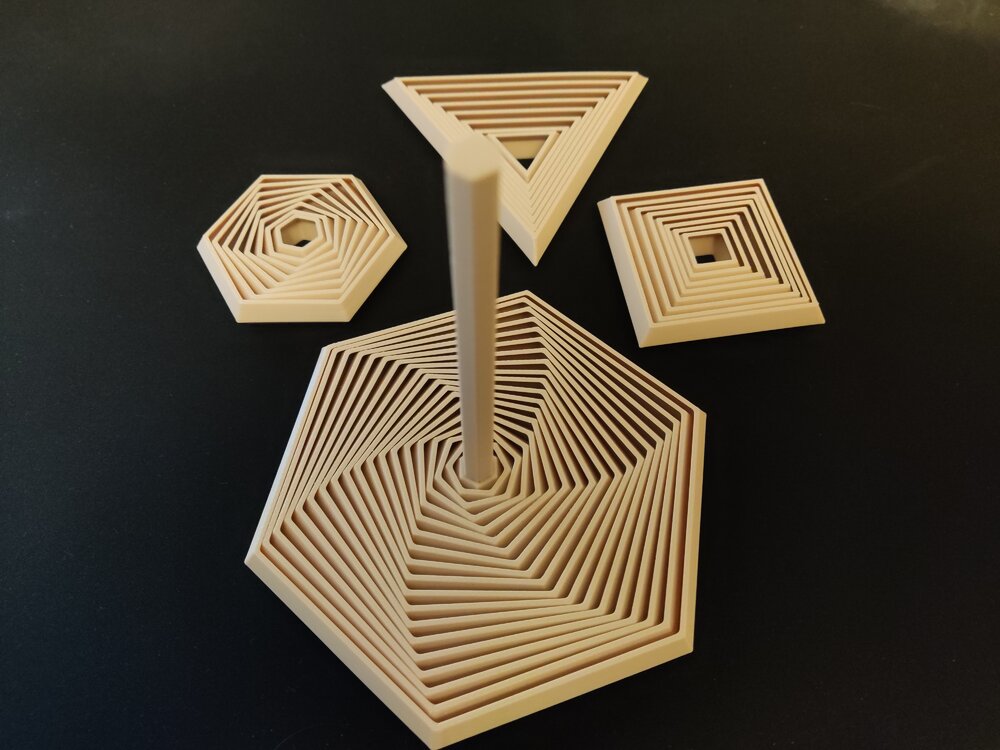
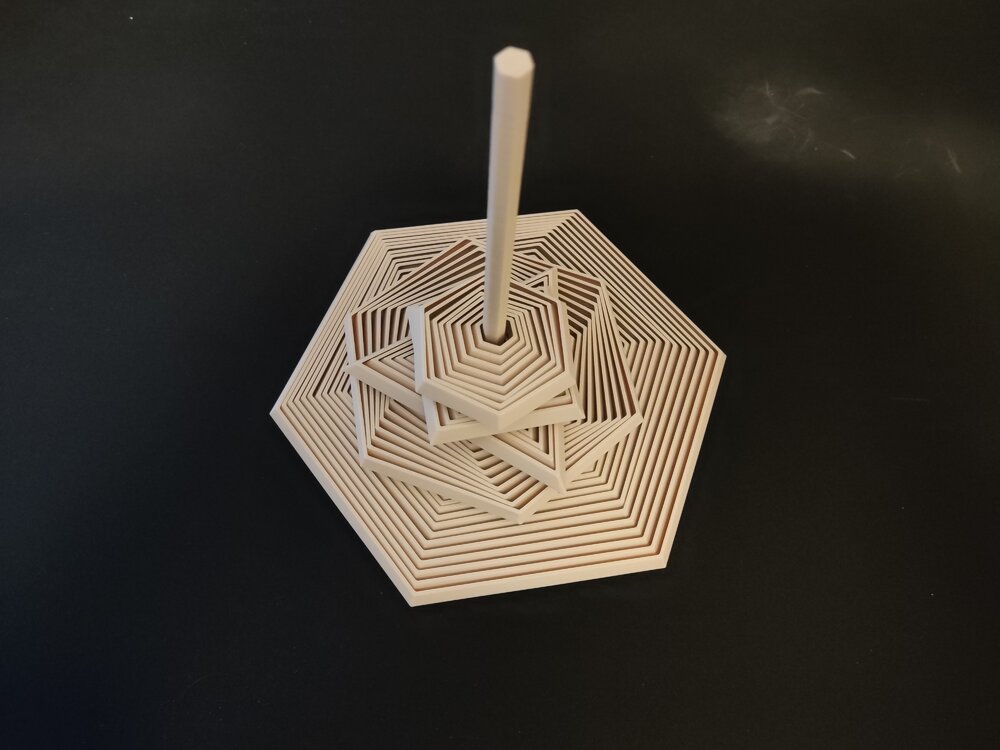
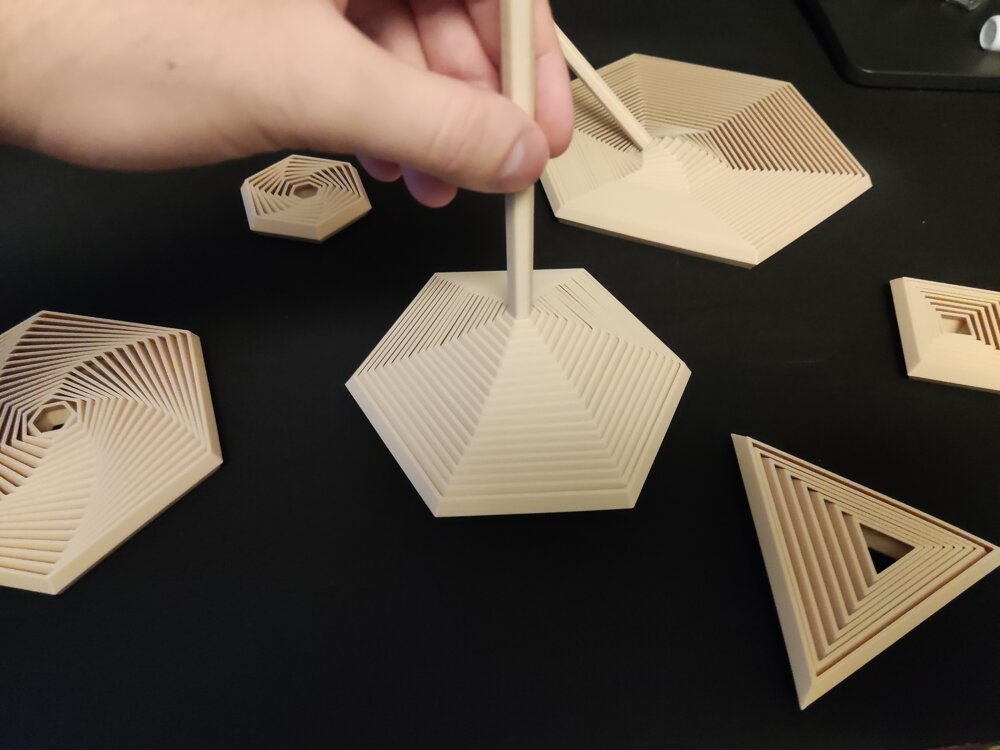 2 points
 -
Hi all, I’ve been looking into automated 3D scanning with robots for repetitive scanning tasks. Manual scanning works, but consistency can be an issue when doing the same part again and again. Recently I came across a robotic scanning setup called MetroHub, which combines a 3D scanner with a robotic arm. I’m curious if anyone here has experience with robot-assisted 3D scanning or similar systems. Is it mainly about consistency, or does it really improve overall efficiency in real use? Just trying to understand whether robotic scanning is practical outside large factories. Would love to hear your thoughts.2 points
-
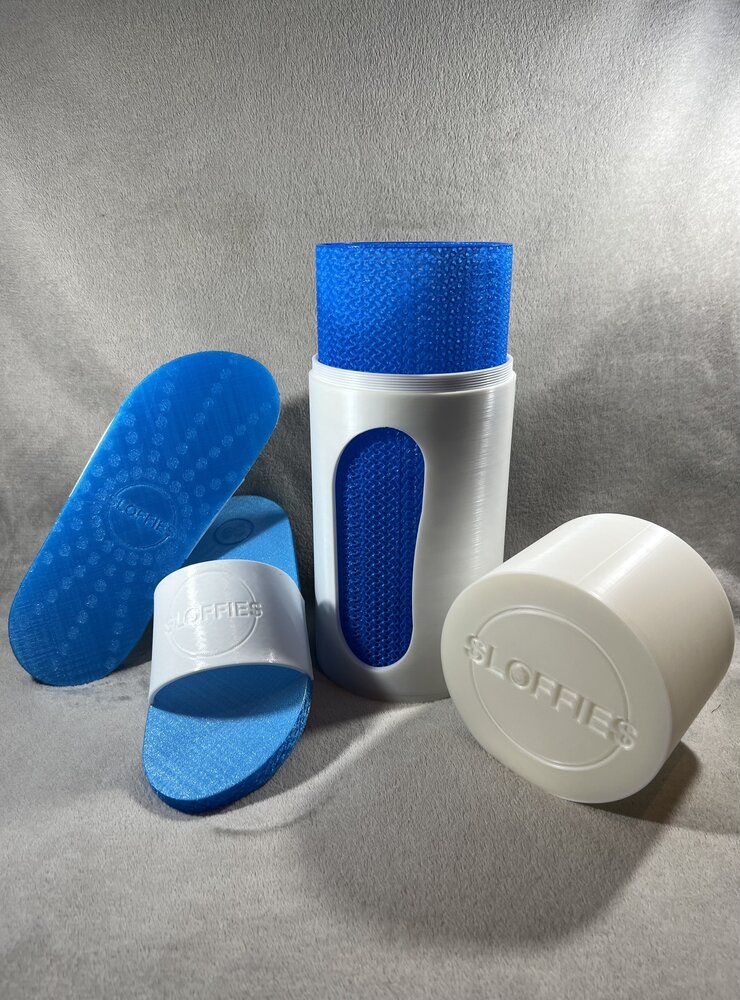
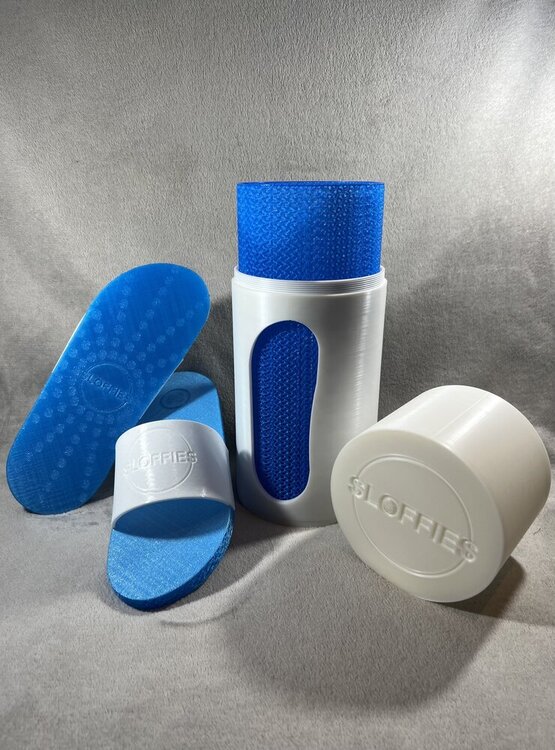
2 points"Sloffies" is an Afrikaans nickname for slides and flip-flops. I have designed Sloffies to be parametric so anyone can customize them for their feet using the customizer on MakerWorld. You can also download the script on GitHub and use the OpenSCAD customizer to customize them; the UI is just not as intuitive as the customizer on MakerWorld. Where it started I designed the slides and accompanying packaging as part of a shoe design competition. The competition, unfortunately, didn't work out for a variety of reasons, but it was honestly a blessing in disguise. It is my most popular design, and thanks to the 3D printing communities of Facebook, Reddit, Twitter, and Thangs, it was featured in a Hackaday article, which opened a lot of doors for me. Parametric slides The design was only available in select sizes required by the competition, and as requested by a few people in the community, I redesigned Sloffies to be fully parametric. You are able to customize the strap’s width, length, and thickness and import a logo. You are able to customize the sole's width, length, and thickness; add a patch; import a logo; and choose from five available sole patterns, which you can further customize to your liking. Designing your own Sloffies is a really involved process. I have included a PDF guide on MakerWorld and GitHub. I hope it will simplify the process. I have also uploaded a YouTube playlist that takes you on a walkthrough of the various sections of the design on MakerWorld and how changing one parameter changes the design. Open Source I have Open sourced Sloffies, and the OpenSCAD script is available on GitHub. You are free to remix and improve upon the design. There are a lot of improvements that could be made, like adding arch support, a contoured footbed, etc. I see the sole as a basis from which more shoes can be designed. The future I would like to learn Blender and design Sloffies with Blender, as OpenSCAD really limits what I would like to do with the design. I would like to establish Sloffies as an international brand. The first step would be redesigning the logo, the slides, and the packaging. I would love to incorporate an augmented reality app that allows people to try on their slides before printing or ordering.
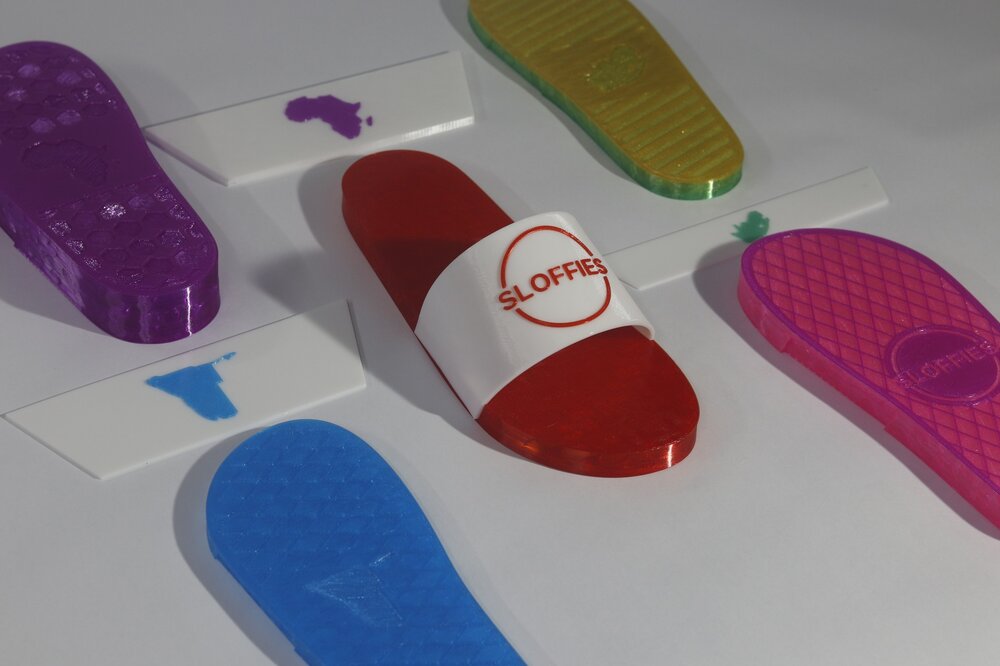
 2 points
 -
1 pointHi everyone, I am new here and new to 3D printing so I don't know anything. I bought a used printer and I'm having some difficulty with my machine. First what happened is this, the screen would be lite up but it would be blank, nothing showing on the screen. After some research I found that it more than likely is a short somewhere in the heater wiring and probably at the heater head. So I started moving it around it the screen lite up with letters again. Next I started taking it off and the belt came apart where the two ends connect. My question is this, there are two metal clips on the ends of the belt but how do I connect them back together? Is there some sort of clip that came off of it because I can not find out how it is suppose to attach together. The belt seems to be in good shape but if I can put it back together and get it going now I won't have to wait for a new one. Thank you for your help. Have a great! By the way, its the old Ender 3 3D printer.1 point
-
🎉 August Giveaway Completed — September Giveaway Is On The Way! Thanks to all participants! We're excited to award our filament prize to forum contributors 🙌 🏆 Winning contributions: Carverall JL9 Make: https://3dwithus.com/forum/topic/1152-carverall-jl9-discussion/#findComment-1576 Longer LK10 Plus: https://3dwithus.com/forum/topic/1233-longer-lk10-plus/#comment-1499 How Do You Calculate the Real Cost of Your 3D Prints?: https://3dwithus.com/forum/topic/1295-how-do-you-calculate-the-real-cost-of-your-3d-prints/ SLS PEBA to Scale 3D-Printed Footwear: https://3dwithus.com/forum/topic/1354-sls-peba-to-scale-3d-printed-footwear/ Two SUNLU filament spools are now on their way 🎁 What's Next✅ The September giveaway is live ✅ SUNLU filament spools will be awarded to 1–4 contributors whose posts or comments add the most value to the community and forum. ✅ All helpful & creative contributions count. Share your projects, tips, questions, fails & wins. Every contribution helps grow the community and puts you in the running. If you were considering posting but haven’t jumped in yet, this is the perfect time to start. Sign Up Here https://3dwithus.com/forum/register/
 1 point
 -
1 pointYour business card looks awesome! Great design. And the QR code works very well. 👍1 point
-
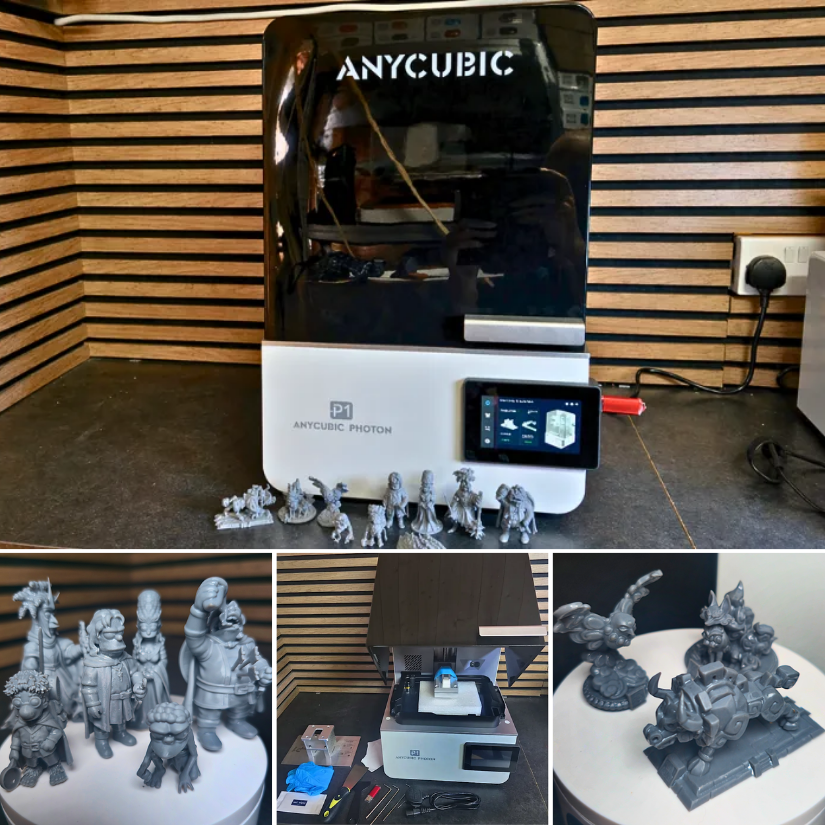
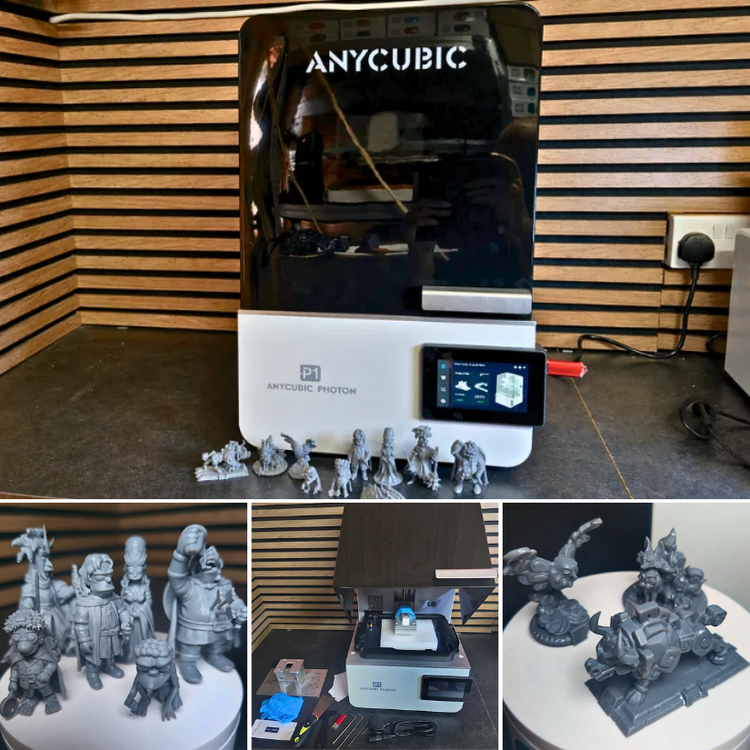
1 pointFresh from hands-on testing: Anycubic Photon P1. ✍ https://3dwithus.com/anycubic-photon-p1-review-hands-on-testing 📹 https://youtu.be/5FWpyO-yW-A Featured: creaturecraftworks.official, nostalgic_3dmodels
 1 point
 -
1 pointGreat milestone! Congratz. Christmas trees are interesting techniques. I remember a similar hairy print craze ten years ago. I wrote an article about it: https://3dwithus.com/hairy-3d-prints. I need to update it at some point. I would definitely link it to your Christmas Tree! Nice glitch benchy print!1 point
-
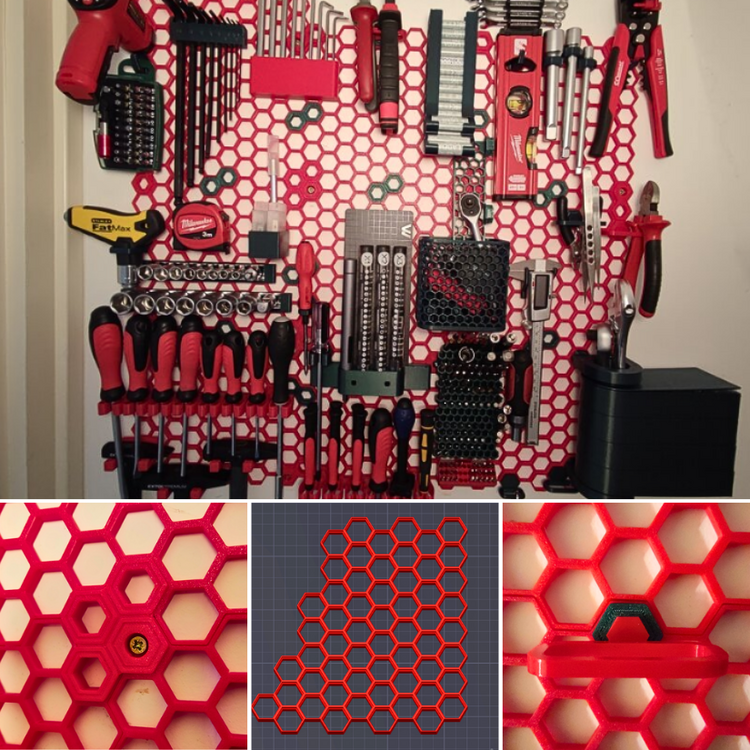
Here is the link to your first guide - Congratz! 🎉🥳 https://3dwithus.com/honeycomb-storage-wall-guide-3d-printed-tool-organization
 1 point
 -
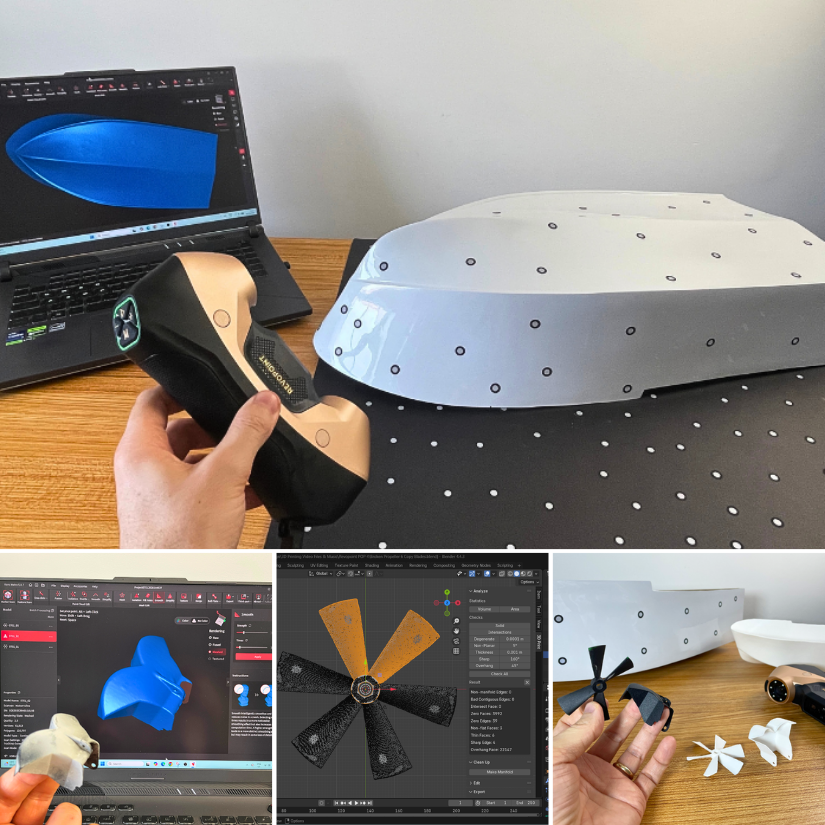
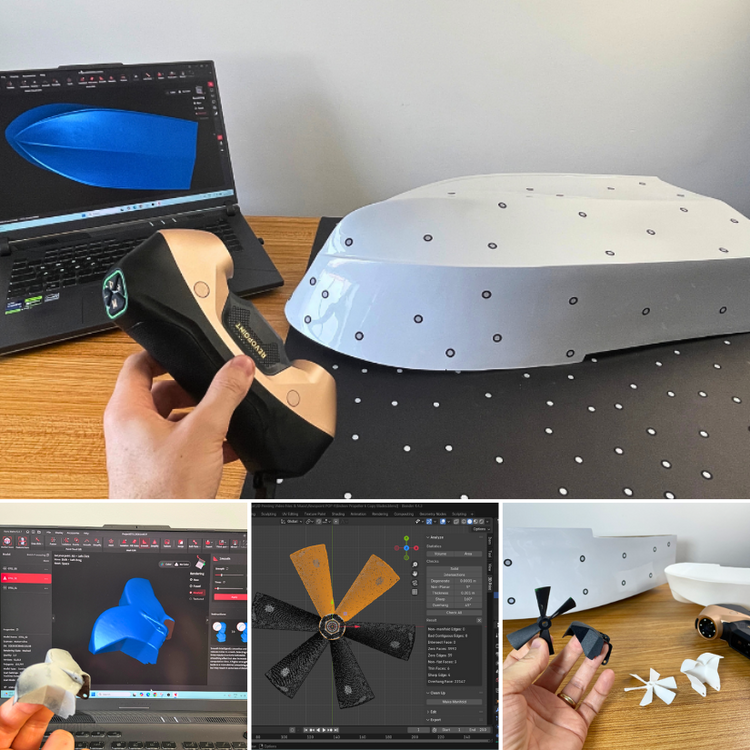
From broken RC boat parts to functional replacements. The biggest lesson from this project wasn't just the scanner. It was the workflow. 3D scanning → Blender → 3D printing, with a little AI help. Full article: https://3dwithus.com/revopoint-metroy-ultra-review-blue-laser-3d-scanner Have this scanner? Please share your results.
 1 point
 -
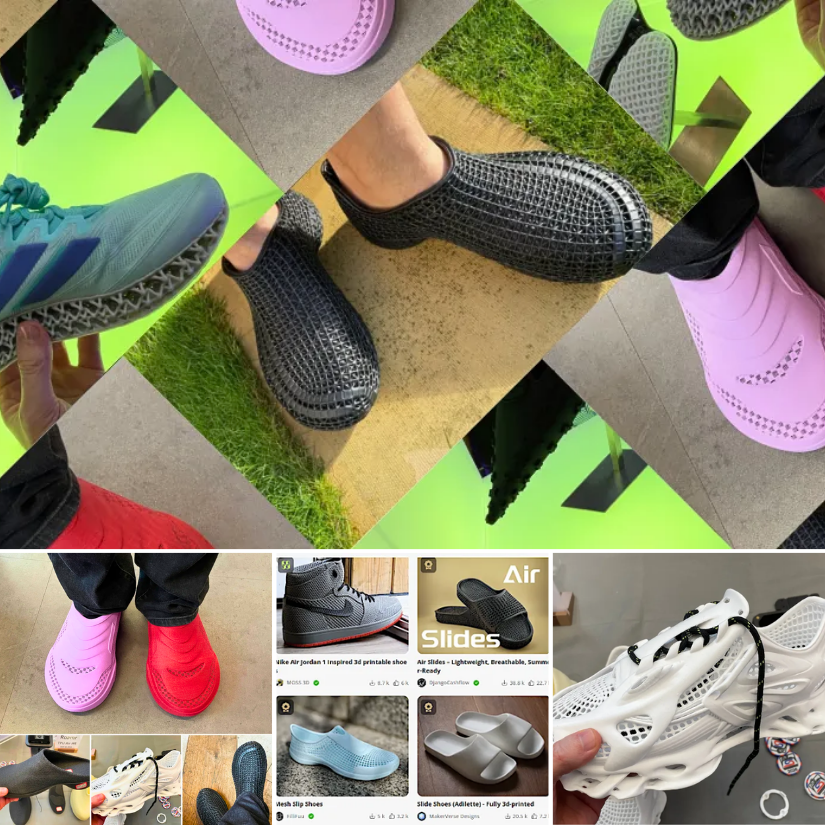
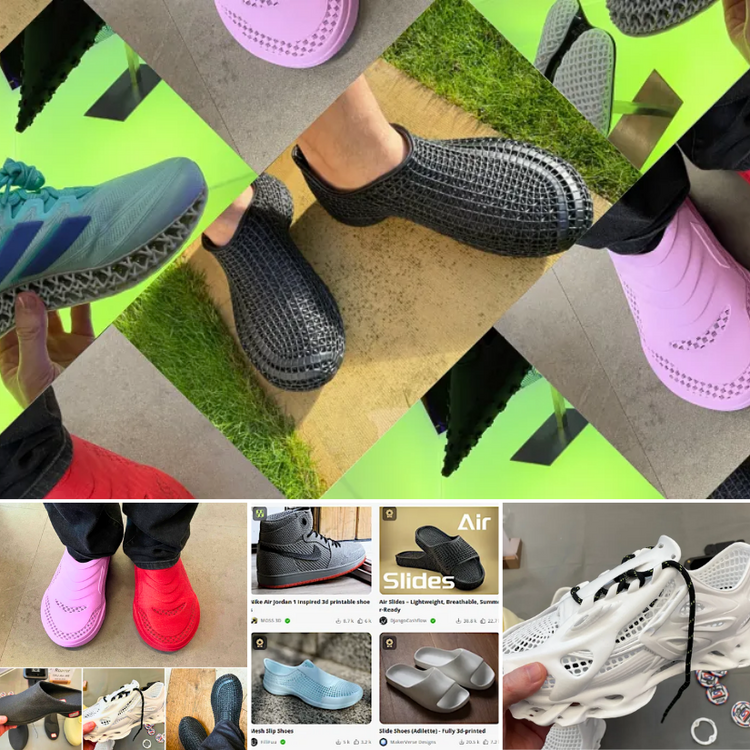
1 pointFinally completed the 3D Printed Shoes guide. Did some hands-on testing, talked to people wearing them, and explored both fully printed footwear and hybrid lattice designs. One thing I still need to complete is printing my own pair at home. https://3dwithus.com/3d-printed-shoes-guide As usual, I’ll keep updating this guide when needed as the technology evolves and more designs appear. If you think something should be added, feel free to post it below or start a new thread.
 1 point
 -
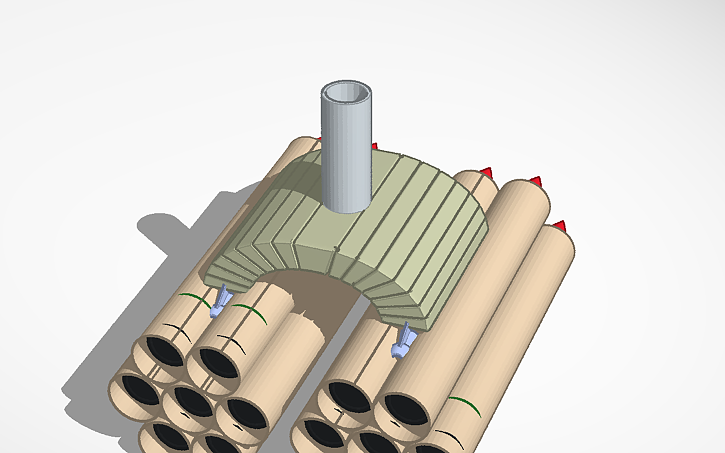
1 pointTo the 3d designers, makers, and innovators if you are listening. I think the most meaningful gifts are the ones that spark creativity. Fuel my passion for design and invention. Give a small inventor a 3d printer. I will invent solutions for a lifetime and I promise to print you something amazing in return!https://www.tinkercad.com/things/0OrmEl0sxv0-missile-launcher-design
 1 point
 -
1 pointCongratulations! 🎉 This post won 1 filament spool in the Contribute to Win - April 2026 giveaway. We will contact you shortly to arrange the delivery of the SUNLU filament spool. Giveaway Rules: https://3dwithus.com/forum/topic/973-contribute-to-win-monthly-giveaway
 1 point
 -
Congratulations! 🎉 This thread won 1 filament spool in the Contribute to Win - April 2026 giveaway. We will contact you shortly to arrange the delivery of the SUNLU filament spool. Giveaway Rules: https://3dwithus.com/forum/topic/973-contribute-to-win-monthly-giveaway
1 point
-
1 point
-
As of 08/26/25, we have over 200 spools listed 🤯 That's a very nice list, thanks! I will add the link to the guide as well!1 point
-
Will do! I just already have too many filaments opened up and waiting to be used. I am still waiting for some reusuable vacuum bags to arrive, so i can store them efficiently after printing.1 point
-
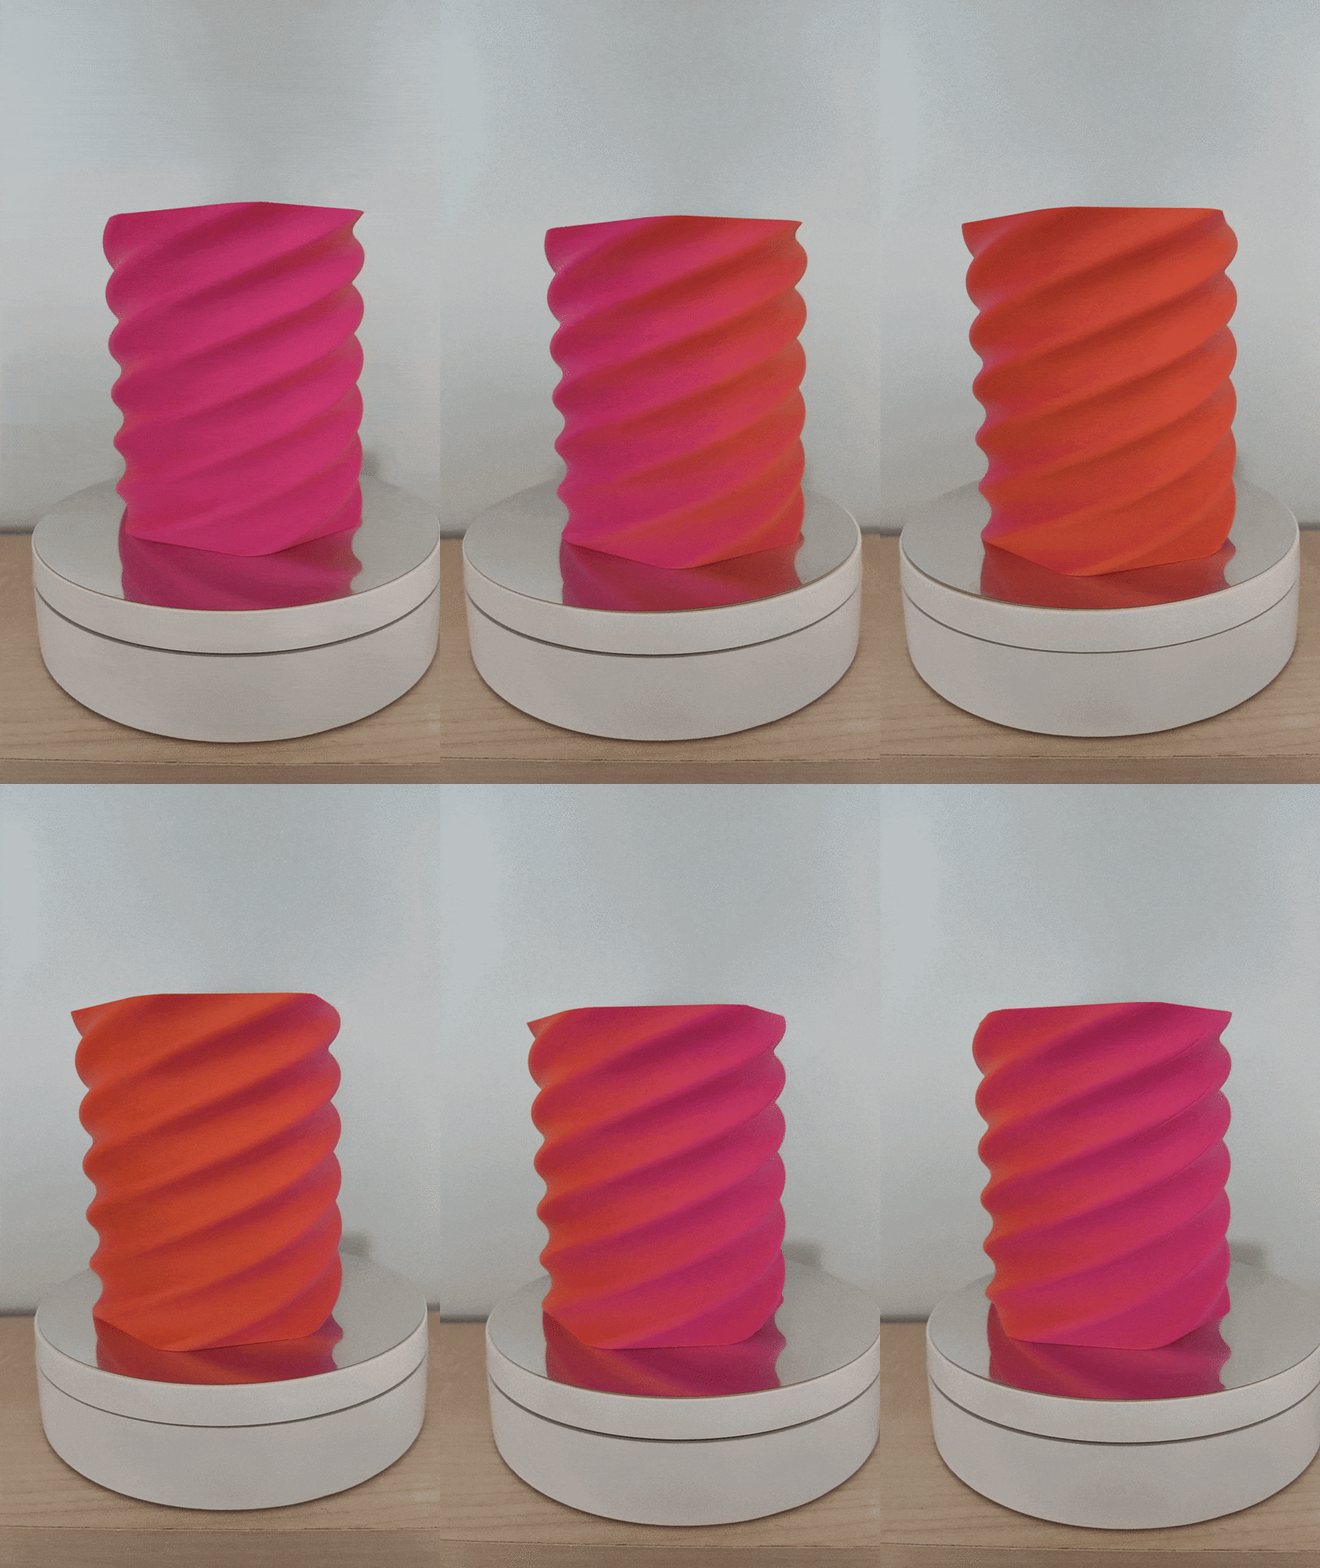
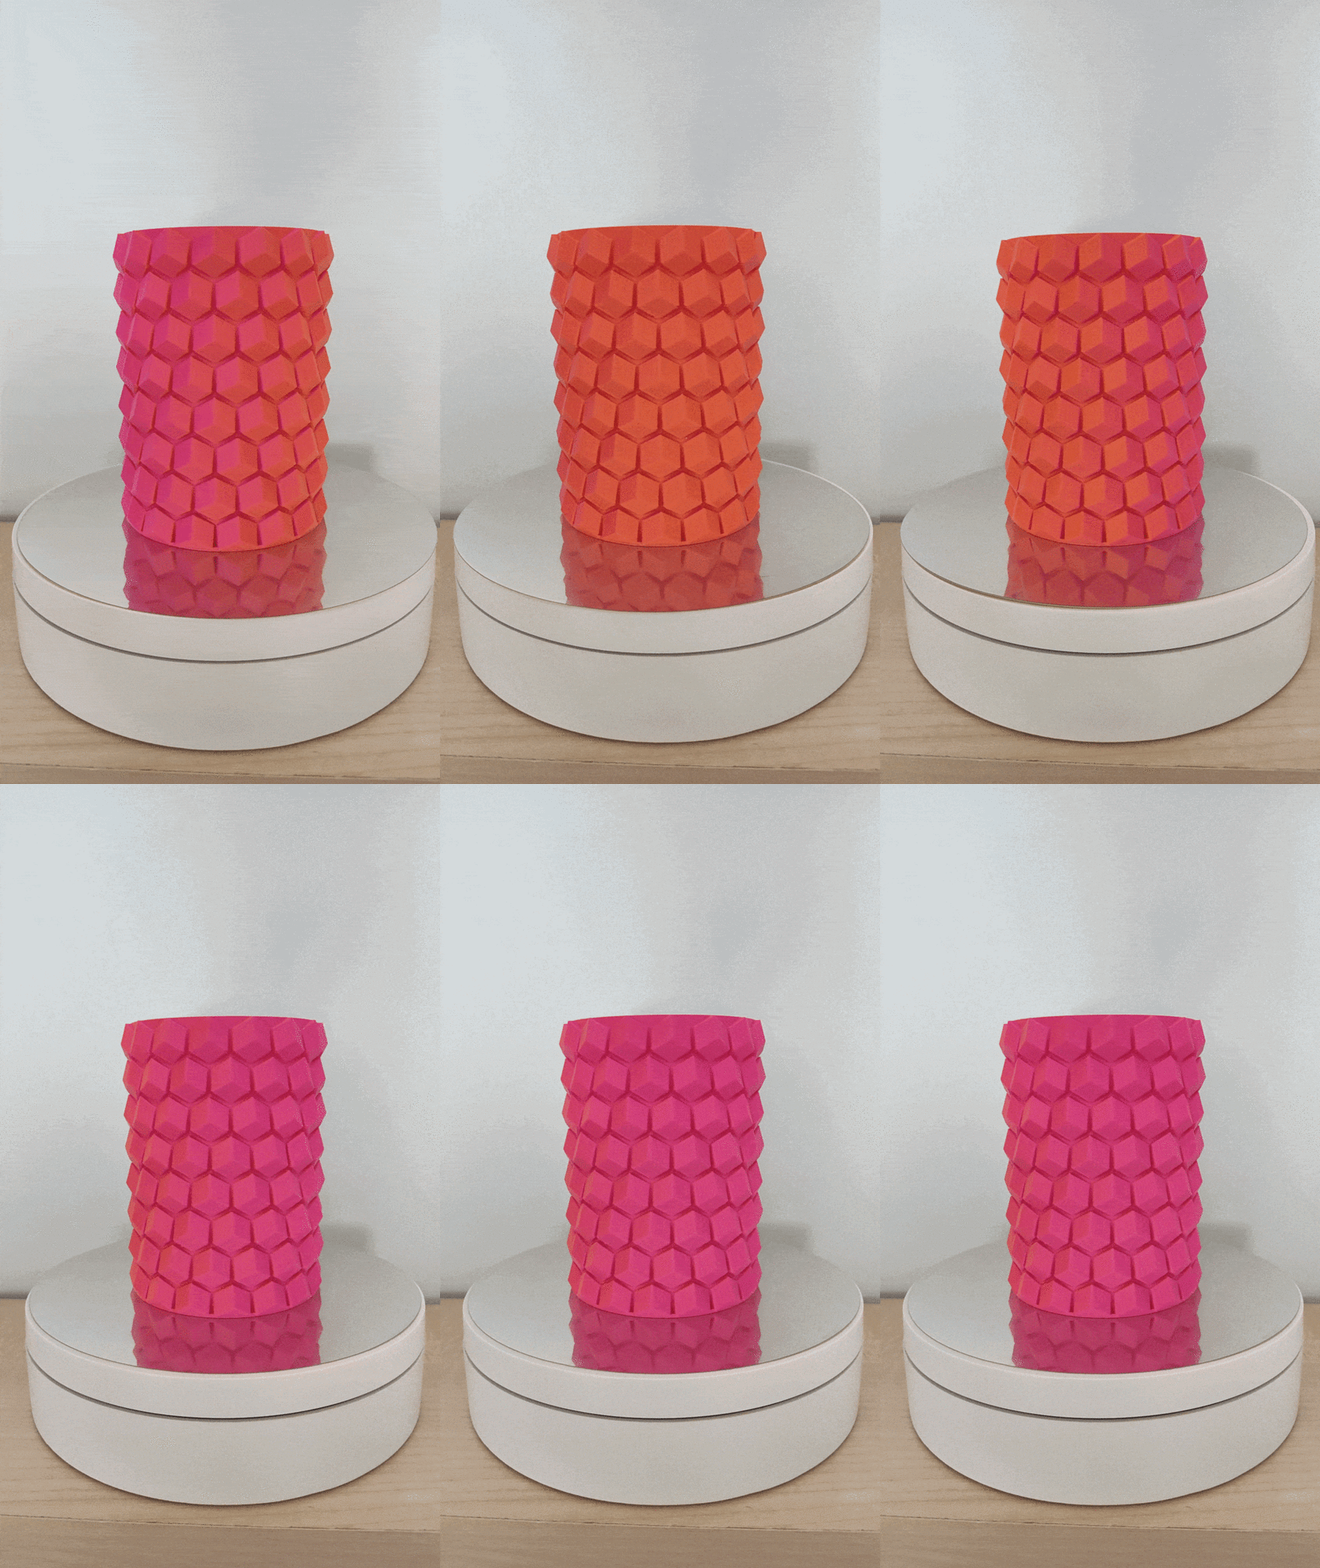
Hi Everyone! I would like to showcase the result of my latest project: A parametric Anti Sphere Pot They are made by carving out a cylinder using spheres placed in circular and linear patterns. These patterns can also be twisted around the Z-axis, resulting in some truly unique designs! Here are some of the pots i created with it: You can check out and download the demo models on Printables for free. I hope you like it :)
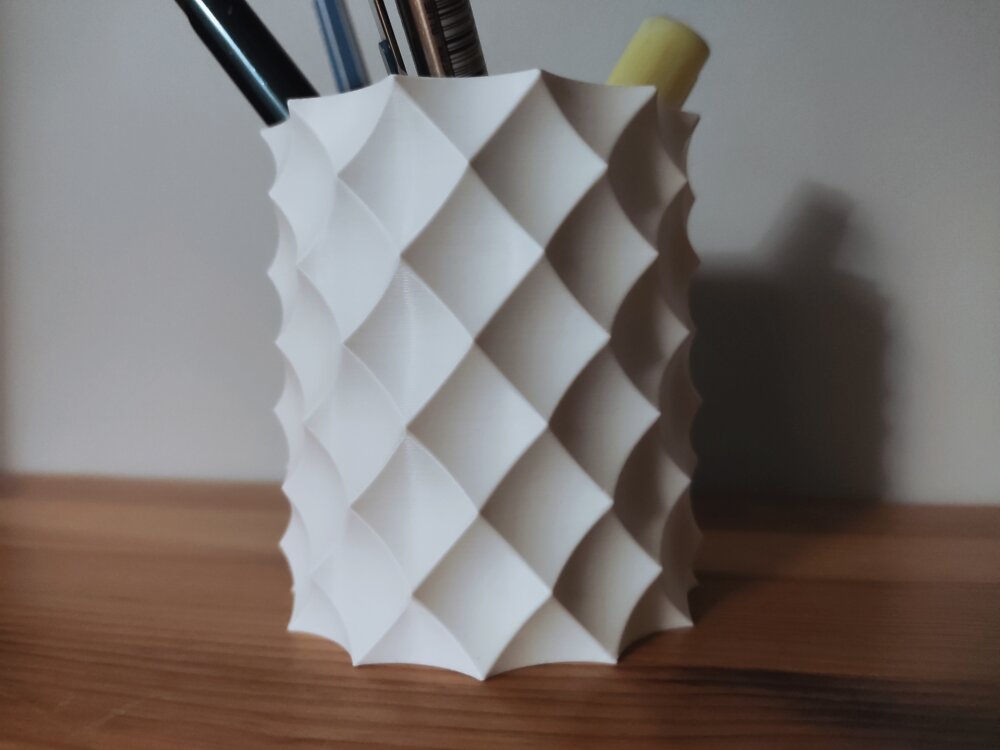
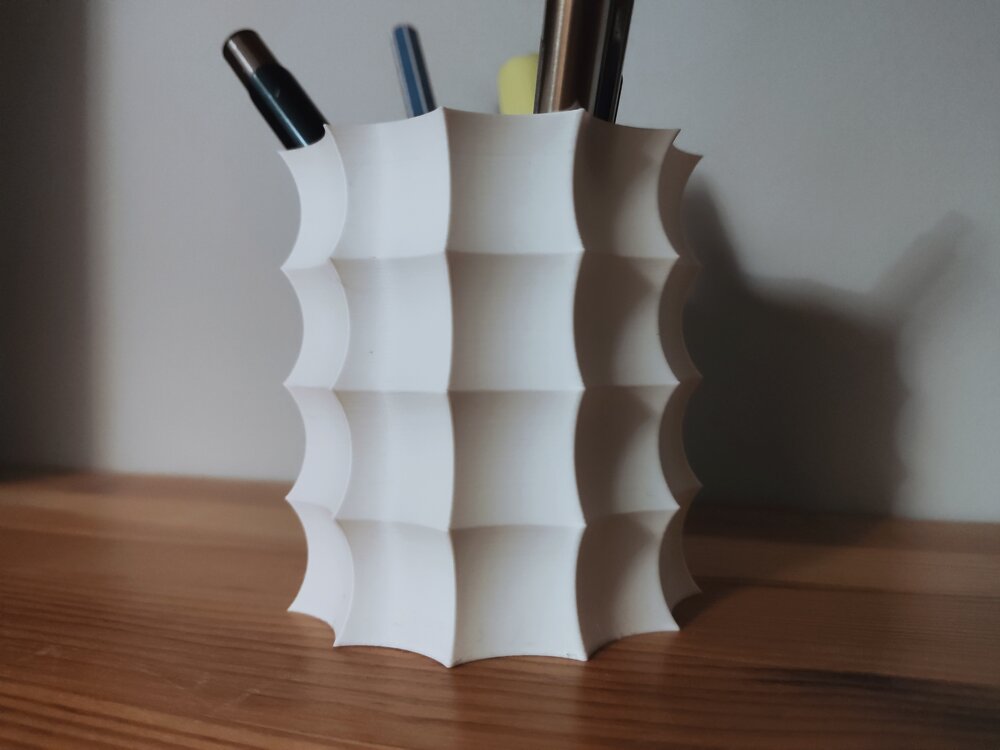
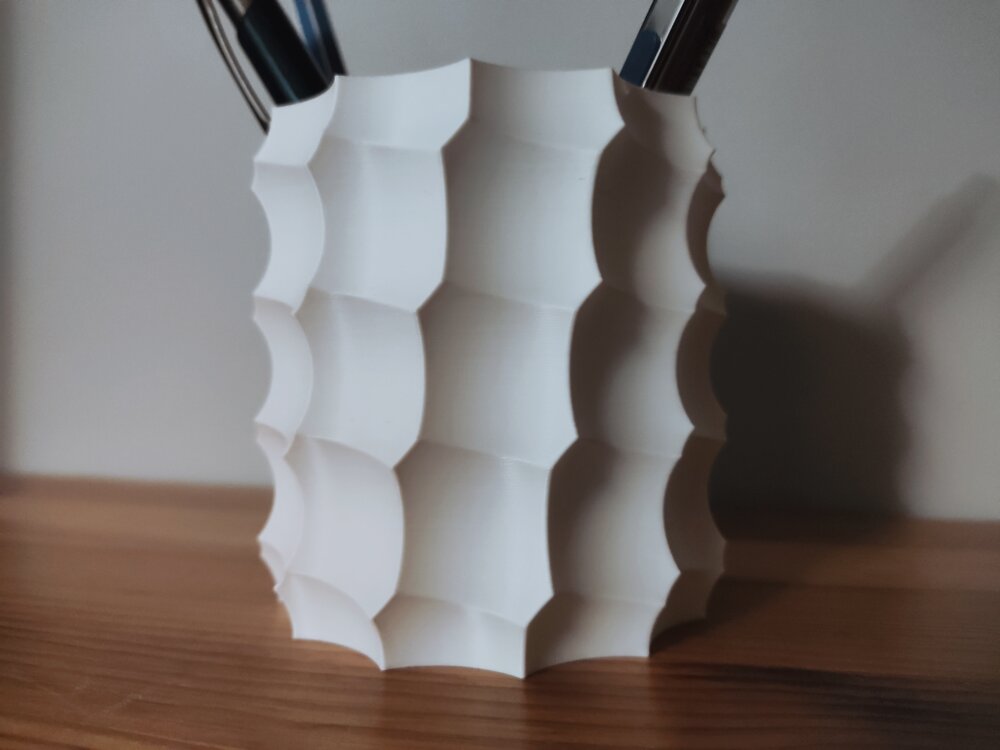
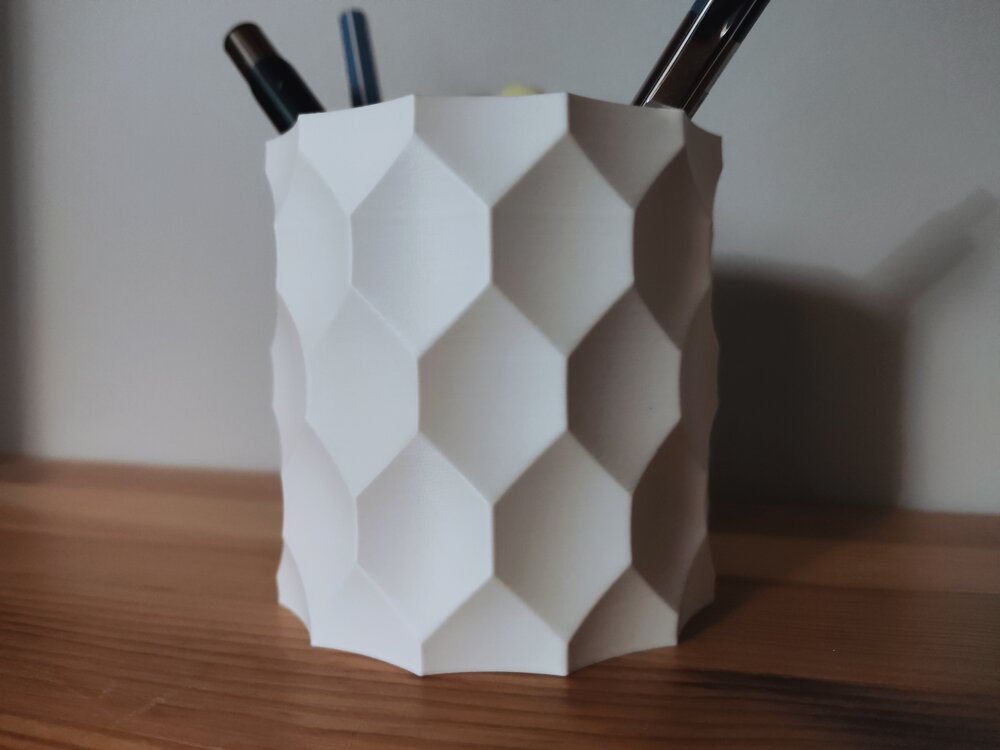
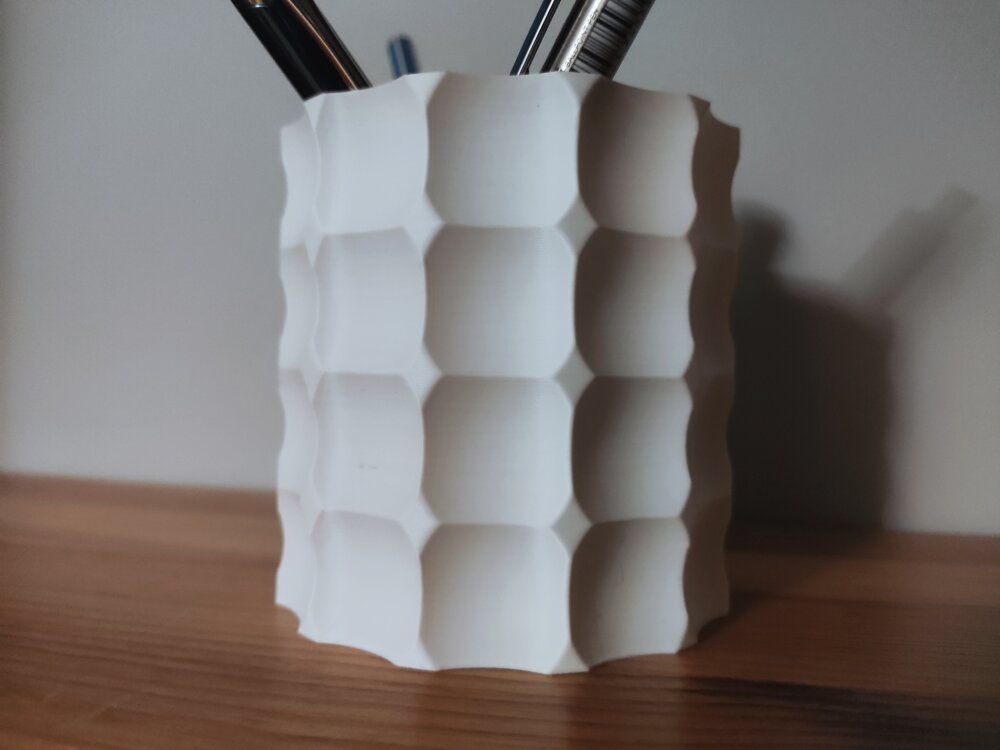
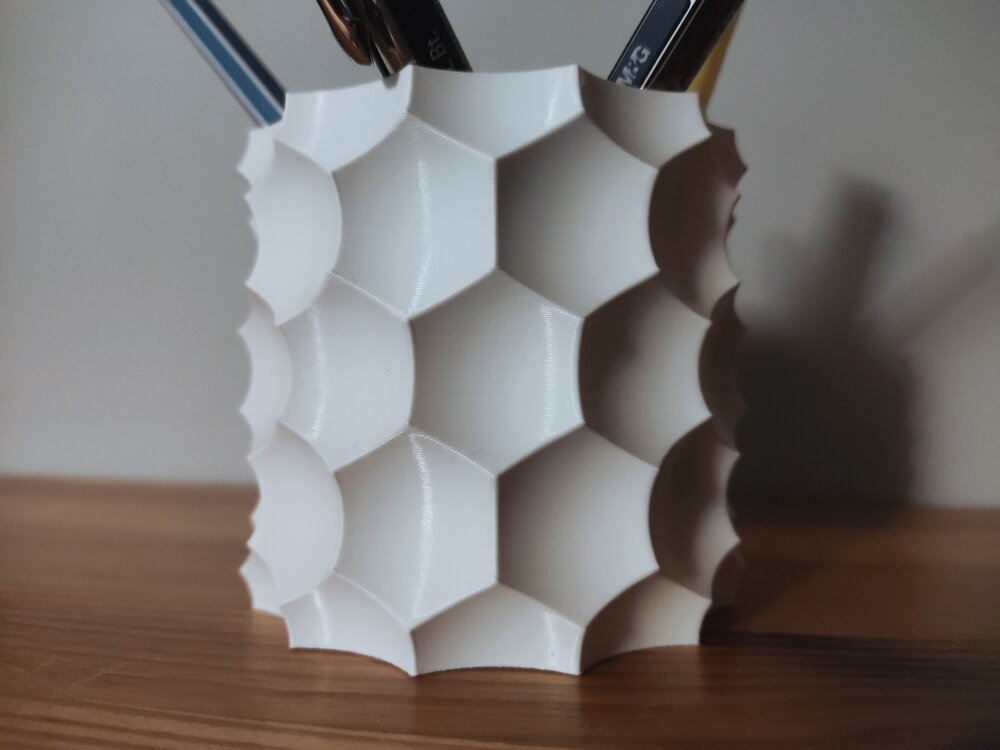
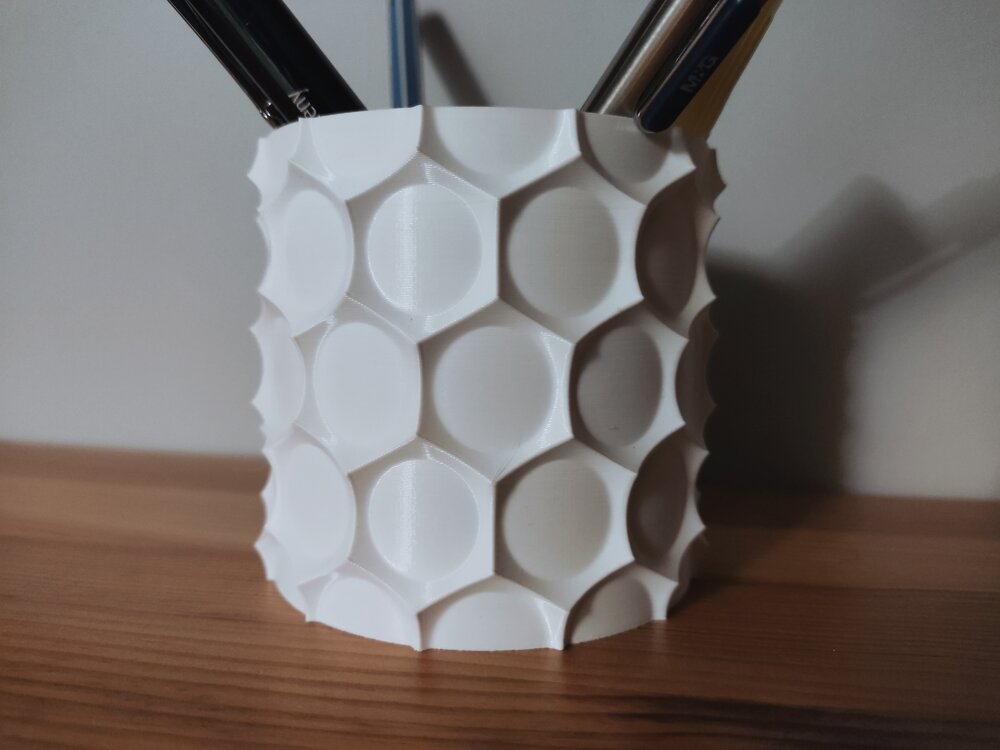 1 point
 -
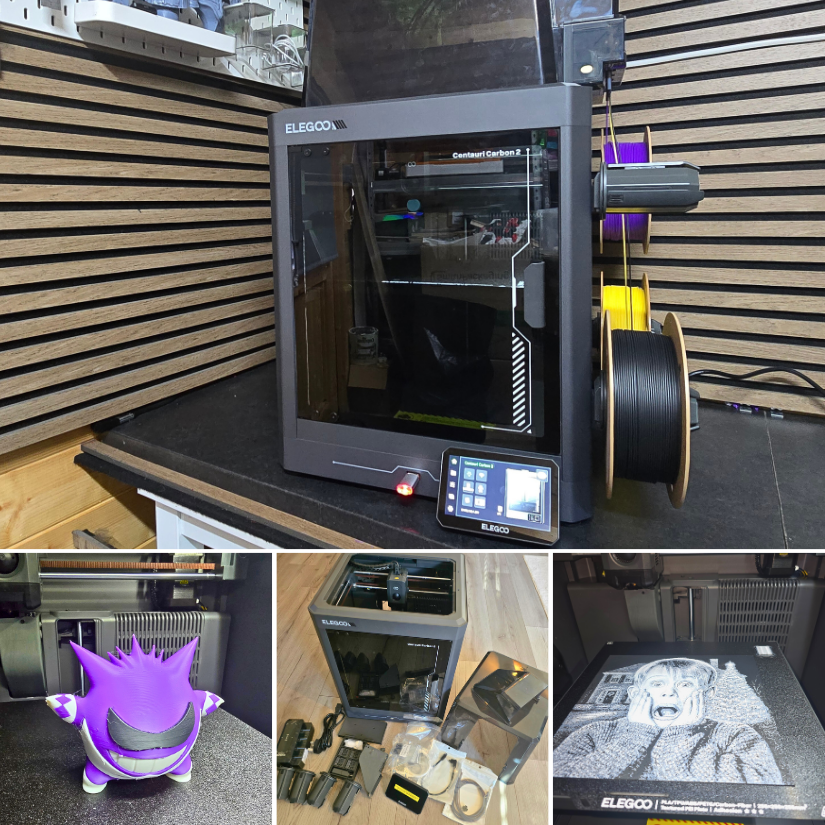
Here is the Elegoo Centauri Carbon 2 Combo evaluation guide and video. 📝 https://3dwithus.com/elegoo-centauri-carbon-2-combo-3d-printer-review 📹 https://youtu.be/f98-ntl3xb8 Featured: Nostalgic3DModels, 3DGlow If you have thoughts, questions, or want to share your own print results with the Centauri Carbon 2 Combo, feel free to post below.
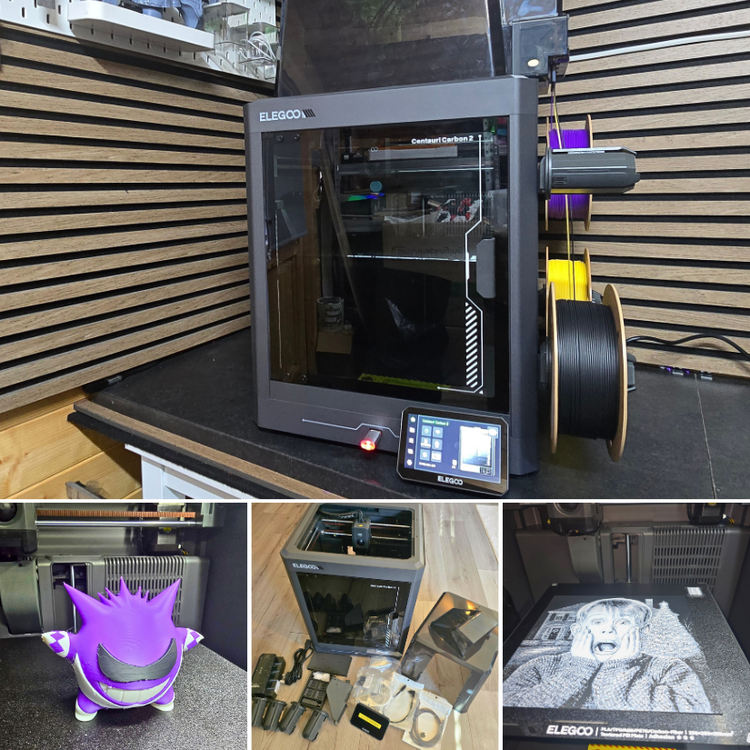 1 point
 -
1 pointCongratulations! 🎉 This thread won 4 filament spools in the Contribute to Win - January 2026 giveaway. We will contact you shortly to arrange the delivery of two SUNLU filament spools. Giveaway Rules: https://3dwithus.com/forum/topic/973-contribute-to-win-monthly-giveaway
 1 point
 -
Hi! I would like to showcase another project of mine: A Balance Tetris Game! How to play?Take turns by placing blocks on the base by either rolling the die for it or choosing a preferred block. If the tower collapses on your turn, you lose! Printing tips:Different wall count and infill % have great impact on the game. I used 2 walls and 15% for every piece. You can print the base with 0 infill, 0 top/bottom layers. Scale it to your preferred size! 50% works just fine as well! I also recommend scaling the tetris die up to 133% (20mm). I recommend printing the solid blocks and the base on a holographic plate. It gives them a great look (Check out the last few pictures)! How to customize your own:To use the project files (.FCStd) you will need FreeCAD, a free to use/download CAD software. After opening the project you will see on the left side all the folders with the models and parameters. When you are done just export the models one by one: Select one of the models, then press Ctrl + e or Top menu > File > Export... The parameters:BaseArcOffset: Offsets the (circle's) arc on the base piece. BaseTeethCount: The number of teeth (slots) on the base piece. EdgeLength: The size of the blocks. GridWallWidth: The wall width of the Grid Blocks. (Solid blocks are not affected) DiceEmbossDepth: The depth of the emboss on the dice PedestalLength: The horizontal length of the pedestal. (The width is always 3 * EdgeLength) PedestalSlotDepth: The depth of the slot the base goes into. PedestalHeight: The height of the pedestal. The project is not foolproof, setting negative/incorrect parameter values might mess up the geometry completely! Happy printing and customizing!I hope you like it! The project is available here: https://www.printables.com/model/1549635-balance-tetris-customizable Other pictures:
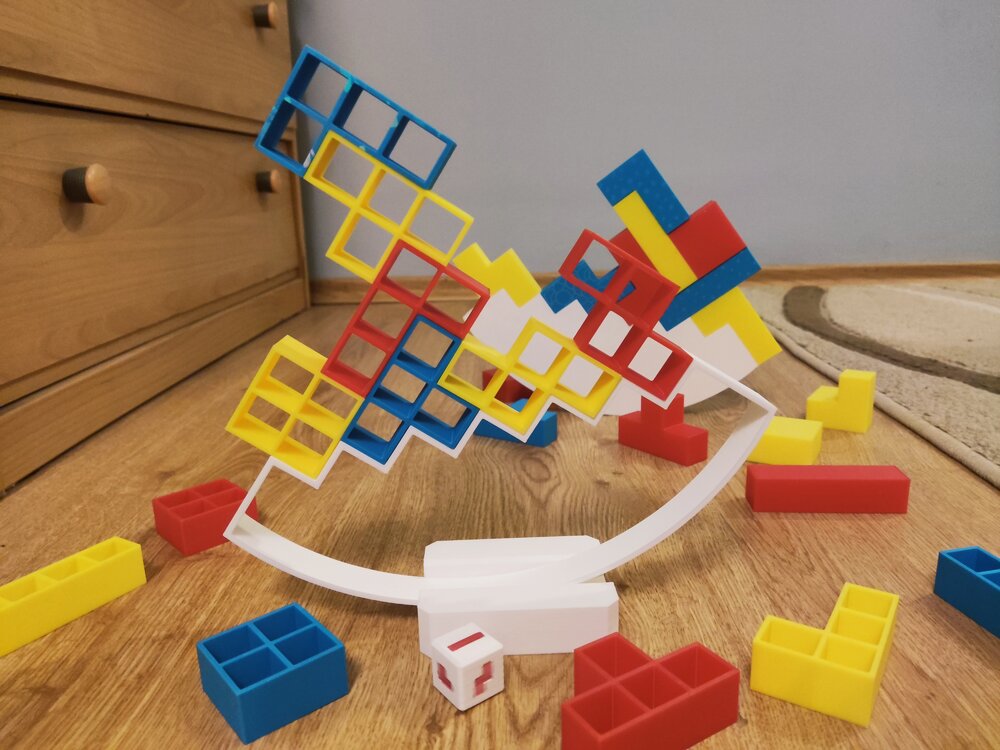
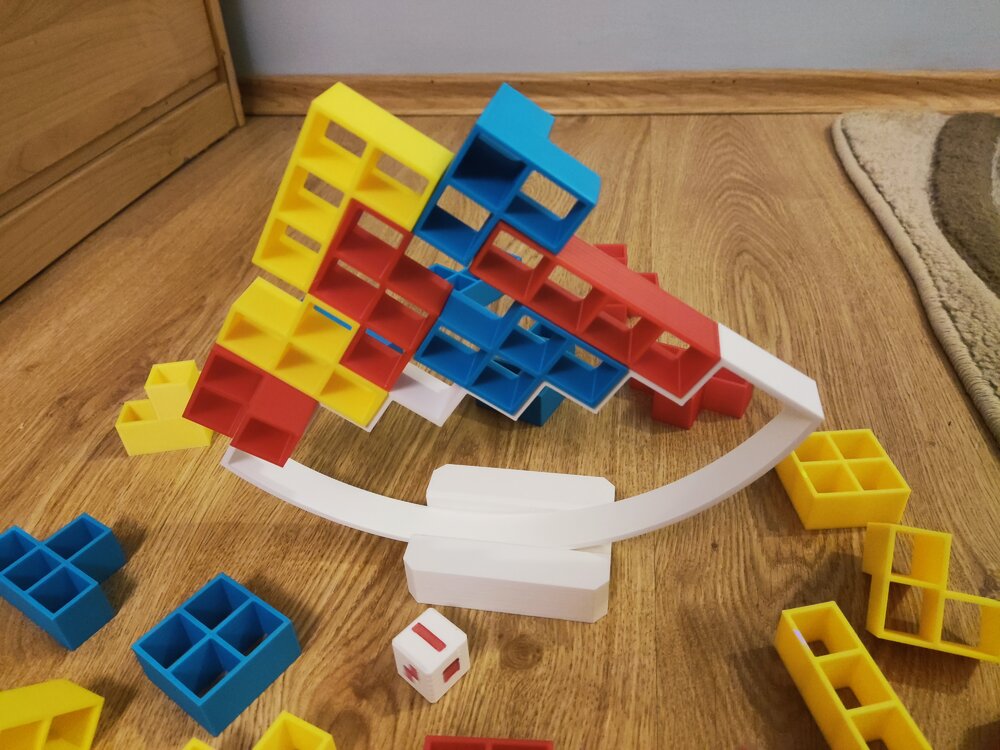
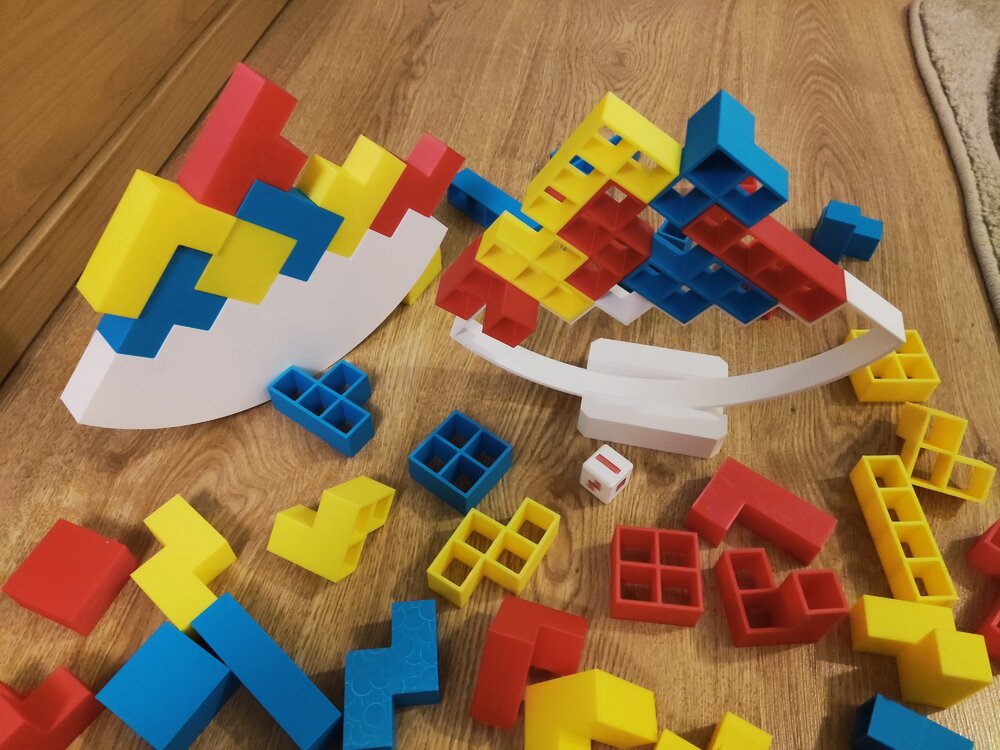
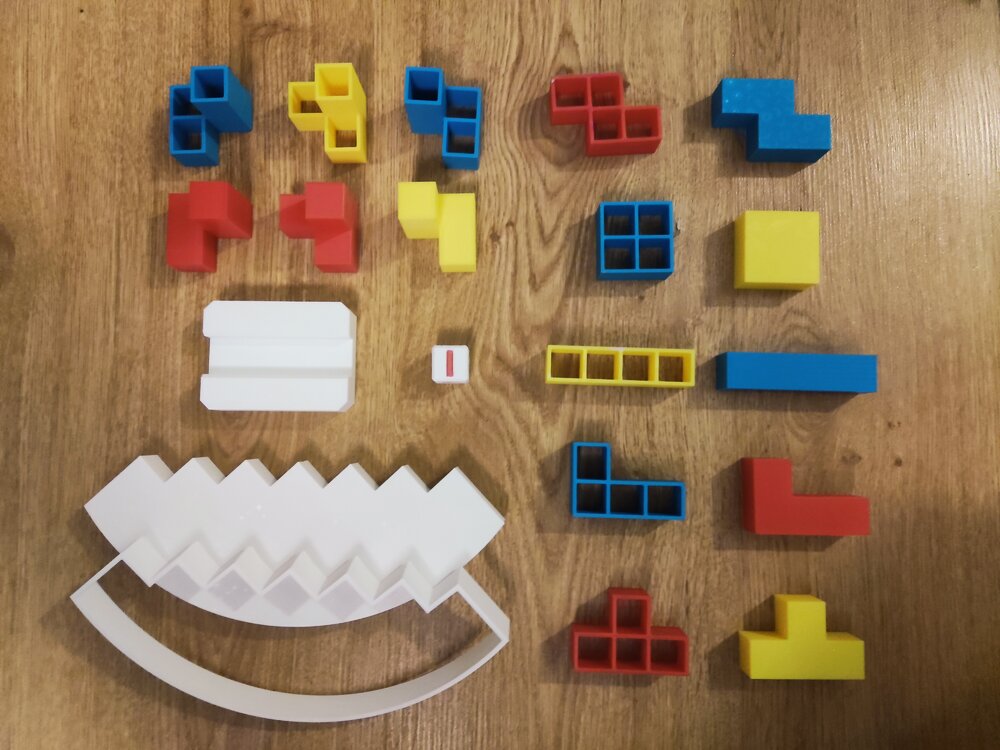
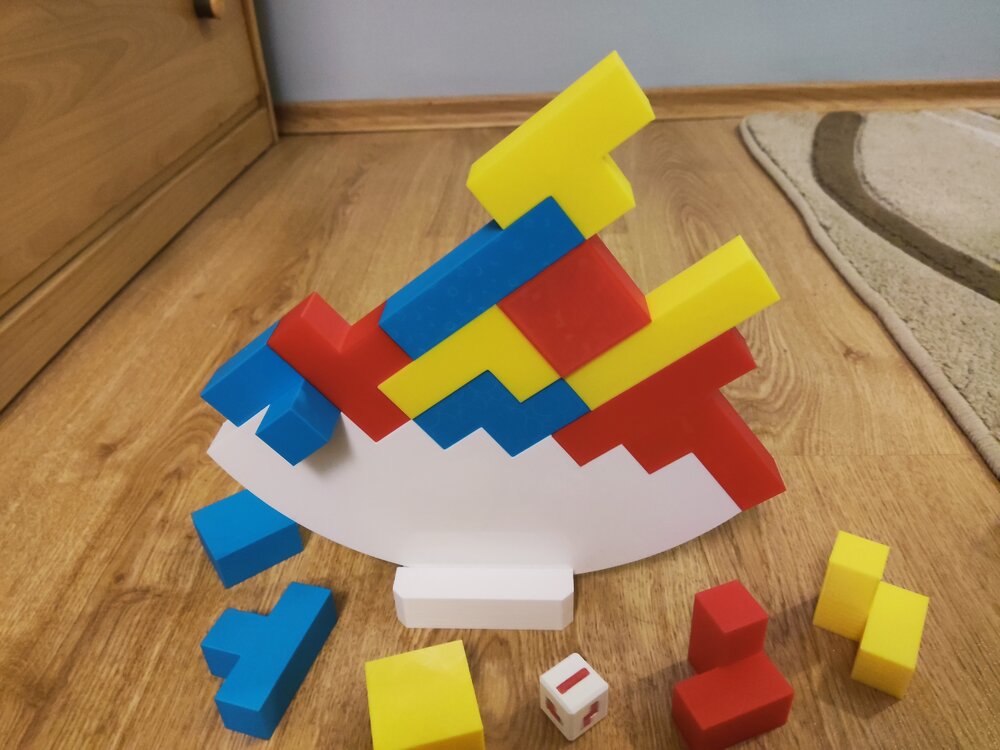
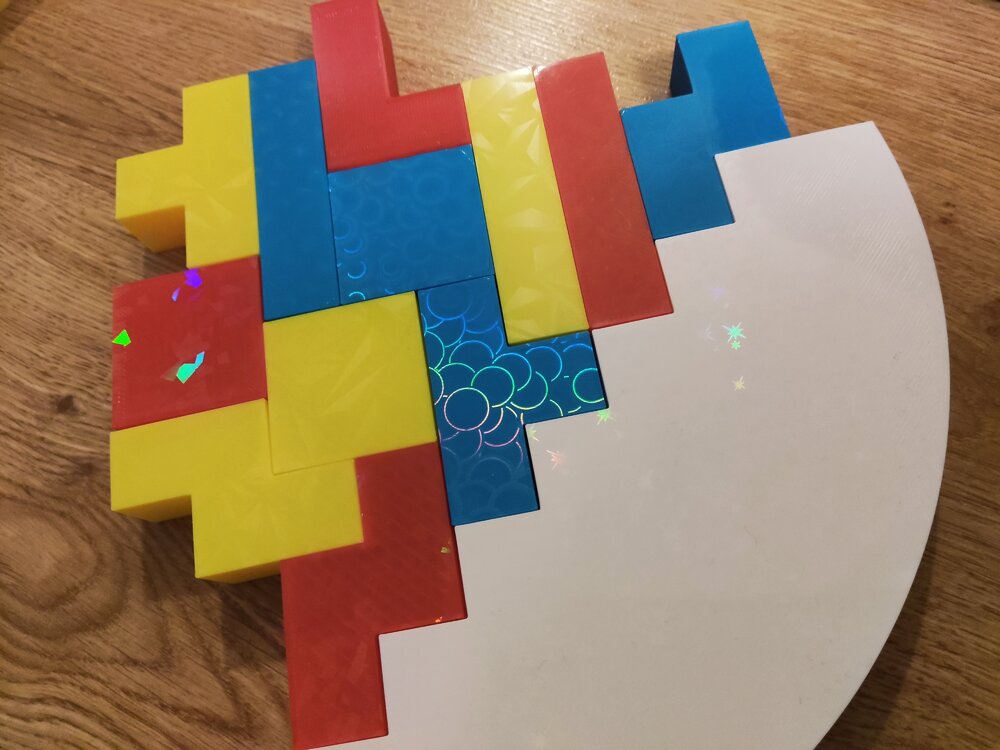
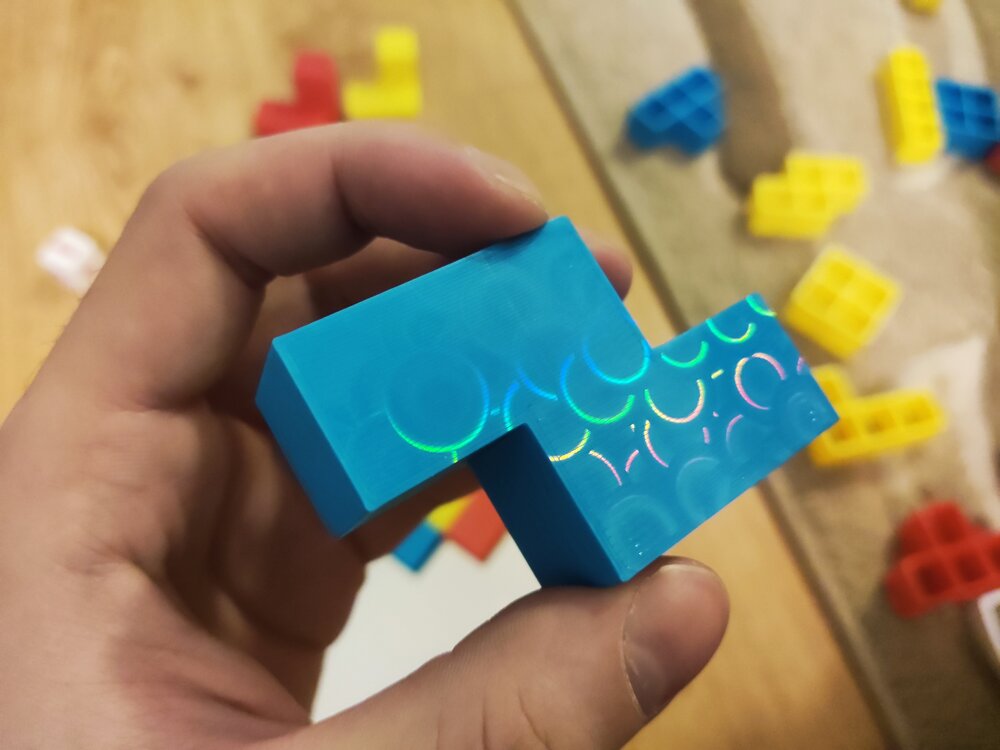
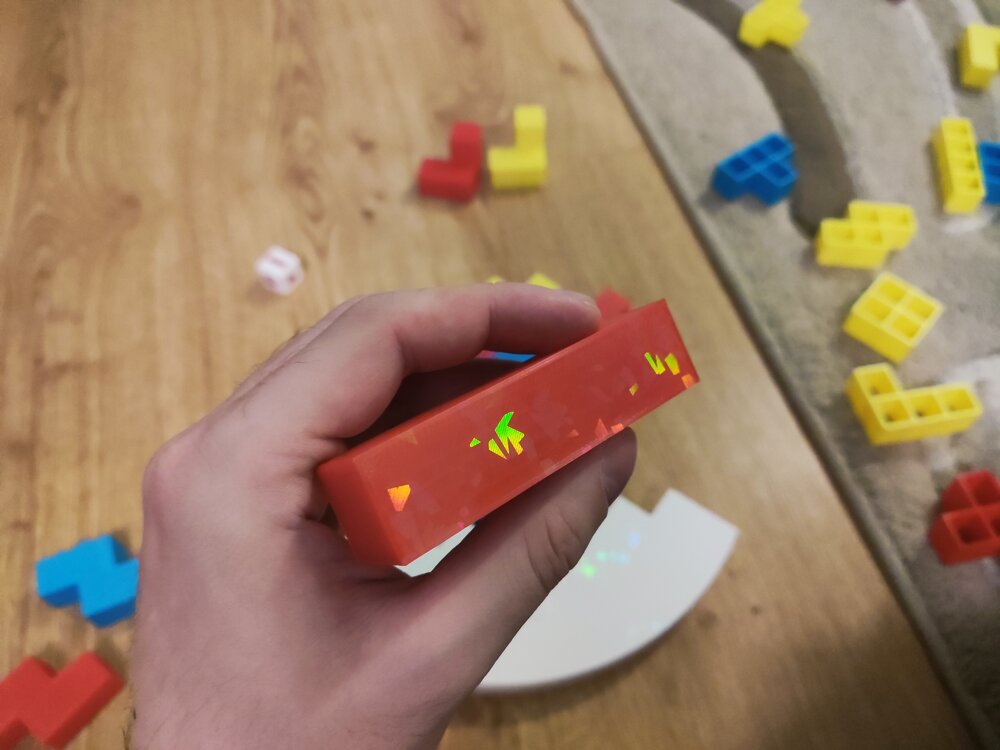
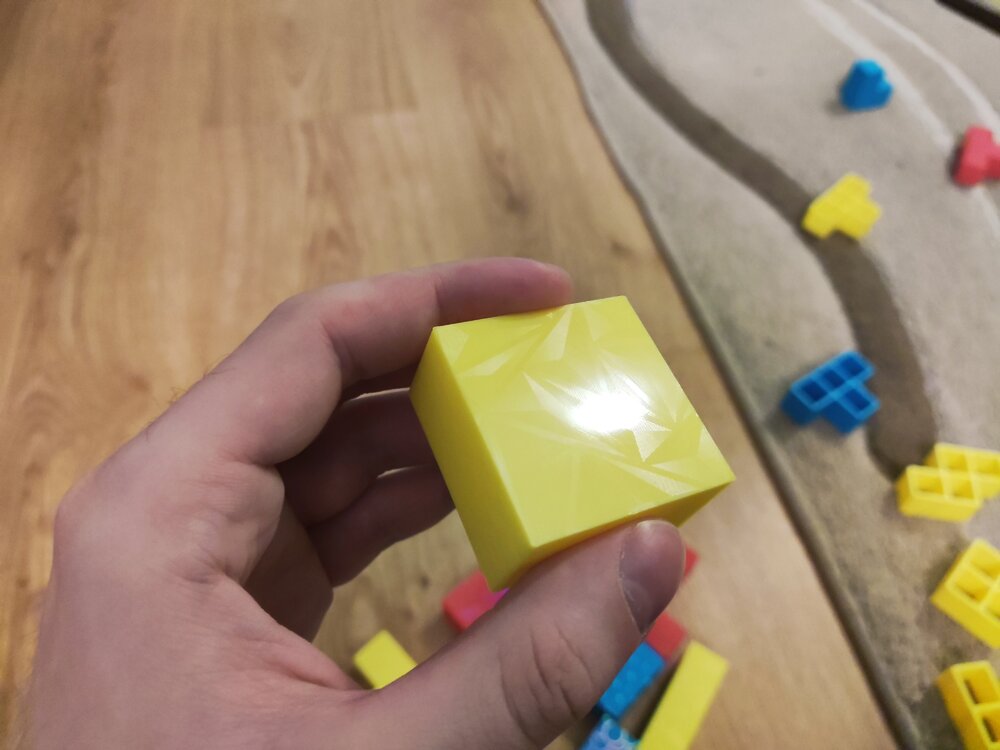
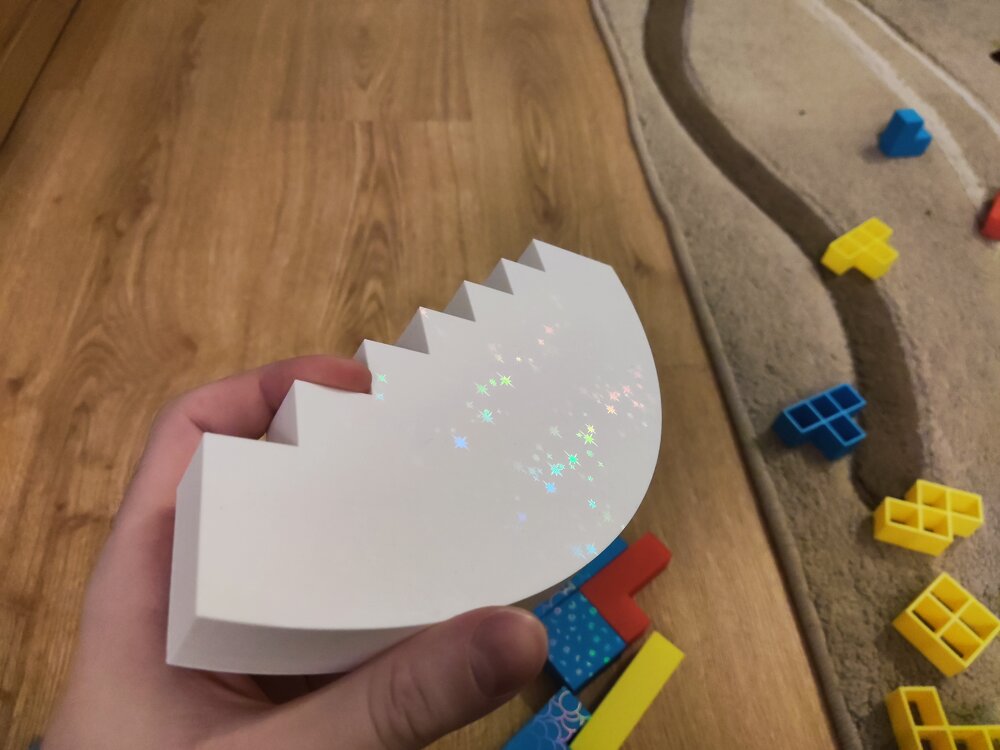 1 point
 -
Thanks! The die wasn't meant to be printed in multicolor :D, I printed it out in 1 color and then colored the shapes in with a sharpie. But yours came out great!1 point


(1).jpg.f83b9d8459fc85bdd4f31594b192df4a.jpg)