If you have spent any time browsing popular 3D models, you have probably seen the Honeycomb Storage Wall sooner or later. It is one of those projects that looks simple at first, but then slowly takes over your workshop, desk, tool corner, or even the wall behind your TV.
The idea is straightforward: print modular honeycomb panels, mount them to a wall, and then add hooks, holders, trays, bins, and all kinds of small attachments wherever you need them. The result is a flexible storage system that can grow with your tools, your printer, and your patience.
In this guide, I will go through the basic parts of the Honeycomb Storage Wall system, what to print, what material to use, how to mount it correctly, and a few community examples that show how far this project can go.
Table of Contents (Jump to a Section)
What Is the Honeycomb Storage Wall?
The Honeycomb Storage Wall, often shortened to HSW, is a modular 3D printed wall storage system. It is made from multiple honeycomb-shaped panels that are attached to a wall. Once the panels are installed, you can add printed hooks, holders, bins, trays, and tool mounts wherever you need them.
The project can be printed on many budget FDM 3D printers, as long as you choose a panel size that fits your build plate. For very long or repeatable sections, it could also be an interesting use case for conveyor belt 3D printers, although most makers will probably build the wall from smaller modular tiles.
The original Honeycomb Storage Wall by @RostaP became one of the most popular functional 3D printing projects on Printables. At the time of writing this guide, it had over 1,200,000 views, 270,000 downloads, 60,000 likes, and 3,000 remixes. That is not bad for a wall full of holes.
It was originally intended for workshop and garage walls, but there is nothing stopping you from using it elsewhere. Tool wall? Yes. 3D printer accessory wall? Of course. Gaming setup wall? Apparently also yes. Cable management board? Why not.
Main Parts of the System
The Honeycomb Storage Wall system is built from a few main part types:
- Honeycomb segments – the main wall panels.
- Fasteners and mounts – parts that connect the panels and attach them to the wall.
- Inserts – small parts that lock into the honeycomb slots.
- Holders, hooks, trays, and accessories – the parts that actually hold your tools and objects.
You do not need to understand every remix before starting. The basic idea is simple: print the wall, mount the wall, then print the holders you need.
Honeycomb Segments – Generator
The honeycomb segments are the base panels of the system. These are the parts that form the visible wall. They are usually printed as repeatable modules, and then placed next to each other to create a larger storage area.
Depending on your printer’s build volume, you can choose smaller or larger segments. If your printer has a small bed, print smaller tiles. If you have a large-format printer, you can print bigger sections and reduce the number of joints.
There are also customizable wall generators online, which are useful if you need a specific size or unusual shape. For example, you may want a panel that fits around a shelf, door frame, desk edge, or a small awkward corner where nothing else fits properly.
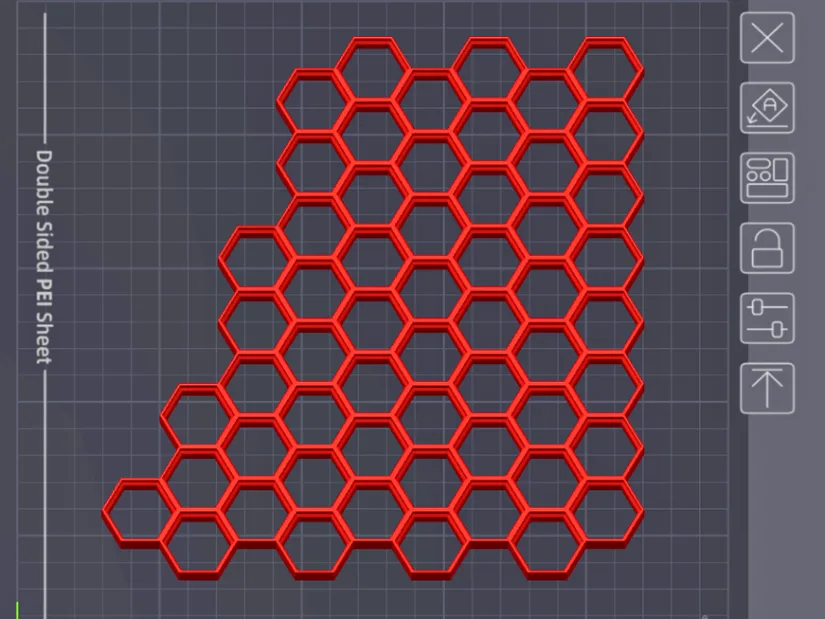
One example of a customizable Honeycomb Storage Wall tile generator can be found here: Simple Fully Customizable HSW Tile Generator on MakerWorld
Fasteners and Mounts
Fasteners and mounts are the parts that hold the honeycomb segments together and attach them to the wall. This is the part of the project where it is worth spending a bit more time, because a badly mounted wall is not very useful. Or safe.
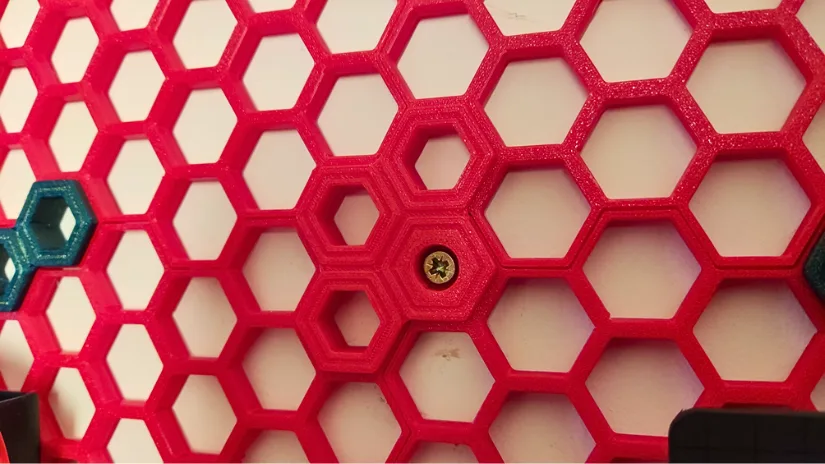
©3DWithUs – Print and Photo: Dimand Márton
There are several types of fasteners. Some are used on the edges of a panel, while others connect multiple panels together. For example, a 4-way fastener can join several honeycomb segments while also providing a mounting point for a screw.
A good approach is to mount at least three corners of each honeycomb segment to the wall. When joining multiple segments, use 2-way or 4-way fasteners to keep everything aligned and connected.
For mounting, you will usually need:
- M3 screws, depending on the specific fastener design
- A drill
- Wall plugs or anchors suitable for your wall type
- A level or measuring tool
- Some patience, which sadly cannot be 3D printed yet
Make sure the screws and wall anchors are suitable for the weight you plan to hang. A few lightweight tools are one thing. A fully loaded workshop wall is another.
Inserts and Attachments
Inserts are the small connector parts that allow holders and accessories to lock into the honeycomb wall.
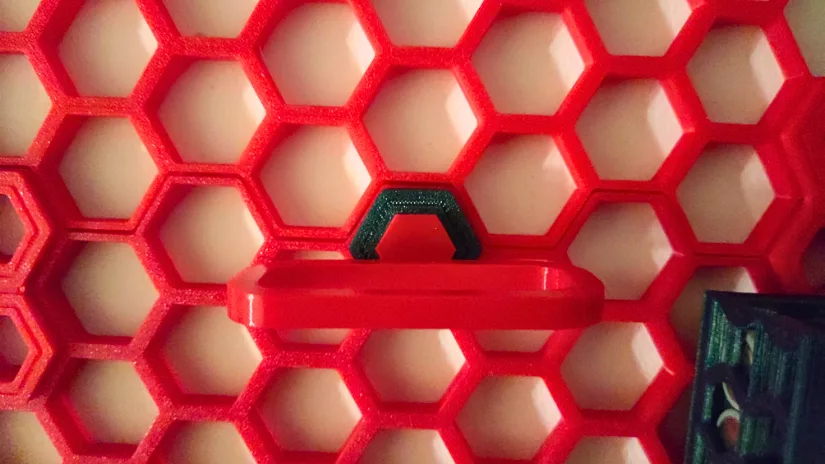
©3DWithUs – Print and Photo: Dimand Márton
In general, there are two common insert styles:
- Direct inserts – these go directly into the honeycomb slot.
- Hollow insert systems – these use an insert that stays in the wall, and the holder or accessory slides into that insert.
In terms of strength, both systems can work well. The choice mostly depends on the holder design and what you prefer to print. Many remixes are designed for one of these insert systems, so check the model description before printing a full batch.
The hollow insert approach can be convenient if you plan to move things around often. You can leave the insert in place and swap the attached holder more easily. Direct inserts are simpler and are often enough for basic hooks and holders.
Material Choice: PETG, PLA, or Something Stronger?
For this project, PETG or a sturdier material is highly recommended, especially for the main wall segments, fasteners, mounts, and load-bearing holders.
PLA is easy to print, but it can be too brittle for this kind of project. During assembly or mounting, PLA parts may crack or shatter, especially around screw holes or clips. That does not mean PLA is completely useless here, but it is not the safest choice for the main structure.
PLA+ or Tough PLA may be acceptable for smaller inserts or light-duty holders, but for the wall itself I would still choose PETG. It is widely available on Amazon in different colors. It has better toughness and is less likely to snap during installation. The PETG and PLA featured in this article were sent by SUNLU after I won the spools in a forum giveaway.
- PETG: Recommended for most parts.
- PLA: Not ideal for structural parts because it can be brittle.
- PLA+ / Tough PLA: May be okay for some inserts or light holders.
- ABS / ASA: Can work, but printability and warping depend on your printer setup.
If the wall will be in a garage, shed, or anywhere with temperature changes, material choice becomes even more important. PLA can soften in heat, so keep that in mind before filling a sunny wall with your favorite tools.
3D Printing and Mounting Tips
The exact print settings depend on the model you choose, your printer, and your material, but there are a few general tips that apply to most Honeycomb Storage Wall parts.
- Use enough walls/perimeters. The strength of these parts often comes from the outer walls, not just infill.
- Do not go too low on infill for mounts. Fasteners and screw points need enough material around them.
- Check bed adhesion. Larger honeycomb panels can take a while to print, so failed corners are annoying.
- Print one test insert first. Before printing 30 inserts, print one and check the fit.
- Keep tolerances in mind. If your printer over-extrudes, clips and inserts may become too tight.
For panels, I would rather have a slightly longer print with stronger walls than a fast print that cracks when I try to mount it.
Mounting the Wall Correctly
You can mount the honeycomb segments one by one, or pre-connect some sections with fasteners and mount them together. Both methods can work.
Mounting one segment at a time gives you more control and makes it easier to keep the wall aligned. Mounting several connected segments together can be faster, but it may be harder to handle, especially if the section is large.
Before drilling, place the panels against the wall and check the layout. Think about what you actually want to store. Tall tools, screwdrivers, calipers, pliers, trays, and cable holders may need different spacing.
A few things to check before making holes:
- Is the wall area large enough for future expansion?
- Will long tools hang down too far?
- Can you reach the top row comfortably?
- Is there enough clearance around doors, shelves, or machines?
- Are you drilling into a safe area with no hidden wires or pipes?
Once you are happy with the layout, mount the segments using the correct fasteners and suitable wall fixings. Do not rely only on the printed plastic if the wall will hold heavy tools.
Correct Orientation and Correct Side
This part is very important. The Honeycomb Storage Wall has to be mounted in the correct orientation and on the correct side.
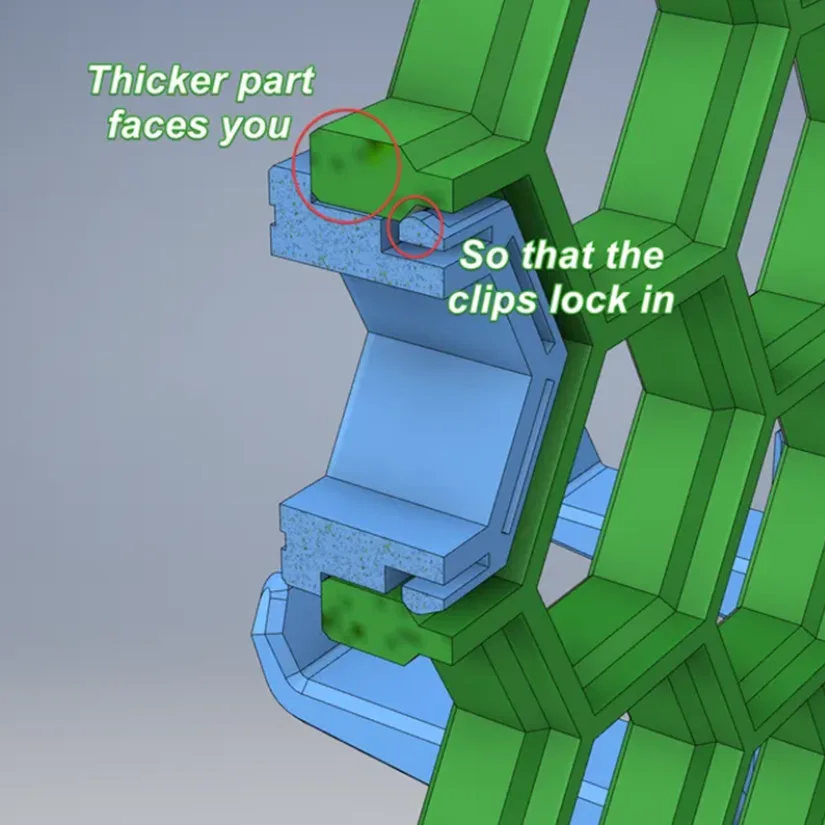
- Correct orientation: The hexagonal slots should sit on one of their edges horizontally.
- Correct side: The thicker part faces you.
The thicker side needs to face outward so the clips can lock in properly. If you mount the wall backwards, the inserts and holders may not work as intended. That would be a very annoying thing to discover after drilling everything into place.
So before you start mounting, test one insert or holder on the panel and check that it locks in correctly. Then check again. Then maybe check once more, because future you will appreciate it.
Example Holders and Accessories
There are already many community-made holders and remixes available for the Honeycomb Storage Wall. The most useful starting points are usually simple hooks, multipurpose holders, small containers, screwdriver holders, bit holders, and tool-specific mounts.
- Parametric HSW hooks for general hanging
- Multipurpose holders for pliers, cutters, screwdrivers, and cylindrical tools
- Small containers and swivel trays for loose parts
- Battery holders for AA and AAA batteries
- Hex key, hex bit, and screwdriver holders
- Tool-specific mounts for calipers, tape measures, thermometers, pliers, and hammers
- etc.
This is where the project becomes fun. You can start with simple hooks and then gradually replace them with better holders designed for each specific tool.
As more and more HSW holders and accessories are being published, it is usually worth searching for the specific part you need together with the “HSW” keyword. For example, search for things like “HSW caliper holder”, “HSW screwdriver holder”, or “HSW battery holder”.
I have also shared a longer list of Honeycomb Storage Wall models and accessories in the related 3DWithUs forum, including some of the parts used in my own setup.
Community Examples
The maker community has taken the Honeycomb Storage Wall far beyond basic workshop storage. Check their use cases and remixes on Printables.
One example is a full workshop wall setup, with a large honeycomb panel mounted behind a workbench. It holds tools, accessories, rolls of tape, drivers, measuring tools, and small items all in one visible place.
Another example uses the honeycomb wall as part of a gaming setup, mounted under a TV. Instead of workshop tools, it holds controllers, headphones, and handheld consoles. It is the same basic system, just used in a different environment.
There are also examples where the HSW system is used for cable management and small electronics. A panel can hold network devices, power adapters, cables, and other awkward boxes that usually turn into a tangled mess.
That is probably why this project works so well. It does not force one specific use case. It gives you a printable structure, and then you decide what problem it solves.
Have questions? Feel free to ask in the comment section below.
For a wider discussion or to share your own Honeycomb Storage Wall prints, join us in the forum:
Final Thoughts
The Honeycomb Storage Wall is one of those 3D printing projects that makes a lot of sense once you start using it. It is practical, modular, expandable, and easy to adapt to your own space.
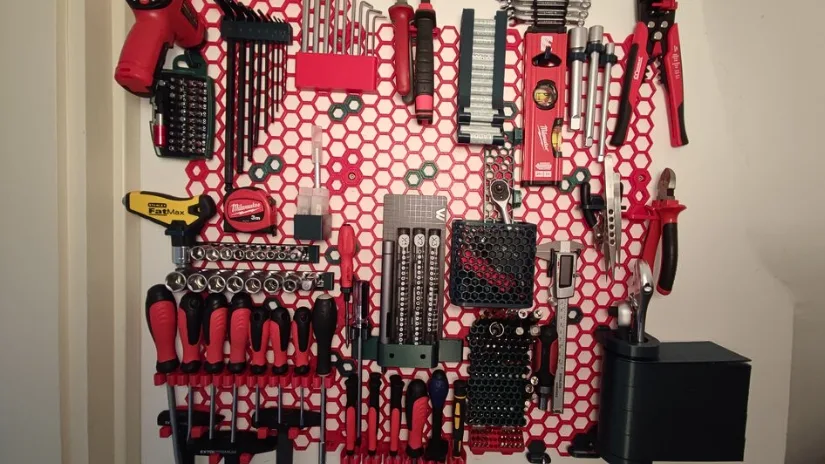
©3DWithUs – Print and Photo: Dimand Márton
For a workshop or 3D printing corner, it can help keep tools visible and within reach. For a desk or gaming setup, it can become a clean way to mount accessories. For cables and electronics, it can turn a messy area into something slightly more respectable.
I would recommend printing the main parts in PETG or a similarly tough material, testing inserts before printing a large batch, and taking your time with the mounting. Once the base wall is installed correctly, the rest of the project becomes much more enjoyable.
And then comes the dangerous part: finding excuses to print just one more holder.