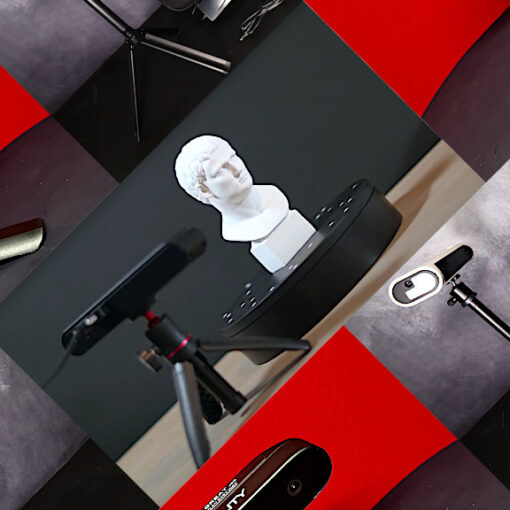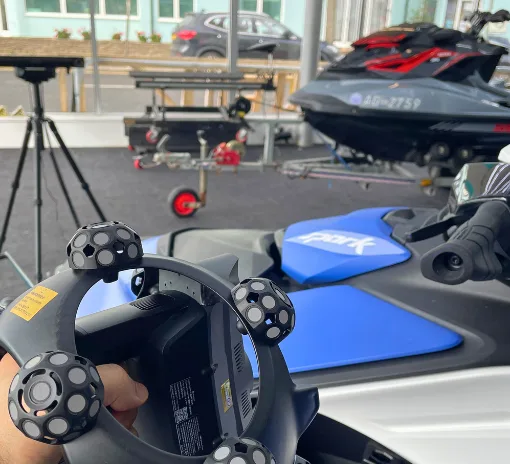
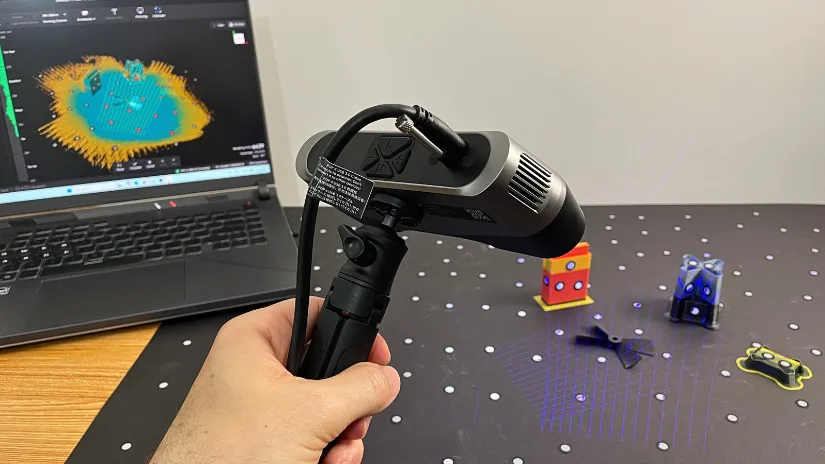
The Revopoint POP 4 is a compact 3D scanner that combines blue laser and infrared scanning modes for different object types and workflows. In this hands-on review, I tested it with several object scans, including foot scans, a color scan, a scan-to-print shoe-stretcher experiment, and a tiny broken RC boat propeller that pushed the scanner close to its practical limits. As usual, the article ends with a review summary and a short Pros and Cons section.
Table Of Contents (Jump to a Section)
Where to Buy
Price from $755
Compare the Prices & Bundles:
Official Website | Amazon
What’s Included – Accessories
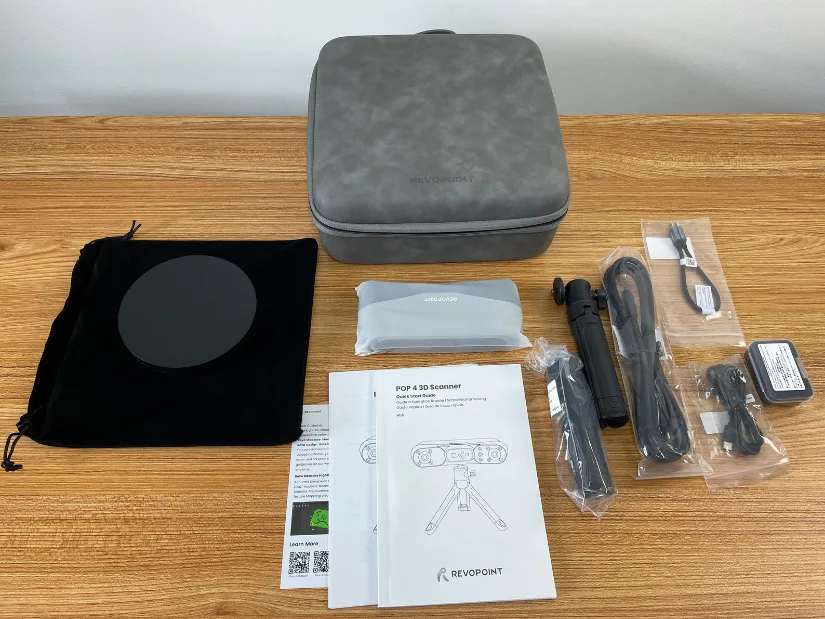
©3DWithUs – Print and Photo: Max Funkner
The Revopoint POP 4 package I received appears to match the POP 4 Premium Edition + Outdoor Blue Filters bundle, likely the Kickstarter Special Edition package. Inside the box were the POP 4 3D scanner, carrying bag, mini turntable, calibration board, tripod, USB Type-C to Type-C cable, battery grip with power cable, high-reflection markers, and the Outdoor Blue Filters. Overall, it is a well-equipped bundle for starting both small object scanning and more advanced testing straight away.
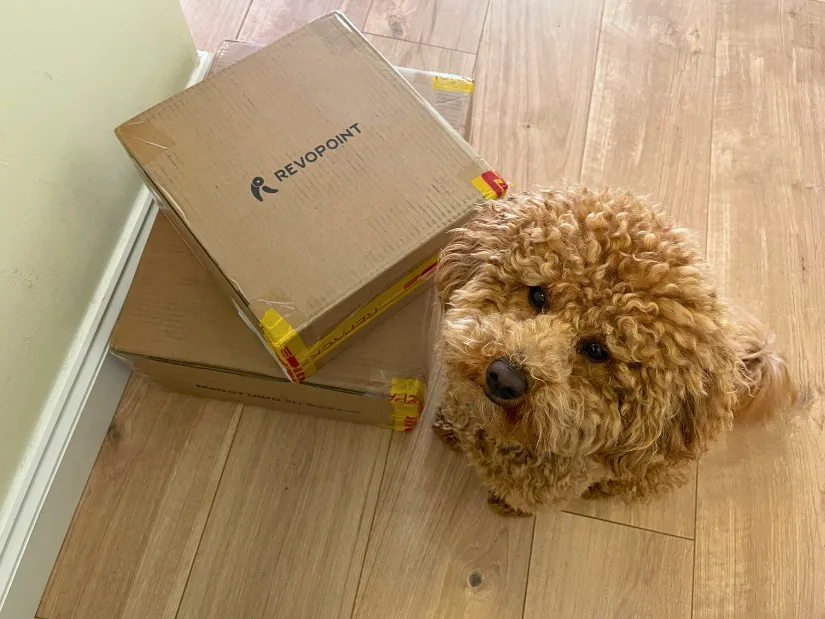
When I received both the POP 4 and Metro Y Ultra for hands-on testing, the POP 4 campaign had already broken past the $1M mark. Teddy, as usual, gave the packages a few barks and sniffs before approving them. With the accessories checked and the scanner ready, the next step was to move on to setup, software, and scanning tests.
Specifications
- Product: Revopoint POP 4 3D Scanner
- Technology: Hybrid blue laser and near-infrared structured light
- Scanning modes: Full-Field HD, VCSEL Rapid, Hybrid HD, 30-Cross Blue Laser Lines, and Single-Line Deep Hole
- Single-frame accuracy: Up to 0.03 mm in laser mode
- Volumetric accuracy: Up to 0.03 mm + 0.05 mm × L(m) in laser mode
- Fused point distance: Up to 0.05 mm
- Scanning speed: Up to 105 fps in multi-line laser mode
- Working distance: 200–400 mm in blue laser modes; wider working ranges are available in structured-light and VCSEL modes
- Outdoor scanning: Supports scanning in direct light up to 100,000 lux
- Wireless use: Up to 4 hours with the 5,500 mAh battery grip
- AI features: Real-time AI object segmentation and tracking
- 3DGS support: Supports photorealistic 3D Gaussian Splatting export in .splat format
- Use cases: 3D printing, reverse engineering, product visualization, digital archiving, VR/AR content, and general object scanning
The POP 4 is positioned as a versatile hybrid 3D scanner rather than a single-purpose object scanner. Its key feature is the combination of blue laser modes for difficult surfaces and fine geometry, with near-infrared structured-light modes for broader handheld and faster scanning workflows.
Setup and Design
The Revopoint POP 4 follows the familiar compact handheld scanner design, but with a more advanced hybrid scanning setup inside. The scanner itself is small and light enough to use by hand, while the included tripod, mini turntable, and battery grip give a few different setup options depending on the object being scanned.
– Wireless and Battery. Love it lasted long. For small objects, the most stable workflow is to place the scanner on the tripod and rotate the object on the mini turntable. For larger objects or body scans, handheld scanning makes more sense. The battery grip also makes wireless-style scanning easier, especially when moving around an object, although for best results it is still important to keep movements controlled and steady.
In my tests, the POP 4 worked well as a flexible scanner rather than a fixed desktop-only device. I used it both on the tripod for small object scanning and handheld for foot scans. The setup process was straightforward, but as with most 3D scanners, the real learning curve starts when choosing the right scan mode, tracking method, and object preparation for each use case.
The POP 4 should also work with a phone using screen mirroring, where the phone simply shows what is happening on the laptop screen. I haven’t tried this workflow yet, but it could be useful for handheld scanning when the laptop is not in a convenient viewing position.
Software: Revo Scan 6
Revo Scan 6 feels different from the previous Revopoint software versions I have used. Before starting a new scan, a window pops up where you choose the tracking method and scan mode, depending on the object and surface you are about to capture.
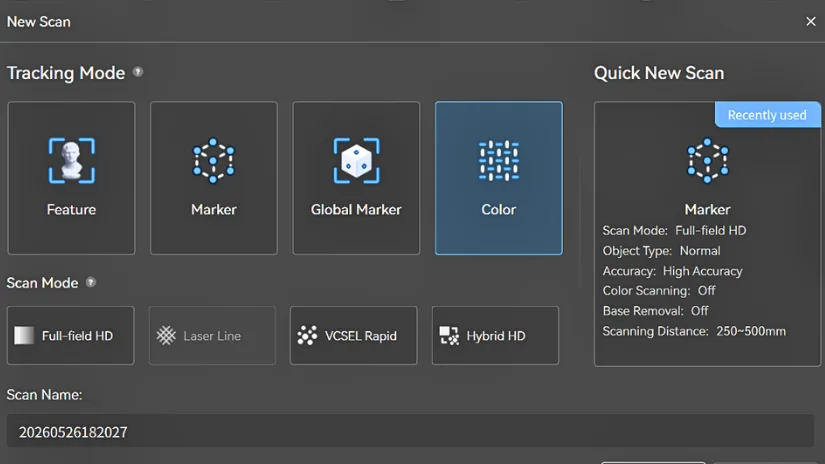
Another important change is how scan alignment works. In Revo Scan 6, scans made with different modes can be aligned together afterwards, which makes sense for the POP 4. For example, you can start with Full-field HD for faster shape capture, then add Single-Line or Cross-Line laser scans for areas where more precision or difficult surface handling is needed.
– Scan Modes: In their Kickstarter campaign, Revopoint featured several scanning modes for specific scenarios. I got a little lost in the sea of options at first, so this quick list gives a clue about which mode may suit certain objects before moving into the hands-on tests.
- Full-Field HD: A general high-detail mode for regular object scanning.
- VCSEL Rapid: A faster option for larger objects or quick shape capture.
- Hybrid HD: A flexible mode for mixed surfaces or objects where one capture method may struggle.
- 30-Cross Blue Laser Lines: A detailed laser mode for difficult geometry, dark surfaces, shiny parts, and reverse-engineering-style tests.
- Single-Line Deep Hole: Intended for recessed details, grooves, holes, and narrow features.
- 3DGS: More of a photorealistic visual capture workflow than a traditional printable mesh workflow.
While scan testing my objects, I briefly tried several POP 4 modes, then continued with the one that worked best in my use case. Below are the scenarios where I tested a few of those modes in more detail.
Testing and Results
Foot Scan and Shoe-Stretcher Test
My first idea was to use the POP 4 to scan my foot, 3D print the model, and try it as a simple shoe stretcher. In theory, this sounded like a useful scan-to-print workflow: capture the foot shape, print it, and use the object to gently stretch tight footwear.
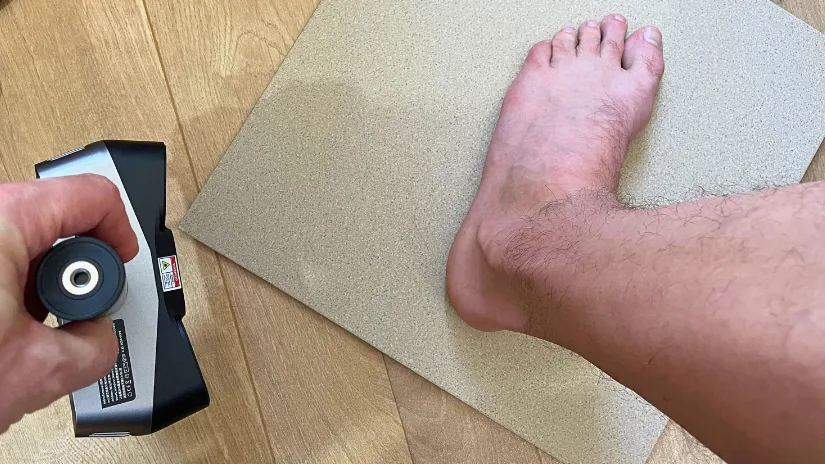
©3DWithUs – Photo: Max Funkner
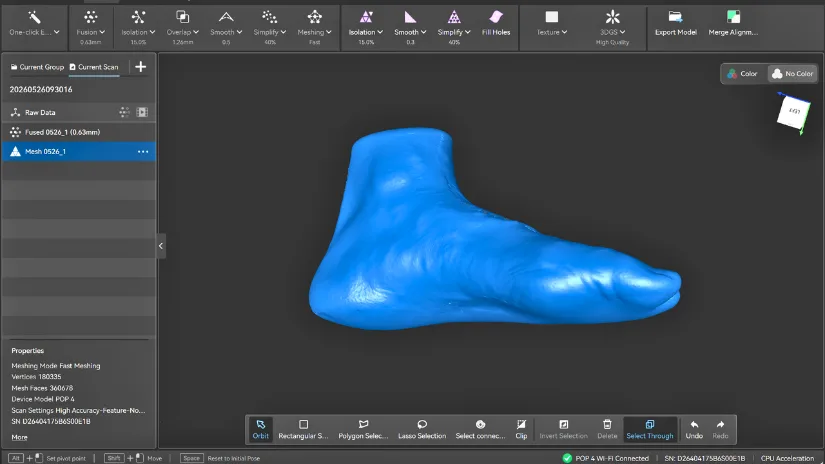
I am looking forward to the days when we can scan our own feet at home and print shoes according to our exact shape and comfort needs. I think we are getting closer to that point, and I will continue covering the topic in my dedicated 3D printed shoes guide. However, there are still many complications, and scanning feet in the right way is one of them. You cannot simply lift your foot and scan it. When we stand, our feet change shape under body weight. With the POP 4, I managed to scan the top area quite well, while Revo Scan 6 filled in the sole area with a curved surface. Because of this, I cannot call the result a true replica of my foot, yet I could go ahead with my project.
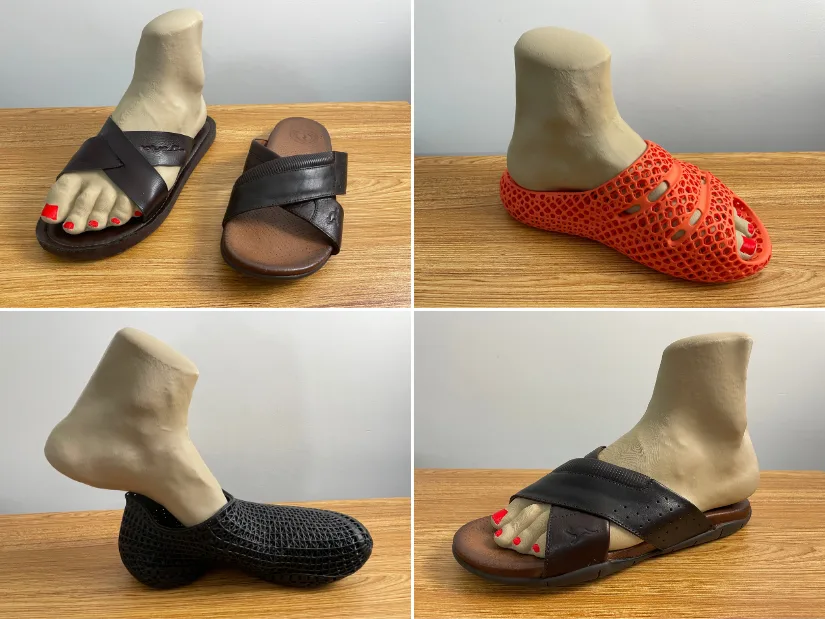
©3DWithUs – Print and Photo: Max Funkner
As a shoe stretcher, the idea only partly worked. After printing my own foot model, I would say there are more practical and functional shoe-stretcher tools available inexpensively on Amazon. Still, this test turned into an interesting case study, and maybe even a Halloween prop, as the print does look a bit creepy. Did it stretch the shoe that needed stretching? Yes, it did.
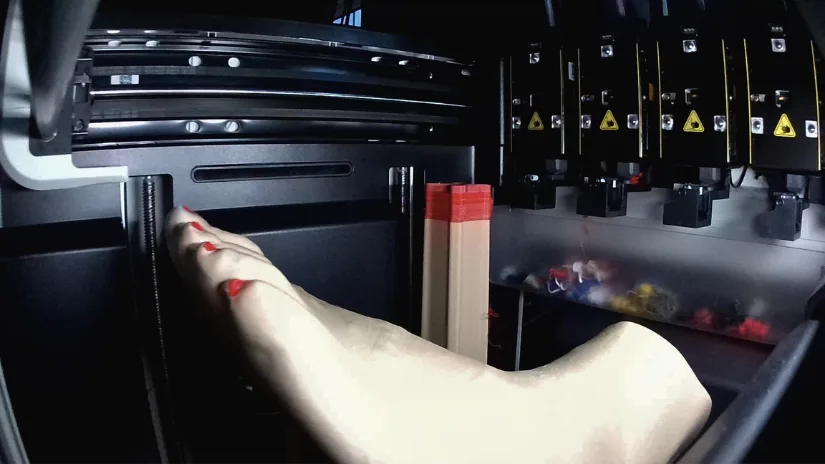
The print itself was also a great stress test for my Snapmaker U1. The red nails printed surprisingly well, but I cannot really justify them from a practical point of view. Adding a second color increased the print time, created purge-tower waste, and added more risk of failure. Without the red nails, the model would have printed faster and with less waste. If I still wanted the nail-varnish effect, painting the nails afterwards would have been the smarter option. So, fun result, but probably a bad idea from an efficiency point of view.
Right Foot – Color Full-Field HD Mode
For this test, I used the POP 4 in Color tracking mode with Full-field HD scan mode. The settings were High Accuracy, Normal object type, and color scanning enabled. This was the best option for my right-foot scan in a sock, as I wanted to capture both the shape and the visible color details.
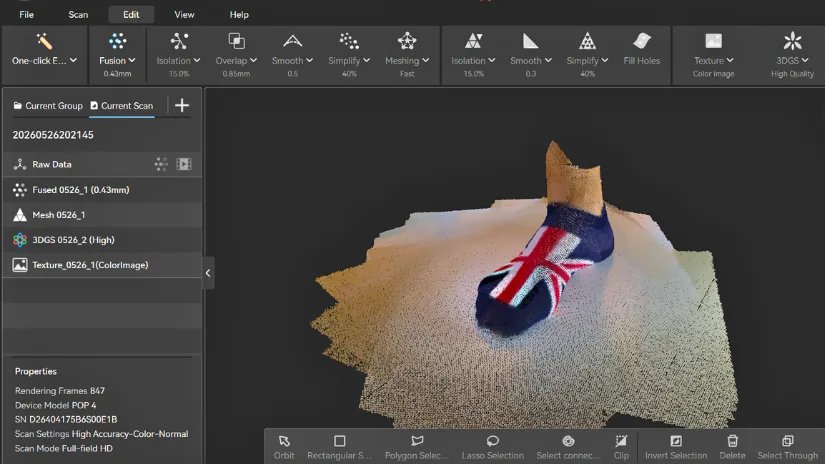
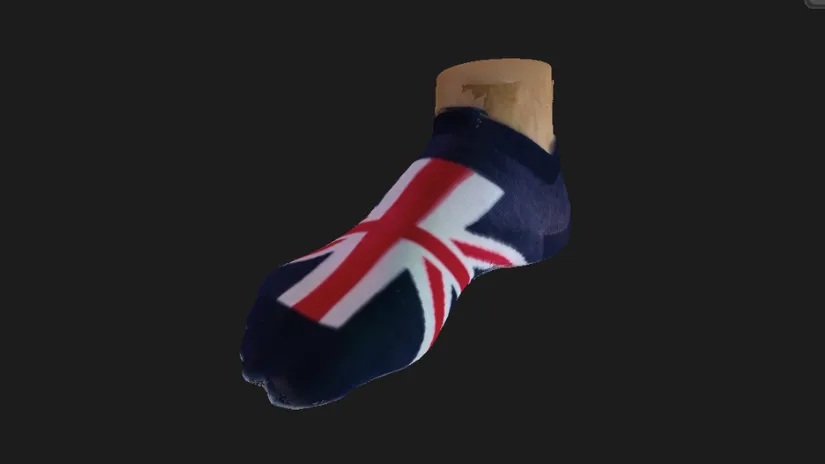
The idea was to scan my right foot in a sock with 3D printing in mind. Of course, moving from a color scan to a full-color 3D print is a much more complicated workflow, so I may return to this later. Still, the concept is very interesting, and I can imagine this type of scan looking great if printed in three or four colors.
Broken Propeller Scan – Single-Line Marker Mode
To test the POP 4 for a more precision-focused use case, I scanned a broken propeller that came as a request from my local RC model boat club. The part is tiny, thin, dark, and damaged, which made it a challenging object for scanning and a good candidate for reverse-engineering-style testing.
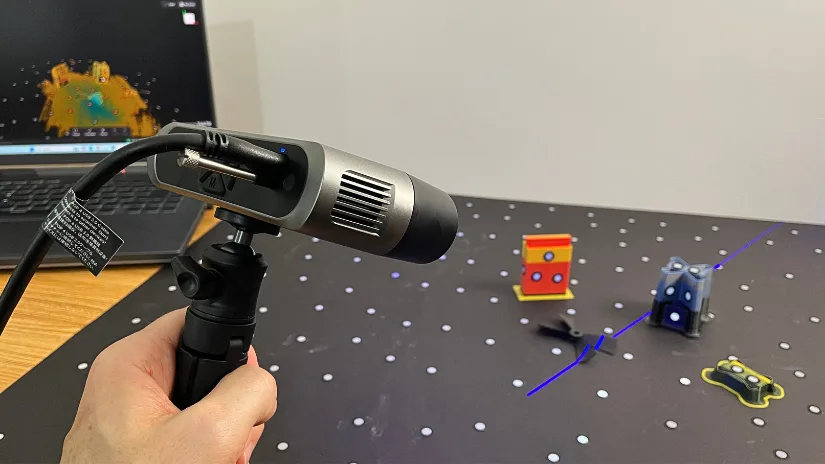
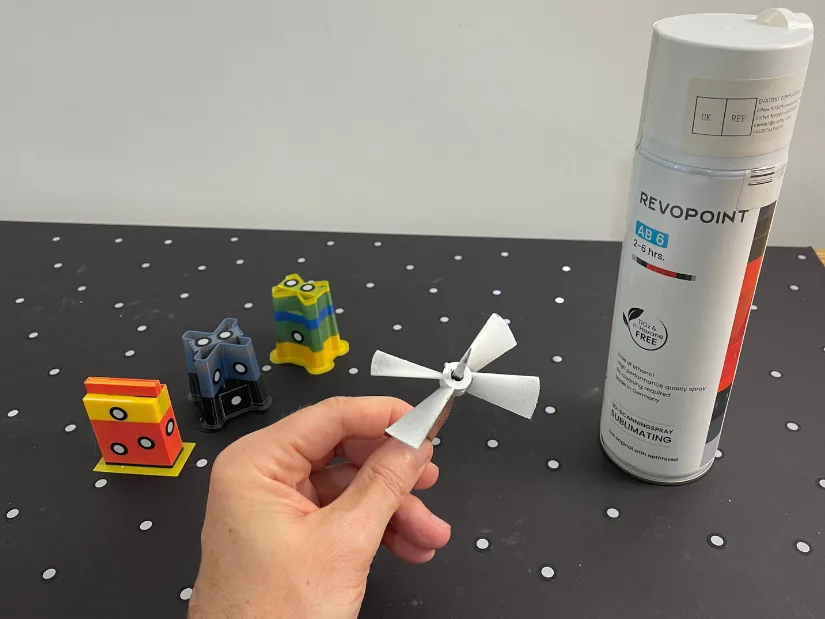
What impressed me was that even the black propeller could be captured after choosing the right mode and settings. However, the sprayed version of the same object was captured better, with cleaner tracking and more reliable surface data. Revopoint also sells scanning sprays for this type of workflow, and similar 3D scanning sprays are available on Amazon.
©3DWithUs – Photo: Max Funkner
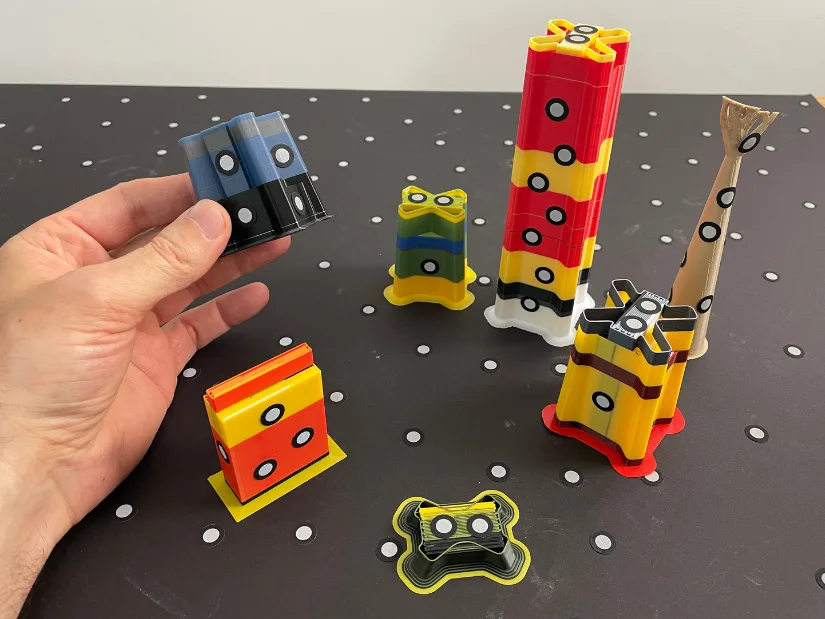
– Marker towers. You may have noticed in the images that I used markers on small tower-like objects. These were actually purge towers from Snapmaker U1 color prints, repurposed for marker tracking. They worked very well, and because the towers have angled sides, they help the scanner track the markers more reliably. DIY replacement to offered Markers Block Kit.
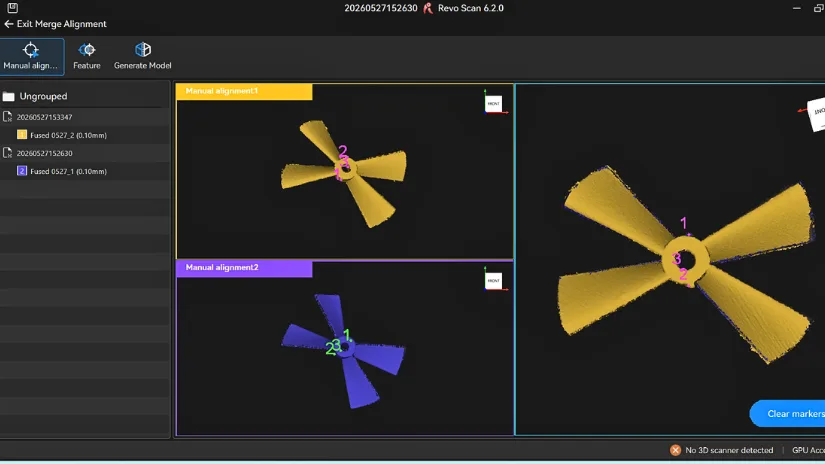
Even after spraying the propeller, the scan remained difficult because the part was simply very small and thin for this type of scanner. The POP 4 captured the main reference geometry, including the hub, center hole, blade count, and overall blade shape, but the thin blade edges remained rough and difficult to clean. For me, this became a useful reference scan rather than a ready-to-print replacement model.
This is where object size matters. The sprayed surface helped, but it could not fully solve the challenge of tiny thin blades. For a functional RC boat propeller, I would likely use the scan as a visual reference, then rebuild the part from scratch in CAD using caliper measurements.
Compare to Other 3D Scanners
The Revopoint POP 4 sits in an interesting place among budget and prosumer 3D scanners. It is more capable than a simple entry-level scanner, especially because of its hybrid blue laser and infrared scanning modes, but it is still positioned as a compact and relatively accessible device. For a broader overview of different options, check our Best Budget 3D Scanners guide, where we compare scanners for makers, designers, and 3D printing workflows.
A close comparison would be the EINSTAR Rockit. It is a very capable scanner with impressive software and scanning modes, but it is also more expensive and aimed at users who can justify a higher investment. Compared to that, the POP 4 feels more like a compact all-rounder for users who want to test different scanning scenarios without moving into a much higher price category.
Within Revopoint’s own range, the Revopoint INSPIRE 2 may be a better option for specific lightweight and simple scanning tasks, especially where portability and ease of use matter more than advanced laser modes. The POP 4, however, gives more room to experiment with difficult surfaces, smaller details, and mixed workflows.
The 3DMakerpro Toucan is a different type of scanner altogether. Its standalone design makes it attractive for users who do not want to rely on a laptop during scanning, while the POP 4 is more of a connected scanner built around Revo Scan 6 and mode-based workflows. In simple terms, Toucan feels more independent, while POP 4 feels more flexible for experimenting with scan modes, surface preparation, and scan-to-print tests.
Overall, the POP 4 is not the only scanner to consider, but it is a strong option for users who want a compact scanner with multiple capture modes and enough flexibility for 3D printing, scanning experiments, and occasional reverse-engineering-style projects.
Have questions? Feel free to ask in the comment section below.
For a wider discussion or to share your own POP 4 scans, join us in the forum:
Conclusion and Pros & Cons
Compare the Prices & Bundles:
Official Website | Amazon
Revopoint POP 4 Review
Review Summary
The Revopoint POP 4 feels like another step in Revopoint’s ongoing effort to democratize 3D scanning and make more advanced capture technologies available to a wider audience. By combining blue laser and infrared scanning modes in a compact device, and by keeping the price relatively accessible through Kickstarter-style launches, Revopoint continues to push features that were once limited to much more expensive scanners into the hands of makers, designers, and 3D printing users.
In my hands-on testing, the POP 4 performed well across several very different scenarios, from foot scans and color scanning to a scan-to-print shoe-stretcher experiment and a tiny broken RC boat propeller. Not every test produced a perfect result, but that is exactly where the review became useful. The scanner handled some difficult tasks better than expected, while also showing the practical limits of small-object scanning, thin geometry, and complex reverse-engineering workflows.
Overall, I see the POP 4 as a flexible and capable 3D scanner for users who want to experiment with different scan modes, surfaces, and scan-to-print ideas. It is not a magic one-click solution, and some workflows still require patience, object preparation, and post-processing skills, but it offers a lot of scanning capability in a compact and relatively affordable package.
Pros
- Hybrid blue laser and infrared scanning modes for different objects and workflows.
- Good scan-to-print potential, as shown in the foot scan and shoe-stretcher test.
- Captured useful reference geometry even from difficult dark and small objects.
- Color scanning mode worked well for visible texture details.
- Revo Scan 6 allows alignment of scans made in different modes.
- Compact setup with tripod, turntable, handheld use, and battery grip options.
- Price – 3D scanning is more accessible.
Cons
- Still requires learning, mode selection, object preparation, and patience.
- Tiny thin parts, such as the RC boat propeller, remain very challenging.
- Dark or shiny surfaces may still need scanning spray.
- Post-processing and mesh cleanup can take time
- Functional reverse engineering still needs CAD work and measurements.