Under- and over-extrusion FDM print quality issues are well-known in 3D printing. Calibration of the extruder, which involves calculating E-steps and tuning the extrusion multiplier, is essential. In this guide, we will walk through the full process for Marlin and Klipper firmware-based extrusion calibration. Also, we will dig into the filament flow rate, or extrusion multiplier, setting.
This Guide Covers:
- Why Do We Need to Calibrate Extruders?
- Calibration Stages & Types
- Tools and Software Required
- Extruder Calibration for Marlin Firmware
- Extruder Calibration for Klipper Firmware
- Test Print and Extrusion Multiplier Tuning
- Conclusion
Why Do We Need to Calibrate Extruders?
The main goal of extruder calibration is to make sure that the amount of filament pushed through is correct, so there will be no under-extrusion or over-extrusion-related print quality issues.
Extruder Calibration Stages for FDM 3D Printers
Calibrating the extruder’s steps/mm value and tuning the flow/extrusion multiplier are two major stages of calibration. It is crucial to carry out these stages in a particular sequence.
An extruder calibration process is the same for most budget FDM printers; the only difference is whether we are using a Klipper-enabled printer or a Marlin firmware printer. For Marlin, we must calculate and calibrate the extruder E-steps, which is the number of steps necessary to extrude 100mm. When for the Klipper systems, we must calibrate the extruder’s rotation distance or the number of rotations necessary to extrude 50mm of material.
©3DWithUs – Photo: Will Zoobkoff
Tools and Software Required
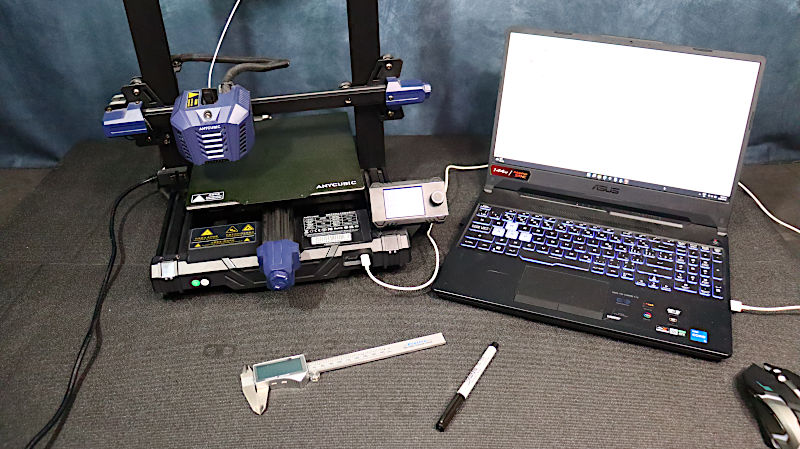
• 3D Printer
• Marker pen
• Calliper
• Filament
• Desktop or laptop
• Pronterface software
To calibrate, you’ll need a few tools, including a good set of calipers with two decimal places, a marker, and a PC running Pronterface or Octoprint to send commands to the printer.
Extruder Calibration Process for Marlin Firmware
Once we have everything we need we can start the calibration process for the extruder with Marlin firmware.
– Connect. As the first step, we must connect a PC to the printer using a cable. Activate Pronterface.
– Temperature. In order to test PLA, we normally use 205 degrees or the usual printing temperature +-5 degrees.
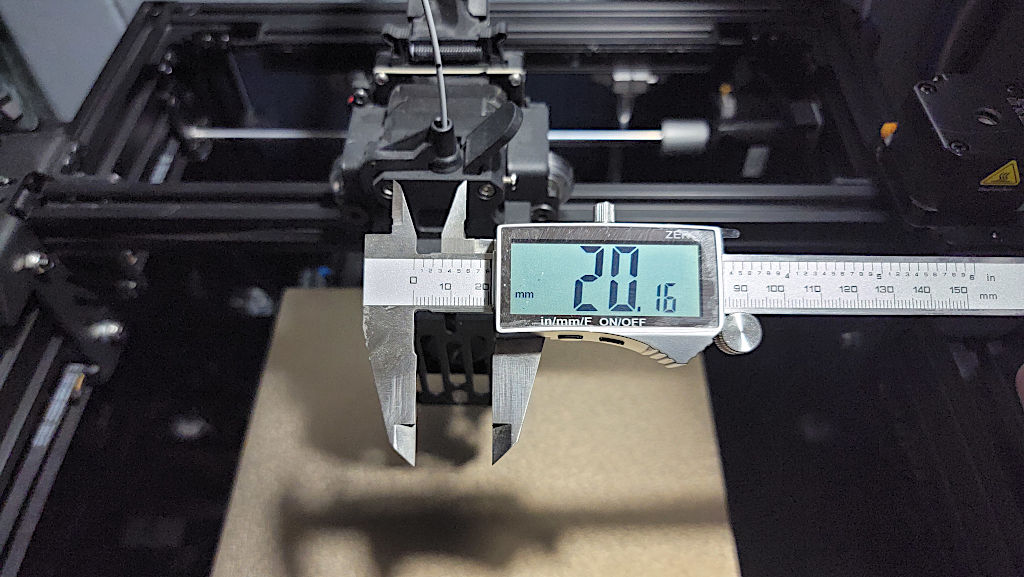
– Measure mark. Then, from the point where the filament enters an extruder, using a caliper, measure 120mm and make a mark on the filament.
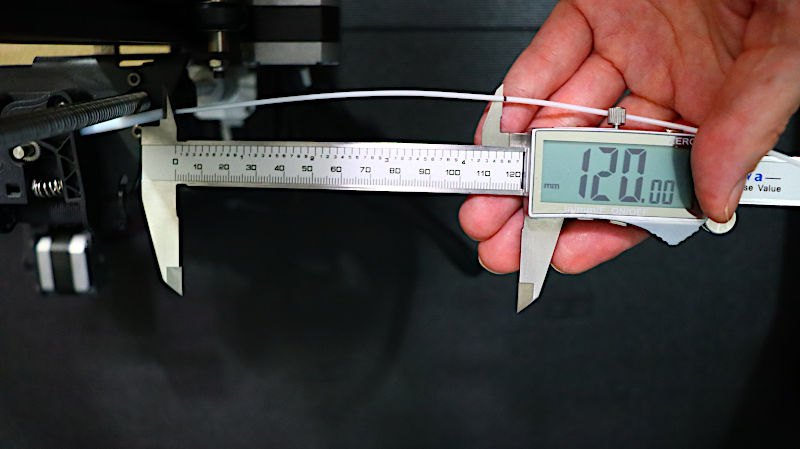
©3DWithUs – Photo: Will Zoobkoff
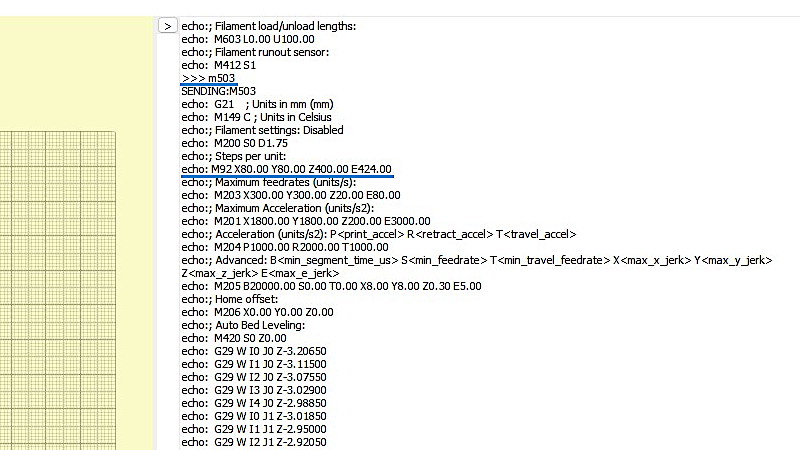
– Command M503. Next, use the Pronterface to send the M503 command. Search for the M92 line. Result E is the current steps. Note this number.
– Command G1 E100 F50. The printer will slowly extrude 100mm of material.
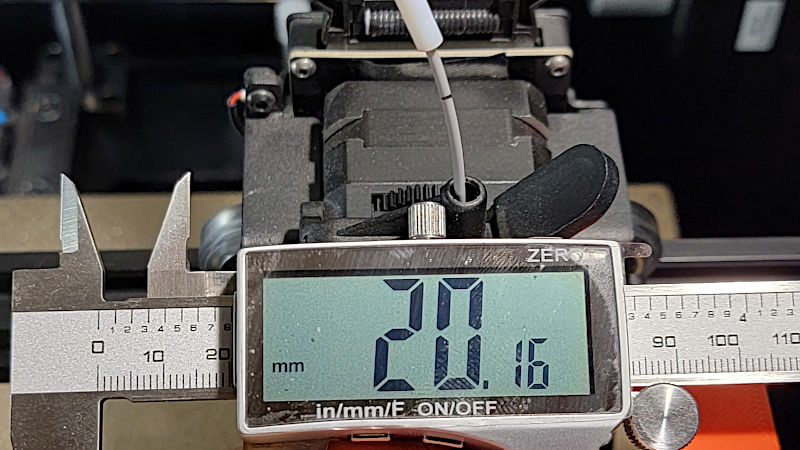
– Measure. Measure the distance to the mark (f/e if only 23mm of filament left then the distance will be 120mm – 23mm = 97mm).
– Calculate. New E-steps = (previous_esteps) * (100) / (actual_extrude_distance) Example: (405 * 100 / 97) = 417.525
– Command M92 E*. Add a new value instead of *.
– Command M503. Double-check that the value was saved at the M92 line.
– Command G90. Complete.
Proceed to stage two – test print and filament Flow Rate/Extrusion Multiplier tuning.
Extruder Calibration Process for Klipper Firmware
Once we have everything we need we can start the calibration process for the extruder with Klipper firmware. As we mentioned earlier, for the Klipper systems, we need to calibrate the extruder’s rotation distance or the number of rotations necessary to extrude 50mm of material.
– Connect. Load WebUI for the printer under configuration. Open printer.cfg. We can find the rotation distance under the [extruder].

– Temperature. In order to test PLA, we normally use 205 degrees or the usual printing temperature +-5 degrees.
– Measure and Mark. Then, from the point where the filament enters the extruder, using a caliper, measure 70mm and put a mark on the filament.

– Command G1 E50 F50. The printer will slowly extrude the material.
– Measure. Measure the distance to the mark.
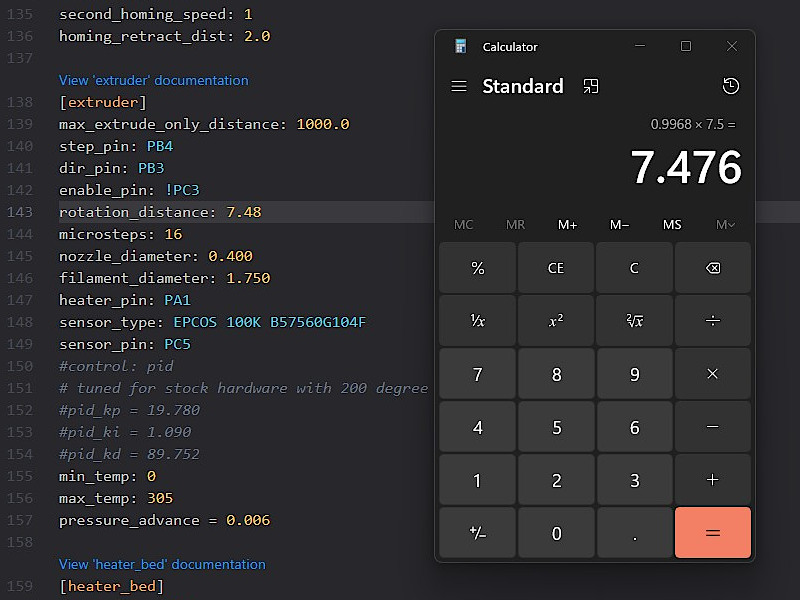
– Calculate. New rotation_distance = (previous_rotation_distance) * (actual_extrude_distance) / (requested_extrude_distance) Example: (7.5 * 49.84 / 50) = 7.476
– Edit printer.cfg. Change rotation distance under [extruder], round to the second decimal point, click save and restart. Complete.
Proceed to the extrusion multiplier tuning stage.
Test Print and Filament Flow Rate/Extrusion Multiplier Tuning
Now, when the extruder has been calibrated, we can tune the hotend flow. In various slicer software, this setting is named an Extrusion Multiplier or Flow Rate. On some printers, it is possible to tune the filament flow rate live during the print. This is a handy option if we deal with an inaccurate filament diameter.
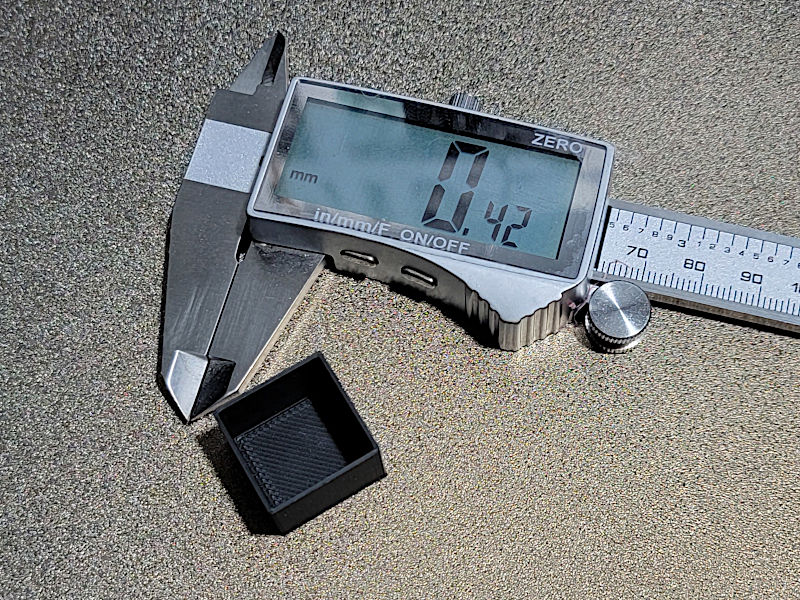
The best model to use for such tuning is the 0.8mm Extruder Flow Test by Litho3D. The Cube object has to be printed in a Vase mode or a Spiralizer Outer Contour mode.
Once the print is finished, we measure each of the four walls to obtain an average measurement. In our case, in the image below, we have 0.42mm, and we will calculate the flow from this number. Simply divide the result by the desired extrusion width. New Flow = (extrusion width) / (result) which gives us (0.4 /0.42 ) as a new flow value of 95%.
Conclusion
We are in a great position to get the best results out of a 3D printer now that we have calibrated the extruder and flow. Many factors can still affect print quality, such as belts that are too loose or too tight, wheels that haven’t been adjusted, ambient temperature, and vibrations in the printer or the table itself. However, calibrating the extruder and flow will help reduce many of the issues that can occur if the extruder is either over- or under-extruding filament or if the flow or extrusion multiplier is not set correctly.
In the past, I created a video tutorial for calibrating the Anycubic Viper desktop FDM 3D printer. There I also covered the e-steps calibration process.
If you have any questions feel free to join my group, StudioZombie3D on Facebook.
Read more: Best Budget FDM 3D Printers
After testing and reviewing various FDM 3D printers through the years, we are putting together a detailed guide about the Best Budget 3D Printers. Here we will list a number of the FDM machines that are cheap to buy, in around the $300 price range, but at the same time, are user-friendly.