
Meshy AI is an AI-powered 3D model generator that can turn text prompts and images into 3D models within minutes. In this hands-on review, I focused on how useful it is specifically for 3D printing, testing personalized pet figurines, Meshy Agent, Add Base, Multi-Color Printing, Split, and a simplified Volkswagen Beetle miniature that I ultimately printed on a desktop 3D printer.
Table of Contents (Jump to a Section)
Pricing
Compare Meshy AI Plans & Pricing:
Visit the Meshy AI Official Website
Meshy AI Overview
After spending time with Meshy AI, what stood out to me is how many different routes there are to arrive at a usable 3D model. You can start from a simple text prompt, upload an image, work from a sketch, or use the more conversational Meshy Agent. The main tools include Text to 3D and Image to 3D, while additional features cover texturing, animation, remeshing, and further model preparation.
For my use case, the most interesting part is that Meshy goes well beyond simply generating a mesh. It includes practical tools to get the model closer to something I can actually 3D print, including Add Base, Multi-Color Printing, Auto Split, printability checks, and several export options for slicer software. Models can be exported in formats such as STL, 3MF, OBJ, GLB, FBX, and USDZ. I found 3MF especially interesting for multicolor work, as it can carry the color information directly into the next stage of the printing workflow.
The Meshy Agent was probably one of the more interesting parts of the platform for me. Instead of trying to get everything right with one carefully written prompt, I could work more naturally: upload an image, explain what I wanted, review the generated result, ask for changes, and continue from there. During my testing, this worked particularly well when the original reference image was incomplete, or when a real-world subject needed to be simplified before turning it into a practical 3D printable model.
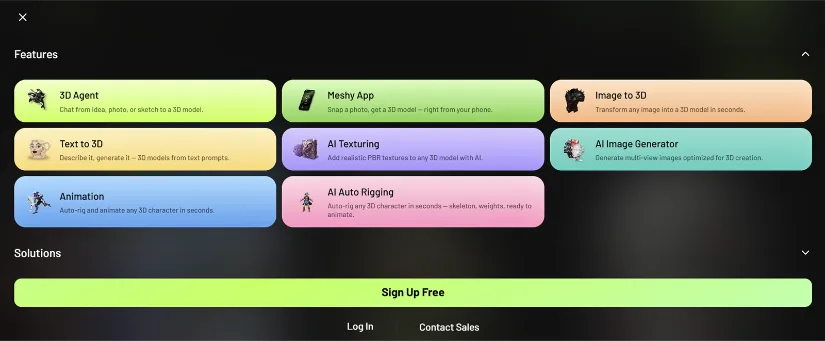
There are also several Meshy AI features I did not test in this review, but they are worth mentioning. These include Animation, AI Auto Rigging, and the Meshy App for creating 3D content from a phone. Beyond the tools themselves, Meshy also has a strong community element, with users sharing models, ideas, and workflows around the platform. For anyone experimenting with AI-assisted 3D creation, that community can be just as valuable as the individual features, especially when looking for inspiration or seeing how others approach similar projects.
You can also find my Meshy AI community profile here: Max Funkner on Meshy AI, where I’ll be sharing some of the models created during this testing.
Testing and Results
Photo-to-3D and Add Base: Teddy Figurine
The first feature I tested was Image to 3D, focusing on a customized model that needed to preserve the unique features of a real pet. Meshy AI also includes additional tools for refining generated 3D models, which made this workflow particularly useful for creating a more personalized and 3D-printable figurine. For this test, I worked with a photo of our dog, Teddy.
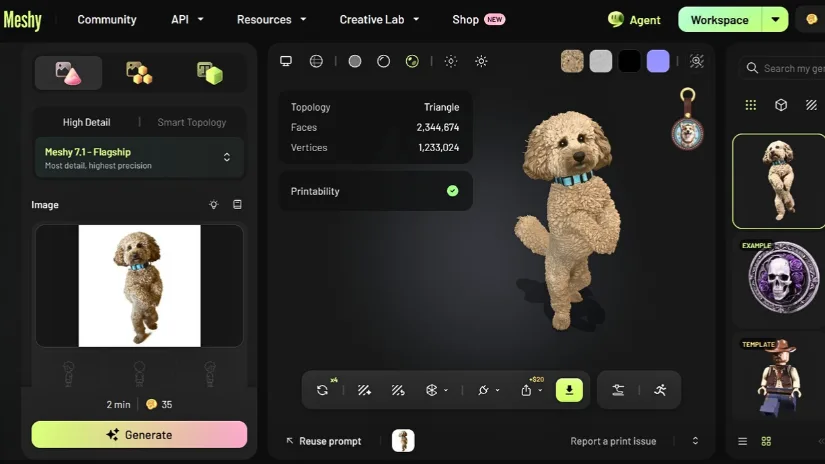
I uploaded a photo of Teddy and generated the model using the default settings. The first result came out surprisingly well, capturing his overall shape and recognizable features, so I decided to keep it rather than generate another version.
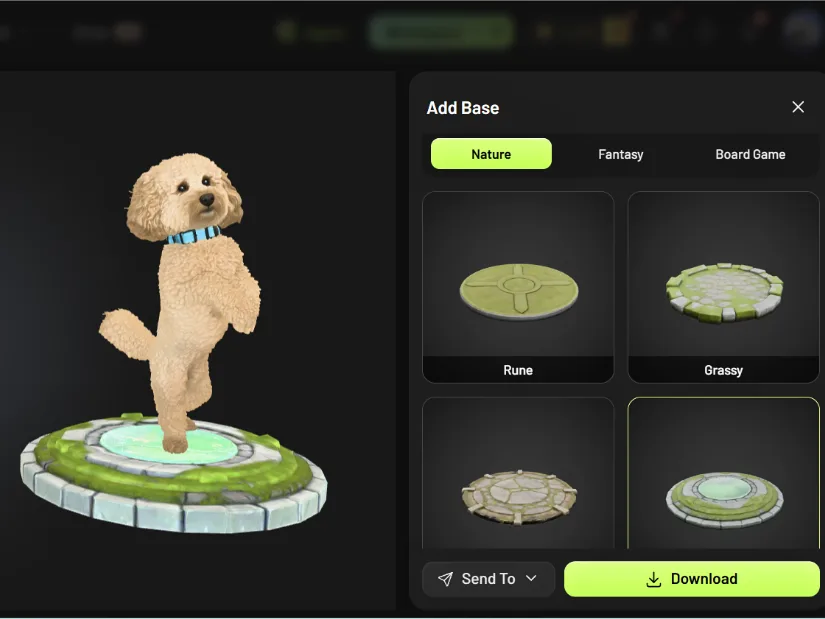
– Add Base. The next feature was very helpful for my case: Print – Add Base. In this ‘Meerkat’ or ‘Dancing’ position, Teddy’s model stands on its two back paws, and even if balanced well, it would still be easy to knock over. A base is highly recommended in cases like this, especially if the final model is intended for display. I liked the selection of available bases, and there was also an option to add a custom base. We could even use the Agent or a Text-to-3D prompt to create almost any base imaginable. I previewed several of the built-in options first, including the nature-style base shown here, before settling on the pebble-style base for the final model.
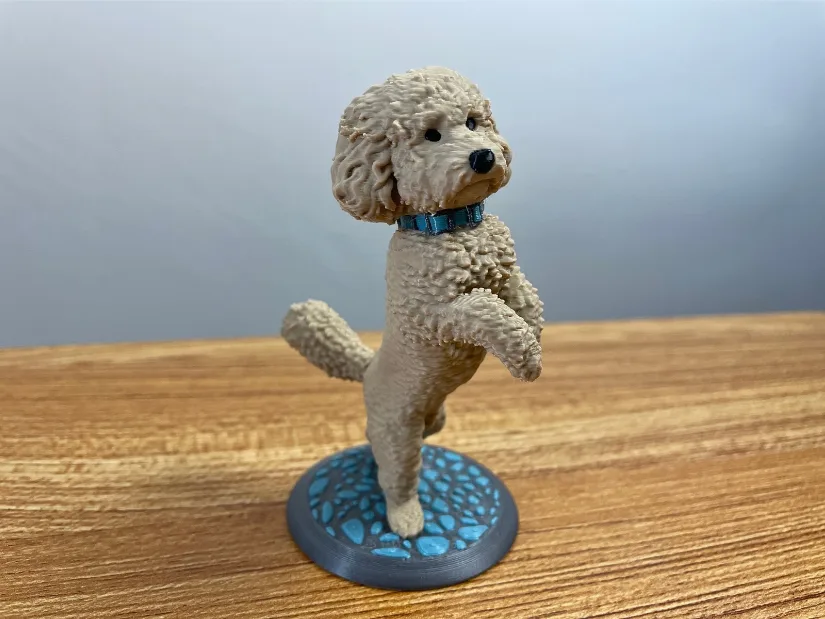
©3DWithUs – Print and Photo: Max Funkner
It took only 4 h to 3D print this 100 mm figurine in four colors on our Snapmaker U1. I only had to change a couple of settings from the defaults: Add Supports – Organic and Top Layer Surface – Concentric. The Snapmaker U1 is a very capable machine, and you can find our full hands-on testing together with many more print examples in the guide linked above.
This highly customized figurine is especially dear to us because our friends took the original photo while we were on holiday, and Teddy is wearing his own collar. Tiny details like this may seem insignificant, but in a personalized model they make a big difference, helping the final figurine feel far more unique and recognizable.
Photo-to-3D Agent: Recreating Ella
I tested Meshy’s Agent mode when creating a model of Ella, the adorable and full-of-character poodle belonging to our local ice cream lady. This case was a little more challenging because I initially had only a limited number of reference images to work with. On top of that, the image showing Ella’s most distinctive posture captured only the upper half of her body.
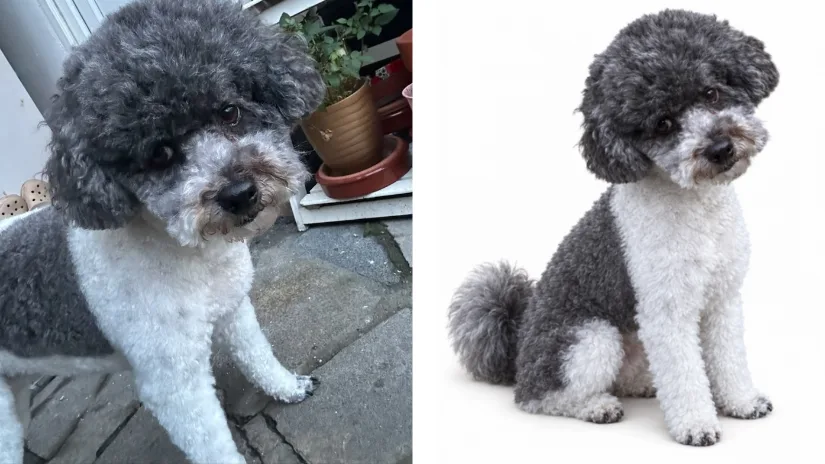
Even with those limitations, the Agent did a great job of recreating Ella in the requested sitting position, including her bushy tail. This made the result feel much more complete and recognizable, especially considering the limited source material.
I was pleased with how intuitive the Agent workflow felt. My prompt was very simple: ‘Please make the tail proportional and fluffy. The dog should be sitting.’ Agent then interpreted and expanded that request into a more detailed instruction: ‘I’ll edit the image to show the dog sitting with a proportional, fluffy tail added — since the original is a close cropped shot, this will involve generating the fuller body pose while keeping the same coloring and breed look.’
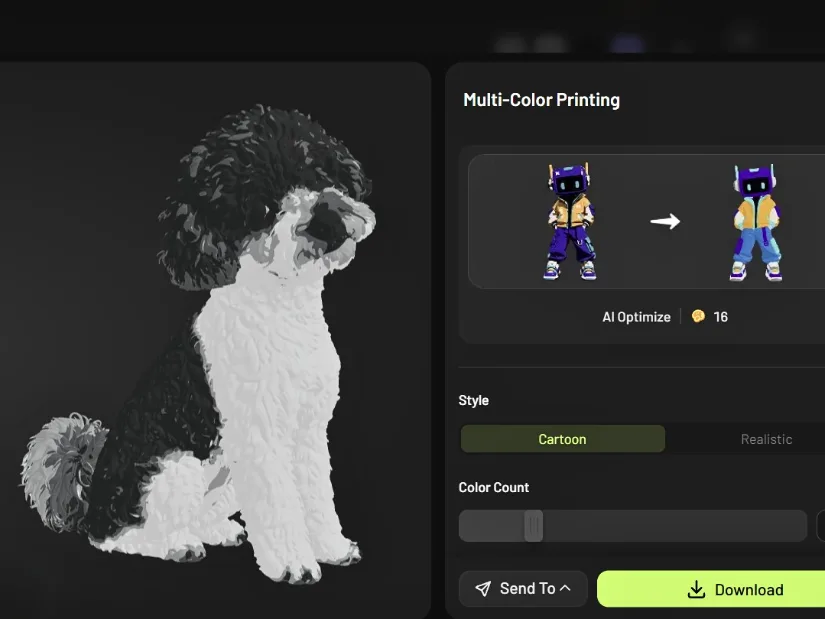
Another powerful feature that can save a lot of time in the slicer’s Color Painting workflow is Multi-Color Printing in Meshy AI. From this screen, Meshy AI can prepare the model for export as a 3MF file with the colors already assigned. This can significantly reduce the amount of manual painting required later in the slicer. This time, I did not use the preset because I still wanted to edit some of Ella’s coat pattern manually.
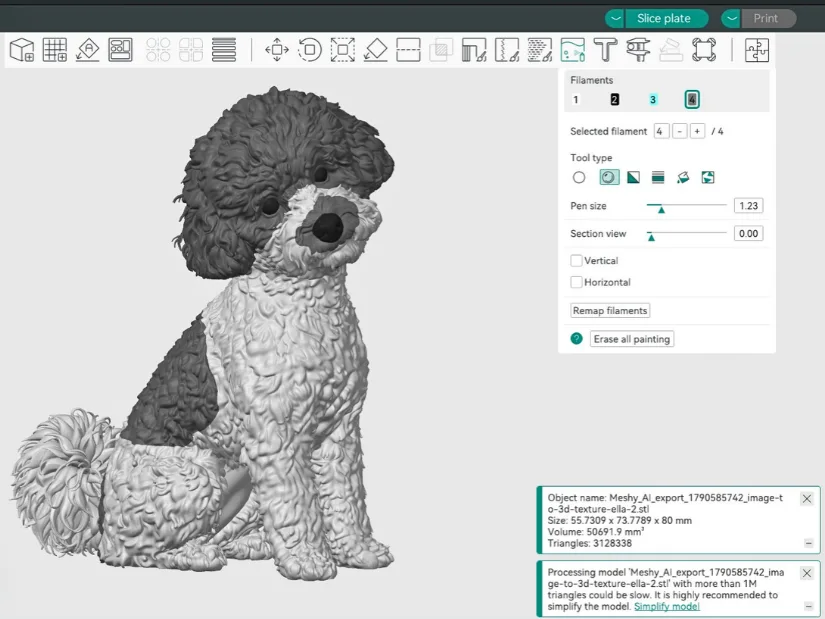
Using the other reference images, I manually recreated more of Ella’s fur pattern in the Color Painting area of Snapmaker Orca Slicer and added the final touches before printing. This was also the stage where I had to consider the filament colors I actually had available. I only had one suitable shade of gray, so I combined it with a marble filament, which worked surprisingly well for reproducing the variation in Ella’s coat.
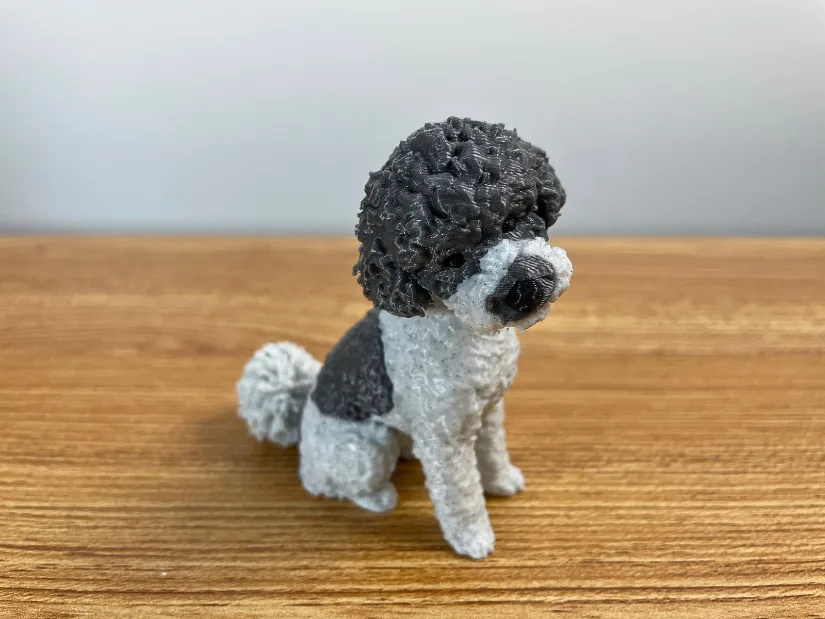
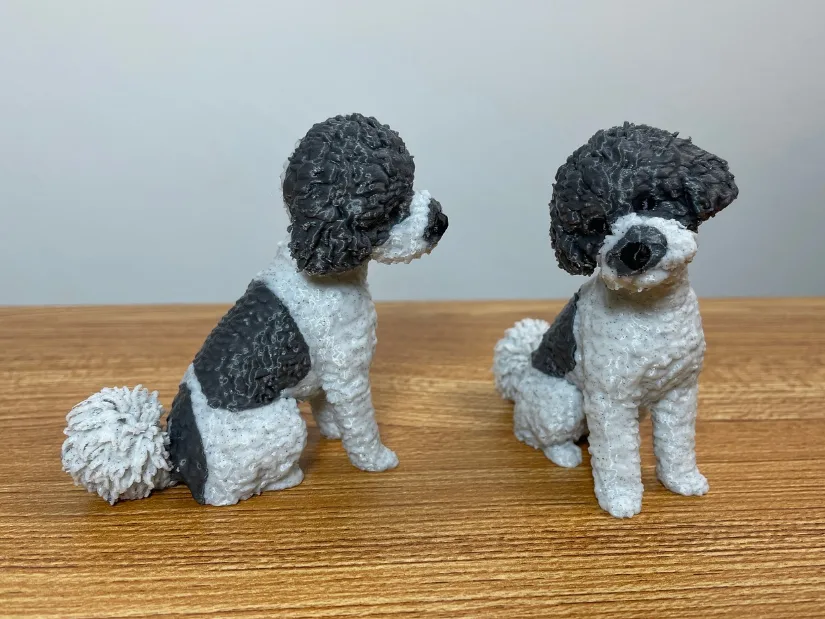
Ella’s and Teddy’s cases once again show where new AI tools for 3D modeling really shine. Image-to-3D works remarkably well for creating highly personalized models, helping the final figurine capture details that make a particular pet recognizable and unique. This is very different from a generic toy based only on a specific dog breed and injection-molded in the thousands. Here, the posture, collar, outfits, fur pattern, and other small details can make the finished model feel genuinely personal.
Photo-to-3D Agent and Multicolor Printing: Car Model
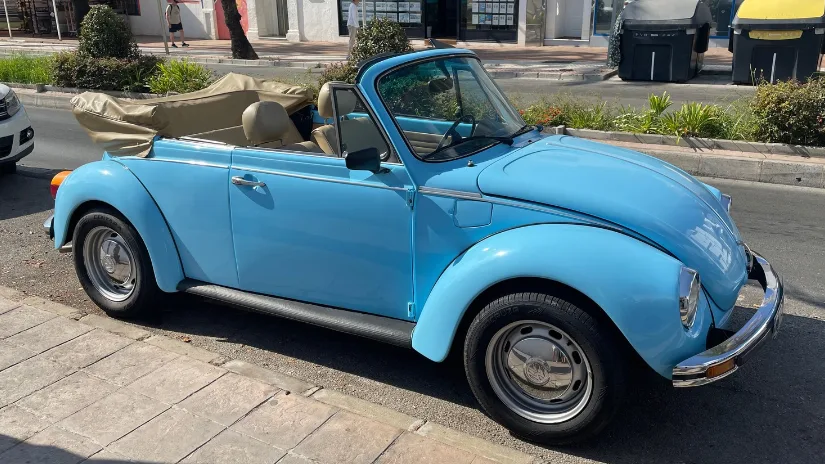
After discovering the Multi-Color Printing feature, I wanted to test it again with a completely different type of model. This time, I decided to create a miniature of a classic Volkswagen Beetle convertible that I had photographed earlier. Because my goal was to 3D print the result on a desktop 3D printer, the feature-rich real car needed to be simplified before turning it into a printable miniature.
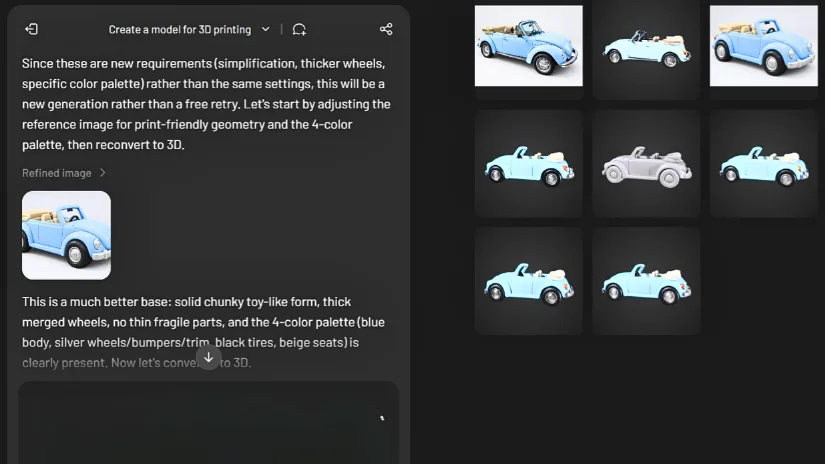
Once again, Meshy AI proved intuitive, helping me craft the right prompt by first generating a refined reference image and then retrying 3D models until I found the most suitable result. This workflow felt especially useful for more complex subjects like cars, where simplification is important for both printability and appearance.
This time, I had to retry a few versions before getting the steering wheel right. In most generated models, the overall shape looked good, but that small yet important detail was often formed incorrectly. After a few attempts, I found a version that worked well as the basis for the final printable model.
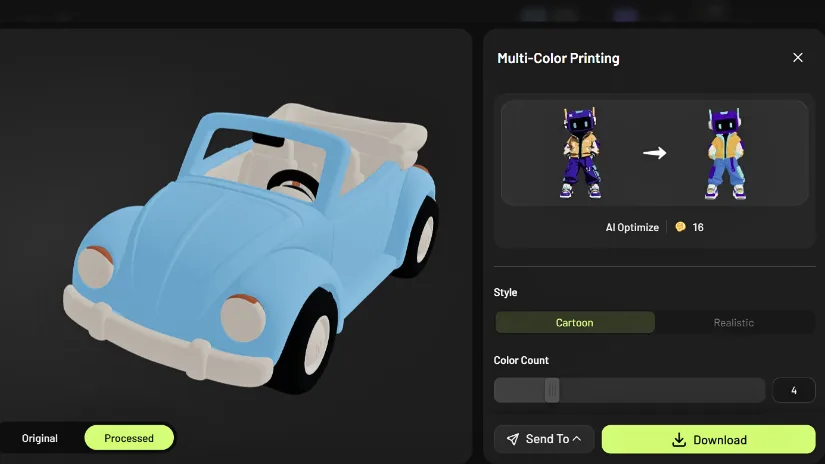
Using the Multi-Color Printing screen, I was able to save the model as a 3MF file with nearly all colors applied correctly. This greatly reduced the time needed in the slicer’s Color Painting area, as I only had to make a few small touch-ups before the model was ready for multicolor printing.
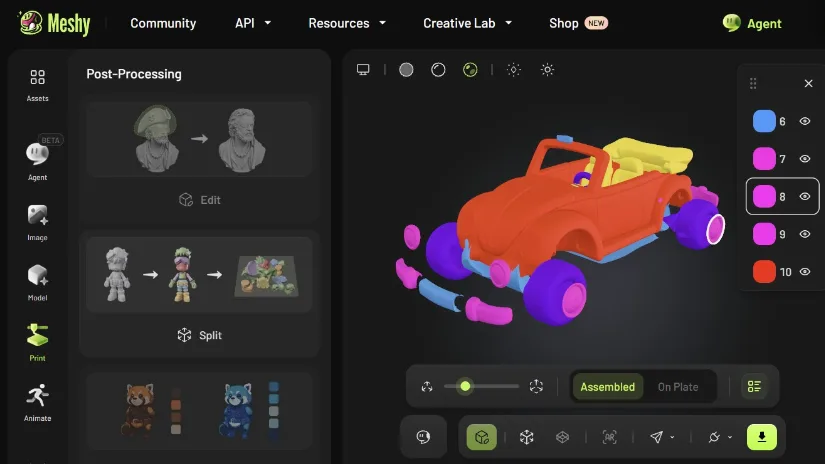
– Split. Meshy AI also includes a Split feature, with connector options for joining the separated parts afterward. This could be useful for models that need more than four colors, or for splitting a model into parts that can be printed with fewer or no supports. In practice, a color-rich model could potentially be divided into several parts and printed in batches of four colors, making 8-, 12-, or even 16-color projects possible on a four-toolhead machine.
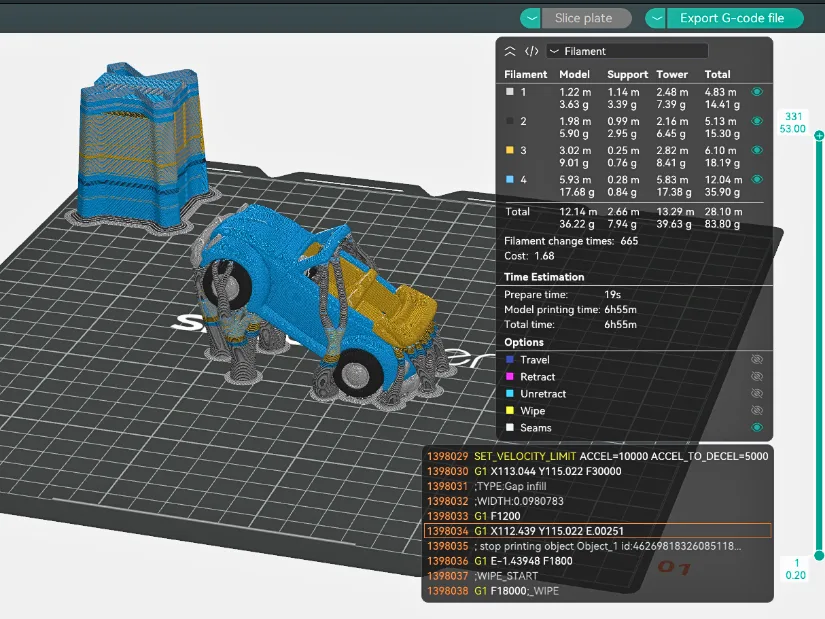
In Snapmaker Orca, in addition to Organic Supports and a Concentric top layer pattern, I tilted the model by 25 degrees. This orientation reduced the amount of support material required and helped keep the more important visible surfaces cleaner after printing.
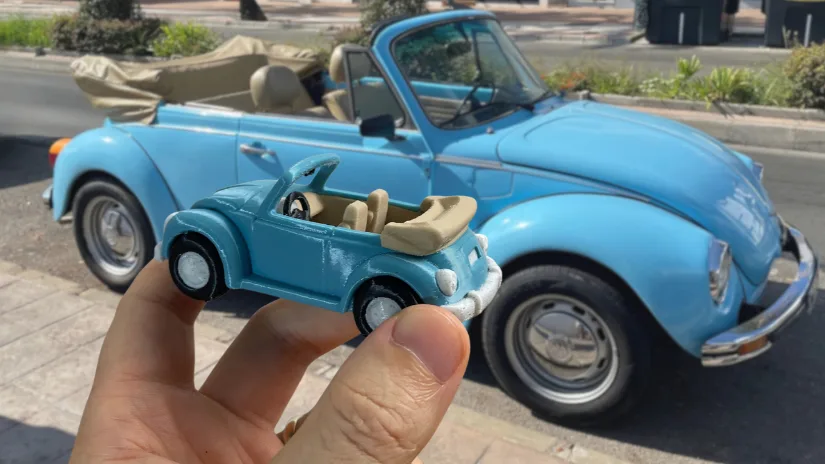
The end result came out nicely, and the potential here is clearly much bigger than a simple static miniature. If this model were transferred into CAD or 3D modeling software such as Blender, it should be relatively straightforward to develop it further, for example, by separating the wheels and making them rotate functionally. That opens the door to turning a quick AI-generated model into something much more refined and interactive.
Have questions? Feel free to ask in the comment section below.
For a wider discussion or to share your own Meshy AI 3D models and prints, join us in the forum:
Meshy AI Review: Conclusion
After testing Meshy AI across several very different projects, I came away impressed by how quickly it can turn simple ideas and reference images into models that are genuinely useful for 3D printing. Teddy and Ella showed the strength of Image to 3D and Agent for highly personalized subjects, where small details such as posture, fur pattern, a collar, or a fluffy tail can make the final figurine feel far more unique than a generic model based only on a breed or category.
What stood out just as much as the generation itself were the tools around it. Features such as Add Base, Multi-Color Printing, printability checks, and Split can reduce the amount of work needed later in the slicer and make the models easier to prepare for a desktop 3D printer. In my tests, I still made some manual adjustments in Snapmaker Orca, especially for color painting and print orientation, but Meshy often gave me a very strong starting point and saved a considerable amount of preparation time.
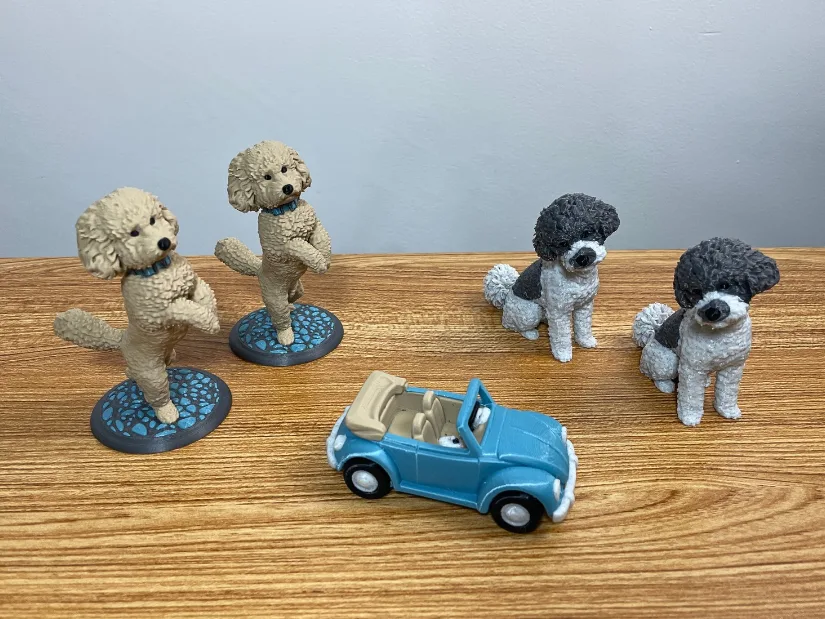
Meshy AI is not a replacement for traditional 3D modeling when precise engineering, moving parts, or full control over geometry is required. However, as a fast way to create customized figurines, simplified miniatures, and printable concepts, its potential is significant. The VW Beetle project especially showed how an AI-generated model can become the foundation for something more advanced; with further editing in software such as Blender, features like separate or rotating wheels could be added quite easily. For me, that combination of speed, personalization, and room for further refinement is where Meshy AI becomes particularly interesting for 3D printing.
Pros
– Strong Image-to-3D results
– Intuitive Agent workflow
– Useful 3D printing tools
– Good multicolor support
– Great for personalized models
Cons
– Some models need retries
– Manual cleanup may still be needed
– Fine details are not always accurate
– Reference image quality matters
– Advanced mechanical parts need further editing




Great review — the Teddy figurine result is really impressive, and it is nice to see how well a single photo can be turned into a printable 3D model. I have been experimenting with similar tools myself and recently tried an image to 3D model service for a pet photo, which was also surprisingly good for simple figurines. The Add Base and color features you tested here would definitely be a big plus for anyone printing these models at home.