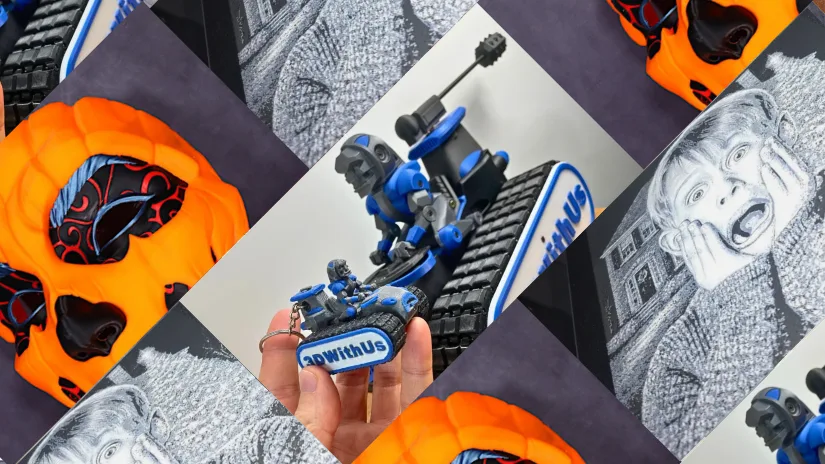
Multicolor 3D printing has come a long way. From detailed figurines and colorful cosplay props to layered artwork and realistic full-color models, today’s technologies offer more creative possibilities than ever. Automatic filament changers, toolchanging printers, and modern slicing software have made many of these workflows much more accessible.
At 3DWithUs, we began exploring multicolor 3D printing years ago with simple manual filament changes. Since then, our hands-on tests have grown to include automatic multicolor systems, four-toolhead printing, HueForge artwork, AI-assisted model segmentation, and examples of industrial full-color technology. This guide brings those methods and our original projects together.
Editorial note: Hands-on testing by 3DWithUs contributors: Will Zoobkoff, Phil Macey, Richard Hirst, Max Funkner, and Andrew Sink.
Table of Contents (Jump to a Section)
- Multicolor 3D Printing Methods
- Automatic Filament Changing Systems
- Toolchanging 3D Printers
- Dual and Multiple Extruders
- Manual Filament Changes
- Color Mixing and Special Filaments
- HueForge and Filament Layering
- Multicolor Printing with Separate Parts
- Full-Color 3D Printing Technologies
- Multicolor 3D Printing Software
- Comparing Multicolor Printing Methods
- Tips and Tricks
- Conclusion
Multicolor 3D Printing Methods
There is no single way to produce a multicolor 3D print. Some methods use multiple filament spools, others switch between separate printheads, and some rely on special filaments or printing models in separate parts. The right method depends on the intended result, budget, and available equipment. Many colorful projects can be achieved even with budget 3D printers, without investing in expensive multicolor hardware.
It is worth distinguishing multicolor from multi-material printing. Multicolor printing uses different colors, often of the same material. Multi-material printing combines materials with different properties, such as rigid filament and flexible filament, or model material and soluble supports. Not every multicolor printer supports every material combination.
The methods below range from automated desktop printing to simple manual techniques and industrial processes. We start with the systems that make detailed multicolor projects relatively easy today, then look at lower-cost alternatives and specialized workflows.
Automatic Filament Changing Systems
Automatic filament changing systems have made detailed multicolor printing accessible to many desktop users. Rather than manually replacing a spool during the print, the printer switches among connected filaments based on color assignments in the slicer. This makes it possible to place several colors on the same layer of a model.
Examples include Bambu Lab AMS and AMS lite, Creality CFS, and other automated multi-filament systems. The tradeoff is that a single-nozzle printer usually needs to purge the old color before extruding the next one, adding time and waste. The number of supported colors and materials varies by configuration.
Bambu Lab AMS and AMS lite
At 3DWithUs, Will Zoobkoff tested the Bambu Lab P1S Combo with AMS, producing detailed multicolor masks, figurines, and articulated prints.
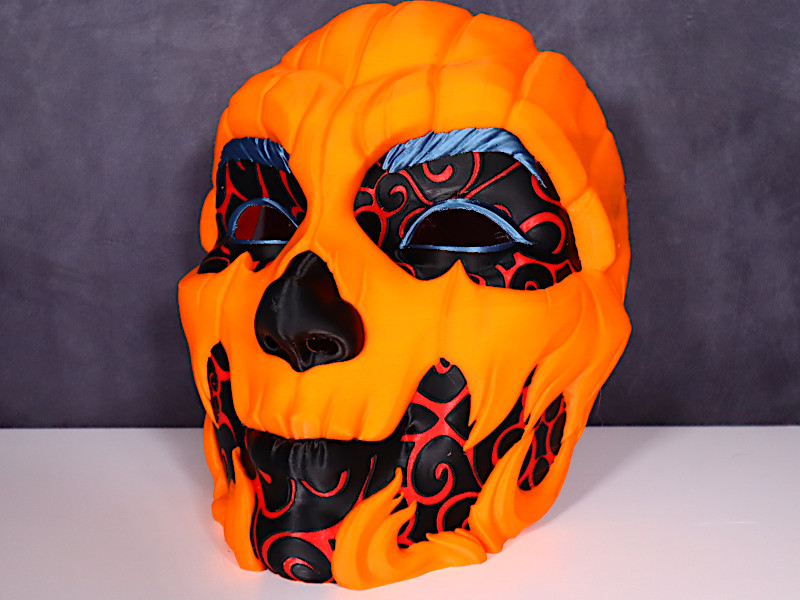
Pumpkin Girl mask printed with the Bambu Lab P1S Combo and AMS. Print and photo: Will Zoobkoff. Design: Pipe Cox.
The four-color Pumpkin Girl mask shows the appeal of automated color changes for complex decorative models. It also highlights the cost of frequent swaps: printing can take substantially longer than a comparable single-color model.
Will also tested the Bambu Lab A1 Combo with AMS lite, another approach to automated four-color desktop printing.
Other Automatic Multicolor Systems
Systems from different brands follow a similar general principle but differ in loading mechanisms, material handling, software integration, and purge behavior. Phil Macey tested the CANVAS multicolor upgrade on the Elegoo Centauri Carbon, including a range of test models and practical observations about printing time and waste.

Elegoo Centauri Carbon CANVAS upgrade and multicolor test prints. Photo: Phil Macey, 3DWithUs.
Read more in our Elegoo Centauri Carbon hands-on testing guide.
Toolchanging 3D Printers
Toolchanging takes a different approach: the printer switches between separate printheads or hotends, each already loaded with its own filament. Because the nozzles are not sharing a single melt path, toolchanging generally needs much less color-purging than single-nozzle switching, although it still involves tool-change time and hardware complexity.
Snapmaker U1: Four-Toolhead Printing
The Snapmaker U1 uses four interchangeable toolheads. During our hands-on testing, we printed multicolor figurines, miniature models, and objects created from 3D scans.

Snapmaker U1 four-toolhead printer and a selection of our test prints. Print and photo: Max Funkner, 3DWithUs.
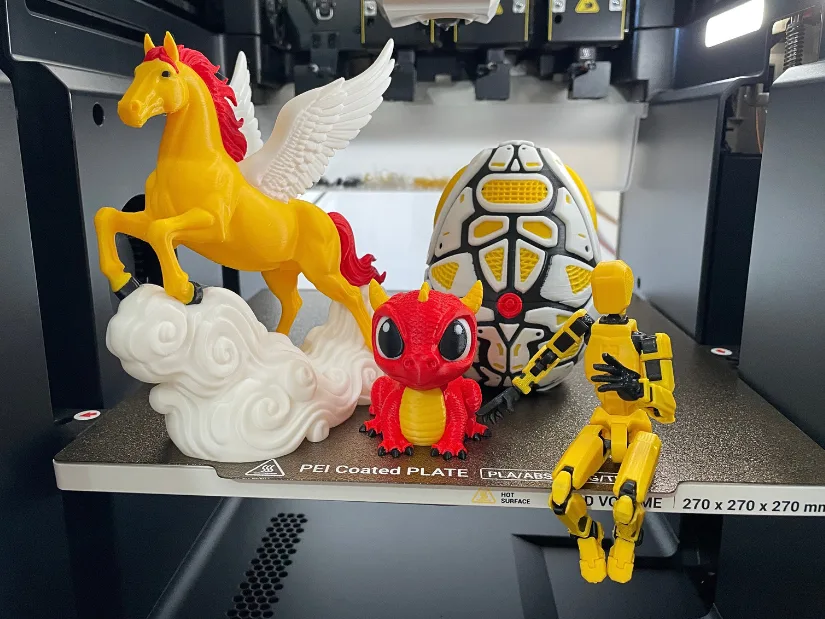
Multicolor models printed on the Snapmaker U1, demonstrating separate-color details on a range of designs. Print and photo: Max Funkner, 3DWithUs.
For small, frequently changing color regions, reduced purging is a practical advantage. We also explored how 3D scanning can be combined with multicolor printing to create personalized miniatures.
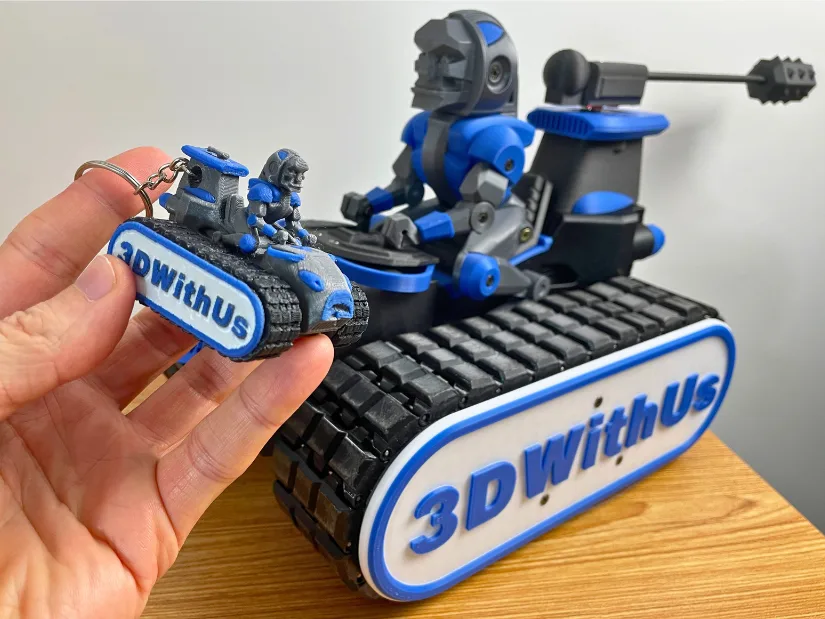
Scaled-down DeathRacer keychain created from a 3D scan and printed in multiple colors on the Snapmaker U1. Print and photo: Max Funkner, 3DWithUs.
See our Snapmaker U1 hands-on guide for more printing examples and workflow details.
Dual and Multiple Extruders
Another approach is to use a printer with two or more extruders or nozzles. These can hold different filaments at the same time, avoiding the need to feed every color through one nozzle. Some machines mount two nozzles on the same carriage; independent dual extruder (IDEX) printers can move their printheads independently along one axis.
Dual extrusion is useful for two-color models, compatible material combinations, and soluble supports. Challenges include nozzle alignment, idle-nozzle oozing, and print preparation. The Snapmaker Artisan is one example of an IDEX printer we have tested.
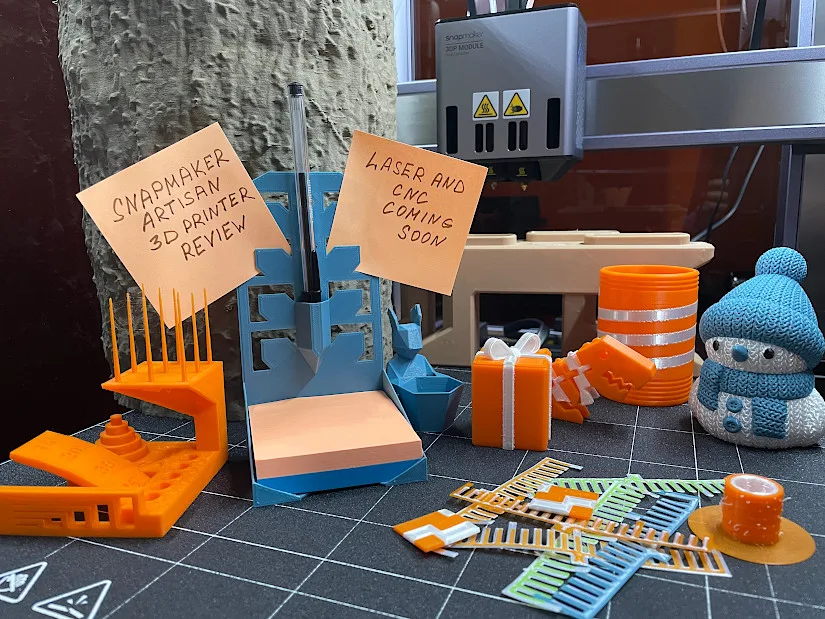
Completed test prints from our Snapmaker Artisan testing. Photo: 3DWithUs.
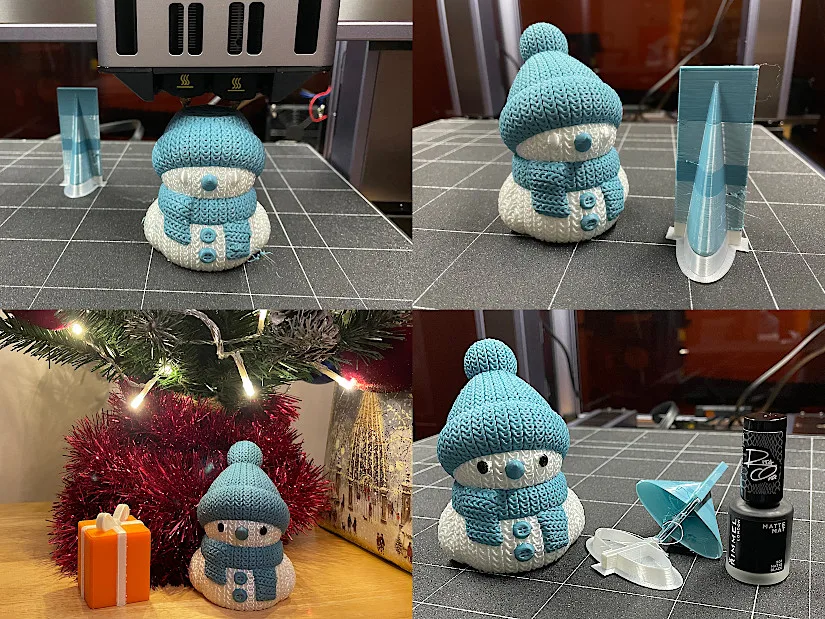
Knitted Snowman multicolor test print produced on the Snapmaker Artisan. Photo: 3DWithUs.
Manual Filament Changes: Single-Extruder Multicolor Printing
Before automated systems became widespread, one of our favorite entry-level techniques was changing filament manually at a chosen layer. It is still useful today for signs, lettering, logos, and prints with colors separated by height. The slicer inserts a pause or filament-change command; the operator swaps filament, purges the old color, and resumes printing.
Firmware support for pause and filament-change commands differs between machines. Test the chosen command and resume behavior before a long print. These early experiments also provide an interesting snapshot of how our multicolor workflow has developed over the years.
Signs, Logos, and Practical Prints
We experimented with warning signs, novelty signs, and small decorative objects. The raised symbols and lettering made it easy to change colors between layers without complex preparation.

Fire and warning signs by Obolski. Print and photo: Max Funkner, 3DWithUs.

Funny Toilet Sign by HJ3D. Print and photo: Max Funkner, 3DWithUs.
We also experimented with a two-color 3DWithUs logo in Tinkercad, adjusting the model’s surface and turning the result into a fridge magnet.
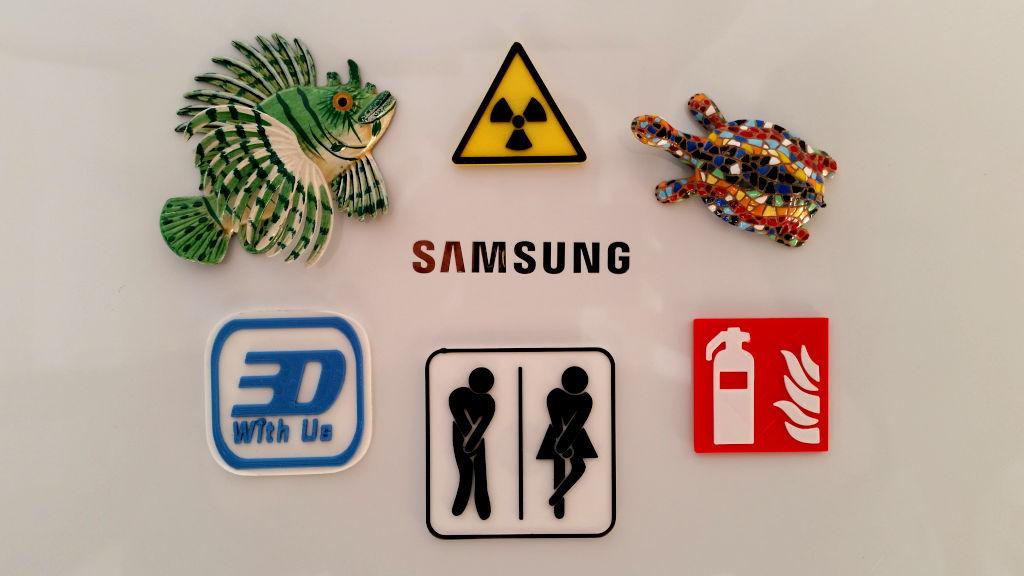
Collection of 3D printed fridge magnets, including the two-color 3DWithUs logo. Print and photo: Max Funkner, 3DWithUs.
3D Printing Guardian: An Early Experiment
Another early experiment was our 3D Printing Guardian pen holder and tool organizer. By switching colors at selected heights, we could highlight different parts of this unusual design.

3D Printing Guardian pen holder, an early multicolor experiment using manual filament changes. Print and photo: Max Funkner, 3DWithUs.
Years later, we revisited the Guardian idea through AI-assisted segmentation and toolchanging. That modern project appears in the separate-parts section below.
Color Mixing and Special Multicolor Filaments
Not every multicolor effect requires several filament changes. Mixing hotends blend filament inputs, while decorative filaments can create multicolor effects in a conventional single-nozzle printer.
Mixing Hotends
A mixing hotend feeds two or more filament inputs into a shared melt path. Depending on the system, it may produce blended colors or gradual transitions rather than sharply separated color areas. Results require careful calibration and can vary with extrusion ratios and filament properties.
Dual-Color, Tri-Color, and Rainbow Filaments
Dual-color and tri-color co-extruded filament contains several colors within one strand, producing different appearances depending on the model and viewing angle. Rainbow or gradient filament changes color gradually along its length as printing progresses. Neither method normally allows precise color assignment to individual features.

Rainbow Silk PLA filament and test prints. Print and photo: Andrew Sink, 3DWithUs.

T-Rex skull printed in Conjure Matte Rainbow PLA. Print and photo: Phil Macey, 3DWithUs.
These filaments are especially attractive for vases, sculptures, ornaments, and decorative models where exact color placement is less important than the overall effect.
HueForge and Filament Layering
HueForge is a different approach to colorful printed artwork. It uses filament colors, translucency, and controlled layer thickness to reproduce images as layered reliefs. Prints can use only a few colors yet appear surprisingly detailed, with either manual or automated changes at selected layers.
HueForge Example: Elegoo Centauri Carbon 2
During testing of the Elegoo Centauri Carbon 2 Combo, Phil Macey printed a Home Alone-themed HueForge artwork using black and white PLA. The grayscale image demonstrates how much visual detail can be achieved with just two colors.
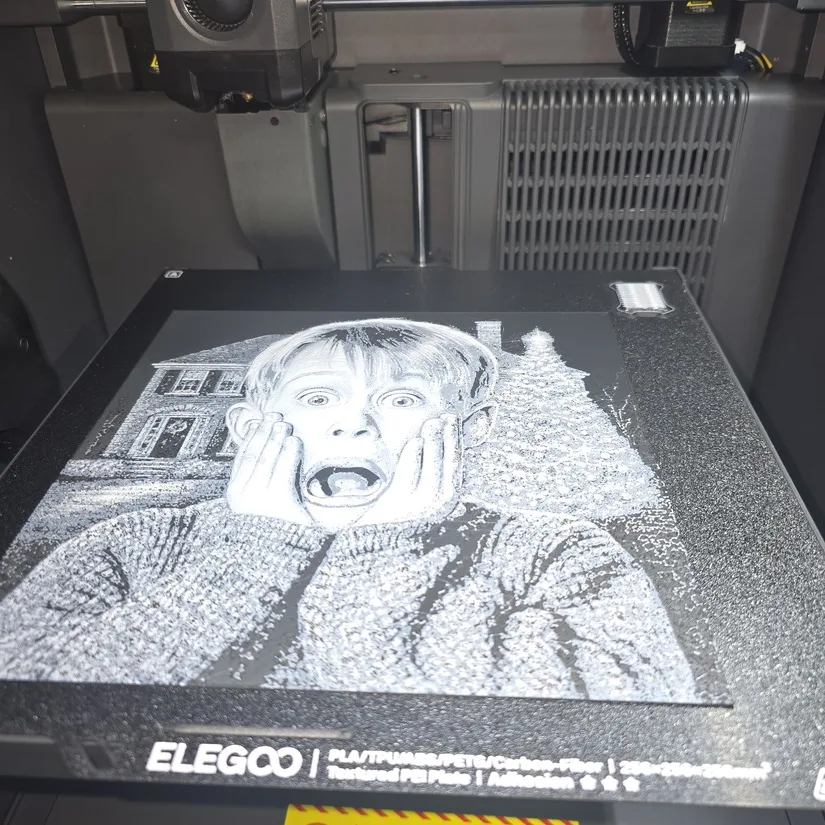
Home Alone-themed HueForge wall art printed on the Elegoo Centauri Carbon 2. Print and photo: Phil Macey, 3DWithUs.
Read more: Elegoo Centauri Carbon 2 Combo hands-on testing.
Multicolor Printing with Separate Parts
A model does not have to be printed in one piece to be multicolor. Printing individual sections in different colors, then assembling them, is a practical way to extend the total palette, even on a machine with a limited number of loaded filaments. The method calls for suitable joints, tolerances, or adhesives and additional assembly work.
3D Printing Guardian: More Than 12 Colors
We revisited the 3D Printing Guardian with a new workflow. Using Tripo AI, we segmented the model into seven parts, then reorganized them into three larger printable sections. Different filament combinations were used for each section on the Snapmaker U1.
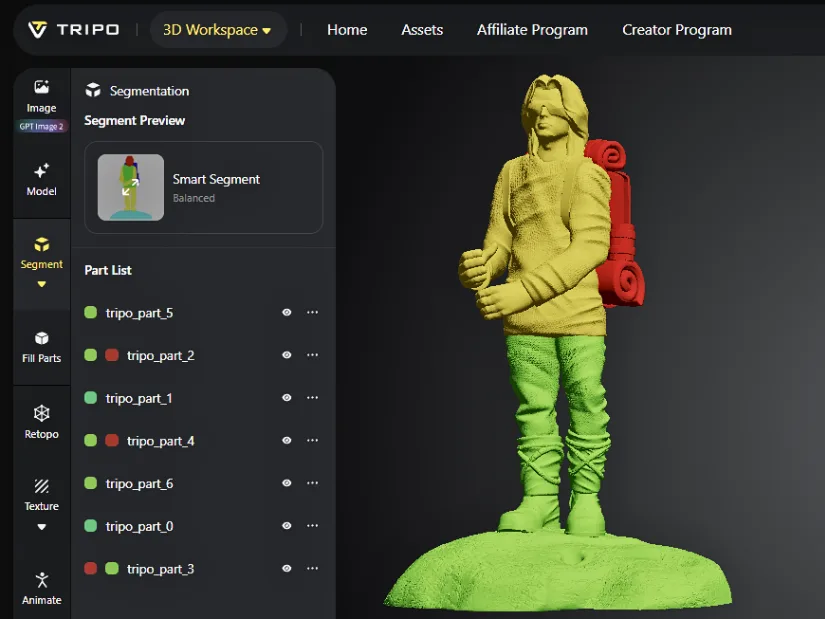
Preparing the Guardian model with Tripo AI’s segmentation tools. Screenshot: Max Funkner, 3DWithUs.
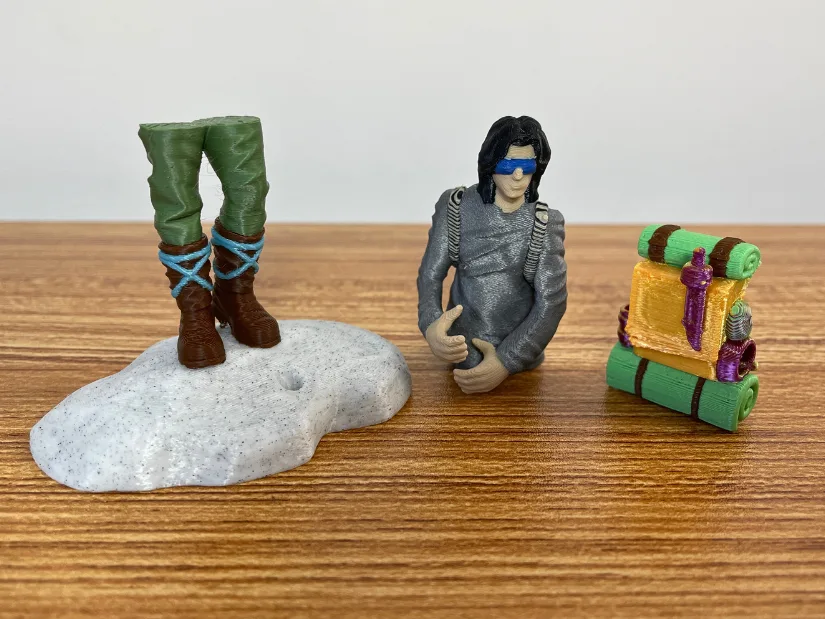
The Guardian printed as three multicolor sections before assembly. Print and photo: Max Funkner, 3DWithUs.
The finished Guardian incorporated approximately 12 distinct filament colors plus two mixed shades, showing that the number of colors in a completed model can exceed the number available in the printer at one time.
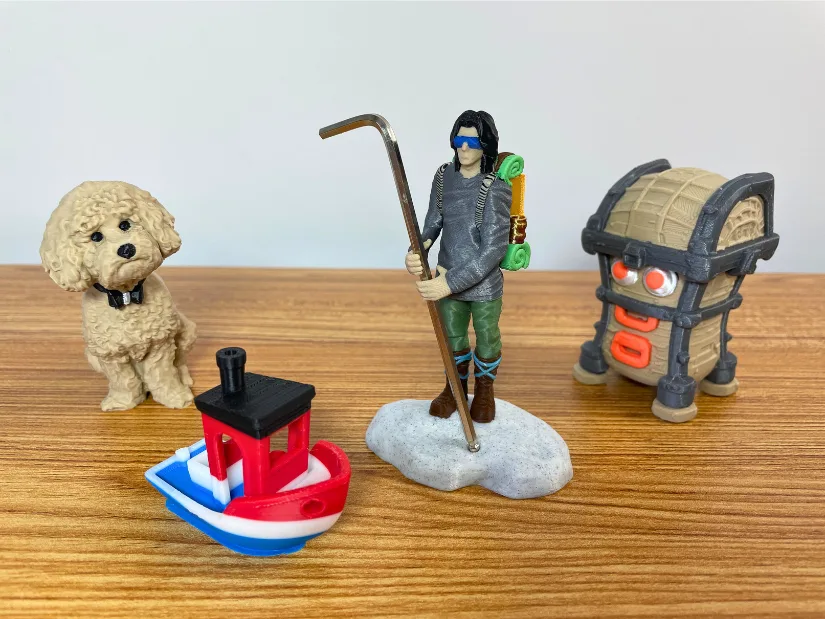
The finished multicolor Guardian alongside other Tripo AI test prints. Print and photo: Max Funkner, 3DWithUs.
For the printing setup, see our Snapmaker U1 hands-on guide.
Full-Color 3D Printing Technologies
Desktop FDM printers typically use a relatively small set of discrete filament colors. Industrial full-color technologies can offer realistic surface colors, fine gradients, and detailed textures beyond what conventional multicolor FDM can easily produce.

Detailed full-color 3D printed models displayed at the Mimaki stand during Formnext. Photo: Max Funkner, 3DWithUs.
Material Jetting
Material jetting deposits tiny droplets of material in controlled locations and then cures or solidifies them. Some systems use combinations of photopolymers to create highly detailed, multicolor models. Full-color inkjet-style systems also exist, with the exact materials and processes depending on the manufacturer.
Binder Jetting and Full-Color Powder Printing
Some binder jetting systems selectively deposit colored binding agents into powder, creating full-color objects for figurines, architectural models, visualization, and prototypes. Finished parts can require post-processing and may have different strength and surface characteristics from filament prints.
Color Resin Printing and Surface Finishing
Most conventional desktop resin printers use one resin color per print. Separate colored components, painting, or specialized industrial processes can expand the appearance of a finished object, but painted parts should not be confused with directly printed full-color parts.
Industrial applications also extend beyond figurines and prototypes. At Formnext, we photographed Stratasys 3DFashion examples showing how colorful designs and textures can be applied in fashion-focused workflows.

3DFashion examples displayed at the Stratasys booth during Formnext. Photo: Max Funkner, 3DWithUs.
Multicolor 3D Printing Software
The slicer is central to most modern multicolor workflows. Depending on the printer and method, software can assign colors to separate objects, paint directly on model surfaces, insert layer-change commands, and calculate purge volumes and material consumption.
Popular slicers include PrusaSlicer, Bambu Studio, OrcaSlicer, Cura, and manufacturer-specific software. Features and compatibility vary between printer profiles and versions.
Color Painting and Model Preparation
Color painting allows users to assign different filaments to selected surfaces of a mesh. Models with separate components or prepared 3MF projects may require less manual painting, but complex scans and detailed textures can still demand significant work.
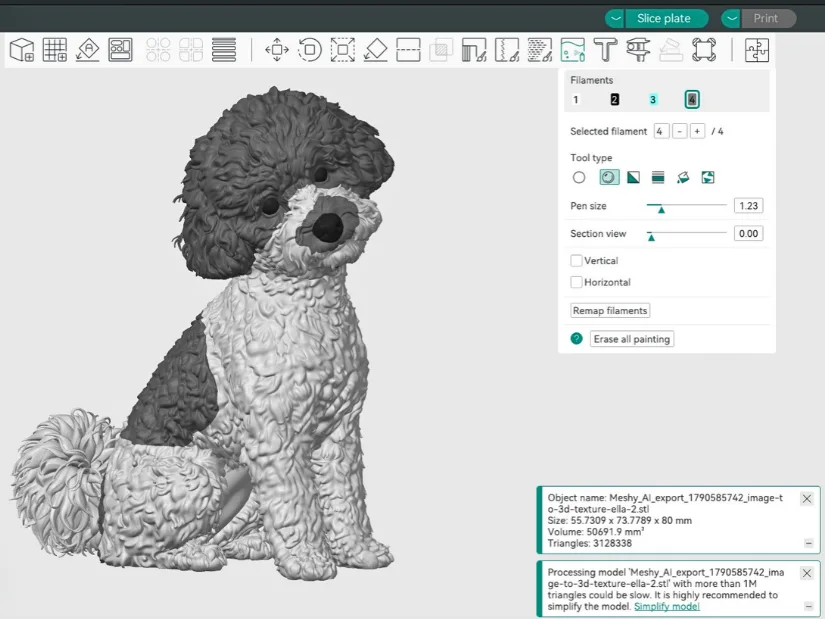
Refining Ella’s coat pattern using the color-painting tools in Snapmaker Orca Slicer. Screenshot: Max Funkner, 3DWithUs.
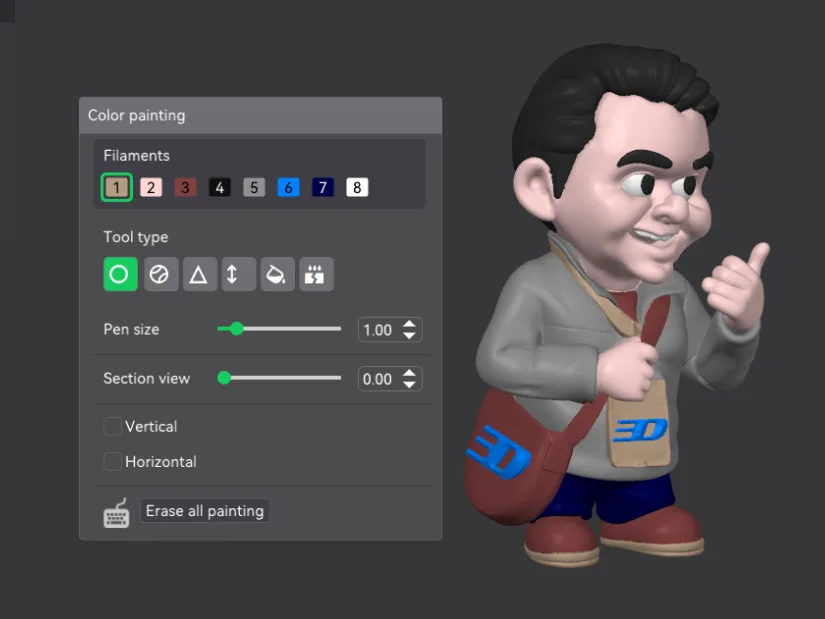
My CubeMe avatar being prepared for multicolor printing in CrealityPrint, with eight assigned filaments. Screenshot: Max Funkner, 3DWithUs.
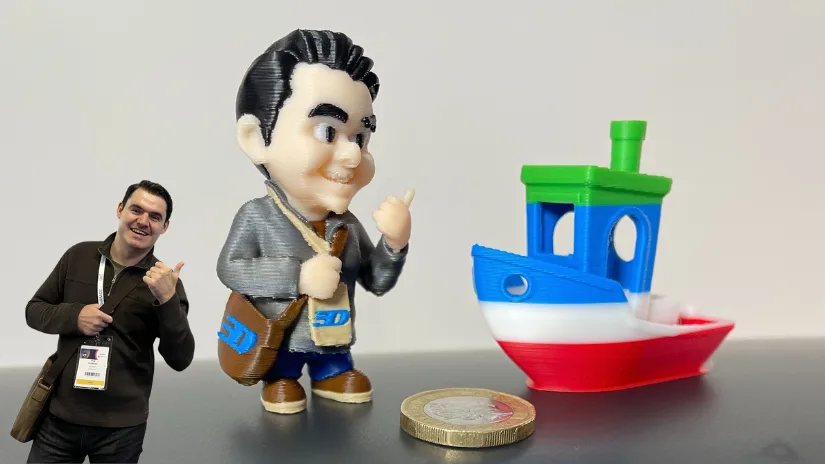
©3DWithUs – Print and Photo: Max Funkner
We also tested eight-color printing on the Creality K2 Pro Combo with two CFS units. One of our projects involved preparing a personalized CubeMe avatar in CrealityPrint, assigning eight filament colors, and producing a miniature figurine alongside a multicolor Benchy. This experiment demonstrates how automated filament systems can bring complex, personalized models to life.
Before starting a long print, check the sliced preview, color transitions, purge settings, support structures, estimated time, and material consumption. Saving the complete 3MF project can help preserve color assignments and relevant settings.
Comparing Multicolor 3D Printing Methods
Different approaches balance cost, time, complexity, and creative control. This overview can help you select a technique for the project rather than simply choosing the printer with the highest advertised color count.
| Method | Main Advantage | Main Limitation |
|---|---|---|
| Automatic filament switching | Detailed designs with multiple colors on one layer | Purging adds time and waste |
| Toolchanging | Separate material paths and less purging | More complex hardware |
| Dual or multiple extruders | Multiple materials or colors kept loaded | Alignment and oozing considerations |
| Manual filament change | Low-cost entry point | Best suited to layer-based color changes |
| Mixing hotends | Blended tones and gradual transitions | Calibration and color predictability |
| Special multicolor filament | Color effects with one nozzle | Little control over placement |
| HueForge | Detailed layered artwork with few filaments | Specialized image-relief workflow |
| Separately printed parts | More total colors with limited hardware | Assembly and segmentation effort |
| Industrial full-color printing | Detailed surface colors and gradients | Cost, materials, and post-processing |
Multicolor 3D Printing Tips and Tricks
- Choose a method that matches the model. A simple two-color sign rarely needs a complex automatic system.
- Start small. Run a short color-change test before a long multicolor project.
- Check material compatibility. Not every combination of filaments works well together.
- Inspect the sliced preview. Confirm colors, supports, and transitions before printing.
- Account for waste. Frequent single-nozzle color swaps can use considerable purge filament.
- Optimize orientation. Model placement affects detail, supports, and color-change counts.
- Consider splitting complex models. Printing in sections can greatly expand the final color palette.
- Save the complete project. A prepared 3MF file can preserve assignments and other useful settings.
Conclusion: Choosing the Right Multicolor 3D Printing Method
Multicolor 3D printing has progressed from simple manual filament swaps to automated systems, multiple printheads, layered artwork, and sophisticated industrial technologies. There is no universal best method: the right choice depends on whether you are producing a sign, figurine, functional object, image, or full-color professional model.
Our projects demonstrate that impressive results are possible at many budgets. Manual filament changes remain useful for straightforward designs, automatic systems make complex models more approachable, and toolchanging reduces the purging associated with frequent color swaps. HueForge, special filaments, and printing separate parts offer additional creative options.
At 3DWithUs, we continue exploring these methods through hands-on testing, original projects, and contributions from our reviewers. Many of these techniques are accessible even with budget 3D printers, making multicolor printing an exciting option for beginners and experienced makers alike. As new technologies emerge, we will continue updating this guide with practical examples and insights.