
One of the recent updates from Polycam, Photo Mode, made my life easier. Basically, it is a very convenient feature powered by Apple’s Object Capture – photogrammetry processing in the cloud. With the hassle-free switching between LiDAR and Photo Mode, the Polycam app became a handy two-in-one 3D scanning application.
Table of Contents:
- Convinient Scanning Technology
- LiDAR vs Photo Mode
- Video Making Feature
- Room Mode New Feature
- Polycam Community – Explore & Publish
- Polycam for Web
- Tutorials & Links
- Conclusion
Convenient 3D Scanning Technology
LiDAR and Photo modes give the ability to capture 3D objects or the scenery using smartphones in two ways. If LiDAR technology on iPhones became a significant time-saver for processing certain scans (sceneries, murals, streets). Then processing photo sets in photogrammetry software is usually done on a relatively powerful PC or in the cloud via PC (f/e Autodesk ReCap software). Polycam is one of the first mobile apps that enabled uploading photo sets to the powerful PC/Server in the cloud. Once in the cloud, Apple’s Object Capture 3D reconstruction software does the job and 3D models become available to download after a short duration.
Note.
LiDAR works on iPhones 12 PRO or higher versions. Photo Mode should be working on all iOS devices. According to Polycam, an Android version of the application with the Photo Mode feature is expected to be released soon.
Update: Polycam for Android version released with the Photo Mode feature.
Other than iOS or Android users can try a handy Polycam for Web feature.
Which Mode to Use: LiDAR or Photo? – Both
First of all, if an object or scenery is important for you, I would recommend capturing it using the LiDAR mode to start with. The capture in LiDAR plays as a sort of a warm-up. As the LiDAR’s result comes very quickly, it is easy to get the feel of where to pay attention when taking the photos in the Photo Mode.
If to compare the end quality, Photo Mode provides better results, I would say, for everything. Only if we want to 3D scan large objects (houses, rooms) or the scenery, we would need to take multiple photo sets and stitch the objects together manually, when LiDAR may provide us with a lower quality result, but in a matter of seconds. Also, LiDAR is handy when there is a low-lighting situation or the object has a small number of features, walls for example.

(Image: 3DWithUs)
Sometimes it is difficult to see the significant difference between LiDAR and Photo Mode results. Like with the stone pillar above, there is a slight difference in the object previews, while meshes, in reality, have a big difference. However, to view the mesh I needed a separate software as I could not find that option in the app itself. If you plan to 3D scan for 3D printing, for example, object capturing in Photo mode produces a much better result.
Polycam’s Photo Mode – General Tips
Read the tips (question mark icon)!
It is recommended to take 20-250 images before uploading them to the cloud. I would recommend following the basic photogrammetry rules, like avoiding the shiny objects, restart the capture if an object moved, etc.
– Object Masking. Advanced feature to capture small objects from all angles. After taking a photoset, you will see the Use Object Masking toggle, which is above Upload & Process button. This function is recommended for scanning small objects including when they are on the side during the process.
NB! Capture now – process later to save the battery life. Uploading may eat up a lot of battery charge. It is better to do the upload later via a faster broadband, for example.
Photo set can be downloaded as a Zip file. This is helpful in case you need to retrieve some of the images or retry the photo set on other photogrammetry software.
Polycam’s LiDAR Mode – General Tips
Read the tips (question mark icon)!
Relatively easy to use. Preview mode is the best guidance in the majority of LiDAR 3D apps including Polycam. When scanning, I usually slow down for a little bit in places with thin walls or tricky surfaces so that the software has time to capture properly.
Video Making Feature
Video making is an easy and straightforward feature and handy for sharing. Basically, these are the recorded views of 3D scans. If you want to share a real 3D view, then the model has to be published on such a platform as Sketchfab, for example. Or you register and share the scan in the Polycam community.
– Orbit mode. Default Mode
– Path mode. Usually available for the LiDAR scans. Good when murals or walls are captured as there is a void on the other side.
– Custom. Setup your own keyframes.
Bench Made of Stone – Orbit and Path Video Modes
MP4: Polycam
New Room Planner Feature – Room Mode
Recently Polycam introduced Room Mode and Teams
The new feature is an integrated Apple’s RoomPlan, a new “ROOM” button in the app. The Room Mode is a modern 3D floor plan building feature that uses LiDAR technology to precisely capture distances between the walls, doors, windows, etc. Then a newly developed technology powered by Apple’s ARKit instantly recreates the scanned area live with pieces of furniture and precise measurements.
Scanned using the Room Mode feature
MP4: Polycam
No special training is required before using this feature, and the emerging live 3D object of the room gives an idea of how it works and how to move the device for the best capture. After a few attempts, the process becomes even quicker.
Uses of the Room Mode Feature
– Home improvements. All who are planning home improvement may find this feature very welcome as it is very easy to get a floor plan with the recorded measurements. Then the application implements object recognition and adds a few pieces of furniture. The furniture pieces, that are shown live and as a preview, are generic and are uploaded from the library. So far, we saw beds, sofas, fridges, chairs, tables, shelves, etc., and even a bathroom unit as the toilet. To see the LiDAR capture, we need to process the scan which may take approximately 60 seconds, depending on the file size.
– Architectural model making. Various architectural prototypes can be created in a matter of hours. Furniture that appears on the scan can be toggled off. I downloaded an STL file of our 1st-floor scan without the furniture to 3D print it, here is the result.

Size: 4″ x 2″ x 1″ (101.6 x 50.8 x 25.4mm)
Print time: less than 2 hours
©3DWithUs – Print & Photo: Max Funkner
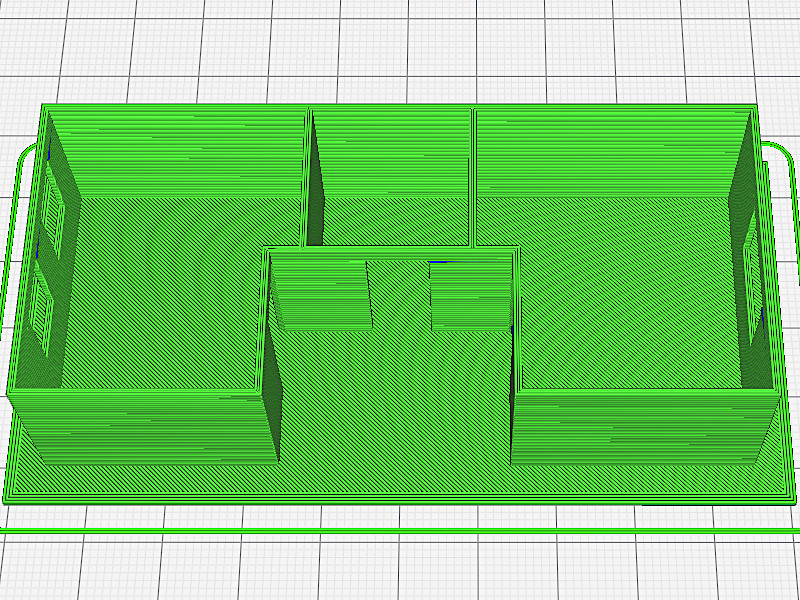
Screenshot: Cura
There shouldn’t be any issues when 3D printing such a model on any FDM or resin 3D printer. To prepare the file for FDM 3D printing, I picked the Standard printing settings in the Cura slicer. 4″ x 2″ x 1″ (10 x 5 x 2.5cm) model took less than 2 hours to print. The print on the picture was made on a budget Elegoo Neptune 3 which I reviewed recently, using white PLA. There were no issues with bridging or bed adhesion.
– AR/VR/Metaverse. All who create virtual worlds may find this feature very valuable as it saves a lot of time. In professional hands, such scans can be turned into quality 3D assets.
Other floor plan tools:
– Ruler. Easy to measure the distance from dot to dot.
– Floorplan. In most cases it won’t be activated unless the whole room is being 3D scanned. This function is for the scans in LiDAR mode.
– Blueprint. This feature will draw for you a blueprint even from a flower bed scan.

(Capture: 3DWithUs)
Polycam Community – Explore & Publish
Explore – Brilliant feature.
I find that uploads by the community give much clearer picture of what may and may not work. And if something was scanned, similar to the published model, and it doesn’t work from the first attempt, then it might be reasonable to try again. For example, My BBQ has an extremely, for 3D scanning, thin legs and it took me three attempts to achieve the desired result. Here is my profile on Polycam and some scans I create for the blogs.
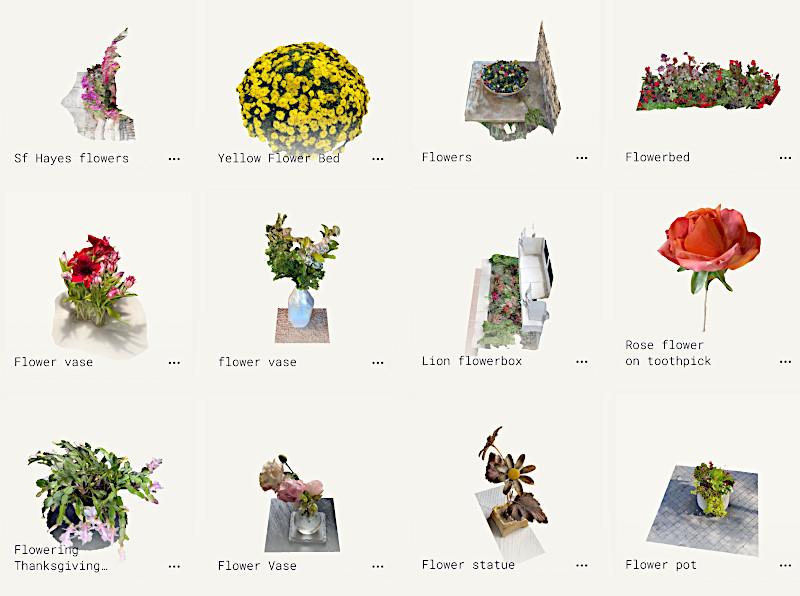
– Albums. Just playing around I created a private Flower and Flower Bed collection. Now, as I am equipped with such a collection, it is easy to try these flowers in the AR mode all over the house. Or to surprise friends by playing around with lovely plant arrangements.
Polycam for Web
Photosets taken by Android, DSLR, or other non-Apple devices can now be uploaded to the cloud for Object Capture photogrammetry to process thanks to the Polycam for Web browser-based feature.

(Screenshot: Polycam)
Up to 250 images that are taken following basic photogrammetry rules, after uploaded and processed, are turned into a 3D Capture. Captures can then be shared with the community and on social media. Also, a mesh of the 3D Capture can be downloaded in the OBJ, GTLF, FBX, DAE, STL formats for further cleaning and editing. The Polycam team made useful tutorials that I think are good to keep in mind.
YouTube Video Tutorials
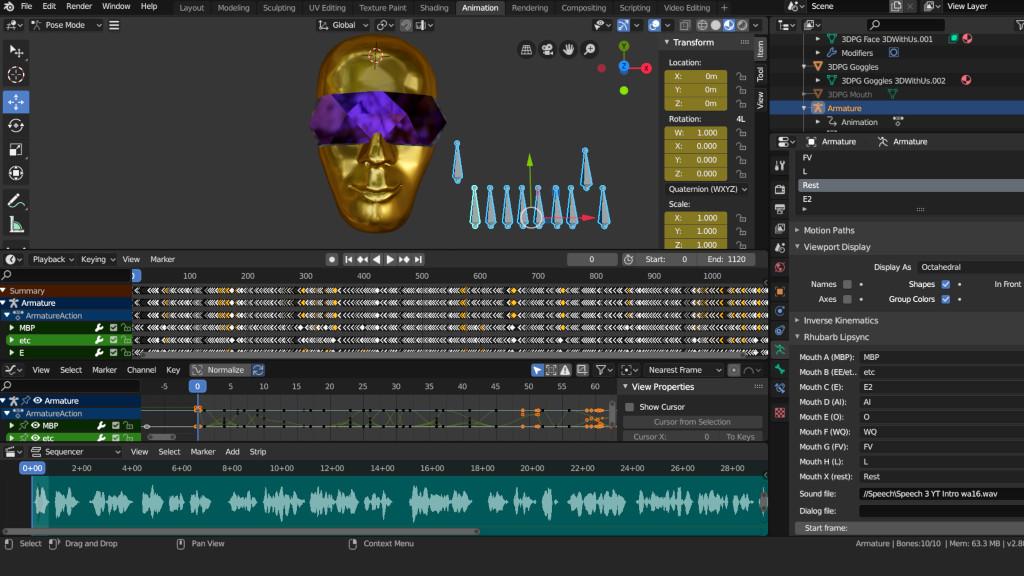
Polycam to Blender
Polycam to Maya
Polycam to Cinema4D
Polycam to Fusion360
Polycam to SolidWorks
Polycam to Rhino
Download Polycam App:
Polycam App for iPhone
Polycam for Android
Please mind that because LiDAR technology has not been developed for Android phones, only the Photo Mode feature is available.
Conclusion
After the Photo Mode feature update, I came to the conclusion that such feature should be enabled in every smartphone 3D scanning application. And because Polycam was one of the first to implement this feature, it receives a lot of attention from both professional and casual users.
For me personally, it was an important improvement, because I was about to reactivate my $50 p/m license on Autodesk ReCap Photo (review), which I wanted to use for the tree trunk scans. Pros are not only in saving money but in the convenience that I mentioned before.
Read more: 3D Scanning Flowers and Flowerbeds
3D scanning flowers and flower beds may be challenging but at the same time rewarding. The end result is a beautiful object that has multiple applications in a 3D world. There are so many small elements and fine detail to take care of, with the shades or even a slight wind movement in the way of the perfect scan. At the same time, capturing the ever-changing highly decorative combinations of such objects often creates the most impressive scans. Let’s find out what can be achieved today with the accessible tools at hand.


I downloaded your app, I loved your 3D App, its so useful. I also have an app called Space Capture that also scans the room and converts it into CAD/BIM. Please go to our app and capture the room space with 3D scanning.