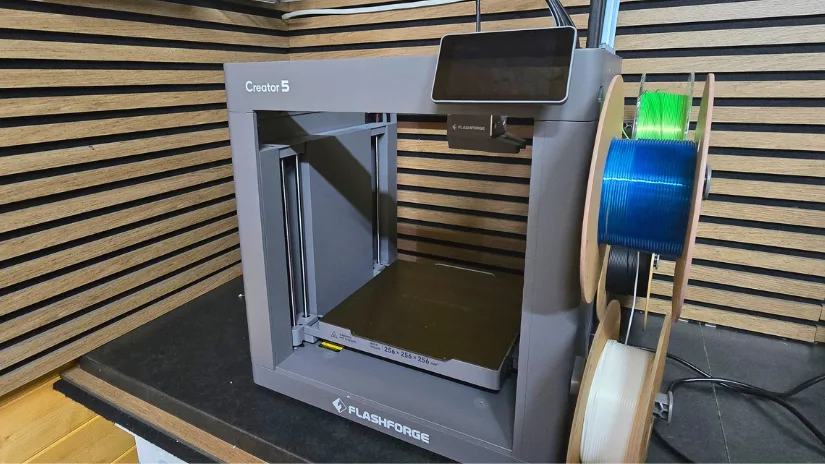
Today, we take a closer look at the Flashforge Creator 5, a four-toolhead FDM 3D printer designed for users who need reliability, material versatility, and consistent performance. Flashforge is a long-established manufacturer known for robust engineering and a steady stream of new hardware releases, and the Creator 5 is positioned as a machine built for demanding environments. In this hands-on article, we’ll look at the setup, calibration, software, print results, and the performance of this multi-toolhead design. Finally, as always, we will finish with the final thoughts and a list of pros and cons.
Table of Contents (Jump to a Section)
Where to Buy
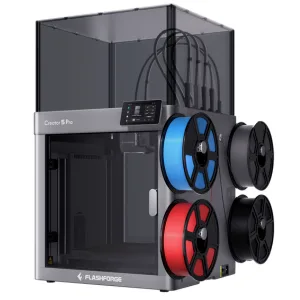
The Flashforge Creator 5 and Creator 5 Pro are available via Flashforge’s official product pages. Pricing starts from $699 for the Creator 5 and $849 for the Creator 5 Pro.
Compare the Prices & Bundles:
C5 via Official Website | C5 Pro via Official Website
What’s in the Box
Inside the package, I found the Flashforge Creator 5, touchscreen, extruder dock module, power cord, four nozzle blockers, Allen keys, grease, screws, four filament samples, user manual, and four spool holders.

©3DWithUs – Photo: Phil Macey
Flashforge Creator 5 Specifications
- Toolhead system: 4 independent toolheads
- Build volume: 256 × 256 × 256 mm
- Max nozzle temperature: 320°C
- Max bed temperature: 120°C
- Build plate: Textured PEI flexible steel plate
- Print speed: Up to 300 mm/s
- Acceleration: Up to 30,000 mm/s²
- Nozzle options: 0.4 mm standard, with 0.25 mm, 0.6 mm, and 0.8 mm options
- Supported materials: PLA, PETG, TPU, PLA-CF, PETG-CF, PVA, BVOH, and selected engineering filaments with enclosure
- Calibration: Automatic bed leveling, dynamic flow calibration, and toolhead calibration
- Monitoring: Built-in 1280 × 720 camera and chamber lighting
- Connectivity: USB, 2.4 GHz Wi-Fi, and 5 GHz Wi-Fi
- Slicer support: Orca-Flashforge and OrcaSlicer
- Structure: Open-frame design
As the product may slightly change over time, the full list of specifications and package contents can be found on the official Flashforge C5 product page.
Design and Features
The Flashforge Creator 5 supports nozzle temperatures up to 320°C and a heated bed reaching 120°C, giving it the range needed for engineering-grade materials. Its motion system is tuned for print speeds up to 300 mm/s with 30,000 mm/s² acceleration, maintaining stability and layer consistency even at higher throughput.
Calibration is handled through a guided routine that includes assisted bed leveling, Z-offset tuning, and toolhead alignment, bringing the machine into a fully dialed-in state in around 20 to 30 minutes. Monitoring is handled by a built-in 1280 × 720 camera at 30 fps, providing real-time visibility and useful timelapse capture. Combined with its multi-toolhead system that reduces waste and shortens print cycles, the Creator 5 delivers a capable, production-minded workflow.
The Creator 5’s print-head assembly houses the extruder motor, while the detachable toolheads only contain the hotend and nozzle. This is unlike the Snapmaker U1, where each toolhead carries its own extruder. The Creator 5 setup keeps the toolheads lighter, enabling fast and clean swaps between materials without lengthy purge routines, while the main print head maintains strong, consistent filament feeding. Combined with automatic alignment and high-temperature nozzles, it delivers fast, precise multi-material printing with minimal waste.

©3DWithUs – Photo: Phil Macey

©3DWithUs – Photo: Phil Macey
The Creator 5 includes a built-in monitoring camera that gives a clear view of the print area, letting you keep an eye on multi-material jobs and toolhead changes in real time. It is especially useful for checking first layers, watching transitions between colours or materials, and reviewing timelapses to spot issues. The camera adds an extra layer of reliability, making it easier to monitor long or complex prints without needing to stand next to the machine.

©3DWithUs – Photo: Phil Macey
It also features a bright LED strip light that illuminates the entire build plate. In my testing, this was definitely an improvement compared with several other brands, especially when checking prints through the built-in camera.

©3DWithUs – Photo: Phil Macey
The Creator 5 uses a rigid, flat, PEI-coated build plate that gives reliable adhesion for most materials without needing extra sprays or glue. Its 256 × 256 × 256 mm build volume offers plenty of space for large models or multi-part batches, and the PEI surface keeps prints stable during fast CoreXY movements while still releasing cleanly once cooled. As with other printers, you do need to remove the three transport screws before use.

©3DWithUs – Photo: Phil Macey
The Creator 5’s Z-axis uses a three-point lift system built around ball screws driven by a single Z-axis stepper motor through a belt. This helps ensure all three screws move in sync as the build plate rises and falls. The screws are positioned at the front-left, rear-left, and middle-right of the bed, giving strong and even support across the platform.
Paired with precision optical rods, the system keeps the bed stable and helps prevent wobble or vibration from screw rotation, maintaining smooth and accurate vertical motion throughout a print.

©3DWithUs – Photo: Phil Macey

©3DWithUs – Photo: Phil Macey
Finally, the manual filament feed on the Creator 5 definitely speeds up the feed and removal process. Compared with the Snapmaker U1, which uses auto feed, this manual system felt quicker in day-to-day use.
Unboxing and Setup
Unboxing the Flashforge Creator 5 immediately sets the tone for what this machine is: a serious, industrial-leaning multi-toolhead printer that arrives with everything organised, protected, and ready to go. The packaging is dense and secure, with thick foam blocks locking the frame in place and each accessory individually wrapped to prevent movement during transit. Nothing feels loose, rushed, or improvised. The presentation reflects a machine built for reliability.
Inside the box, the four toolheads are neatly arranged in their own protective compartments alongside the PEI flexible build plate, power cable, spool holders, and a well-organised accessory kit. Flashforge includes all the essentials: nozzles, tools, screws, grease, and documentation. It is the kind of unboxing where everything has a clear place, and you are not left guessing what a part is for.
Once lifted out of the packaging, the Creator 5’s rigid metal frame makes an immediate impression. Even before powering it on, the machine feels stable and purpose-built, and the clean internal layout is visible straight away. With the printer on the bench, setup begins almost instantly: no complicated assembly, no hidden steps, just a straightforward path from box to minimal build, calibration, and first print.
Printer Setup Procedure
Step 1: Connect the display screen. The push-fit connection removes the need to struggle with screen cables. Then use the supplied screws to secure the screen to the printer.

©3DWithUs – Photo: Phil Macey
Step 2: Install the extruder dock module by sliding it down from above until it clicks into place. It is a simple push-fit connection, but once seated, secure it with the supplied screws. Take care with the four toolheads during this step. Rest them gently on the opposite side to avoid strain or accidental damage.

©3DWithUs – Photo: Phil Macey

©3DWithUs – Photo: Phil Macey
Step 3: Fit the toolheads onto the Creator 5’s magnetic connectors. This is a simple but precise step. Each toolhead uses a guided pin-slot system that ensures correct alignment before the magnets pull it into position.
- Hold the toolhead with the nozzle facing downward and the connector pins facing the rear of the printer.
- Line up the two locating pins on the toolhead with the matching slots on the magnetic dock.
- Once aligned, push the toolhead straight in with firm, even pressure. You will feel the magnets engage as it clicks into place.
- Give the toolhead a gentle tug to confirm it is seated correctly and fully locked onto the dock.
- Repeat the process for all four toolheads, ensuring each one is aligned before applying pressure to avoid bending the pins.
This method keeps the installation controlled and prevents strain on the connectors, giving a clean and secure fit every time.

©3DWithUs – Photo: Phil Macey

©3DWithUs – Photo: Phil Macey
Step 4: Connect the print head cable. This is a USB-C style connection, and it is secured with the supplied screws.

©3DWithUs – Photo: Phil Macey
Step 5: Install all four nozzle blockers with the curved edge facing downward. This step can also be done before connecting the toolheads.

©3DWithUs – Photo: Phil Macey

©3DWithUs – Photo: Phil Macey
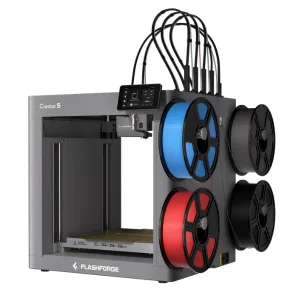
Step 6: Install the spool holders. First, remove the stickers covering the four mounting holes, then install each spool holder in each corner and secure them with the supplied screws.

©3DWithUs – Photo: Phil Macey

©3DWithUs – Photo: Phil Macey
Step 7: Remove the three transport screws highlighted with arrows. It is important not to calibrate or power the machine fully until this step has been carried out.

©3DWithUs – Photo: Phil Macey
Calibration
The next step is the setup and calibration procedure. The whole process is made easy with the simple step-by-step guide shown on the screen. First, you select your chosen language, followed by another reminder to remove the three transport screws. Next, you can assign your Wi-Fi connection, although you can skip this step and perform it later.
You are then required to perform a full calibration of the printer. The approximate time for this is around 20 to 30 minutes. The routine includes full auto bed leveling, vibration compensation, pressure advance, and toolhead calibration.

©3DWithUs – Photo: Phil Macey
The Creator 5’s toolhead calibration is a streamlined, mostly automated process that brings all four hotends into the same coordinate system. It starts with a quick semi-assisted bed level, where the printer guides you through three adjustment points and then uses each head to establish a shared Z-offset baseline.
Once the bed reference is locked in, the machine prints a series of alignment patterns to measure the XY differences between the toolheads. It analyses how these lines overlap and automatically applies the necessary offsets, ensuring each head lands in the same position during multi-material or multi-colour prints.
With XY sorted, the printer moves on to fine Z-offset matching. Each head prints a short test line, and you confirm or slightly adjust the height so all four nozzles lay down material consistently. The system then syncs everything together, saves the calibration profile, and prints a final verification pattern. The entire routine takes around 15 to 20 minutes and leaves the machine ready for precise toolhead swaps without visible seams or height inconsistencies.
To carry out this step, the printer asks you to remove the build plate.

©3DWithUs – Photo: Phil Macey

©3DWithUs – Photo: Phil Macey
After reinstalling the build plate, you can print. The overall calibration time can vary, but a rough estimate is around 20 minutes in total. That means the complete unboxing, build, and calibration process can take up to around 30 minutes.
Once these steps are completed, you are welcomed by the user interface. The 4-inch 800 × 480 full-colour touchscreen was responsive, and I found it easy to move between functions.

©3DWithUs – Photo: Phil Macey
The Flashforge Creator 5 arrives mostly preassembled, making installation quick with only a few simple setup steps, followed by an easy guided calibration process. Now it is time to put it to the test with a range of prints, from the preinstalled models to sliced projects using Flashforge’s Orca-based slicer.
Software: Flashforge Orca Slicer
For all slicing needs, I used the latest Flashforge-tuned version of Orca Slicer. With its extensive options and steady stream of updates, it has quickly become a reliable choice for preparing FDM prints. The Flashforge Orca and the Flash Studio Mobile App can be downloaded from their download center.
All models were sliced using the base profile, with only minor adjustments to wall speeds: inner walls at 300 mm/s and outer walls at 250 mm/s.
Test Models
Model 1: Four-Colour Benchy
The first test print was the obligatory multi-colour Benchy, a simple but effective way to confirm that all four toolheads were functioning correctly. The model completed in around 45 minutes with minimal filament waste, and the Creator 5’s multi-toolhead system handled each colour transition cleanly.
Monitoring the print through the onboard camera provided a clear, detailed view of the progress. Overall, the result was a tidy, well-defined Benchy with every feature of the model clearly visible.

©3DWithUs – Photo: Phil Macey
Model 2: The Mandalorian and Grogu
The second model was a Mandalorian and Grogu print found on MakerWorld: The Mandalorian and Grogu model.
This print required four colours: silver, white, green, and black PLA. The overall print time was approximately 6.5 hours, which is pretty impressive. In addition to the print time, the lack of filament waste was also impressive, with only a pre-print purge and a prime tower. This model was sliced using Flashforge Orca Slicer at a 0.2 mm layer height.

©3DWithUs – Photo: Phil Macey

©3DWithUs – Photo: Phil Macey
Model 3: TPU 95A Trainer with Breakaway Supports
The third model was where I wanted to really test the printer’s capability. I used eSUN TPU 95A to print a pair of trainers found on MakerWorld: Whaleberry thick-soled casual shoe.
Because of my shoe size, I had to reslice and reorient the downloaded model to achieve the correct fit, which also changed the support layout. For supports, I used Snapmaker’s new Breakaway filament. With the 256 mm build volume, I could only fit one shoe per print.
Each trainer took roughly 3.5 days to complete, or around seven days of continuous printing in total, at a 0.2 mm layer height. Impressively, both the TPU 95A and the Snapmaker Breakaway filament printed flawlessly throughout the entire process.
Overall, the trainers came out amazing, but they were a little uncomfortable, most likely because of the TPU used. The other issue I found was that I sliced the supports incorrectly. This was not due to the printer or slicer, but my own mistake.

©3DWithUs – Photo: Phil Macey

©3DWithUs – Photo: Phil Macey
3D printing your own shoes at home is becoming increasingly popular in the 3D printing community, and I am happy to see that the Flashforge Creator 5 is capable of this challenging task. Read more about 3D printed shoes on 3DWithUs.
YouTube Video
To see the Flashforge C5 in action, including printing in TPU, check out the hands-on video walkthrough on our YouTube channel:
This video adds extra context to the written review, showing how the Flashforge C5 performs. It is especially useful for seeing the toolhead workflow, TPU printing behavior, and overall machine operation in a practical setup.
Compare Flashforge Creator 5 to Other 3D Printers
In the past, we tested several Flashforge 3D printers on 3DWithUs, and one of the standout machines was the Flashforge AD5X. This multi-colour 3D printer performed particularly well with TPU and delivered interesting results during testing. While this type of multi-colour system has some disadvantages compared with tool-changing machines like the Creator 5, there are still many cases where it can be successfully optimised and used effectively. Check out the Flashforge AD5X testing article.
Era of Toolchangers
Toolchangers and hotend changers are becoming one of the hottest areas of competition in desktop FDM 3D printing. As users, we only benefit from this race: machines are becoming more affordable, workflows are improving, and more innovation is happening around multi-material and multi-colour printing.
For Flashforge C5, Snapmaker U1 is the closest competitor at the moment. The Flashforge Creator 5 and the Snapmaker U1 both support multi-toolhead workflows, but they approach the concept in very different ways, and that difference shapes how each machine behaves.
The Creator 5 uses a lightweight hotend-only toolhead design, keeping the extruder motor mounted on the main carriage. This reduces the moving mass, allowing faster travel speeds, tighter motion control, and cleaner tool changes because only the hotend module is swapped rather than the entire extrusion system.
In contrast, the Snapmaker U1 treats each toolhead as a fully self-contained module, with its own extruder, wiring, and mechanical interface. That makes the U1 more modular and flexible. Each head is a complete system that can be removed, replaced, or upgraded independently, but it also means heavier toolheads, slower acceleration, and more inertia during printing.
Both machines are built with a budget-friendly philosophy, aiming to deliver multi-toolhead capability without drifting into the premium price bracket. Both also put reduced filament waste and consistent print quality at the centre of their design choices. Read more about Snapmaker U1 testing on 3DWithUs.
Of course, it is also important to mention one of the earlier toolchanger-style 3D printers launched by Prusa Research a few years ago. The Prusa XL became available to a wider audience, but its pricing remained steep for many makers. I wrote a detailed review of the Prusa XL after having the opportunity to test it for both 3DWithUs and my 3DPUK Tech Channel on YouTube.
On 3DWithUs, we have also put together a detailed guide featuring budget FDM 3D printers. Tool-changing systems like the Flashforge Creator 5 show how multi-toolhead 3D printing is steadily moving into the mid-price range, around $600. For more options, including other specialty printer types, check out our full guide.

©3DWithUs – Photo: Phil Macey
Flashforge Creator 5 vs Creator 5 Pro
The Flashforge Creator 5 Pro builds on the standard Creator 5 by adding a fully enclosed, actively heated chamber, upgraded air filtration, and improved thermal stability. That means the Pro version is better suited to high-temperature engineering filaments, while the regular Creator 5 is more naturally suited to standard materials like PLA and PETG.
The Creator 5 Pro uses an actively heated chamber that can hold the internal temperature at around 65°C, while its hotends reach up to 320°C. It also includes a HEPA and activated-carbon filtration system that continuously pulls fumes and particles through a dedicated air-circulation module. These are useful features if your material focus is ABS, ASA, nylon, PC, or other engineering materials.
Have questions? Feel free to ask in the comment section below.
For a wider discussion or to share your own Flashforge C5 prints, join us in the forum:
Conclusion and Pros and Cons
Compare the Prices & Bundles:
C5 via Official Website | C5 Pro via Official Website
Flashforge Creator C5 Review
Review Summory
After spending the past two months working with the Flashforge Creator 5 Basic, I have been genuinely impressed by how capable and efficient this machine is, especially for a multi-toolhead printer in this price range. One of the standout advantages has been its multi-toolhead system, which not only speeds up print times but also significantly reduces filament waste. Tool changes are clean and controlled, and despite the faster workflow, overall print quality remains consistently high.
Each of the four toolheads comes fitted with a standard 0.4 mm nozzle, but Flashforge gives you the flexibility to swap them out for 0.25, 0.6, or 0.8 mm options depending on the level of detail or throughput you need. With maximum nozzle temperatures of 320°C and a heated bed that reaches 120°C, the Creator 5 handles a wide range of materials without difficulty.
The 256 × 256 × 256 mm build volume offers plenty of room for most projects, from functional prototypes to multi-part assemblies. The PEI flexible build plate worked well in my testing, and with brands like EIBOS offering compatible alternatives, there is room to customise the setup if you prefer a different surface.
Performance-wise, the printer’s maximum flow rate of 32 mm³/s and top speeds of 300 mm/s, with 30,000 mm/s² acceleration, put it in line with the current generation of fast multi-toolhead machines. Connectivity is equally solid, with both 2.4 GHz and 5 GHz Wi-Fi available for quick and stable transfers.
The built-in Full HD camera, listed at 1280 × 720 and 30 fps, has been surprisingly clear, making it easy to monitor prints or capture timelapses. Paired with the Creator 5’s bright chamber lighting, which is noticeably stronger than many competing brands, you get excellent visibility across the entire build area. That is especially valuable when remote monitoring.
Slicer compatibility is also well covered, with support for Orca-Flashforge and OrcaSlicer, both of which integrate smoothly with the machine.
It is worth noting that this model is the Creator 5 Basic, which is open framed. Flashforge also offers the Creator 5 Pro, an enclosed version with a heated chamber and filtration system. At the time of writing, the price difference between the two is roughly £100, making the upgrade a realistic option depending on your material needs.
With all the standard calibration tools you would expect and a feature set that competes strongly with other budget multi-toolhead printers, such as the Snapmaker U1, the Creator 5 stands out as a well-rounded and reliable choice for anyone looking to step into multi-head printing without overspending.
Pros
- High-temperature nozzle and heated bed
- Solid build quality
- Low cost for a four-toolhead system
- Fast printing performance
- Dual-sided PEI build plate
- Internal light is brighter than many competitors
- Low filament waste compared with many multi-material systems
Cons
- Basic version is not enclosed, although the Pro version is available
- No waste bin
- No heated chamber on the Basic version, unlike the Pro version