Rooting a 3D printer can reveal a lot of benefits and enhancements, the most noteworthy of which is the ability to install new features or get unlimited access to system files for customisation. This comprehensive guide is specifically designed for Creality’s K1 Max, demonstrating how to root the device and maximize its potential. Rooting the K1 Max enables the integration of powerful control systems like Klipper with user interfaces such as Fluidd or Mainsail, giving you greater flexibility and control over your 3D printing experiences.
This article explains all you need to know about rooting your Creality K1, K1 Max, and K1C. The script also supports Ender 3 v3 KE, however we haven’t tested it.
Disclaimer: Rooting your 3D printer can void the manufacturer’s warranty and expose the device to potential security risks. Proceed with caution, as incorrect modifications can result in irreparable damage or operational failures. Fully understand the risks before proceeding.
This Guide Covers
- Benefits of Rooting Your 3D Printer
- Preparation for ROOT Access
- Creality K1 Max Rooting
- Restoriong to the Original Firmware
- Conclusion
Root access means having administrative permissions that allow the user to fully control the operating system. This level of access enables the user to bypass restrictions put in place by the device manufacturer or carrier, install custom software, update the OS, replace the firmware, and perform tweaks and modifications that are otherwise not permissible on unrooted devices.
This article not only explains how to root the K1 Max, but it also discusses crucial changes and additions that dramatically increase its usefulness. From input shaper improvements and KAMP levelling tweaks to camera modifications and handy macros, these updates promise smoother prints, more precise levelling, and greater control over your printer’s settings and performance.
Benefits of Rooting Your 3D Printer
For those undecided between Fluidd and Mainsail, the good news is that you may install both interfaces to discover which one best suits your needs, ensuring a personalized experience. The installation script we’ll be utilizing does more than just enable these control mechanisms. It also includes a number of important updates and changes that considerably improve the machine’s functionality:
• Input Shaper Enhancements: The script includes modifications to the input shaper, a vital tool for reducing printer vibrations. These fixes help in achieving smoother prints and enhancing overall print quality.
• KAMP Leveling Adjustments: With adjustments to KAMP leveling, the script ensures more accurate bed leveling, which is critical for achieving flawless print results on every project.
• Camera Modifications: For those utilizing a camera to monitor prints, the script offers modifications to improve camera functionality, making it easier to keep an eye on your prints in real time.
• Additional Useful MACROS: The inclusion of new MACROS within the script adds a layer of convenience, providing quick access to frequently used commands and settings. As well as some handy for maintenance purposes.
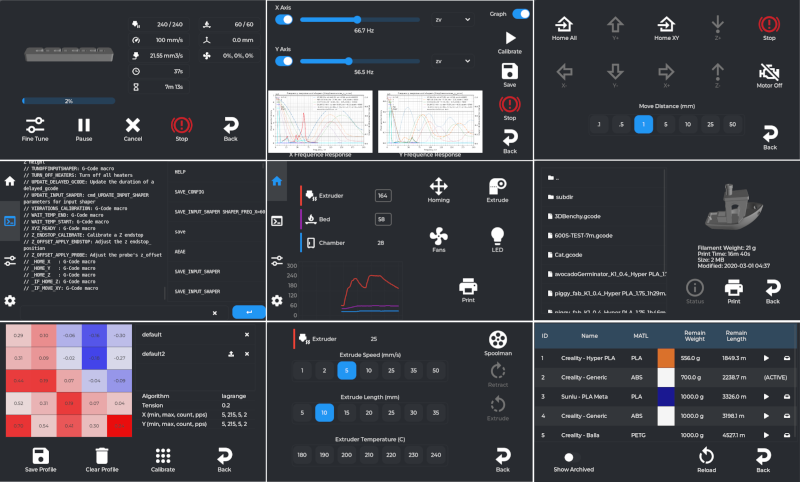
• Revamped Touch Screen Interface: Perhaps one of the most significant enhancements is the introduction of a new touch screen interface. This interface is designed to be intuitive, offering easy access to all the options you could possibly need, all built into a seamless and user-friendly design.
By following these steps to root and modify your K1 Max, you’ll open up a new world of possibilities for your device. Not only will these changes improve the machine’s performance and usability, but they will also enable a more tailored and efficient 3D printing process. Whether you want to fine-tune your printer’s settings, apply quality upgrades, or simply discover your device’s full potential, rooting the K1 Max with the enhancements indicated in this article will get you started.
Preparation for ROOT Access
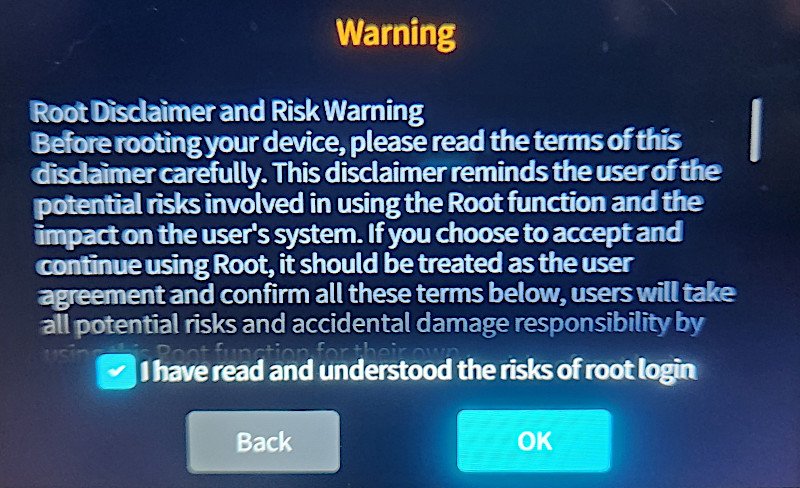
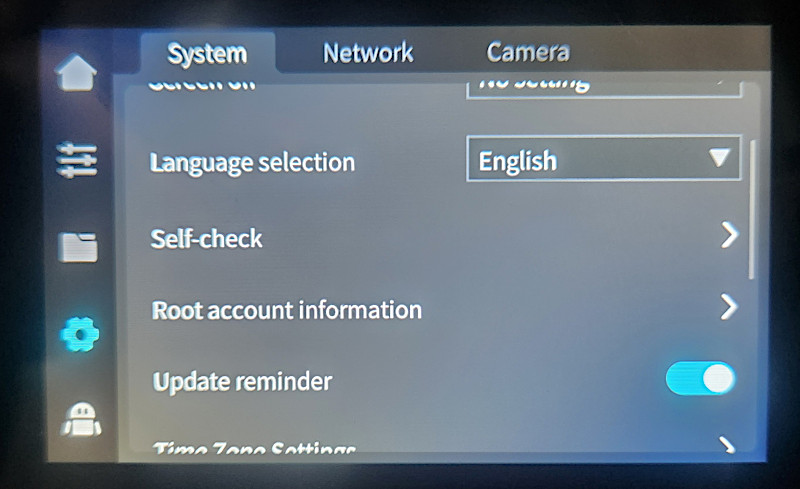
The first step is to enable SSH access on the K1 Max. From the home screen, select the gear icon and scroll down to “Root Account Information.” Once there, wait 30 seconds before tapping “OK.” The screen will display information on root access, which you may read.
Screenshot
Next, we need to identify the K1 Max’s IP address so that we may complete our rooting method remotely. This requires the use of an SSH client. We recommend utilizing MobaXterm, which you can obtain from their website. MobaXterm Xserver with SSH, telnet, RDP, VNC and X11 – Home Edition.
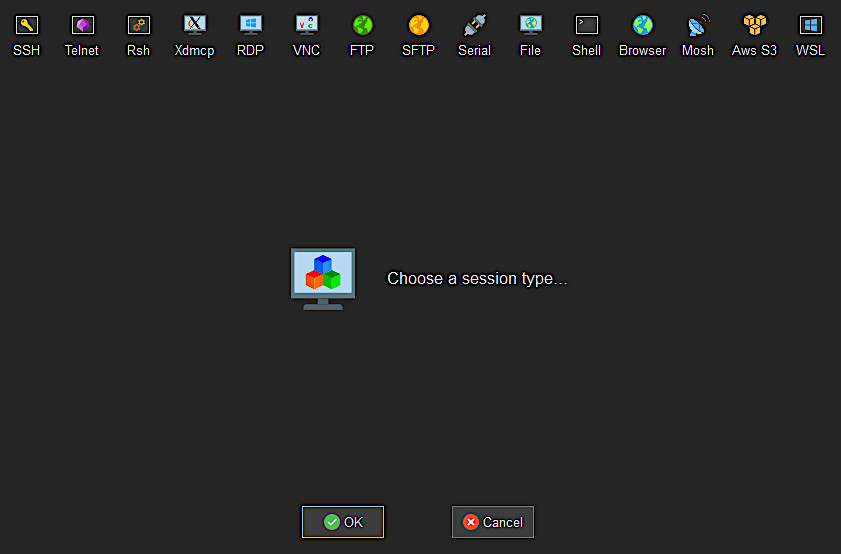
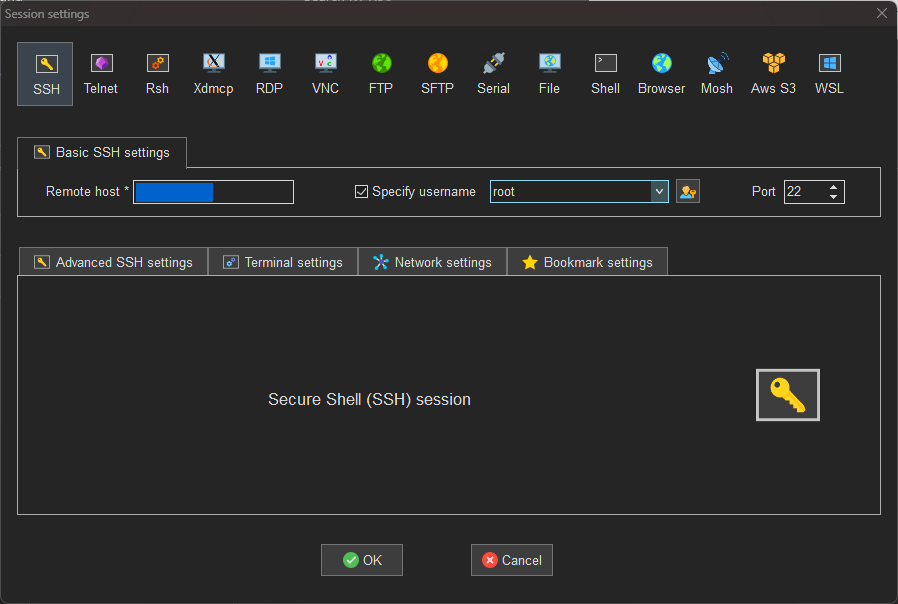
After you’ve installed MobaXterm, connecting to the K1 Max is simple. Simply click the ‘Session’ icon on MobaXterm’s main toolbar. Next, click ‘SSH’. Here, you’ll provide the K1 Max’s IP address as well as the username “root”. When you’re done, click ‘OK’. The following window will prompt you to enter the root password. This password, obtained by selecting ‘OK’ on the Root Account Information screen, is “creality_2023”.
Creality K1 Max Rooting
Based on Cyril Guislain (Guilouz) Instructions.
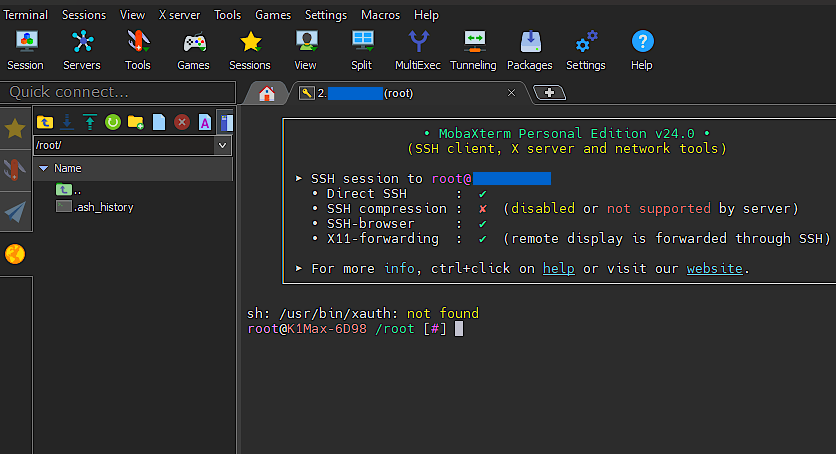
Once we have access, we can now load the installation helper script by executing the following command on the printer:
git clone https://github.com/Guilouz/Creality-Helper-Script.git /usr/data/helper-script
After the script has been downloaded, you can run the script by executing:
sh /usr/data/helper-script/helper.sh
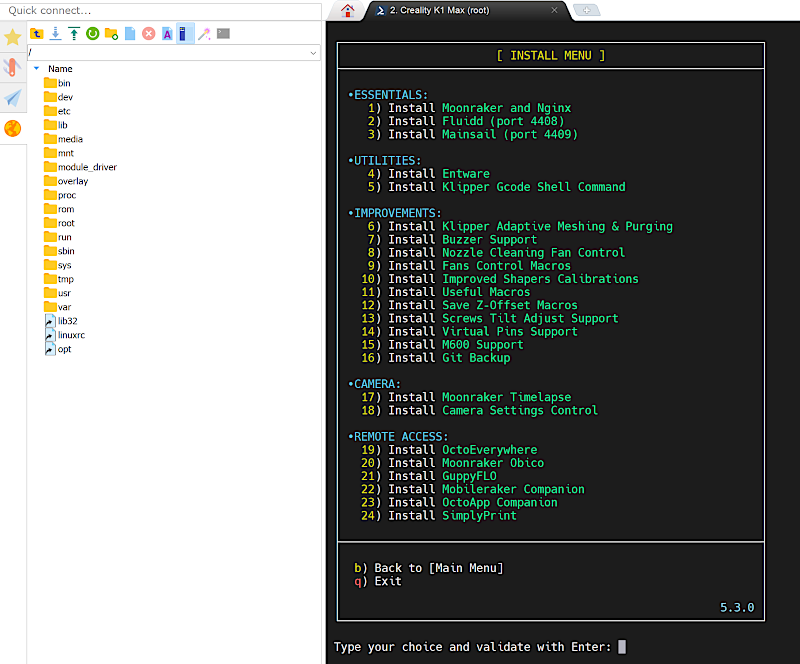
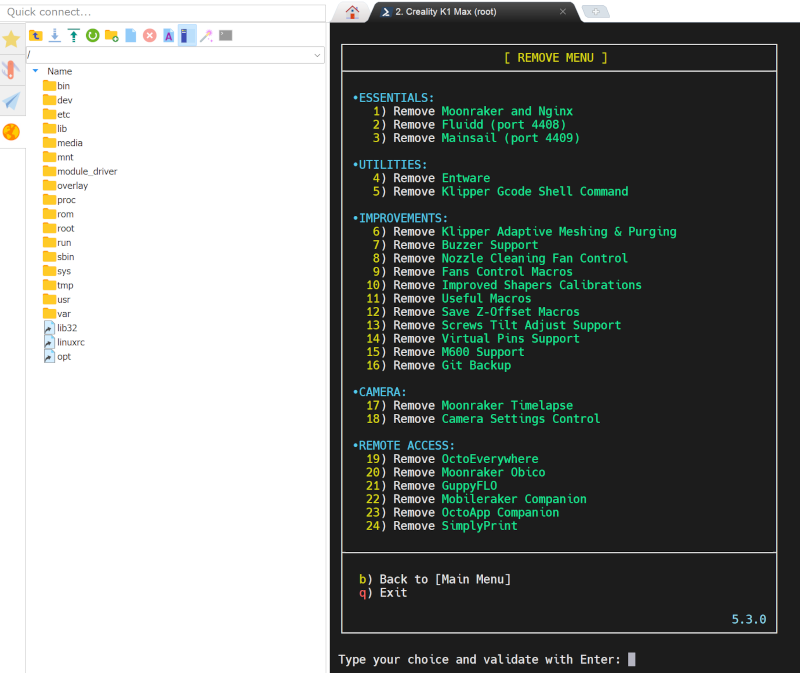
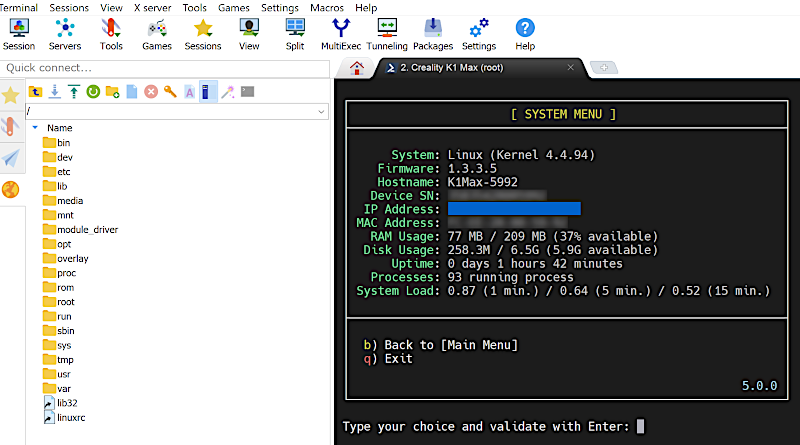
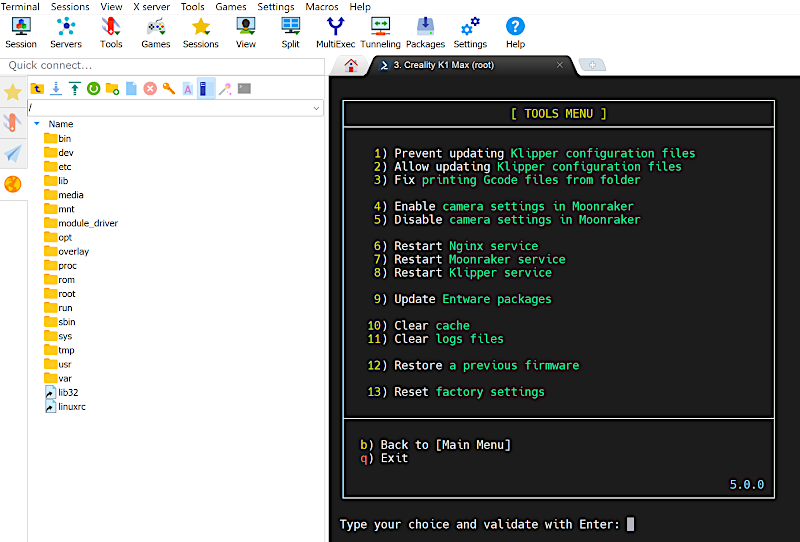
When run, the screen will display the helper script menu, which contains various options, including the install menu, where the majority of the work will be completed. There is also a delete menu, which allows you to easily remove components.
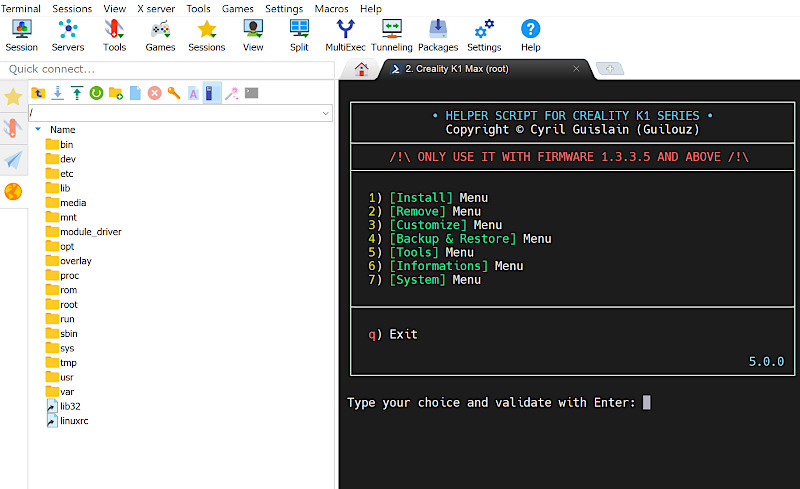
Then there’s the customize menu, where you can alter the boot-up image and replace the touch screen interface with Guppy screen.
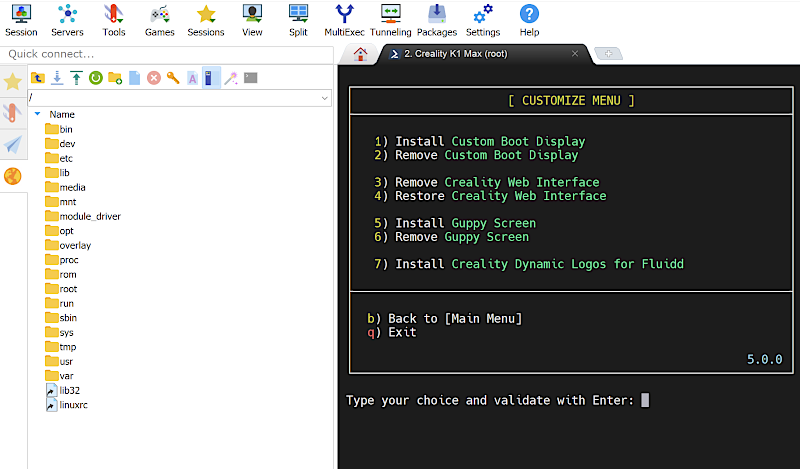
I recommend that users install the Guppy screen because it provides more options than the original interface for calibrating and controlling the printer, as well as having the input shaper fixes applied, and more options are coming with updates. You can find more information as well as updates from the Wiki located here: Wiki for Creality K1 Series.
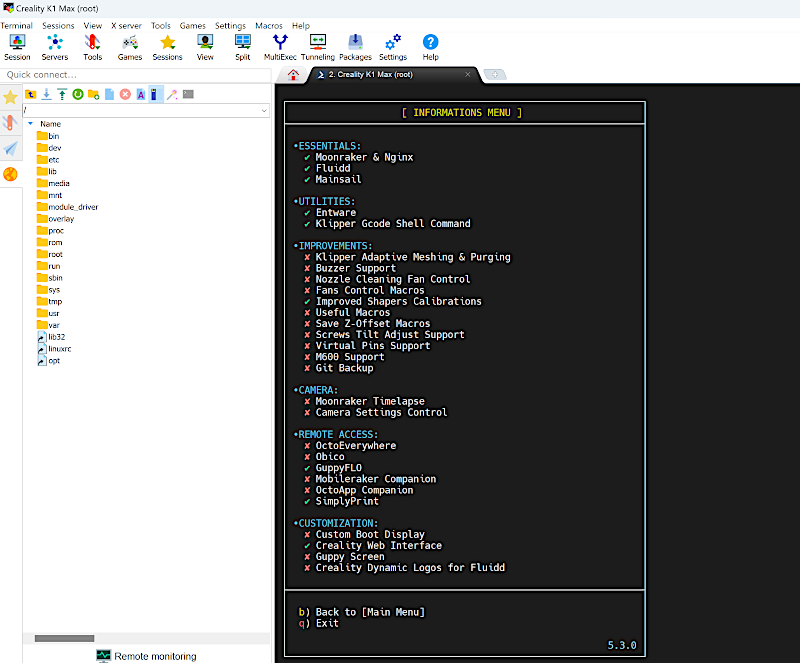
For our personal needs, these are the options we chose to install on our K1 and K1 Max:
• Moonraker/ngix
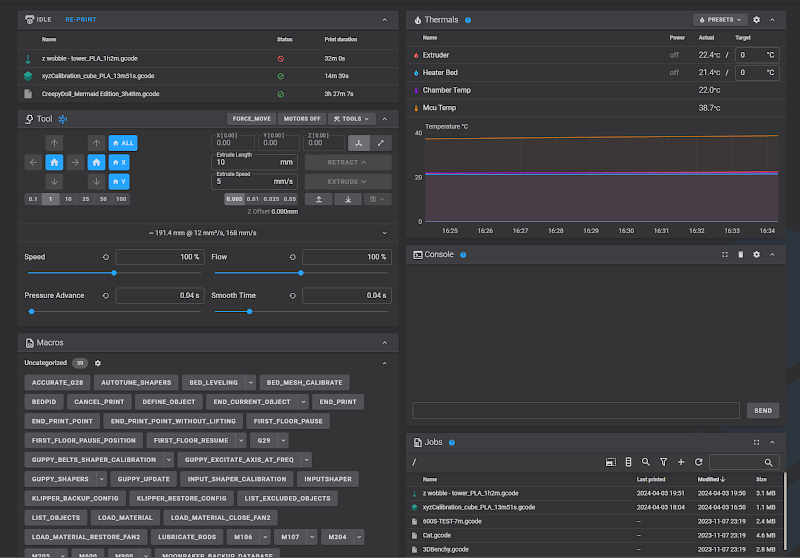
• Fluidd
• Entwire
• Klipper gcode shell command
• Guppy screen you can keep or disable creality intergration
• KAMP needs virtual pins
• Useful macros
• Save z-offset macros
• M600 support
• Camera setting control k1 max or k1 with camera
• Moonraker timelapse
• Octoeverywhere
Another useful modification we recommend is the ability to utilize a USB camera, which can be plugged into the front USB port of both the K1 and K1 Max. To install this, you’ll need to exit the helper script menu and from the main SSH prompt, run:
cd ~/ && git clone https://gitlab.com/kirbo/k1-max-dual-camera.git && cd k1-max-dual-camera && ./install.sh
If there are any updates to the files, you can run the following command to update them:
cd ~/k1-max-dual-camera && git pull && ./install.sh
Should you ever need to remove the dual camera files, you can easily uninstall them with this command:
cd ~/k1-max-dual-camera && git pull && ./uninstall.sh
This addition is incredibly practical, allowing the use of a USB camera that can be positioned anywhere to assist in monitoring your prints or even your workspace. More information here: Kimmo Saari / k1-max-dual-camera · GitLab

With these options installed, you’ll have a firm basis for complete control of your K1 and K1 Max. You may discover that some of the settings we selected are unnecessary or ineffective for your workflow, or that other features we did not include might be advantageous. There is also support for adding manual bed levelling knobs to the printer bed. This tool will verify and tell how much you need to adjust each dial to better level the bed.
Restoration to the Original Firmware
Finally, if you ever need to revert to the original stock firmware, you can easily do so from the helper script menu or you can fully restore the printer using the command line. You will need the official firmware file from Creality.
You’ll need a USB drive to save the firmware file on. For the printer to work properly, the USB drive must be formatted as FAT32 with a 4096 allocation unit size. After downloading the stock firmware file, store it on a USB device and connect it to the K1 or K1 Max. Then, using the SSH terminal on your PC, run the following command to flash and restore the printer to stock:
/etc/ota_bin/local_ota_update.sh /tmp/udisk/sda1/*.img
The SSH console will show you the flashing progress. Once finished, just switch off the printer and then back on to finish the flashing process. It is also recommended that you restore the printer software, which may be done through the printer’s settings menu. Simply hit the gear icon, then scroll down to “restore factory settings.” Once this is done, go through the setup to get a fully stocked K1 or K1 Max.
Conclusion
Rooting your printer provides various benefits and enhancements, including the ability to install new features and change system files to your desire. This article is designed exclusively for Creality’s K1 Max, providing step-by-step instructions on how to root the device and maximize its capabilities. By rooting the K1 Max, you can combine complex control systems like Klipper with simple interfaces like Fluidd or Mainsail, giving you more flexibility and control over your 3D printing projects.
With the inclusion of features such as USB camera compatibility and manual bed levelling knobs, you’ll have a comprehensive arsenal at your disposal to improve your printing experience. And if you ever need to revert to the original stock firmware, the method is simple and easy.
By following the steps given in this article, you’ll open up a world of possibilities for your K1 Max, improving its performance, use, and versatility. Whether you’re a beginner or a seasoned enthusiast, rooting the K1 Max with the improvements outlined in this post will surely take your 3D printing experience to new heights.


I have completed all the above.It a while ago. Now I am trying to ssh into the device and I got permission denied. I have guppy screen installed, how do I enable the root access from Guppy Screen so I can ssh into the device again.