With AI-generated images, we can create custom Blender brushes that accurately reflect the desired texture and shape for the 3D sculpting projects. In this article, I will show you how to prompt in the AI art generators, further prepare the images in the editing software, and then transfer the result as a texture to create a unique brush in Blender.
This Guide Covers
- AI Generators and Software
- The Prompt
- Cleanup in Photoshop
- Load into Blender
- Quixel Mixer and Photoshop Brushes
- Conclusion
AI Generators and Software
To create a Blender brush based on an AI image you’ll need an AI service like Midjourney or Dreambooth, a photo editing software, and a desire to make your own sculpting brushes. For this guide, we’ll be working with Midjourney (v3 & v4) for our generations and photoshop for the editing. This workflow would be similar to other services. If this is your first time working with AI generators we cover Midjourney basics in our AI Art for 3D Print Design article.
Prompts by Amber W. @ohheyvoid
The Prompt
Ah, the prompt. An eloquent run-on sentence that only makes sense to its creator and a machine. You’ll need to play around with your prompt structure depending on your AI of choice. The Midjourney prompts that worked for us involved some variation of;
– photoshop brush of [topic], black background and white details
– photoshop brush of [topic], white background, black details
– [topic] texture, black and white –version 3 –tile
– Texture of [topic], black and white –version 3 –tile
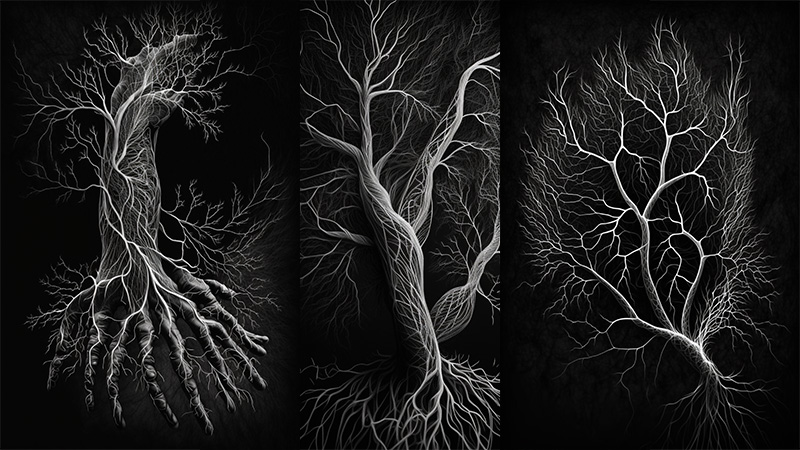
We are currently working on customizing a metahuman and needed vein brushes. Here are a few images we generated with the prompt;
– Photoshop brush of large veins, black background and white details –ar 2:3
The reason we extended the aspect ratio (–ar 2:3) was to give us some variation in the next step.
Cleanup in Photoshop
The following will cover image cleanup in photoshop, but the workflow would be similar in other image editing software.
©3DWithUs – Image: Amber W. @ohheyvoid
Step 1: Open an Image + Black Fill
Open a new image. Be sure to choose a square aspect ratio and fill the first layer with black.
Keep in mind a larger size will improve artifacts when scaling your brush. The smaller image size can cause fuzzy brush edges when scaled.
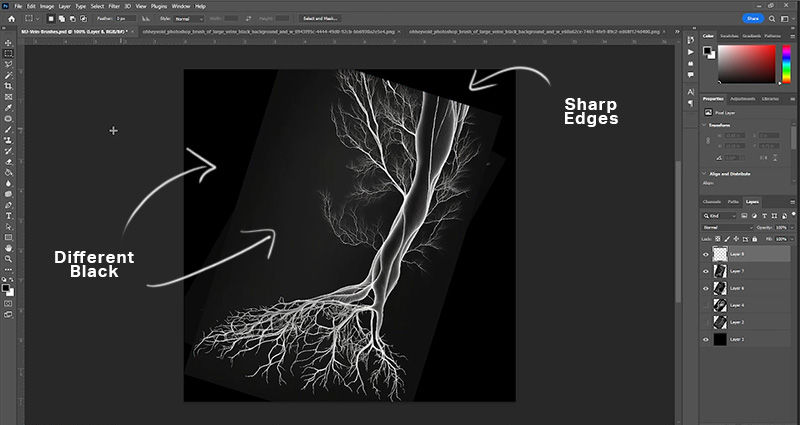
Step 2: Frame Your AI Brush
Drag/Import your AI-generated image on top of your black layer. Size the AI-generated image to fit your brush frame
The reason we did a 2:3 aspect ratio for our vein generations was to give us options for orientation in this step.
Step 3: Clean Up the Edges
You want to make sure that your brush doesn’t have any hard edges. Paint black over the ends of your line-work with a soft brush. Also don’t allow your line work to go to the edge.
The cleanup should look something like this;
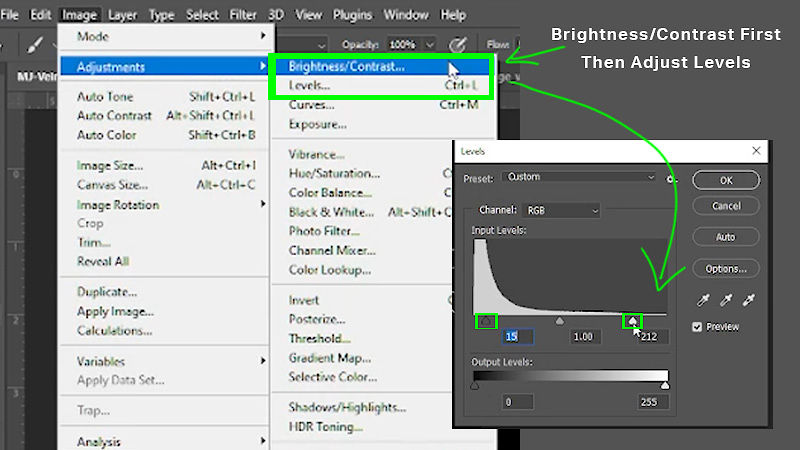
Step 4: Adjust Black & White Settings
We need to clean up the black and white values in your image. This can be done by adjusting your Brightness and Contrast (Image > Adjustments > Brightness & Contrast).
For good measure we would also recommend adjusting your Levels (Image > Adjustment > Levels. )
These settings will vary for each picture. As a rule of thumb, I like to bring in the black and white node a smudge closer to the center and that does the trick.
Step 5: Flatten Your Layers
Next you’ll need to make sure the background of your intended brush is black and not transparent.
This can be done by selecting your ai-brush layer and black fill layer and hitting CTRL+E.
This will merge the two layers into one. I was preparing multiples in one photoshop file, so my layers looked something like this;

©3DWithUs – Image: Amber W. @ohheyvoid
Note: If you notice a discoloration in your blacks after merging your layers, be sure to repeat the previous step (Step 4) on the individual layers.
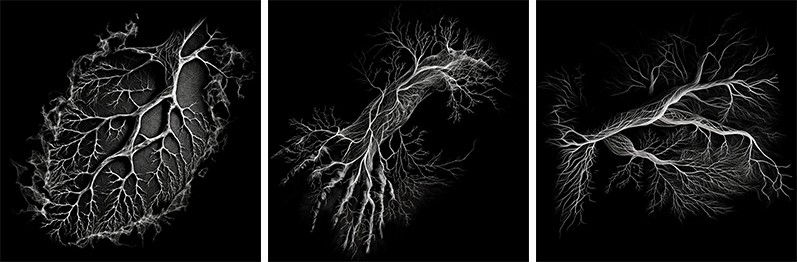
Step 3: Blur Your Black and White image
We’ll need to blur our black & white images before exporting. This is because blender brushes are displacement/height/alpha maps. With any height/displacement map in Blender the whites of the image will be raised, the black will be lowered.
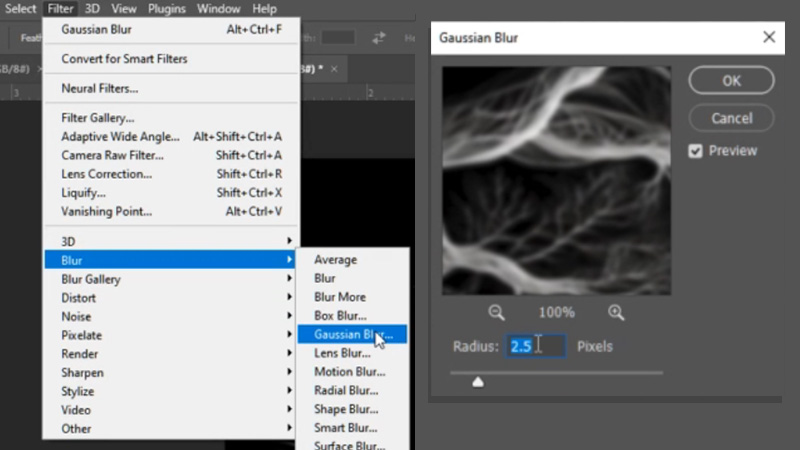
Because we’re going to be using these brushes for sculpting we want to create a Height/Displacement Map.
The fastest way to do that is to blur our already black and white images using Gaussian Blur.
We went with a 2.5 radius, but feel free to experiment with your values.
Note: The blur helps with the transition from the black and white values. The sharper your image the sharper the edges of your displacement will be.
Step 4: Export Your Displacement/Alpha Maps
If batch exporting, use the Export Layers as Files option. (File > Export > Layers to Files)
For your Blender brushes save your images as PNG-24s.
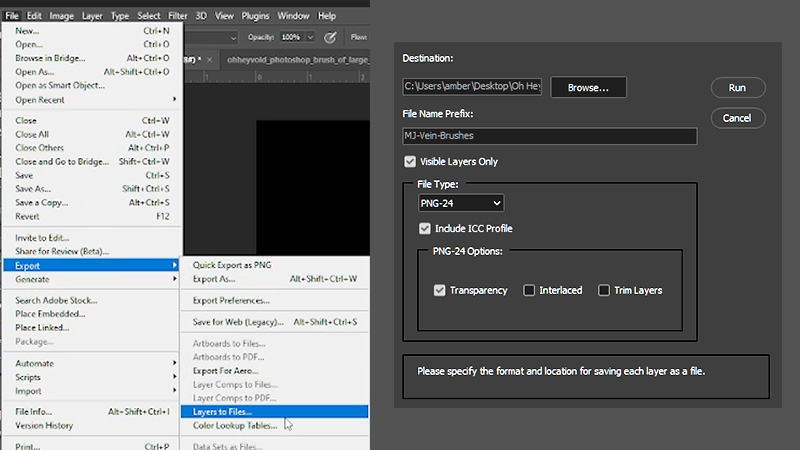
NOTE: If you notice any artifacting on your brush stroke, you may need to make sure your file is higher than 8 bit. This can be checked in Photoshop via Image > Mode. Make sure that you have 16-bit or higher selected.
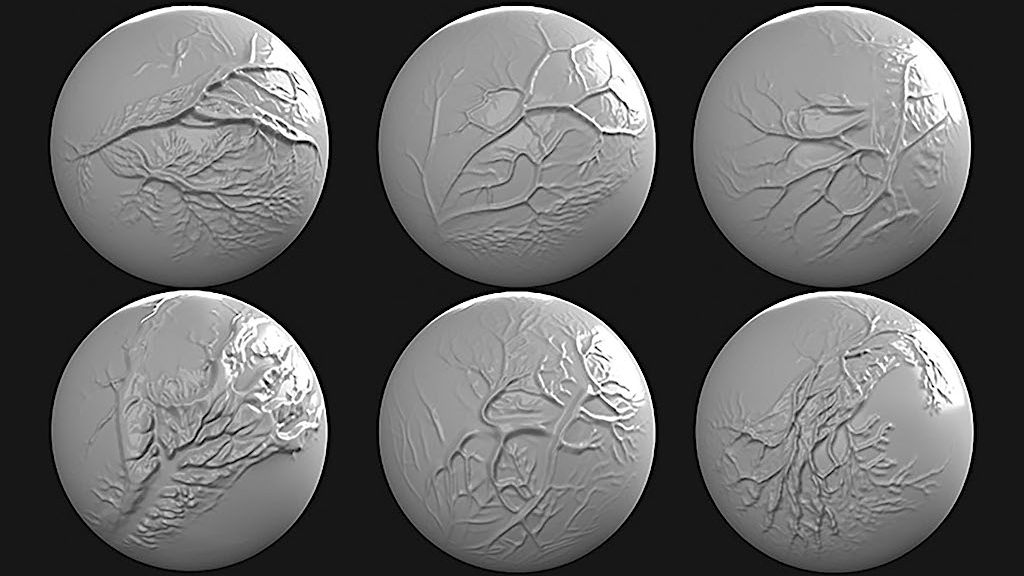
Load the Texture into Blender
Step 5: Choose & Duplicate a Blender Brush
Get into SCULPT MODE and choose any of the blender brushes to build off of. For the sake of my vein project, I’ll be choosing to build off the Sculpt Brush.
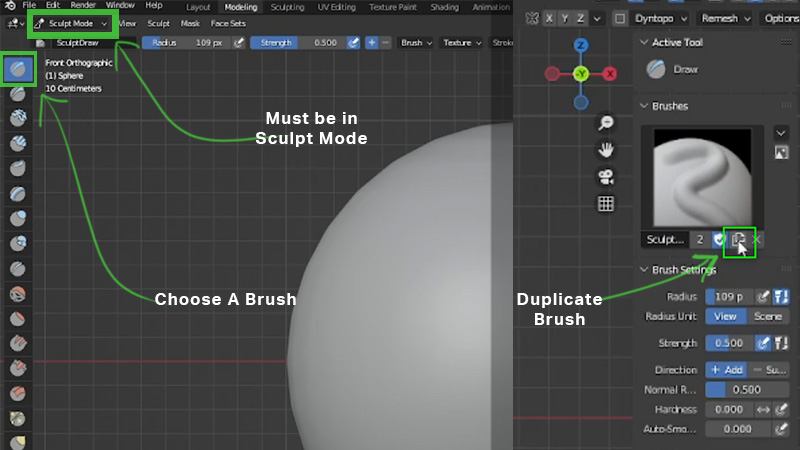
©3DWithUs – Image: Amber W. @ohheyvoid
Open your Information bar (‘N’) and select the Tool Tab. Then hit the Duplicate Button. This will duplicate the brush so you can modify it.
Feel free to rename it something related to your brush.
Step 6: Import Your AI-Alpha Map as a Texture
The next step is to bring in your displacement/alpha map by creating a new Texture.
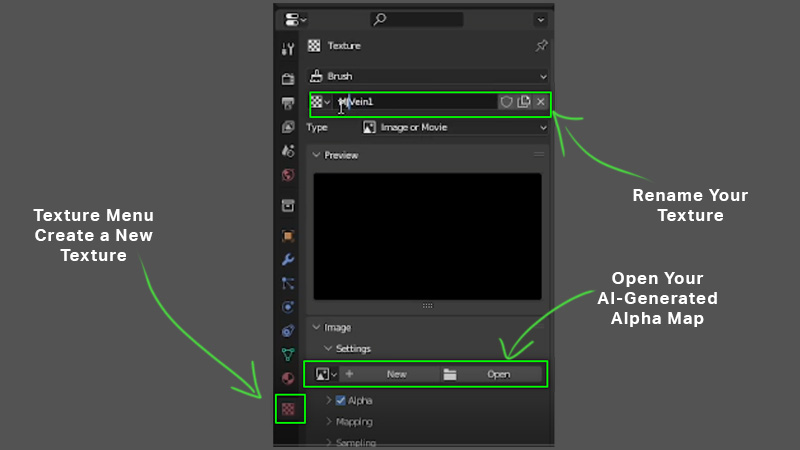
©3DWithUs – Image: Amber W. @ohheyvoid
To do this you’ll go down the texture’s toolbar. Create a new texture, Rename It, Open your AI Alpha Brush. (The blurry ones you just exported from photoshop).
Step 7: Set Your Brush Texture
This may automatically happen, but if it doesn’t you’ll want to return to your BRUSH Tool bar (‘N’) and set your brush to use the texture in the “Texture” bar.
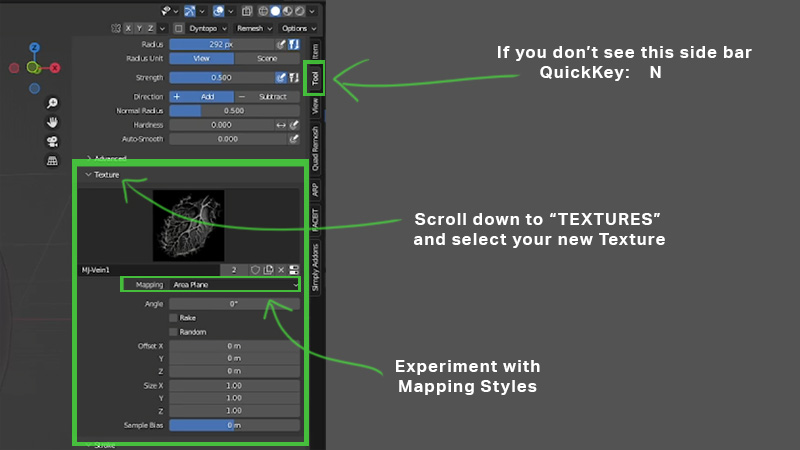
©3DWithUs – Image: Amber W. @ohheyvoid
You can experiment with your Mapping type. At default, it will say “Tiled.” I personally work with “Area Plane” and “View Plane.” And leave everything else default.
BONUS TIP: Make Sure Your Sculpt Surface is HIGH POLY
Remember your sculpt surface needs to be HIGH POLY in order for these displacement maps to work as brushes. If you’re not getting the results you want, try a Dynotopo workflow, a voxel remesh workflow, or add a multi-res/subdivide modifier with a 5+ subdivision.
Remember, if you want more detail, you need more polys.
Quixel Mixer and Photoshop Brushes
Just like in Blender, I made custom brushes using Quixel Mixer and Photoshop. If you want to create your own custom albedo brushes for Quixel Mixer using your AI Images from Midjourney, check out my quick tutorial. Alternatively, if you prefer Photoshop, I have another tutorial on how to transform your favorite AI Images into custom brushes. I hope these tutorials will give you an idea or two.
What’s Next? – Conclusion
Creating custom blender brushes with Artificial Intelligence is a great way to guarantee original tools for your projects. If you’re interested in learning a little more about character design we’ve got a great walkthrough for 3D Character Design Workflow in Blender. For other ideas on how to utilize AI in your workflow, we can definitely recommend AI-Generated Reference Images for 3D Printing.