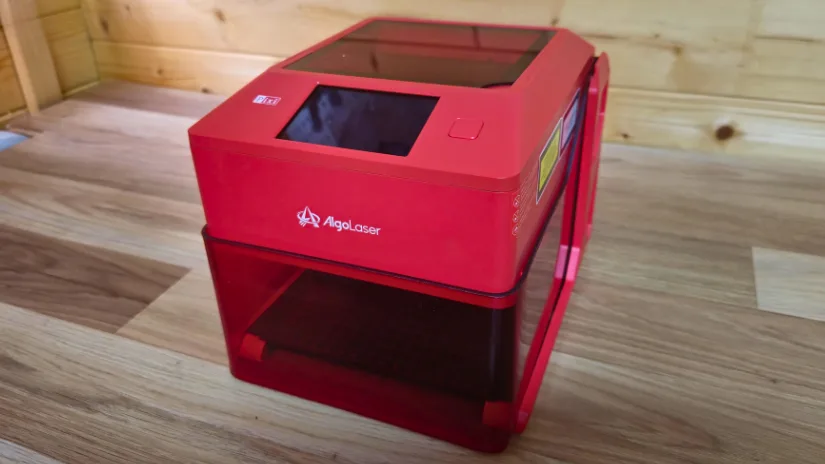
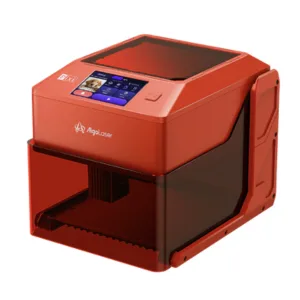
Today, we take a look at the Algolaser Pixi Smart Laser Engraver with its built-in enclosure and touchscreen interface. Algolaser has been gaining momentum in the laser community, and this compact unit is a strong addition to their growing lineup. The Pixi arrives fully assembled, so you can jump straight into your projects right out of the box.
In this hands-on feature, we explore its key functions, test its engraving capabilities across various materials, and highlight what makes this compact engraver stand out. As always, we finish with a breakdown of Pros and Cons.
Disclaimer: Laser cutting and engraving may be hazardous if improperly operated. Please make sure to follow the safety guidelines such as wearing eye-protective goggles and using the machine enclosure while operating.
Where to Buy the AlgoLaser Pixi
Price: $279.00 – $399.00
Compare the Prices & Bundles:
Official Website | AliExpress | Amazon
AlgoLaser Pixi Specifications
- Laser power: 5W also available in 3W and 10W
- Working area: 100 mm × 100 mm
- Max working speed: up to 6000 mm per min
- Laser source: diode laser
- Laser spot 5W: 0.03 mm to 0.07 mm 3W 0.02 mm to 0.04 mm 10W 0.08 mm to 0.12 mm
- Laser head life: more than 10,000 hours
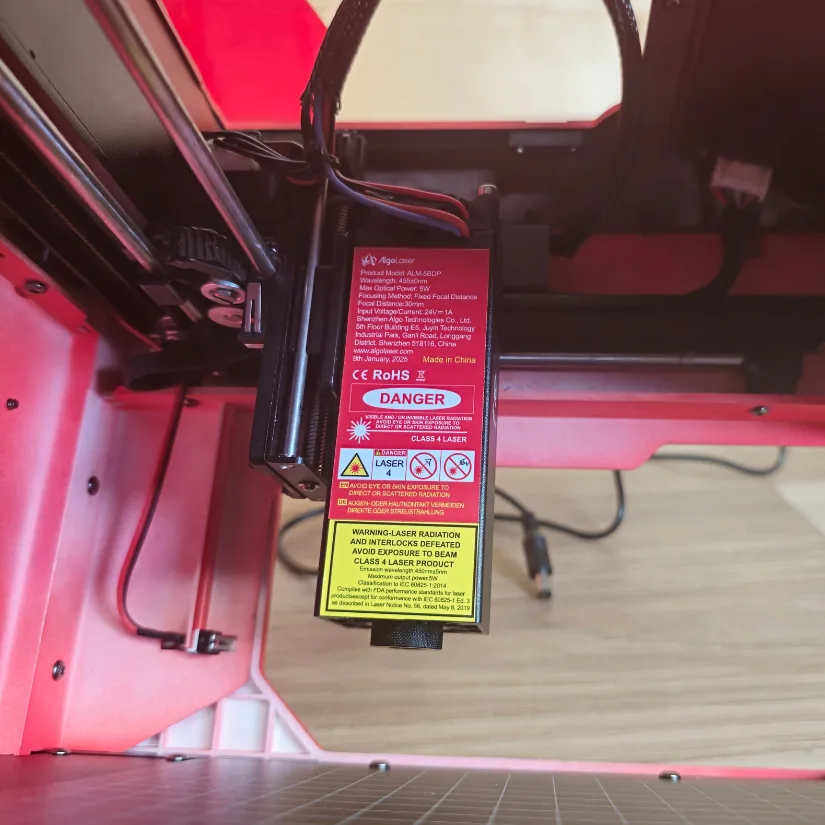
- Wavelength: 450 ± 5 nm
- Operation: 3.5 inch color touchscreen
- Connectivity: USB and Wi-Fi
- Product size: 264.75 mm × 214 mm × 195.5 mm
- Input voltage: 100 to 240 V 50 or 60 Hz
- Output voltage: 24 V 2 A 3 A max
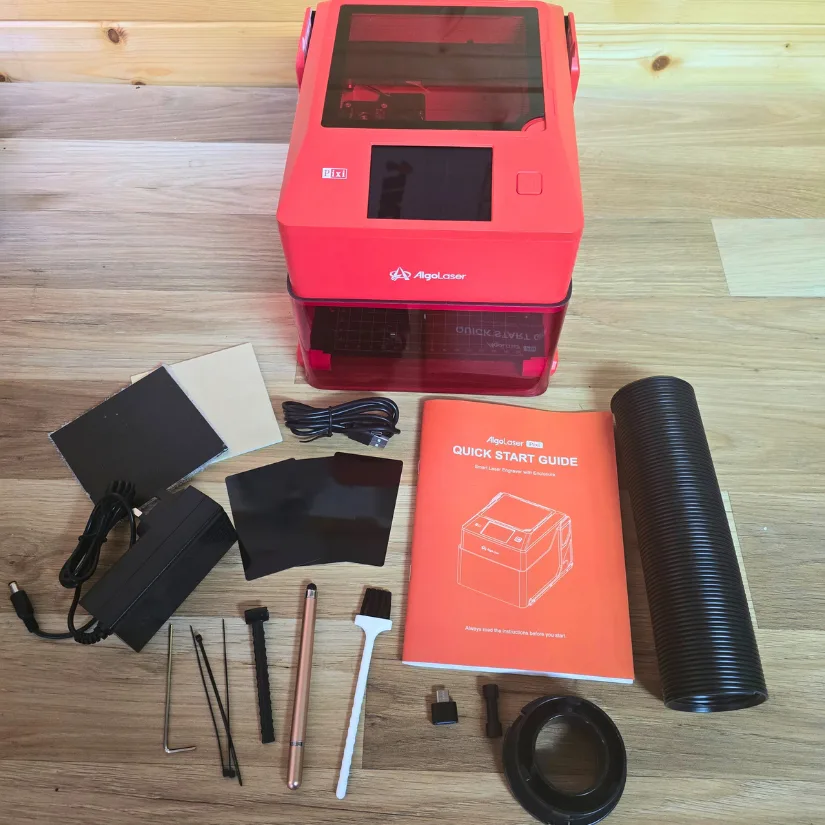
What is in the Box
The box includes the AlgoLaser Pixi unit, power adapter, Allen keys, stylus pen, exhaust tube with adaptor, USB adapter, focus tool, brush, sample materials, USB connection cable, and a user manual.
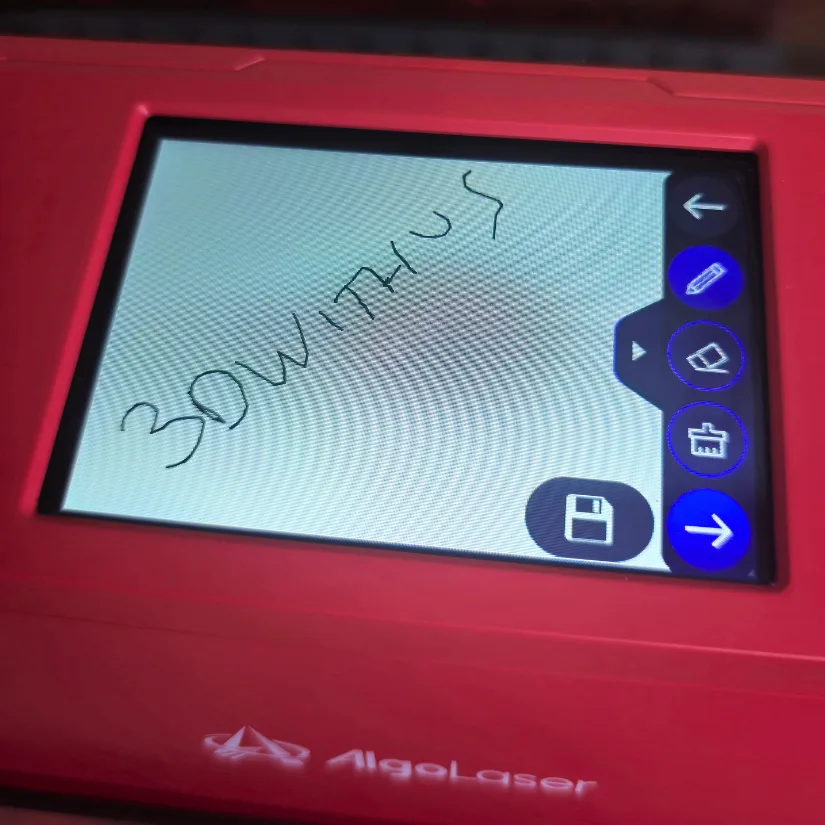
©3DWithUs – Photo: Phil Macey
Initial Overview
The AlgoLaser Pixi is a compact diode laser engraver designed for entry-level users and hobbyists working in limited spaces. With a small footprint and lightweight frame, it is easy to set up and operate. It supports a range of common materials, including wood, leather, acrylic, and anodized aluminum.
Its 5W output and 100 × 100 mm work area suit small and detailed projects. Construction is solid for its class, with stable mechanics that help maintain alignment and consistent output.
The onboard software is functional, but for complex designs, Lightburn remains a strong option. For this review, the tests were carried out using only the built-in AlgoOS interface.
Overall, the Pixi is a beginner-friendly laser that is surprisingly capable for its size. With pre-installed projects, touchscreen control, and a fully enclosed design, it is a good introduction to digital fabrication.
©3DWithUs – Photo: Phil Macey
Setup and Calibration
The Pixi includes a red protective enclosure that helps block stray laser light and improve safety. The lid has an interlock that disables the laser when it is open or tilted. The unit height can be adjusted by repositioning the legs using pre-drilled holes and screws, which helps when working with taller or bulkier materials.
A rotary tool can be added for cylindrical objects. The machine has a dedicated rear port for the rotary. After connecting the cables, switch the machine to ARR Roller Mode and apply the recommended settings. The Quick Start Guide could provide clearer Pixi-specific rotary steps, but setup is manageable with a brief check of the manual.
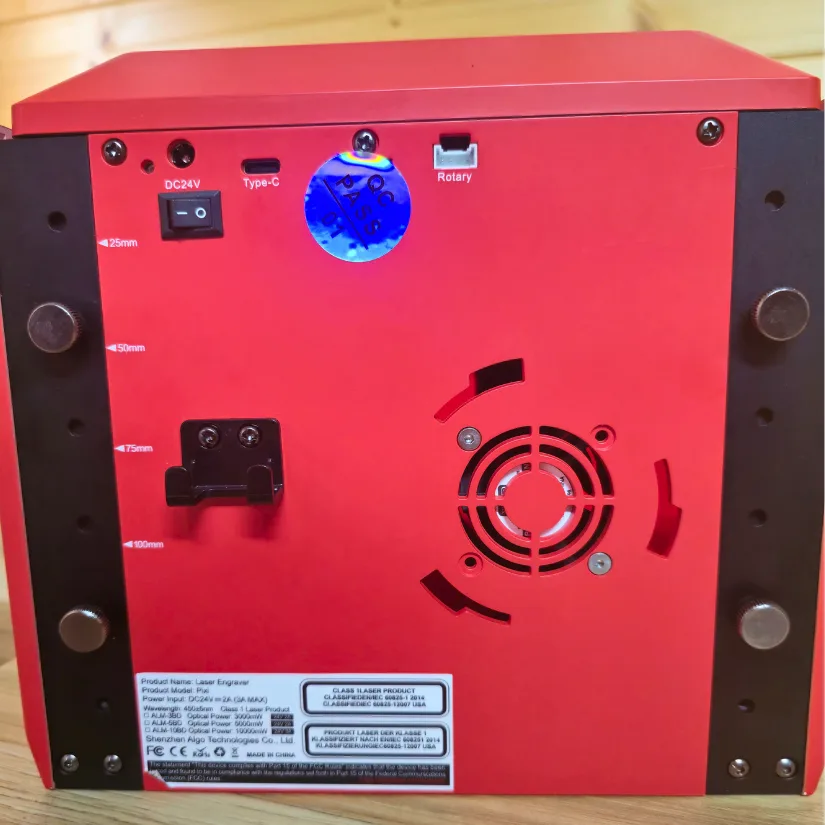
The unit’s height can be adjusted by repositioning the legs using a set of pre-drilled holes and screws. This allows users to accommodate taller or bulkier materials that might not fit under the standard enclosure, offering greater flexibility for a variety of engraving projects.
Rotary Attachment
The unit also features the ability to add a Rotary tool, and during my testing phase I will also carry out some functional tests with this attachment, this was added as part of my review but can be purchased at an additional cost, in the pack you will receive connections, tools and instructions. This Rotary tool can also be used on other brands of lasers with the additional wiring.
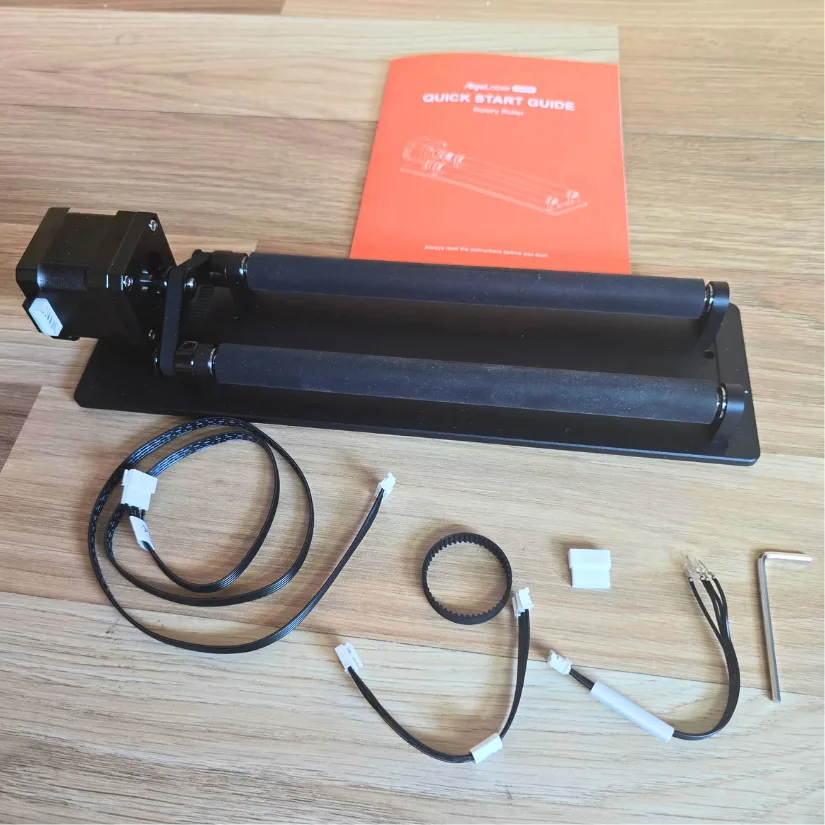
Installing the rotary attachment was fairly straightforward, though I did have to check the manual and figure out a few steps on my own. The machine has a dedicated port on the back for connecting the rotary, so once I plugged in the cables, things started to make sense.
The main challenge I faced was realizing I needed to switch the machine into ARR Roller Mode and tweak some settings for it to work correctly.
I think the Quick Start Guide should include more specific instructions for Pixi models. The Lightburn settings it provides are useful, but there should be clearer guidance on how to set up and use the rotary attachment with the Pixi.
Touchscreen and UI
Powered by the AlgoOS 2.4 the on-screen guide walks you through the setup process, and once that’s complete, you have full control over the unit without needing to connect it to a computer—a major selling point for me in a portable desktop laser. The display is very user-friendly, with clear sections for different categories.
At the top of the main display screen, several icons visually indicate the laser’s status, such as Wi-Fi connection, SD card presence, USB connection, and any error notifications.
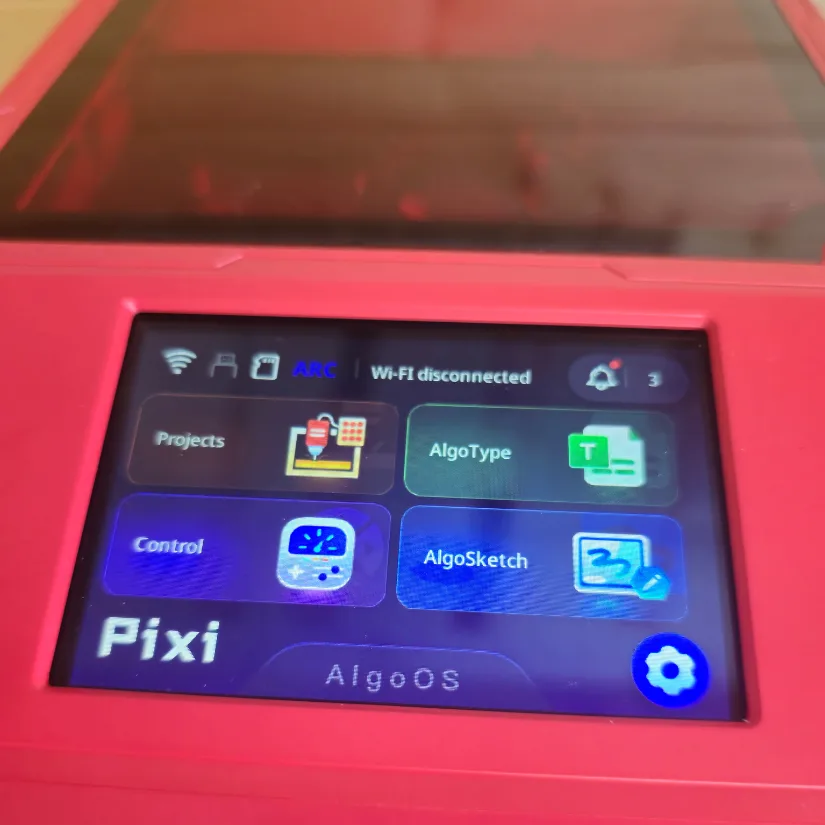
Four subcategories:
- Projects Pre-installed demo files with a helpful material list and visual guidance for power and speed
- Algotype Type text with a stylus for fast signage and labels
- Control Move the laser, home it, and adjust speeds and basic settings
- Algosketch Draw designs directly on the screen for quick engraving or cutting
– Projects The laser features a large catalogue of preinstalled files, ranging from images to brand logos, once you have selected your desired project to test, the screen then displays a list of materials you can laser onto, whats even more useful was the visual guide on power and speed levels, giving a visual representation of the project look. This helps guide you when making a choice on power output and how long the project will take to engrave or cut.
Design and Material Capabilities
The Algolaser Pixi features advanced laser technology that produces a fine laser spot as small as 0.03mm. This allows for highly precise cutting and engraving with an accuracy of 0.01mm, making it ideal for detailed projects like jewelry or model-making.
Pixi can cut and engrave over 300 types of materials, including:
• Wood: Cuts up to 13mm plywood and 20mm pine wood
• Leather: Suitable for detailed leather crafting
• Paper & Cardboard: Perfect for prototypes and creative projects
• Acrylic & Plastics: Cuts non-transparent acrylic and various plastics
• Fabric & Felt: Enables custom textile designs
Focusing the laser is straightforward with Pixi’s manual Z-axis adjustment knob. Users can quickly set the focus without tools, and the included focus tool ensures precise cutting and engraving results.
Pixi is a Class 1 laser device, featuring a fully enclosed design and a lock screen for safety, making it suitable for use at home, in schools, or workshops.
The user interface makes the operation simple. You can drag your design file onto the screen, position it easily, and fine-tune placement with on-screen controls for precise alignment.
Pixi also includes over-the-air (OTA) updates via its AlgoOS touchscreen system. This means it automatically downloads and installs software updates to keep the machine current and running smoothly.
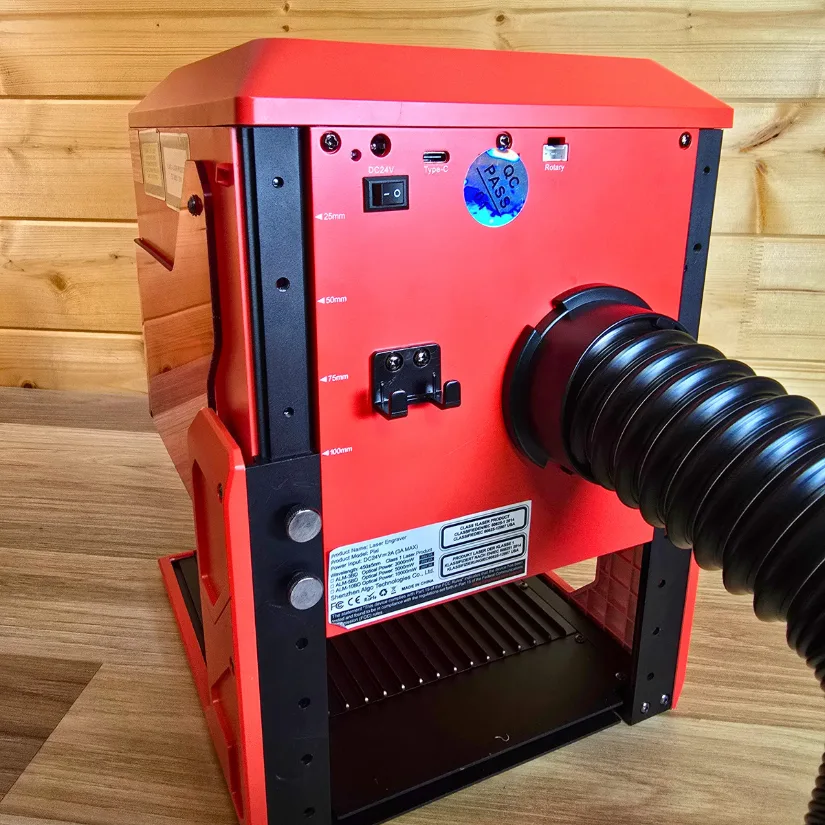
The Pixi can be used in a safe and responsible manner with the inbuilt enclosure, exhaust pipe and connection, providing a way to remove harmful fumes away from the user and environment. If you have a fume extraction unit this will be even more useful.
Software – AlgoOS
All testing in this review was done with AlgoOS. The interface was responsive and reliable, making it easy to locate projects, run calibration, and update firmware with over-the-air updates. Lightburn compatibility is available, but it was not covered in these tests.
Test Results
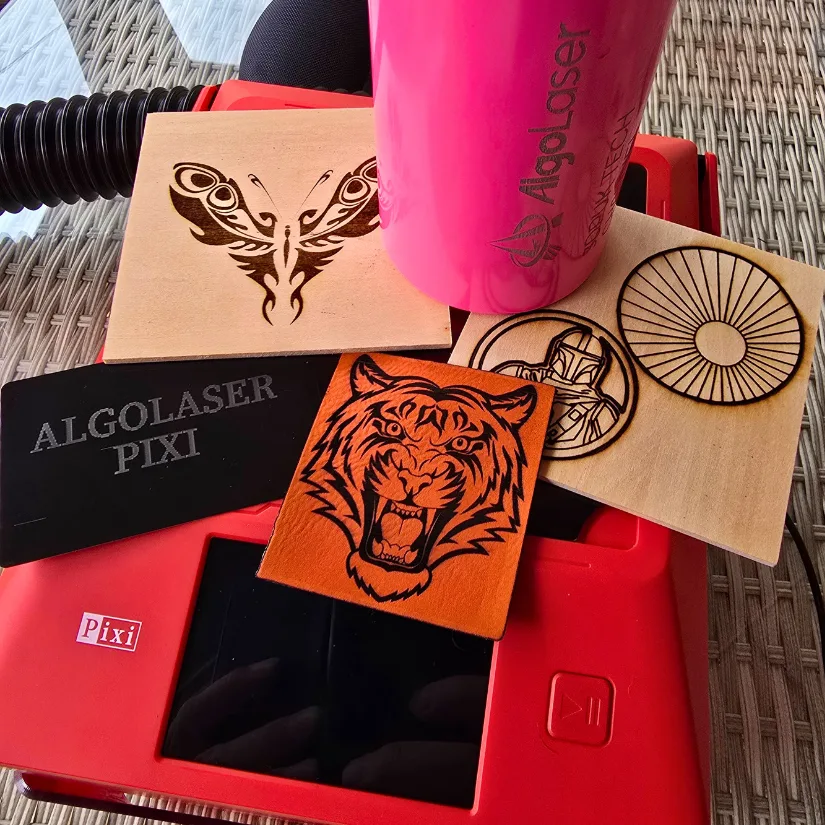
Engraving on Birch Plywood
For my first engraving test, I decided to use one of the pre-supplied images already loaded onto the Pixi. The built-in material selection and engraving colour scale made it easy to choose the finish I wanted. The interface shows how speed and power affect the outcome. Faster speeds with lower power produce lighter images, while slower speeds and higher power give a deeper burn.
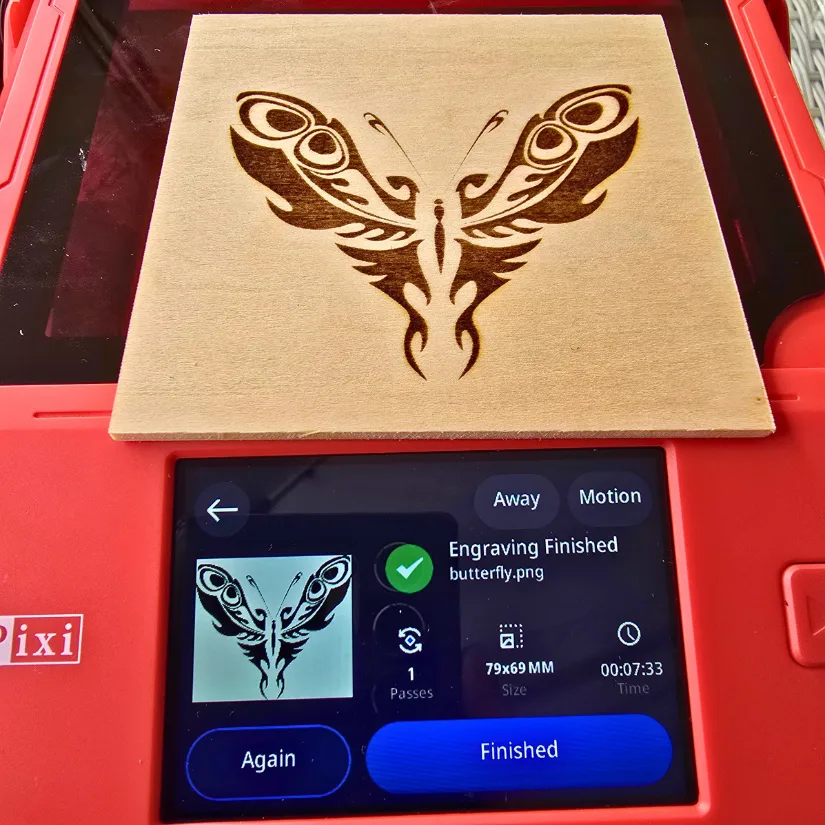
©3DWithUs – Laser Job and Photo: Phil Macey
For this test, I went with a mid-range setting, and the image engraved perfectly. The whole process took around five minutes from start to finish.
Engraving Leather
For my second engraving test, I selected a pre-installed image of a tiger. I chose “Scratch Leather” from the GreatCarve Scratch Leather Kit—premium laser-ready leather with a dual-layer design. When engraved, the top layer burns away to reveal a contrasting underlayer, creating a striking effect. Once again, I used the material selection tool on the Pixi and went with a mid-range speed and power to achieve a deeper engraving.
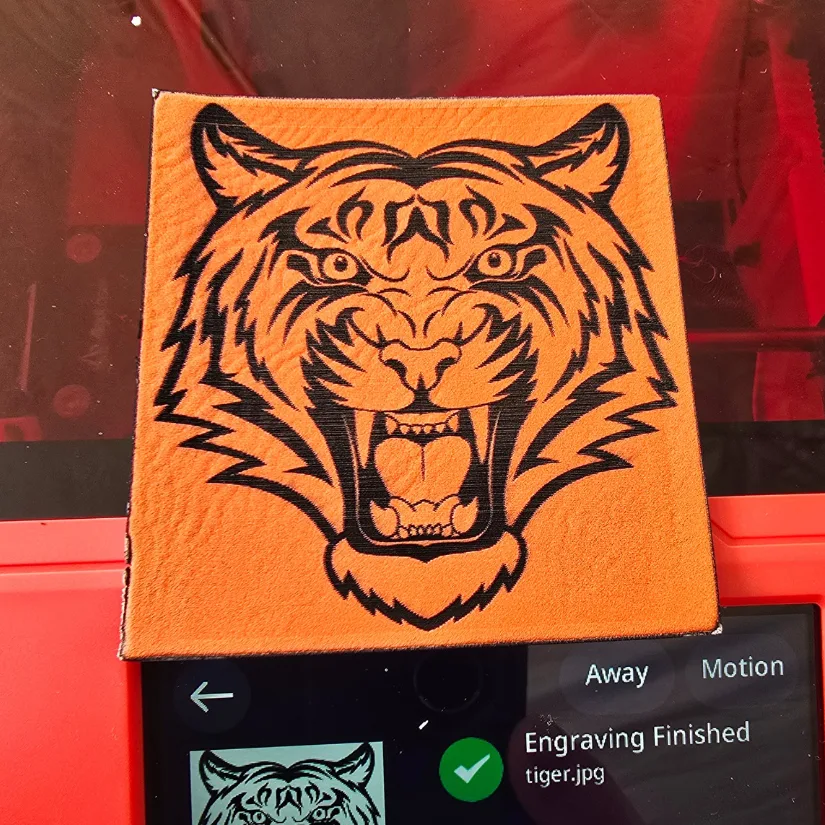
©3DWithUs – Laser Job and Photo: Phil Macey
In addition to engraving, I also tested the cut function. You simply select the desired cut depth on-screen, and the software adjusts speed and power automatically. However, since the lowest depth available was 1 mm and the leather was only around 0.2 mm thick, it caused a bit of edge burning. Despite that, the overall process was smooth and easy to follow using the built-in guide.
Rotary Laser Engraving
For my third project, I connected the rotary tool to the Pixi. This required raising the lid height as outlined earlier, and plugging the rotary unit into the dedicated port at the back of the machine. Once everything was in place, I changed the operation mode to Rotary from the selection screen.
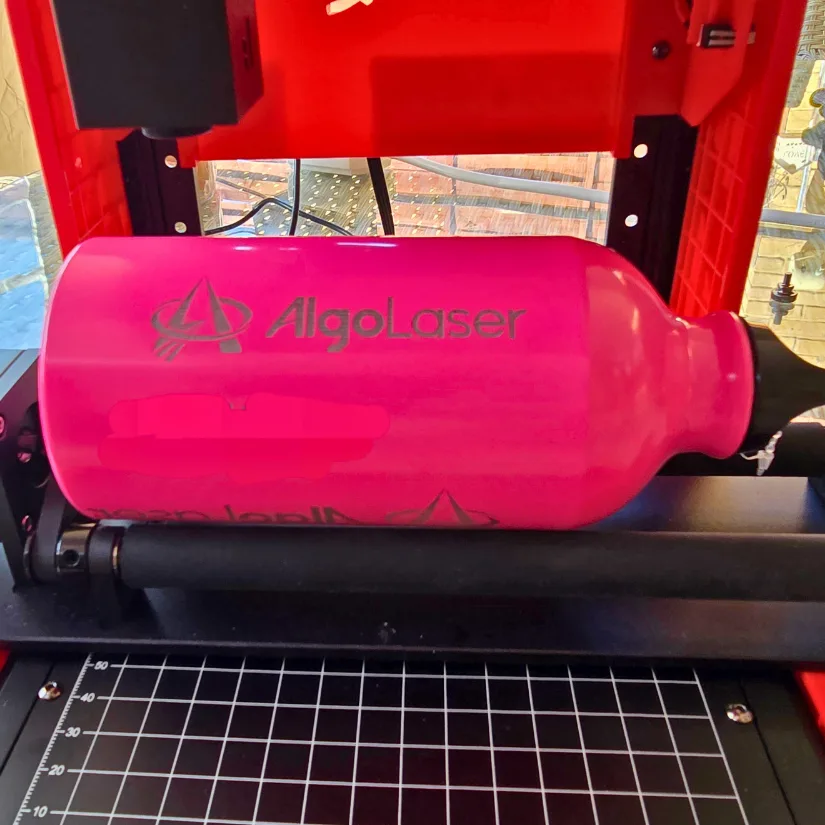
©3DWithUs – Laser Job and Photo: Phil Macey
I used the Algotype feature to enter the brand logo and engraved it onto a paint-coated metal bottle. I selected the “Coated Aluminium” material setting and aligned the laser to the center of the bottle. After a few adjustments, the final result came out brilliantly—as shown in the image above.
Aluminum Business Cards
For my fourth project, I decided to laser engrave some aluminum cards using the Algotype function. I typed in the desired wording directly on the touchscreen, added the brand name, and selected the correct dimensions for the card. As with the previous projects, I also chose the appropriate material preset from the list—this time selecting the aluminum option.
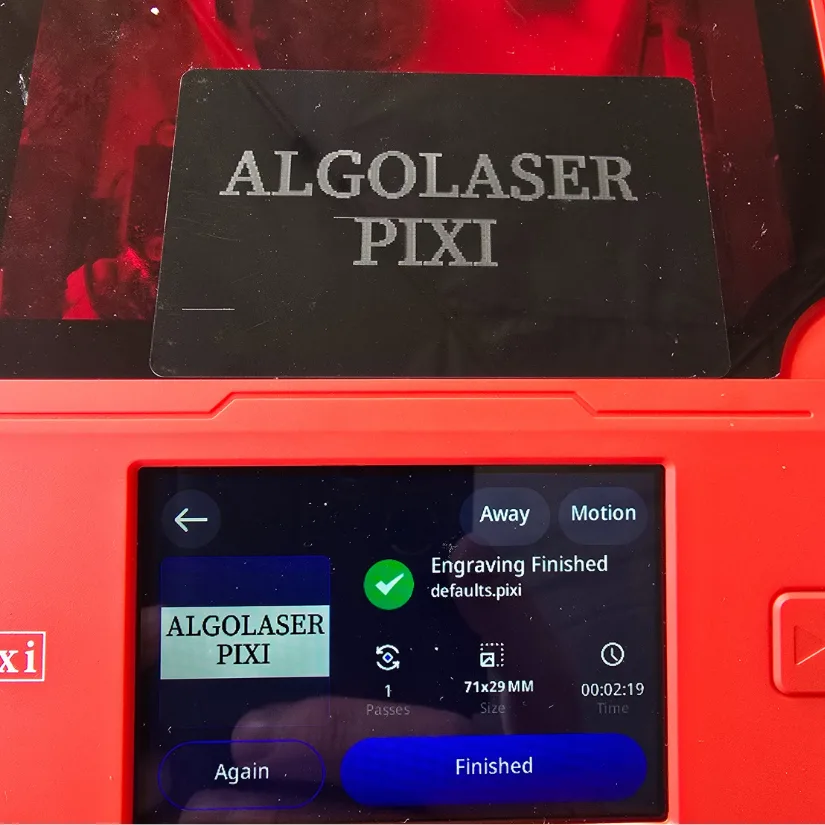
©3DWithUs – Laser Job and Photo: Phil Macey
The Pixi handled the task smoothly. The engraving came out clean and precise, with no issues during the process. It was another great example of how effective the built-in UI can be for quick, computer-free projects.
YouTube Video
To see the Pixi in action, including material tests and the rotary setup, check out the hands-on video walkthrough on our YouTube channel:
Compare to Other Compact Laser Engravers
The Algolaser Pixi joins the growing category of compact, enclosed diode laser engravers designed for makers and hobbyists. At 5W output, with its built-in enclosure, touchscreen UI, and plug-and-play setup, the Pixi is ideal for small-scale projects in tight spaces or portable environments like craft fairs and workshops.
One of the closest comparisons we’ve tested is the Genmitsu Kiosk 10W. While the Kiosk offers a slightly larger workspace, it lacks the Pixi’s touchscreen interface. The Pixi, on the other hand, is more beginner-friendly thanks to its AlgoOS software, onboard project files, and guided material presets.
For a broader overview of other small diode lasers we’ve tested, explore our Laser Cutters and Engravers Guide and such machines as:
©3DWithUs – Laser Job and Photo: Phil Macey
Have questions? Feel free to ask in the comment section below.
For a wider discussion or to share your own Pixi projects, join us in the forum:
Conclusion and Pros and Cons
Compare the Prices & Bundles:
Official Website | AliExpress | Amazon
AlgoLaser Pixi Review
Review Summary
The Algolaser PIXI performed as intended and the overall function of the laser allowed me to complete various projects with so much ease. This laser would be great for novice and experienced users. And even more useful to take to craft shows with the built-in enclosure and exhaust tube. You would need a Fume extraction unit to fully utilise its safety features. The Algolaser OS was a standout feature for me, with its simple navigation around the menu and preinstalled projects and materials settings, allowing the unit to be totally independent from the computer. During these tests, I focused only on the in-built user experience; however, setting up and using Lightburn would be easy, but I didn’t cover this in my tests.
With the safety features installed, you can be sure to work safely with your projects. The compact size and standard 100mm x 100mm working area gives you so much scope for mini projects and crafting tasks.
I think the dual-sided working plate is the standout feature for me, giving you the option to swap from the engraving platform to the cutting platform, which could make a huge difference to the overall project look.
My only real concern is the raising of the lid for working on the rotary tool; this removes the safety feature of the enclosure. As light can be emitted below the level, you should encourage them to wear goggles for this.
Overall, the Algolaser PIXI was a brilliant portable laser, and having reviewed other brands that have the same features, I would definitely say the PIXI stands out to me. With the touch screen, preinstalled materials list and exhaust pipe. These are all key features.
Pros
• Compact and portable design
• Touchscreen with intuitive AlgoOS
• Preinstalled materials and project library
• Supplied exhaust tube for fume management
• Built-in enclosure with safety interlock
• Dual-sided work plate for engraving and cutting
Cons
• Safety compromised when lid is raised for rotary use
• Rotary setup may require additional caution and alignment effort
• 1 mm minimum cut depth not ideal for thin materials
• Limited to 100 × 100 mm work area