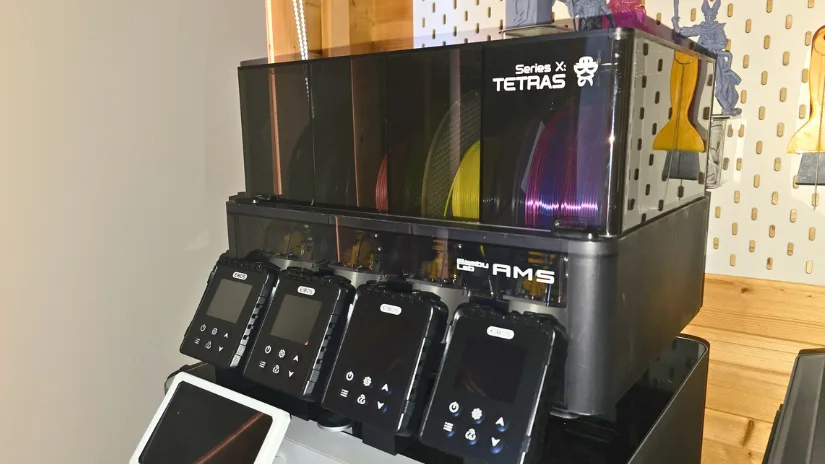
As multicolor 3D printing continues to gain popularity, so does the need for improved filament management, particularly in terms of moisture control. For users of the Bambu Lab AMS, the EIBOS Series X Tetras offers a practical upgrade that adds professional-grade filament drying to an existing setup, without needing to buy a separate dryer or new filament. This guide explores the installation process, key features, and hands-on results using the Tetras with the Bambu Lab X1C.
EIBOS has been bringing innovative 3D tech to the market since early 2020, from filament dryers to the Oceanus 3-in-1 resin cleaner, as well as a wide range of uniquely colored filaments. I’ve worked with their design team over the years and had the chance to follow the early development of the Series X Tetras. With multicolor printing now mainstream — and drying needs more important than ever — many users have asked the same question: Do I need to buy an entirely new setup just to get reliable drying? The answer, thanks to this upgrade, is no. The Series X Tetras is designed as a modular, easy-to-install kit that transforms your existing AMS unit into a multi-bay filament dryer.
This article is based entirely on my own hands-on experience setting up and running the Tetras on a Bambu Lab X1C. Below, you’ll find a full walkthrough of the installation process, along with real-world print tests and performance results. A summary with Pros and Cons is available at the end of the article for quick reference.
Table of Contents (Jump to a Section)
- Specifications
- What’s in the Box
- Assembly and Setup
- Operating the Dryer
- In Use – Real-World Operation
- Sample Projects
- Temperature Accuracy
- Comparison
- Conclusion, Pros & Cons
Where to Buy the EIBOS X Tetras
Price: $175 – $194
We don’t know if this product will be available on Amazon or other major e-stores, but just in case, here is the link to their Amazon store.
EIBOS Series X Tetras Specifications
• Input Rating: 120v US 230V EU / UK / AUS
• Rated Power: (Single) – 60w
• Rated Power: (Whole Unit) – 240w
• Package size: 420 x 360 x 250mm
• Upper Cover Module Size 360 x 290 x 135mm
• Net Weight: 4.0kg
• Total Weight: 5.0kg
• Overall height with AMS: 280mm
• Maximum height with cover open: 440mm
• Humidity range: RH 10% – 99%
• Temperature range: 20 -65c (based on 25c environment temperature)
• Filament size: 1.75mm
• Max Spool size: Single Spools 205 x 68mm
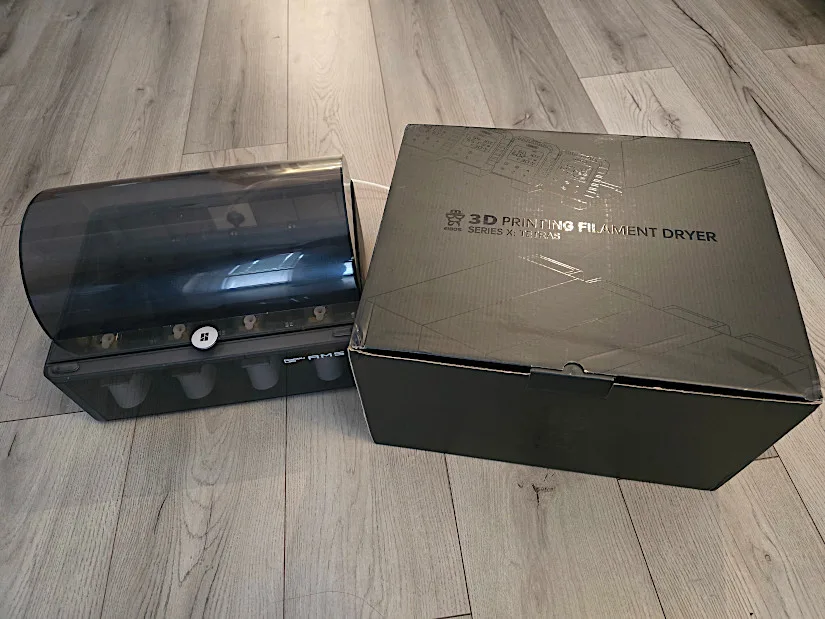
What’s in the Box
Upper Cover Module, Power Module, Screen Module, Acrylic front baffles, Acrylic Middle baffles, Acrylic Rear baffles, Acrylic fixings, Feed baffle, Support frames, Foot pads, Power cord, Type- C cable, Square Silicone strip, Allen screwdriver, M3 H10 screws, M3 H8 screws, and various spares.

©3DWithUs – Photo: Phil Macey
Assembly and Setup
The EIBOS Series X Tetras is designed for a straightforward upgrade of the Bambu Lab AMS. With clearly labeled parts and step-by-step visuals in the manual, the entire process is beginner-friendly and tool-light.
Overview and Prep
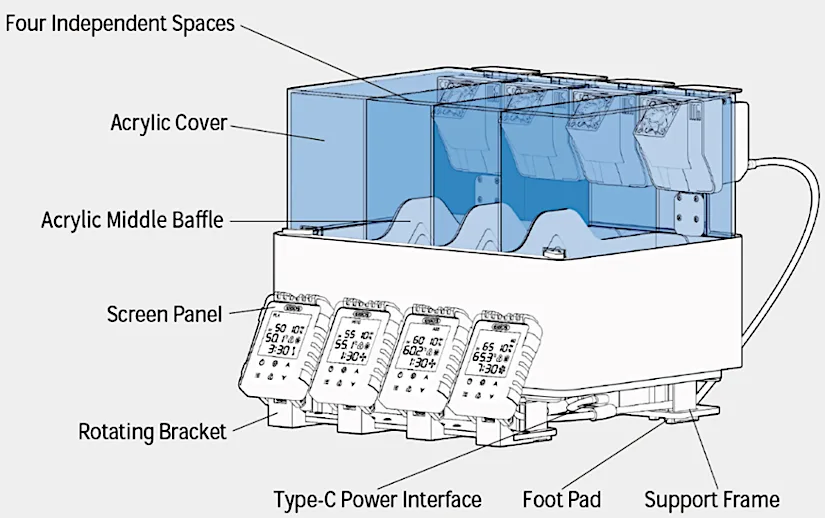
After unboxing, begin by reviewing the layout diagrams provided in the product manual (front and rear views). Carefully handle components and lay them out for quick access.
Core Installation (AMS Integration)
1) Remove the AMS lid: Unscrew the 4 rear screws securing the AMS v1 top cover.
2) Attach the Tetras upper cover: Align it with the AMS and secure using the original screws.
3) Install support frames: Turn the AMS upside down (use included foam) and attach the 4 support frames to the base using M3 H8 screws. Ensure channels face outward.
Cabling and Module Assembly
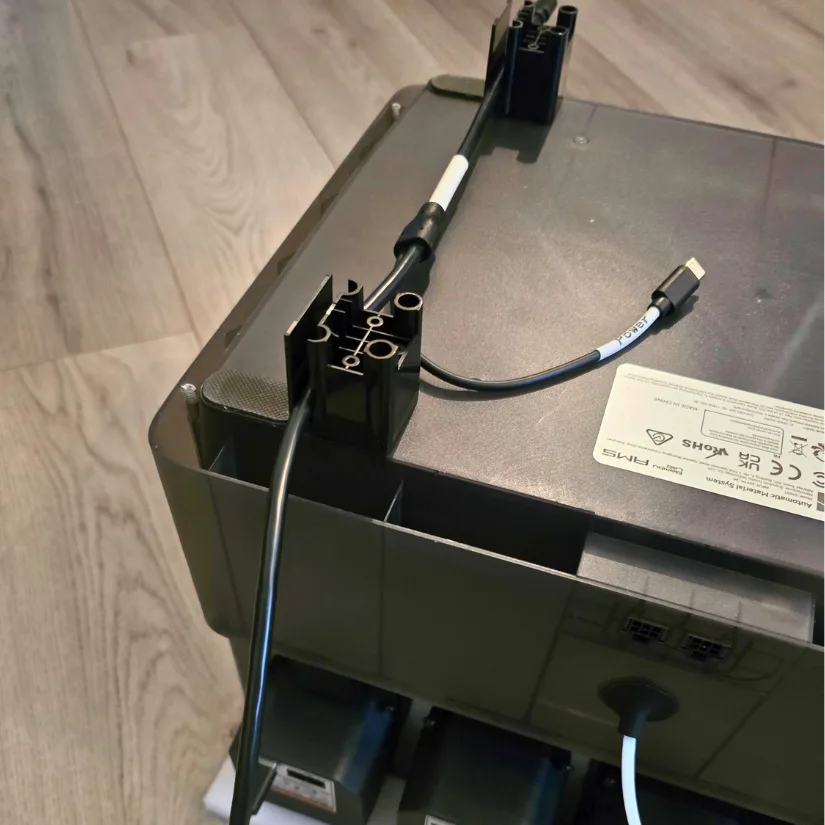
4) Connect USB-C cables: Plug in the labeled cables — power module to rear, screen module to front, and heating station leads routed through the outer channels.
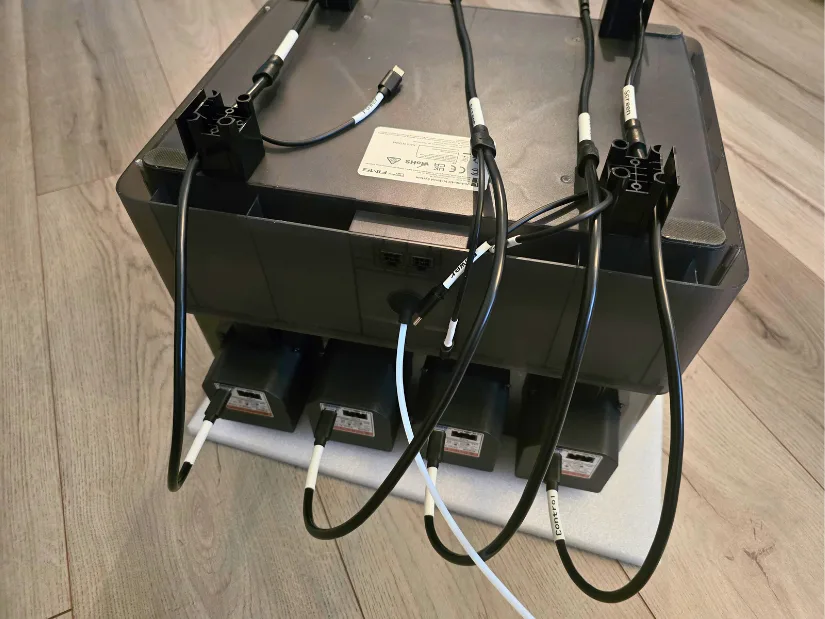
5) Attach modules: Secure the power module to the rear and the screen module to the front brackets using M3 H10 screws. Confirm no cables are pinched and all connections are firm.

6) Final connections: Complete all USB-C wiring: screens to front, power to rear, and long leads to heating stations.
Acrylic Baffles and Seals
7) Attach rubber feet: Place 4 on the front and 4 on the rear module brackets.
8) Assemble front baffle set: Clip the acrylic parts in this sequence: A (left), B, B (center), C (right).
9) Insert assembled baffles: Fit into their corresponding slots as per diagram.
10) Install middle baffles: Use the acrylic fixings to insert in the order: B, A, B.
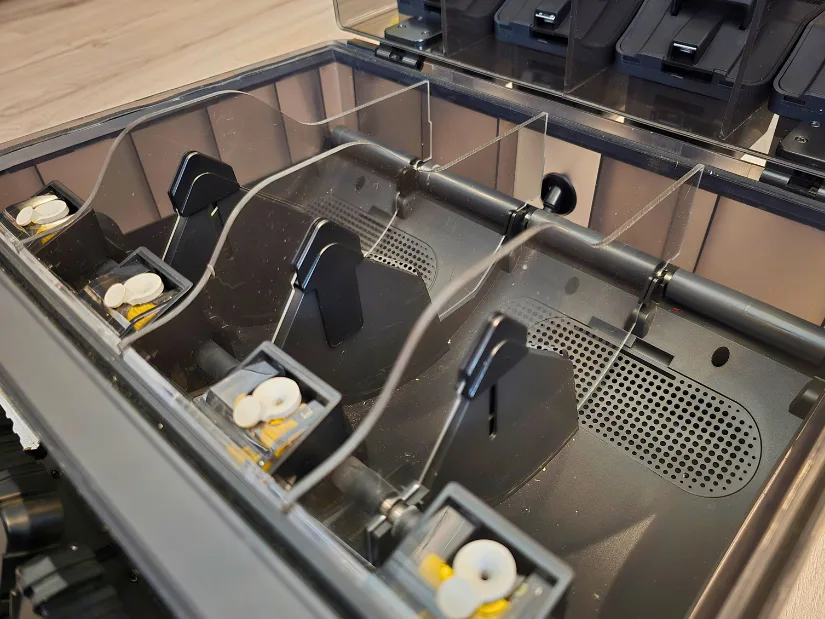
©3DWithUs – Photo: Phil Macey
11) Secure rear baffles: These lock in the acrylic housing. Fit them gently — do not force.
12) Apply gasket: Add the silicone strip between the upper and lower housing to complete the chamber seal.
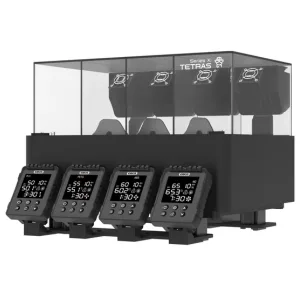
The fully assembled unit should now resemble the product demo images, ready for connection to the printer.
Watch the Setup Walkthrough: For a full hands-on demonstration, check out this video. It covers the complete installation of the EIBOS Series X Tetras onto the Bambu Lab AMS, with tips and close-up views of key assembly steps. Ideal if you prefer visual guidance alongside this written guide.
Operating the Dryer
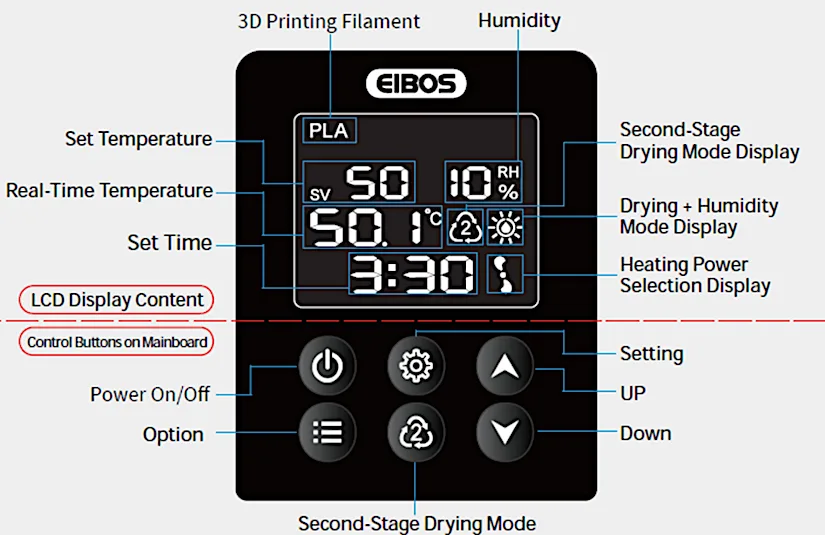
– Screen Layout / Settings
The display screen is much like previous Eibos dryer models and is easy to use with the simple layout.
Before powering on, it’s worth checking the voltage label on the back of the unit to ensure it matches your region’s standard safety requirements.
Once connected, a single press of the power button brings the dryer online. You can toggle between drying-only and humidity-controlled modes depending on your needs. There’s also a factory reset option, but I never had to use it.
Filament types, such as PLA, ABS, PETG, and TPU, can be selected via the Option button. Each preset automatically loads the ideal drying parameters, but you can override them if necessary. I liked that the system remembers custom material profiles (M1 and M2), which is useful if you frequently switch between brands or experimental filaments.
Using the Setting button, you can cycle through key parameters:
Drying temperature (20°C – 65°C)
Drying time (30 minutes – 24 hours)
Power level (Low / Medium / High)
An optional humidity threshold if you’re using it in “smart” mode
One handy feature is the Second-Stage Drying Mode. I didn’t use it every time, but when drying filaments that had been sitting unsealed for weeks, it came in useful. It’s activated through the dedicated button and offers the same level of control as the primary cycle.
For me, the screens were responsive and easy to understand. The segmented layout clearly displays set temperature, live temp, humidity, and time remaining — all at a glance.
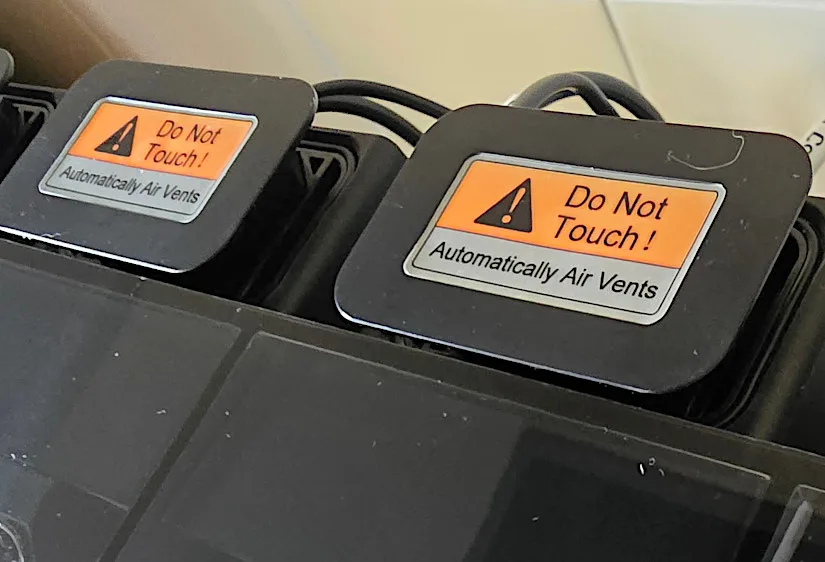
– Automatic Sealing Cover Operation
During the drying function, the sealing cover will automatically open and remain in an open Position. Once drying is complete, the cover automatically closes and maintains the sealing condition of the chamber. In the event of a sudden power loss or external interference that causes the cover to fall or remain open, you can manually adjust it.
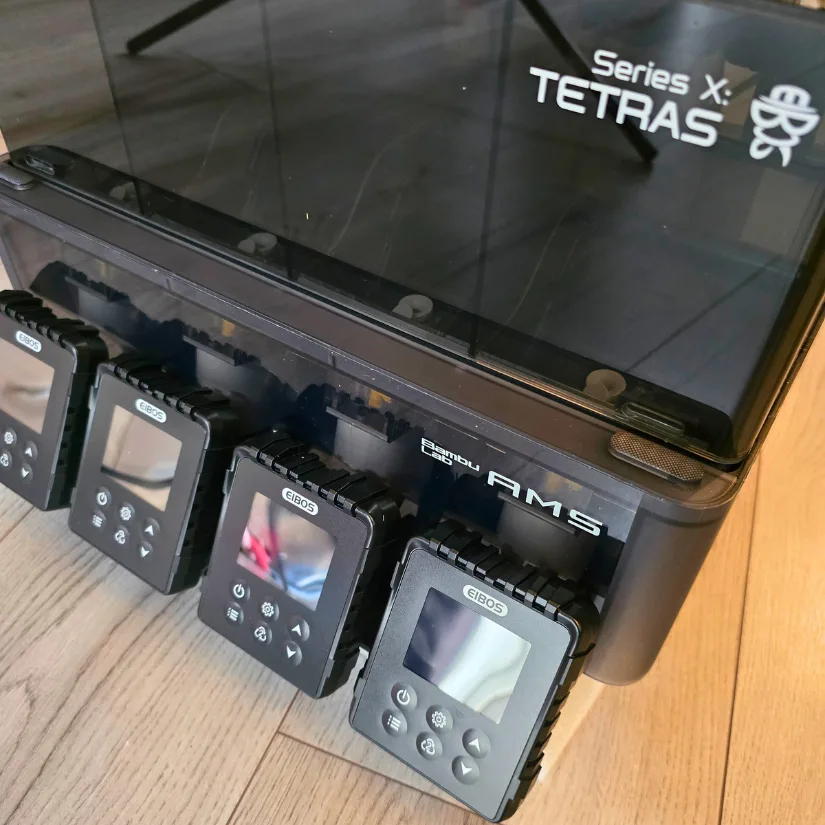
In use Operation
Once the assembly was complete, I mounted the Tetras unit on top of my Bambu Lab X1C, in its usual position. What stood out immediately was how seamlessly it fit in: the overall look and functionality of the setup remained unchanged. I connected the familiar PTFE tube and cables, with the only notable difference being the need for a second power socket. That said, having the ability to actively dry filament during printing is a huge win. It felt like a natural upgrade rather than a workaround.
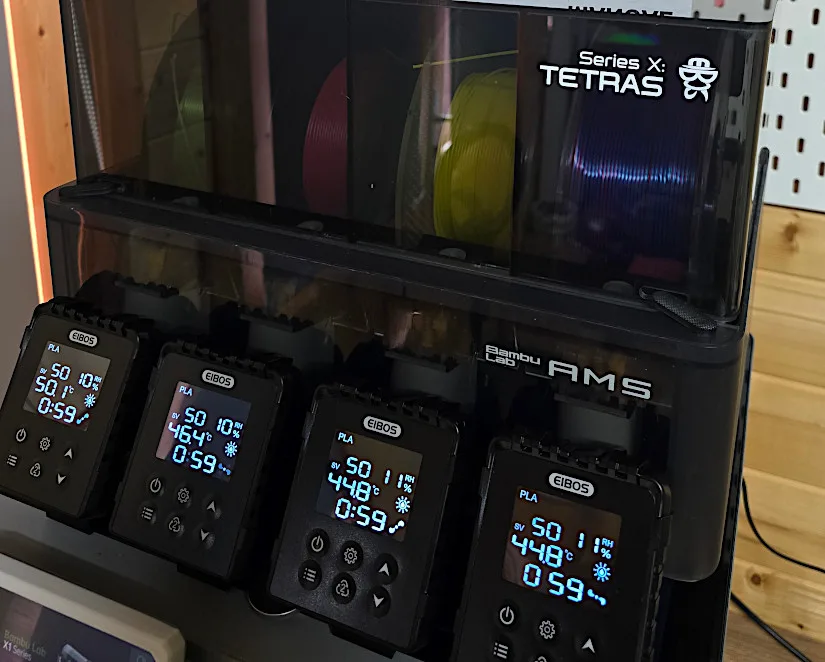
Over the following days, I ran a range of prints using both new and previously opened filaments. Selecting the correct material profile on the Tetras was quick, and the drying cycles could be adjusted based on condition and time. One standout feature was the option to run just one filament bay at a time, which is perfect for saving power. Whether printing single-color objects or pushing multicolor jobs at high speeds, I noticed a clear boost in print quality. Overall, the Tetras integrated seamlessly into my workflow, making them feel like they had always been part of the AMS.
Sample Projects
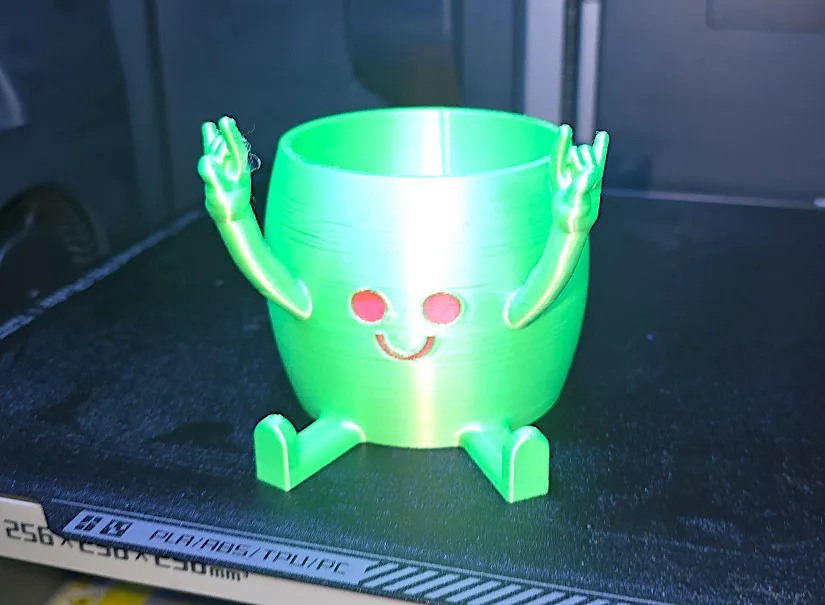
Model 1: Happy Sitting Pot Horns
I printed this model in dual color using filament that had been left unsealed for several weeks. A perfect test for the Tetras’ drying capability. I preheated the Series X Tetras for 2 hours before starting the print and kept it running throughout the job, with a total drying time of around 6 hours.
©3DWithUs – Print and Photo: Phil Macey
The model I chose was the Happy Sitting Pot Horns Hand by TomoDesigns on MakerWorld. It was printed at 0.2 mm layer height using two color variants. Despite the filament’s exposure to ambient air, the result came out clean and consistent, showing that the drying system really makes a difference.
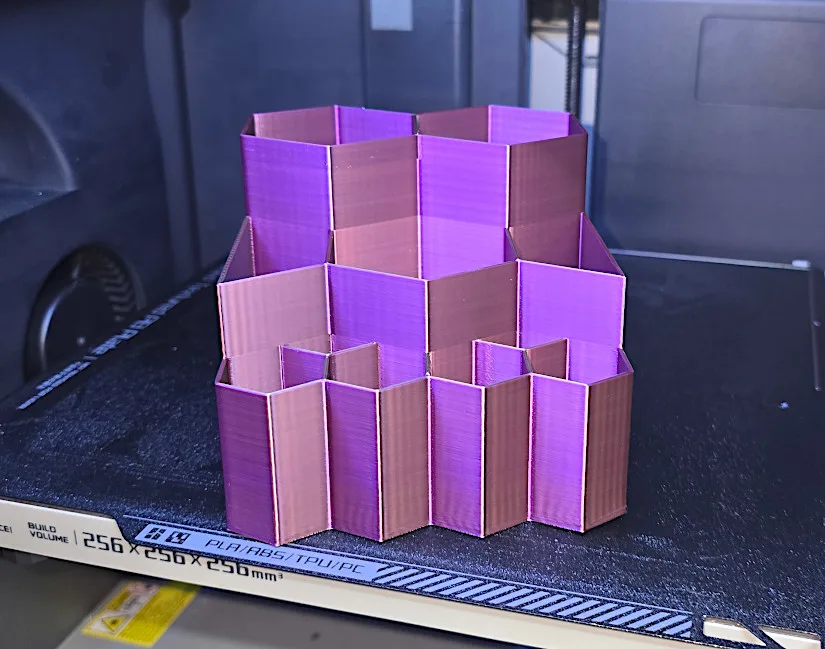
Model 2: Pencil Holder
This model was preloaded on the SD card of the Bambu Lab X1C, and since my wife needed a pencil holder, it was the perfect choice. I printed it in a single color to see how the Series X Tetras would perform in a basic single-bay scenario. I set the dryer to run for about 6.5 hours to cover the full print duration, and when I checked back, it had shut off exactly as scheduled. Simple, effective, and spot on for everyday use.
©3DWithUs – Print and Photo: Phil Macey
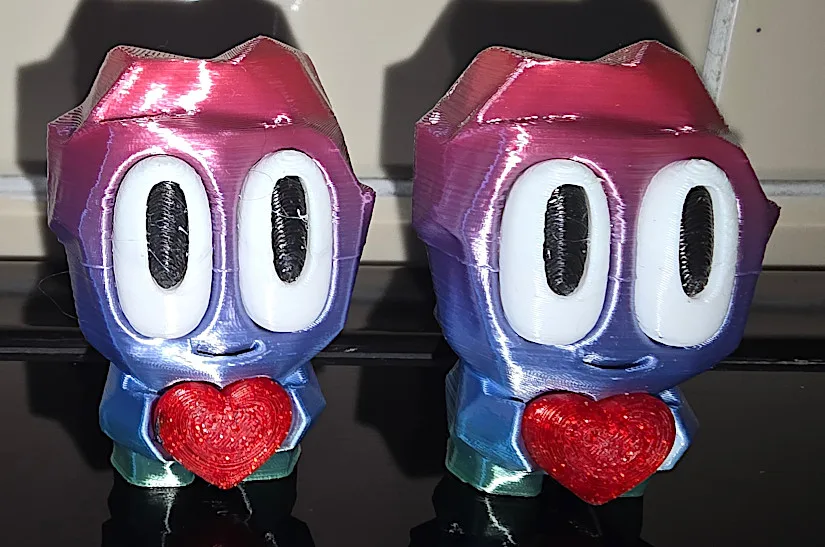
Model 3: Rock People by Blob Lab
I printed the Rock People models by Blob Lab, found on Patreon, using multi-color filament. Each one was printed individually due to the nature of the design, and I ended up completing over a dozen of them. In the past, I’ve had issues with damp filament causing failed prints, especially on detailed models like these.
©3DWithUs – Print and Photo: Phil Macey
For this run, I used all four filament slots on the Tetras and dried the spools for about six hours before printing. The results were noticeably more consistent.
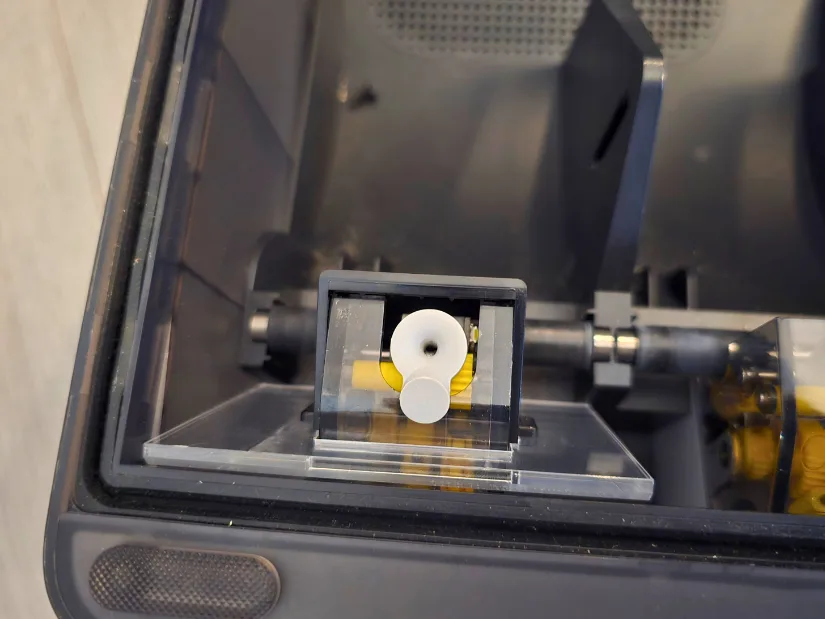
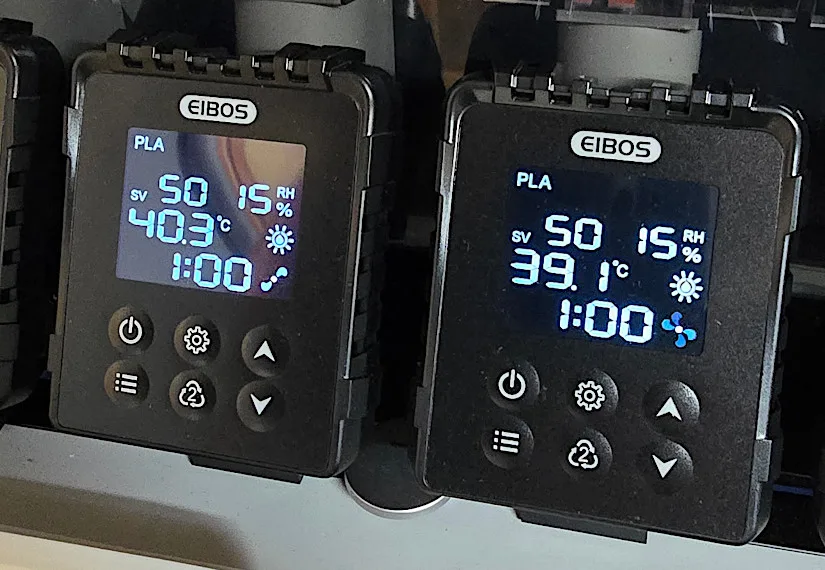
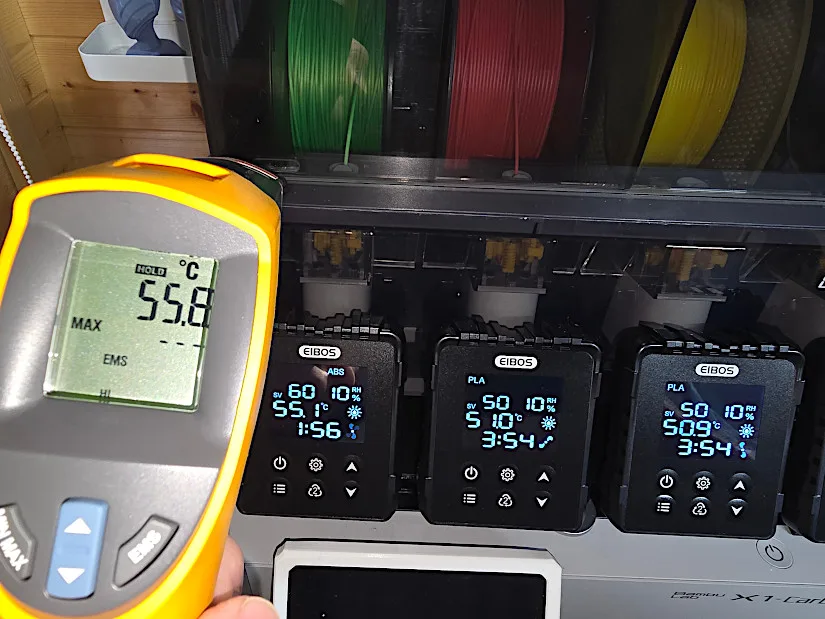
Temperature Accuracy
I carried out temperature performance tests on each bay to compare the readings from the unit’s display with an external temperature sensor. All readings were within 0.5°C of each other, confirming that the Tetras is delivering consistent heat. You can see an example of this test in the image below.
©3DWithUs – Photo: Phil Macey
The temperature ramped up quickly after entering the settings and reached the target range within the expected timeframe. Airflow across the chambers was even and steady, contributing to a reliable drying environment.
Comparison: Other Filament Dryers
On 3DWithUs, we maintain a comprehensive filament dryer comparison guide, covering various models across brands like EIBOS, Creality, SUNLU, Polymaker, and Sovol. These products differ by capacity, drying method, and intended use — from single-spool casual solutions to multi-bay systems for professional workflows.
The EIBOS Series X Tetras stands out by integrating directly with the Bambu Lab AMS, offering active drying across four individual filament bays. Unlike standalone dryers, the Tetras is designed as an upgrade module and doesn’t require additional handling or spool transfer once installed.
Other options such as the EIBOS Polyphemus support two spools or a single 3KG roll.
In summary, while most dryers cater to consumer-level needs, the Tetras is unique in its ability to retrofit and elevate existing multicolor printing systems like the AMS, bridging a gap between convenience and production-grade consistency.
Have questions? Feel free to ask in the comment section below.
For a wider discussion or to share your own X Tetras experience, join us in the forum:
Conclusion and Key Takeaways
The EIBOS Series X Tetras is a well-thought-out upgrade for users already running a Bambu Lab AMS. Instead of adding yet another standalone dryer to your setup, the Tetras integrates directly with your existing system, offering independent drying bays without compromising on space or performance. The kit comes well-packaged with all components neatly labeled, and the step-by-step assembly process is straightforward even for users new to hardware modifications.
What stands out most is the ability to enhance print quality without needing to buy a new filament or overhaul your workflow. Each bay operates independently with its own screen and settings, allowing for efficient filament management across multicolor prints. From setup to performance, the system worked reliably throughout testing. While the current configuration uses four separate control panels, there’s potential for future refinements such as a unified touchscreen interface or smart connectivity.
Pros
• Easy to assemble and operate
• Independent heated chambers for each filament bay
• Strong overall build quality
• Seamless integration with Bambu Lab AMS
• Quick heating response
Cons
• Uses four separate screens — a single touchscreen could reduce clutter and offer future expandability