In this article, we’ll be going over the full 3D character workflow as seen in games, illustration, & animation. These steps can be used to start your journey into character creation for 3D Printing with a few adjustments.
This Guide Covers:
- What is Character Design?
- The 10 Steps
- Concepting
- Blocking
- Design Stage
- Retopology
- UV Mapping
- Texturing
- Baking
- Rigging
- Weight Painting
- Posing & Animating
- Mix & Match Approach
- 3D Character Design Resources
What is 3D Character Design?
Characters are the lifeblood of storytelling. They are how an audience connects and relates to events and circumstances explored in all real and imagined worlds. So, it’s no wonder that 3D character design is a big part of the 3D Design Community.
3D character design is a process shrouded in some mystery for a self-taught designer. It comes in various workflows depending on who you ask – with no hard or fast rules. But most workflows include a variation of the same 10 steps (give or take a few) no matter what you’re doing.
The 10 Steps to 3D Character Creation
I’ve found that the hardest thing about learning 3D character design has been having limited knowledge of what is involved. And a lot of that has to do with not knowing the vocabulary words for the steps. This guide should get you up to speed on what to expect from an animation/game character workflow.
1. Concepting
What is it?
Concepting is the process of developing all your ideas about the character. Who is this person? What’s their personality like? What’s their story? How do they dress? What are their defining features? This part of the process is really your planning stage. The stage where you figure out a general direction and goal you’re aiming to accomplish for the character in mind.

Screenshot: PureRef
How to do it?
Many people sketch ideas, gather reference material in programs like PureRef, and some even make mood boards and spreadsheets to document their concepts. However in-depth or limited you decide to do this is up to you.
It is also worth looking into a such AI Art Generator like Midjourney. I wrote a detailed article about text-to-image tools on 3DWithUs.
2. Form Blocking
What is it?
This step is done by defining the basic body type, proportions, silhouette, and main features in primitive form in a 3D program of your choice.

Image: Amber W. @ohheyvoid
How to do it?
This step usually involves designing the character’s basic shapes with primitives. You can also use base meshes to get you started faster. But for purely original characters blocking your forms for more control is a huge advantage.
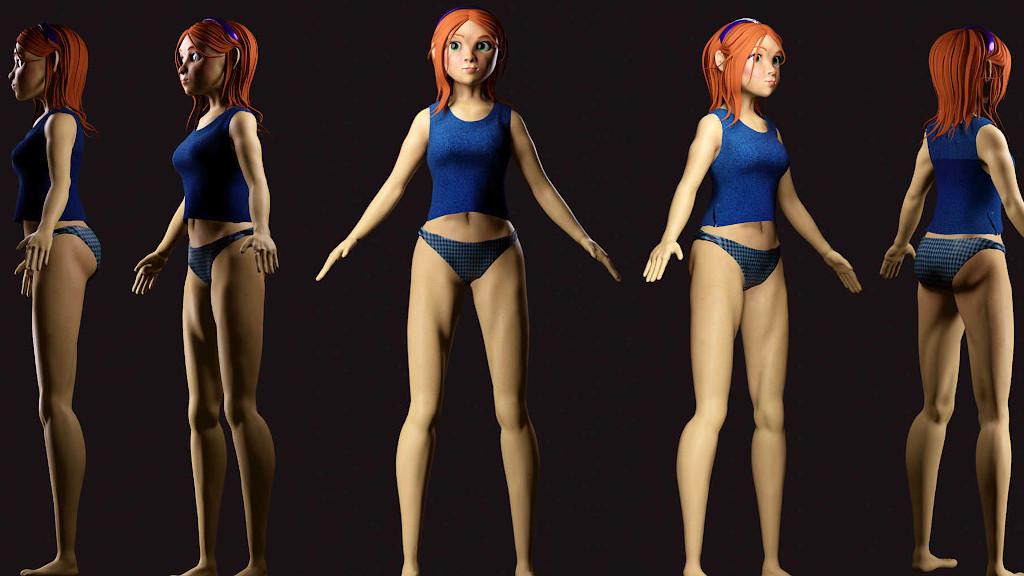
3. Design Stage
What is it?
This step is the process of defining details in your blocked-out forms. The contours, the wrinkles, and the overall look. This is where the choices you make will help turn those primitive block shapes into a fully formed character.

Screenshot: Amber W. OhHeyVoid
How to do it?
How you design your character is completely up to you. Be focused on capturing the essence of the character so that you can transform them into an asset. 2 Main approaches to the 3D character design process include:
■ 1) Sculpting – Involves deforming a high poly mesh using 3d programs like Blender or Zbrush. Sculpting is a very popular process because large deformations to your mesh can happen with one stroke of a pen/mouse. You can also get very detailed very quickly.
■ 2) Poly Modeling. Allows you to skip the sculpting details and go straight for the polygons. Using your knowledge of anatomy and shape you move polys/verts around until your character takes shape.
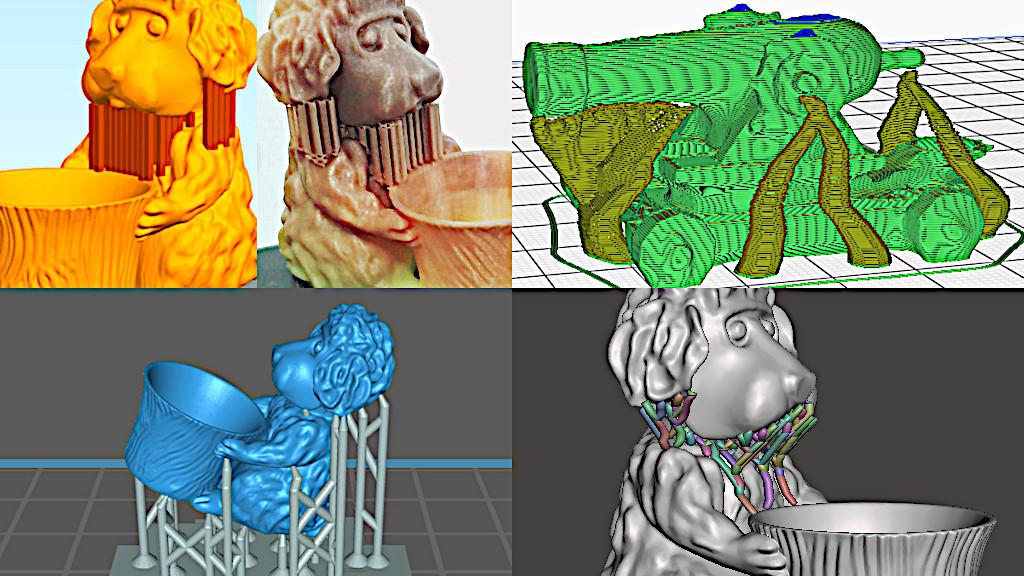
4. Retopology
What is it?
Retopology is the step where workflows vary. If you’ve sculpted a high poly/detailed character and you’re looking to animate or pose later you’re going to want to lower those poly counts with healthy edge loops. All it means is you’ll be rebuilding your character with fewer polygons.

Screenshot: Amber W. @ohheyvoid
How to do it?
If planning to animate for a game or cinema you’ll likely be using a 3D tracing technique. This technique requires you to manually rebuild the mesh using fewer polygons. Placing your new polys around your high poly mesh helps capture the desired silhouette. A key focus should be building quality edge loops that will allow for high quality, real-time deformations in areas like the eyes, mouth, arm/leg joints, etc.
If 3D Printing is your end goal of choice retopology might not be necessary. But if you don’t want to kill your slicer – many people settle for letting their 3D program retopo for them. Decimating the mesh just enough to lower the file size is a valid option, but may lose some finer details.
There are also tools like QuadRemesher that will automatically retopologize using a fancy algorithm. The best part is it works with most Autodesk and 3d programs.
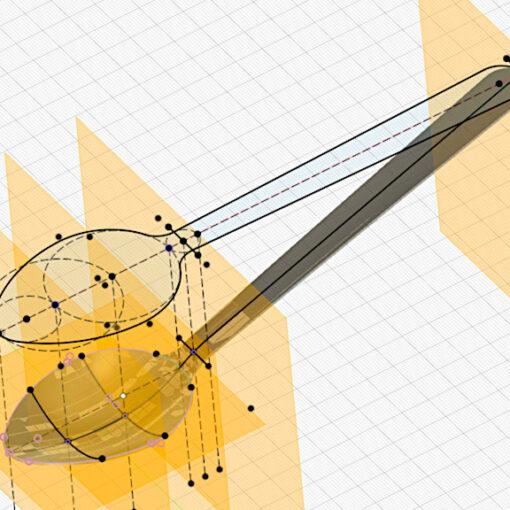
5. UV Mapping
What is it?
This is a part of the process where you add seams to your 3D object so that it can lay flat in a 2D Map. The reason for this is so that you can add back the high-quality details from your high poly sculpts as well as introduce color/textures.

Screenshot: Amber W. @ohheyvoid
The best real-world example of this is how globes are made. The color information is printed flat and then pasted artfully onto a 3D sphere.
The reason for this is so that we can tell the computer where exactly to project certain color and height information in render/animation engines.
How to do it?
This process involves identifying seams on your 3D object where the mesh will be split. With enough seams, you’ll be able to “unwrap” the object and create landmarks on a 2D map. These landmarks will correspond with your 3D object.
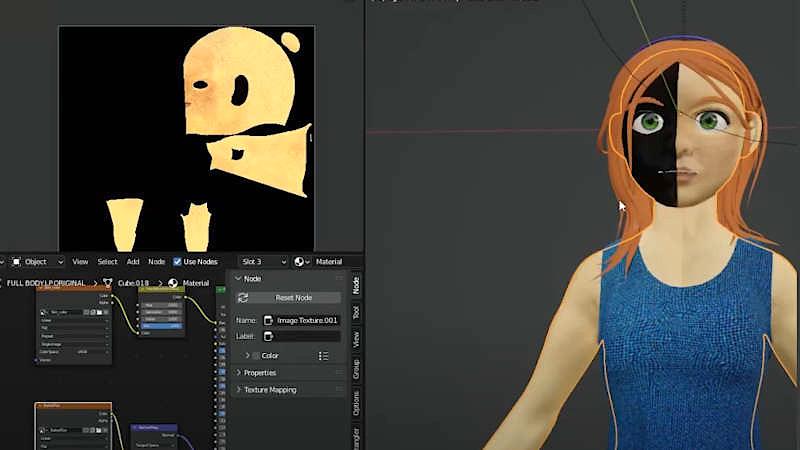
6. Texturing
What is it?
3D Texturing is the process of defining what’s going on your UV maps. This can include color information as well as adding more physical texture to your high poly mesh.

Screenshot: Amber W. @ohheyvoid
How to do It?
You can texture using pre-designed textures purchased on marketplaces or downloaded for free from other services. Or you can paint your own in programs like Substance Painter and Blender.
Most of the time you’ll be doing a mix of both of these things throughout the workflow. This color information will be placed onto your unwrapped UV Maps and saved to your computer in your choice of photo format.
7. Baking
What is it?
Baking is the process of locking in your color, height, specular, and deformation details into your UV maps. Those maps are then projected onto your low poly object. This process reduces how much processing your computer needs to do to get your desired look.
Screenshot: Amber W. @ohheyvoid
How to do it?
This process comes in various flavors depending on which map you’re looking to export. You can bake out up to 10 different types of maps depending on your style of texturing. The maps each hold a different type of information.
This can include Color Maps, Normal Maps, Maps for Roughness, Maps for Ambient Occlusions, Refraction, and more.
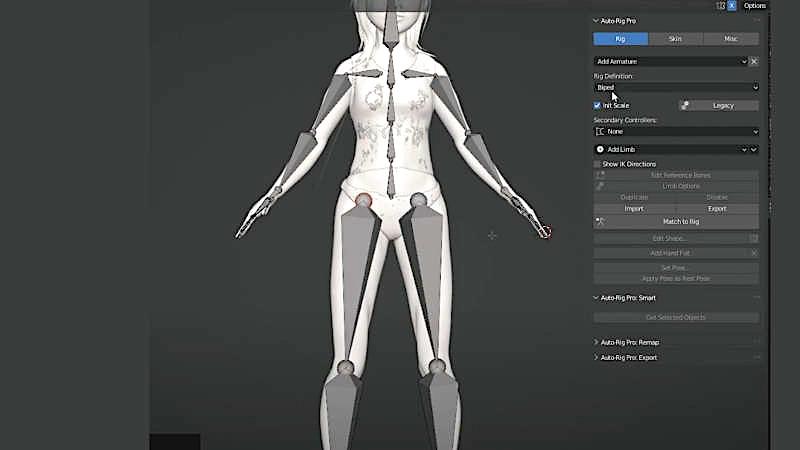
8. 3D Character Rigging
What is it?
Rigging is when you add digital bones to your 3D character. This allows for posing and animating. This process can be very time-consuming depending on how accurate and detailed your mesh deformations need to be.
Screenshot: Amber W. @ohheyvoid
How to do it?
If you’re designing something with a face and a body chances are you’ll have a face rig and a body rig. There are a number of different programs that provide rigging systems that can be manipulated to your liking.
Rigging doesn’t stop at meshes. It can also involve building elaborate animation tools that control multiple bones at once through drivers and shapekeys / morph targets. These give you a little extra control over your deformations. You usually use an amalgamation of these handy techniques with the next step simultaneously.
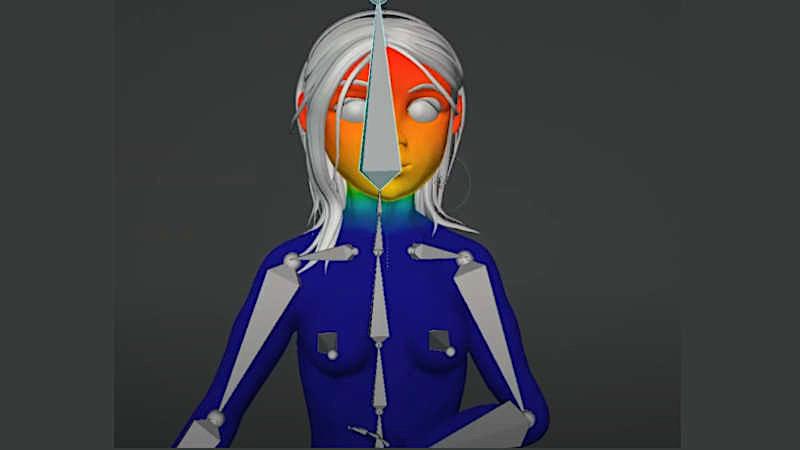
9. Weight Painting
What is it?
Once you’ve placed the digital bones of your character you’ll then start defining how the rig interacts with your mesh. Weight painting is the process of telling the rig how much to deform the mesh when a bone is moved.
Screenshot: Amber W. @ohheyvoid
How to do it?
A lot of the time you can auto weight your rigs, but the more you work with the rig you’ll start to notice deformations that look out of place. You’ll also start to realize how important those Edge loops actually are. To manually do this you’ll select the bone and go into weight painting mode – and paint your pressure areas accordingly. The “hotter” the color the more control the selected bone has over the mesh.
Again, weight painting is a huge part of the rigging process, but it can also be used to determine particle placement. This can be used for hair, generative scene design, and more.
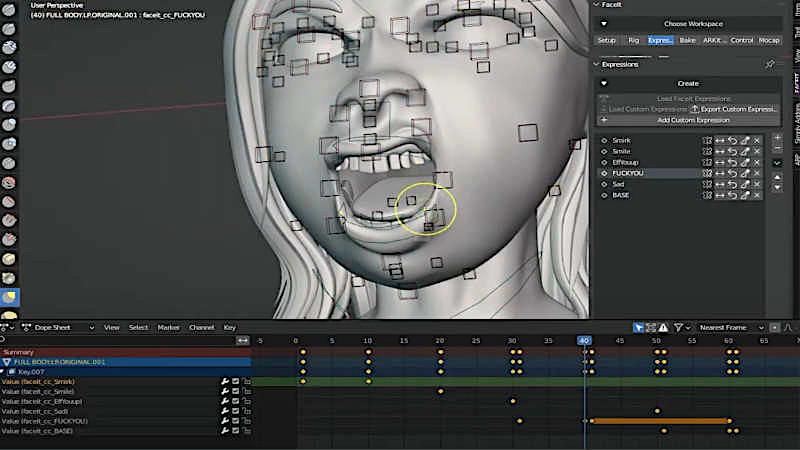
10. Posing & Animating
What is it?
Posing and Animating is when you take all your hard work from the previous steps and really start making your character do the things you want them to do.
Screenshot: Amber W. @ohheyvoid
How to do it?
Both of these processes involve working with keyframes in a timeline Keyframes tell the computer where everything needs to be in a particular spot on the timeline. If you’re simply posing for still images – you’re likely only using one keyframe. If you’re animating – you’ll be using a lot of keyframes to create your masterpiece.
MIX & MATCH APPROACH
And that, my friends, are the ten ingredients of 3D character design. It’s important to note that how you use these steps is going to come down to how you work and what your end goal is.
For example; Concept art might only require Design Sculpting and Texture Painting. As making your character animation ready is not necessary.
But if you’re planning to animate a film or use your character for video games chances are you’ll be using all 10 steps in some order that works best for your workflow.
Now if you’re 3D printing you might Concept, Design, Retopologize, Rig, and Print. Without ever bothering to unwrap or texture. You might even go straight from Design to Print depending on your needs and the density of your mesh.
There are no hard or fast rules to how you approach the 3D character workflow as everyone works differently. But this overview should be able to guide you in the right direction.
3D Character Resources
If you’re interested in diving deeper into Character Design there are massive amounts of resources online. I’ve collected all of my favourite tutorials, courses, and blender add-ons in my Free Study Guides. I also summarize my top tips for specific techniques on my youtube channel, Oh Hey Void!.
Read more: How to Create MetaHuman 3D Character for Unreal Engine 5
Creating a MetaHuman for Unreal Engine 5 is an exciting endeavor that boosts your creativity, technical skills, and understanding of the Unreal Engine 5 software. Epic Games defines their MetaHuman as a next-generation digital human creation tool.
Read more: How to Create Custom Brushes in Blender Using AI Images
In this article, I will show you how to prompt in the AI art generators, further prepare the images in the editing software, and then transfer the result as a texture to create a unique brush in Blender.