The unveiling of the Sovol SV08 sparked immense anticipation among the vast community of 3D printing enthusiasts, myself included, as it marked the arrival of a much-desired addition to the printing world. Sovol endeavors to introduce a sizable Core XY printer to the market at an accessible price point, with impressive features. The Sovol SV08’s Core XY design, complemented by the Klipper firmware and expansive build volume, is a testament to Sovol’s commitment to delivering cutting-edge technology to its users. The fitting of four independent motors for the Z-axis, alongside linear rails on every axis and robust 10mm belts securing each corner, signifies an attention to detail that enhances the printer’s functionality and precision. In this review, I will examine the machine, check the slicer software, 3D print some models, and outline the Pros and Cons.
Table Of Contents
- Specifications
- Unboxing and Assembly
- Features
- Bed Leveling and Calibration
- Slicer Software
- Klipper Firmware
- Test Prints
- Comparison
- Conclusion and Pros & Cons
Price: $579-599
Product affiliate links: 3DWithUs is supported by its audience. Purchases via some links may earn us a small commission at no extra cost to you. This helps us to continue bringing you high-quality content. Our guides and reviews remain unbiased and independent.
Sovol SV08 Specifications
• Build volume of 350 x 350 x 345 mm, 13.77 x 13.77 x 13.58 inch
• CoreXY motion system
• ALL axes use linear rails
• 4 independent Z stepper motors
• Speed up to 700mm/s
• 40,000 mm/s/s acceleration
• LED light
• Remote Control
• Camera module
• Single toolhead for 1.75mm filament
• Klipper high-speed firmware
• Ceramic heating block
• AC-powered high-speed heating print bed
• Networkable with remote control app
• Nozzle sensor for automated Z-offset calibration
• Enhanced cooling system
• Automated bed levelling
• Printable Filaments PLA,PETG,TPU,PETG-CF,ABS with Enclosure
• Extruder Planetary gear extruder
• UI Control and Display screen 3 inch with control knob or 5-inch Touch screen add-on.
Unboxing and Assembly
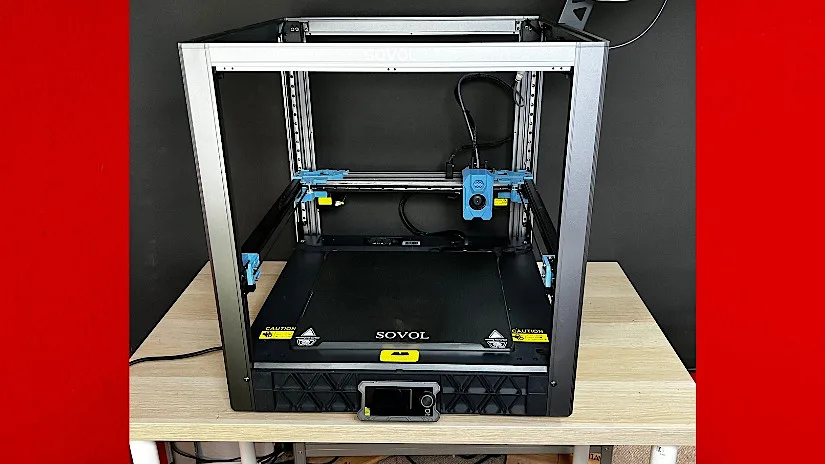
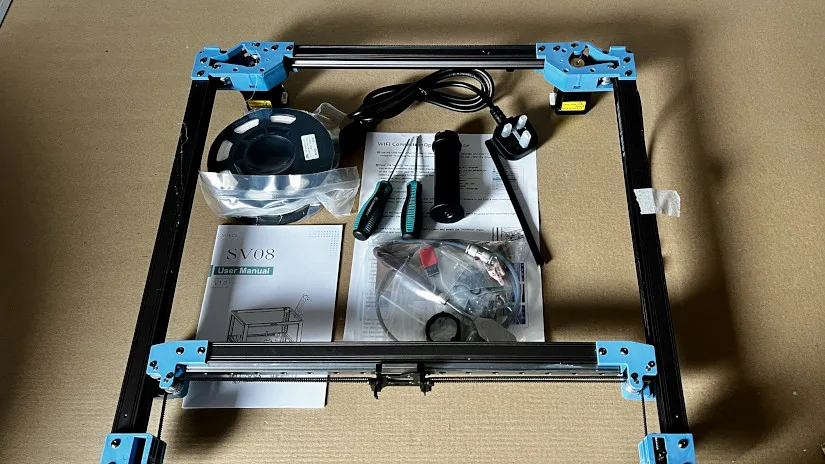
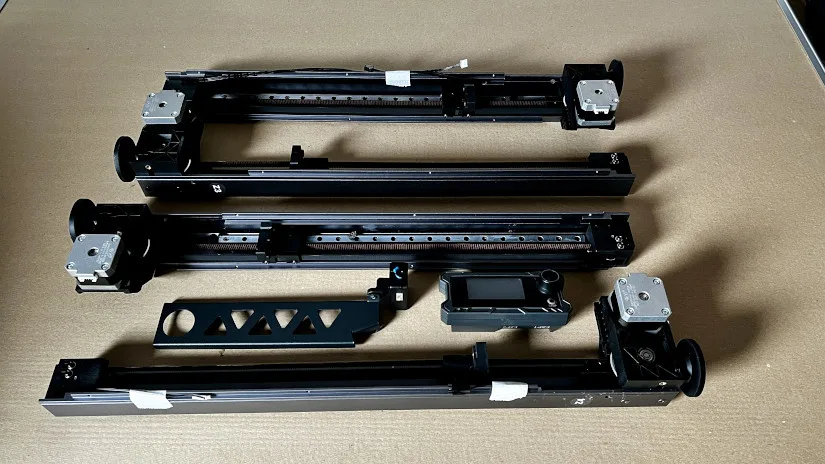
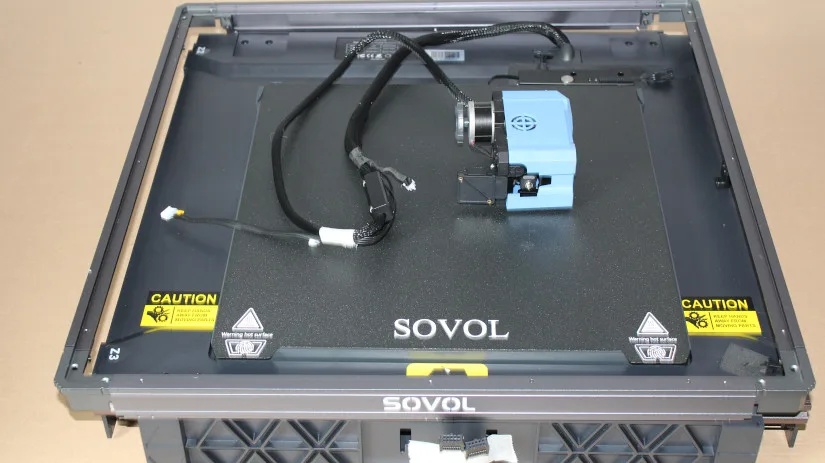
The Sovol SV08 arrived well-packaged. This CoreXY 3D printer, compared to the more common bed-slinger type 3D printers, requires a bit more time to assemble – about an hour – with easy-to-follow instructions. A crucial point to note is the placement of cables; some are located in tricky areas and can easily become trapped or damaged. However, with careful handling, these issues can be managed. As expected with a CoreXY printer, which features a framed design, there are significantly more parts to assemble and more bolts.
©3DWithUs – Photo: Richard Hirst
The process was straightforward: first, installing the Z uprights, all being labeled, then the top rail, and then installing the gantry. After all the mechanical parts are assembled, it’s just a case of connecting all the wires.
©3DWithUs – Photo: Richard Hirst
– WiFi. After assembly, you have to use the USB stick, which has a file for setting up the WiFi. It’s an easy process: just open the file and type in your WiFi name and password into the file and save. Then insert it into the USB port of the printer, which then updates your WiFi details and logs the printer onto your WiFi.
Features
Let’s explore some of the Sovol SV08 features: linear rails, extruder head, camera, Z motors, UI screen, and connections.
– Linear Rails. The linear rails, which the printer has on all axes, make the movement a lot smoother and help with the speed.
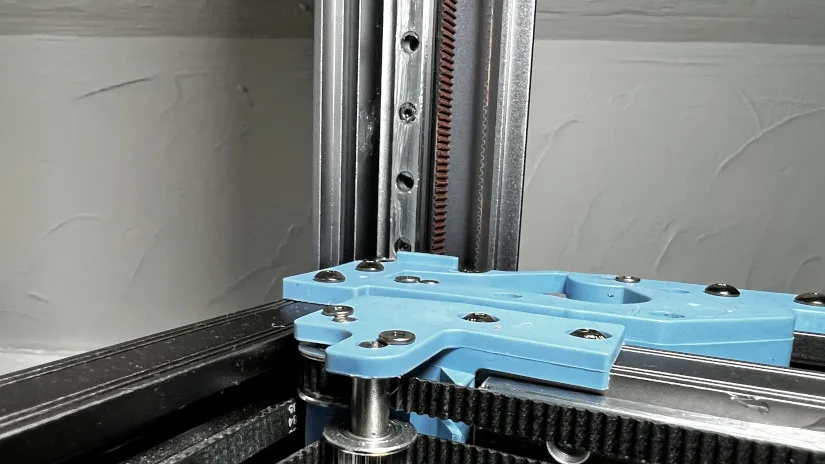
©3DWithUs – Photo: Richard Hirst
– Extruder. The extruder head features a ceramic heater block, planetary gear filament drive, and inductive sensor.
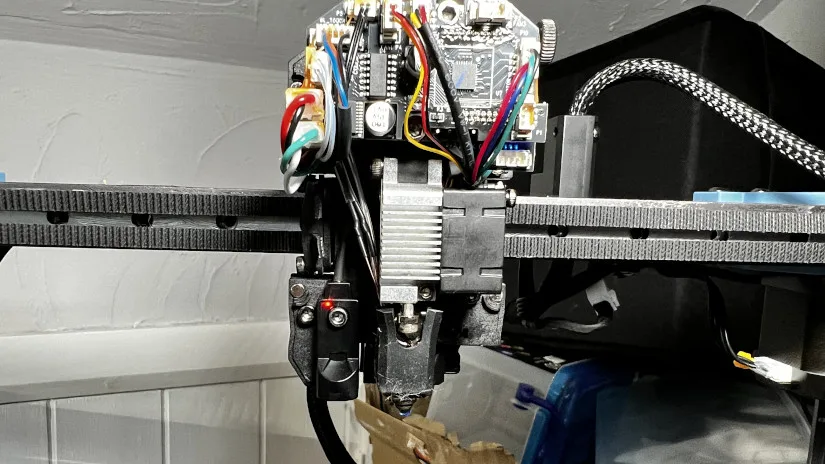
©3DWithUs – Photo: Richard Hirst
– Camera. The camera is equipped for creating time-lapse videos and monitoring the printer.
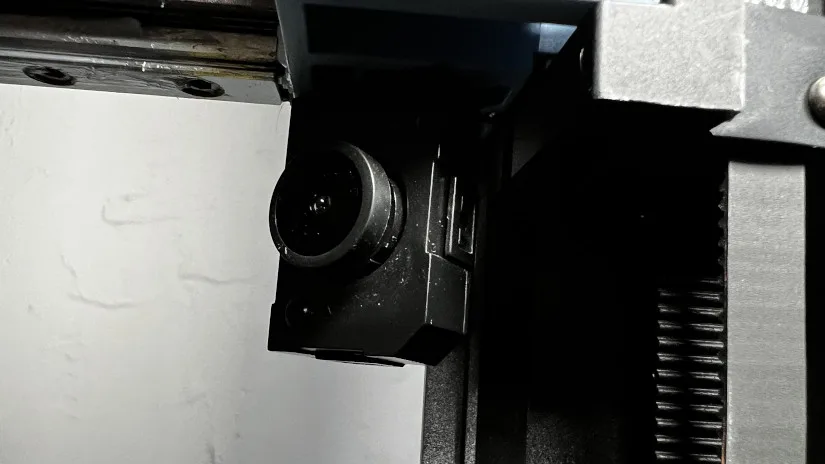
©3DWithUs – Photo: Richard Hirst
– Z Stepper Motors. The Z stepper motors are positioned on all four corners to ensure better Z-axis alignment of the gantry.
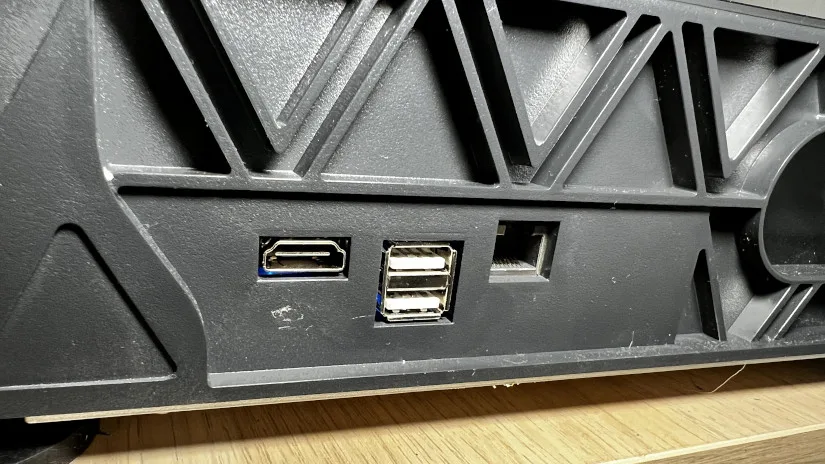
– UI Screen. Lastly, the UI screen and printer connection options.
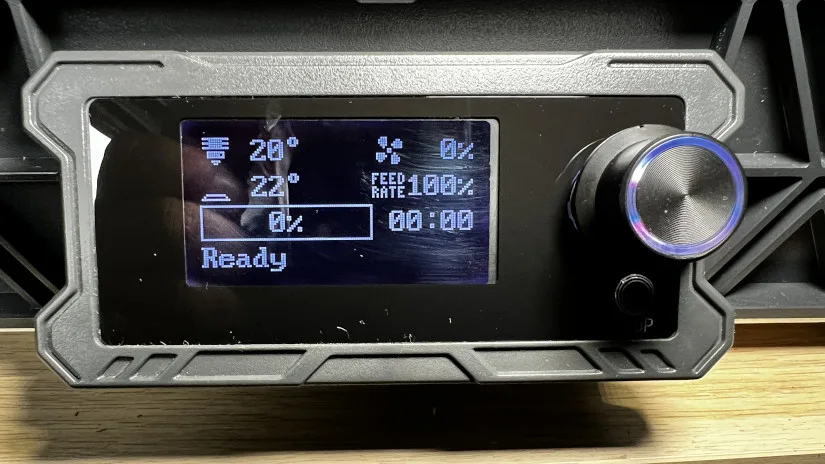
©3DWithUs – Photo: Richard Hirst
Bed Leveling
After the printer is assembled, the first task is to level the printer. Begin by navigating to the leveling section on the screen and selecting ‘Calibrate Z Offset.’ The printer will automatically heat the bed to 60°C, calibrate the Z offset, then home the X, Y, and Z axes. Next, it will perform the Quad Gantry Level followed by the Bed Mesh process; this entire sequence takes about 5 minutes.
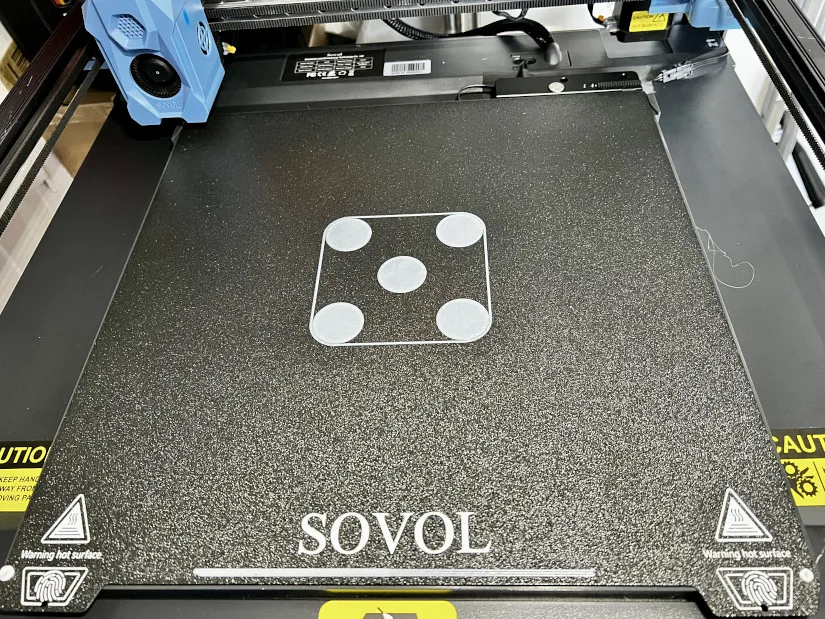
©3DWithUs – Photo: Richard Hirst
After leveling, proceed to print the bed test print, which consists of 5 circles. While it’s printing, observe the print to see if any Z adjustment is needed. If so, adjust it during the printing process.
Slicer Software
The Sovol SV08 includes the ORCA slicer on the USB stick, a software that is becoming increasingly popular among users. With the printer profiles already installed, the slicer was easy to set up and start printing.
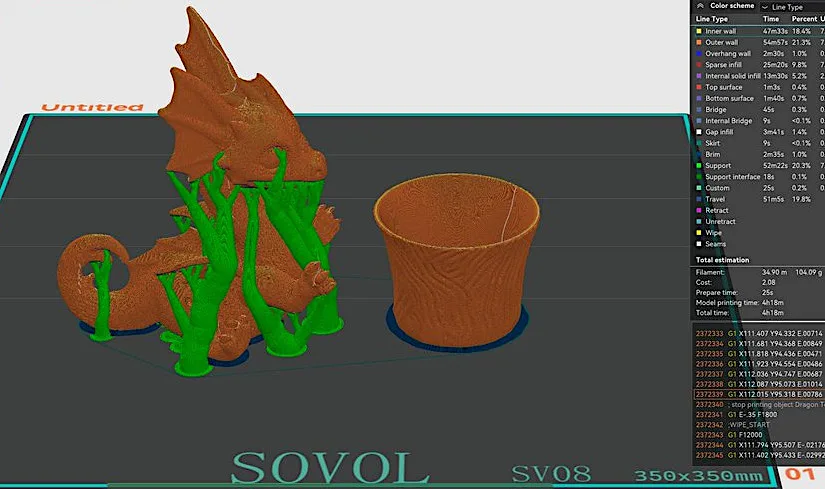
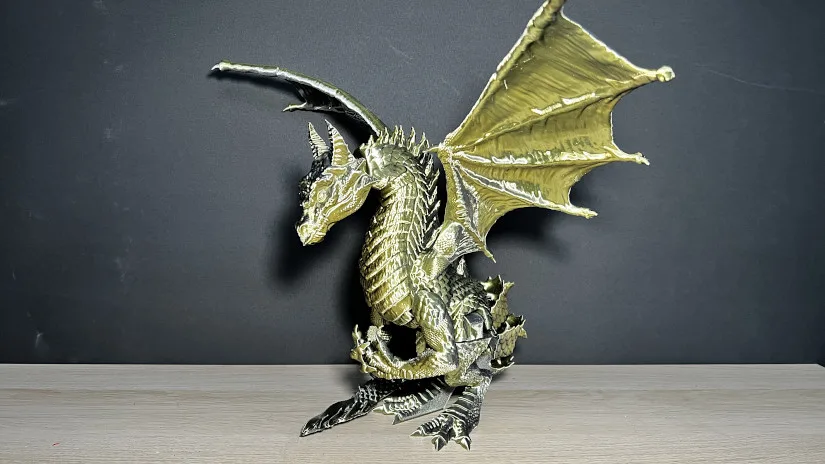
Featured above is a Dragon model with automatic organic tree supports generated in Orca slicer. Such models may be challenging for some printers as more slicer settings need to be tuned in order to print it well. I was pleased to see the SV08 profile in Orca is well-tuned, as I am completely satisfied with the print result.
Klipper Firmware
The Sovol SV08 is equipped with Klipper firmware, which offers many functions for improved print quality. While it may initially seem complex, it becomes more manageable with use, and there is ample information available online. A major advantage of using Klipper is the ability to access the printer remotely via the web. You can log into the Klipper interface by obtaining the printer’s IP address from the UI screen and entering it into your browser. This provides full access to all of Klipper’s features, where you can add macros and control all aspects of the printer.
Test Prints
This is the part I like best: finding out how well the printer can perform. The Sovol SV08 performed excellently in this part; no matter what prints I chose, they printed excellently. First off, I printed the 12-minute Benchy from the USB stick, which came out nicely. Then I started some more complicated models, some with high details and very small parts.
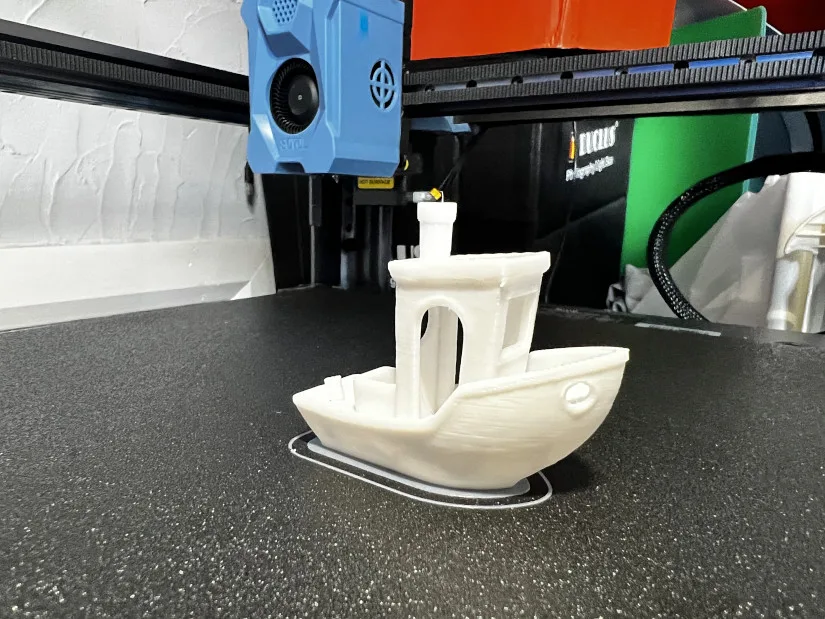
©3DWithUs – Print & Photo: Richard Hirst
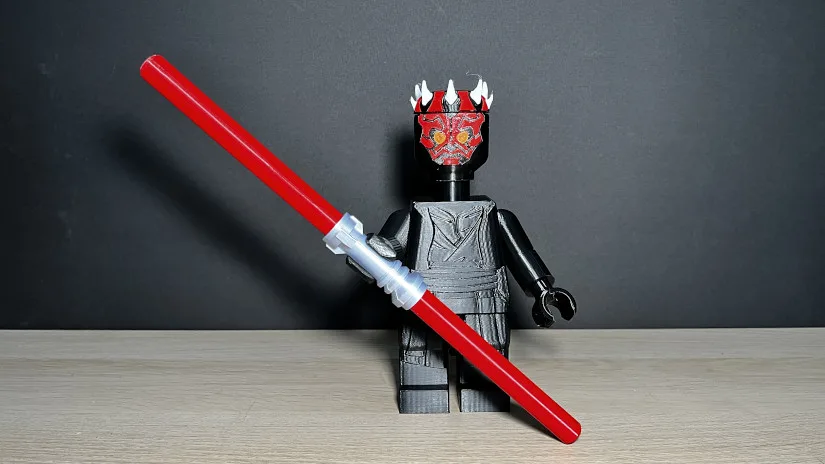
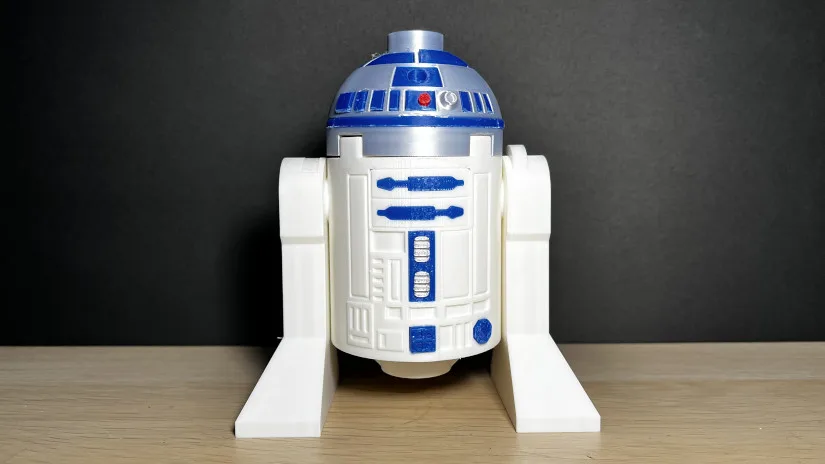
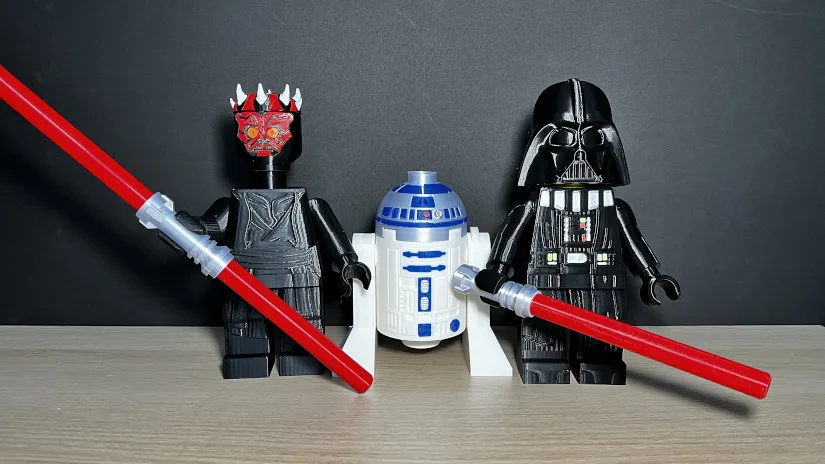
Multi-Part Prints
For this series of prints, I selected models with parts that clip together, allowing you to appreciate not only the fine details but also the various colors. As evident from the printed models, some parts were quite small and had to fit into tight spaces. This demonstrates that the Sovol SV08 can print with high accuracy, as all the parts clipped tightly into place.
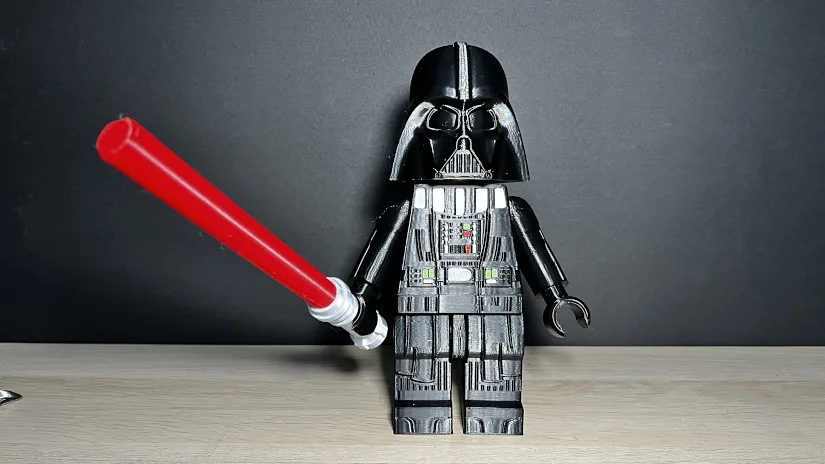
3D Model by BigBricks on Thangs
©3DWithUs – Print and Photo: Richard Hirst
3D Model by BigBricks on Thangs
©3DWithUs – Print and Photo: Richard Hirst
3D Model by BigBricks on Thangs
©3DWithUs – Print and Photo: Richard Hirst
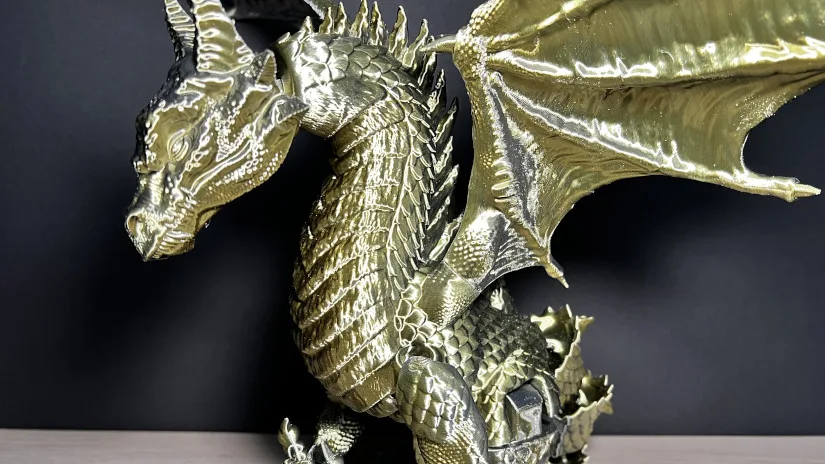
Flexi Prints
Flexible prints are one type of printing that often amazes people, as it’s hard to believe that all the parts are printed simultaneously and joined together. The flexible print I selected was composed of five parts: the tail, body, two wings, and a head, all of which simply click together. The tail, legs, and head are articulated, allowing movement. Additionally, using dual-color single-strand filament enhanced some remarkable details.
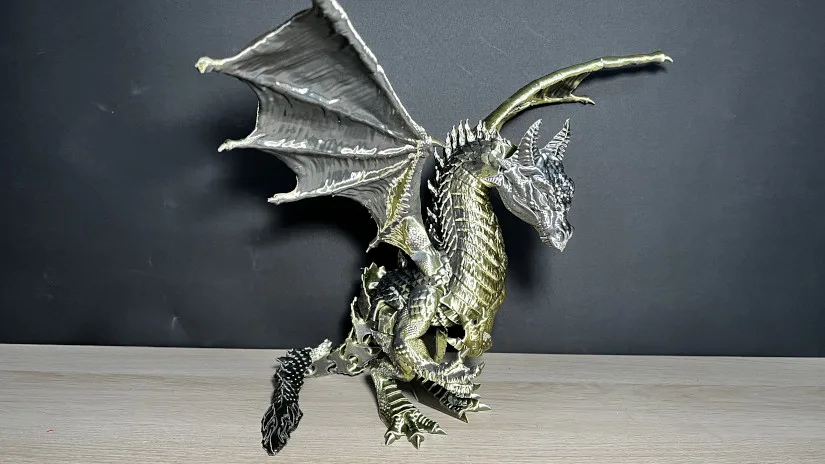
3D Model by STLFlix
©3DWithUs – Print and Photo: Richard Hirst
Functional Prints
3D prints can be both functional and aesthetically pleasing for everyday items, adding stunning details. In this section, I selected a few models to test the printer’s ability to produce high-detail prints that are practical, not just for display. The Dragon pot planter from 3DWithUs is an excellent example of this.
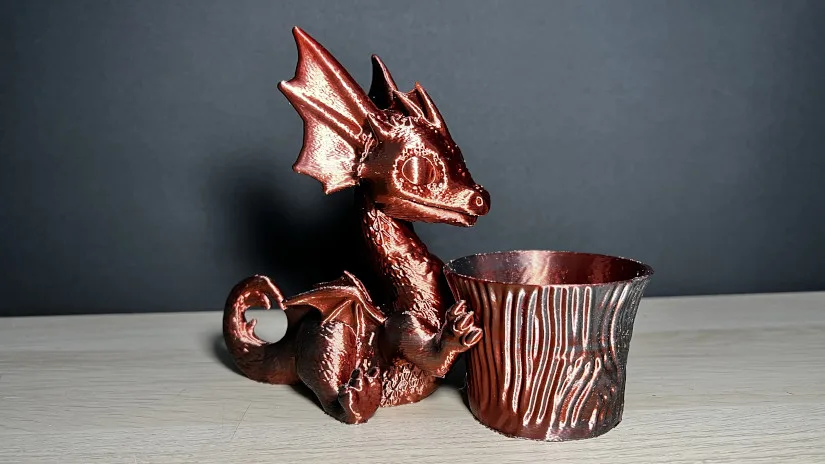
3D Model by 3DWithUs
©3DWithUs – Print and Photo: Richard Hirst
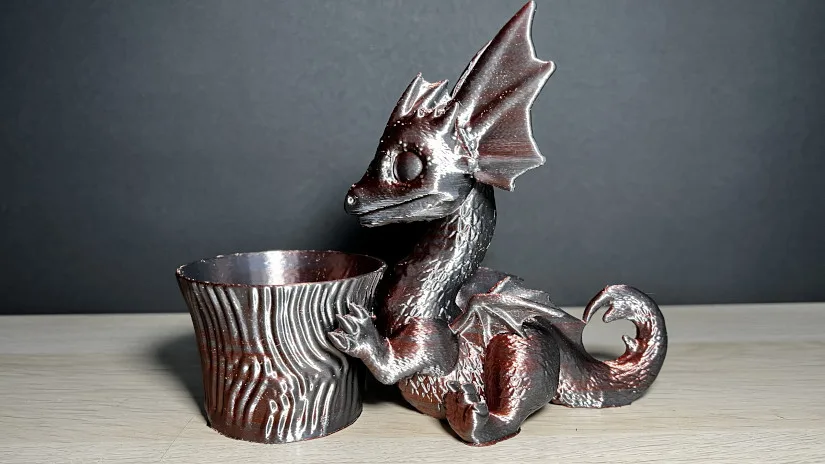
This model is particularly challenging as it requires a lot of supports. This is where Orca Slicer comes in handy, as their organic tree supports are placed automatically and do the job. The model was printed without issues, and dual filament landed very well on the model, featuring a specific color shade on each side.
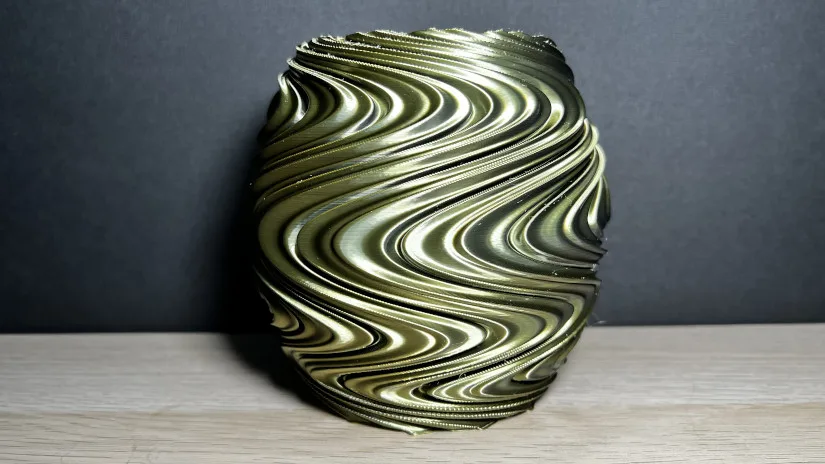
Vase
My final test print choice was a non-vase mode, yet still an astounding vase by ChelsCCT. Her Trippy Wave Vase is an excellent choice to showcase dual-color filaments.
ChelsCCT on
3D Model by Thangs
©3DWithUs – Print and Photo: Richard Hirst
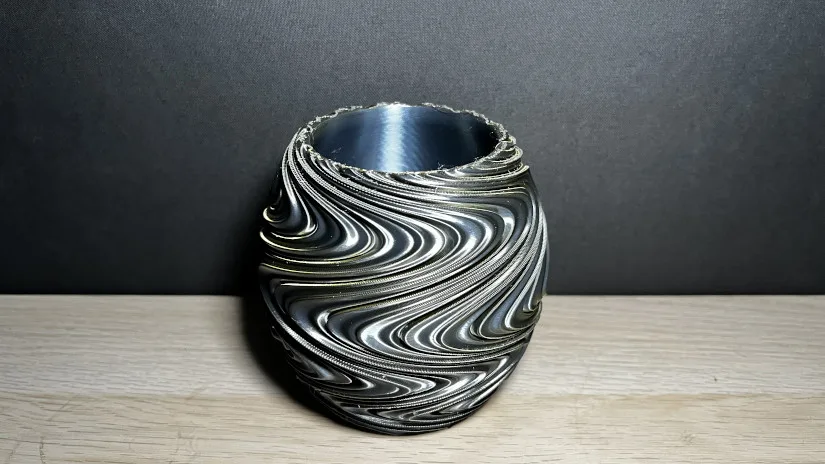
For this review, I used dual-color filaments from Amazon to test the printer’s ability to handle color transitions smoothly. These filaments are ideal for producing visually striking prints. The Sovol SV08 3D printer managed this task well, showcasing its capability to execute complex color patterns and bring creative ideas to life with impressive detail and quality.
Compare to Other Sovol 3D Printers
The Sovol SV08 is the latest addition to the Sovol SV series of 3D printers. On this website, you can also find a review of the Sovol SV07 Plus, a plus-sized, Klipper-enabled 3D printer that demonstrated good results in our tests. Additionally, there are tips on how to pause a printer for filament changes. While it’s uncertain if this will work with the SV08, it’s certainly worth trying.
On 3DWithUs, we have a comprehensive comparison guide covering FDM 3D printers. Sovol SV series machines, both price and quality-wise, is highly comparable to other machines. To compare similar builds and price ranges, the closest would be the following machines:
In comparison to the machines listed above, the Sovol SV08 stands out due to significantly bigger build volume for the similar price.
Conclusion and Pros & Cons
As an open-source printer, the Sovol SV08 emerges as a canvas for enthusiasts and modders to unleash their creativity through modifications and enhancements, as well as add-ons that Sovol is selling, such as an enclosure and a 5-inch touch screen. I have not tried these, but I think they will only make this printer better as it will be able to print even more filament types. While the assembly process of this printer demands a bit more time and patience, I found the nature of the process easy, with the build quality and comprehensive instructions that guided me through each step.
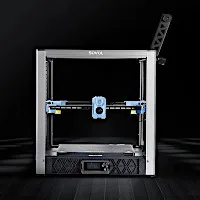
Sovol SV08 Review
Review Summary
This was my first time testing and reviewing a core XY printer, and the Sovol SV08 did not disappoint. It was straightforward to assemble, and the speed and print quality were very good, requiring no tuning or profile changes for this review. The printer performed excellently and is a strong contender in its price bracket. It matches the performance of more expensive printers on the market, and with its large build plate, fast speed, and impressive specs, it’s likely to be very popular. Looking ahead, the SV08 has several promising upgrades on the horizon, including an enclosure, touch screen, and a color-changing unit. These features make it an attractive option for both beginners and more experienced users.
Pros
Linear rails all-round
Klipper firmware
Quad gantry motors
High speed
Cons
Small UI screen
Filament holder
Motherboard fan is noisy