If you’re interested in getting started with 3D printing and your priorities are A) not spending too much money and B) not building a printer from scratch, the Anet ET4X 3D Printer might be a good fit for you. It comes in at under $200 and doesn’t require any electrical wiring knowledge or tools beyond a few allen keys and a screwdriver. The software can be a bit tricky if you’re starting from scratch but if you’re willing to put in the work, this printer will get you up and printing with no additional supplies. Add a filament run-out sensor, a heated bed, and a power outage resume feature and you’ve got a great entry-level machine.
For a comparison with other FDM 3D printers please refer to the detailed budget FDM 3D printers guide
Anet ET4X 3D Printer Review – First Thoughts and Impressions
The Anet ET4X is shipped as a semi-built kit printer, and requires some assembly before you can start printing. The extruder gantry and the hot end assembly come pre-assembled with all wires terminated, so the assembly is generally limited to building the frame of the machine and connecting the wiring.

(Image: Andrew Sink)
The boards are all clearly marked, so this is a straight-forward process. The most important step is making sure the wiring harness attached to the X gantry is secured to the mounting plate with zip ties, to prevent the connectors from coming loose during printing. This seems to be a common issue, with many negative reviews calling out this step specifically as being easy to miss which could allow damage to occur to the printer.

(Image: Andrew Sink)
Anet ET4X Features
The ET4X has a 2.8” color touch screen which makes performing tasks like loading/unloading filament and calibrating the bed an intuitive and simple process. In addition, the extruder and heated bed temperature, print speed, and fan speed can all be controlled during printing via the touch screen. The firmware that ships on this printer does not have the ability to utilize baby-stepping, so all Z adjustments need to be made using the four wheels under the bed to control the overall calibration. The bed is heated, so PLA sticks well to it without any glue or other adhesives.

(Image: Andrew Sink)
Filament Run-out Sensor
The filament run-out sensor is positioned in-line with the aluminum extruder assembly, and has a small printed bracket that makes it fully aligned with the extruder gears. I tested it a few times, and it successfully registers when filament is no longer present, and will bring the printer to a paused state to allow you to insert new material. I thought it was a cool touch that the riser bracket was printed; the perfect example of how 3D printing likely saved the day during manufacturing!
The ET4X also has the ability to resume a print after a power outage. I tested this by unplugging the printer during a print, and then plugging it back in. After being prompted to continue the print, the ET4X will rehome the X/Y axis, so the print will continue even if the print head has moved on the X/Y. While you might have calibration issues when printing with higher-temp materials due to shrinkage, this function worked as expected when printing with PLA.

(Image: Andrew Sink)
First Prints – Choosing Slicer Software
Unfortunately, if you’ve never used any 3D printer slicing software before, the Anet ET4X can be a little tricky to set up. Anet recommends using Cura as a slicer for this machine, and offers a downloadable profile that you can get from within Cura. This profile has a number of questionable parameter decisions (including printing infill before perimeters) which can make your first print come out with noticeable defects.
I opted to create a profile with PrusaSlicer along with some custom start g-code to create an initial purge line, and have been very happy with the software experience since. If you’re planning on using Cura with the ET4X, I would highly recommend taking your time and getting your profile dialed in before you start any large or ambitious prints.

(Image: Andrew Sink)
Manual and Automatic Bed Leveling Systems
To level the bed before printing, I adjusted the four bed adjustment screws at each corner of the bed while tramming the nozzle until they were all equally offset from the bed. It pays off to be very careful and precise during this process, especially if you are going to be printing directly on the glass bed and want an even first layer.
Both Anet ET4 PRO and Anet ET5 PRO 3D printer models have automatic bed leveling systems.
Silent Mode 3D Printing with TMC2208 Stepper Driver
One of the first things you’ll notice while printing is the sound of the stepper motors. The Anet ET4X uses A4988 stepper drivers, which can create a high buzzing sound during rapid travel moves. If you’re printing large objects with long print times this noise can get pretty old, pretty quickly. The upgraded ET4 Pro uses TMC2208 stepper drivers, which are significantly quieter and allow for a more peaceful printing process. I personally have the printer on the other side of my office while I’m working, so the noise is less intrusive.
- Anet 3D Printers on Amazon (affiliate link)
I printed several 20mm calibration cubes to test the accuracy of the machine, and they were generally accurate to +/- .04mm (or 0.0015”) on the X,Y, and Z axis. I didn’t test this accuracy on larger parts (or large parts with small features), but it certainly shows a good deal of promise for printing small, accurate parts.

(Image: Andrew Sink)
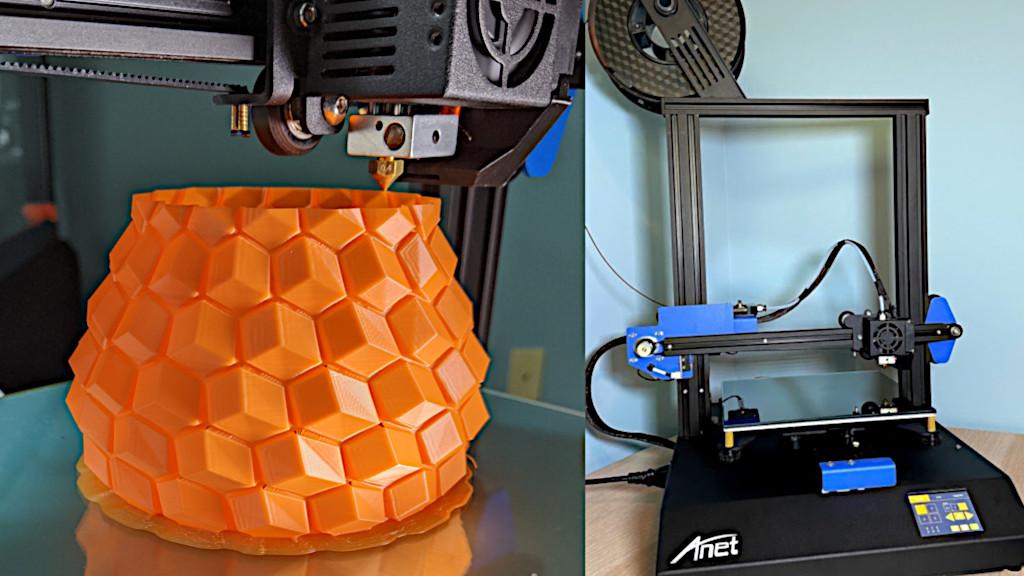
I also tested the printer’s ability to print a large object using the “Spiralize Outer Contour” setting in Cura and printed out the ‘‘Curved honeycomb vase’ by eggnot from Thingiverse. The printer performed well with no hiccups, and the printed model looked great.
Due to the continuous toolpath that had very few large travel moves, this printing mode was a good deal quieter than the standard printing mode.

(Image: Andrew Sink)
Should you be interested?
Coming in at under $200 shipped to your door from Amazon, the Anet ET4X is an attractive option for someone getting started in 3D printing who doesn’t mind tinkering or building their machine themselves. For the price, the Anet ET4X offers a lot of value and most beginners will come to appreciate the extra features built into this machine over time. For more advanced users who want features like an auto-leveling bed, TMC2208 silent stepper drivers, or a smaller amount of assembly, Anet also offers a Pro version of the ET4 platform that has those features in a more print-ready machine.
- Anet 3D Printers on Amazon (affiliate link)
Read More & Compare
Read more about desktop 3D printer builds and processes. Type, volume, FDM or Resin, all to consider. Or jump to the latest 3D printer reviews.
For a comparison with other FDM 3D printers please refer to the
detailed budget FDM 3D printers guide.