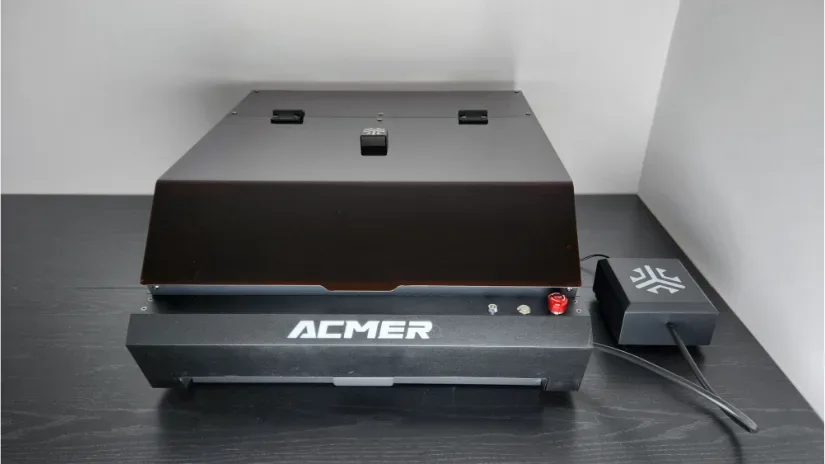
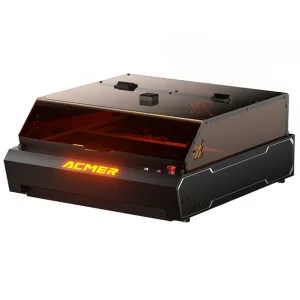
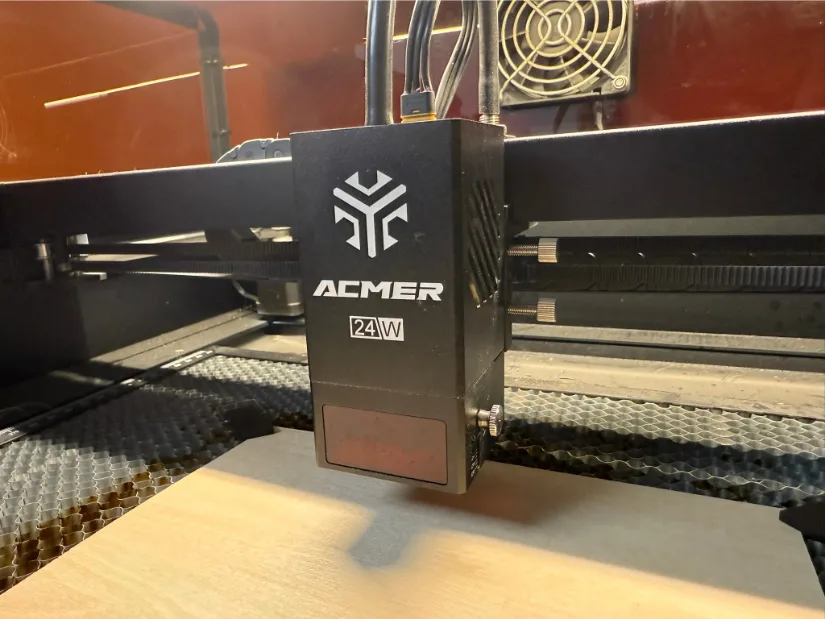
The Acmer P3 24W is the largest laser in the lineup, featuring a fully enclosed design and a built-in HD camera. It’s equipped with everything you need to engrave and cut a variety of materials. There are three laser module options available: a 2W infrared (IR) laser for engraving metals, a 2-in-1 module that combines a 10W diode laser with a 2W IR laser, and a 24W high-power diode module. There’s also a 48W diode module with a switchable 24W mode for added versatility.
Thanks to these flexible module options and its new and industry-first CoreXY motion system, the Acmer P3 can engrave at speeds up to 800 mm/s — faster than many other gantry-based laser systems. It also offers a generous 400 × 400 mm workspace and an HD camera to help with precise material alignment.
In this review, we’ll take a closer look at the Acmer P3’s features, test the 24W module on various materials, and break down its strengths and weaknesses.
Disclaimer: Laser cutting and engraving may be hazardous if improperly operated. Please make sure to follow the safety guidelines such as wearing eye-protective goggles and using the machine enclosure while operating.
Table of Contents (Jump to a Section)
- Acmer P3 24W Specifications
- What’s in the Box
- Setup and Design
- Software – LightBurn
- Testing Results
- Materials and Supplies
- General Material Settings
- Compare Acmer P3 24W to Other Laser Engravers
- Conclusion and Pros & Cons
Where to Buy
Price: $1,051 – $1,720
Compare the Prices & Bundles:
Official Store | Amazon | AliExpress
Acmer P3 24W Specifications
Dimension: 577 x 655 x 286 mm
Laser Power and Source: 24W Diode (optional: 48W, 2W IR, or 2-in-1 10W Diode / 2W IR)
Working Area: 400 x 400 mm
Machine Weight: 19 kg
Laser Spot Size: 0.07 x 0.09 mm (24W)
Engraving Accuracy: 0.01 mm
Focal Length: 8 mm (24W)
Max Working Speed: 800 mm/s
Preview Mode: HD Camera, Outline Framing Preview
Supported File Formats: G-code, JPG, PNG, BMP, SVG, DXF
Connectivity: USB, TF Card, WiFi (app only)
Supported Software: LightBurn, LaserGRBL, AcmerApp (iOS, Android)
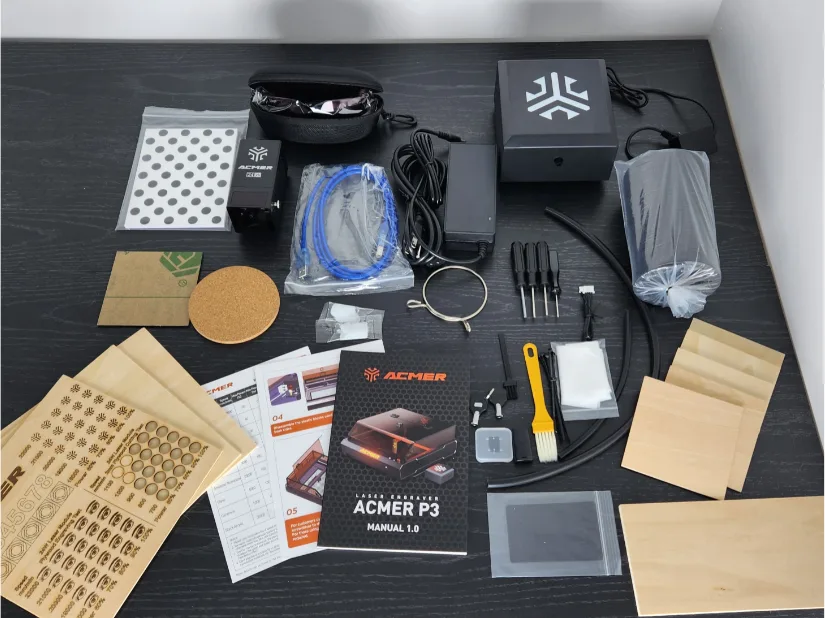
What’s in the Box
The Acmer P3 comes with the following accessories: a laser module, air pump (except for the 2W IR version), power adapter, safety goggles, USB cable, air tubes (except for the 2W IR), sample materials, camera calibration board, tool kit, smoke exhaust hose, and a hose clamp.
©3DWithUs – Photo: Will Zoobkoff
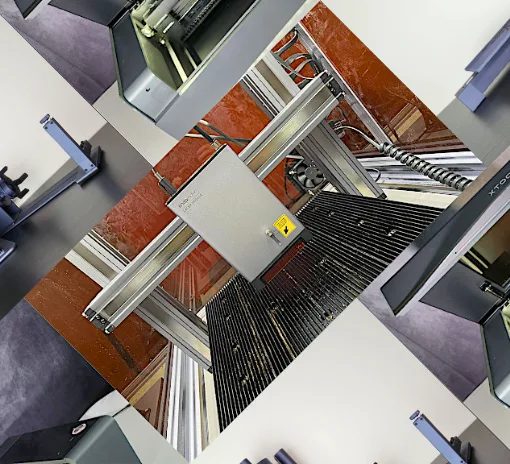
Setup and Design
The Acmer P3 is easy and quick to set up. Just take the machine out of the box, remove the internal packaging, and then take out the two gantry blocks that hold the X gantry in place at the back. The laser module can then be installed by sliding it into place and fastening it with the two locking screws on the mount’s side.
©3DWithUs – Photo: Will Zoobkoff
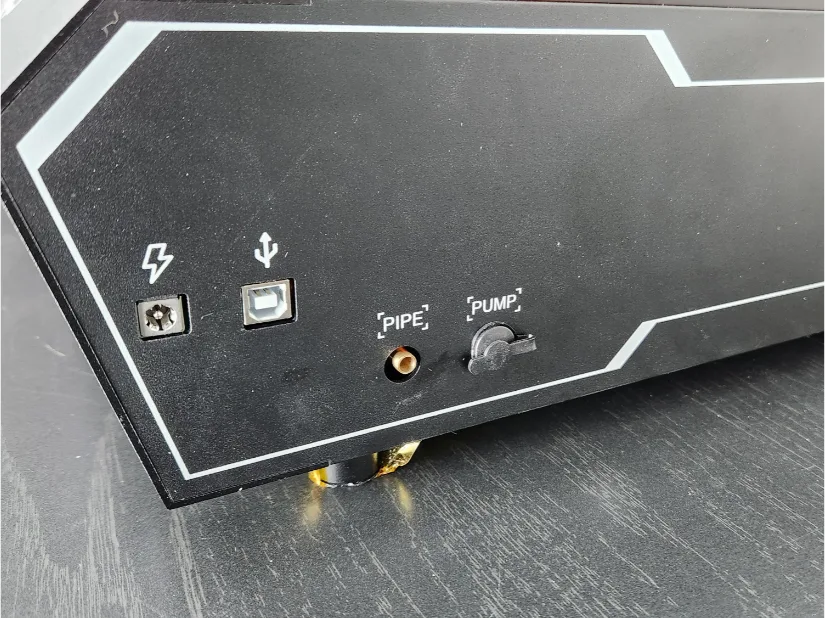
Next, attach the power cable and air hose to the machine’s side to connect the air pump. Once everything is set up, turn on the device, connect it to your computer, and then calibrate the integrated camera.
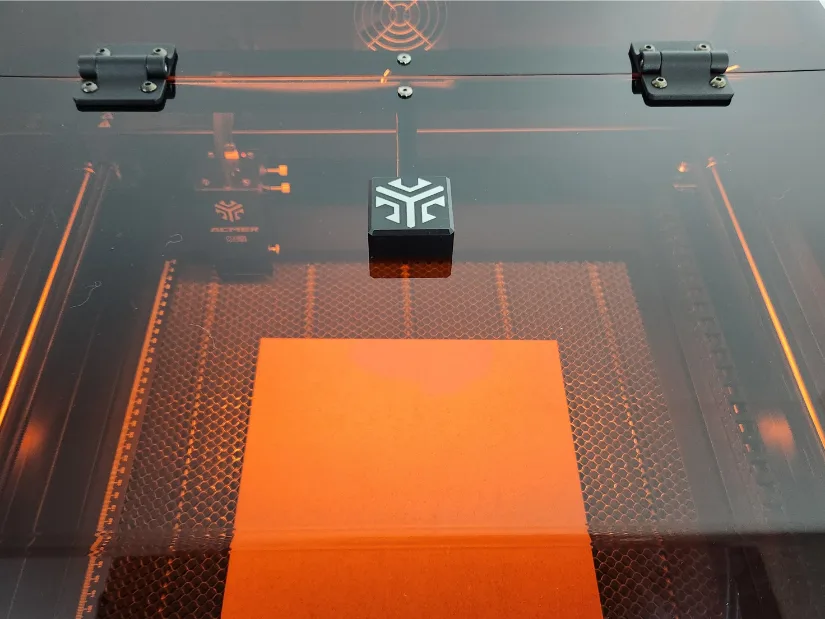
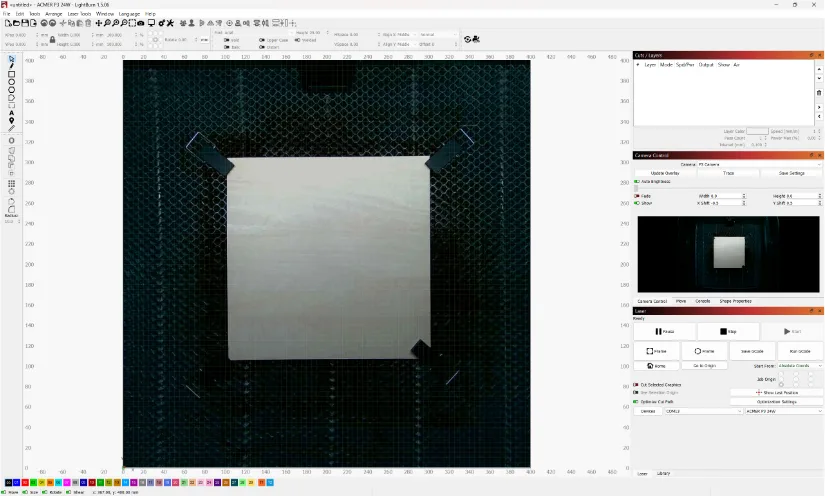
Acmer provides clear, easy-to-follow instructions for connecting and calibrating the camera using LightBurn, which we’ll be using for this review. To calibrate the camera, you’ll need to position the calibration board in five different spots and ensure each is clearly picked up by the camera. Once that’s complete, you’ll run a test engraving and click on the four corners to align the overlay with the camera view.
I recommend taking an extra step: do a small test engraving — like a box — then update the overlay to ensure accurate alignment. LightBurn’s camera tab includes controls to fine-tune the overlay, helping you get the best possible match. Once everything looks right, be sure to click “Save Settings” so your adjustments are preserved for future sessions.
Design
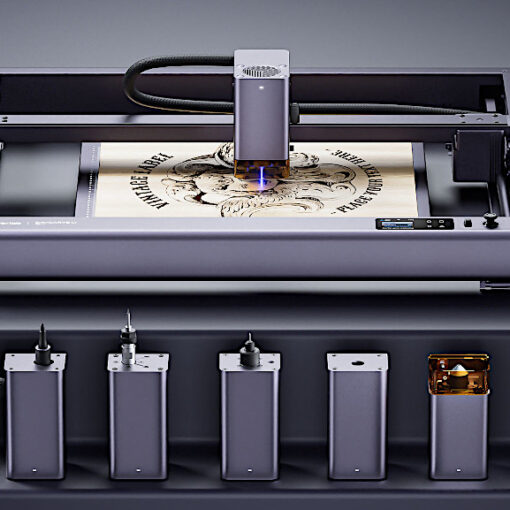
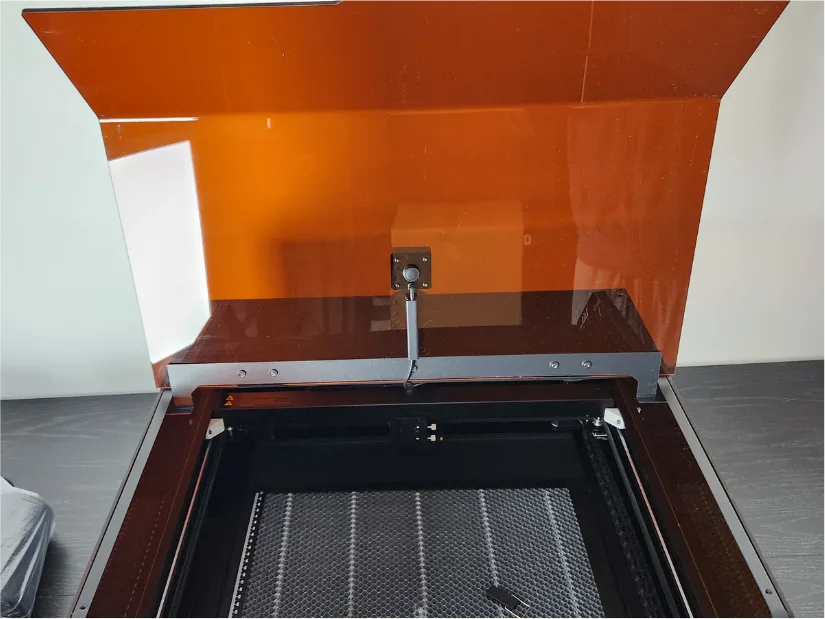
On the design side, Acmer went with a sleek black aluminum body, topped off with a UV-blocking acrylic lid that houses the camera and allows you to safely monitor engraving and cutting progress. The power button, key lock, and emergency stop button are conveniently located on the front right of the machine for easy access. The switches for the light and exhaust fan are positioned at the rear — slightly inconvenient, but not a real issue since they typically remain on during operation.
There’s also a TF card slot located inside the front of the machine on the right side, just behind the emergency stop button. You’ll also find a port for the USB camera and an extension port here for connecting a rotary attachment (sold separately).
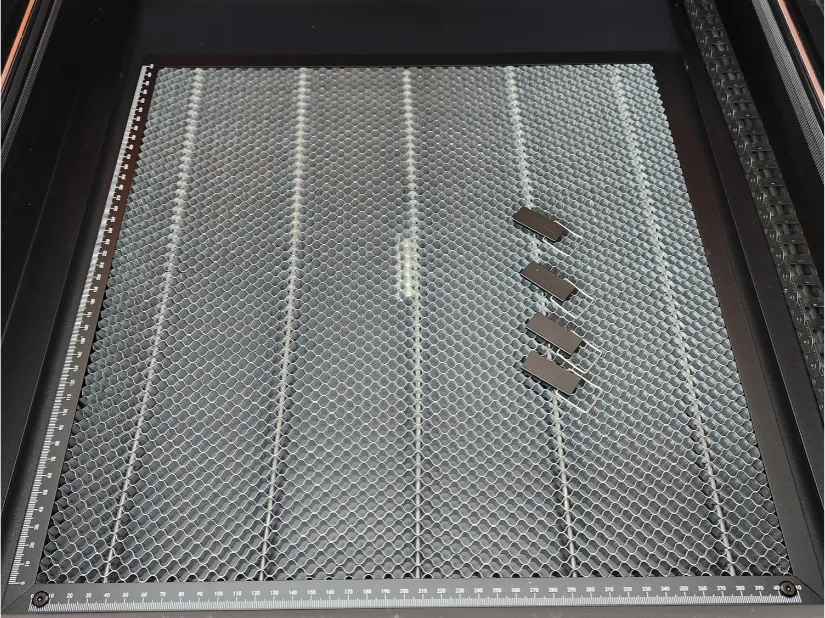
The workspace features a honeycomb bed that’s ideal for engraving and cutting. It’s secured to the pull-out drawer with two screws at the front, preventing any shifting between projects. The drawer itself makes it easy to remove materials and clean up debris generated during use.
Software – LightBurn
For all testing conducted during our review, we used LightBurn for design, control, and operation. While the Acmer P3 also supports LaserGRBL and the Acmer mobile app (available on Android and iOS), LightBurn remains one of the top choices for laser engraving and cutting thanks to its powerful feature set, clean user interface, and wide compatibility. It’s a professional-grade tool that offers fine control over every aspect of the engraving and cutting process — though it is worth noting that it’s a paid program.
Acmer makes it easy to get started with LightBurn by including a configuration file for the P3 on the SD card bundled with the machine’s accessories. This allows for a quick and hassle-free setup, especially for first-time users.
One limitation to be aware of is that LightBurn requires a USB connection to the Acmer P3 for the duration of any job. This means you’ll need to keep your computer tethered to the machine during operation, which could be a minor inconvenience depending on your workspace setup.
When using LightBurn, there isn’t a built-in material library with preset settings, due to the wide compatibility of laser engravers. Fortunately, Acmer includes a reference sheet with recommended engraving and cutting settings for a variety of materials to help you get started. LightBurn allows you to create and save custom settings for different materials, making it easier to adjust parameters for future projects.
To get the best results for your particular material and design, it is always advised to experiment with different speed and power combinations. For instance, by varying speed and power when working with slate, you can produce a range of shades and a striking contrast. With vector files, this method is particularly effective because it allows you to apply different settings to different areas of the design.
Although a little more difficult, image engraving on slate is still possible. Use LightBurn’s greyscale mode, set your minimum power to 15–20%, and use your usual maximum power setting for optimal results. You can better control the final image’s tonal range and detail as a result.
When using LightBurn, you’ll need to enable overscan to ensure the laser module can reach the higher speeds you set. In our testing, we found that setting 5–10% overscan allows the laser to ramp up properly and achieve full speed as it moves across the work area.
Testing Results
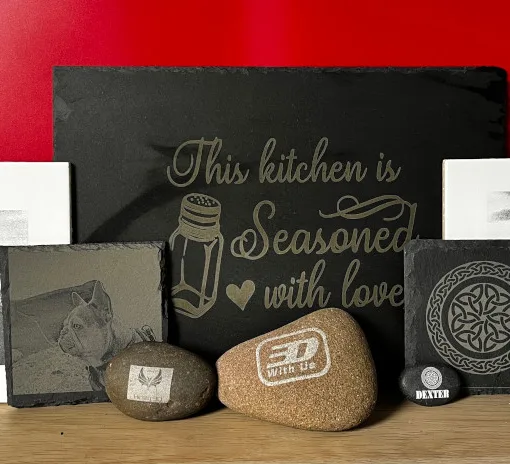
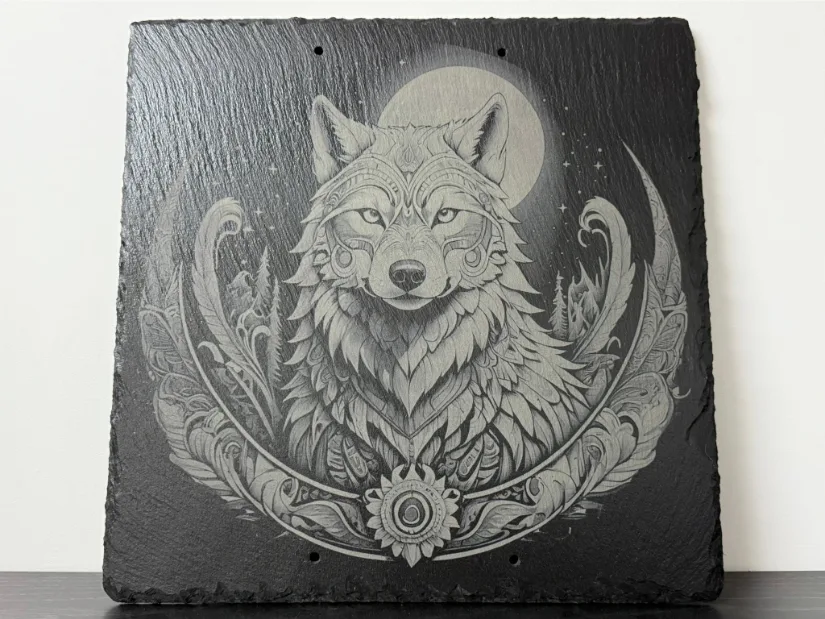
Wolf on Slate
For our first test, we chose to engrave a large piece of slate. Thanks to the generous 400 × 400 mm workspace of the Acmer P3, it’s easy to work with a full 12” × 12” slate tile. For this project, we used an image I designed of a wolf using Leonardo.ai and Procreate.
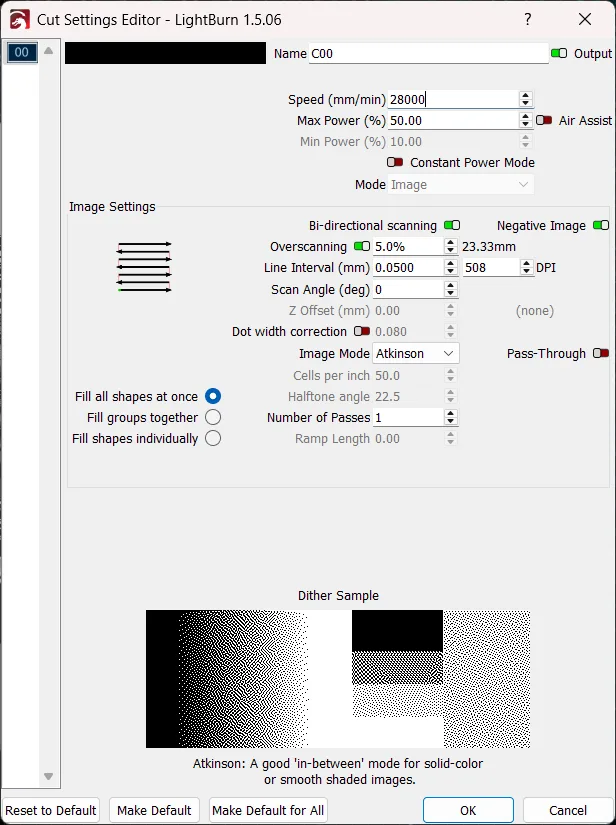
To add more sharpness and clarity, we set the image to negative, chose the Atkinson dithering mode in LightBurn’s image settings, and set the enhance radius to 7 and the enhance amount to 120. A line interval of 0.050 mm was chosen.
©3DWithUs – Laser Job and Photo: Will Zoobkoff
We set a speed of 20,000 mm/min and a power level of 65% for the engraving itself. Just under three hours were needed to finish the task, and the outcome was breathtaking. Once a clear coat is applied to improve contrast and finish, the wolf head’s sharp detail and the surrounding border truly stand out.
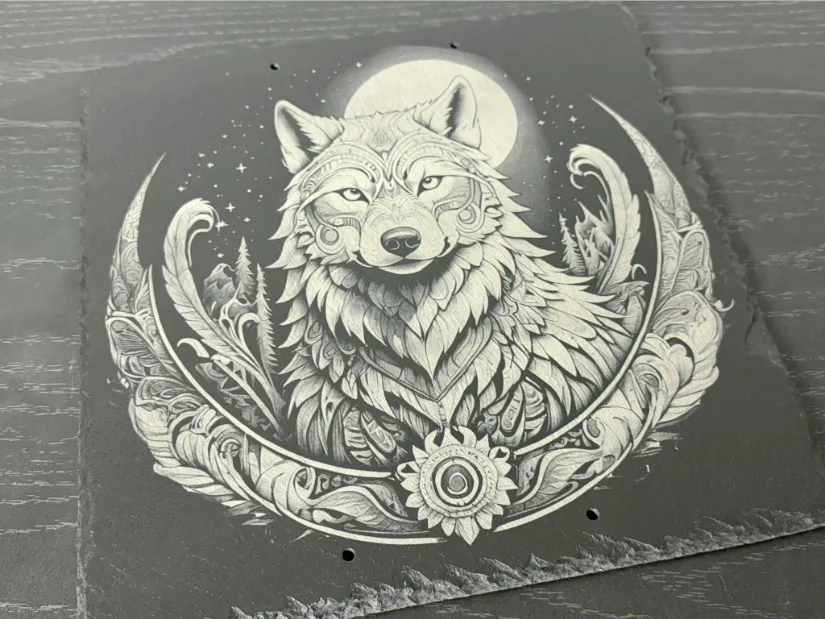
You can take on more ambitious projects and genuinely broaden your creative horizons with a workspace this size.
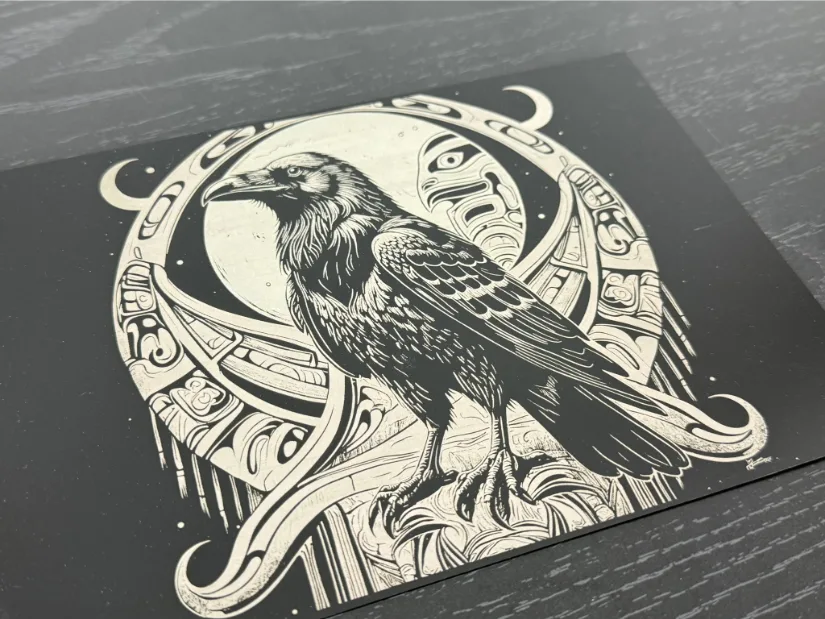
Native Raven on Anodized Aluminium
Next, using another unique design I made of a raven with a native theme, we used an 8″ × 6″ piece of anodized aluminium. We used the same image settings, such as the same dithering mode and contrast enhancements, from the prior wolf engraving test for consistency. For our engraving settings, the Acmer P3 was set to 20,000 mm/min at 50% power.
The entire task was completed in less than an hour. After finishing the engraving process, we cleaned the surface with isopropyl alcohol and a clean cloth to remove any fine dust or residue. The final product was impressive, with each line and element of the design looking clean, neat, and extremely detailed.

Scaling up production is simple with the P3’s roomy 400 × 400 mm workspace. You could engrave several business cards in a single run with flawless alignment by making a basic jig and using the HD camera.
Native Raven on Acrylic
We also cut a larger piece of black acrylic into a square and then engraved an image onto it for our subsequent test. We set the machine to cut at 300 mm/min at 100% power using another raven design I made. In order to get cleaner, more accurate cuts, we also made sure to activate the air assist. In a matter of minutes, the cut was finished.
We then engraved the raven image onto the larger acrylic sheet after removing the cut square from it. We adjusted the image settings for contrast and clarity, just like in our earlier tests. We set the power to 50% and used a speed of 28,000 mm/min for the engraving itself.
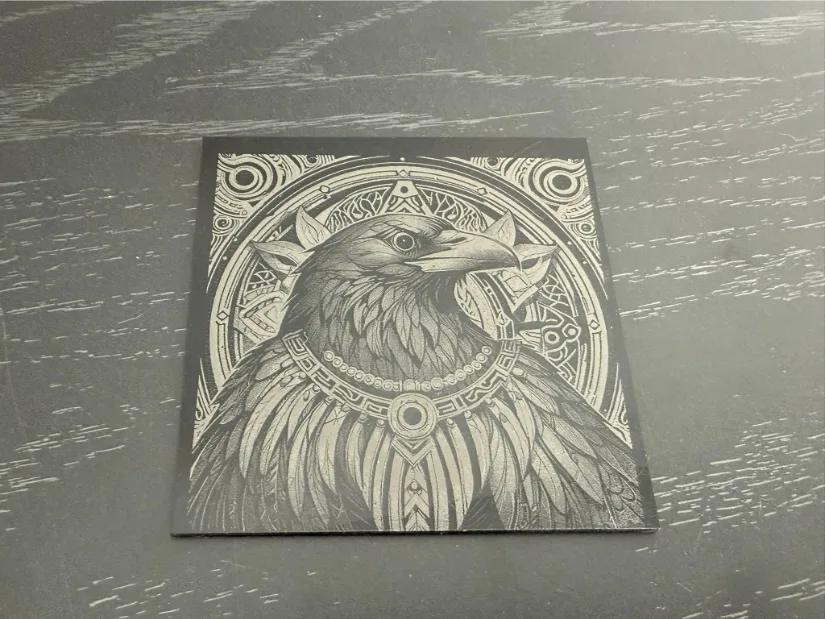
The engraving took approximately 12 minutes to complete. Despite accidentally bumping the piece and causing a slight misalignment, the final result still looked fantastic, with sharp lines and excellent detail.
Moon Box
We decided to cut and engrave a decorative box design that we discovered on Etsy for our last test. This specific design included a moon-themed engraving on the lid, a living hinge, and a basic snap-lock mechanism. We were able to finish the project in a single pass without having to move the material because of the Acmer P3’s roomy workspace.
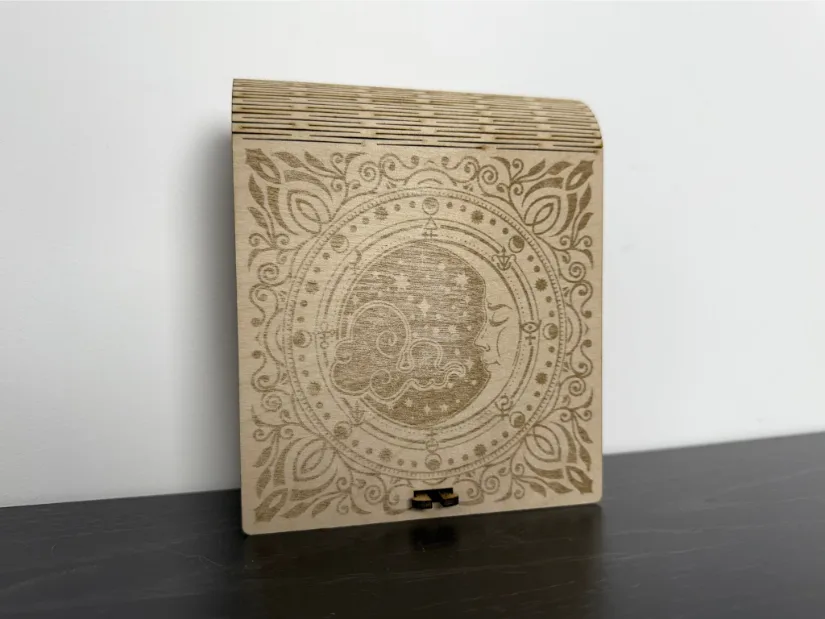
©3DWithUs – Laser Job and Photo: Will Zoobkoff
For the task, we utilized a 3mm basswood sheet. We set the speed for the cutting process at 600 mm/min at 100% power, which resulted in precise, clean cuts. We set the power to 75% and used a speed of 28,000 mm/min for the engraving. Although Acmer advises engraving at maximum power for faster speeds, we chose to reduce it a little bit to get a softer finish to the engraving.
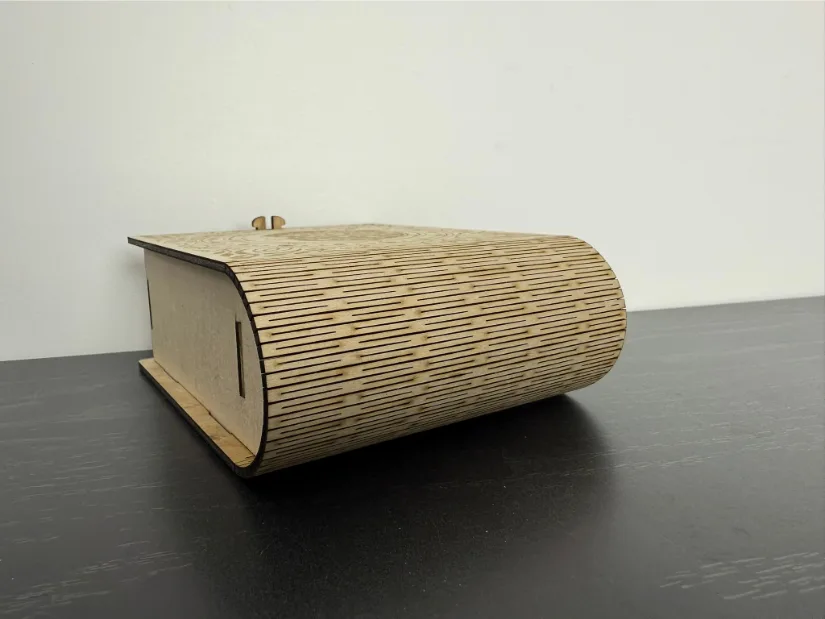
The entire process took just under an hour. All pieces separated easily, the living hinge moved smoothly, and the moon engraving came out beautifully. The box assembled tightly, though we recommend using glue to ensure long-term durability, even if the snap-fit feels snug.
Materials and Supplies
The ACMER website offers a vast collection of materials and supplies for laser engraving. Worth a look.
Material Settings for ACMER P3 and Other Series Machines
Refer to the material settings tables on the ACMER website for guidance on adjusting the settings. These tables provide a list of all materials along with their respective settings for laser cutting and engraving. Key settings to keep an eye on include material thickness – especially important when cutting-laser power, speed, and the number of passes.
Compare Acmer P3 24W to Other Laser Engravers
On the ACMER website, the P1 S Pro 6W is the most budget-friendly option, with many optional add-ons available. In addition to the P1 series, the P2 and P3 series machines are also available for purchase, featuring more powerful lasers and advanced specifications.
An innovative laser product, the ACMER P3 comes fully enclosed with IR and diode dual laser engraving and cutting capabilities. For the full range of ACMER laser cutters and engravers, please check the official website.
On 3DWithUs, we have featured a few compact portable laser cutters and engravers that operate with diode lasers. For a comparison please refer to the detailed Laser Cutters and Engravers Guide.
On our website, you can compare the prices, capabilities, and functionalities of laser engravers and cutters from brands such as xTool, Snapmaker, LaserPecker, and others. What distinguishes the ACMER P3 24W is its high-quality build and competitive pricing.
Have questions? Feel free to ask in the comment section below.
For a wider discussion or to share your own ACMER P3 Projects, join us in the forum:
Conclusion and Pros & Cons
Compare the Prices & Bundles:
Official Store | Amazon | AliExpress
ACMER P3 24W Review
Review Summary
A versatile, high-performing device designed for serious makers, small enterprises, and creative professionals, the Acmer P3 24W laser engraver stands out. Its robust enclosed frame, roomy 400 × 400 mm workspace, and industry-first CoreXY motion system allow it to achieve remarkable speed and accuracy—up to 800 mm/s, which is faster than many similar gantry-based systems.
The P3 easily handled a variety of materials in our testing, including acrylic, basswood, anodized aluminium, and slate. Although it required a tethered USB connection, LightBurn integration gave us total control over engraving detail and cut quality, and the included HD camera greatly simplified material alignment and multi-pass jobs. Acmer’s attention to detail in the packaging and included accessories demonstrates a clear focus on user experience, and setup was quick.
The P3 24W is a great, dependable tool with expansion potential, whether you’re engraving fine art, prototyping products, or creating personalized gifts. This is especially true if you intend to upgrade to the optional 2W IR or 48W diode modules. The Acmer P3 is an attractive choice that is definitely worth taking into consideration if you’re searching for speed, power, and versatility in a well-designed package.
Pros
- Simple Setup
- Core XY
- Large workspace
- Solid Build Quality
- Fast
Cons
- Fan and light switches on rear
- Light is blocked when in use