Revopoint continues its mission to democratize 3D scanning with the launch of Trackit, an optical tracking system designed to bring advanced, marker-free scanning capabilities to a broader audience. By offering a more affordable alternative to traditional industrial systems, Trackit opens the door for engineers, designers, and makers to explore high-precision scanning without the steep cost. The system combines a powerful dual-camera scanner with a wide-area tracker, enabling accurate, fast, and flexible scans across various object sizes and surfaces.
In this review, we will test a variety of objects across different modes. As usual, we’ll wrap up with final thoughts and a list of pros and cons.
Table Of Contents (Jump to a Section)
- Specifications
- What’s Included – Accessories
- Setup and Calibration
- Software: Revo Metro 5
- Testing and Results
- Compare to Other 3D Scanners
- Conclusion and Pros & Cons
Where to Buy the Revopoint Trackit
Price: $4,482 – $4,980
![]()
![]()

Compare the Prices & Bundles:
Official Website
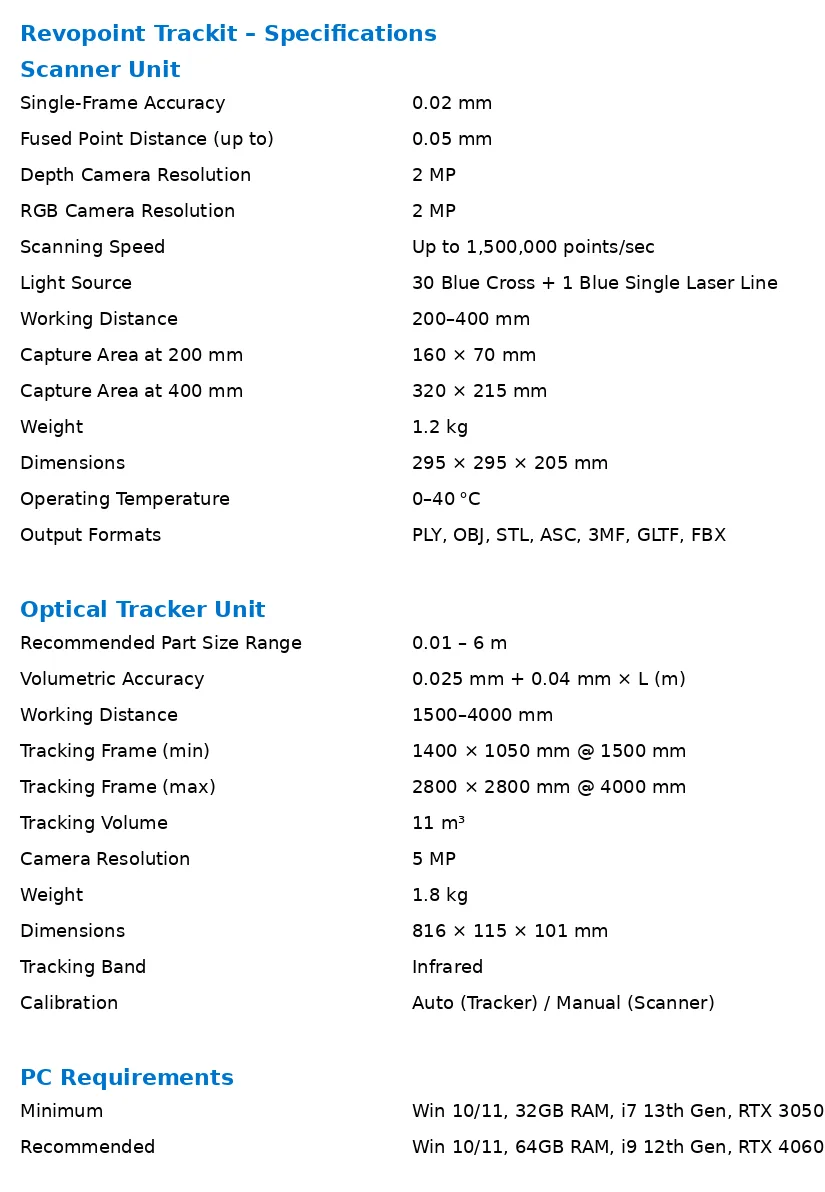
Revopoint Trackit Specifications
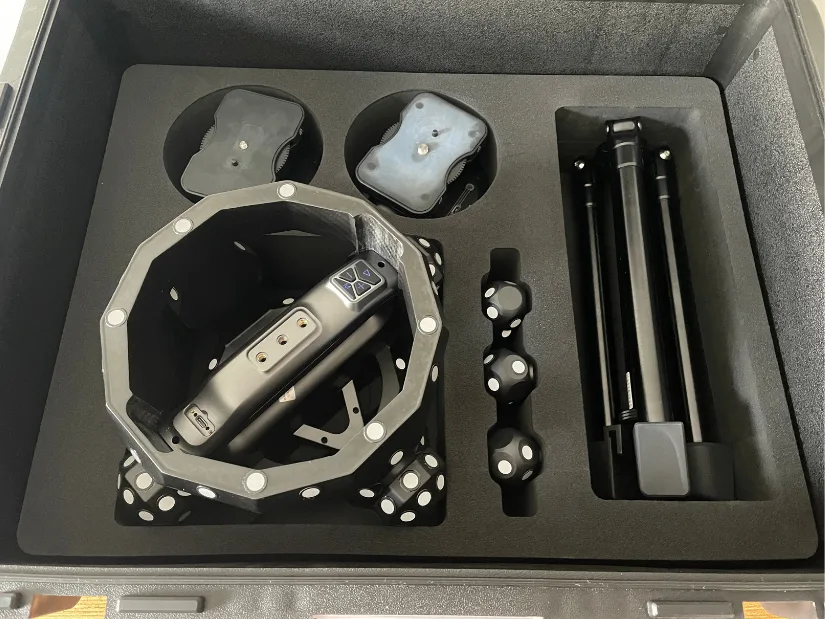
What’s in the Box
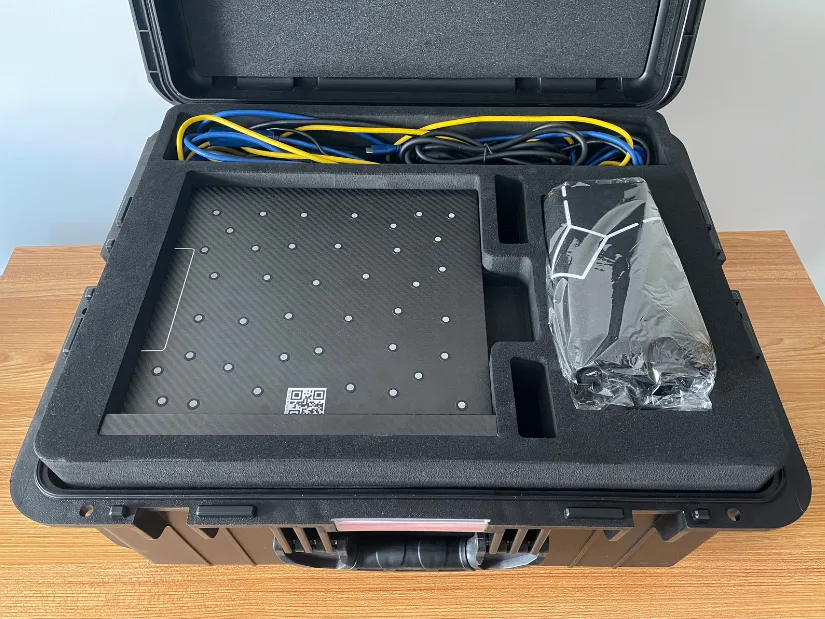
The Trackit system arrives in two separate, well-organized cases. One holds the scanner, and the other contains the tracker. Both cases are quite heavy, reflecting the industrial-grade build quality, and offer solid protection with custom-cut foam interiors.
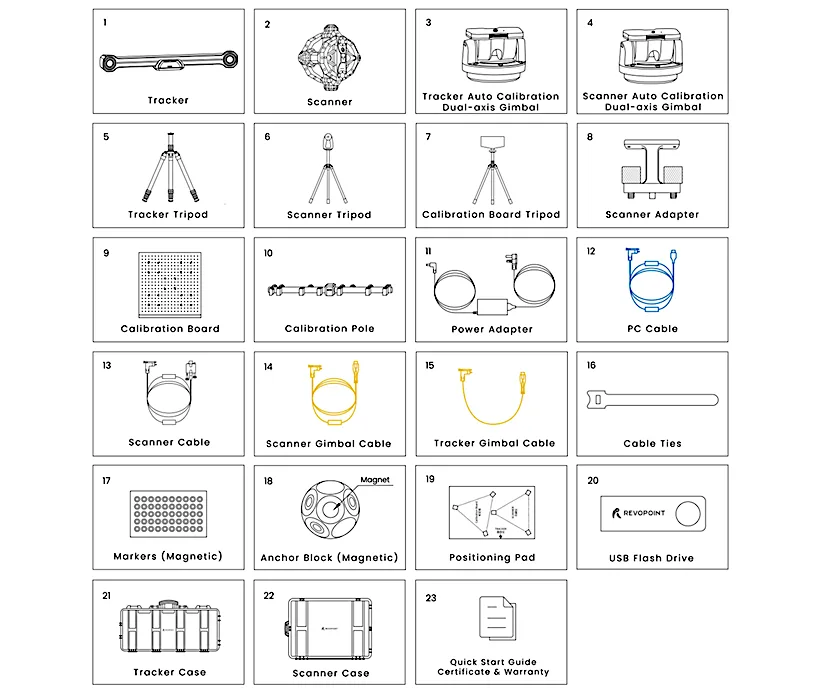
Image: Revopoint
©3DWithUs – Photo: Max Funkner
Setup and Calibration
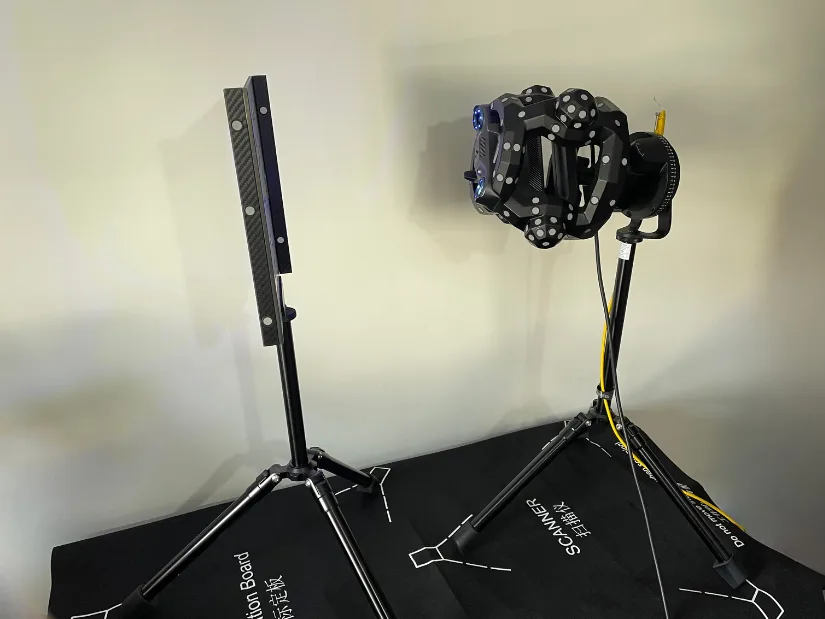
– Tripods. Sturdy tripod. All three tripods are of high quality, designed to hold equipment that requires stability.
– Scanner. The Hand-Eye frame is stable and does not require assembly. It is a one-piece carbon fiber 3D print. If such a frame were assembled, assembly cracks would cause a significant shift in accuracy.
– Cables. Cabling may feel intimidating at first. The long, color-coded cables have a secure and clearly assigned place in the case. Initially, I thought packing and unpacking them would be a hassle, but after a few scanning trips, I realised there is no reason to worry. There is plenty of space, and the layout is well thought out.
©3DWithUs – Photo: Max Funkner
– Workspace. You will need a clear area of at least 2 to 4 metres between the scanner and the tracker. It is worth planning this in advance, especially in smaller rooms or shared spaces.
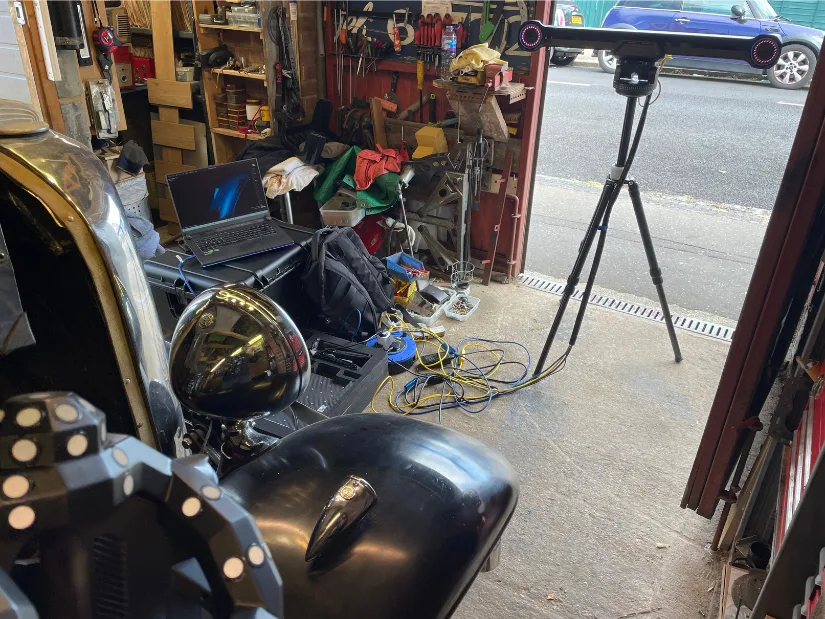
– Monitor / Laptop position. It is important to maintain clear visibility of the screen during scanning. I often found myself switching to (full-screen) mode to better monitor the tracking and scan progress. Positioning the laptop so it is easily viewable while holding the scanner made the workflow smoother. In the small garage, for example, I used two reinforced cases as a makeshift table for the laptop.
©3DWithUs – Photo: Max Funkner
– Power ON. I had to restart the tracker (switched it off and on again using the button behind the unit) to get it recognized in Revo Metro 5. The restart worked. After that, I proceeded to the calibration stage.
Calibration
– Gimbal calibration system. A key feature of Trackit is its gimbal-based calibration system. Accurate calibration is vital. Previously, it was required that the user rotate a calibration pole in their hands. Trackit now handles this step automatically, delivering higher precision.
– Scanner calibration. Revopoint recommends running the Scanner, Tracker, and Hand-Eye calibration when the unit first arrives and repeating it periodically. Following the official video guide, I found that my scanner was already within tolerance, and the software proceeded directly to tracker calibration.
– Tracker calibration. This stage takes longer because it involves several distance checks. The tracker must be positioned at 1.5, 2, 2.5, and 3 metres. I completed the procedure in my studio, though the limited space made it a little bit challenging.
©3DWithUs – Photo: Max Funkner
– Hand-Eye calibration. Before submitting the alignments in the software, I had to adjust the calibration poles to a specific height, as my table was positioned lower than the standard height. Once submitted, the only way to reattempt the alignment was by physically moving the tracker.
Overall impressions. Auto-calibration is one of Revopoint Trackit’s key selling points. Unlike previous-generation tracking scanners that required time-consuming and manual calibration, Trackit automates the process—saving a significant amount of time and effort.
– Temperature. Generally, the temperature during calibration and scanning should remain consistent. The system will warn you if it’s too high or too low. In my case, a 10°C difference occurred due to a heatwave, triggering a recalibration warning. I continued scanning anyway and, aside from some extra noise, didn’t notice a major impact.
Software: Revo Metro 5
During the testing of the Revopoint Trackit, software updates were frequent, each addressing various improvements and introducing new functionalities. I experienced a couple of crashes during heavy scans with around 50,000 frames, so I developed the habit of regularly pressing the “Complete” button to preserve the scanned data. I also began taking many small scans and merging them later, rather than attempting long, continuous ones. Similar to MetroX, both the software and scanning method require a learning curve to fully grasp and become familiar with.
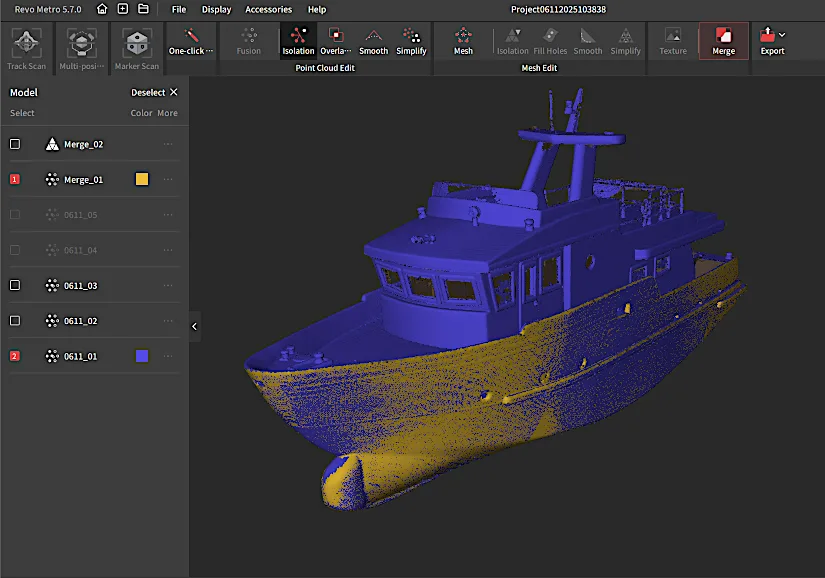
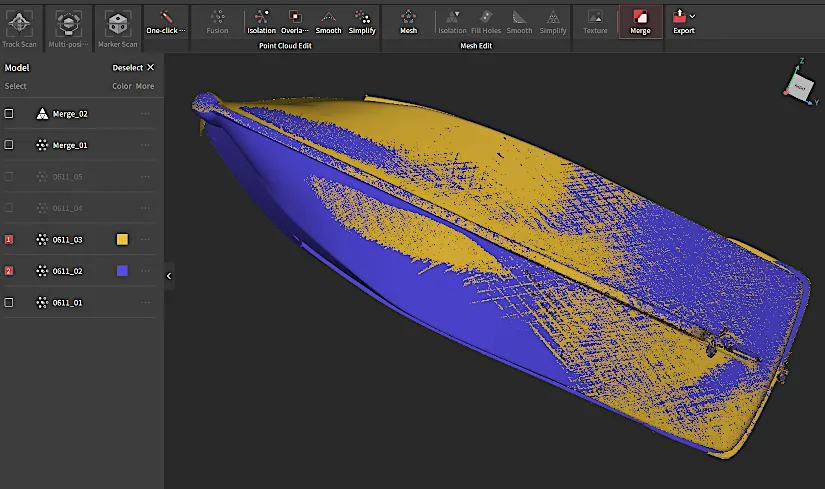
– Merge. When scanning the boat model, I found the Merge feature very useful. Rather than trying to scan a complex, feature-rich object in one go, I scanned parts separately. This approach resulted in 1) lighter scan files that were easier and faster to clean, and 2) a quicker workflow overall. The cleaned scans could then be merged effectively using the software’s Merge function.
If you’re familiar with any 3D software such as Blender or Fusion 360, the basic cleaning tools in Revo Metro 5 will be easy to pick up. Cleaning and patching can be done directly within the software.
– Tips. These settings are worth trying to improve your workflow: 1) Target Point Distance – consider increasing this when scanning larger objects. 2) Fusion Point Distance – I found 0.4 mm to be optimal for balancing detail and processing speed. If your PC struggles with heavy scans, adjusting this setting may help before processing. 3) Uniform or Geometric Simplifier – helps reduce faces either across the whole object or on flat areas only.
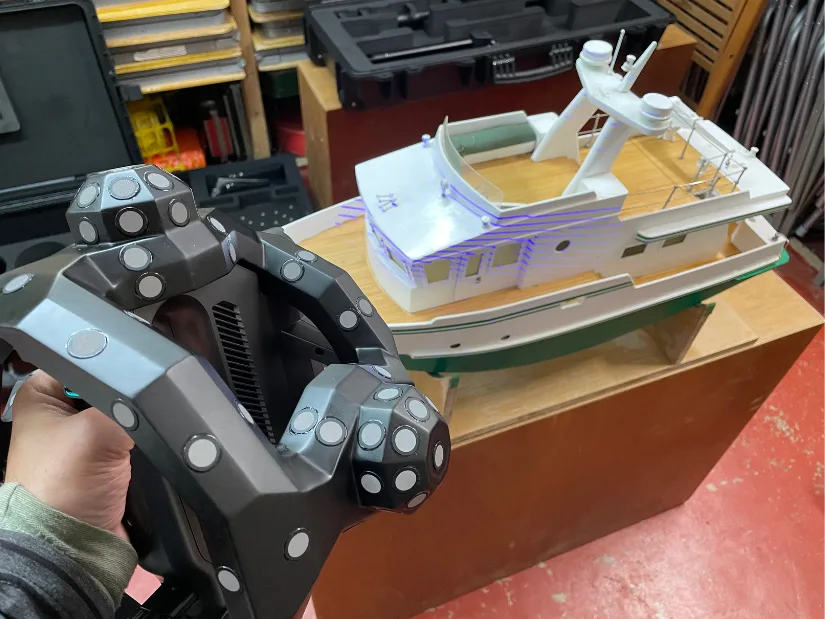
– Modes. There are three main scanning modes: Tracker Scan, Multi-position Scan, and Marker Scan. Tracker Scan was the one I used most to explore the hardware’s capabilities — it requires both the tracker and the object to remain stationary. In Dynamic Referencing Scanning, by contrast, you can rotate the object as long as the system detects a small number of markers. Marker Scan, which originates from the older tracker model, remains available and is suitable for scenarios where the tracker cannot detect the object, such as when dealing with oversized parts.
Testing and Results
Apart from testing in my studio, I managed to try the Revopoint Trackit in a few different environments. I took it once to the local Model Boat Club and later to a small garage where a classic car was parked. One thing worth noting is that moving the scanner requires some physical effort. Fortunately, both the garage and the club are nearby, but even then, I definitely felt the weight of the cases. Additionally, I was carrying a rucksack with a laptop and a cable extension.
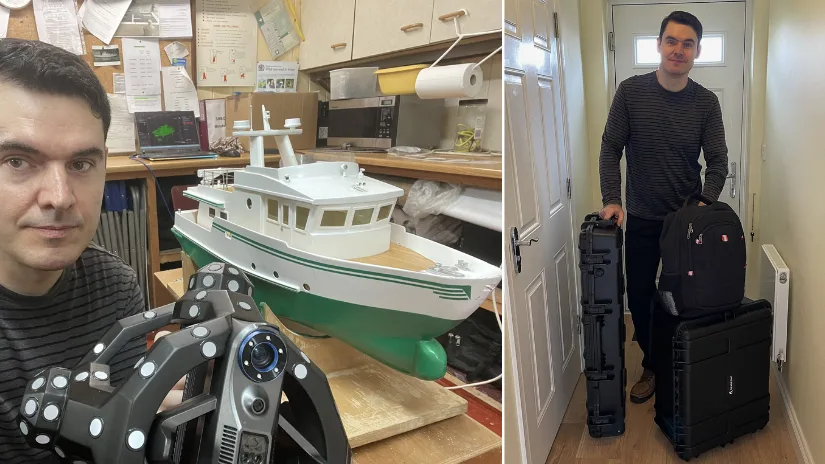
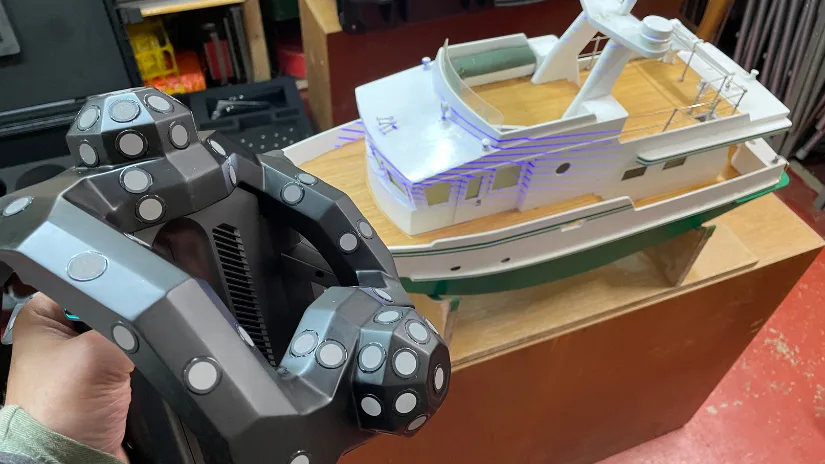
Scanning Model Boats in Track Scan Mode
On 3DWithUs, I recently wrote about the local RC Model Boat Club and how its members showcase replicas of real boats. Many of these RC boat models are handcrafted using traditional techniques and 3D printing.
According to Clive and Andy, the boat I was scanning (featured above) wasn’t performing well in windy conditions. The top was too heavy, and the hull didn’t sit deep enough in the water, making it unstable. That makes this case particularly interesting—3D scanning and 3D printing could be used not only to repair the model but also to optimize its design for improved speed and stability on the water.
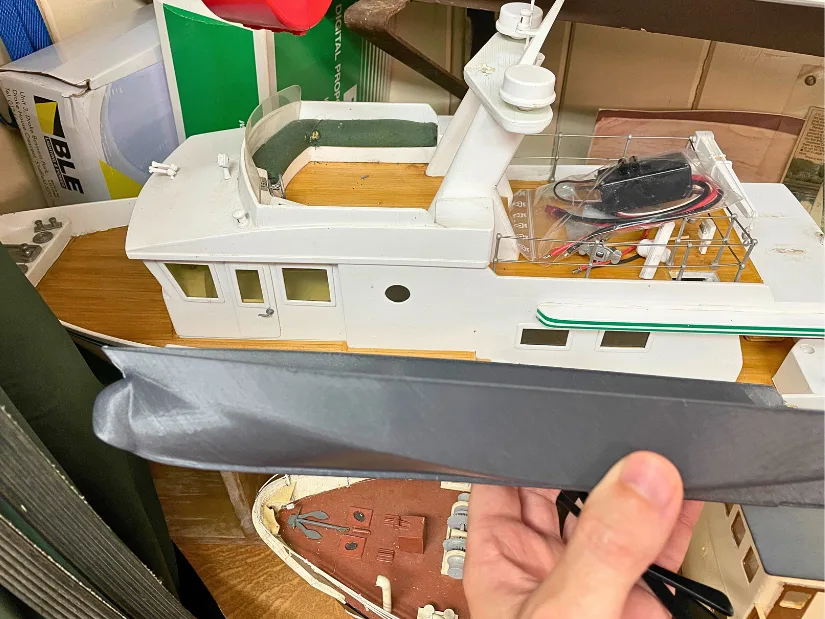
Due to limited time, I didn’t plan to fully fix the boat, but I was curious to see if I could 3D print one of its main components—the hull. I quickly merged the scanned parts, transferred the result to Blender, and after alignment and solidifying, exported the model to OrcaSlicer. There, I scaled and positioned it for optimal 3D printing. At 50% scale, the print took around 8 hours to complete with supports.
©3DWithUs – Photo: Max Funkner
I couldn’t replicate the full-size hull in one piece due to the bed size 400 mm × 400 mm × 400 mm limitation of my Snapmaker Artisan, which otherwise did a great job. A large-format printer like the Elegoo OrangeStorm Giga, with its 800mm x 800mm x 1000mm build volume, would be able to handle it. As RC driving components, including batteries, getting smaller and more efficient, some RC model boats can now be fully replicated using budget FDM or Resin 3D printers. In some cases, assembling the boat by gluing printed parts together is a practical approach.
Scanning Car Parts in Track Scan Mode
Citroën – 10CV or Rosalie, built in January 1934 in Slough, UK. Thanks to my neighbour Brian Murphy for giving me access to scan parts of his car. Although scanning inside a small garage was challenging, I successfully captured a few components.
©3DWithUs – Photo: Max Funkner
For proper reverse engineering—where scanned parts are converted into CAD models for restoration, modification, or reproduction—it is usually necessary to detach the parts from the car to capture all required angles.
Here is the scan of the engine cover – it was accessible and straightforward to scan while still mounted on the vehicle.
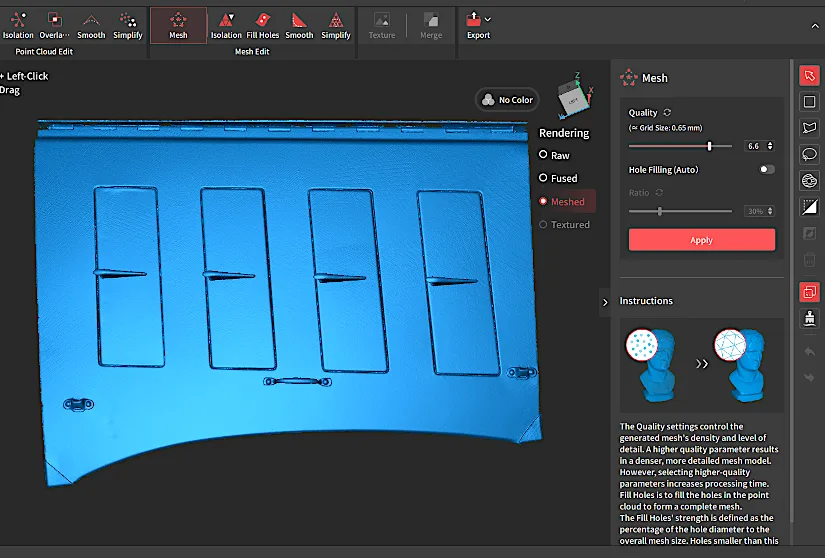
3D scanning can play a valuable role in preserving and restoring classic cars. Beyond creating accurate digital records of rare parts, it enables reproduction through 3D printing, CNC machining, or even casting. For parts that are no longer manufactured, having a clean scan makes it possible to design replacements or adapt components with precision.
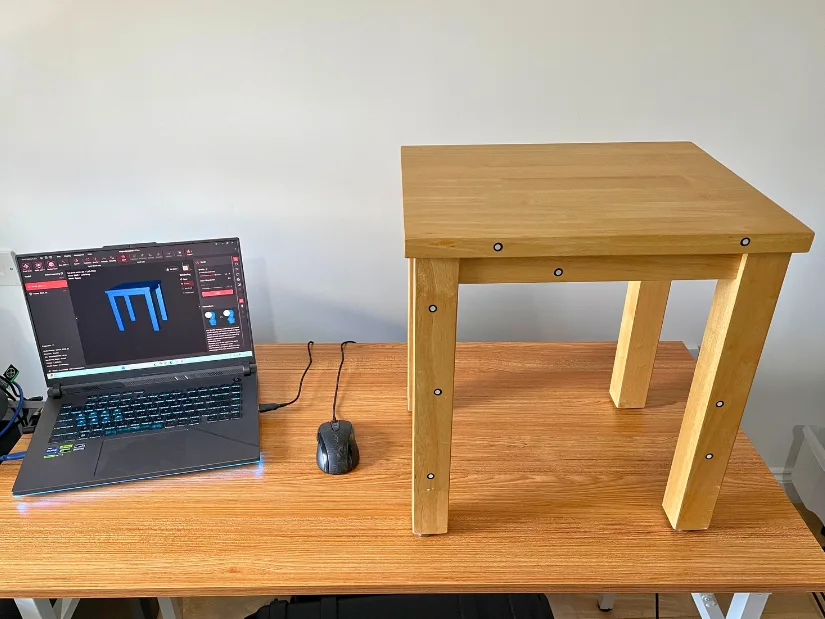
Scanning Furniture in Multi-position Mode
As an experiment, I scanned a chair and a small table using Multi-position mode. This mode is generally best suited for objects that need to be flipped upside down to reach otherwise hidden areas, or when scanning from certain angles would be physically awkward. To my surprise, I was able to scan the small table entirely by repositioning it only once.
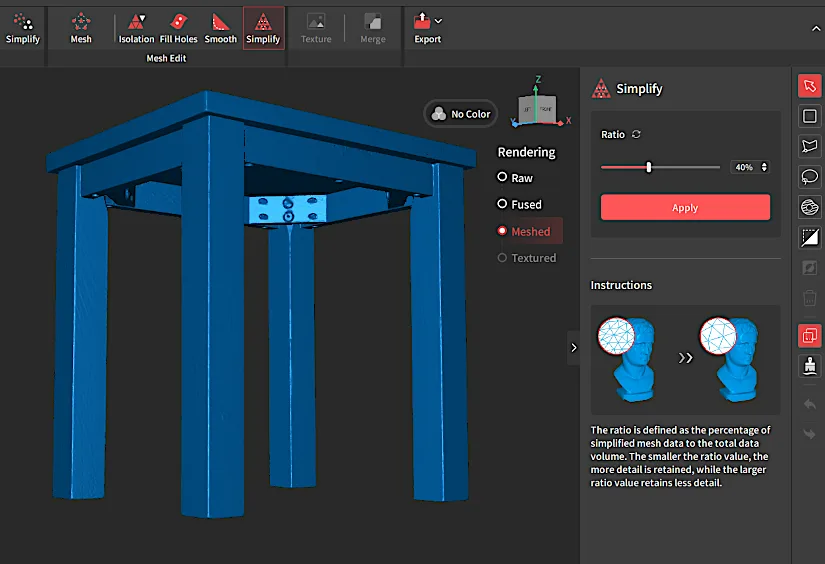
The recommendation is to set up a minimum of five tracking points—I used eight, just to be safe.
Since I managed to capture the full model in one session, I also completed a full scan-to-print workflow. I cleaned up the noise, removed the markers, filled the holes, and simplified the mesh to around 30MB—all directly within the software. From there, I moved to OrcaSlicer and used the Snapmaker Artisan for printing.
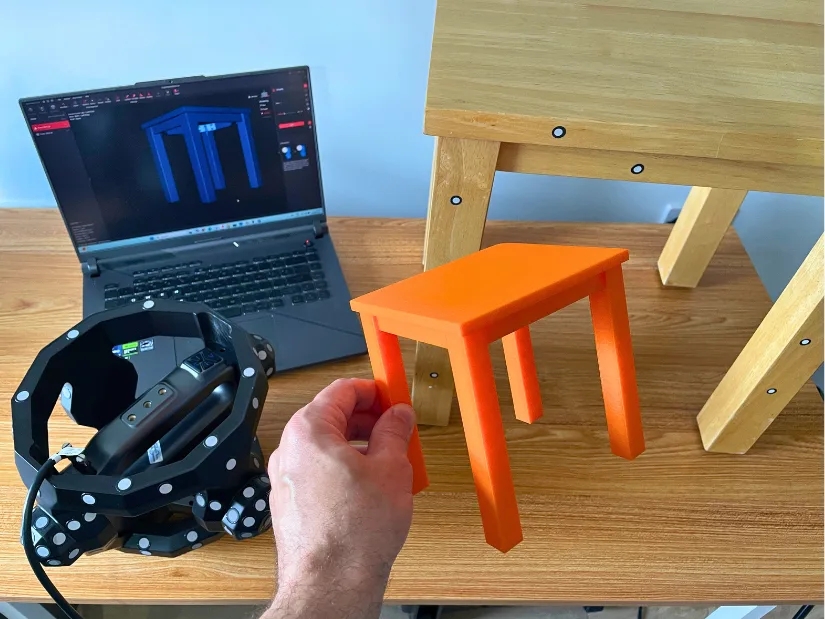
©3DWithUs – Photo: Max Funkner
I’m really pleased with the result—especially since I didn’t need to use Blender for any additional mesh cleanup or editing. The miniature was printed on the Snapmaker Artisan in just 8 hours.
Marker Scan Mode Examples
Marker Scan Mode, originally introduced with the older MetroX scanner, remains available in RevoMetro5 and is useful in situations where the tracker cannot reliably detect the object. Previously, we created a number of examples using MetroX with marker-based tracking.
As usual during our MetroX testing, we also scanned and 3D printed several objects to demonstrate the scan-to-print workflow and the resulting quality.
Compare to Other 3D Scanners
Compared to other scanners in the Revopoint lineup:
The Revopoint Trackit is a different class of 3D scanner altogether. Unlike the portable MetroX and MIRACO, Trackit uses a higher-grade laser tracking system and is designed strictly for indoor use. It is not battery-powered or handheld, and instead prioritizes precision and stability, ideal for professionals working with machinery parts, automotive components, and other engineering-grade applications.
As 3D scanning technology becomes more accessible, the market continues to grow with competitive offerings from various brands. You can explore more in our guide to budget 3D scanners. That said, the Trackit stands out as a unique product, bringing industrial-level features to a wider audience through a more affordable and Kickstarter-backed platform.
Generally, Revopoint positions the Trackit as a bridge between affordable non-tracking scanners and high-end industrial tracking systems. According to their official campaign, Trackit offers features like automatic calibration, marker-free scanning, and high volumetric accuracy—all at a significantly lower price point.
Have questions? Feel free to ask in the comment section below.
For a wider discussion or to share your own Trackit scans, join us in the forum:
Conclusion and Pros & Cons
Revopoint Trackit Review
Review Summary
Revopoint Trackit introduces optical tracking to their 3D scanner lineup, targeting users who need more precision without stepping into high-end industrial systems. While the setup requires space, calibration time, and some effort to transport, the system delivers on what it promises—marker-free scanning, high volumetric accuracy, and reliable alignment. It’s particularly well-suited for professionals working with mechanical parts, restoration projects, or complex modeling workflows.
In real-world scenarios, we scanned car parts, RC model boats, and furniture—testing different scan modes and completing full scan-to-print workflows. Across these varied cases, the Trackit showed consistent performance and produced usable meshes with good accuracy and clean geometry.
The Revopoint team continues to bring sophisticated yet affordable 3D scanning technology to a wider market and we look forward to seeing them at trade shows to learn more about new product launches.
Pros
– Marker-free scanning with high accuracy
– Automatic gimbal calibration system
– Stable, one-piece carbon fiber scanner frame
– Excellent performance on engineering-grade and large models
– Affordable compared to industrial tracking systems
Cons
– Portable but heavy – requires effort to transport
– Large – needs a spacious indoor setup
– Steeper learning curve compared to entry-level scanners