While looking for the relevant thumbnails for some of our blogs, we found an interesting way to convert existing 3D models into fun 2D images with just a few clicks. Such “stickers” can be used further as the image add-on elements or for video overlays, for example. Let’s take a quick look at 3D to 2D concept art and see what casual CAD users may achieve with minimal effort.
Disclaimer: Before trying the following technique using other designer models, please read the copyright license’s terms and conditions carefully. If such conditions (for example CC BY-NC) permit monetizing in any form, we would still recommend contacting the designer directly for permission.
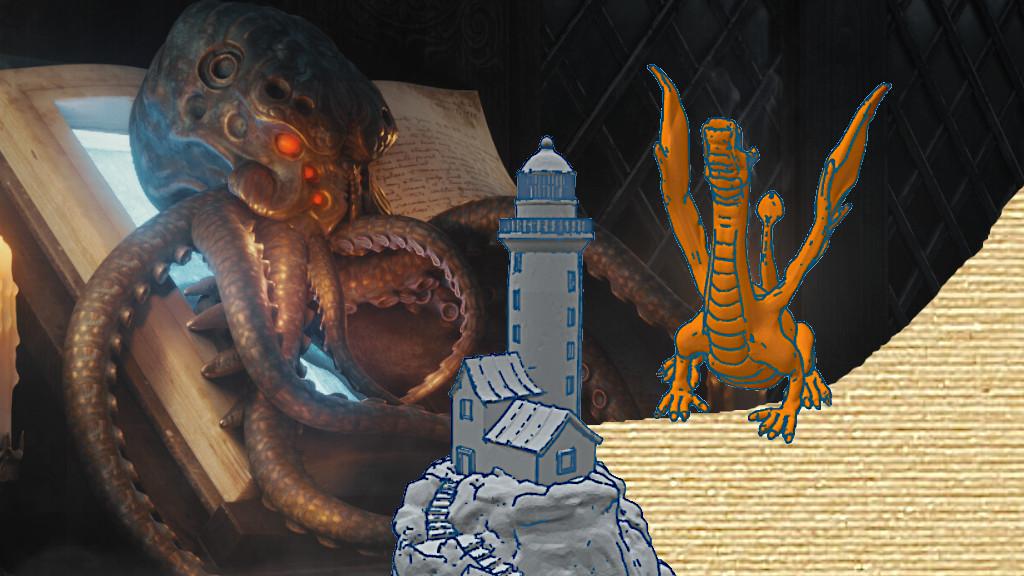
With permission, we featured the following 3D models:
Call of Cthulhu by Vladimír Stáňa Tummi (ArtStation)
Adalinda by Louise Driggers Loubie3D (Patreon)
Lighthouse on a Rock by Jukka Seppänen Kijaidesign (Twitter)
3D to 2D Concept Art
To create a masterpiece, designers or 3D printing services first create a 3D model or scenery, and then they buff it up to perfection using various software. Often, in their workflow, there are multiple software involved. For instance, ZBrush, plus Blender, plus Photoshop is a common combination.

(by Vladimír Stáňa)
CGBoost, a 3D-specialized platform, is the one who regularly organizes such 3D to 2D art competitions. Their Hall of Fame gallery is awesome. However, to create such renders, certain skills and software knowledge are required.
This is an advanced level. Let’s take a look at something quite basic and easy to achieve.
3D to 2D – How to Create a Sticker
Basically, anyone without any drawing skills can create a funny sticker in Tinkercad, for example.
Here is the step-by-step mini-tutorial.
– Upload your 3D model to Tinkercad. Mind the file size limit (30MB);
– Apply the Color;
– Move the model away to free space with a white background;
– Rotate to the desired angle, Zoom-in, Zoom-out to your preference;
– Once all looks good, then Snip & Sketch, Screen Clip, or PrtSc it.
Now we have the sticker with a white background ready, and we can crop it in another free software – GIMP.
How to Apply Transparent Background in GIMP
Move the freshly created picture to GIMP (copy-paste) and use the following Tools:
– In the Bucket Fill tool, change the Mode setting to “Color Erase”;
– Fill the background and all-white spaces with the Void;
– Use an “Export as” option to save the image.
Practical Uses of Renders
What makes such basic and advanced renders appealing is that they can be produced in the same way over and over again. Graphics can be done quickly and in the same style, which may be especially advantageous for maintaining the brand/blog/channel recognition. Let’s list some of the practical uses.
– Website blogs. As we mentioned earlier, we had situations when we had no thumbnail on the subject we wanted to write about. And as images play a significant role in Google search ranking, this forces the publishers to use, often meaningless, stock images. There are two issues with the stock images. For one, they may be overused and thus won’t bring any value, because Google will see them as copied material. And secondly, if the website uses too many of such images, it may obtain a reputation as a content scrapper. The stickers created in Tinkercad, or the whole scene renders created in Blender, may be the right solution for blogs.
– YouTube click-baiting thumbnail. Every YouTuber knows that CTR (Click-Through-Rate) is an important part for the videos to receive traffic from the search results and from the featured videos. Such 3D to 2D stickers can help to spruce up thumbnails or to be a fun element (overlay) somewhere in the body of the video. Basic video editing skills are required here.
– Social media cards. Be it Instagram or Pinterest, it is possible to upload such stickers to the Canva and create all sorts of compilations. A thumbnail for this blog was created in Canva.
– Hand-crafted cards and packages. No doubt that such hobbies still exist even in this, extensively digitalized, world. The stickers can be used in birthday cards, customized boxes, etc.
– Turn 2D image back to 3D for color-changing 3D printing. Embed an existing 3D-to-2D model into the multi-colored logo, for example.
Will Such Images Improve CTR?
What is the CTR (Click-Through-Rate aka Clickbait Rate)? It is calculated as the impressions divided by clicks. For example, an image that had 100 views and generated 10 clicks will have 10% CTR.
It depends on whom you want to click on it. If to 3D printer user such image may look familiar, and he/she may stop for a second while browsing the internet, then to a general viewer, spoiled with all amazing art available on the internet, it won’t be impressive enough.
Software
Such renders can be created in any CAD software: Blender, Meshmixer, Zbrush, Tinkercad, etc. Even a screenshot of a slicer software view can be appealing. Think of PrusaSlicer MMU or the color changing by layer preview.
Create in Canva
If you have never tried this awesome free tool (Canva), we would definitely recommend to try it out. It has a well-working drag and drop system and user-friendly functionalities. Use the new stickers to play around there. Fun guaranteed!

(Image: 3DWithUs)
Thumbnail used for 3D Print Cost Calculator post.
3D models involved:
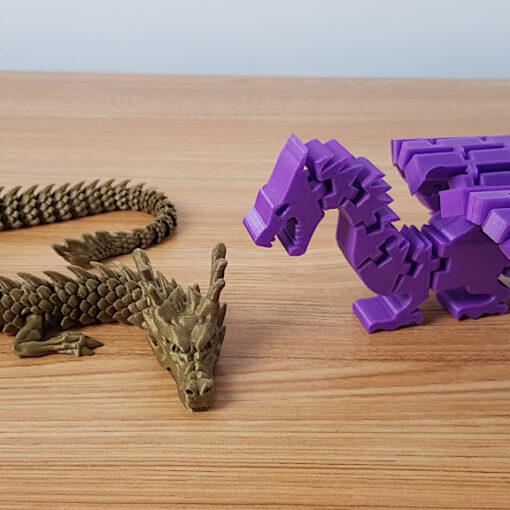
Flexi Rex
by DrLex
Slug
by 8ran
3DBenchy
by Creative Tools
and other models…

(Imapge: 3DWithUs)
Thumbnail used for NFT in 3D Printing post.
Read More: Create Graphic Design with 3D Printer
We feel that the traditional graphic design is too boring for the 3D printing-at-home related blogs. To be unique, ideally all animation can be 3D printed using a desktop 3D printer and filament leftovers.

(Image: 3DWithUs)