
AI-powered 3D model generators are becoming increasingly capable, but for 3D printing the real question is not simply how good a model looks on screen, but how well it can be turned into a physical object. In this hands-on review, I tested Tripo AI with that goal in mind, using text-to-3D, image-to-3D, refinement, and segmentation workflows before preparing and physically printing several generated models. As usual, the article concludes with a review summary and a Pros and Cons section.
Table of Contents (Jump to a Section)
Pricing
Compare Tripo AI Plans & Pricing:
Visit the Tripo AI Official Website
Tripo AI Overview
Tripo AI is an online 3D generation platform that can create 3D models from text prompts, images, and existing 3D files. Beyond model generation, the platform includes tools for refining, segmenting, retopologizing, texturing, and even rigging models for animation, providing a broader workflow for preparing generated assets for further use.
For 3D printing, the most interesting features are text-to-3D model and image-to-3D model generation, followed by tools such as segmentation and refinement. Generated models can be exported and then prepared in software such as Blender or directly in a slicer, depending on how clean and printable the geometry is.
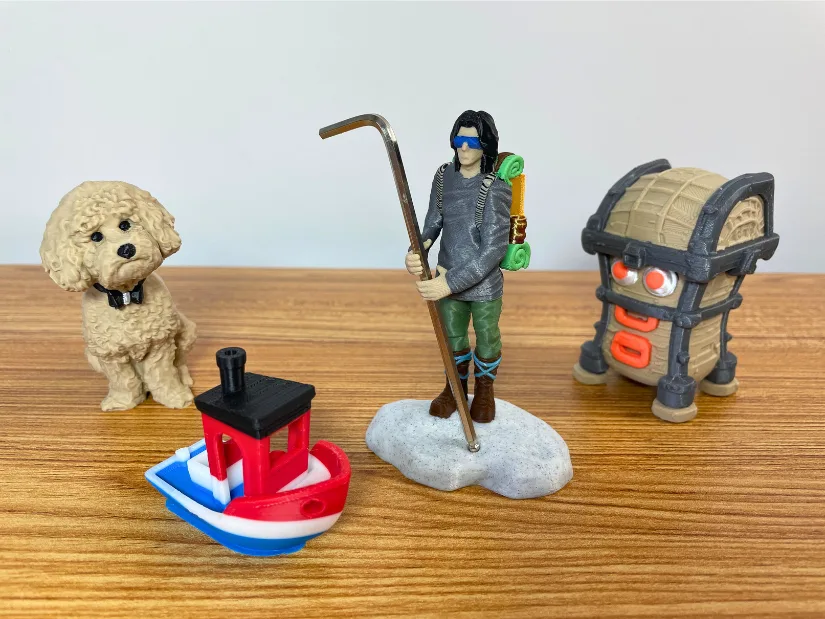
©3DWithUs – Print and Photo: Max Funkner
Tripo AI is not limited to 3D printing, and many of its tools are also aimed at gaming, animation, and digital asset creation. In this review, however, I focused specifically on how useful the platform can be for makers who want to turn ideas, photographs, or existing models into physical 3D prints.
Pricing and File Outputs
Tripo AI can be tested with a free account, which is useful for exploring the interface and generating initial models before committing to a subscription. However, downloading generated assets requires activating a trial or one of the paid subscription plans.
For 3D printing and further editing, Tripo AI supports a wide range of export formats, including STL, 3MF, OBJ, FBX, USD, and GLB. STL and 3MF are the most straightforward choices for 3D printing, while formats such as OBJ, FBX, and GLB are particularly useful when transferring models with textures, separate parts, or segmentation data into software such as Blender.
Testing and Results
Test 1: Text-to-3D Monster Treasure Chest
The first model I tried was created using the free version of Tripo AI. Please note that exporting generated models requires at least a Pro trial or subscription.
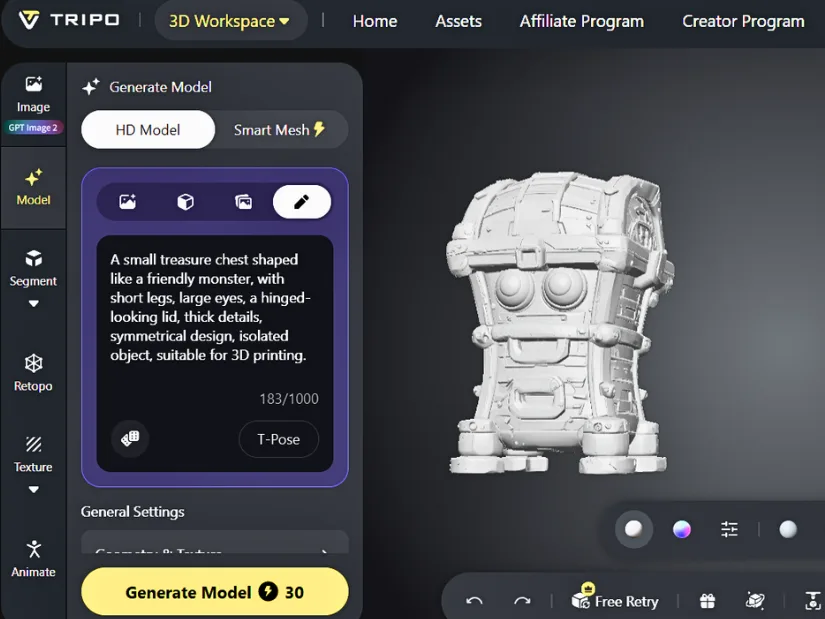
As I did not have anything specific in mind, I simply wanted to see what Tripo AI could produce from a basic text prompt. My exact prompt was:
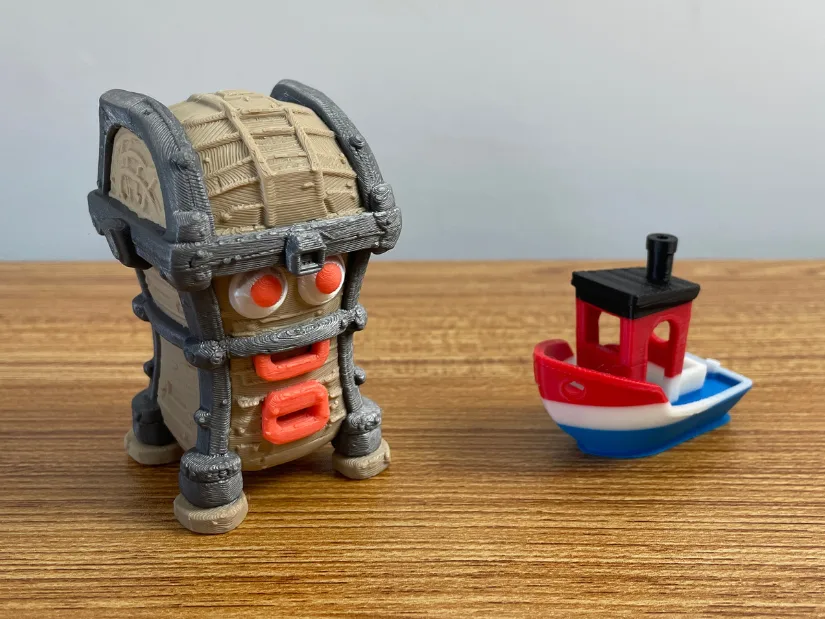
A small treasure chest shaped like a friendly monster, with short legs, large eyes, a hinged-looking lid, thick details, symmetrical design, isolated object, suitable for 3D printing.
I accepted the result straight away. Since my main goal was to test the full text-to-3D-print workflow, I decided not to modify the model and moved directly to preparing it for 3D printing.
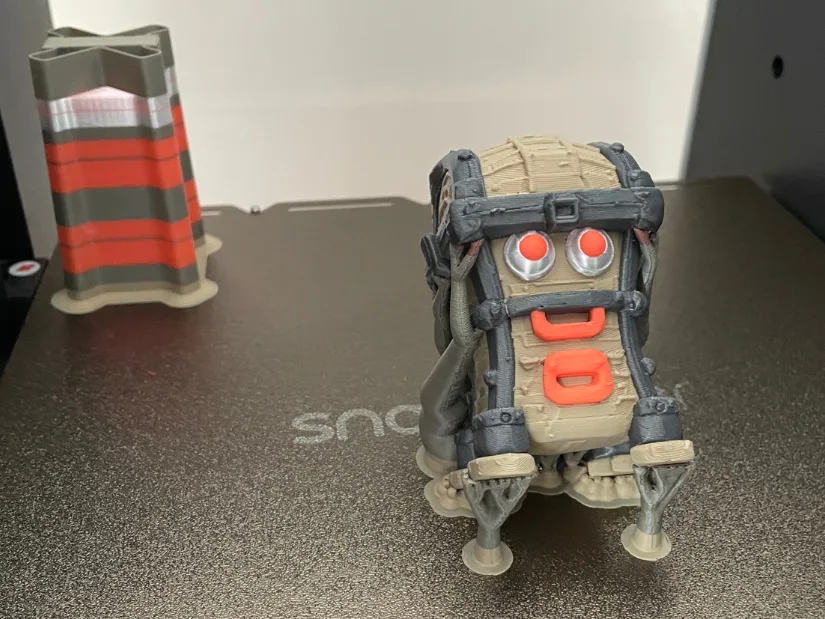
– Printing tips. The initially exported STL model was quite small, so I scaled it to 80 mm in height in Snapmaker Orca. This made it large enough to print cleanly without making the model too bulky.
The second step was to rotate the model by 45 degrees. This has been my preferred positioning method for several years, as I often find that angled prints come out cleaner, especially around the front or ‘face’ area.
The next step was to color-paint the model in Snapmaker Orca. This task can take quite a lot of time depending on the geometry. When the edges and boundaries are sharp, it is relatively easy to fill individual areas with color. More complex or rounded geometry requires considerably more manual work.
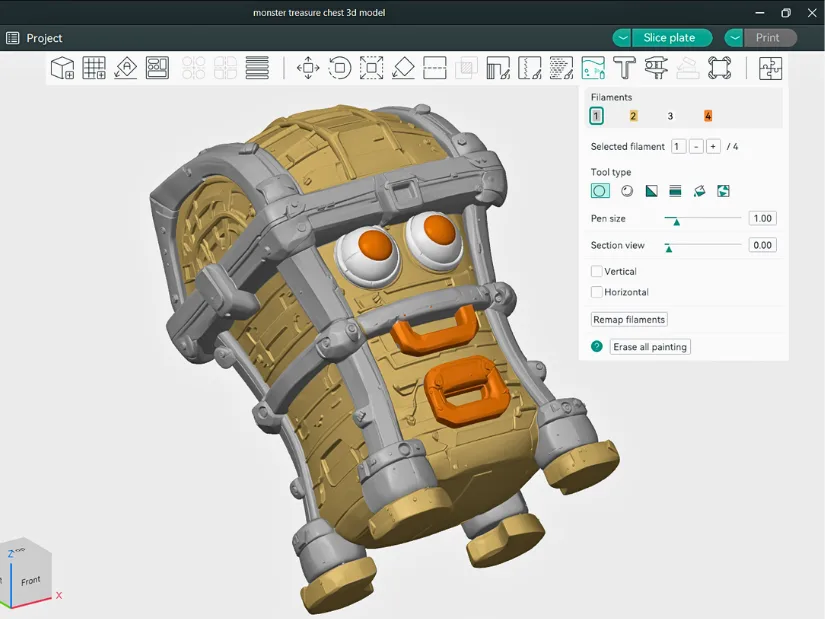
When color painting, a useful trick was to ignore some of the very small details. At only 80 mm tall, features such as tiny bolts are barely recognizable in the final print, so there is little benefit in spending time painting every element individually.
Other optional settings I used: Support structure: Tree (Auto), Seam Position: Random, Top Surface pattern: Archimidean Chords.
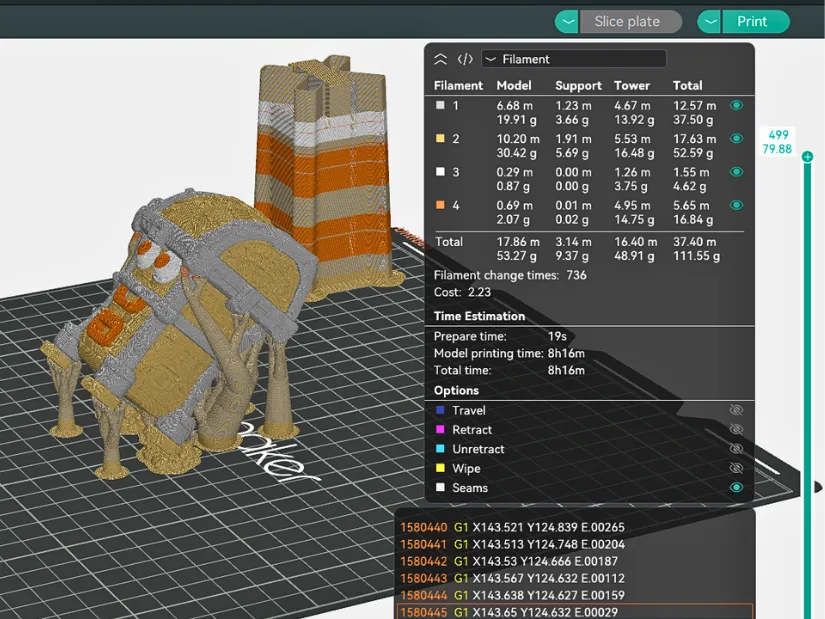
The final step was to slice the model and inspect the preview carefully. This helped me spot and correct several color inaccuracies that were difficult to notice in the painting view. Overall, it took me a little over one hour to color this model, although more complex models could easily take longer.
©3DWithUs – Print and Photo: Max Funkner
©3DWithUs – Print and Photo: Max Funkner
The result is awesome. It is impressive how easy it can be to turn a simple idea into an original 3D printed toy using the Tripo AI generator and a 3D printer. I also have to praise the Snapmaker U1 here, as it is very well suited to this type of multi-color project.
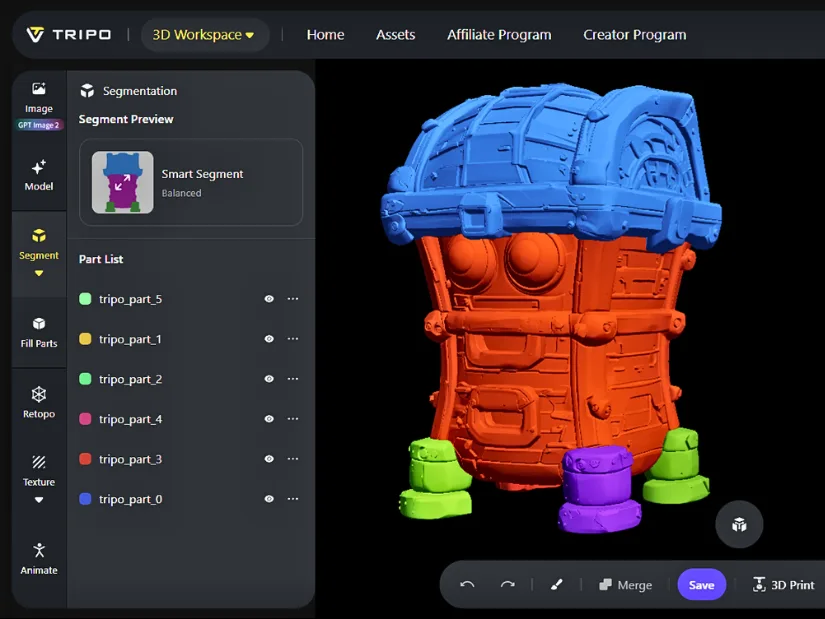
Four colors are not necessarily the limit either. The model can be segmented using Tripo AI’s own tools and then printed with more color variation by using the Color Mixing feature in OrcaSlicer. This opens up more possibilities for turning AI-generated models into detailed multi-color prints.
Test 2: Photo-to-3D Dog Puppy
For the second test of the Tripo AI generator, I focused on its image-to-3D capabilities. Working with animals and small children can be particularly tricky, as it is almost impossible to keep them still long enough for traditional 3D scanning. This is where AI-generated 3D models can be especially useful and, in some cases, may be the only practical option.
For this test, I used a photo of our puppy, Teddy. It took quite a few generation attempts before I was happy with the result. The process helped reveal where image-to-3D works well and where it still requires some manual adjustments. Below are my findings, along with a few tips that helped me get a better result.
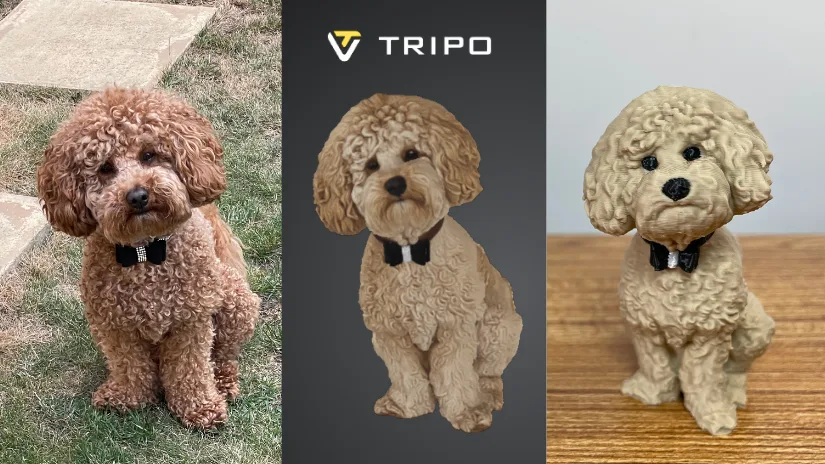
For my main photo-to-3D test with Teddy, I could not help but use Blender to improve the generated model. The tail and the fur on the back needed adjustment in Sculpt Mode. I would not necessarily blame the AI for the inaccuracies, as the original photo simply could not provide a complete view. Also, I could have used the generator for longer and used more credits. For my task at hand, I tried different ways.
That said, for my picked result, the AI had already done most of the heavy lifting. There was relatively little left to fix, so even with basic sculpting skills in software such as Blender or ZBrush, the model can be cleaned up and prepared for 3D printing with minimal difficulty. This can also include practical changes such as creating a flat base for better bed adhesion. If this type of software is still unfamiliar, Tripo AI also offers a Refine feature, which may be included with some subscriptions or available separately for around $10.
Refine Feature
Another useful Tripo AI tool I tested was the Refine feature. It allows the generated model to be improved directly inside the platform without starting the generation process again from scratch.
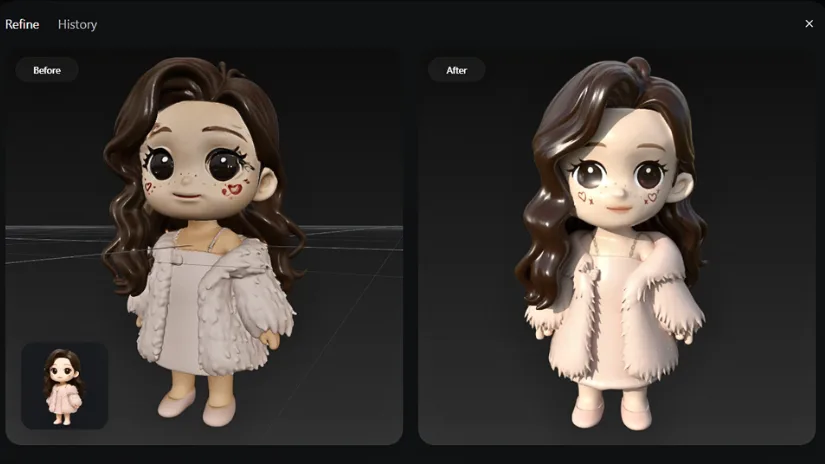
In this demo, the refined version looks noticeably cleaner and more polished, especially in the hair, clothing, facial details, and overall proportions. The changes are not always dramatic, but Refine can be a useful intermediate step before exporting the model for further editing or 3D printing.
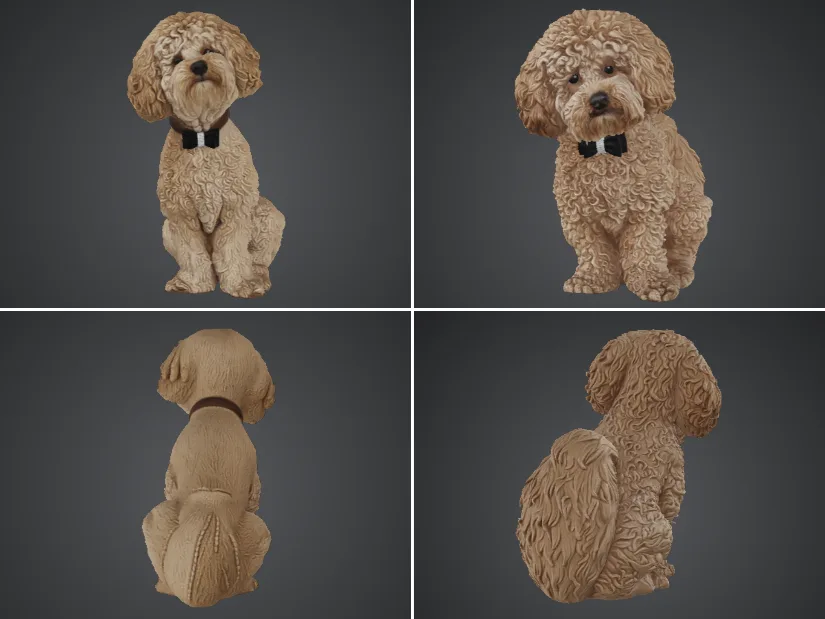
I used the Refine feature with a simple request: Make the dog’s back fur curlier and redesign the tail. The before-and-after comparison above shows the result from both the front and rear views.
Please note that this feature can take around 1–7 days to complete and may cost an additional $10, depending on the package. Judging by the turnaround time and the quality of the changes, it appears that the Refine process may involve additional AI generation combined with skilled human intervention. Some parts may also be manually adjusted in conventional 3D modeling or sculpting software.
©3DWithUs – Print and Photo: Max Funkner
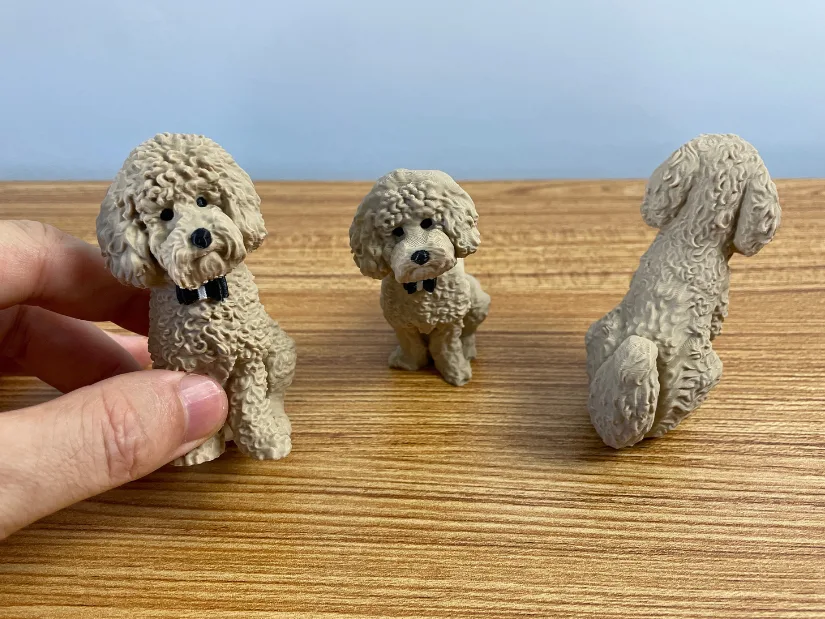
As usual, I color-painted the models in Snapmaker Orca. Compared with the treasure chest monster, Teddy was much easier and quicker to paint. I also printed two models in a single run, which took only around six hours. The finished models came out very nicely and should make a fun surprise gift for Teddy’s admirers.
Test 3: Segmented for 3D Printing
Another Tripo AI feature that can be particularly useful for 3D printing is model segmentation. For this test, I used our existing 3D Printing Guardian figurine, a character we previously featured in our comic series. The goal was not simply to split the model into separate parts, but to create a more ambitious multi-color print using a 3D printer equipped with only four toolheads.
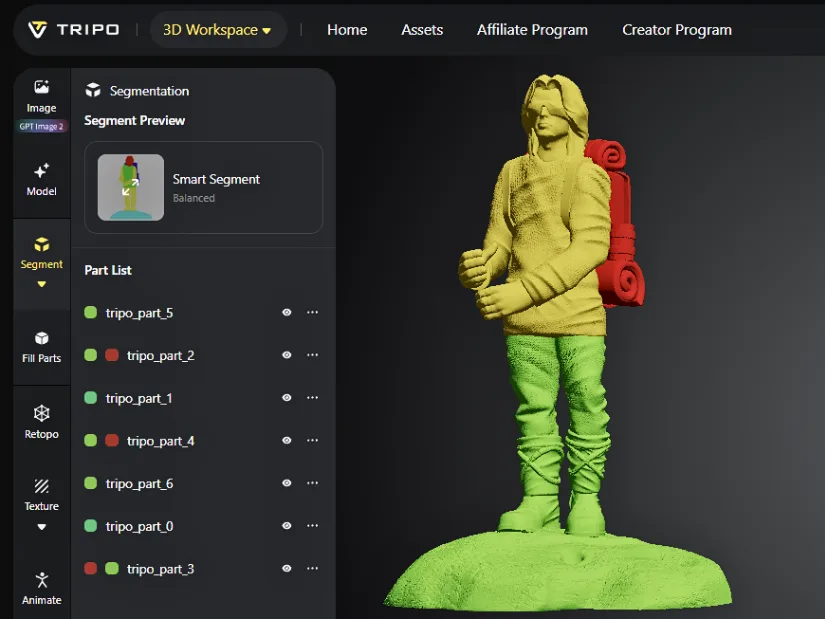
I uploaded the existing model to Tripo AI and initially segmented the figurine into seven parts. I then merged these into three larger sections that made more sense for printing. By printing each section separately, I could use a different combination of four filaments for every print job, potentially increasing the total number of colors in the finished figurine from four to twelve.
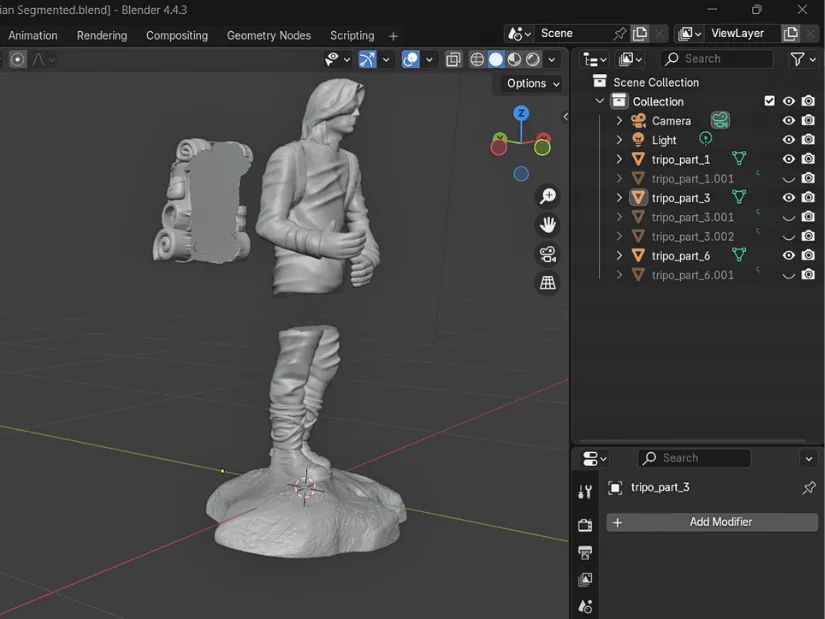
When working with a segmented model, it is important to export it in a format that preserves the separate parts, such as OBJ, FBX, or GLB. Blender recognized my OBJ file correctly and imported the three main sections as separate objects.
The next step was to make each section fully solid and suitable for 3D printing. Depending on the model, this can be one of the more complicated parts of the workflow, especially where segmentation leaves large open surfaces between sections. I used Blender to close and clean these areas, and ChatGPT helped with the step-by-step instructions whenever I got stuck.
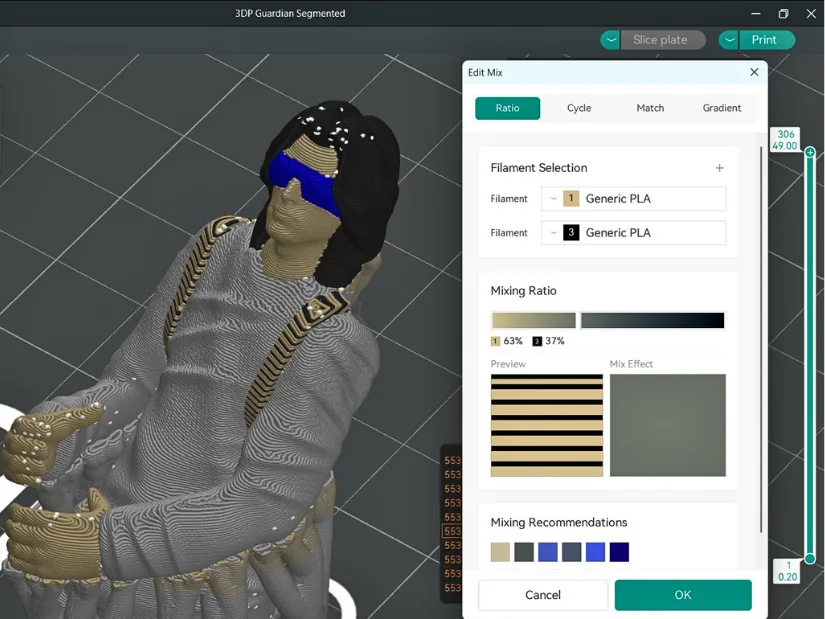
While preparing the model in the slicer, I realized that the main figurine segment needed five distinct colors rather than four. Since the Snapmaker U1 has four toolheads, I used the Color Mixing option in Snapmaker Orca to create an additional shade for the backpack belts from two loaded filaments.
As usual, manually color-painting the model was quite time-consuming, but I actually find the process surprisingly soothing. Once the main regions are defined, it becomes a matter of slowly working through the smaller details and checking the sliced preview for any missed or incorrectly painted areas.
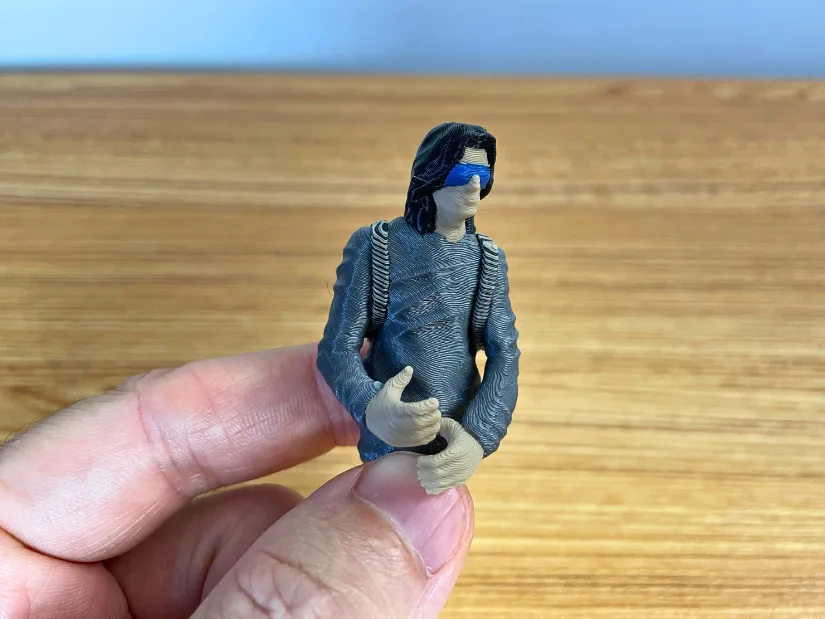
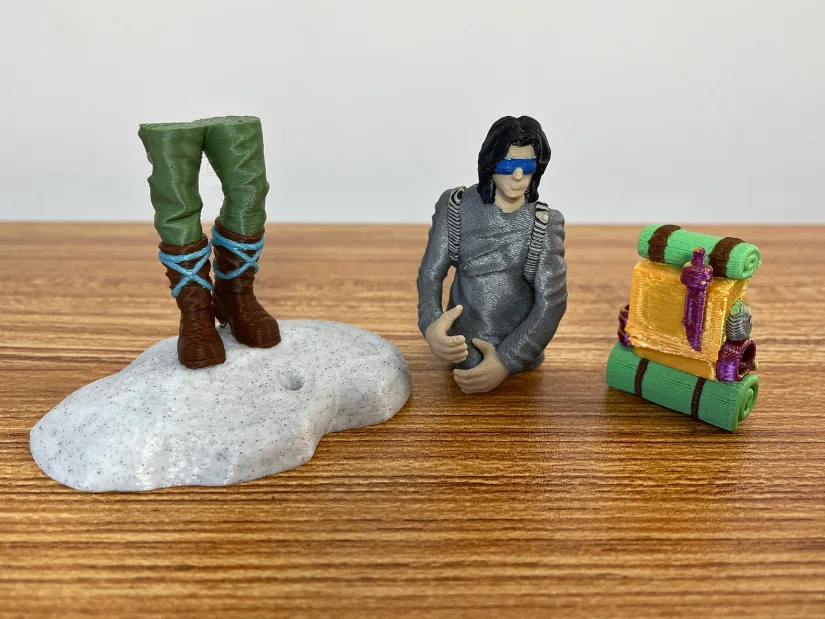
At this point, all that was left was to glue the three printed sections together. I was also pleased to find that Blu Tack worked well as a temporary fixing method, which made it easy to test the fit and positioning before committing to permanent assembly.
©3DWithUs – Print and Photo: Max Funkner
To keep the experiment quick, I printed the entire figurine on my Snapmaker U1 at a relatively small scale. The Benchy comparison gives image gives a good sense of the scale. With around 13–14 colors used across the finished model, some of the mixed-color transitions would likely look smoother and more noticeable if the figurine were scaled up. On a larger print, there would simply be more surface area for the additional shades and smaller painted details to show properly.
Have questions? Feel free to ask in the comment section below.
For a wider discussion or to share your own Tripo AI 3D models and prints, join us in the forum:
Tripo AI Review: Conclusion
After several hands-on tests, my main takeaway is that Tripo AI can significantly shorten the journey from an idea or image to a physical 3D print. Text-to-3D model is particularly effective for quickly creating decorative models, while image-to-3D opens up interesting possibilities for turning photographs and existing designs into printable objects. The generated models are not always ready to print immediately, but a large part of the modeling work is already done.
Generation itself is impressively fast, which makes it easy to try several variations and choose the best starting point. For more demanding projects, some knowledge of Blender, ZBrush, or similar software is still useful, but the Refine feature can also make Tripo AI much closer to a one-stop solution for users who do not want to handle all of the sculpting and cleanup manually.
The segmentation tool also makes Tripo AI more than just a simple model generator. Segmentation can be particularly useful for multi-color 3D printing, as demonstrated with the 3D Printing Guardian figurine, where separating the model into larger sections allowed me to go beyond the four-color limitation of a single print job.
Overall, Tripo AI fits very naturally into a modern 3D printing workflow. It is easy to try, quick to experiment with, and capable of producing models that would otherwise take considerably more time to create from scratch. For makers, designers, and 3D printing enthusiasts, I see it less as a replacement for traditional modeling software and more as a powerful starting point that can make original 3D content much more accessible.
Pros
– Fast text-to-3D and image-to-3D generation
– Easy to create useful starting models from prompts or photos
– Refine feature can reduce the need for manual sculpting
– Segmentation can be useful for multi-color 3D printing workflows
– Supports common 3D formats for further editing and printing
– Free version allows users to test the generation workflow first
Cons
– Generated models may still require Blender or ZBrush cleanup before printing
– Segmented parts may not be immediately ready for separate 3D printing
– Exporting generated models requires a trial or paid subscription
– Manual color painting can still be time-consuming
Compare Tripo AI Plans & Pricing:
Visit the Tripo AI Official Website



One thing I would add for makers testing this workflow is to separate the model-generation step from the image-preparation step. Before sending a reference into an image-to-3D tool, I usually clean the background, keep the subject centered, and make sure the silhouette is easy to read. That makes the first result easier to judge and reduces time spent repairing non-manifold areas. For anyone preparing reference images, I also found this Chinese AI image generator useful for creating quick concept variations: ai生图. After generation, I would still check wall thickness, flat bases, and scale in Blender or the slicer before printing. The practical point in this review is right: AI gets you past the blank-page stage, but printability still depends on a careful cleanup pass.