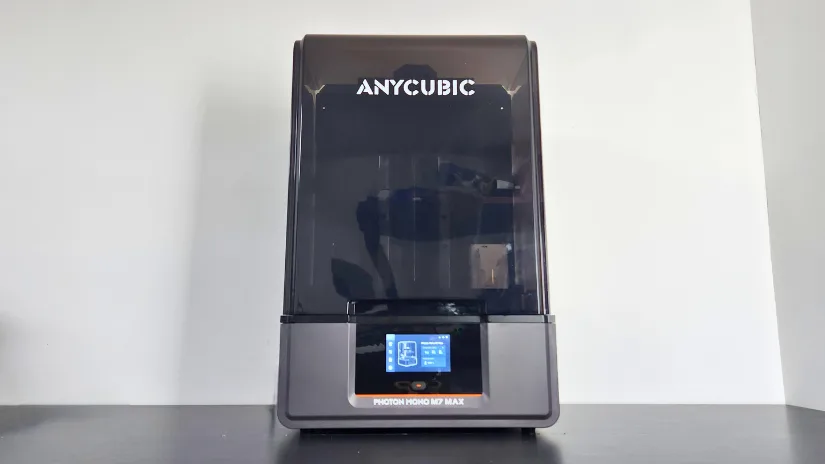
The Anycubic Photon M7 Max is the largest in the M7 range and the successor to the Photon M3 Max. It is designed to improve upon the previous model with many new automated features. While it has a massive build volume of 298 x 164 x 300mm, its screen resolution is lower; this may not be noticeable given the quality of prints the machine can produce. The Photon M7 Max is also faster than Anycubic’s previous large-format resin printer, allowing for quicker completion of large prints and batch printing. It also boasts new features such as resin and residue detection, a smart pressure system, a heated resin vat, autofill, and other features. In this review, we’ll put the Photon M7 Max to the test, evaluating its large-volume printing capabilities, the effectiveness of its smart features, and any potential drawbacks that may arise during the printing process. As usual, we’ll wrap up with final thoughts and a list of pros and cons.
Table Of Contents
- Specifications
- Unboxing – What’s Included
- Setup and Design
- New Features
- Software – Photon Workshop
- Testing and Results
- Resin and Accessories
- Compare to Other 3D Printers
- Conclusion and Pros & Cons
Where to Buy
Price: $799 – $899
Compare the Prices & Bundles:
Official Store | Amazon | AliExpress
Photon M7 Max Specifications
Build Volume 298 x 164 x 300mm (11.7 x 6.4 x 11.8 inches)
LCD Screen 13.6-inch Monochrome
Light Source COB (Chip On Board) with Fresnel Lens
X/Y Axis Resolution 46 x 46μm
Normal Exposure Time 2.2 seconds
Interface 4.3-inch Touch Panel
Connectivity USB, WiFi
Machine Footprint 425 x 362 x 652mm (16.7 x 14.2 x 25.6 inches)
Machine Weight 24kg (52.91 lbs)
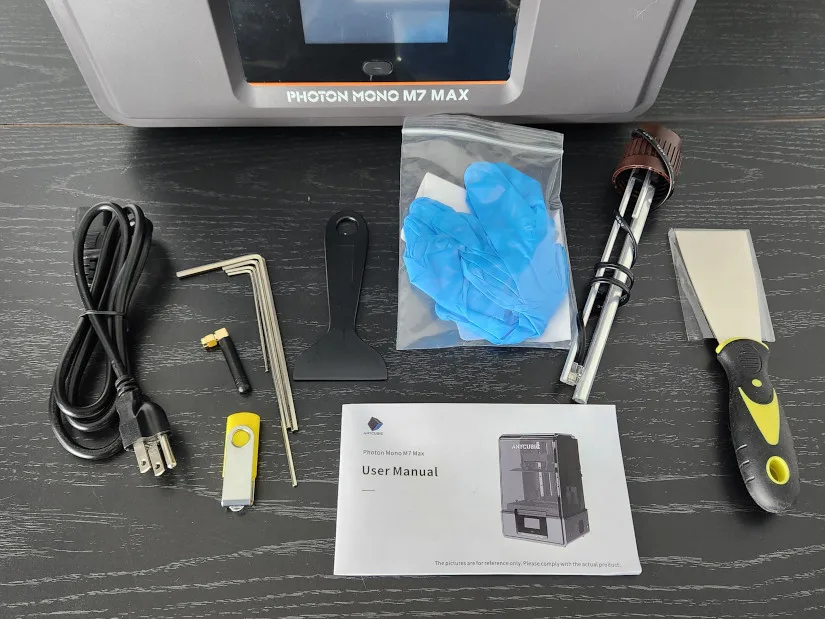
What’s in the Box
– Photon 7 Max – Print platform – Auto fill Cap – WiFi antenna – Hex Keys – Gloves – Filter – Metal scraper – Plastic scraper – Leveling paper – USB drive – User manual – Power cable
©3DWithUs – Photo: Will Zoobkoff
Setup and Design
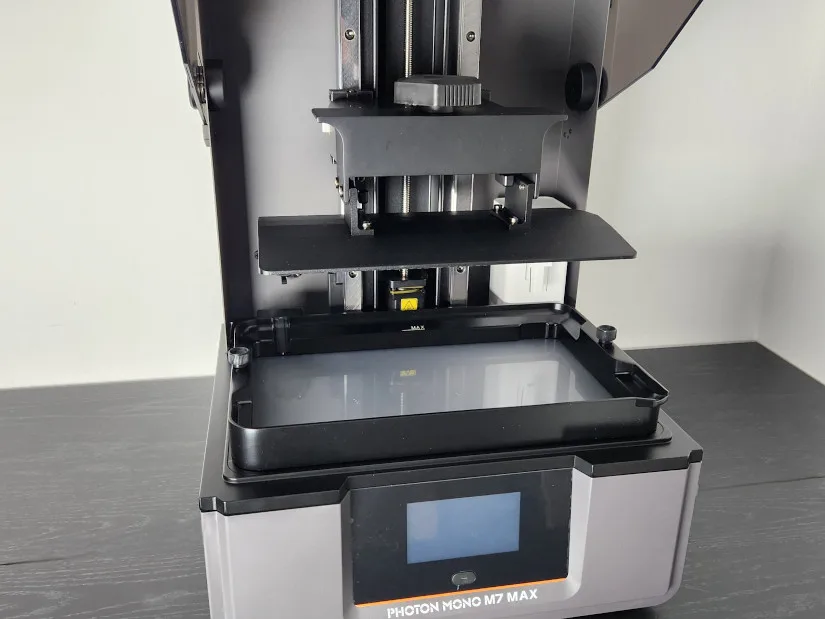
The Photon M7 Max comes completely assembled and requires minimal setup for your first print. First, attach the WiFi antenna, and remove all protective coverings from the touchscreen, LCD, and resin vat.
©3DWithUs – Photo: Will Zoobkoff
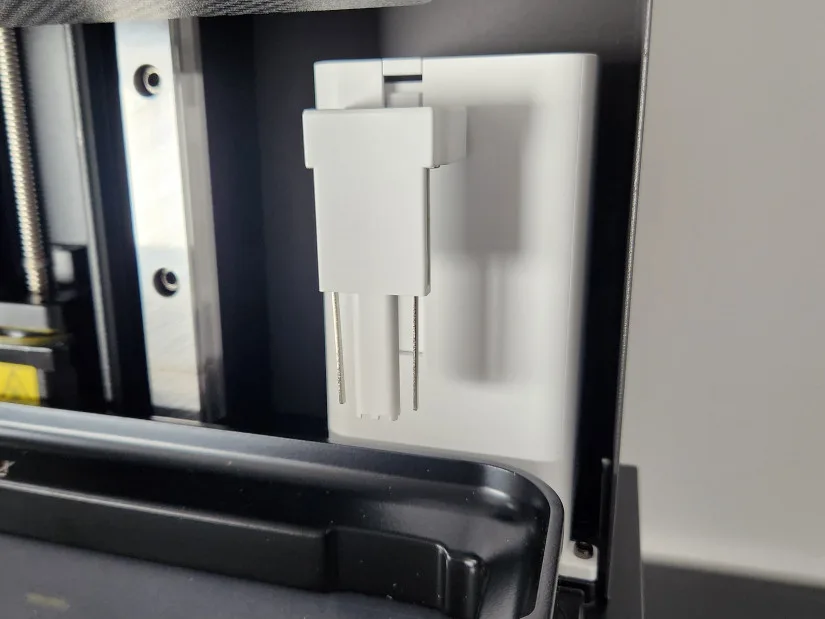
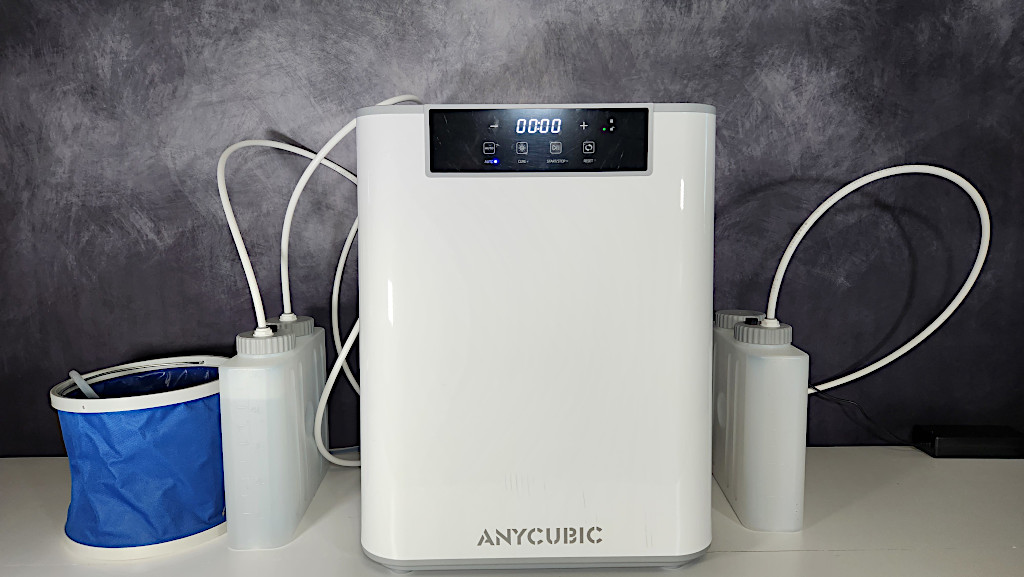
Next, attach the auto-fill cap and cable to enable the automatic resin management system. Afterwards, install the printing platform by screwing it into position, and power on the printer.
©3DWithUs – Photo: Will Zoobkoff
Before a print, it’s always best to level the printing platform for proper adhesion and precision. For this, loosen the four screws on the platform so that it becomes free to move. Then place the leveling paper on the LCD screen, and initiate the leveling process—the platform will automatically move into place. Once in place, lightly press down on the printing platform with some pressure and tighten the four screws gently to secure it.
©3DWithUs – Photo: Will Zoobkoff
To ensure that leveling is correct, tug lightly on the leveling paper—it should be tight and not slide around freely. If it slides too freely, repeat the process to verify calibration.
Once leveled, the printing platform will move to its home position, where you can now mount the resin vat. You are now ready to load resin and initiate your first print.
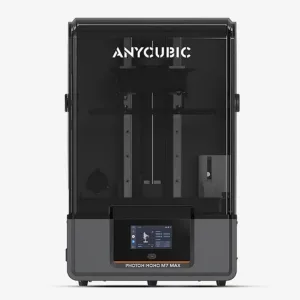
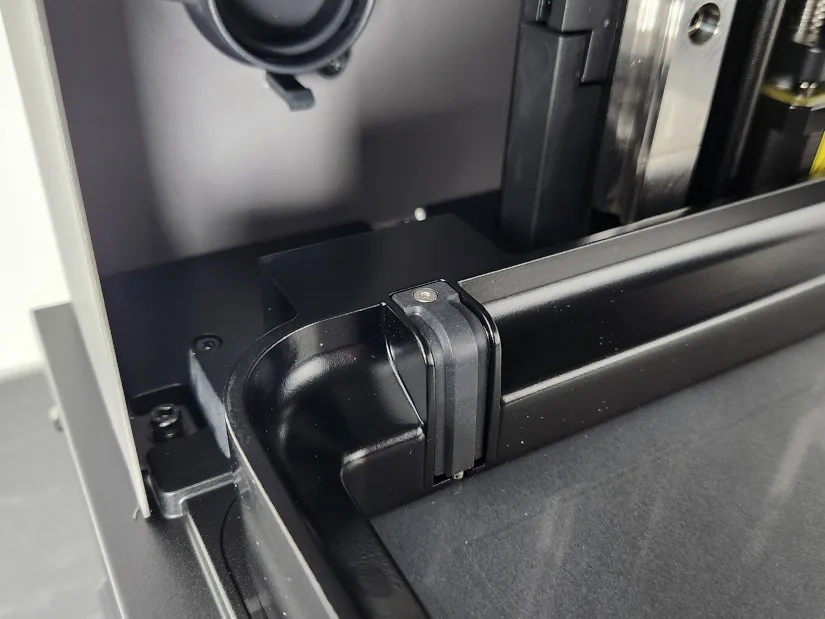
In terms of design, the Photon M7 Max is identical to the other M7 series printers, with the same black-on-black coloring. The standout addition is the flip cover, which provides easy access to the print platform and opens high enough to provide plenty of clearance for accessing the entire interior.
©3DWithUs – Photo: Will Zoobkoff
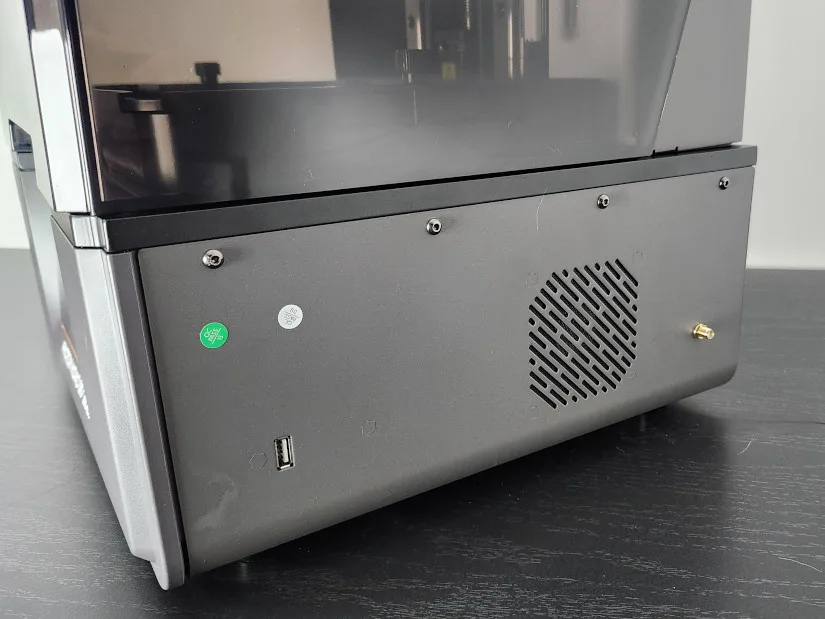
There is also a vent at the rear of the machine that allows users to attach an exhaust hose to remove fumes from the enclosure during printing—something always highly recommended when printing with resin.
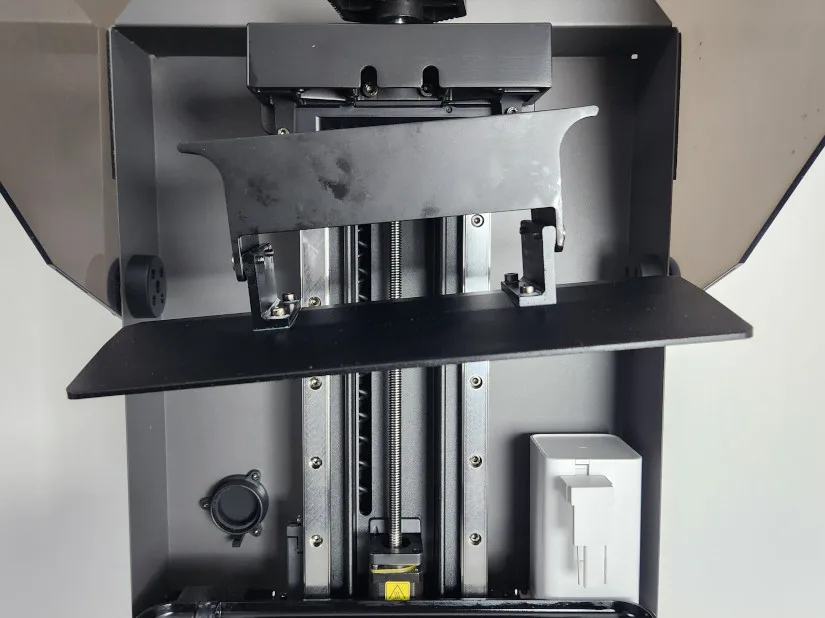
Another useful feature is the hanger on the print platform arm, which allows excess resin to drain from prints after printing, reducing messy drips when transferring parts to the cleaning station.
©3DWithUs – Photo: Will Zoobkoff
The Menu system features a clear easy to navigate screens with everything you need to level the build plate, start and monitor prints as well as check machine status, you can also monitor the printer and status using Photon Workshop.
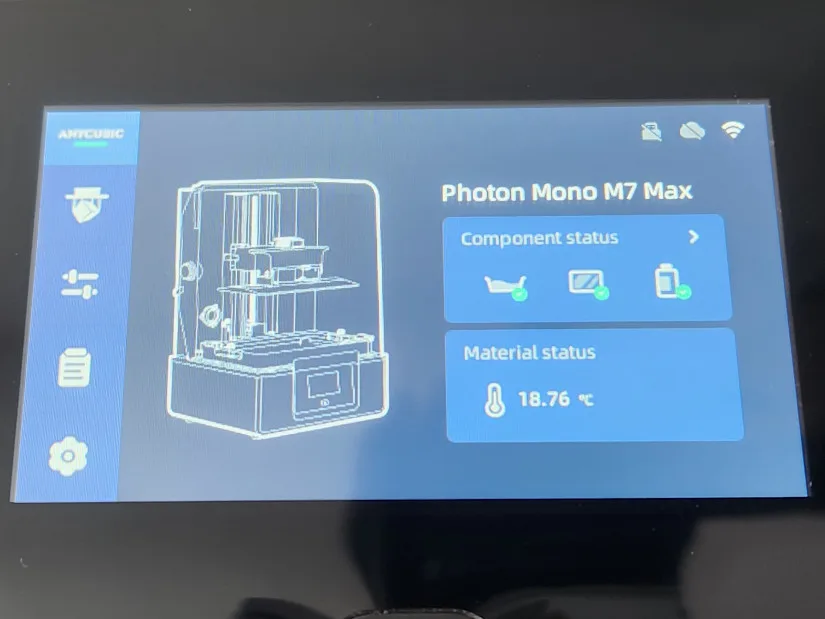
©3DWithUs – Photo: Will Zoobkoff

Overall, the Photon M7 Max is sleek and stylish in its design and will easily fit into any work setup.
New Features
Compared to its predecessor, the Photon M3 Max, the Photon M7 Max has a myriad of new features designed to streamline and expedite printing. The new COB light system and Fresnel lens improve light uniformity compared to previous LED panel systems, for a more level exposure on the build plate. The Intelligent Release 2.0 system with pressure sensors dynamically switches between lift height of a layer, in helping to reduce printing time.
With these upgrades, the Photon M7 Max boasts a maximum print speed of 4 seconds per layer. The employment of a full-metal resin vat with heating keeps the resin at a perfect temperature, and the resin auto-fill and draining system prevents interruptions due to low resin levels—especially helpful for those large prints.
Before each print, the M7 Max also performs a pre-check to make sure there is no residue or debris within the vat and verifies whether there is enough resin for the entire print. All these together provide a smooth and enjoyable printing experience.
Printing Safety and Precautions
As with any resin printer, the Anycubic Photon Mono M7 Max should be treated carefully to avoid harm. Uncured resin is poisonous, and solvents used to clean it are skin irritants, so always wear gloves and safety glasses when pouring resin, handling uncured prints, or wiping spills.
Ventilation is essential — use your printer in a well-ventilated area to reduce fume exposure. Clean up immediately if resin has been spilled using 99% isopropyl alcohol in order to not contaminate. Be sure to wipe your printer, resin containers, and work surface with each use of the printer removing any remaining resin to maintain a clean working space.
For long-term safety, always store resin in a closed container in a dry, cool place out of the reach of children and pets. Maintaining and handling properly will offer a safer and more efficient printing experience.
Software – Photon Workshop
The Photon M7 Max is also natively supported by the widely used Chitubox slicer, but it also includes Anycubic Photon Workshop software, which we utilized during our review period. While Chitubox reigns supreme in the resin printing ecosystem, Photon Workshop has improved considerably over the years and therefore represents a decent alternative with a better support generation system compared to earlier versions.
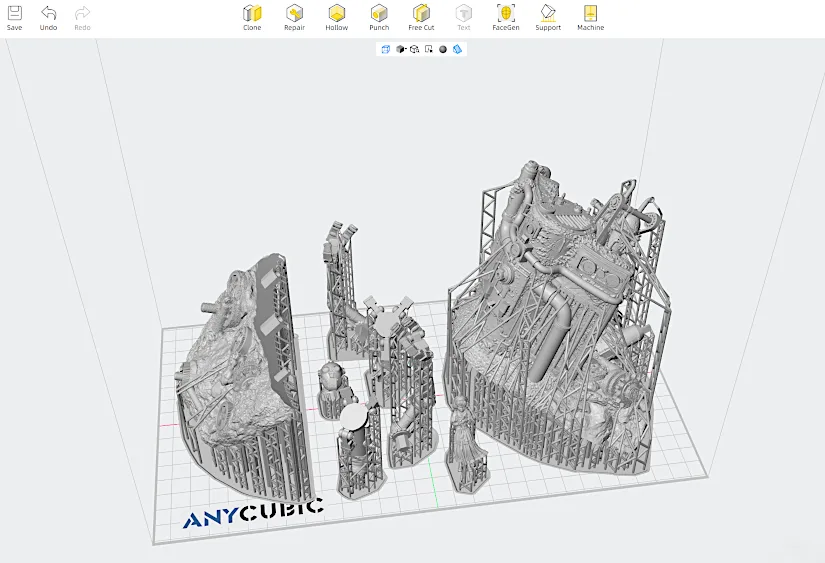
Photon Workshop offers all the tools necessary to load, hollow, punch, and add supports to your models prior to printing. It also features preset settings for different types of resins so that users can customize their print parameters to get the best out of their prints. The software also allows users to tweak anti-aliasing, exposure times, and lift speeds, providing better control over the final print quality.
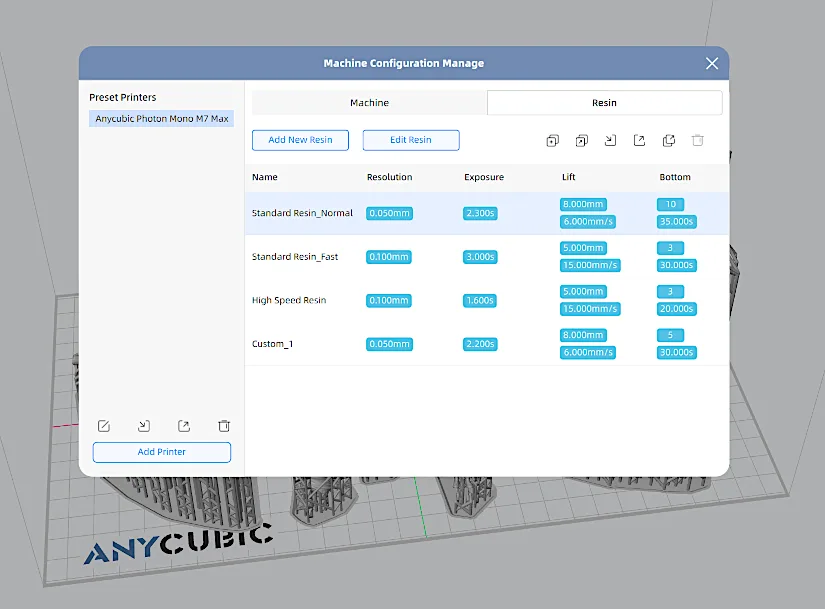
We used the default lift heights and rates provided by the software for our testing we also set AA to 16x. We made no other adjustments except to the layer exposure time and off-time, which were optimized to the specific resin we were printing with in each case. This permitted us to achieve the best compromise between print speed and precision of detail. Overall, Photon Workshop is a capable and user-friendly slicer and thus a suitable choice for beginners as well as advanced users.
Test Printing Results
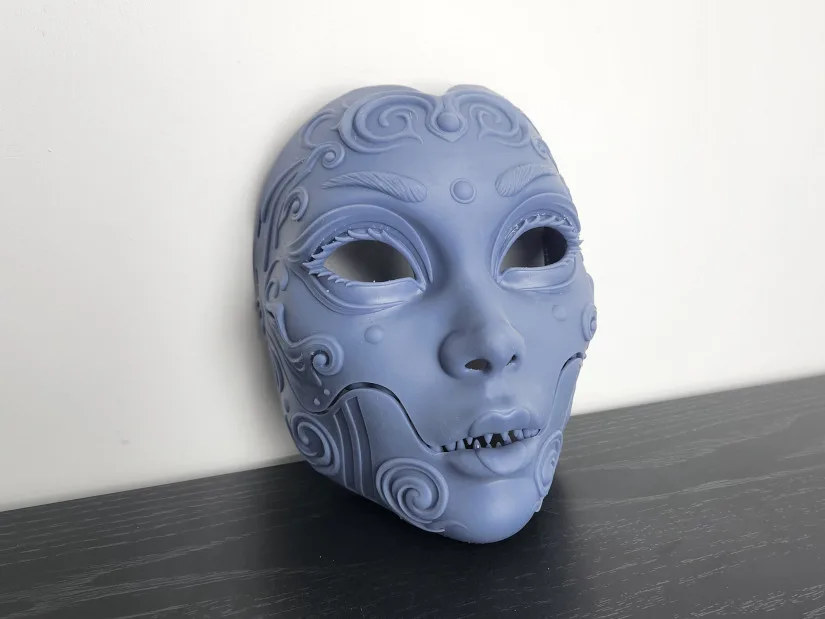
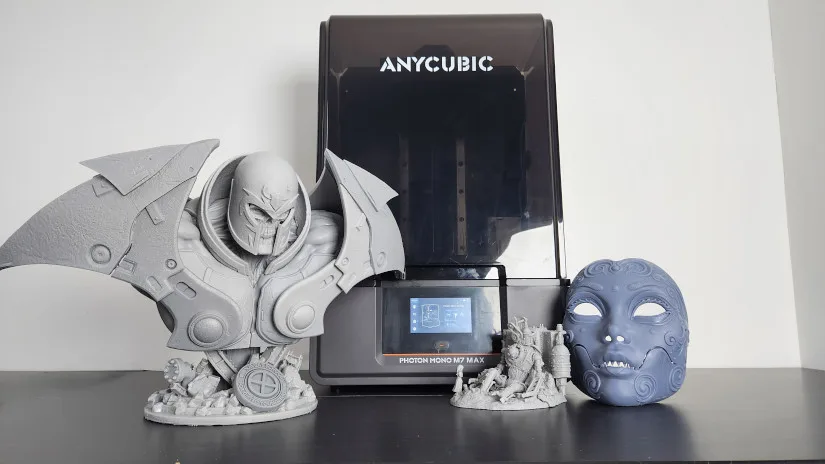
– Geisha Mask. For our first test print, we turned to one of our favorite designers, Pipe Cox, and printed the Geisha Mask. This piece is two pieces: the jaw and the face. To ensure that it is long-lasting without having the mask be heavy, we hollowed out both halves using a 2mm wall we then generated supports using the auto supports.
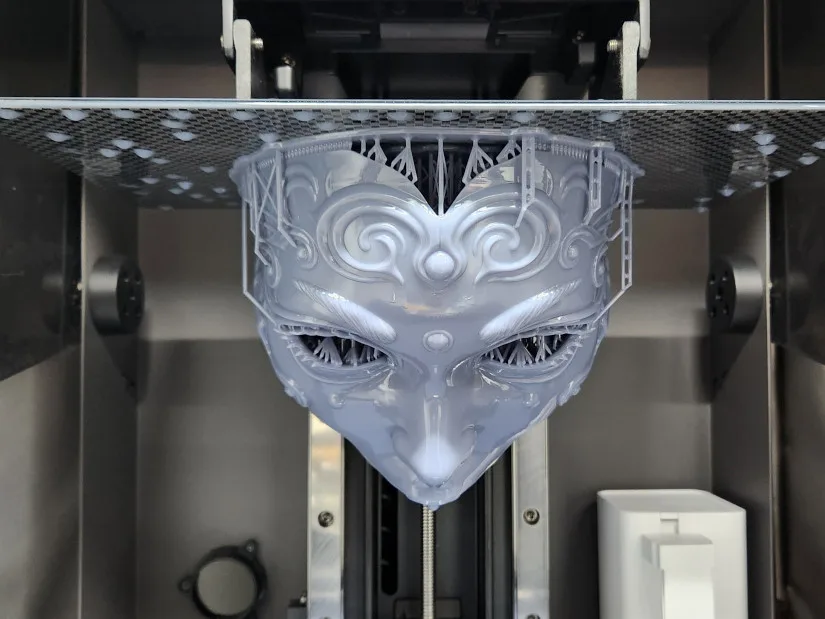
©3DWithUs – Print and Photo: Will Zoobkoff
The top piece required 5 hours and used 323ml of Anycubic Water Washable Resin. The bottom piece required 3 hours and used 129ml of resin.
3D Model by Pipe Cox on Thangs
©3DWithUs – Print and Photo: Will Zoobkoff
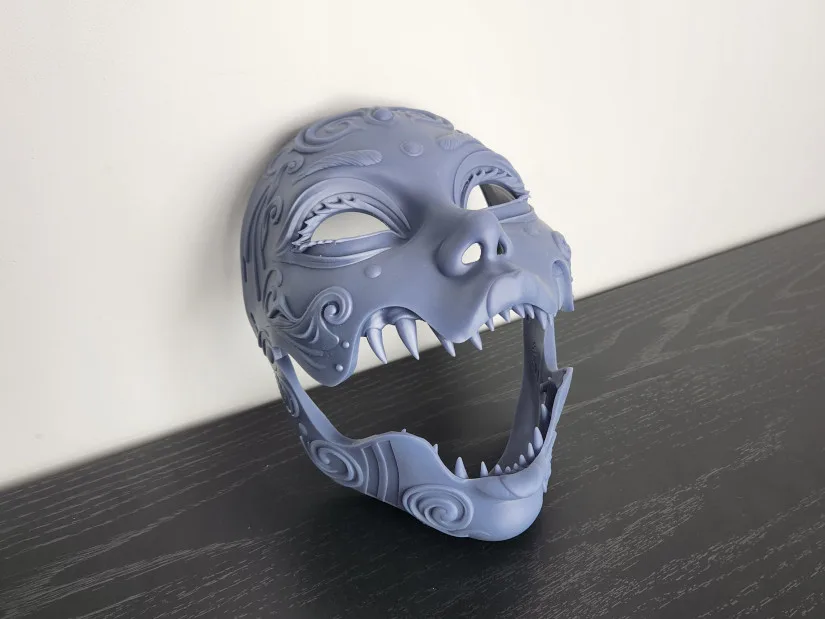
Upon printing, washing, and curing, the two pieces fit together nicely, with the jaw moving with ease. The 16x anti-aliasing (AA) gave it a smooth, polished finish that demonstrated the Photon M7 Max’s capability of printing big masks and other wearables thanks to the large build volume and with outstanding detail.
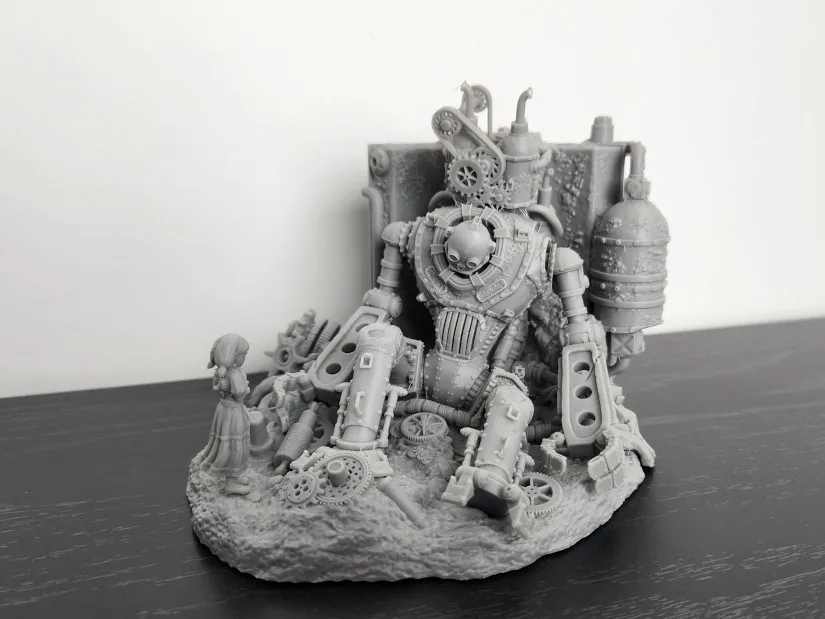
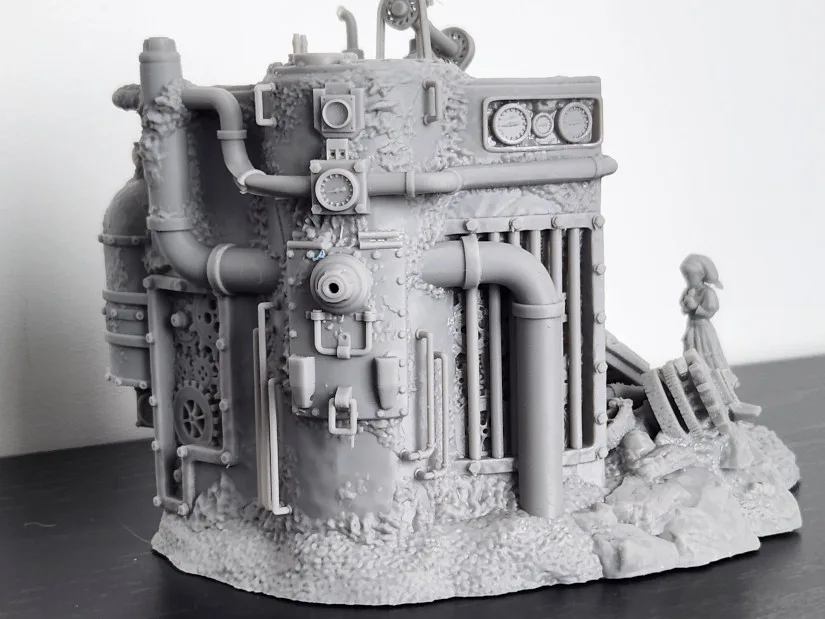
– Abandoned Robot Diorama. Then, we decided to print a smaller diorama, but this time from Nerkison – the Abandoned Robot Diorama. This model consists of seven pieces, with detailed elements, tiny gears, and mechanical patterns, which qualifies as the perfect subject to test whether the Photon M7 Max can accurately capture fine details.
3D Model by Nerikson on MyMiniFactory
©3DWithUs – Print and Photo: Will Zoobkoff
Although complex, the entire diorama had enough room to fit in a single build plate, with a little extra space left over. It printed within 4 hours and 30 minutes and utilized 376ml of resin.
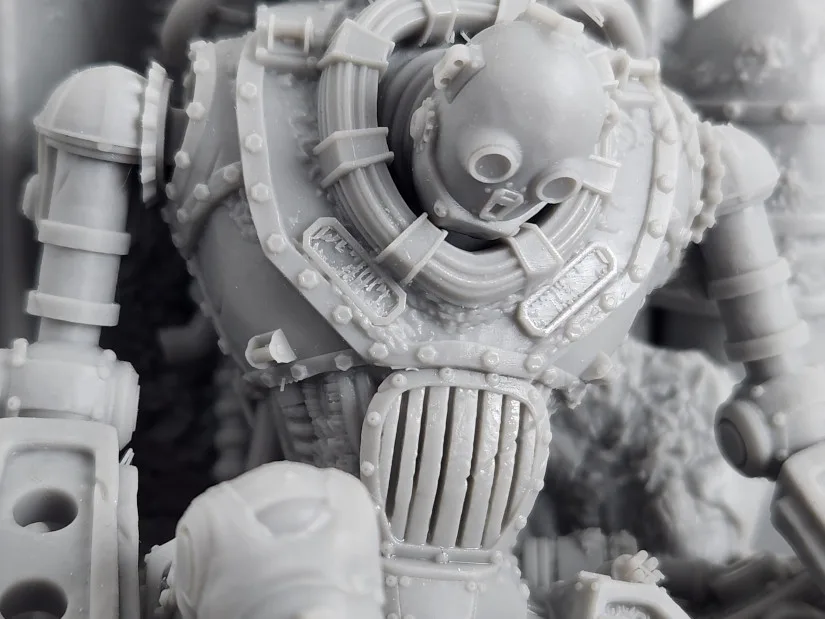
The final result was excellent—all of the fine detail was sharp and clear. Even though the Photon M7 Max has a 7K resolution screen, you would not know from the print quality itself. The detail retention is excellent with very little fine feature loss.
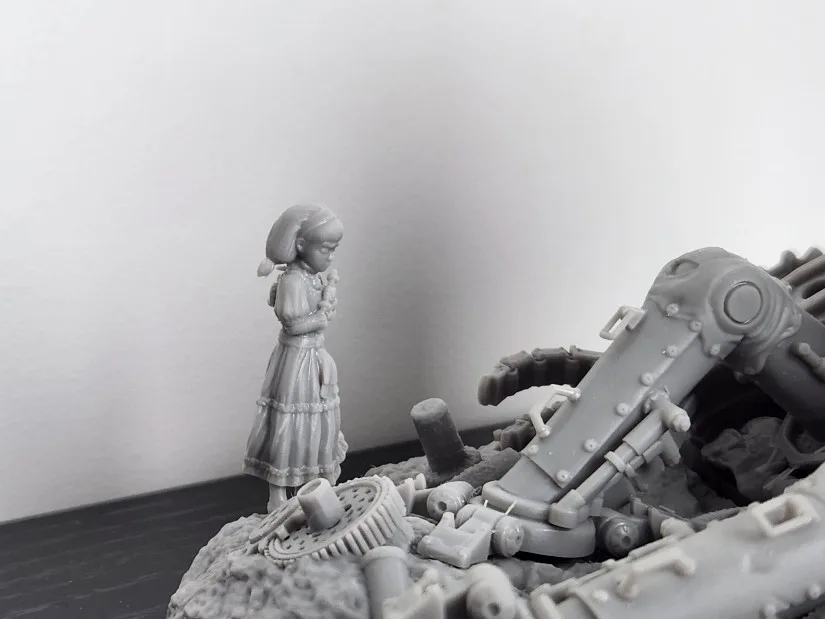
This kind of performance makes the Photon M7 Max an ideal machine for batch printing, no matter if you are producing small numbers of figures, detailed dioramas, or scenery for tabletop gaming or exhibitions.
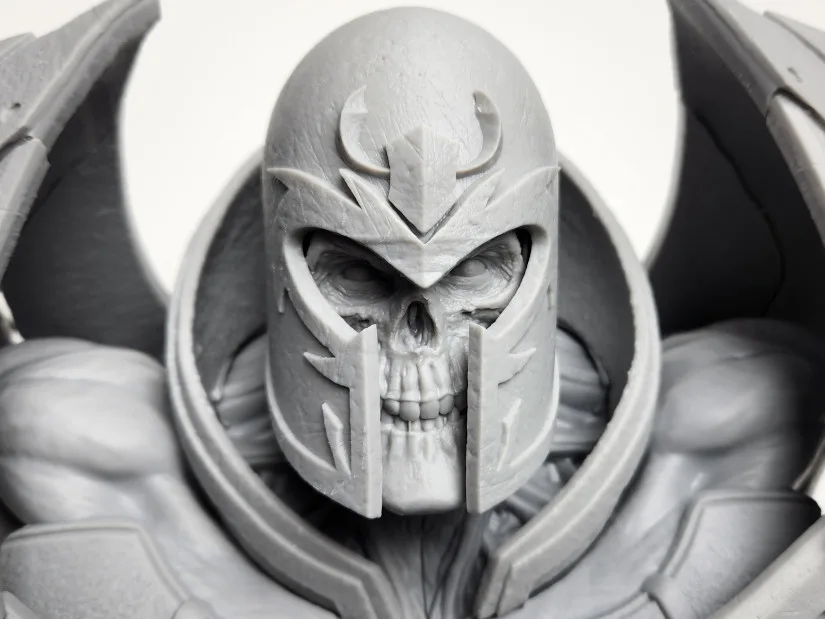
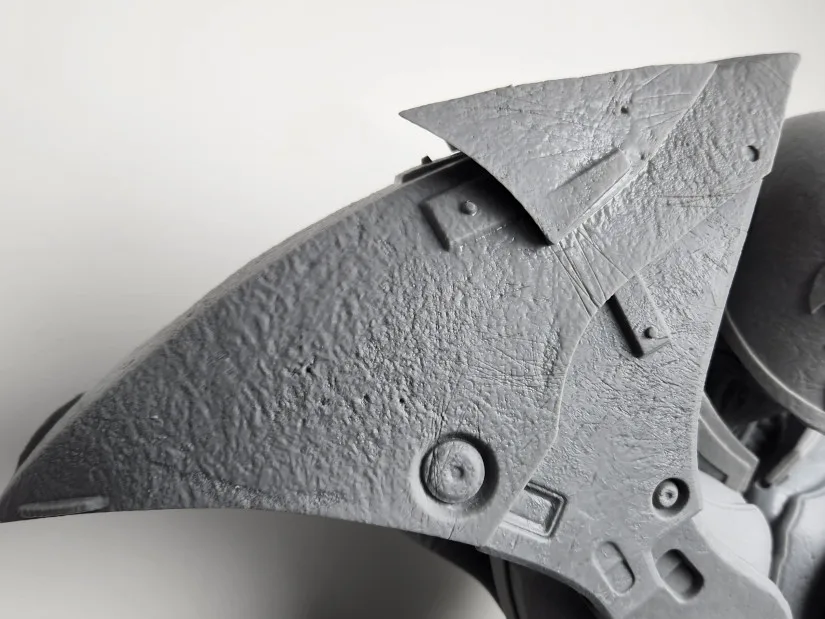
– Onslaught Bust. For our final print in our testing, we pushed the limits of the Photon M7 Max with a massive multi-platform print—the Wicked3D Onslaught bust. This giant of a model required eight full build plates to complete, amounting to just over 34 hours of print time and an astonishing 3,503ml of resin.
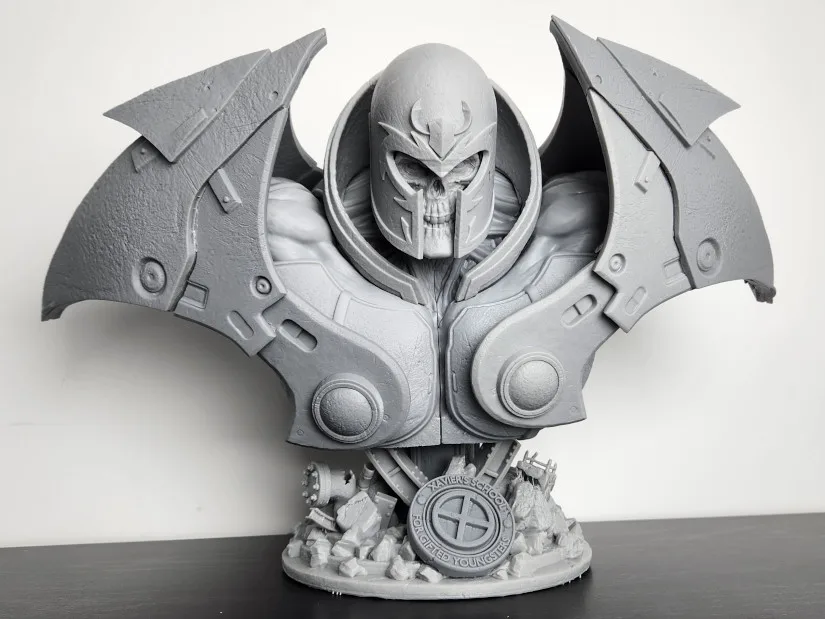
3D Model by Wicked3D on Cults3D
©3DWithUs – Print and Photo: Will Zoobkoff
Once all the parts had been printed, cleaned, and cured, they all fit together flawlessly, with not a single hitch during the printing. The finished assembled model is simply stunning—from the fine details on the skull face underneath the helmet to the worn, battle-scathed shoulder armor, every detail is executed in minute detail.
©3DWithUs – Print and Photo: Will Zoobkoff
The Photon M7 Max handled the long printing procedure excellently. With all of our test prints, we did not have to re-level the build plate once we had it initially calibrated, so it was silky and effortless to change between one print task and another.
This test also verifies that the Photon M7 Max is a behemoth of large-scale, high-resolution resin printing and is thus an ideal solution for big projects, batch printing, and intricate models.
Anycubic Resin, Post-Processing and Accessories
Apart from the Photon series 3D printers, it is possible to purchase various specific resins on the Anycubic website and Amazon.
©3DWithUs – Print and Photo: Will Zoobkoff
On their website, we also noticed accessories such as extra build plates, resin tanks, and post-processing stations like the Wash and Cure Max. Read more about imporatance of post processing stations on 3DWithUs.
Compare Anycubic Photon M7 Max to Other 3D Printers
Compare to the similar volume resin 3D printers in the same price range.
Budget large-volume 3D printers are rare, making the Anycubic Photon M7 Max a standout option. It offers a substantial build volume at an affordable price, distinguishing itself from competitors that often require a significantly larger investment. For a few years in a row, the Anycubic Photon M7 Max and Elegoo Jupiter have been the only XXL-size budget resin 3D printers available on the market.
©3DWithUs – Print and Photo: Will Zoobkoff
Conclusion and Pros & Cons
Compare the Prices & Bundles:
Official Store | Amazon | AliExpress
Anycubic Photon M7 Max Review
Review Summary
The Anycubic Photon M7 Max is a resin behemoth printer that excels at large-format printing, batch printing miniatures, and dioramas in less time with fewer build plates. While its screen resolution is slightly lower than that of other current printers, that’s hardly noticeable given the high quality of print it achieves. From wearable masks and intricate dioramas to gigantic busts, the Photon M7 Max printed each test perfectly, demonstrating its versatility and reliability.
Its smart features, such as resin detection, residue monitoring, and smart pressure monitoring, ensure a seamless printing process, reducing the possibility of failure and increasing efficiency. The heated resin vat and auto-fill system also make the workflow smoother with ease to create large, high-quality prints with little intervention from the user.
Whether you are a cosplay prop artist, tabletop gamer, or model maker producing large-scale work, the Photon M7 Max is a top choice. Its speed, precision, and simplicity make it a valuable addition to any resin printing workshop. If you need a high-end, large-format resin printer that achieves the balance of smart features and quality, the Anycubic Photon M7 Max is well worth considering.
Pros
– Heated Vat
– High speed printing
– Great details
– Host of smart features
Cons
– Manual leveling
– Auto fill not great with thick resins