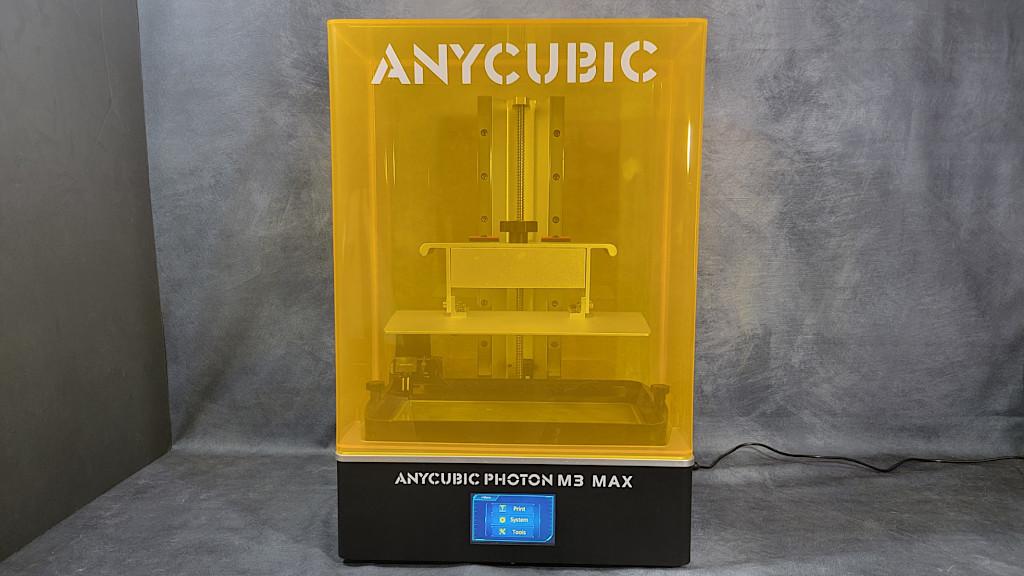
The Anycubic Photon M3 Max SLA 3D printer is at the forefront of technology. Due to its high build capacity, 7K screen, and monochrome display, it satisfies all of the current resin 3D printing trends. Anycubic Photon M3 Max is capable of creating high-quality prints effortlessly and is encased in a stunning black frame with a spacious semi-attached cover. The Photon M3 Max is the largest machine in the new Photon lineup from Anycubic and offers a tremendous build volume. Let’s analyze the new Photon M3 Max’s capabilities and benefits, as well as look at any disadvantages there may be.
Photon M3 Max Specifications
13.6” Monochrome screen
Laser-etched build platform
Build volume: 298 x 164 x 300 mm
Anycubic parallel Matrix LED (84xLED lights)
7K screen: 6480×3600 px
Auto refill system
Optional Air Purifier
Contrast ratio: 450:1
Screen protector pre installed
Horizontal accuracy: 46um
Vertical accuracy: 10um
Print speed: ≤ 6 cm./hr. ≤ 2.36 in./hr.
Machine weight 26kg / 57.3Lb
Comparison Table
Affiliate Links:
Amazon
AliExpress
Official Website
Printing timelapse
©3DWithUs – Print & MP4: Will Zoobkoff
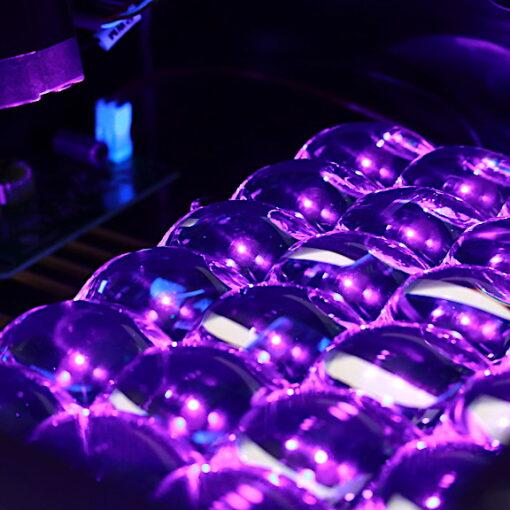
Anycubic Parallel UV Matrix Review
The primary feature of the Photon M3 Max is its massive 13.6″ monochrome LCD display. At this scale, the Photon M3 Max LCD is an industry first. Current SLA 3D printers have rapidly adopted monochrome panels as the new industry standard, and this trend is anticipated to continue into the foreseeable future. It offers various advantages over traditional RGB displays, including shorter curing times, fewer energy use, and a longer panel life.

©3DWithUs – Photo: Will Zoobkoff
Anycubic LighTurbo Matrix is the light source included with the M3 Max. Compared to RGB displays with ordinary RGB LCD panels, the monochrome LCD panel of the Anycubic LighTurbo permits more light to flow through, resulting in a quicker cure time and a faster print speed. In addition, with brilliant LED lights and a screen with a high light transmittance, the Photon M3 Max can provide more light uniformity and stronger light energy, resulting in superior print detail.
The longevity of monochrome displays is four times that of their color counterparts, demonstrating that they are more resilient. By decreasing the UV-light intensity by 70–80 percent and customizing the Photon M3 Max’s intensity, Anycubic is able to extend the device’s usefulness and durability even further.

©3DWithUs – Photo: Will Zoobkoff
Moving Beyond The Realm of 4K Screens
There are a total of 6840 x 3600 pixels on the screen, which are dispersed on a printed area of 298 x 164 mm. This yields an XY pixel size of 46 microns, which is comparable to that of other large competitors. The Anycubic M3 Max is equipped with a gigantic 298 x 164 x 300 mm build capacity, which corresponds to an astounding 14.7 L (499.8 oz) of resin.

©3DWithUs – Photo: Will Zoobkoff
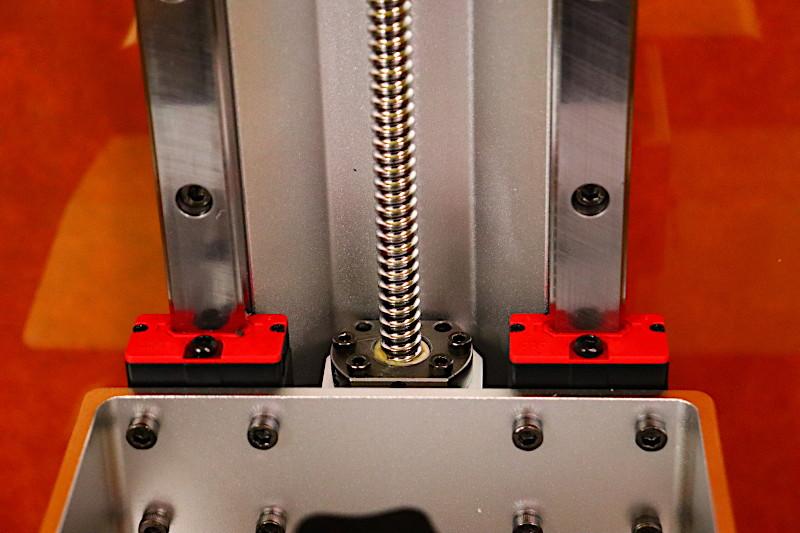
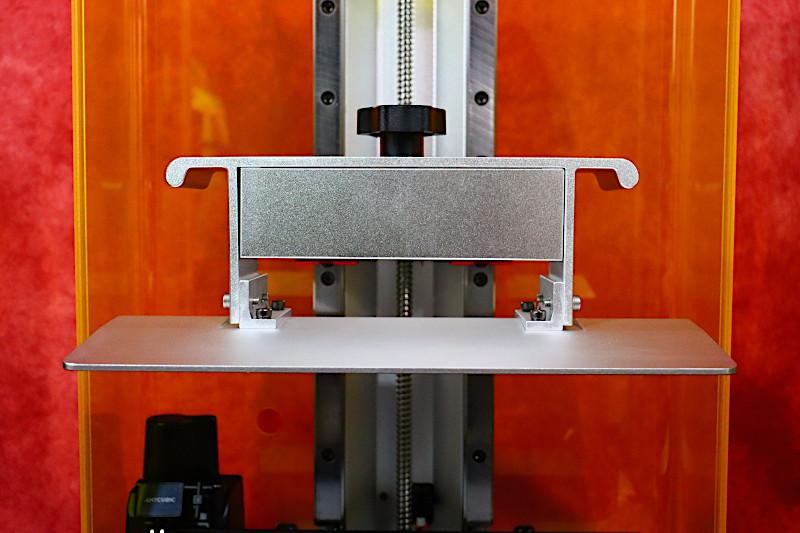
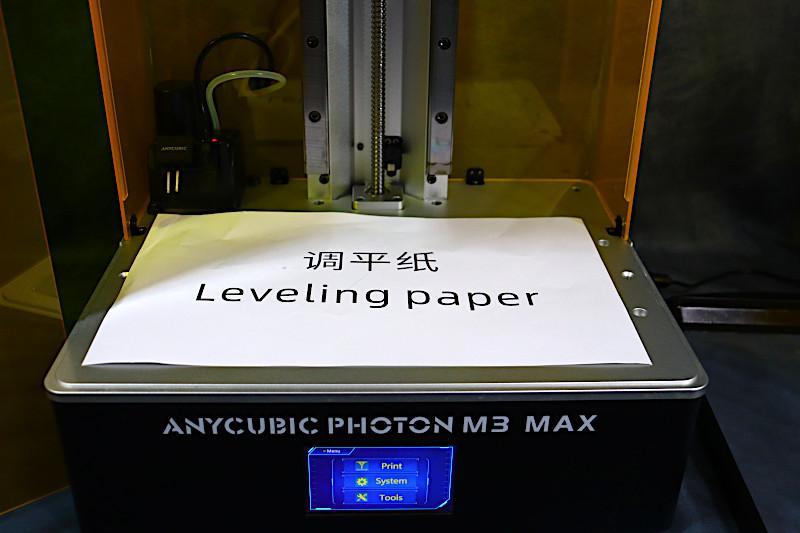
Bed Leveling
Due to the combination of a dual linear rail and an anti-backlash nut, the Photon M3 Max’s Z-axis travels smoothly and precisely throughout the printing process. As with the rest of SLA printers, levelling the build plate of the Photon M3 Max printer is straightforward. Loosen four screws from the plate and position it on a sheet of paper before re-tightening them.
©3DWithUs – Photo: Will Zoobkoff
©3DWithUs – Photo: Will Zoobkoff
The Anycubic Photon M3 Max resin 3D printer is exactly what you’ve been searching for in terms of looks and functionality. The 4.3-inch touchscreen and USB port are situated on the front and right sides of the sturdy chassis, while the yellow detachable top completes the design. It is a straightforward design that works. One item to note is that the front cover may benefit from hinges on one side or at the top; this is not unexpected!
Resin Auto Refill System
As with the Photon M3 Plus, one of the most intriguing improvements to the Photon M3 Max is the auto-refill mechanism. This enables for larger, longer prints without the need to stop the printing process to add more resin to the vat. Only the air and feed tubes must be attached to the auto-fill cap. Note that the auto-fill system’s top is intended to fit on 1 kilogram Anycubic bottles.

©3DWithUs – Photo: Will Zoobkoff

©3DWithUs – Photo: Will Zoobkoff
Order at least one for use with the auto-fill system. In my tests, the auto-fill function performed well. There are cycles. It will monitor the level and, if necessary, engage the pump to add additional resin to the vat. Once the resin reaches the maximum level, the sensor above the vat will activate and switch off the pump. To clean the tube, a retract cycle will begin. It might be quite shocking to hear for the first time. The retract cycle is effective in clearing resin from the feed tube in preparation for the next cycle or bottle. It is advisable to clean the tube between colours to prevent contamination of the subsequent resin.
AirPure – Testing Air Purifier
The use of the Anycubic AirPure filtration system helped reduce the printer’s resin fumes, and a single charge of the AirPure battery lasted 16 hours without issue. They also come in a two-pack, allowing you to place one next to the printer and the other inside to maximize filtering.
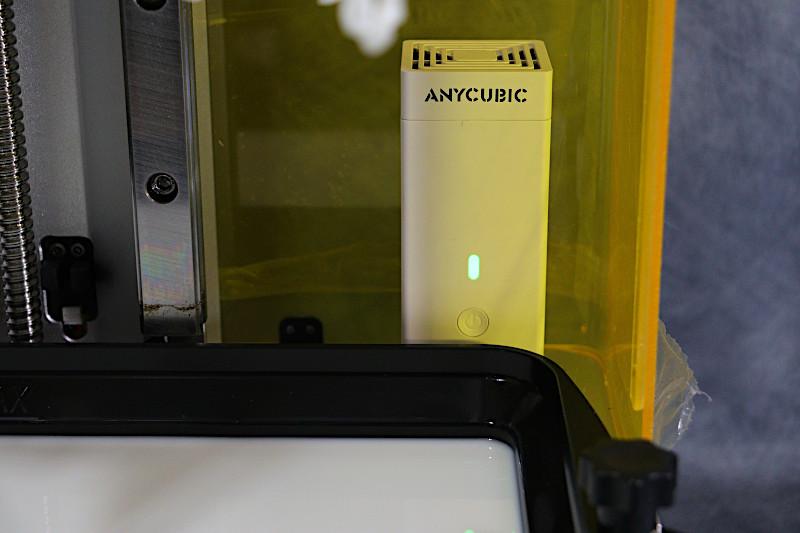
©3DWithUs – Photo: Will Zoobkoff
Unboxing and Initial Setup
Included in the box:
• Power supply
• Spatula tool
• Plastic scraper
• USB drive
• Three pairs of gloves
• Three resin filters
• Resin vat
• Refill tubes and cap
• Aluminum laser engraved build plate
• Printer
• UV Cover in two parts
• Screws for the cover and extra for the resin vat
• Allen keys
• Screen protector
• User manual
• Level Sheet
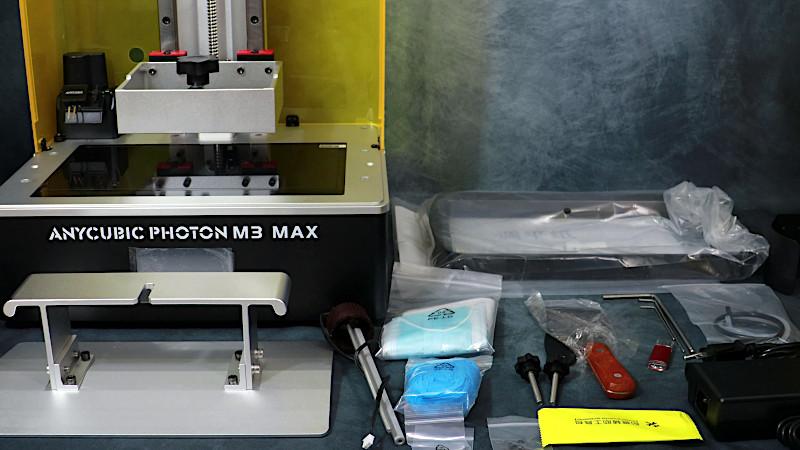
©3DWithUs – Photo: Will Zoobkoff
Anycubic is renowned for manufacturing 3D printers with minimal setup requirements. To begin printing, take the Photon M3 Max from of its packaging. Install the rear cover, air and feed tubes for the automatic refilling mechanism. Attach the bottle holder to the rear, position it on a level surface, and power the machine. Initially, you must ensure that your construction platform is level. This may be accomplished using the paper that comes with it.
©3DWithUs – Photo: Will Zoobkoff
Now is the time to loosen the four bed screws. This will enable the bed to move freely. Once the bed has settled in the home position , apply gentle pressure to the bed and tighten the screws.

Once everything is tight, press the z=0 button to conclude the process of levelling.
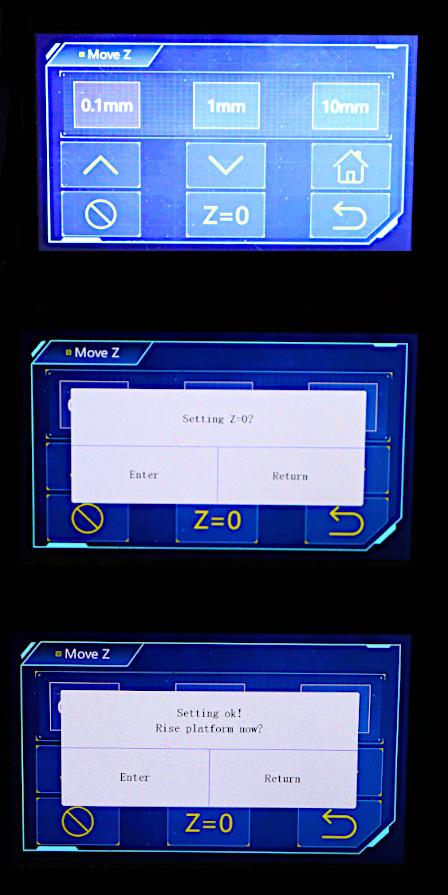
Afterwards, two bolts are used to secure the resin vat in place. The remaining steps consist of filling the vat, ensuring the construction plate is secure, and placing the lid. Now you can print.

©3DWithUs – Photo & Prints: Will Zoobkoff
Photon M3 Max Large Print and Resolution Test
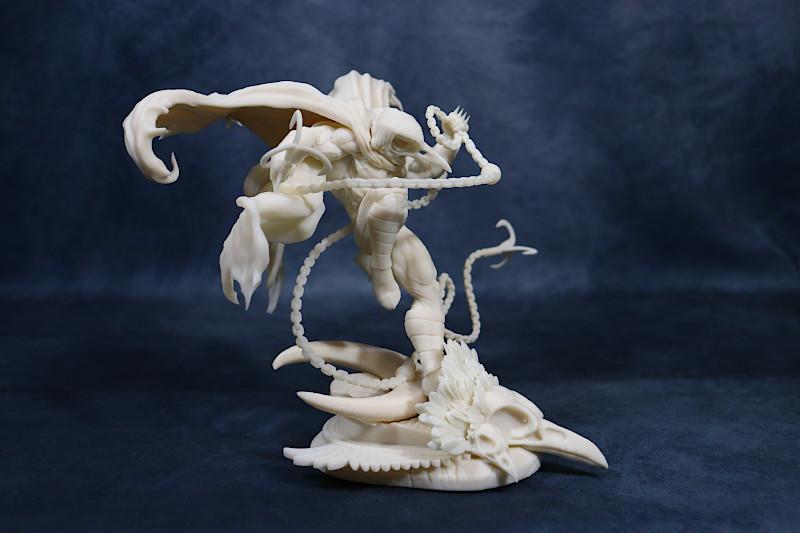
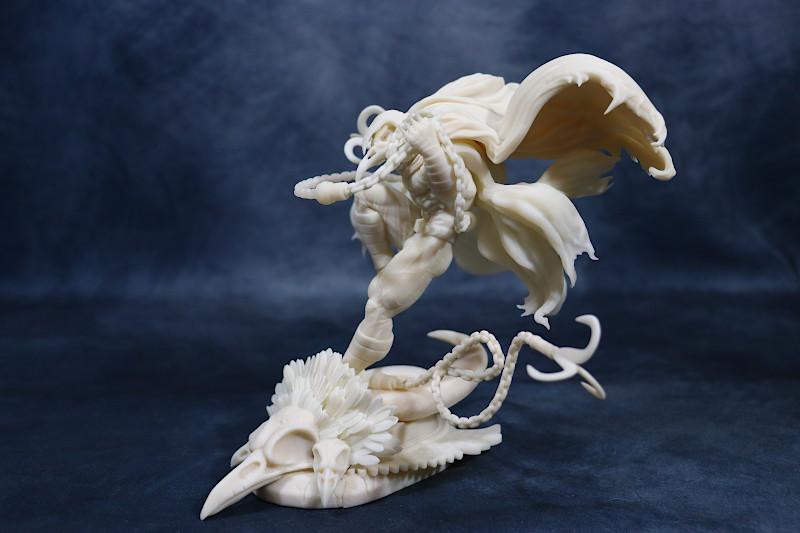
After the first successful test print with the Photon M3 Max, I wanted to print a model to demonstrate the potential of the 7K screen. After examining my collection of models, I choose to try the Moon Knight Sculpture by Wicked3D. With the Photon M3 Max, I was able to print the entire statue in only two prints. I chose to print the model at a size of 50% so that it could be completed in two prints. Using Anycubic Craftsman White resin, each piece was formed flawlessly. I used the same slicing settings for all my prints, I kept my lift speeds lower due to the size of the bed.
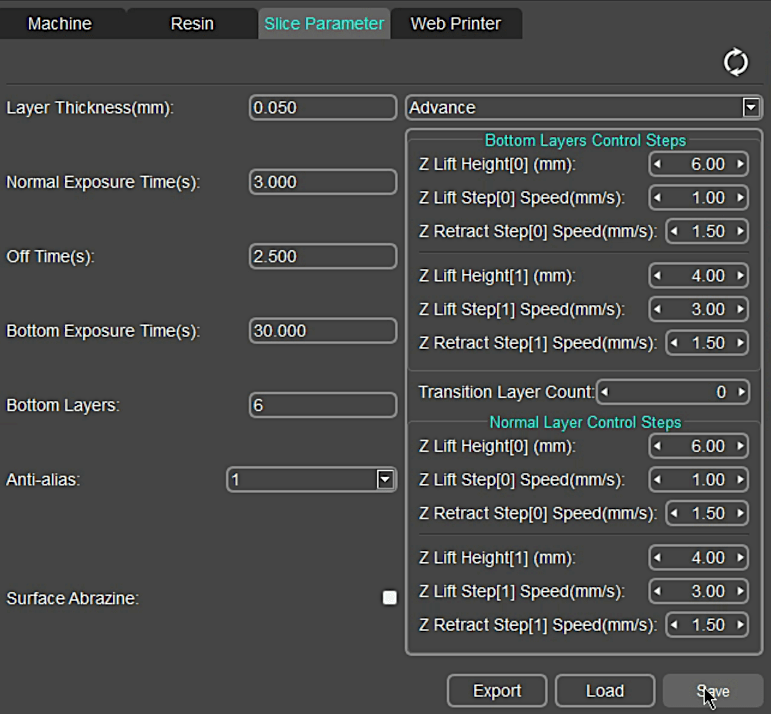
Screenshot: Anycubic Photon Workshop Slicer
The Photon M3 Max’s 7K display rendered every feature crystal clear and distinct. Wicked3d’s models are ideal for testing the level of detail your SLA printer can produce. The material of the suit and hood stunned me.

©3DWithUs – Photo & Print: Will Zoobkoff
©3DWithUs – Photo & Print: Will Zoobkoff

©3DWithUs – Photo & Print: Will Zoobkoff
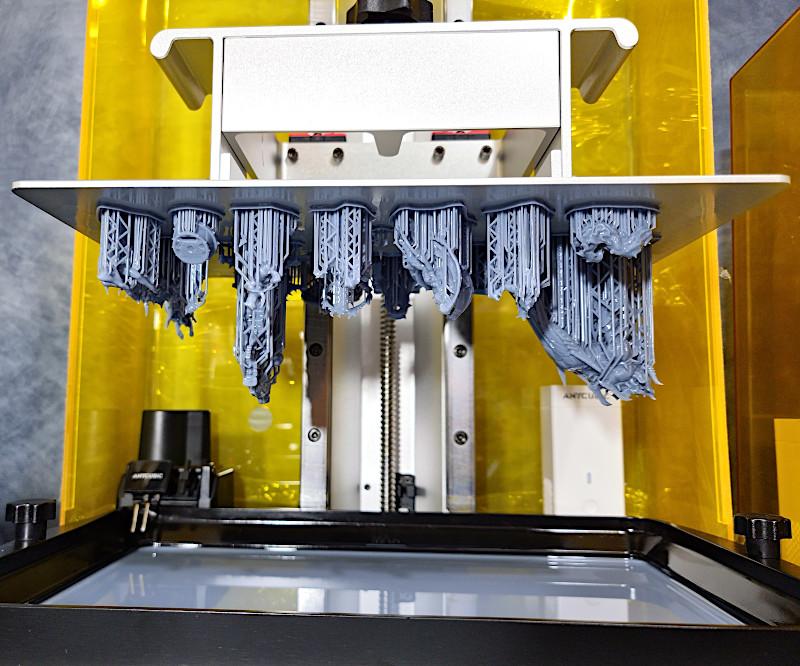
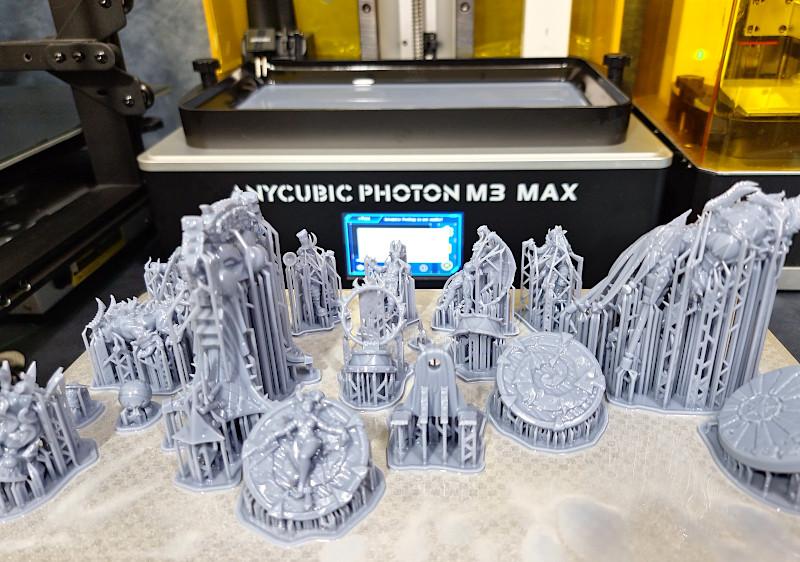
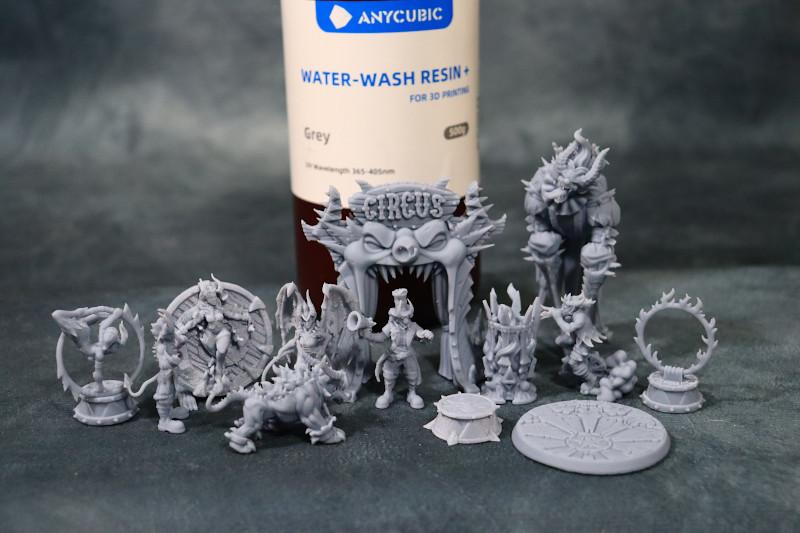
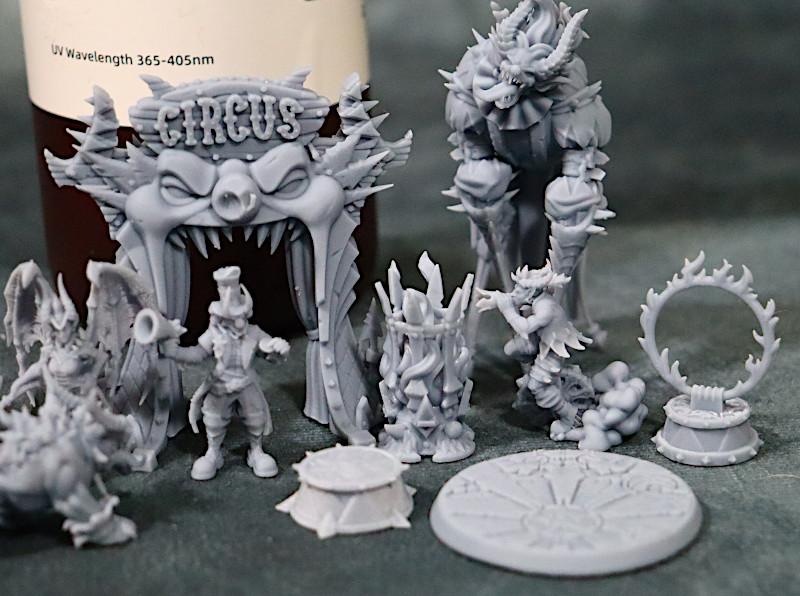
Full Build Plate 3D Printing Test
After finishing the Moon Knight statue, I wanted to experiment with miniature printing. This assortment of Demonic Circus by DrunkenDwarf characters was an excellent selection. I was able to fit all of the characters and props on a single bed. For this testing part of my review, I used Anycubic Water Wash Grey Resin.
©3DWithUs – Photo & Print: Will Zoobkoff
©3DWithUs – Photo & Print: Will Zoobkoff
©3DWithUs – Photo & Print: Will Zoobkoff

©3DWithUs – Photo & Print: Will Zoobkoff
©3DWithUs – Photo & Print: Will Zoobkoff
One of the benefits of the Photon M3 Max is that it can handle many models at once, or alternatively, it can print far larger models than smaller SLA printers. The Photon M3 Max does not disappoint; each print is flawless and the level of detail is astounding. Just a friendly reminder: SLA printing requires that the vat be inspected after each print to verify that the FEP is clean and free of debris.
Conclusion
I hope my Photon M3 Max review is helpful. The machine Max is a wonderful choice for SLA printing, regardless of whether you are a novice or an expert user. The combination of the 7K mono screen, the auto-refill mechanism, and the vast build volume makes it a fantastic alternative for expanding your printing capabilities and the number of models you can output each print, therefore substantially boosting your efficiency.
The Photon M3 Max is one of the best large-volume SLA printers on the market, and its pricing is far cheaper than that of comparable-sized rivals. If your budget permits, I strongly suggest investigating the Photon M3 Max. The combination of 7K resolution with a resin auto-fill mechanism that eliminates the need to constantly monitor and add resin is a tremendous advantage. In a world where trends are always shifting, SLA is rapidly becoming the system of choice for the manufacturing of anything from jewellery to gaming parts and even cosplay accessories.
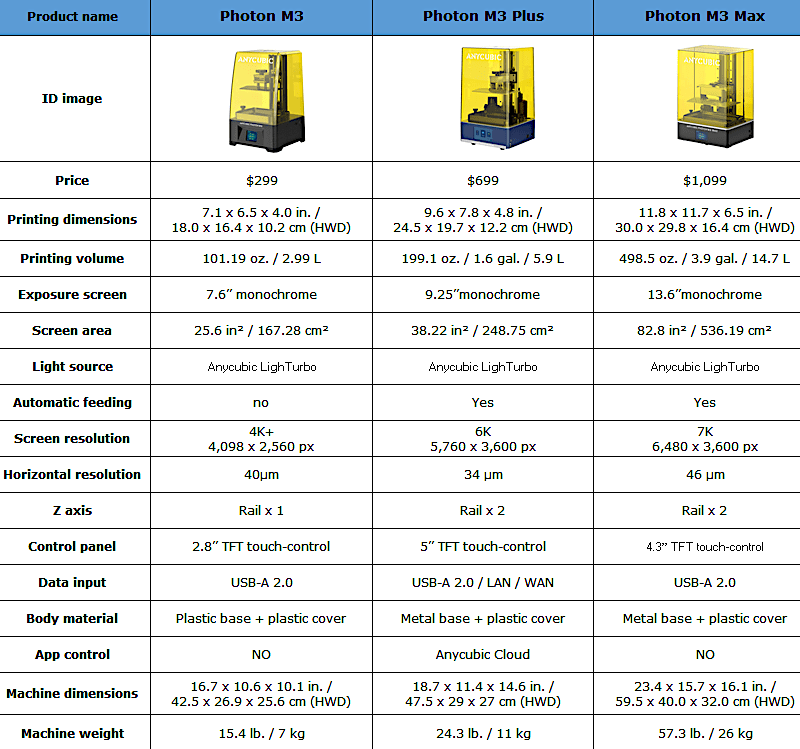
Anycubic Photon M3, Photon M3 Plus, and Photon M3 Max Comparison
Anycubic has released three printers in the Photon M3 line: the Photon M3, the Photon M3 Plus, and the Photon M3 Max. Please find the differences in the table below.
- Read more: Anycubic Photon M3 Review
- Read more: Anycubic Photon M3 Plus Review
Amazon
AliExpress
Official Website
Read more: Anycubic Photon M7 Max Review
Compared to its predecessor, the Photon M3 Max, the Anycubic Photon M7 Max has a myriad of new features designed to streamline and expedite printing. The new COB light system and Fresnel lens improve light uniformity compared to previous LED panel systems, for a more level exposure on the build plate. The Intelligent Release 2.0 system with pressure sensors dynamically switches between lift height of a layer, in helping to reduce printing time. Read more …
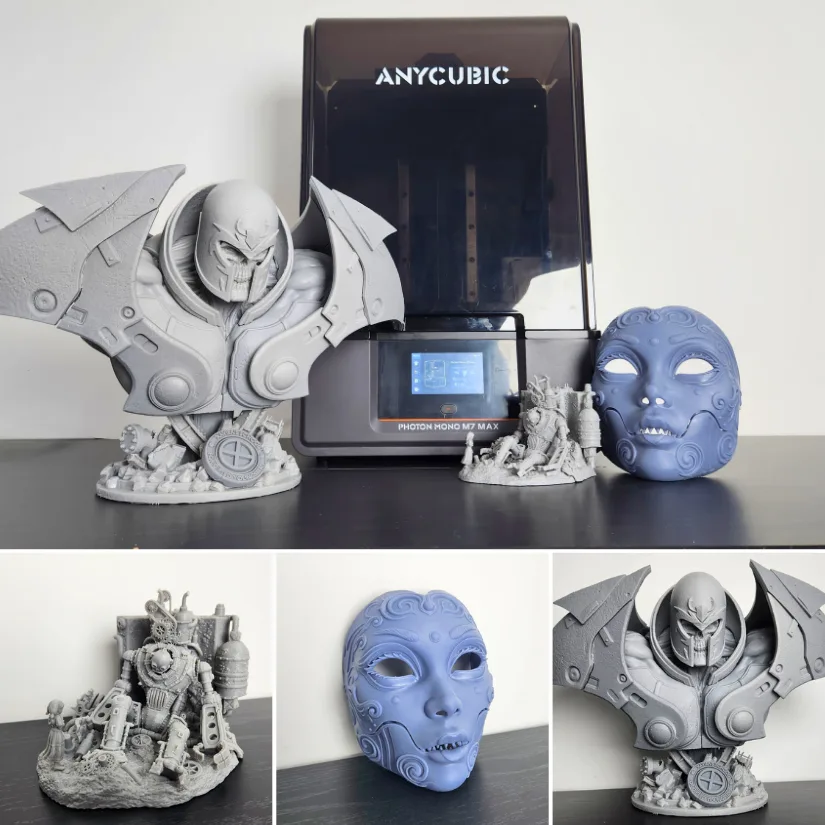
©3DWithUs – Photo and Print: Will Zoobkoff
Review Summary
The Anycubic Photon M3 Max SLA 3D printer is at the forefront of technology. Due to its high build capacity, 7K screen, and monochrome display, it satisfies all of the current resin 3D printing trends. This product is capable of creating high-quality prints effortlessly. The Photon M3 Max is the largest model in the new Photon lineup from Anycubic and offers a tremendous build volume. The Photon M3 Max is one of the best large-volume SLA printers on the market, and its pricing is far cheaper than that of comparable-sized rivals. If your budget permits, I strongly suggest investigating this machine.
PROS
• Massive Build Volume
• 7K monochrome screen
• Auto refill system
• Front removable cover
• Easy setup
• Fast print times
CONS
• Absence of WiFi or LAN connection
• Cover could use a hinge system