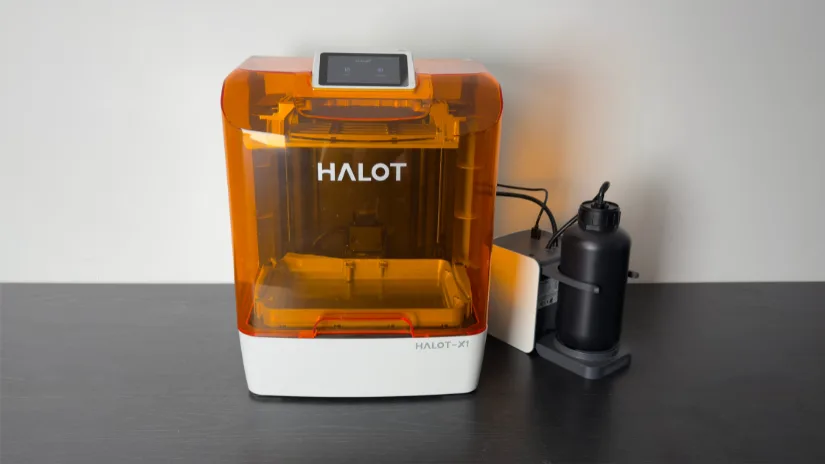
Piocreat’s Halot X1 aims to make ’16 K desktop resin printing’ more than just marketing jargon. Its 10.1-inch mono LCD packs 15,120 × 6,230 pixels, yielding an effective 14 × 19 µm pixel size that promises razor-sharp detail rivaling far pricier machines. Yet resolution is only half the story. Piocreat flips the typical MSLA motion system by locking the build plate in place while the vat, screen, and light engine travel underneath, eliminating manual leveling and, in theory, reducing vibration-induced artifacts. Add a honeycomb-matrix light source rated for up to 170 mm/h, a quick-release build plate, and an optional auto-feed unit that tops up resin mid-print, and the Halot X1 reads like a wish list for everyone from tabletop-miniature painters to product-design studios.
In this review, we test those promises—speed, surface finish, and day-to-day usability—to see whether the Halot X1 is just spec-sheet theater or a genuine leap toward hassle-free, high-detail resin printing.
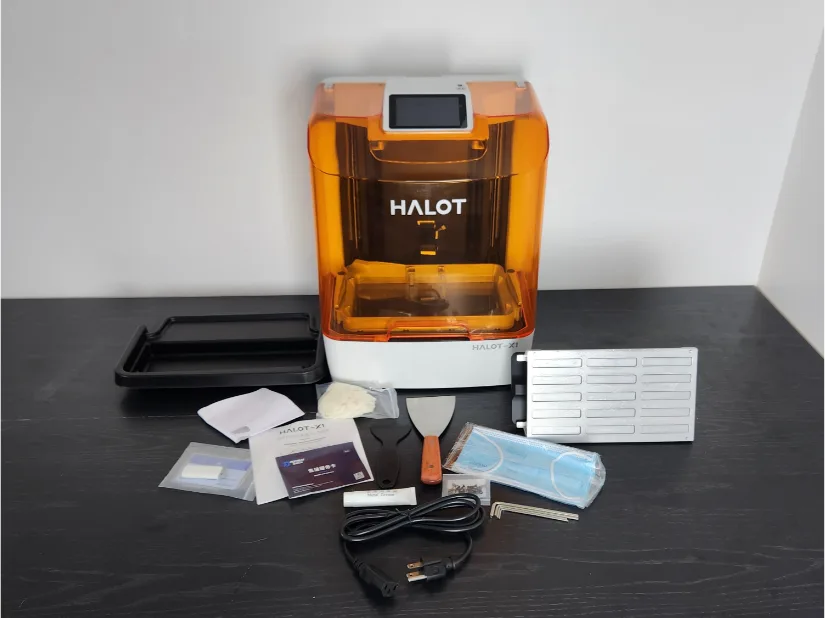
What’s in the Box
The PioCreat HALOT X1 comes with a comprehensive accessory kit, including a metal scraper, plastic scraper, power cable, USB drive, filters, hex keys, lubricant, gloves, spare screws, masks, a manual, and a print removal tray.
©3DWithUs – Photo: Will Zoobkoff
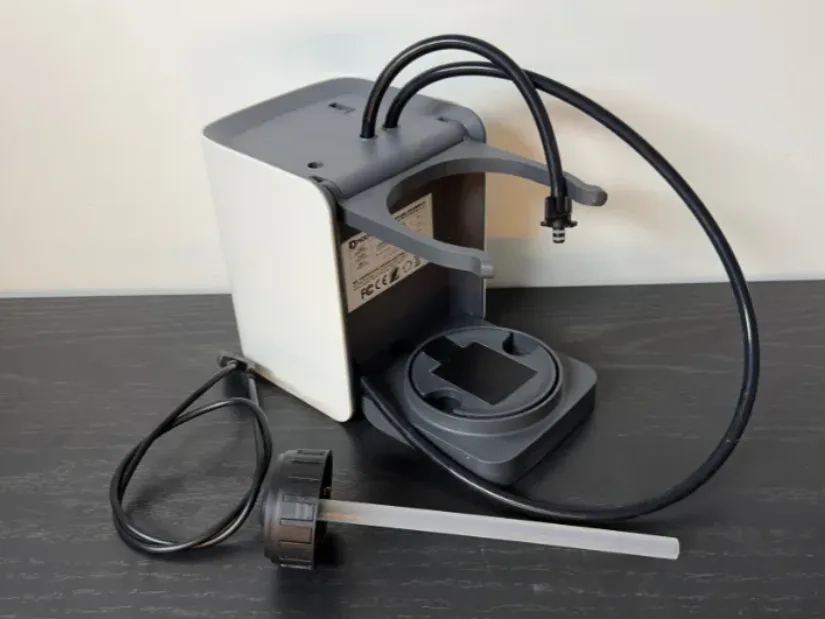
The PioCreat AFU (Resin Auto-feed Unit) package includes the AFU feed unit, resin caps, a resin vat adapter, and an extra resin bottle tube.
Specifications
| Technology | LCD resin 3D printing |
|---|---|
| Build Volume | 211.68 × 118.37 × 200 mm (8.33 × 4.66 × 7.87 in) |
| Overall Dimensions | 344 × 331 × 434 mm |
| Weight (Net / Gross) | ~12.9 kg / ~16 kg |
| Resolution | 16K Mono LCD: 15,120 × 6,230 px (14 × 19 µm pixel) |
| Layer Thickness | 0.01–0.2 mm |
| Printing Speed | Up to 170 mm/h |
| Z-Axis Accuracy | 0.01 mm |
| Light Source | Honeycomb Matrix Light Source |
| Exposure Intensity | 6500 ± 10% µW/cm² |
| Touchscreen | 3.98-inch capacitive |
| Connectivity | USB and Wi-Fi |
Setup & Design
Setting up the HALOT-X1
Setting up the HALOT-X1 is simple and takes only a few straightforward steps.
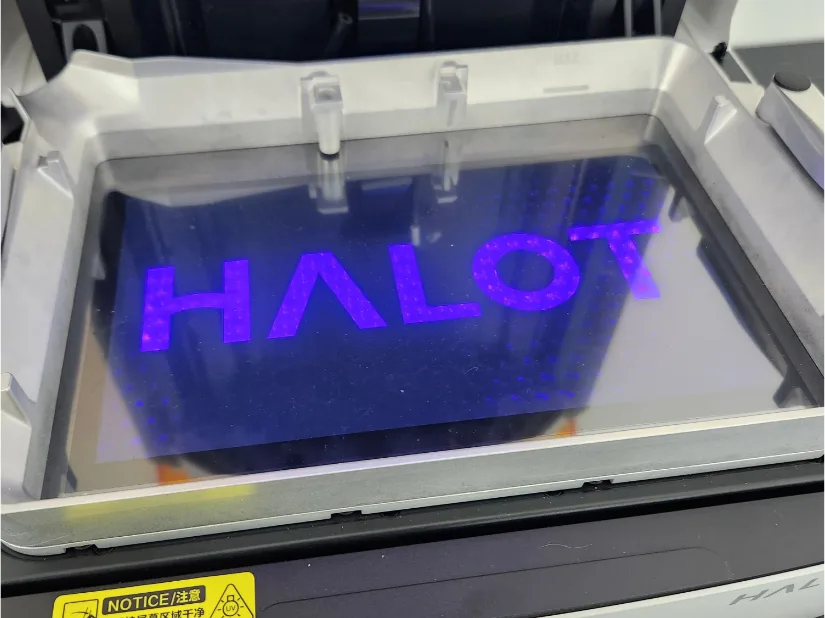
Start by unboxing the machine, removing all transit foam and tapes, and peeling the LCD’s protective shipping film.
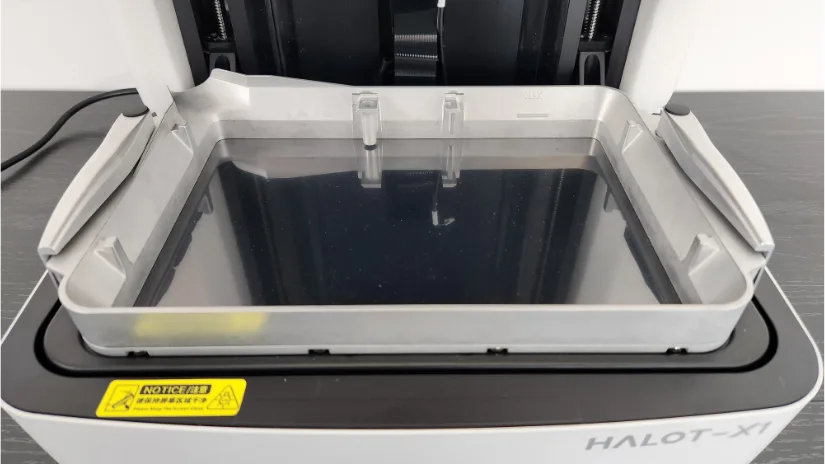
Inspect the resin vat to ensure the FEP is clean and evenly tensioned, then seat the vat and lock the tabs.
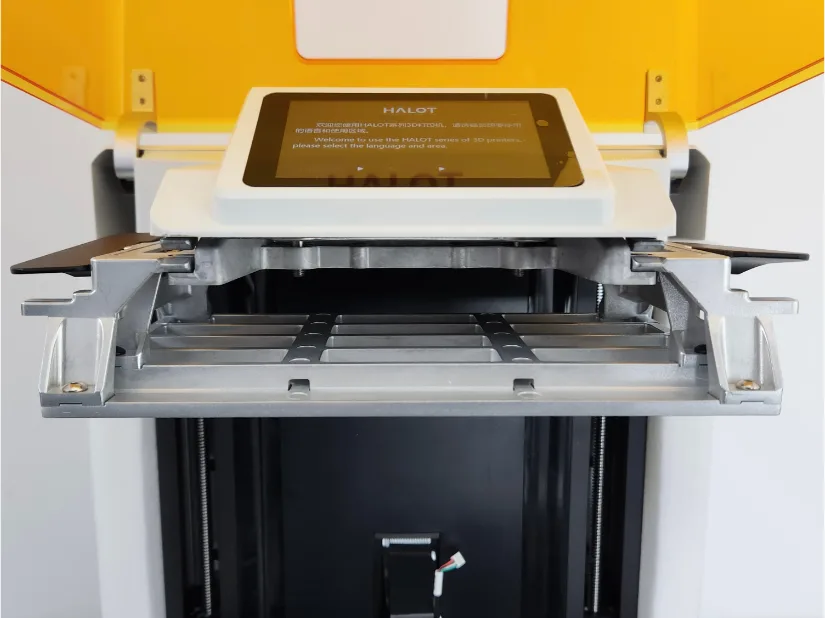
Thanks to the fixed, leveling-free build plate, there’s no manual adjustment—just slide the plate into its holder, push it fully back into position; as the print starts, the build plate will lock automatically.
Power on the printer, set your language and location, and connect to Wi-Fi using the touchscreen prompts.
Before your first print, wipe the build plate so it’s clean and dry.
As always when working with resin, wear gloves and a mask, work on a covered surface, and ensure adequate ventilation.
Overall, the leveling-free design and guided setup make the HALOT-X1 one of the easiest resin printers to get from box to first print.
Setting up the AFU – Resin Auto-feed Unit
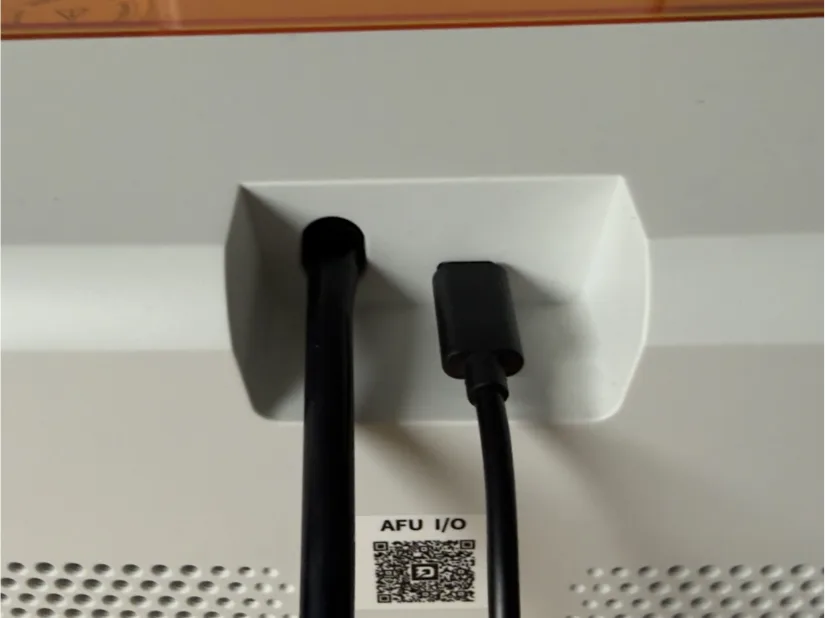
Place the AFU beside the HALOT-X1. Insert a compatible resin bottle into the holder, fit the supplied cap, and connect the feed hose.
Route the feed tube to the printer’s inlet and connect the AFU to the printer via USB.
©3DWithUs – Photo: Will Zoobkoff
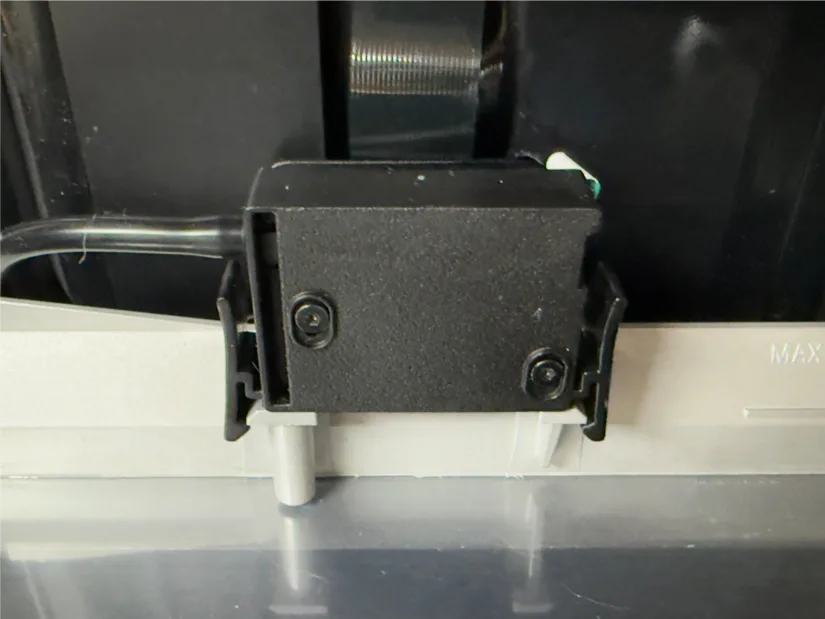
Attach the hose adapter clip and the resin-level sensor to the rear of the vat.
The feed clip has two positions: mount it on the vat to feed resin and keep the level topped up during printing, or—if you’re not using the AFU—move the clip to the storage slot behind the vat, which has a rubberized base to prevent leaks from the hose.
Neatly route the feed tube and sensor/data cable along the rear of the vat to avoid kinks.
Use the on-screen Prime/Feed function to push resin through the line and purge any air (and any factory fluid).
With RFID-tagged bottles, the printer will detect the resin and apply defaults; with third-party resins, choose a generic profile and set exposure parameters in your slicer.
Enable auto-top-up so the AFU maintains resin level during long jobs, and preheat the resin in cool rooms to reduce viscosity.
When changing colors or brands, run the drain/flush routine and cap the bottle before removing the AFU to prevent drips and cross-contamination.
Design Overview
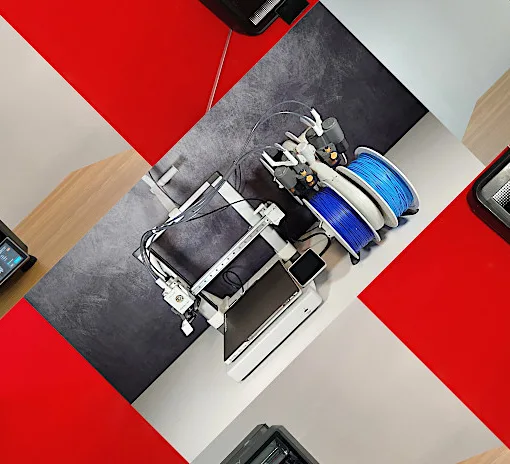
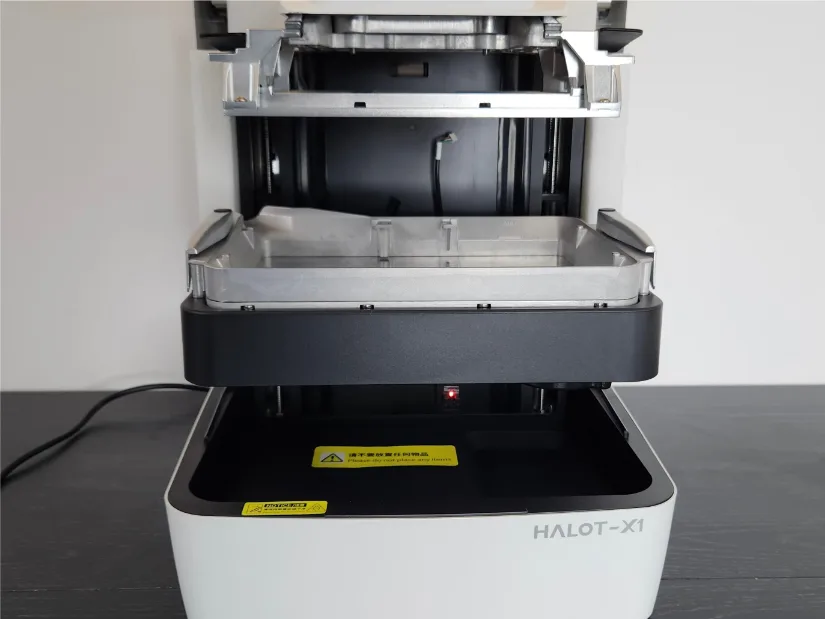
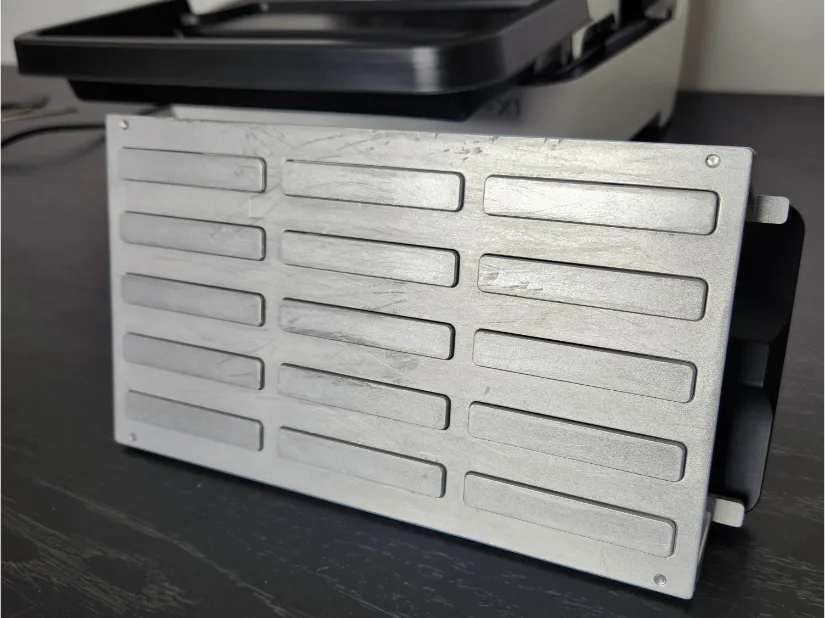
The HALOT-X1’s design leans hard into usability and rigidity. Up top, the fixed, leveling-free build platform is rock-solid, and the build plate uses wide removal tabs so you can twist and lift finished parts without prying or gouging the surface. The real innovation is below: instead of the plate traveling up and down, the resin vat moves while the platform remains solidly mounted, which reduces vibration and Z-wobble, shortens peel distances, and makes layer separation more consistent—especially on taller prints.
©3DWithUs – Photo: Will Zoobkoff
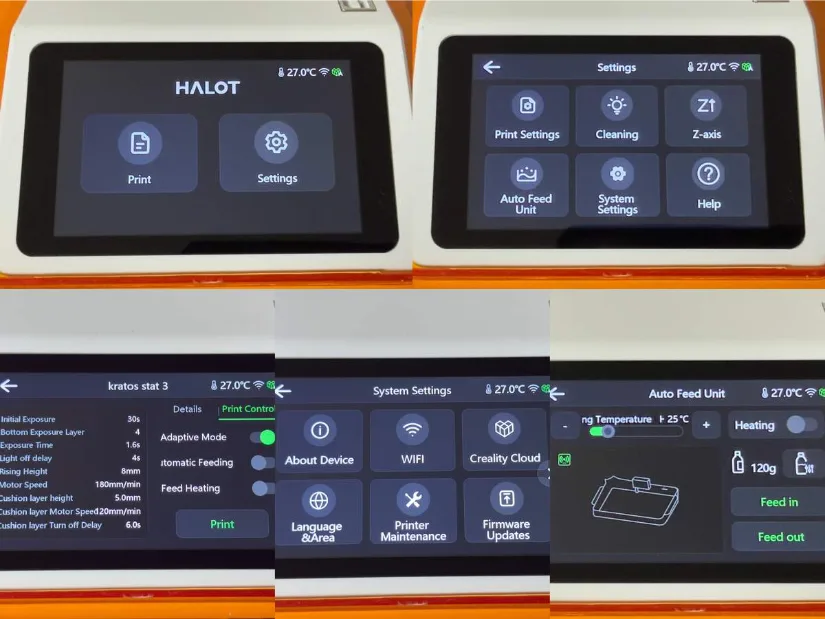
The chassis feels dense and well-damped, the tinted cover seals cleanly, and the compact touchscreen keeps controls simple with a clear, easy-to-navigate menu (quick access to homing, exposure tests, Wi-Fi, and AFU controls). Overall, it’s a smart, stability-first layout that translates directly into easier setup, cleaner first layers, and fewer failed starts.
©3DWithUs – Photo: Will Zoobkoff
Software
HALOT BOX is a clean, beginner-friendly resin slicer with the core tools you expect: profile-based exposure controls, auto/manual supports, hollowing with drain holes, island detection, and anti-aliasing.
Workflow is straightforward—import, orient, support, slice—then export to USB (or send over the network, where supported).
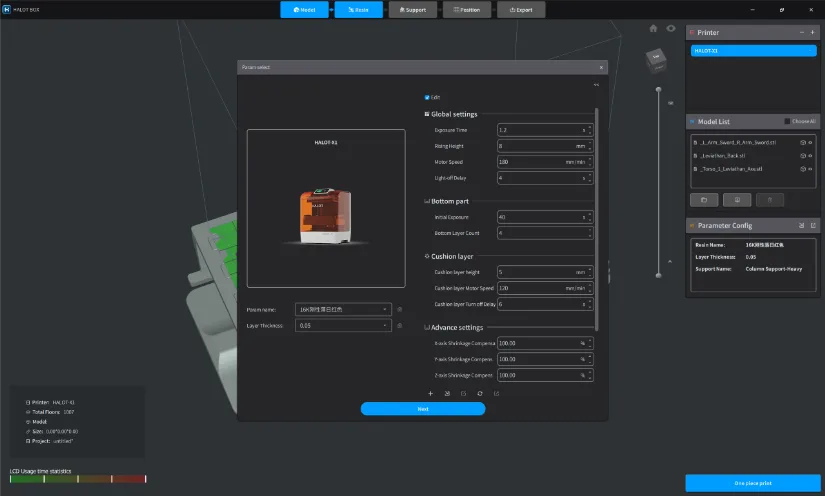
In testing, the UI feels responsive and the presets for the HALOT-X1 get you printing quickly, but note that the resin usage and print-time estimates are currently unreliable (they can skew high or low depending on the model).
These are known software issues and are slated to be corrected in upcoming updates, so accuracy should improve over time.
Results
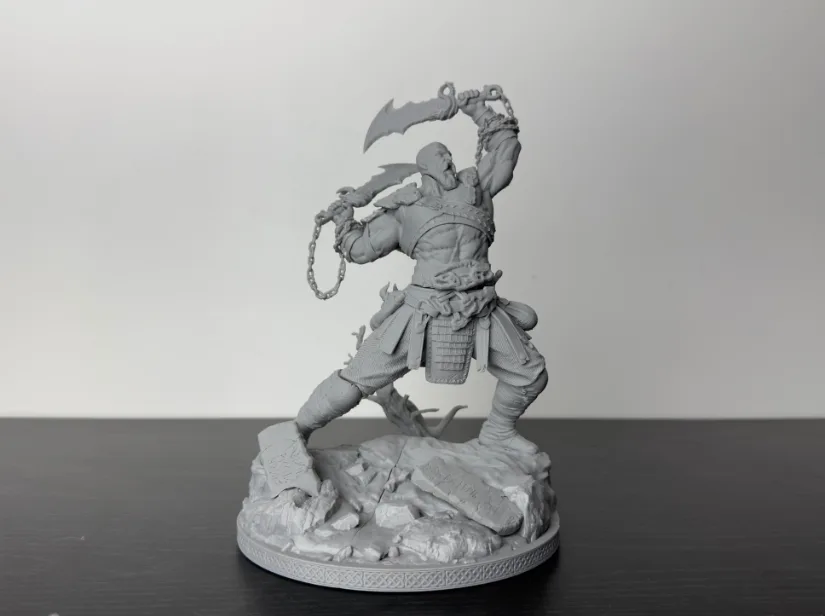
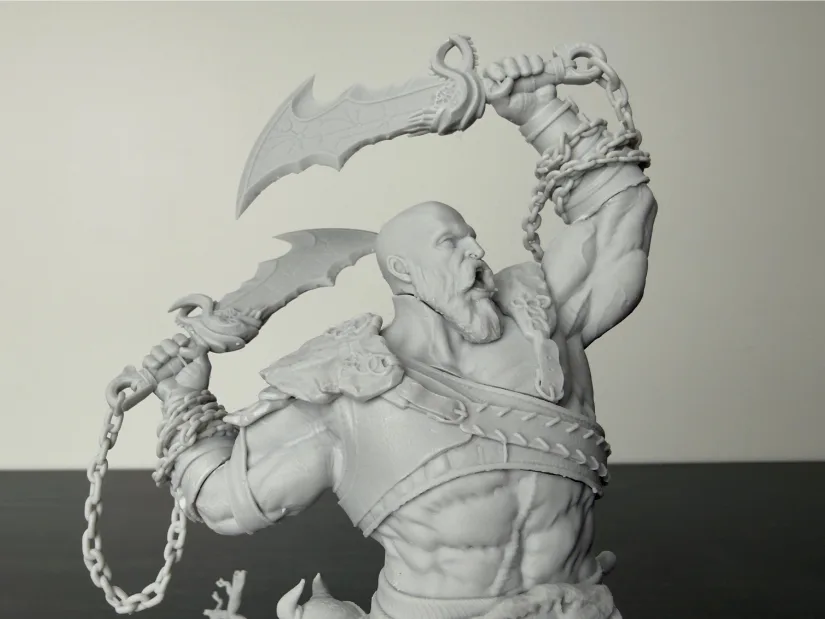
Wicked3D – God of War Kratos
For our first print, we chose a model from the Wicked3D collection, The God of War Kratos statue from Cults. The job required three build plates’ worth of parts, with each plate averaging 3–4 hours. Using the AFU and Piocreat 16K resin, the Halot X1 automatically heated and loaded resin into the vat before printing; we never had to refill mid-run, and the preheating helps minimize temperature-related failures. The printer’s 92-zone intelligent exposure partitions the LCD into individually controlled cells and only activates the zones under the model and supports, which reduces stray exposure, lowers thermal load, sharpens edges on small features, and helps extend the LCD’s lifespan—useful on intricate armor plates and fabric textures.
©3DWithUs – Print and Photo: Will Zoobkoff
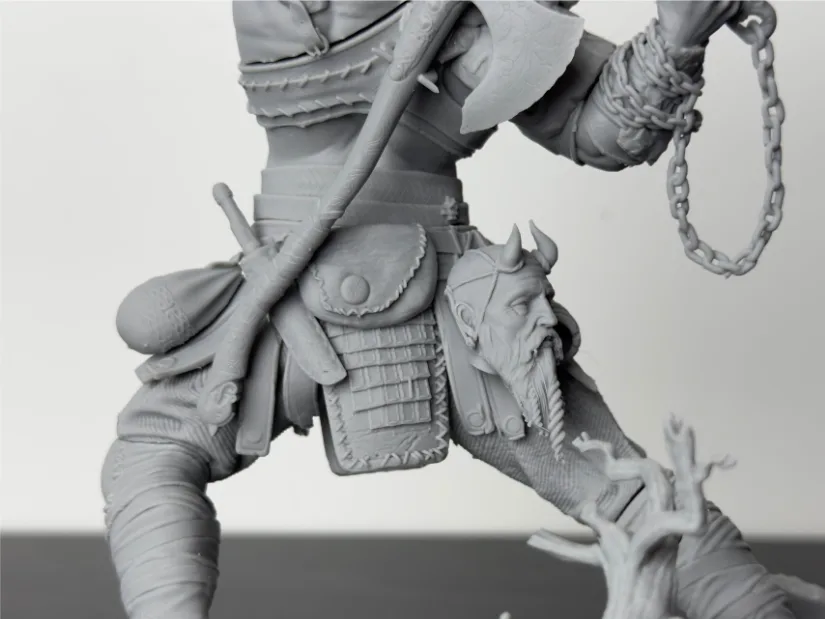
©3DWithUs – Print and Photo: Will Zoobkoff
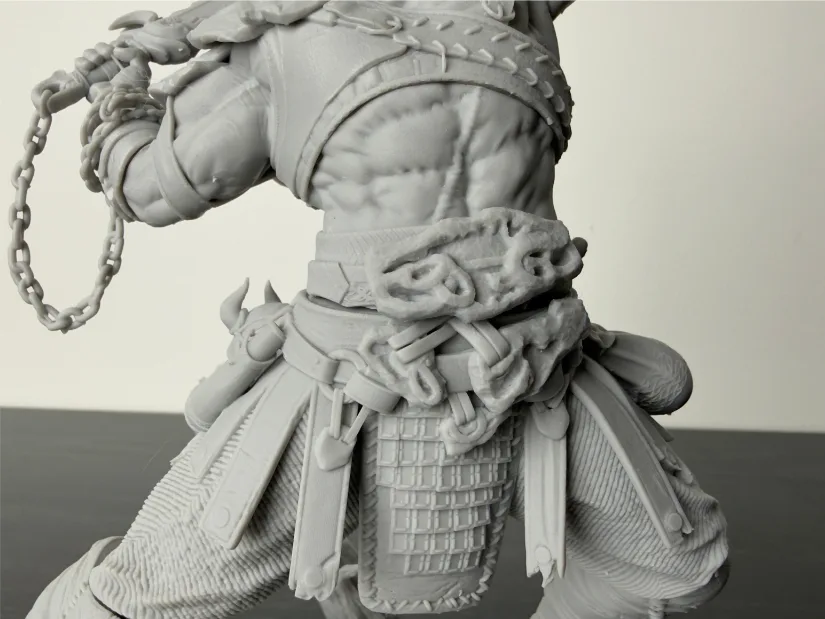
Once complete, removal was easy: a simple twist of the build plate’s tabs released most parts immediately, with a few stubborn spots needing a quick assist from a metal scraper. The results were excellent—crisp, 16K detail throughout, with the textures on the leather armor and fabric clearly on display.
Nerikson – Famine Horseman
For the next model in our testing, we printed one of the Horsemen statues designed by Nerikson—The Famine Horseman from MyMiniFactory—using Anycubic Standard+ resin. The print required four build plates, each taking roughly four hours, with the final plate containing the base pieces running a little over six hours due to the height of the parts.
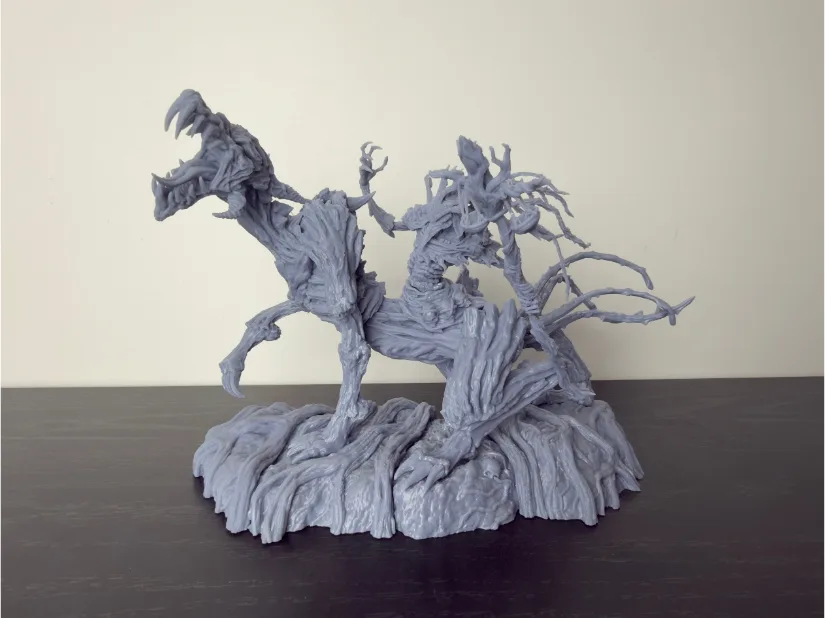
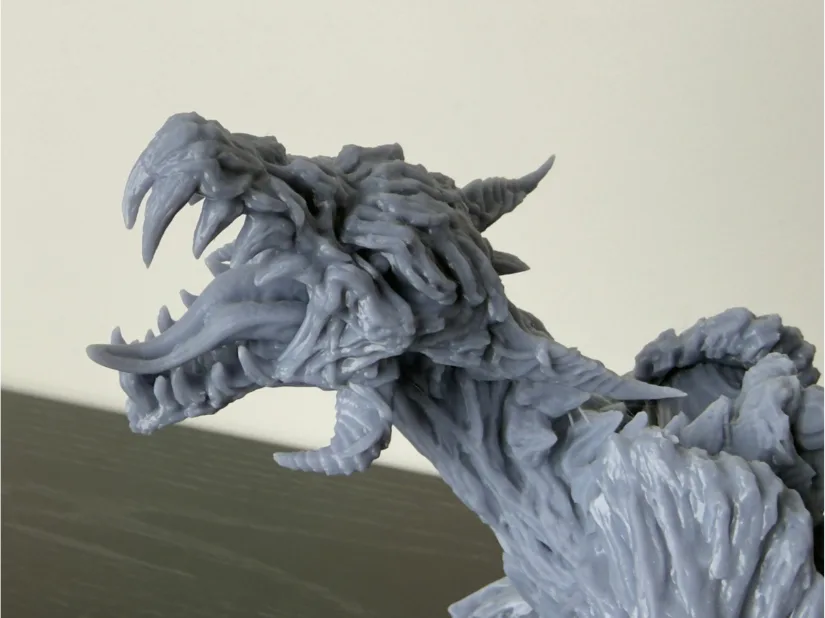
As with our previous prints, there were no issues during printing, and part removal was a breeze once complete. The Standard+ resin has a slightly softer look than the 16K resin used in the earlier test, but the results were still excellent: all details came out sharp and clear, and the smooth surfaces were clean without artifacting, thanks to the clean anti-aliasing. Even on the taller pieces, there were no signs of Z-wobble or movement, thanks in part to the stationary build plate and the resin vat performing the motion during the printing process.
Nerikson – Famine Horseman Standalone
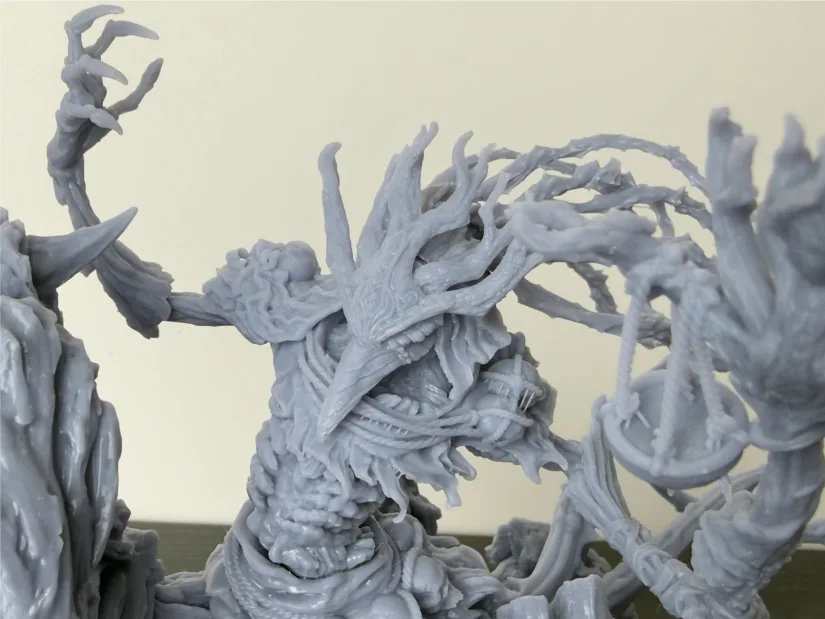
Building on the quality of the previous print, we selected the standalone Famine Horseman by Nerikson from MyMiniFactory. This model fit on a single build plate and finished in just over three hours. We chose Piocreat 16K resin to maximize fine detail and contrast, ensuring the final piece would really pop.
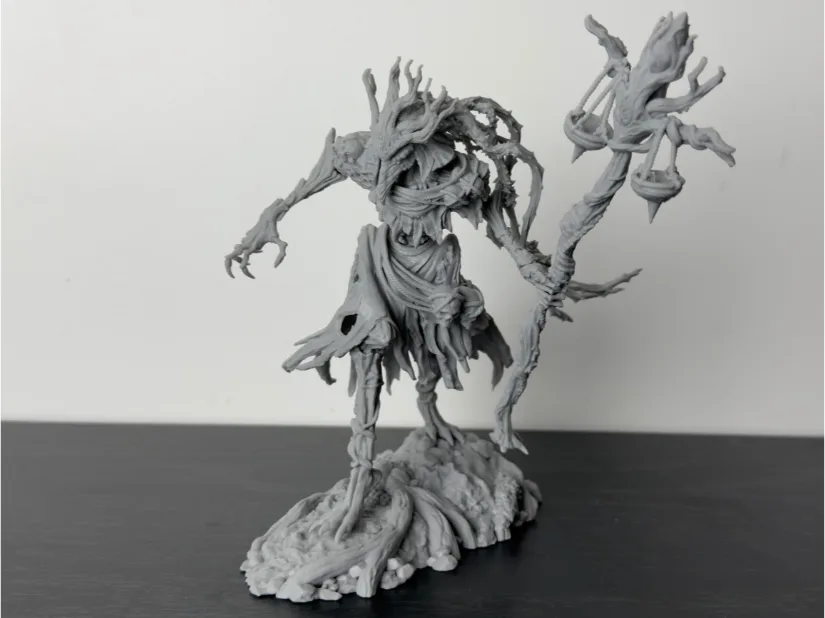
©3DWithUs – Print and Photo: Will Zoobkoff
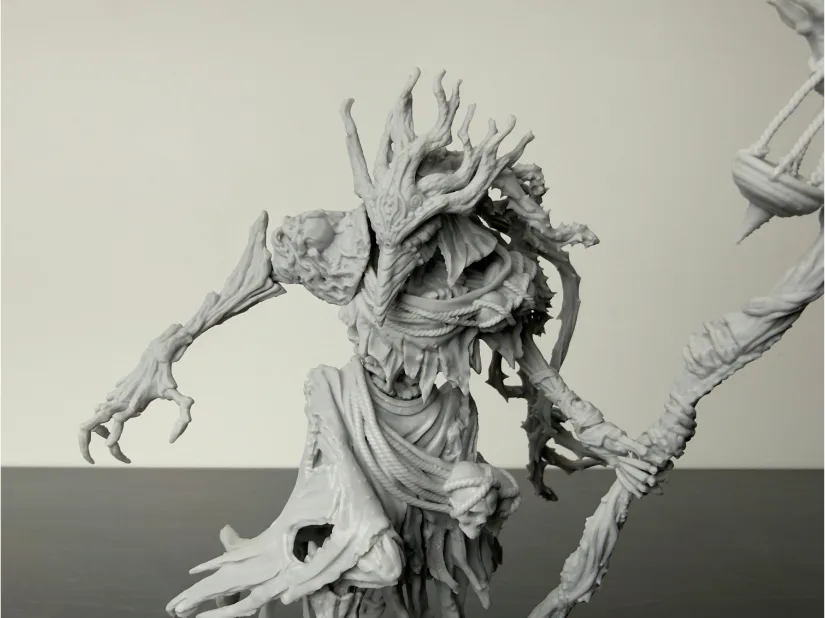
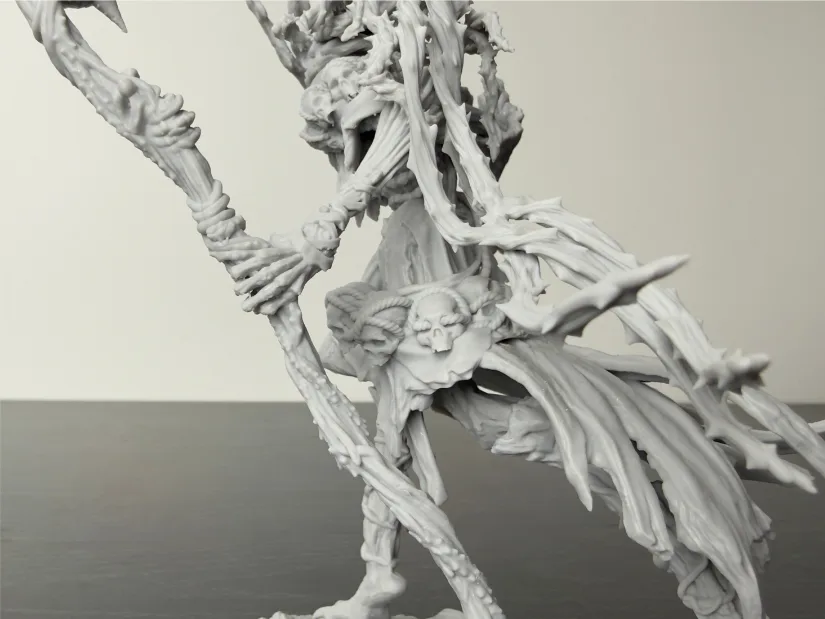
The results didn’t disappoint. There’s a remarkable amount of crisp detail—from the mask on Famine’s face to the belt of skulls at his waist. Even the small features, like the fingers and the intricate accents on the staff Famine carries, came out clean and well-defined with smooth surfaces and no visible artifacts. Support marks were minimal and easy to address, edges remained sharp, and subtle textures such as fabric folds read clearly. For a fast, single-plate job, the combination of the HALOT-X1 and 16K resin delivered excellent clarity and overall print quality.
Nerikson – Enika the Assassian 75mm
For the final print in our testing, we chose a Nerikson miniature—the Enika the Assassin 75 mm figure from MyMiniFactory. This job completed in just under two hours using Anycubic Standard+ resin. Thanks to the HALOT-X1’s high-resolution screen and rock-solid, leveling-free platform, miniatures are a breeze to run: fast startups, reliable adhesion, and consistent layer adheasion throughout the build.
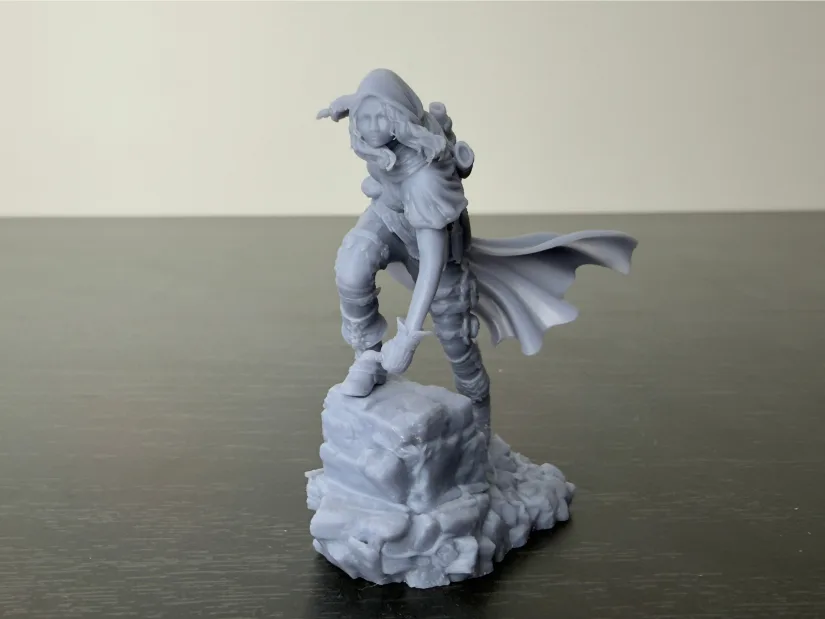
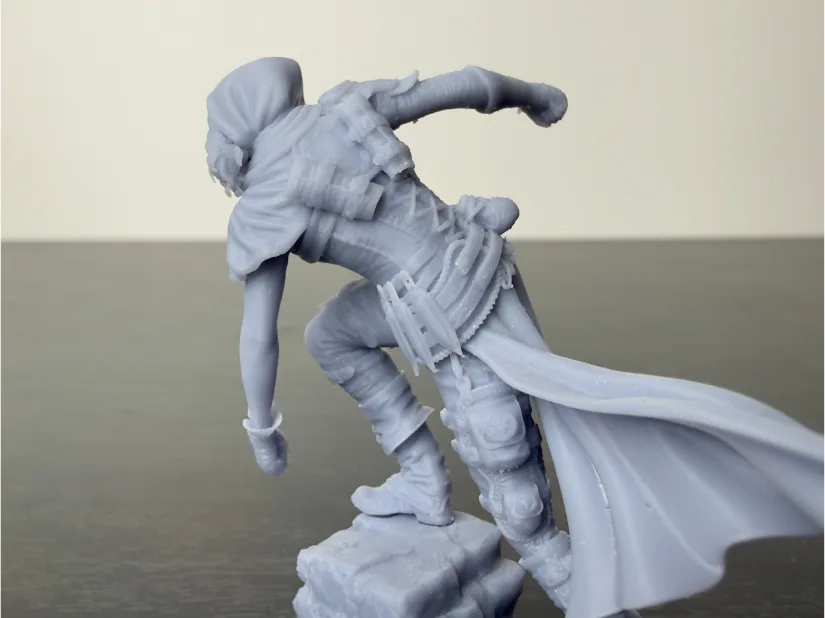
©3DWithUs – Print and Photo: Will Zoobkoff
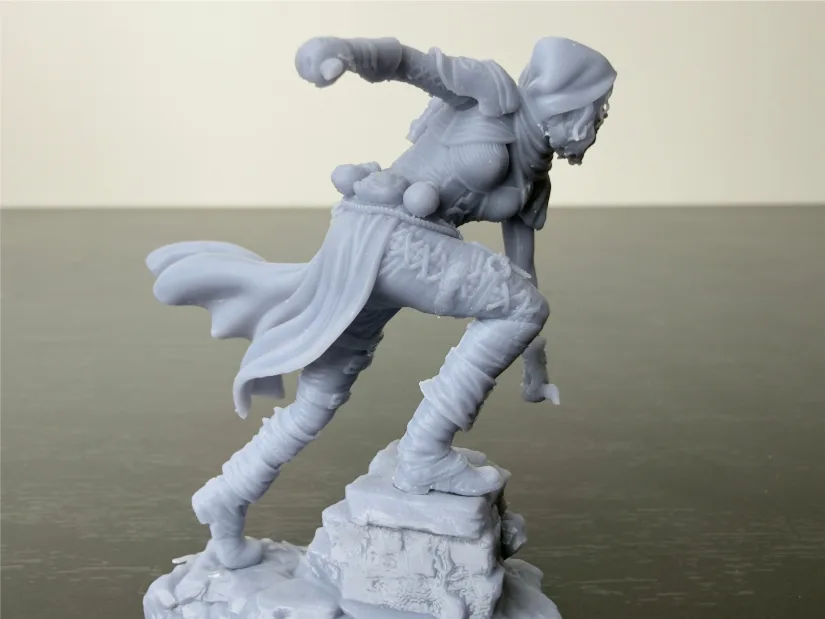
The results speak for themselves. Despite the small scale, fine elements—like the knives strapped to her leg, the facial features, and the trim details on the outfit—came out sharp and well-defined. Surfaces were smooth with minimal visible layer stepping, and anti-aliasing kept curved forms clean. Support marks were light and easy to tidy, and part removal was straightforward with the quick-release build plate. Given the X1’s build area and speed, you can comfortably batch several miniatures on a single plate, making it an excellent choice for tabletop gamers printing characters, squads, scenery, and objective markers.
Compare PioCreat HALOT-X1 to Other 3D Printers
Compare to the similar volume resin 3D printers in the same price range.
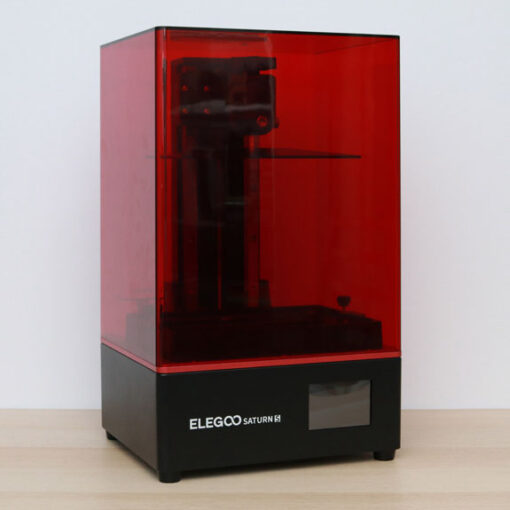
PioCreat HALOT-X1 is a large-volume resin 3D printer. In this category, volume and price wise, the competitors would be Elegoo Saturn 4 Ultra and Nova3D Whale4 machines. Innovative features wise, PioCreat HALOT-X1 is in an advanced position.

©3DWithUs – Print and Photo: Will Zoobkoff
About Piocreat
Piocreat (PioCreat 3D) is a Shenzhen-based additive-manufacturing company founded in 2015 that builds an end-to-end 3D printing ecosystem—hardware, software, materials, and services—backed by its own R&D and IP. Its portfolio spans pellet (FGF) printers for cost-efficient, large-format production, dental and medical resin systems, and the HALOT consumer line, serving industries from manufacturing and automotive to education and art/design. PioCreat is a wholly owned subsidiary of Creality Group, founded and led by Creality co-founder Fred Liu.
Have questions? Feel free to ask in the comment section below.
For a wider discussion or to share your own PioCreat HALOT-X1 prints, join us in the forum:
Conclusion and Pros & Cons

Compare the Prices & Bundles:
Official Store
PioCreat HALOT-X1 Review
Review Summary
Piocreat’s Halot X1 delivers on its promise of high detail with unusually thoughtful engineering. The star of the show is the stability-first motion system: the solid-mount build platform stays locked in place while the resin vat travels beneath it. In practice, that inversion pays off—peel forces feel consistent, tall parts show no hint of Z-wobble, and first layers come in clean. Pair that with the quick-release build plate tabs and part removal becomes a twist-and-lift routine instead of a pry-and-pray moment. Image quality is reinforced by the 92-zone intelligent exposure that lights only where it’s needed, trimming stray cure, lowering thermal load, and tightening edges on tiny features—exactly what you want for armor textures, fabric folds, and miniature detail.
Day to day, the X1 is easy to live with. The leveling-free setup shortens the path from box to first print, and the optional AFU adds real convenience by heating, identifying (with compatible bottles), and topping up resin automatically through long jobs. Software is the lone rough edge: HALOT BOX is intuitive, but resin usage and time estimates aren’t yet trustworthy. Still, those are fixable quirks, and the slicer otherwise gets the job done.
Verdict: If you value sharp, repeatable results with minimal fuss, the Halot X1’s moving resin vat + solid-mount bed architecture and intelligent light system make it a standout choice for miniature painters, prop makers, and small studios. With excellent detail, simple setup, and smart resin handling, it feels less like spec-sheet theater and more like a practical step toward hassle-free, high-detail resin printing.
PROS
- Solid platform
- Moving Vat!
- AFU RFID/ Heating / Weight
- Leveling free
CONS
- Software Resin estimates off
- Printing platform hard to clean