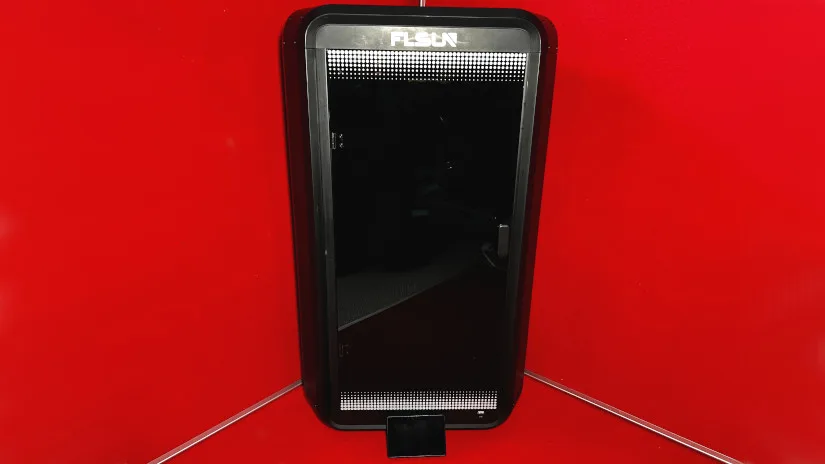
Since visiting Flsun a year ago, I have been eager to review the Flsun T1 Delta 3D printer. At that time, information on the new model was limited, but the promise of exceptionally fast print speeds was highlighted. The Flsun T1 is a delta-style printer, a less common design in the market than the more prevalent core X/Y or bed slinger configurations. This design features three arms that maneuver the extruder both around and upwards. Flsun is renowned for its delta printers, and the T1 stands out by offering significantly faster speeds than any previous models, except for its larger sibling, the S1. In this review, we will explore the capabilities of the T1 in terms of print quality and speed, tackling challenging prints and experimenting with various filaments. As usual, in the end, we will publish our conclusion and pros and cons.
Table Of Contents
- Specifications
- Unboxing and Assembly
- Setup and Calibration
- Features and Details
- Slicer Software
- Test Prints
- Comparison
- Conclusion and Pros & Cons
Price: $499-699
Product affiliate links: 3DWithUs is supported by its audience. Purchases via some links may earn us a small commission at no extra cost to you. This helps us to continue bringing you high-quality content. Our guides and reviews remain unbiased and independent.
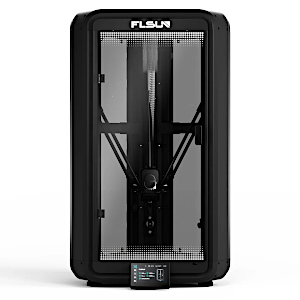
Flsun T1 Specifications
Product Dimensions: 436*490*836mm
Net Weight: 18.44kg
Enclosure: Acrylic Glass
Extruder: Dual-Gear Direct Drive Extruder
Max Printing Speed: 1000mm/s
Max Acceleration: 30000mm/s²
Nozzle MAX Temp: 300℃
Nozzle Diameter: 0.4mm
Build Plate: Textured PEI Plate
Bed MAX Temp: 110℃
Materials: PLA, PETG、TPU、PVA、PET、ABS、ASA, PA、PC etc.
Layer Height: 0.1-0.35mm
Build Volume: Φ260x330mm³
Display: 4.3″ Color Touch Screen
Connectivity: USB
Camera
Air Filter
Unboxing and Assembly
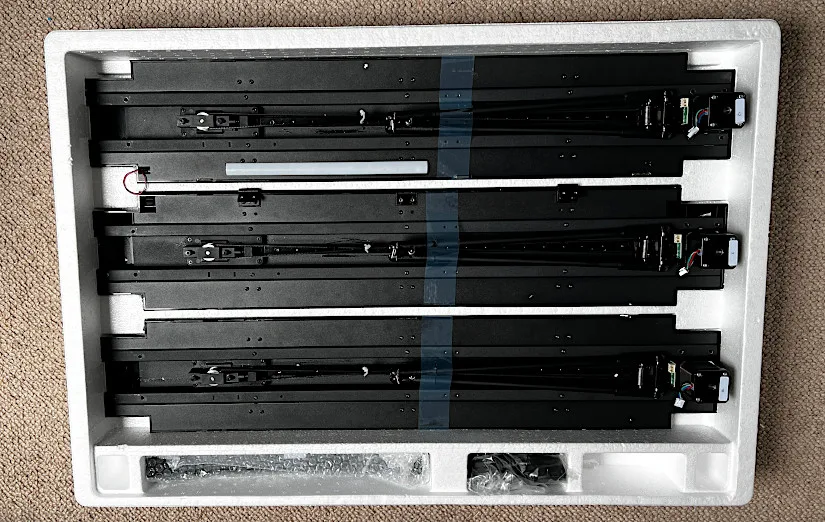
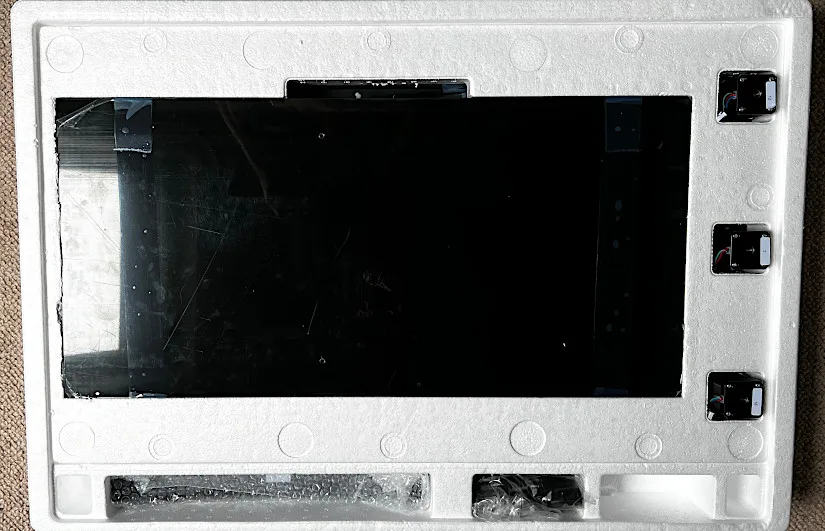
Unboxing the contents was easy. It was well packaged for transport, with all the contents enclosed in foam. There were not many parts, but it is important to remember that Delta printers are generally more challenging to assemble than other bed slinger or CoreXY type 3D printers. Here is a list of the box contents:
Top shell; Bottom shell; Y-axis; LED light strip installed X-axis with hinge holes and z-axis; Front Enclosure X1 Side Enclosure X2; Extruder; Display Screen; Accessory and toolbox; Instruction Manual/Service Policy; Filament holder and cable covers; Camera; Side Enclosure supports; Power Cord; Screw packs; Filament Sample.
©3DWithUs – Photo: Richard Hirst
Setup and Calibration
In this section, we will outline the setup process for the Flsun T1. The process is challenging—the difficulty comes not from the number of parts but from their size; some components are notably intricate to install. For individuals with limited experience assembling printers, the setup could take approximately 3 to 4 hours. Even with my expertise, it required over 2 hours. Below is a guide to the setup procedure that worked for me, highlighting areas that may present challenges.
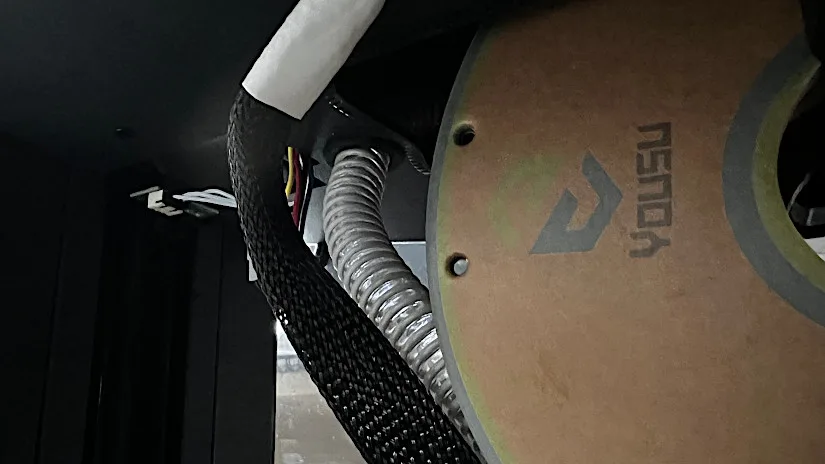
First, following the instructions, I installed the filament holder to the top shell, then inserted the 3-axis into the base shell and fastened it with the screws, then the top shell and released the extruder carrying arms.
©3DWithUs – Photo: Richard Hirst
The next step was installing the extruder, which proved quite challenging. I started by attaching the tiny M3x3 and M3x5 screws. These screws are very small and fiddly, making them difficult to handle. After securing the screws, I slid the extruder onto the arms’ pins, tightening the locking screws, which was tough due to their small size and matching black color. Then, I assembled the air supply hose and cables from the top shell to the extruder, ensuring everything was securely locked.
©3DWithUs – Photo: Richard Hirst
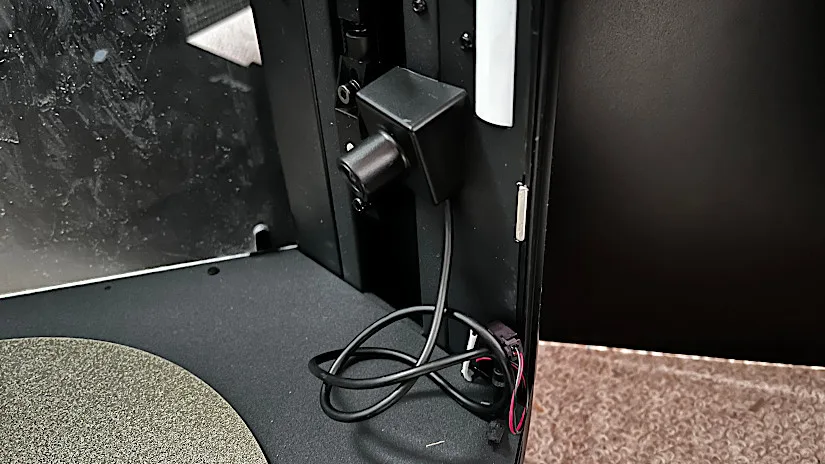
Next, I installed the camera into the USB C port. The cable provided with the camera is too long, which doesn’t allow for a neat setup. At this point, I also installed the limit switches located under the top shell.
Routing the main cable up the left side was another fiddly part of the process. I had to remove a slim metal panel to feed the cable upwards, which was not straightforward.
The touchscreen installation at the front also required precise handling. I lifted a small clip to insert the ribbon cable into the slot and then secured it back.
Finally, I installed the enclosure sides and the door, making sure to use the spacers provided to prevent breaking the glass when tightening the screws.
Once assembled, I checked that the voltage switch, tucked away deep inside its slot, was correctly set to match my region’s settings. Then, I plugged in the printer and powered it on.
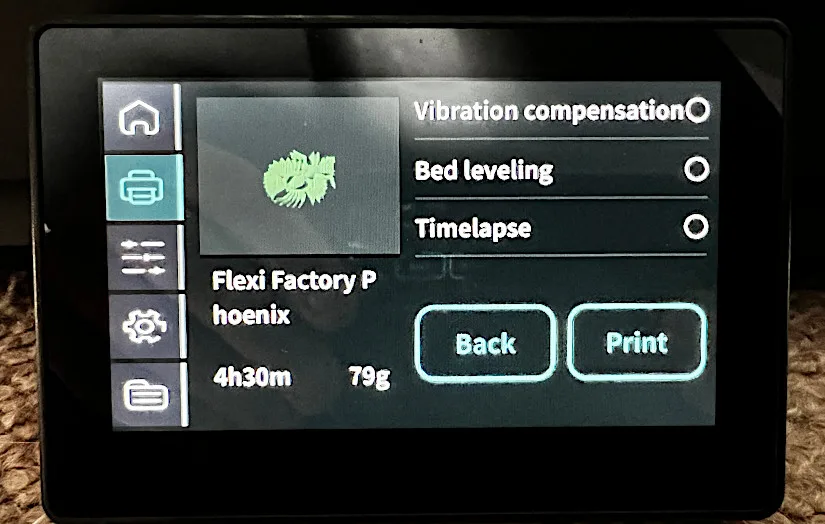
– WiFi and Self-inspection. I set the language for the initial startup, configured the WLAN settings, and ran the self-inspection. This process tested the heat-up detection, motor operation, vibration compensation, and bed leveling, ensuring the printer was ready for its first print.
Flsun T1 Features and Details
– Enclosed Design. The Flsun T1 is distinguished by several unique features not commonly found in other 3D printers. It boasts a fully enclosed design with a HEPA-activated carbon filter and runs on Klipper firmware, which enables precise bed leveling thanks to its dual sensors.
AI Camera. Additionally, an AI camera can be installed inside or outside the printer to monitor prints and create timelapse videos of the printed models.
The printer includes an optimized input-shaping algorithm that significantly reduces vibrations, enhancing the overall print quality. It features a 4.3-inch UI touchscreen, a popular size among contemporary 3D printers, providing a user-friendly interface to control the printer. A robust LED light strip along the right axis offers ample illumination inside the enclosure.
©3DWithUs – Photo: Richard Hirst
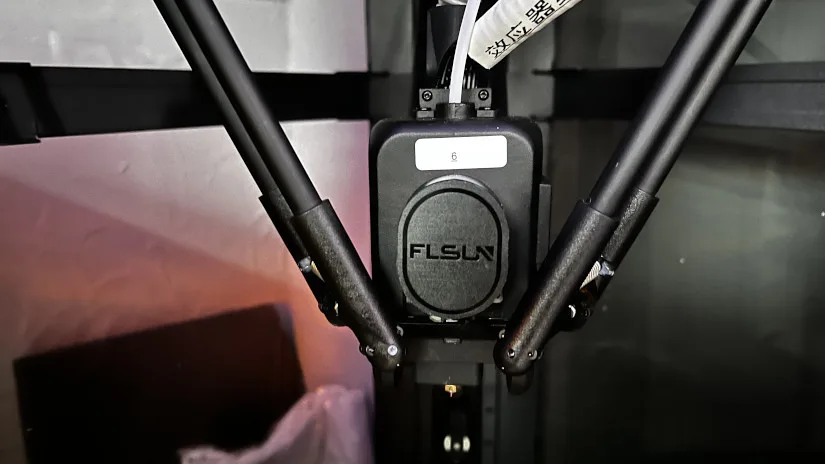
– Extruder. The T1’s extruder is notably lightweight yet capable of reaching temperatures up to 300℃. This lightness facilitates smooth arm movement. It is equipped with a durable dual-gear extruder gear setup made entirely of metal.
– Cooling. The T1’s cooling method is novel. Unlike most 3D printers, which have cooling fans directly on the extruder, the T1 uses a large hose fed from the top shell. This hose is connected to a CPAP high-pressure turbofan running at 30,000 RPM, delivering wind speeds 3.75 times faster than typical small cooling fans.
– Noise. The primary drawback is the noise level. The turbofan is loud, making the T1 less suitable for overnight use or operation in quiet environments. However, Flsun has attempted to mitigate this by providing a model for a silencer that fits over the fan intake. While it makes a slight difference, the noise reduction is minimal, but this compromise is necessary for cooling at the high speeds at which the T1 can print.
Flsun Slicer Software
The Flsun T1 includes generic Flsun slicer software, which can be found on the USB stick for installation on a PC. This software offers a comprehensive range of settings suitable for various filaments and printing parameters. It features an extensive selection of material and printing settings, which is particularly advantageous as many slicers bundled with printers often offer only basic options. After discovering numerous models to print, I used the provided settings to slice the files, aiming to maintain the accuracy of the tests as much as possible.
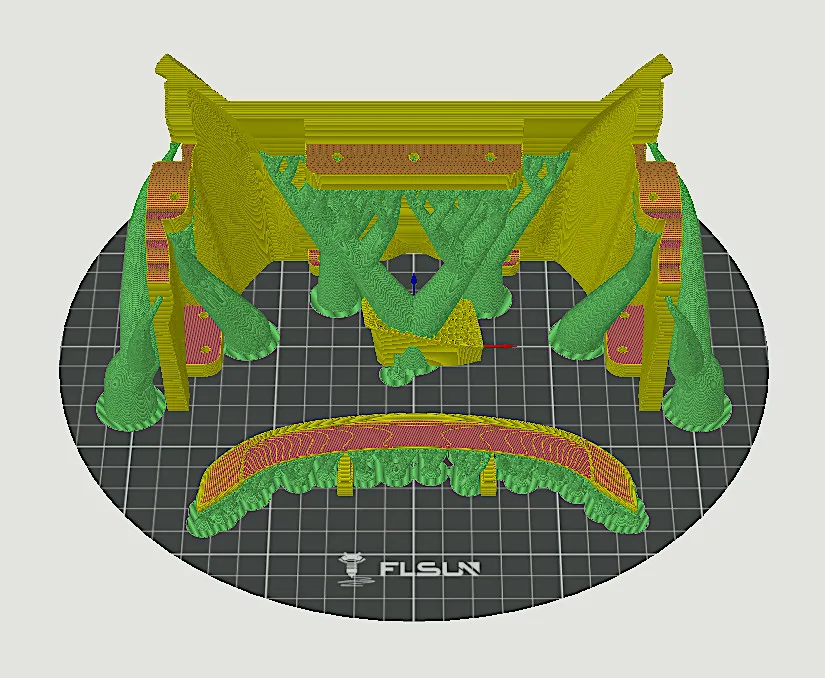
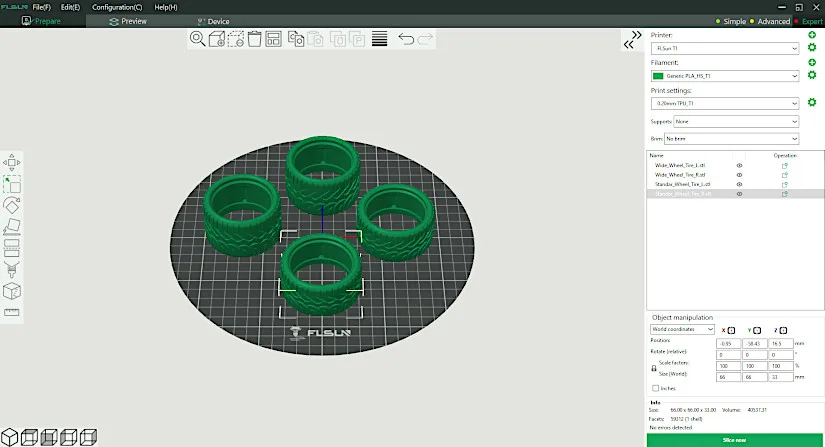
As usual, the models for this machine can be sliced on other slicer software, such as Cura, Orca, or Prusa Slicer.
Test Prints
Flexi Print-in-Place Prints
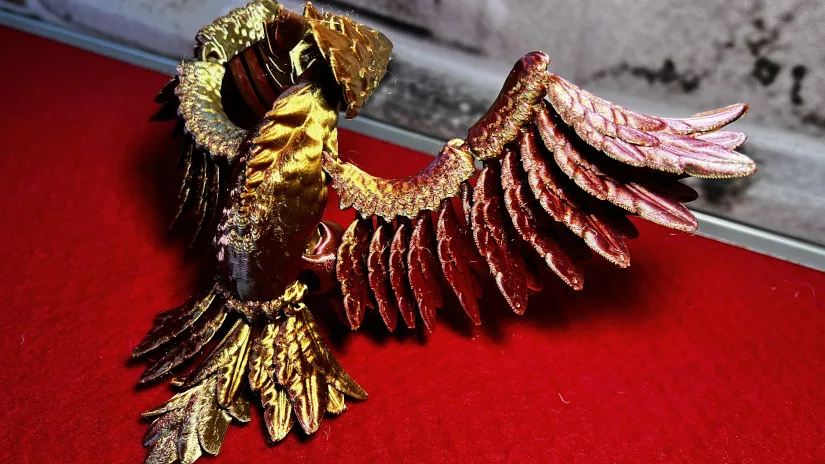
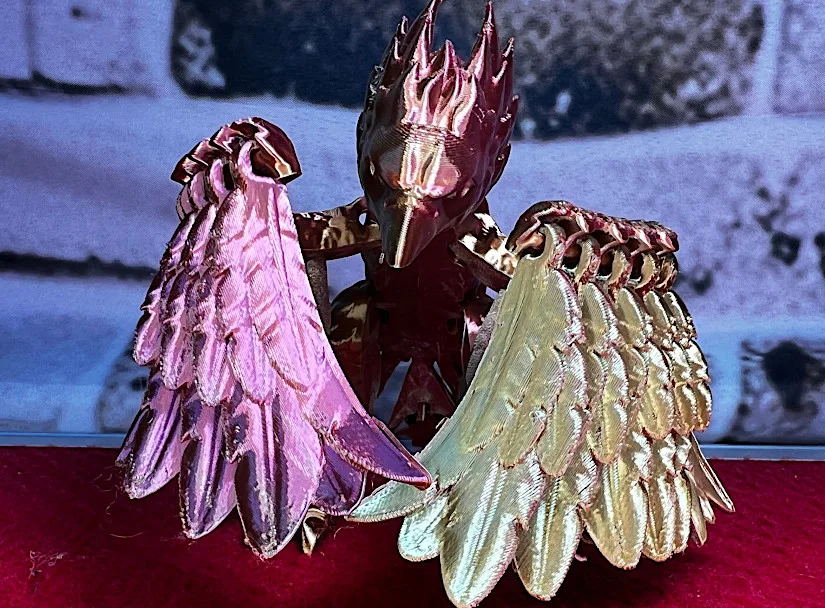
Flexi print-in-place models are popular choices among 3D printing enthusiasts. Wanting to try one, I selected a design from Flex Factory, which I purchased through Cults 3D. The Flexi Print-in-Place Phoenix is a particularly stunning model. It not only showcases the vibrancy of the filament and the quality of the print but also features numerous moving sections, effectively demonstrating the capabilities of the 3D printer.
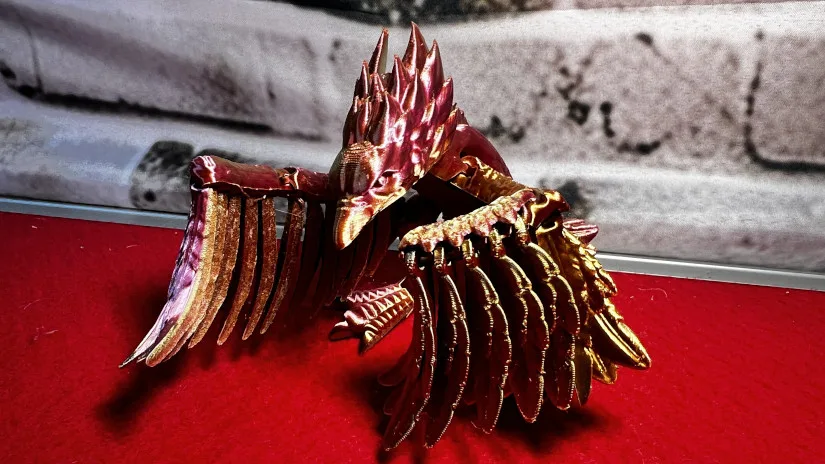
©3DWithUs – Print and Photo: Richard Hirst
Fan Art Miniatures
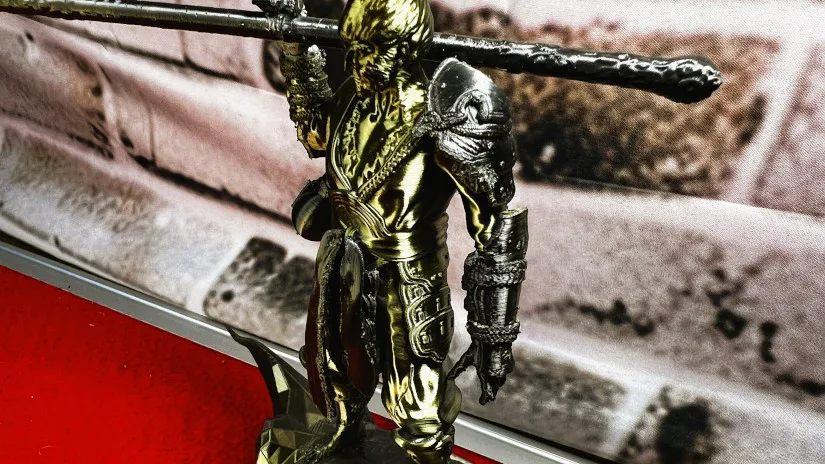
At the time of this review, the model Wukong Black Myth Monkey King was quite popular among 3D printing enthusiasts. I discovered this free STL file on Makerworld. It features great detail, including some very delicate parts that I was initially sceptical the T1 could handle. However, the results were impressive, particularly the intricate details on the hands and tunic. I am genuinely surprised that FDM 3D printer can achieve such results.

©3DWithUs – Print and Photo: Richard Hirst
Large Print in Vase Mode
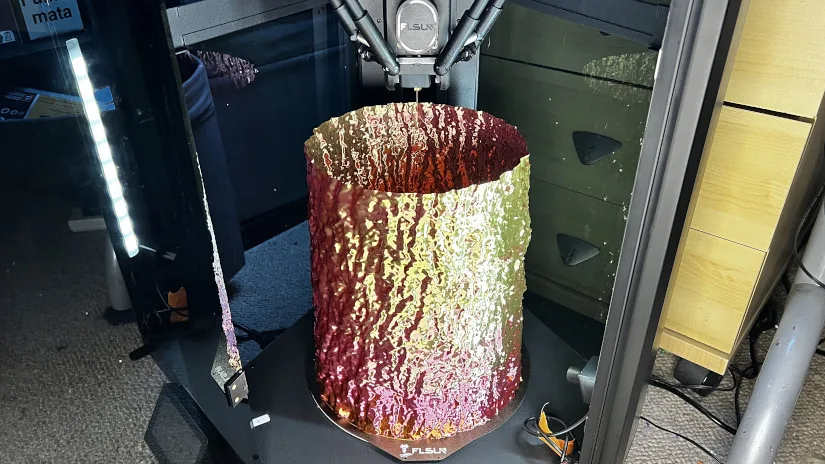
I wanted to test the Flsun T1’s maximum print size, as it is advertised to handle dimensions up to Φ260x330mm³. However, I discovered that this maximum size is achievable only if the print is centred at the end. To achieve the maximum build volume on T1, the model should be a cylinder in the beginning and cone-shaped in the end. Due to the mechanics of delta 3D printers, the three arms cannot extend to certain angles, limiting the print height near the edges of the build plate.
©3DWithUs – Print and Photo: Richard Hirst
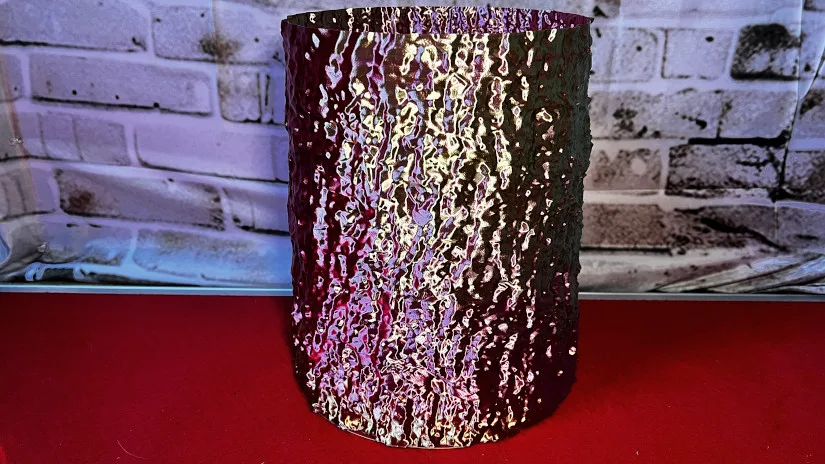
For this test, I chose the giant Redwood Tree Trunk model from 3DWithUs, available on Cults 3D. Given the massive size of the print, we opted to print it in vase mode to conserve both time and filament. The Flsun T1 managed a maximum height of 288mm on this model because it could not print any higher near the edge of the build plate. This test once again proved that Φ260 diameter width is only possible until the height of 288 mm.
©3DWithUs – Print and Photo: Richard Hirst
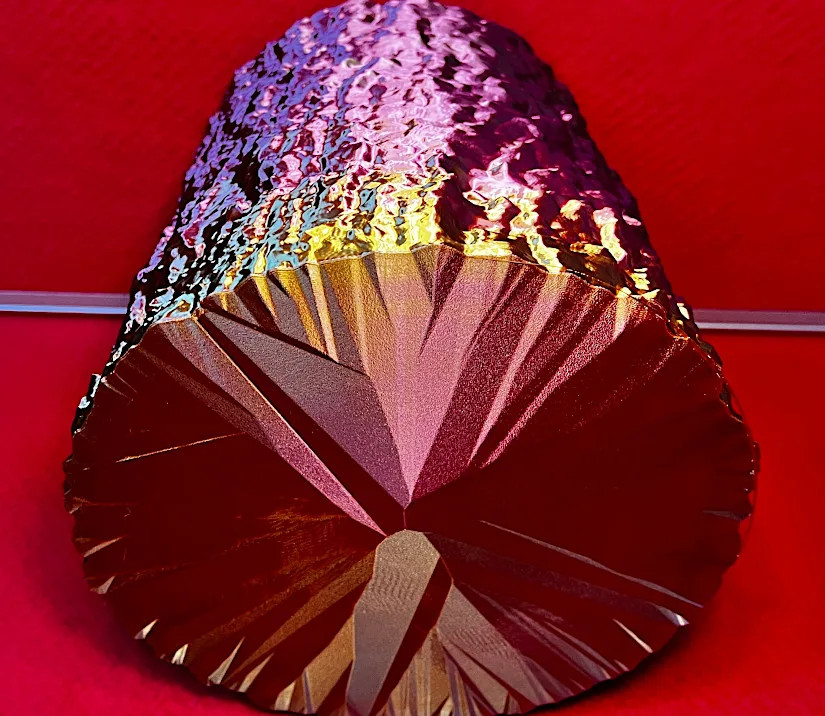
Delta printers are known for their fast and precise capabilities in printing vase models. T1 is not exempt. The model came out well, and the vibrant tri-color Yousu filament from Amazon beautifully highlighted all the bark details.
Functional Prints
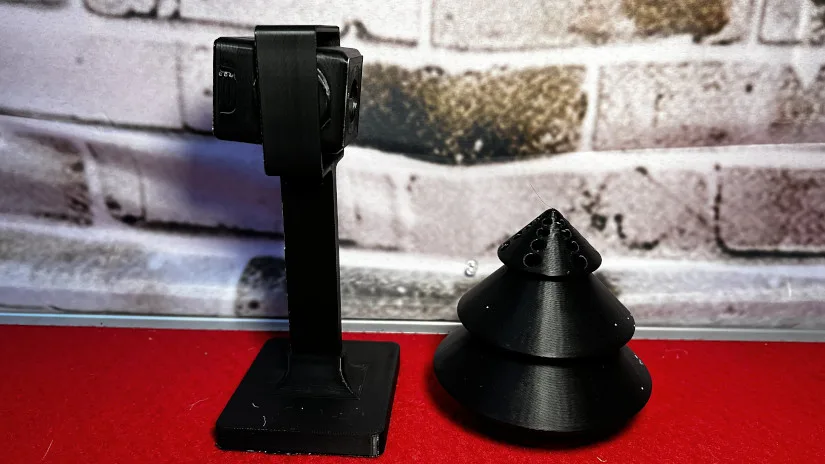
For this section, I printed two models from the files supplied by Flsun. One is the AI camera external tripod mount, and the other is the silencer for the CPAP cooling system. Both were printed in R3D high-speed black PLA filament. I used this filament to try to test the speed of the T1 printer as it would be printing at max speeds up to 1000mm/s. As it was printing, I watched the screen, and at some point, the printer reached these speeds with no print quality loss.
©3DWithUs – Print and Photo: Richard Hirst
Complex Kit Model – RC Car
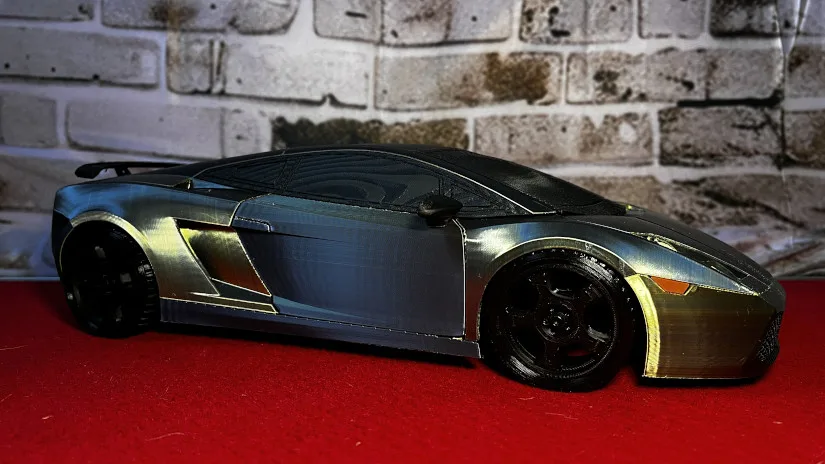
I’ve always wanted to try this particular model, and with the Flsun T1’s speed capabilities, it seemed like the perfect opportunity despite the lengthy print time these models require. Fortunately, I found the 1/10th-scale Lamborghini Gallardo by CarPrint on Cults3D and the chassis by Dukedocs. This model can be converted into a full 1/10th-scale RC car with additional electronic components.
3D Model by CarPrint on Cults
©3DWithUs – Print and Photo: Richard Hirst
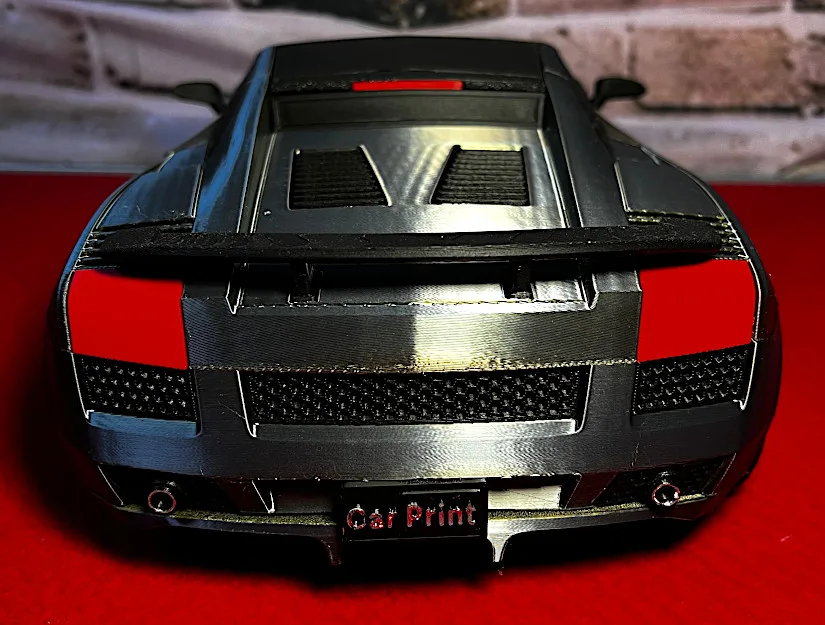
The project required several build plates to accommodate all the parts, and I used TPU filament for the tyres—a material some printers struggle with. However, the T1 handled it effortlessly using the stock settings on the Flsun slicer.
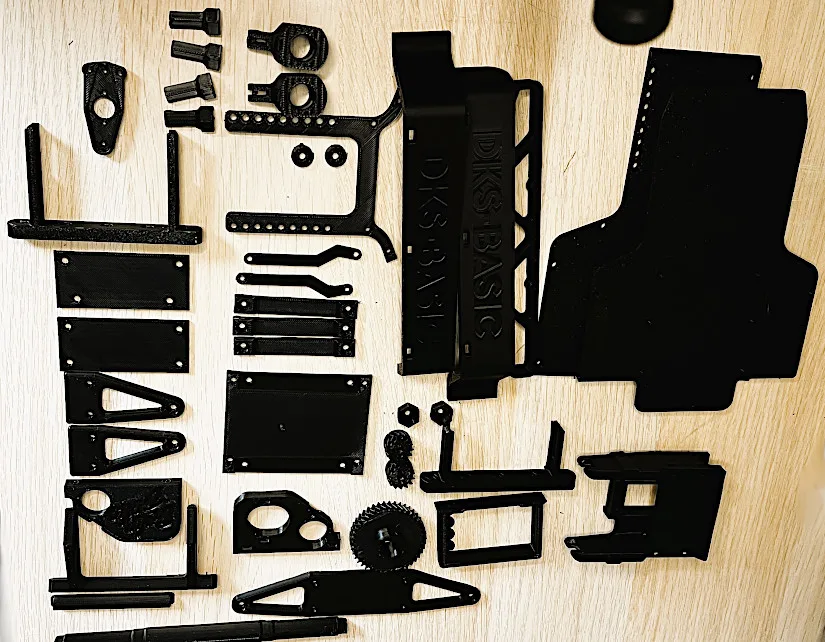
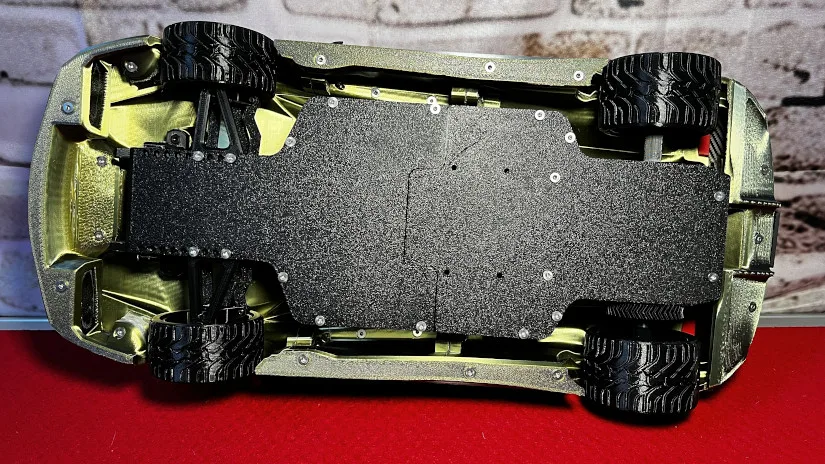
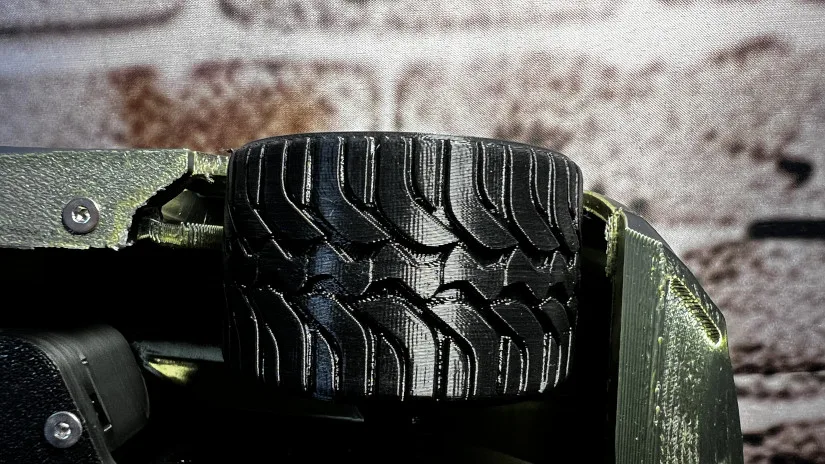
The tyres came out exceptionally well, with impressive detail on the treads, which was particularly notable for TPU. This model is worth checking out for its stunning results and functionality as a fully operational RC car.
Compare to other Flsun 3D Printers
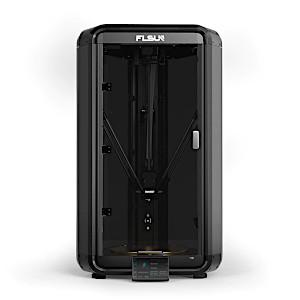
FLSUN was one of the first 3D printer manufacturers to create speedy consumer 3D printers implementing Klipper firmware. Their V400 and Super Racer (SR) were highly praised. Recently, FLSUN launched their new S1 and T1 series machines with many extra features, such as higher speeds and flow rates and enclosed chambers. The Flsun S1 also has an AI Lidar sensor, smart zone heating, and a built-in filament dryer.
Quick T1 and S1 Pro Comparison
FLSUN S1 Pro Specifications
Print Speed: 1200mm/s Max Speed
Large Build Volume: Ø320mm * 430mm
Hotend Max Temperature: 350°C
Price: $1,499.00 Sale price $1,299.00
Official Website
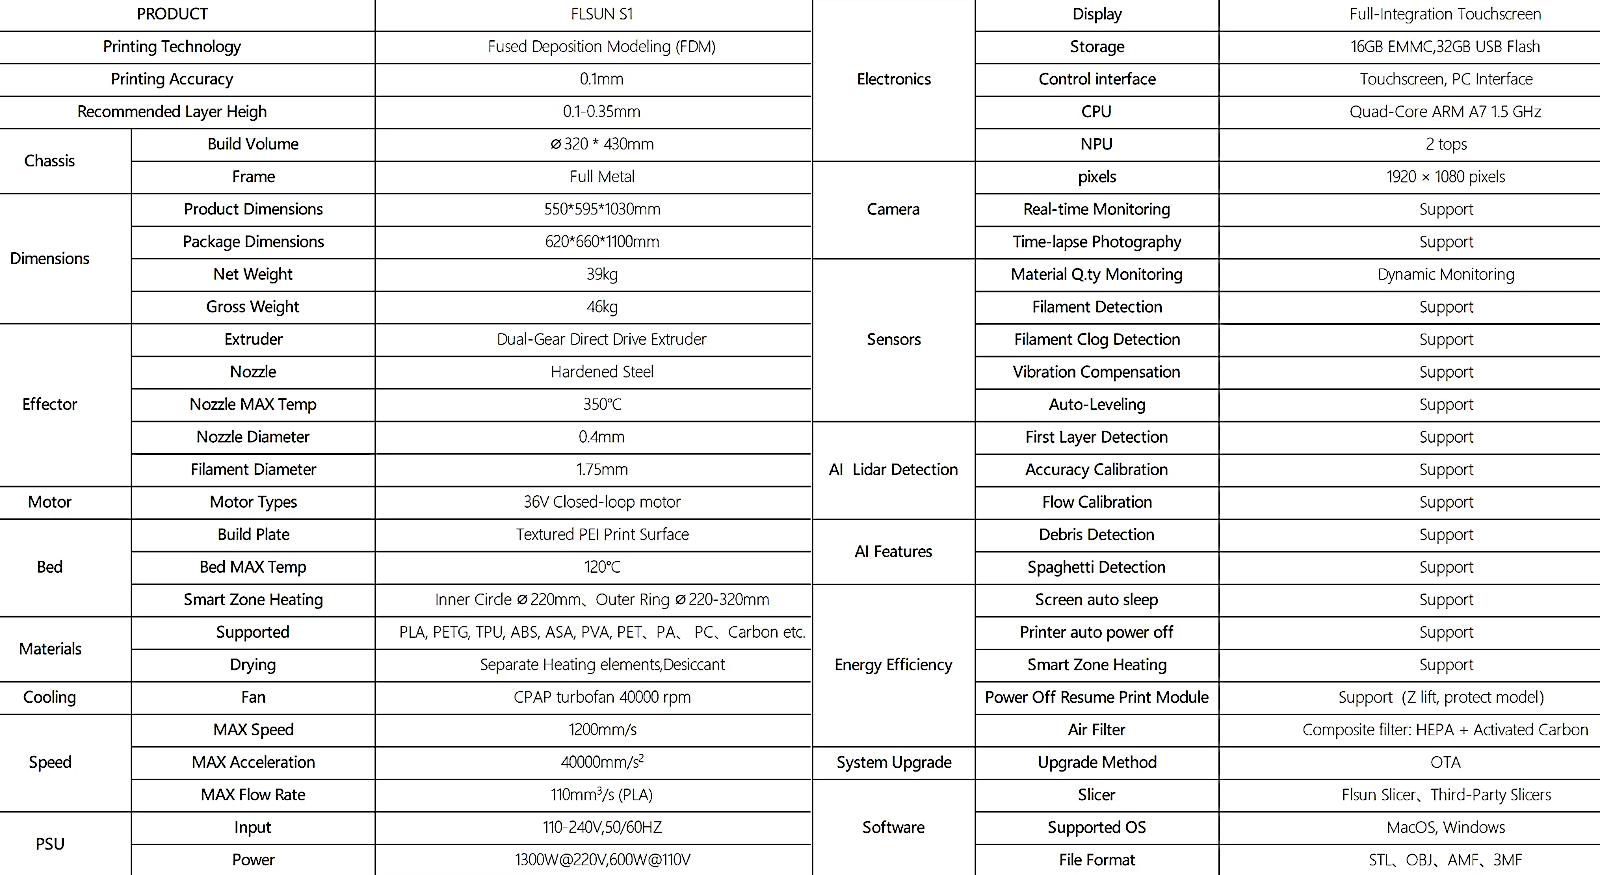
Open in the next tab for better resolution
Image: FLSUN
FLSUN T1 Specifications
Print Speed: 1000mm/s Max Speed
Build Volume: Ø260mm * 330mm
Hotend Max Temperature: 300°C
Price: $599.00 Sale price $499.00
Official Website
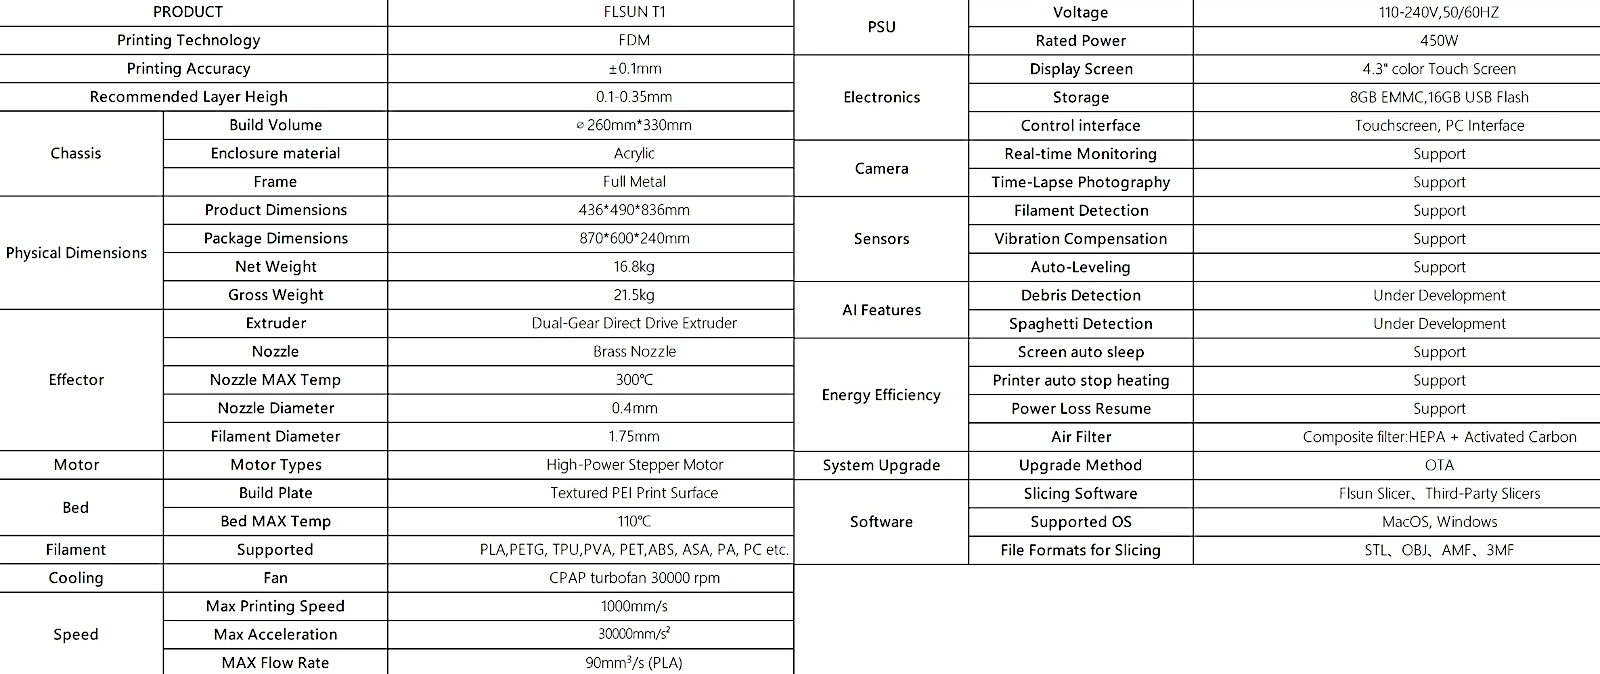
Open in the next tab for better resolution
Image: FLSUN
On 3DWithUs, we have a comprehensive comparison guide covering FDM 3D printers. Delta technology differs from most i3 bed slinger and CoreXY 3D printer builds. The comparison guide about Delta 3D printers is coming soon…
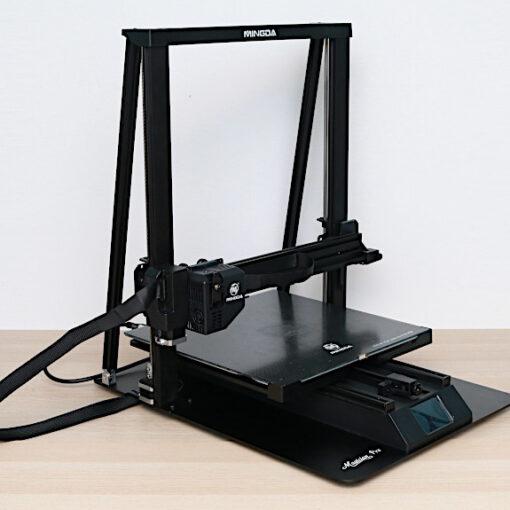
Here are some Delta printers that were reviewed and in the past on our website:
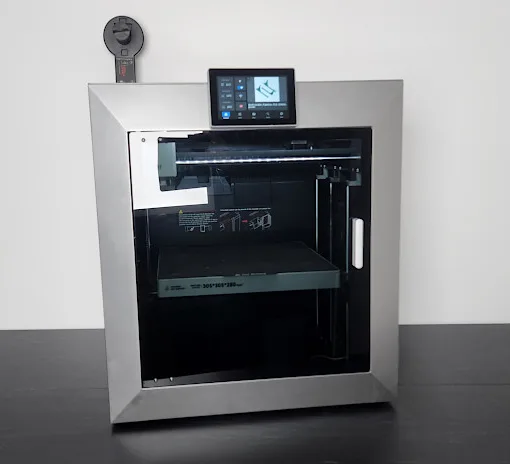
Currently, there are no competitors to Flsun printers in this technology and price segment. Prusa3D (Prusa Pro HT90) and WASP have versions of Delta 3D printers, but such machines are aimed at professional and industrial markets. The price difference is significant. Monoprice Delta V2 has been discontinued.
We are happy that Flsun continues to push delta printer technology to new heights, bringing affordable machines to a broader market.
Have questions? Feel free to ask in the comment section below.
For a wider discussion or to share your own T1 prints, join us in the forum:
Conclusion and Pros & Cons

Flsun T1 Review
Review Summary
With its standout features, the FLSUN T1 Delta printer would be a notable addition to any 3D printing studio—its aesthetic makes it worth watching. However, assembling the T1 is not a swift 15-minute task, unlike many other printers today, which demand more time and effort. I found a few aspects of the printer less than ideal. Firstly, the internal filament holder tends to catch the main cable and air hose, leading to the extruder, which could potentially damage these components over time. Although an external spool holder could alleviate this issue, this would add to the overall height of the printer. The noise from the cooling fan is also important to consider, as it is significantly louder than most, even with the silencer.
Despite these challenges, the T1 excels in its primary function. It is a high-speed printer that produces quality prints rapidly. If you can overlook the fan noise, the T1 offers excellent print quality and speed, making it ideal for those prioritizing efficiency and output in their 3D printing tasks.
There are no competitors to Flsun printers in this technology and price segment. We are happy to see that Flsun continues to push delta printer technology to new heights, bringing affordable machines to a broader market.
Pros
High speed
Small footprint
Fully enclosed
High temp extruder
Cons
Filament spool holder
Left-side cabling routing
Very loud cooling
It takes some time to assemble

