The QIDI Plus4 is a significant step forward in the company’s lineup of 3D printers, offering new features and improvements over its predecessor. The updated design includes a durable metal and glass construction, moving away from the plastic shell of earlier models for a more premium feel. With a nozzle temperature of up to 370°C and a heated chamber capable of reaching 65°C, this printer promises to easily handle challenging, high-performance filaments like PA-CF, PET-CF, Nylon, and ABS. In this review, we’ll explore the features and high-speed printing capabilities of the QIDI Plus4 and assess the resulting print quality. As always, we’ll wrap up with a list of pros and cons.
Table Of Contents
- Specifications
- Unboxing – What’s Included
- Setup and Design
- Software
- Testing and Results
- Compare to Other 3D Printers
- Conclusion and Pros & Cons
Price: $837 – $849
Product Affiliate Links: 3DWithUs is supported by its audience. Purchases via some links may earn us a small commission at no extra cost to you. This helps us to continue bringing you high-quality content. The product featured was provided in exchange for an honest review. Our guides and reviews remain unbiased and independent.

Update There was an issue with the heating chamber control board on initial units, specifically affecting users in 120V regions. QIDI addressed this by sending replacement boards to the affected users, and the new boards do not have this problem. However, exercise caution, as it is unclear which machines have been updated and which still contain the old board.
QIDI Plus4 Specifications
• Printing technology: FDM (Fused Deposition Modeling)
• Print volume: 305 × 305 × 280 mm (12.01 × 12.01 × 11.02 inches)
• Maximum nozzle temperature: 370°C (698°F)
• Maximum bed temperature: 120°C (248°F)
• Maximum chamber temperature: 65°C (149°F)
• Printing speed: Up to 600 mm/s, standard 300 mm/s
• Extruder type: Direct drive
• Nozzle diameter: Standard 0.4 mm
• Filament diameter: 1.75 mm
• Construction: CoreXY
• Z-axis configuration: Dual Z-axis
• Bed leveling: Automatic print bed leveling
• Heating bed: Dual sided PEI magnetic printing bed, flexible
• Operation: 5-inch touchscreen, color
• Connectivity: USB, WLAN
• Supported filaments: PLA, ABS, PETG, TPU, PA, PC, ASA, as well as carbon and glass fiber reinforced filaments
• Software compatibility: QIDI Slicer, Cura, PrusaSlicer, Orca Slicer
What’s in the Box
• X Plus4 • Touch screen • Door handle • Filament holder with mount block • Spare fuse • Allen keys • 7mm wrench • Flathead screwdriver • Scraper • Glue stick • USB drive • Spare part kit • Ethernet cable • Power cable • User manual • Lubricant • Thermal paste
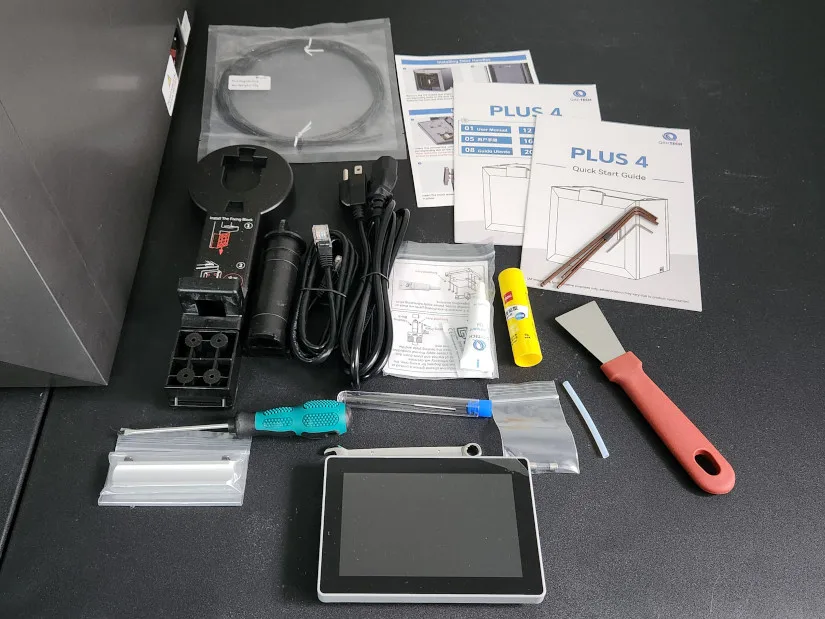
©3DWithUs – Photo: Will Zoobkoff
Setup and Design
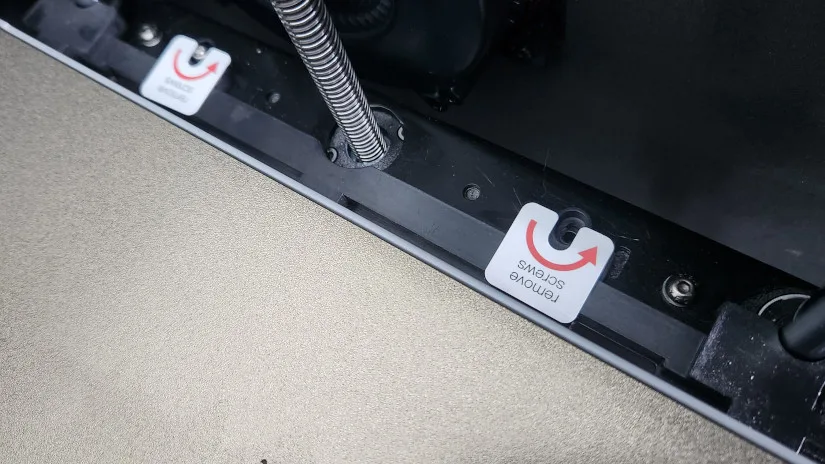
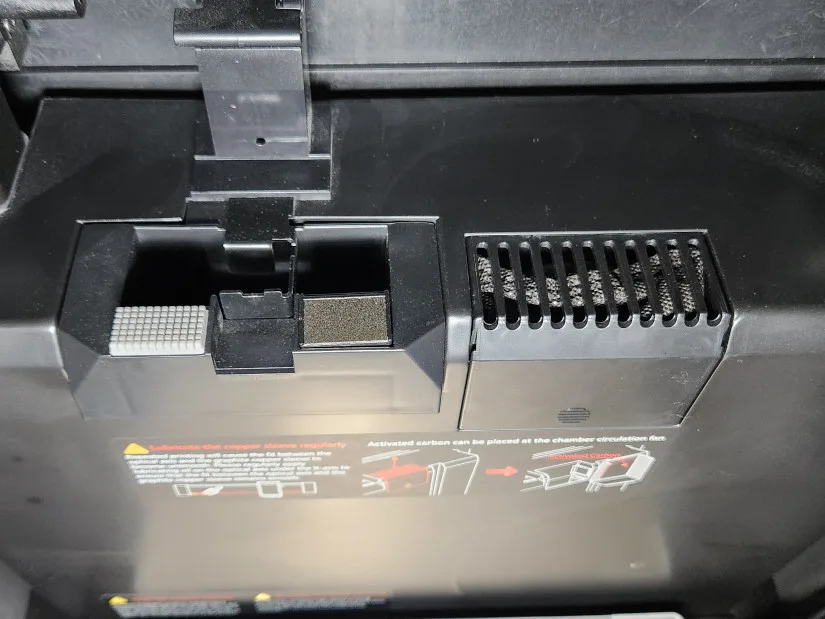
Setting up the Plus4 is one of the quickest setups for a printer in recent times. The process is straightforward: install the screen and the door handle, remove the cable ties and cardboard from the hotend, and take off the various tape pieces. Don’t forget to remove the carbon filter bag from the plastic bag inside the in-chamber filter box located at the rear of the machine. After completing these steps, install the spool holder and remove the four screws along with the two plastic shipping brackets from the print bed to allow it to move freely.
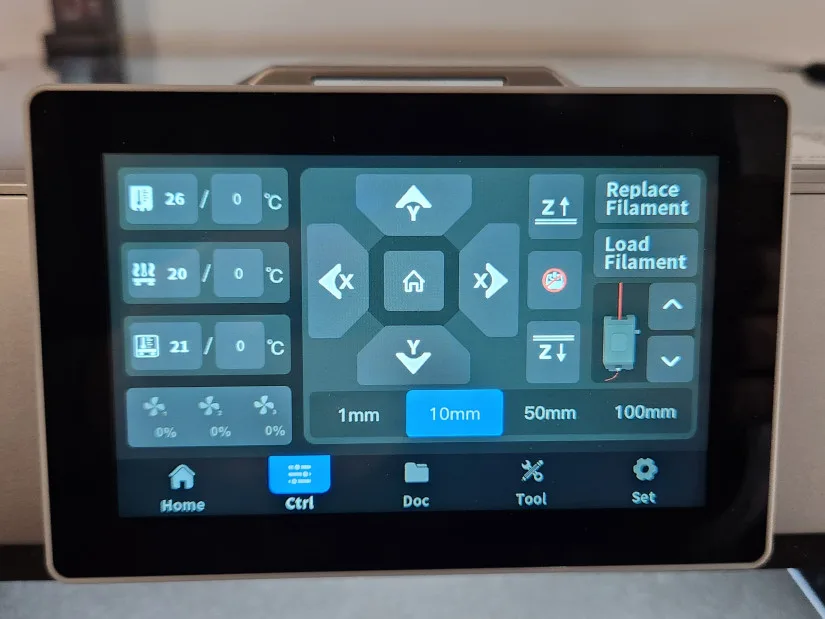
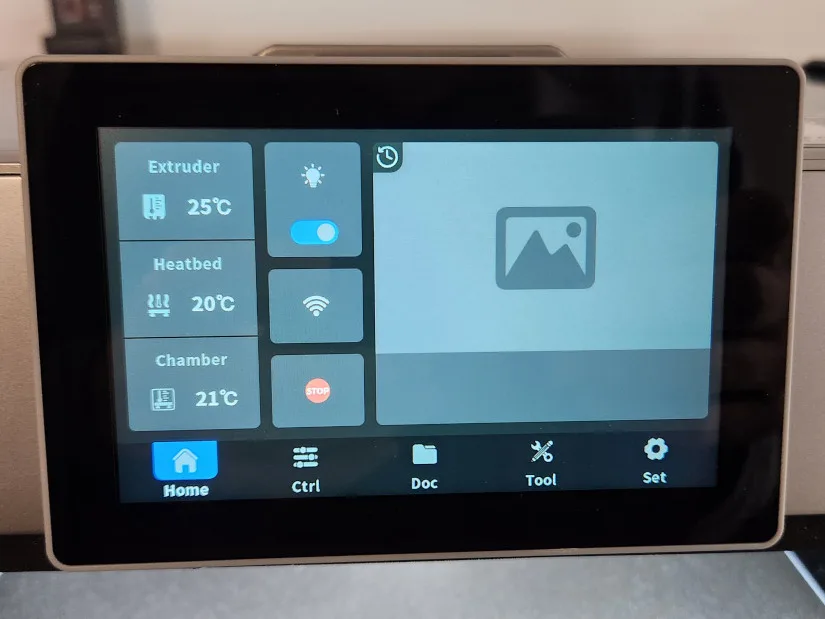
– Touchscreen. An on-screen guide walks you through the setup process. Once that is complete, you can load the filament and proceed with the calibration procedure. The X Plus 4 is ready to start printing in approximately 10 minutes, making its setup time impressively fast.
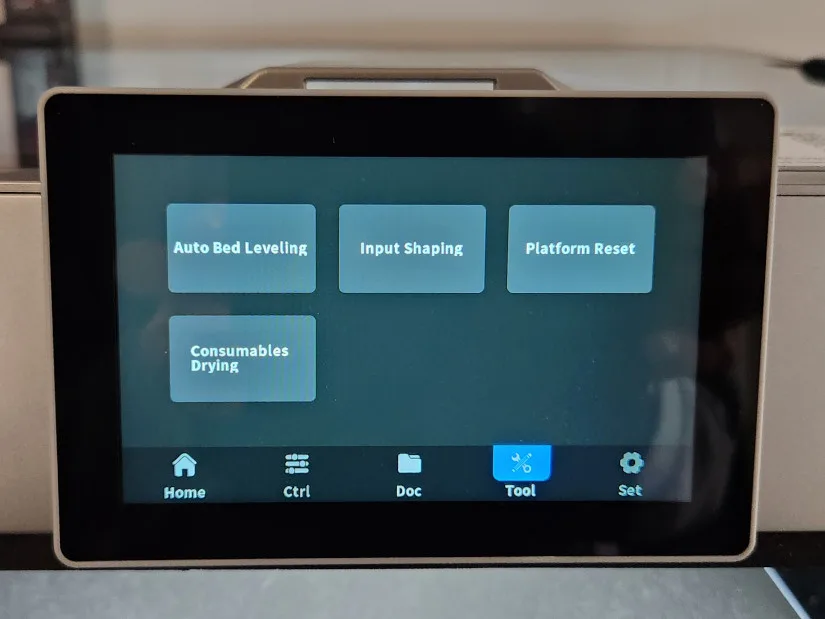
– Calibration. If you find the print bed to be off or tilted, you can run the Platform Reset Calibration. This feature lowers the bed to the bottom, automatically adjusting its tilt. It then probes all four corners and allows you to manually adjust the level using a piece of paper and the dials underneath the bed. Once this is done, you can re-run the auto-leveling function to ensure the platform is both level and straight.
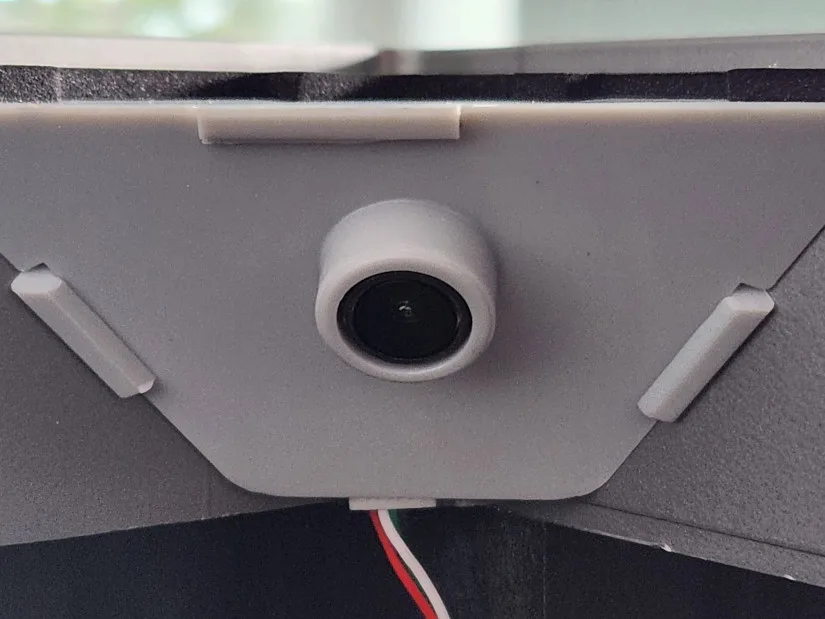
– Camera. The camera built in the QIDI Plus4 is capable of 1080p, but it is set to a much lower resolution out of the box. Luckily, with the Klipper system installed, it is very easy to adjust the camera’s resolution.
©3DWithUs – Photo: Will Zoobkoff
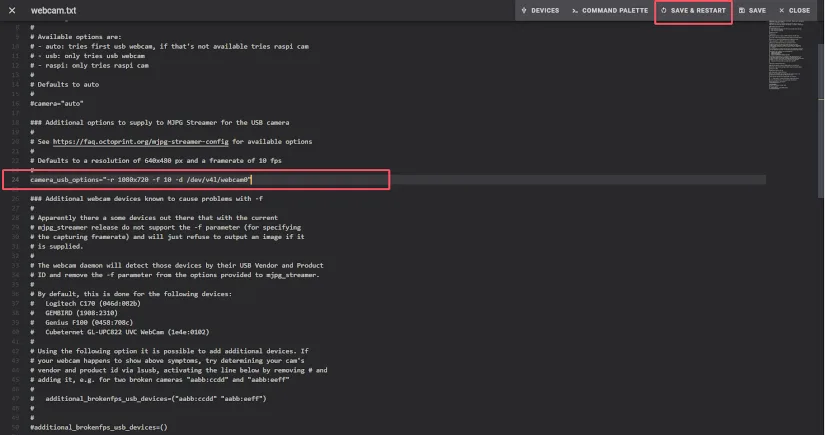
– Tips. To adjust the camera, you simple need to go to the Configuration tab in the Klipper interface then, double click and open the webcam.txt file, and change the resolution line shown to:
camera_usb_options=”-r 1080×720 -f 10 -d /dev/v41/webcam0”
This will increase the resolution, giving you a better-quality image.
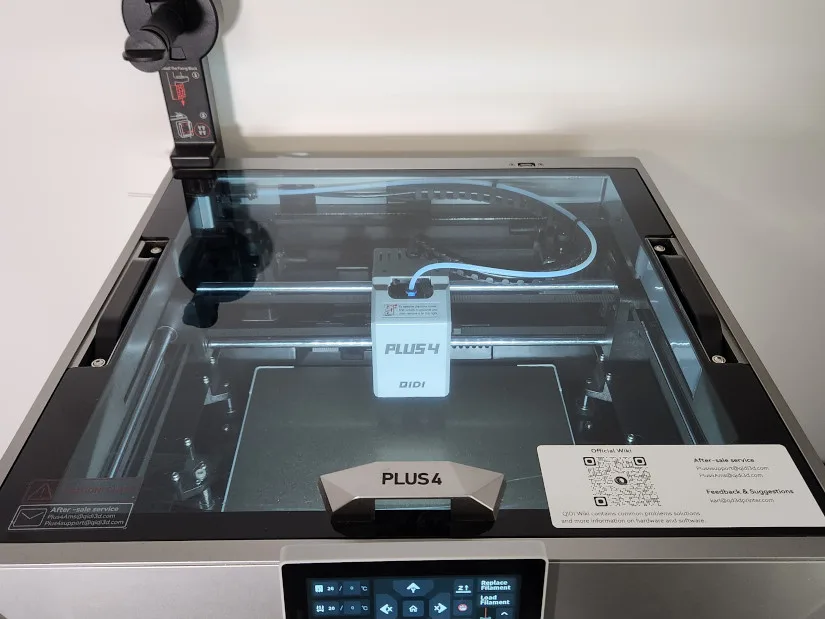
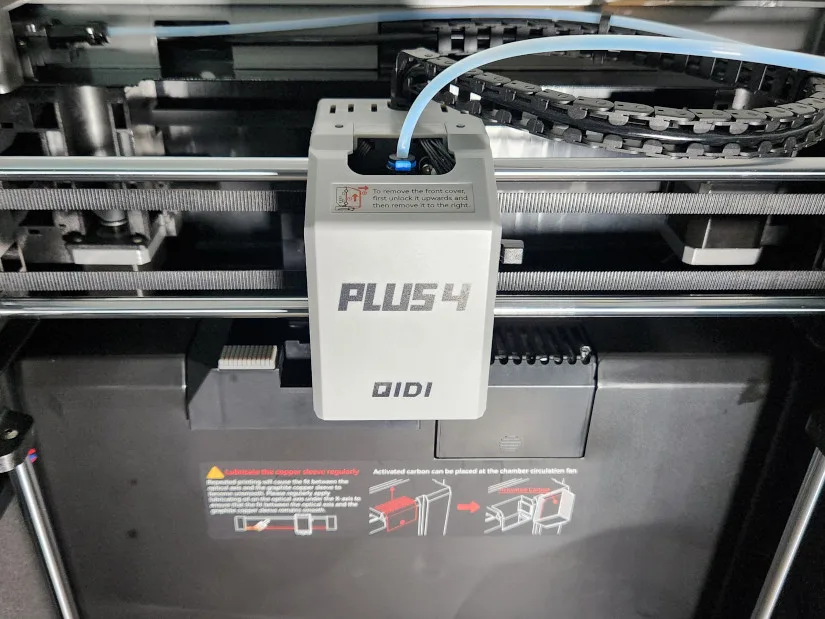
– Design. QIDI has updated the printer’s body to feature mostly metal construction, complemented by a removable glass top and a glass door. This gives the X Plus 4 a premium look and feel but also adds to the unit’s weight. While it can be moved by one person using the built-in handles, the weight can make it somewhat awkward to carry.
©3DWithUs – Photo: Will Zoobkoff
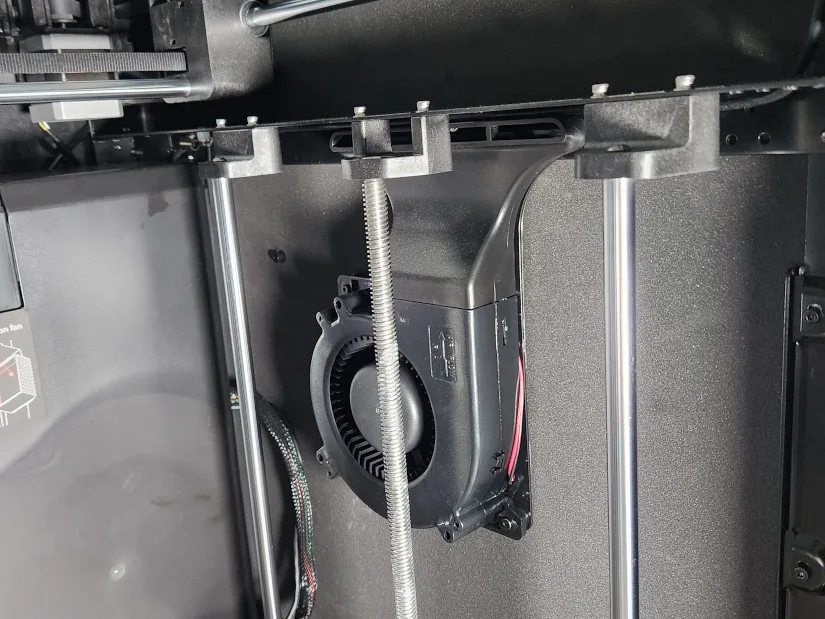
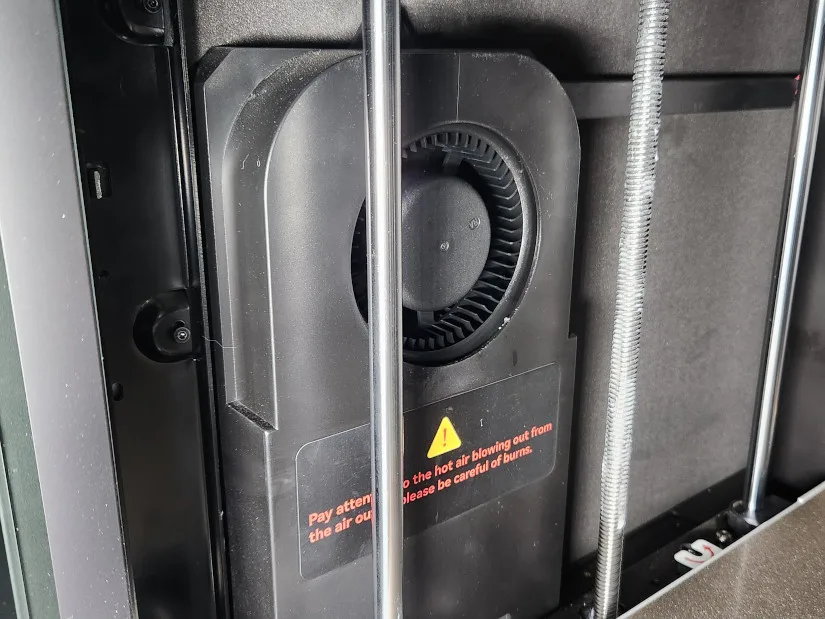
At the rear of the machine, there is a filament ejection port. This is particularly useful for purging filament for when the QIDI Box launches and aids in better nozzle cleaning and filament loading, both before and during prints. Various models for filament collection buckets and chutes are available to catch and route the ejected filament.

– Enclosed Chamber. The removable glass top is another thoughtful feature. For PLA and other materials that don’t require a fully enclosed environment, it’s best to remove the lid to prevent the chamber from becoming too warm, which could lead to clogs.
©3DWithUs – Photo: Will Zoobkoff
While it is possible to print PLA with the system closed, the risk of overheating remains. Alternatively, you can use models available on Printables to prop the lid open or attach risers with vents to allow heat to escape.
©3DWithUs – Photo: Will Zoobkoff
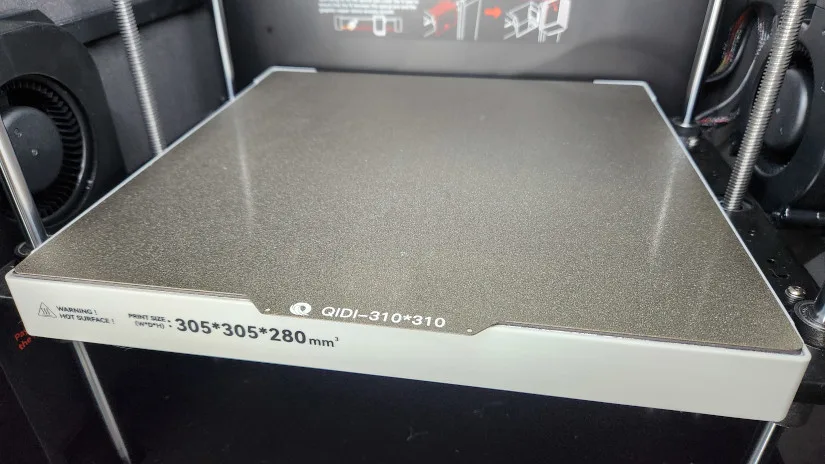
– Build Volume. The bigger print volume of 305x305x280 mm makes the X Plus 4 ready for larger format projects, while the maximum print speed of 600 mm/s will deliver much faster and higher-quality results.
©3DWithUs – Photo: Will Zoobkoff
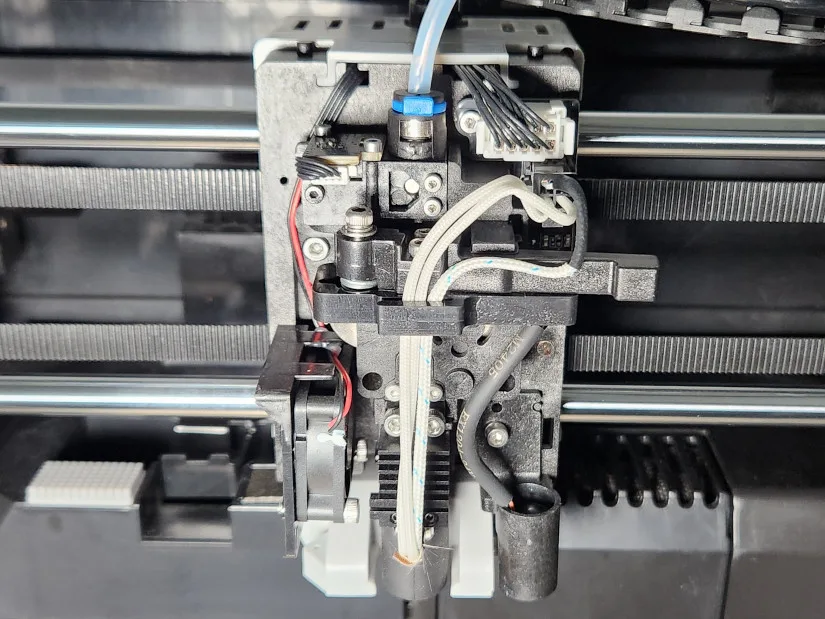
– Extruder. The strong and reliable Core XY, heated chamber, and hotend temperatures up to 370°C (698°F) make this machine stand out from the crowd and handle engineering-grade materials with ease. Keeping these features in mind, this machine is built for tricky and high-performance filaments such as PA-CF, PET-CF, Nylon, and ABS.
Software – Orca Slicer Settings
For all our slicing needs, we used the latest version of Orca Slicer. With its numerous options and frequent updates, it has become a favorite for preparing FDM prints. All prints were sliced using the base profile, with only a few changes made to wall speeds: the inner walls were set to 300 mm/s and the outer walls to 250 mm/s.
Screenshot: Orca Slicer
Keep in mind that you won’t consistently achieve these speeds during printing, as various factors can affect the overall print speed. These include the cooling minimum layer time setting under filament settings and the flow rate adjustments also found in the filament settings.
Test Printing Results
– Thermochromic PLA. For the first print in testing, I chose a wall mask from the Pipe Cox Patreon. This particular model is the Tengu Wall Mask, printed using Sunlu temperature-change PLA. This filament is orange when cold but transitions to a pale yellow when warmed.

3D Model by Pipe Cox on Cults
©3DWithUs – Print and Photo: Will Zoobkoff

The print took 3 hours and 30 minutes to complete, and the results were all the proof one needed. All areas of the mask were perfect and without any issues. Overhangs are printed without any visible drooping and are very smooth.
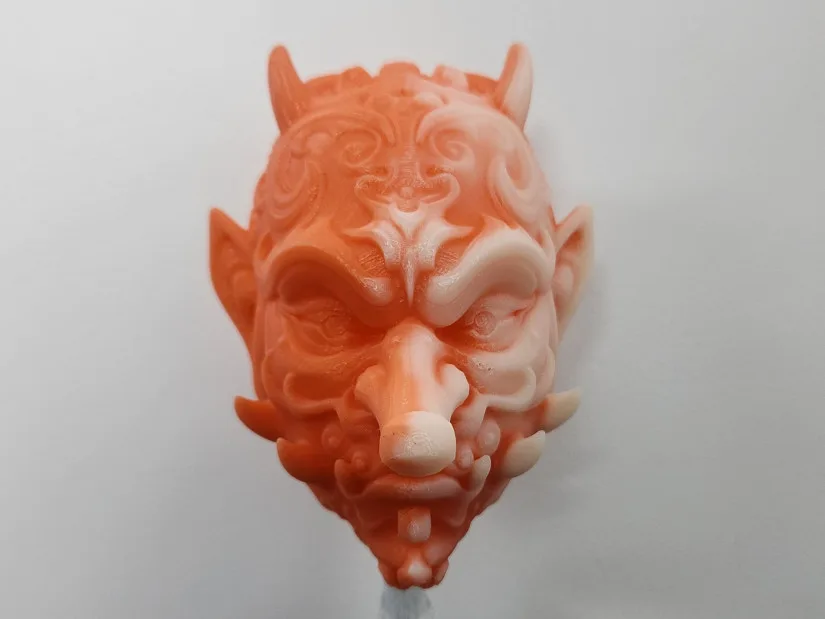
The Sunlu temperature-change filament is amazing. It begins as one colour, then transforms into the other while being printed, and eventually switches back to the original color during the cooling process. When exposed to sunlight or a warm environment, it is shifted slowly to another colour, which can cause an interesting visual effect. Read more about the Color Changing Thermochromic Filament on 3DWithUs.
– Marble PLA. Next, we printed another new model by Pipe Cox: the Suplay Wall Mask. For this captivating design, we chose Sunlu Marble Green PLA. The Suplay mask took just over 5 hours to print and, like the previous prints, turned out fantastic.
The wider belts and improved tooth spacing on the Plus 4 significantly reduce VFA, a ripple effect commonly seen with high-speed printers. While it doesn’t completely eliminate the issue, it does help minimize it when combined with speed adjustments.
3D Model by Pipe Cox on Patreon
©3DWithUs – Print and Photo: Will Zoobkoff
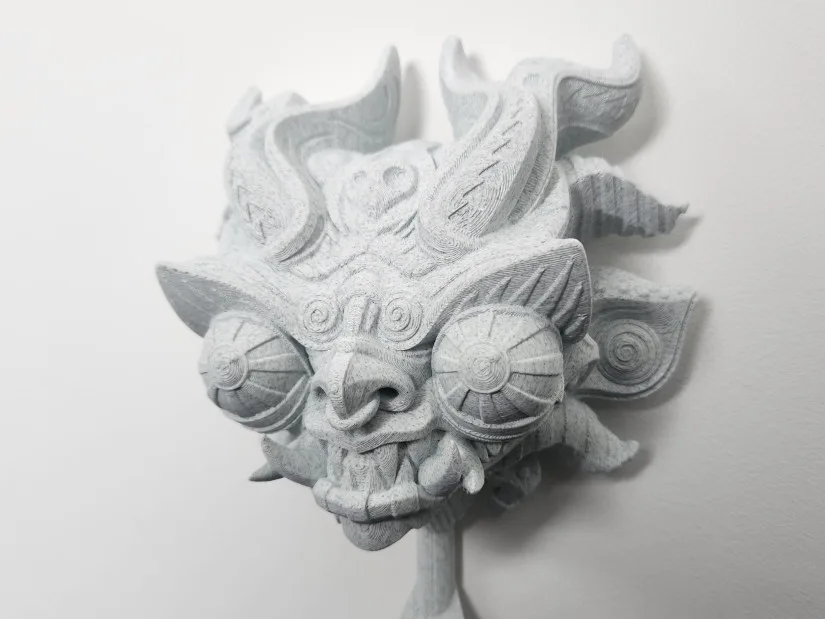
There are no flaws in any areas of the print – everything is clean and smooth. The SUNLU Marble Green PLA from Amazon was an excellent choice for this print, making the model truly stand out. Its unique texture enhances the design, whether displayed on a stand or hanging on a wall.
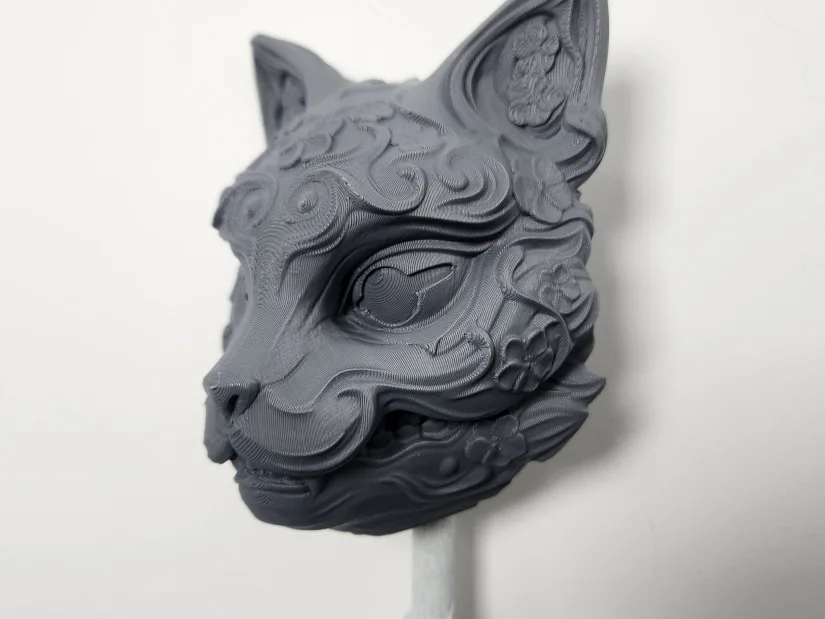
– PLA. Next in our testing is the Feline Skull Mask. This model consists of two parts: the skull and the jaw. The larger print volume makes projects like this easy to handle. Using organic supports set to “build plate only,” the jaw took just over 4 hours to print, while the skull required just under 12 hours. Both were printed with Sunlu Pri Cyan PLA.
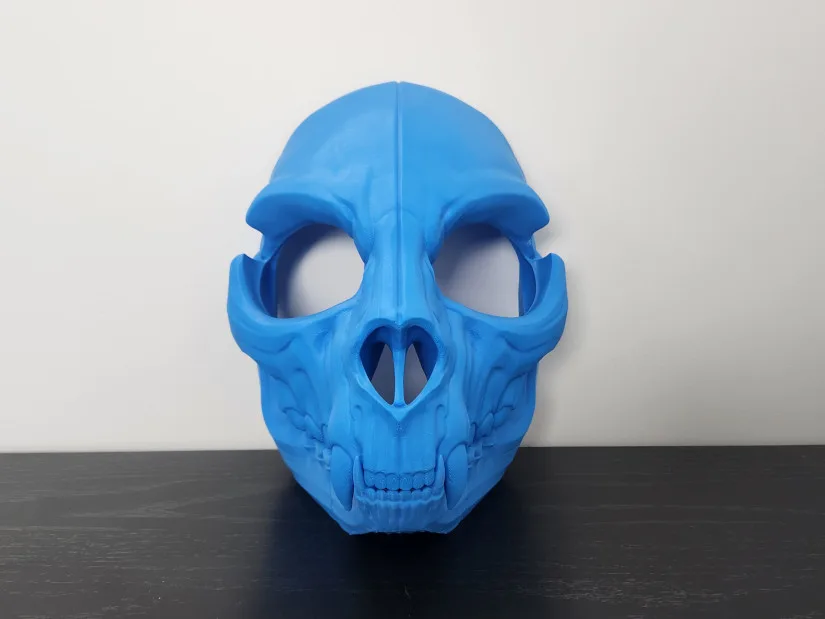
3D Model by Pipe Cox on Patreon
©3DWithUs – Print and Photo: Will Zoobkoff
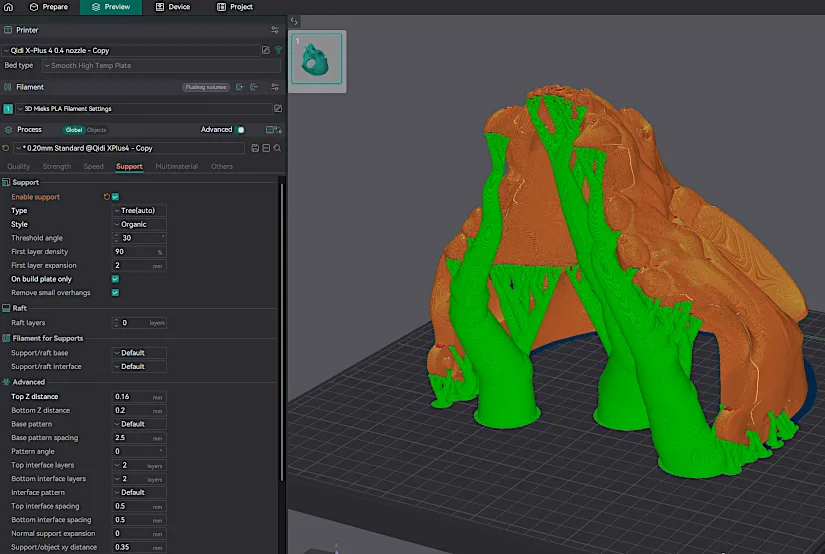
– Tips. The jaw features a steep overhang, something that can be tricky even with support. For prints like this, it’s important to put the wall order on ‘inner/outer.’ Some models will turn out better with the ‘inner/outer/inner‘ mode to achieve a better quality; unfortunately, the walls get messy on steep overhangs. Ensuring that more perimeters are active on overhangs is another way to help ensure that results are clean and strong.
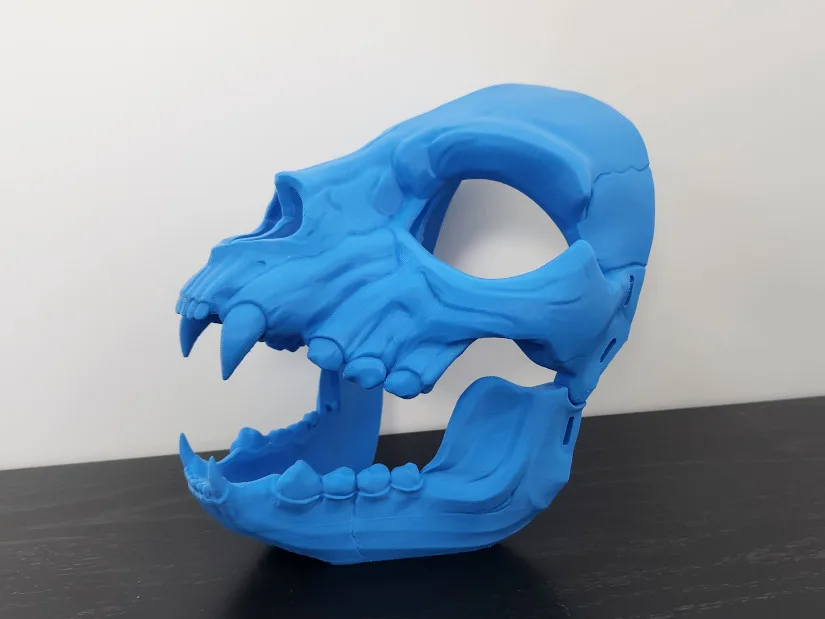
©3DWithUs – Print and Photo: Will Zoobkoff
This print came out fantastic. The overhang on the jaw is clean, and all the supported areas are perfect. The jaw fits tightly onto the skull, locking into place with ease, which shows the accuracy of the QIDI Plus4. The jaw moves freely and easily after a couple of open and closings to ensure it is seated, and when you add rubber bands, it opens and closes with ease when wearing.
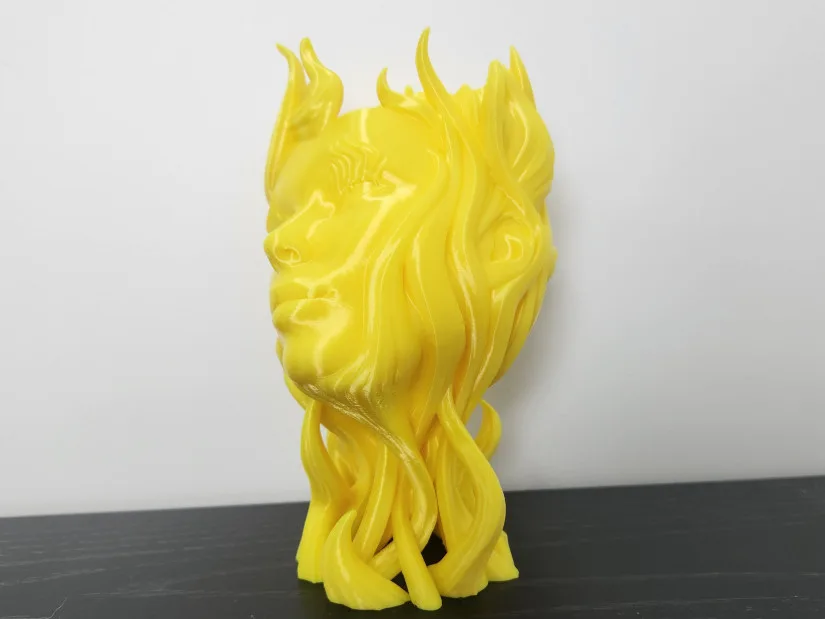
– PETG. We then tested the new Sunlu Rapid PETG from Amazon by printing Pipe Cox’s Fluidia model. This print took 9.5 hours to finish. It didn’t need support, and the outcome was great. The new PETG had no trouble with print speeds up to 300 mm/s, showing no clear flaws in the final model. The print turned out very smooth and clean, even with the various fluid waves. The model’s face shines almost like glass, which really stands out.
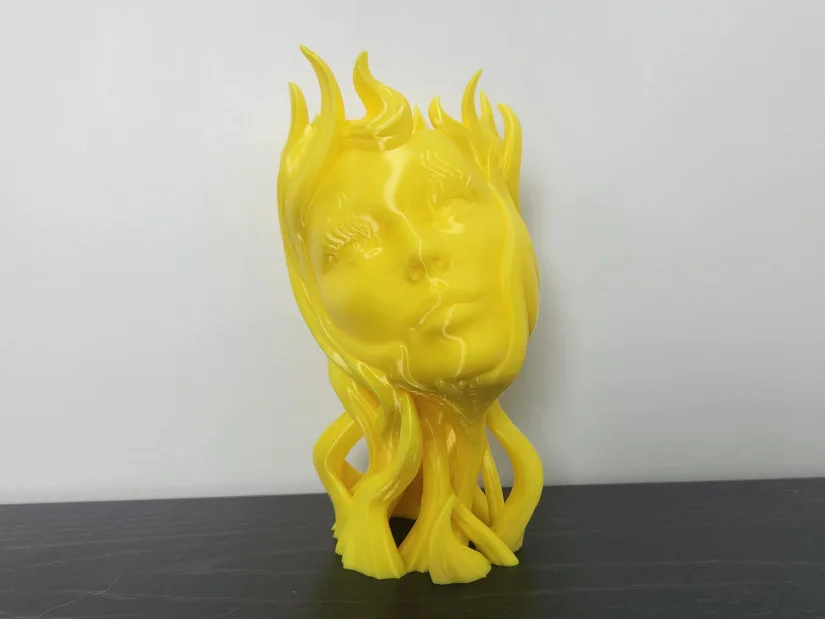
3D Model by Pipe Cox on Patreon
©3DWithUs – Print and Photo: Will Zoobkoff
The QIDI Plus4 works well with filaments like PETG. Its closed design keeps the temperature steady, which helps prevent warping. PETG doesn’t need a heated enclosure, but the closed setup cuts down on possible problems that can happen with open-frame printers, leading to high-quality results every time.
©3DWithUs – Print and Photo: Will Zoobkoff
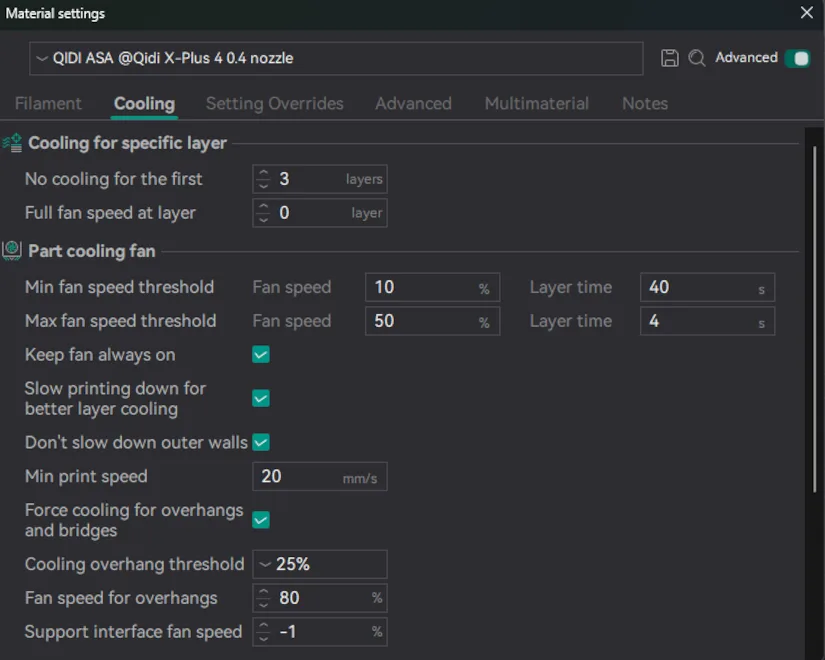
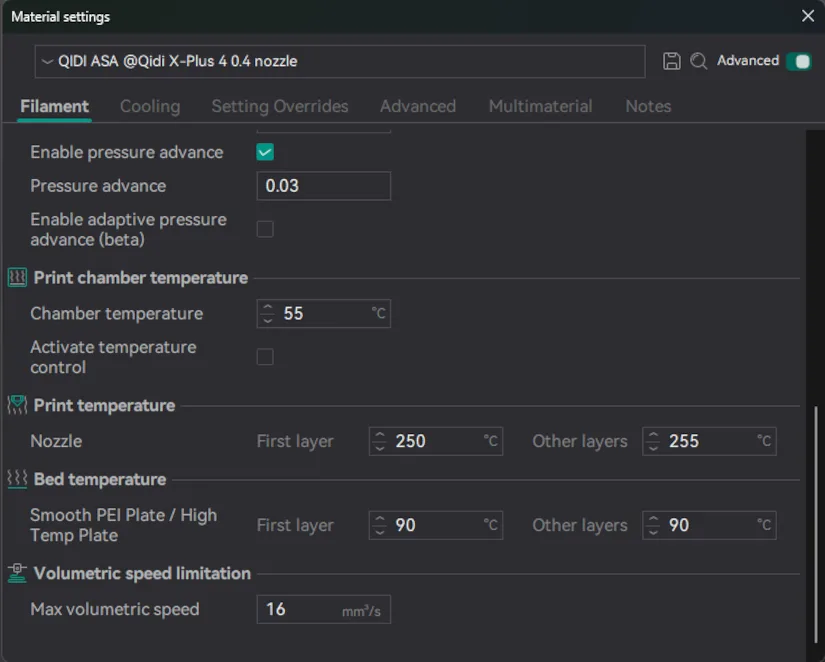
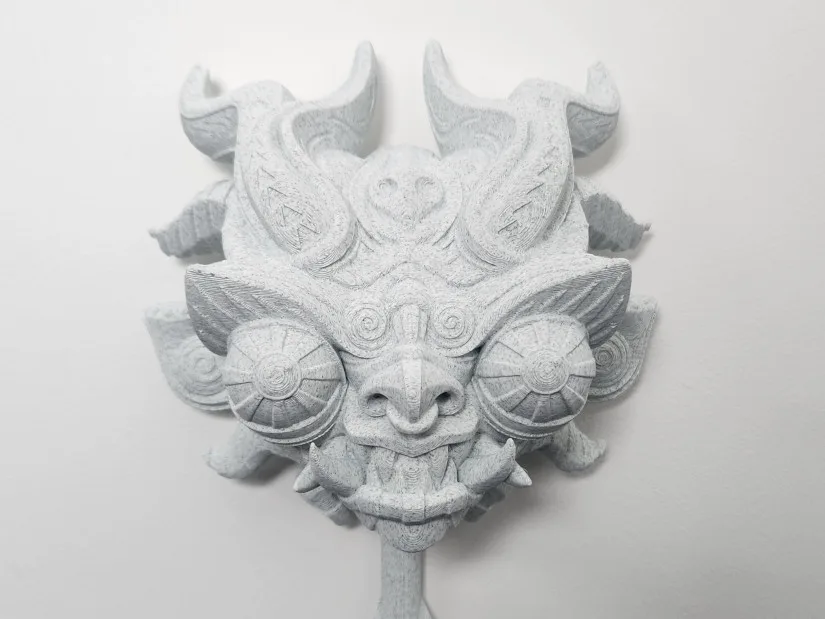
– ASA. For the final print in our testing, we chose one of Pipe Cox’s masks: the Kitsune wall mask. This time, we used Sunlu ASA from Amazon. ASA is an engineering-grade material which is notoriously tricky filament to print with. Using the QIDI ASA filament option, the printer’s chamber was set to 55°C. Before starting the print, the chamber was preheated to this temperature and maintained it consistently throughout the process.
©3DWithUs – Photo: Will Zoobkoff
Note: There was an issue with the heating chamber control board on initial units, affecting users in 120V regions. QIDI promptly addressed this by sending replacement boards to affected users, and the new boards were unaffected by this problem.
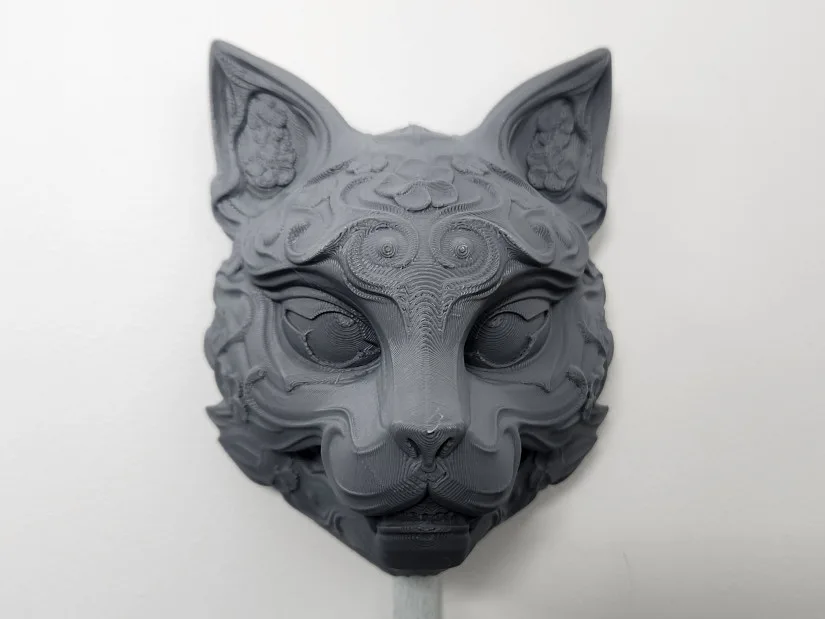
3D Model by Pipe Cox on Patreon
©3DWithUs – Print and Photo: Will Zoobkoff
©3DWithUs – Print and Photo: Will Zoobkoff
The print took 3 hours and 40 minutes to complete. Despite the challenges of working with ASA, the result was fantastic. The chamber’s filtration system also helped minimize the strong odor typically associated with ASA.
©3DWithUs – Photo: Will Zoobkoff
If you have an air filtration or exhaust system, there are models available on Printables that allow you to connect a hose to the rear vent of the QIDI Plus4, further improving ventilation.
Compare QIDI Plus4 to Other 3D Printers
The Plus4 is QIDI Tech’s most recent Core XY enclosed printer, building upon its previous series of machines.
Compare to the QIDI 3D printers:
Compare to similar builds, volume and price range, FDM 3D printers on 3DWithUs.
These three machines are close competitors to the QIDI Plus4 in price, Core XY build and build volume. What makes the Plus4 stand out are its higher bed 120°C (248°F) and hotend temperatures 370°C (698°F) and the included inside heater, which allows for a wider variety of materials to be printed on this machine successfully. Also, the build volume is on a level with Creality K1 Max. The P1S’s strong point is that, for an extra cost, it can be purchased together with the AMS system for multicolor 3D printing. The Flashforge AD5MP machine has a swappable hotend system.
©3DWithUs – Photo: Will Zoobkoff
Conclusion and Pros & Cons
Update There was an issue with the heating chamber control board on initial units, specifically affecting users in 120V regions. QIDI addressed this by sending replacement boards to the affected users, and the new boards do not have this problem. However, exercise caution, as it is unclear which machines have been updated and which still contain the old board.
QIDI PLUS4 Review
Review Summary
The QIDI Plus4 is a 3D printer packed with features that go beyond expectations, giving both hobbyists and pros a dependable, high-performance machine. Its sturdy metal and glass build and cutting-edge features like a 370°C nozzle and 65°C heated chamber show that QIDI had versatility and capability in mind when they created this printer. What sets it apart in its category of 3D printers is its bigger print area, quick printing speeds, smart upgrades such as a double-sided flexible PEI bed, advanced CoreXY design, and the ability to work with engineering-grade filaments.
In our tests, the QIDI Plus4 proved its worth with different filaments and tricky models, giving great outcomes. This printer shows what it can do by working fast and maintaining steady quality. Even when we used tough stuff like ASA and PETG, it made clean, smooth prints. This is thanks to its closed-in design and good filtering system. The QIDI Box, which is coming soon, aims to make this already great setup even better by enabling multi-material printing.
While the user interface could be more responsive, this is a minor drawback in an otherwise exceptional printer. The Plus4’s strengths far outweigh its limitations, making it a worthy investment for those looking to expand their 3D printing capabilities.
With a solid foundation and future-proof design, the QIDI Plus4 is a printer that meets and exceeds expectations. Whether you’re a hobbyist tackling intricate designs or a professional needing high-speed, high-quality results, this printer is ready to deliver.
Pros
• High Temp Nozzle
• Heated Chamber
• Build Volume
• Solid Build Quality
• Fast
• Z-axis Tilt Adjust
• Hardened Nozzle
Cons
• UI can be sluggish