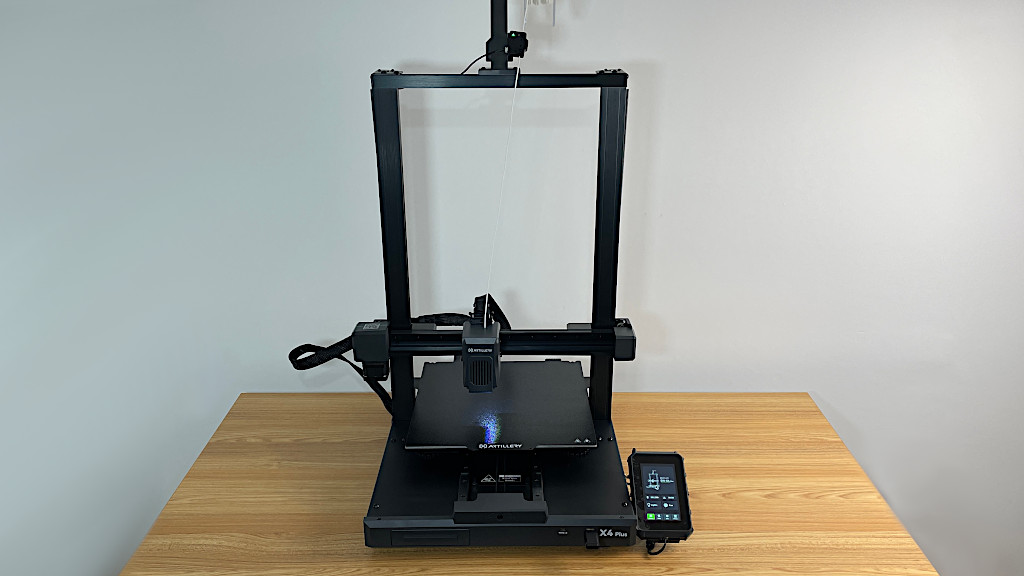
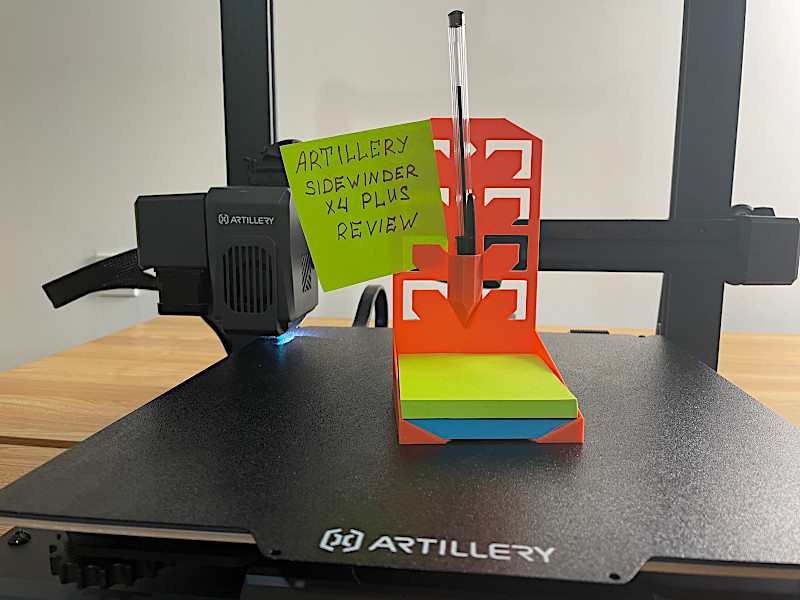
Artillery continues to update their machines with the new Klipper firmware to benefit from enhanced speed and stability features. With a bigger print volume, the Artillery Sidewinder X4 Plus was released a few months after the X4 Pro version. Given the tough competition in the market for this type of machine, consumers continue to benefit by receiving great new features at a low price. Initially, I was surprised not to see an extra cooling fan, which usually accompanies such high-flow and speedy machines; keep reading to see the results. Let’s review the machine, print some challenging models, examine some slicer settings, and outline the Pros and Cons.
Table Of Contents
- Specifications
- Unboxing and Assembly
- Bed Leveling
- Included Model Test Prints
- Slicer Software
- Printing with Organic Supports
- Printing Large Model in Vase Mode
- Automatic Filament Change Pause
- Comparison
- Conclusion and Pros & Cons
Artillery Sidewinder X4 Plus Specifications
Printing size: 300*300*400mm / 11.8*11.8*15.7inch
Platform: PEI Magnetic Flexible Sheet
Bed temperature: Max 100°C
Nozzle temperature: Max 300°C
Printing Speed: Max 500mm/s, (Recommended 250m/s)
Touchscreen: 4.3-inch Full Colour
Connection: USB/WiFi
Extruder: Dual-Gear Direct Extruder
Bed levelling: Auto 121 Points/Manual
Firmware: Klipper
Supported materials: PLA, TPU, PETG, ABS, Carbon
Price: $369-429
Product affiliate links: 3DWithUs is supported by its audience. Purchases via some links may earn us a small commission at no extra cost to you. This helps us to continue bringing you high-quality content. Our guides and reviews remain unbiased and independent.
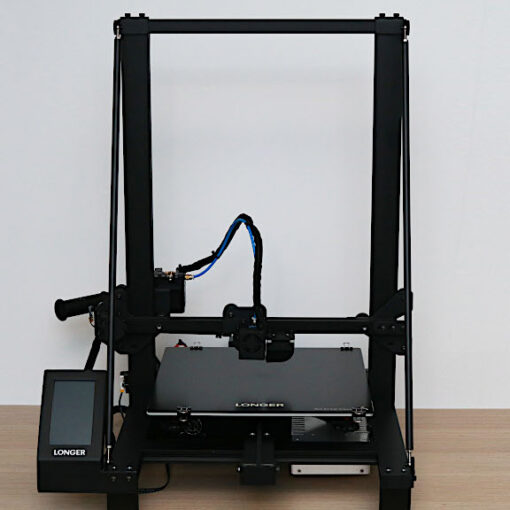
Unboxing and Assembly
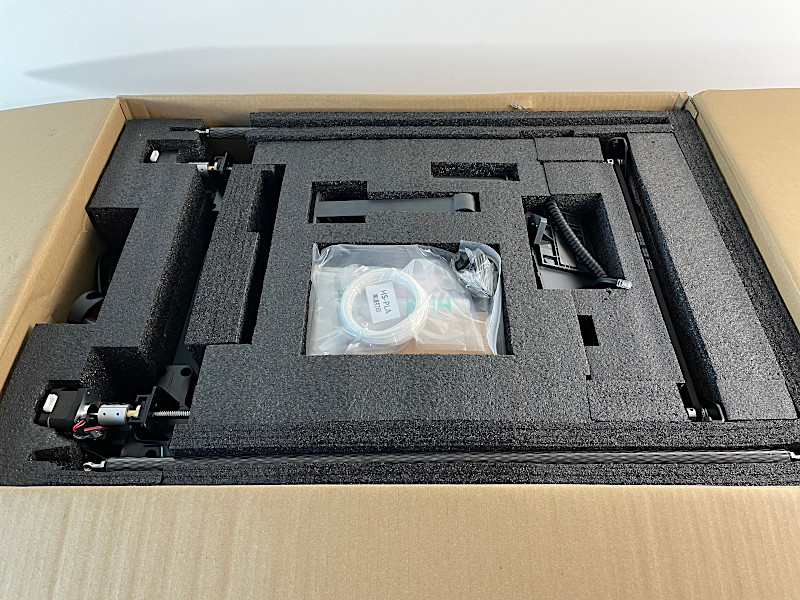
The machine arrived in a well-packed box, with foam protecting all the important parts. I have assembled a dozen machines that came in such pre-assembled or 90% assembled states and generally didn’t have any issues that would be caused during shipment.
©3DWithUs – Photo: Max Funkner
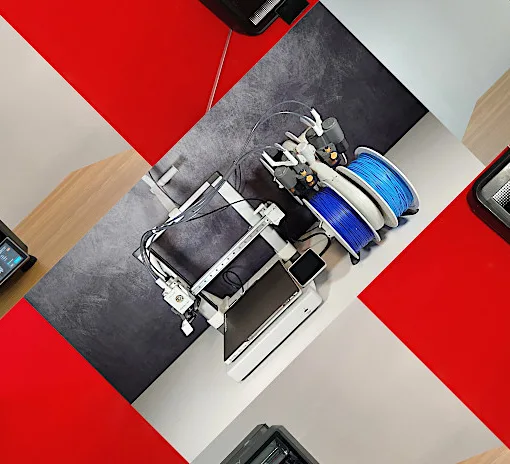
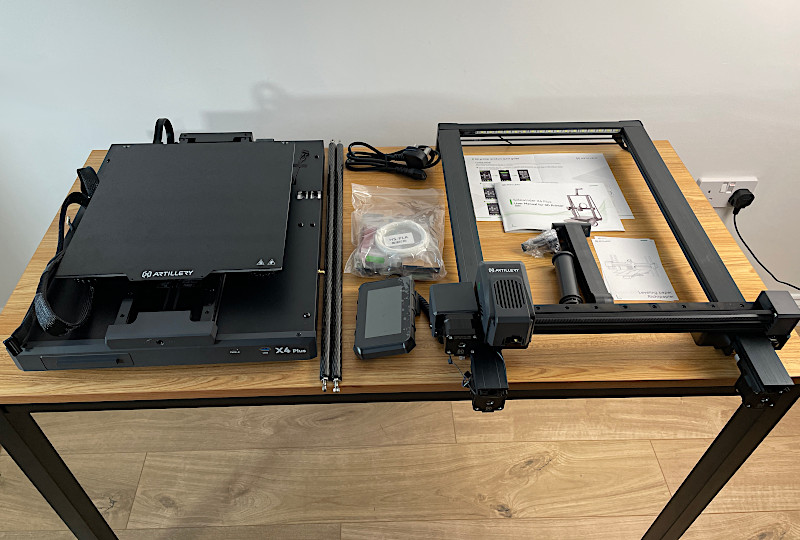
All parts could be placed on one table. It took me approximately 30 minutes to assemble the machine, carefully following the instructions.
©3DWithUs – Photo: Max Funkner
– Linear rails. Linear rails are considered to be better than linear rods because they ensure stable movement and, therefore, higher quality prints. Artillery has highlighted this addition as one of its main features.
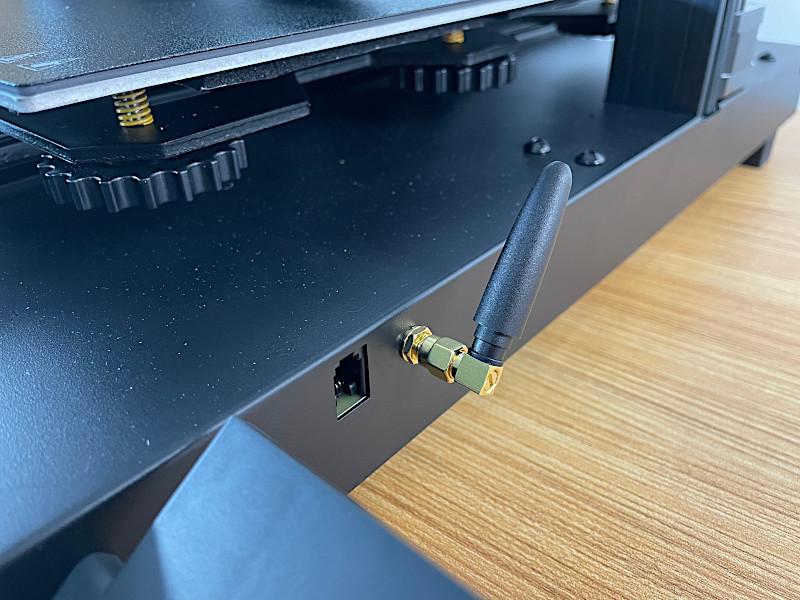
– Connectivity: USB/WiFi. After printing the included test files from the USB stick, I connected the machine to WiFi to access the Fluidd interface and for an easier file transfer option.
Bed Leveling and Calibration
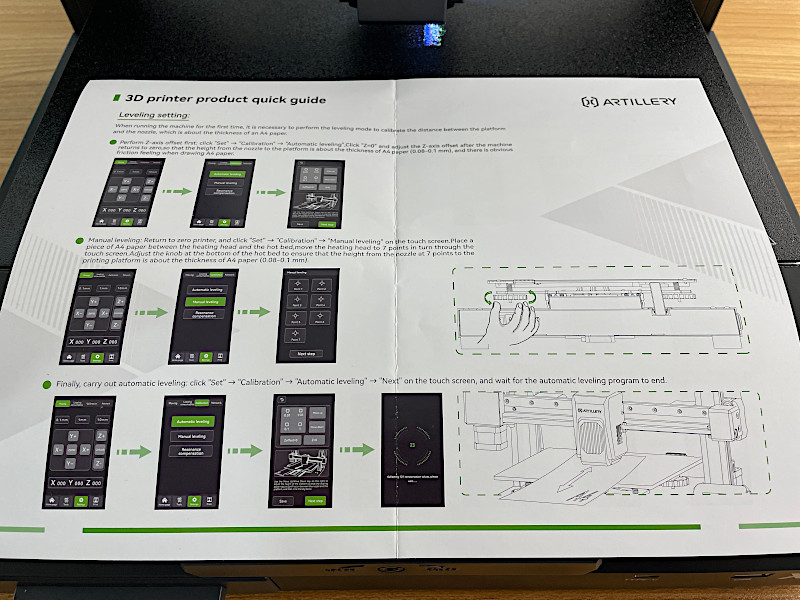
Sidewinder X4 Plus came with a separate leveling guide. The instructions were clear, but when I proceeded to the manual leveling phase, the printer bed wheels felt loose. I decided to do a full 121-point auto-leveling calibration first instead. In the end, for me, the three-step bed leveling worked the best, namely: automatic (including 121 points), then manual using the provided leveling paper, then automatic 121 points again.
©3DWithUs – Photo: Max Funkner
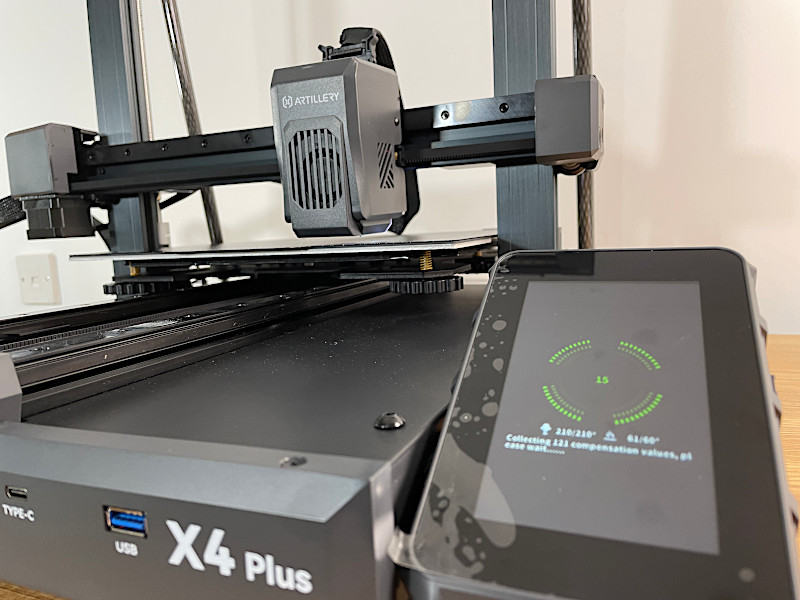
I did my bed leveling calibration only once, and it worked well for all my prints. In a few cases, I adjusted the Z-Offset setting during printing, a very handy feature to ensure the first layer is perfect. The Z-Offset setting can be accessed via the first user interface screen.
Included Model Test Prints
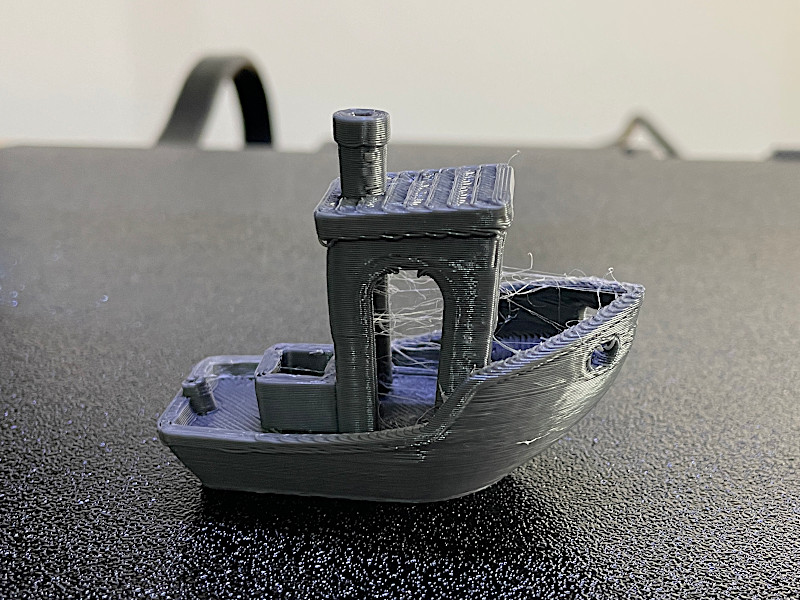
Artillery included a few interesting test files on the USB stick. A boat (modified 3DBenchy) was printed very quickly to demonstrate the printer’s fast printing capabilities. I printed two boats, and in both cases, there were quality issues such as unfinished top layers.
©3DWithUs – Photo: Max Funkner
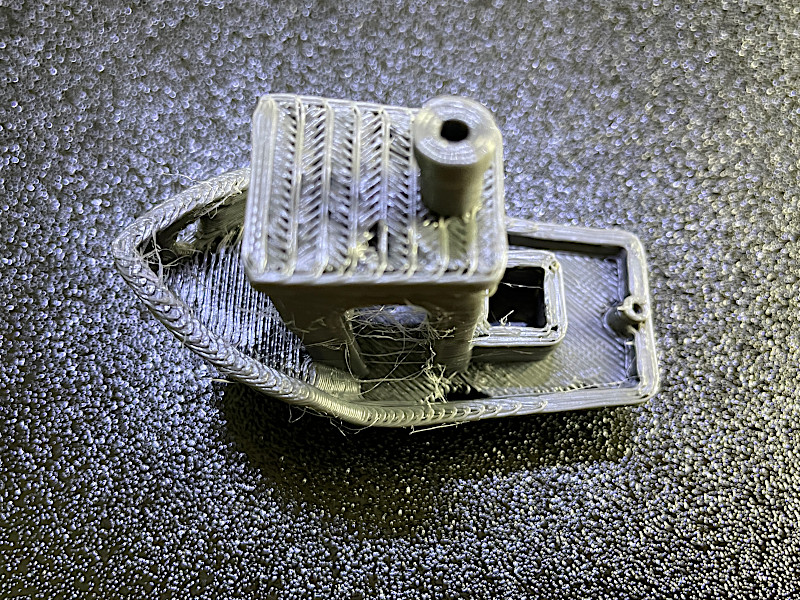
I would recommend that the Artillery team review this GCode, as this file doesn’t do justice to the overall well-performing machine. The rest of the test files came out nicely. Keep reading to see the results of both the included and custom-sliced 3D model prints.
©3DWithUs – Print and Photo: Max Funkner
©3DWithUs – Print and Photo: Max Funkner
©3DWithUs – Print and Photo: Max Funkner
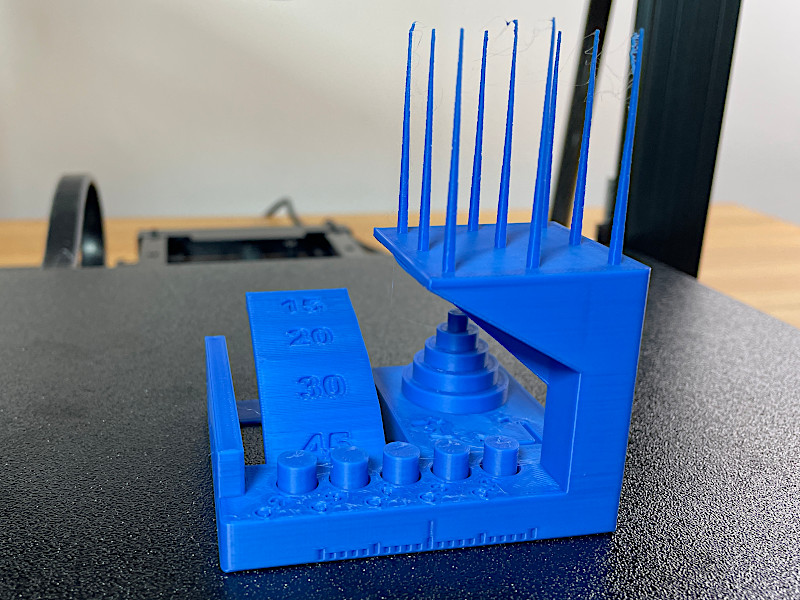
My first custom-sliced model was the Autodesk x Kickstarter FDM 3D Printer Assessment, with files on GitHub. This print is challenging because it tests bridges, cooling, tolerances, and more, all at the default high speed. The model printed very well, with exceptional tolerances and minimal cobweb-like strings at the end of the print.
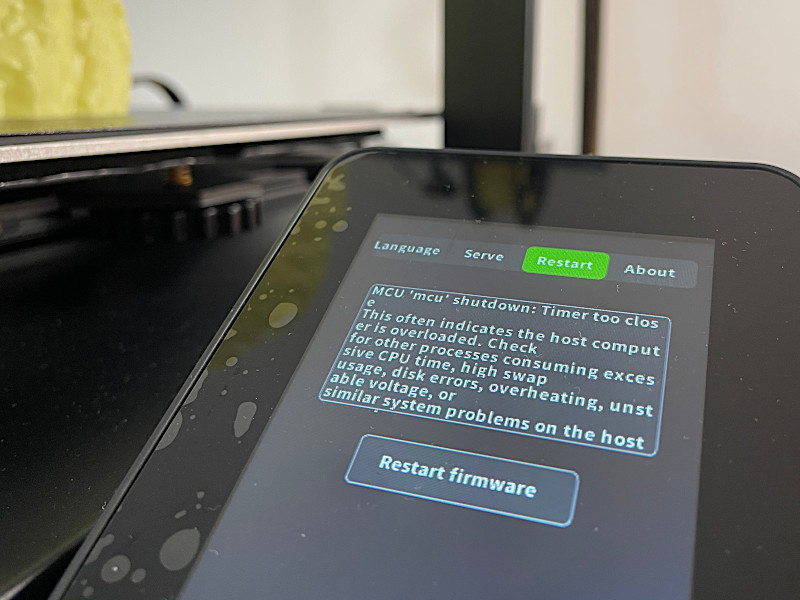
‘Restart firmware’ Message – How to Recover
As I mentioned before, I was surprised not to see an extra cooling fan, which usually accompanies such high-flow and speedy machines. Most likely, this is the reason my printer paused with the ‘Restart firmware‘ message in the middle of the print. This happened twice, during the Bunny print and Vase Mode print. The second time, I managed to complete the print by using the ‘Recovery’ option.
©3DWithUs – Photo: Max Funkner
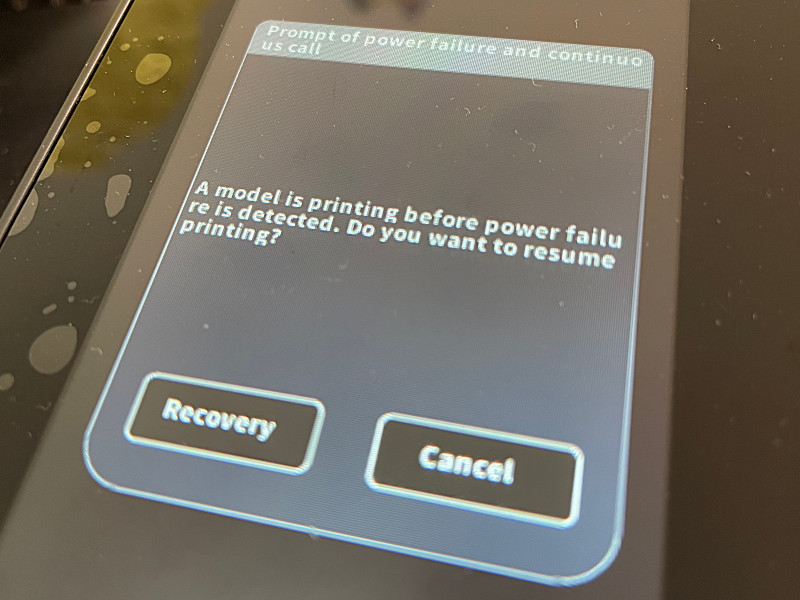
I managed to recover and successfully finish my 7-hour print in Vase Mode. I could have finished my first print as well, but I didn’t wait enough time and stopped the print by mistake. Mental note… WAIT.
After these couple of incidents, I started using the fan’s Gale option almost always after the first layer of any print.
Slicer Software – Settings and Tips
The included ArtillerySlicer is based on the highly reputable PrusaSlicer. As this machine is very new, there are no Sidewinder X4 Plus profiles available on other slicer software. I printed all models using ArtillerySlicer with no issues. For specific models, I had to adjust settings a little bit to accommodate specific needs.
Test Printing – Organic Supports
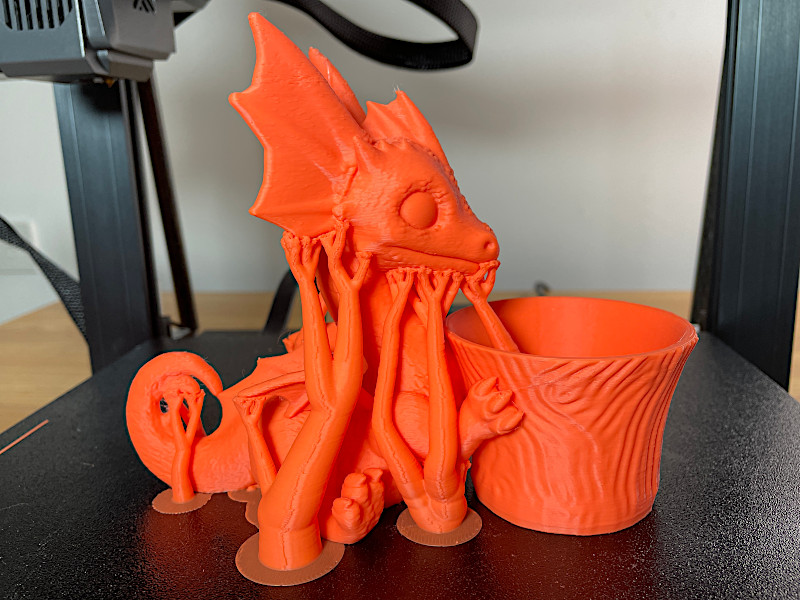
I loved the way organic supports worked for the Dragon model by ChelsCCT. Initially, ‘Automatic painting’ showed me the locations where supports were needed. Then I added extra by painting manually to cover some especially vulnerable places, such as the tongue, for example.
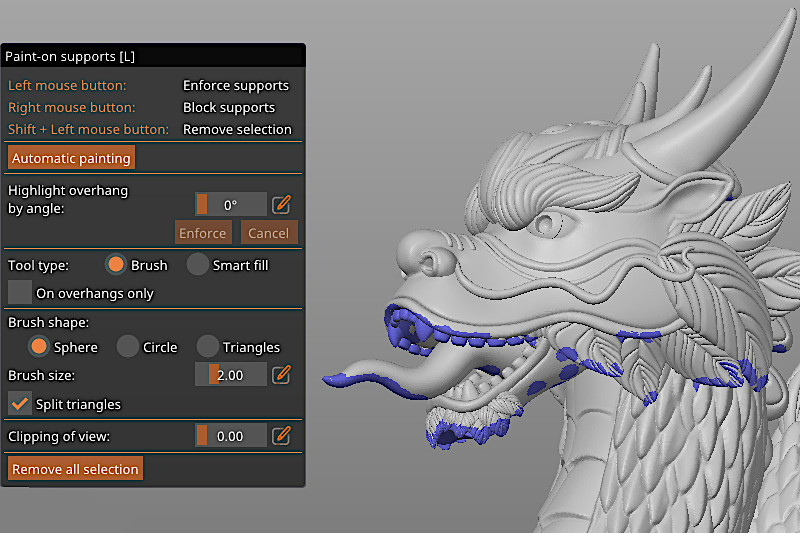
To pick Organic Supports, go to Print Settings > Options for Support Materials and Rafts > Style. I also increased First Layer Expansion for the support material base for better bed adhesion. In the Supports area, I picked the ‘For Support Enforcers Only’ option.
3D Model by ChelsCCT on Thangs
©3DWithUs – Print and Photo: Max Funkner
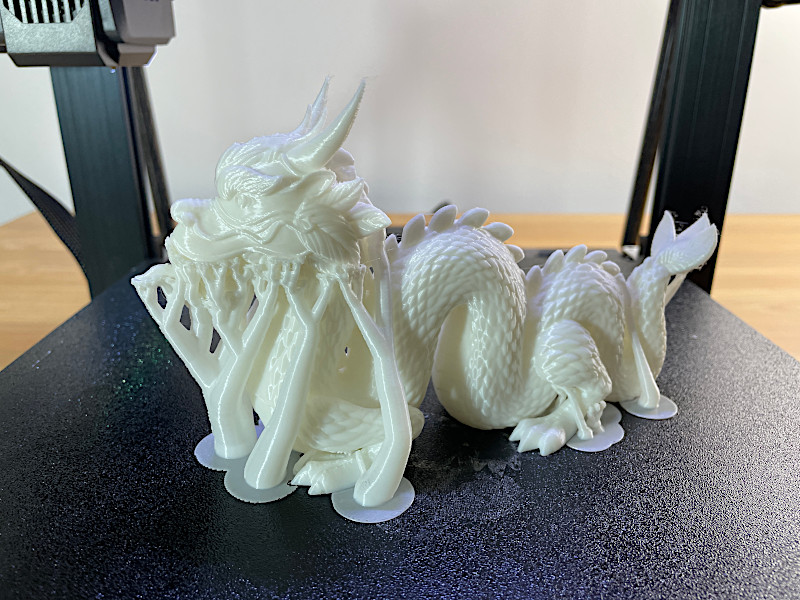
The dragon model took me approximately 7 hours to print. I was thrilled to clear organic supports around the dragon’s tongue, as this needs to be done very carefully. The provided sharp pliers are a brilliant tool for such a task.
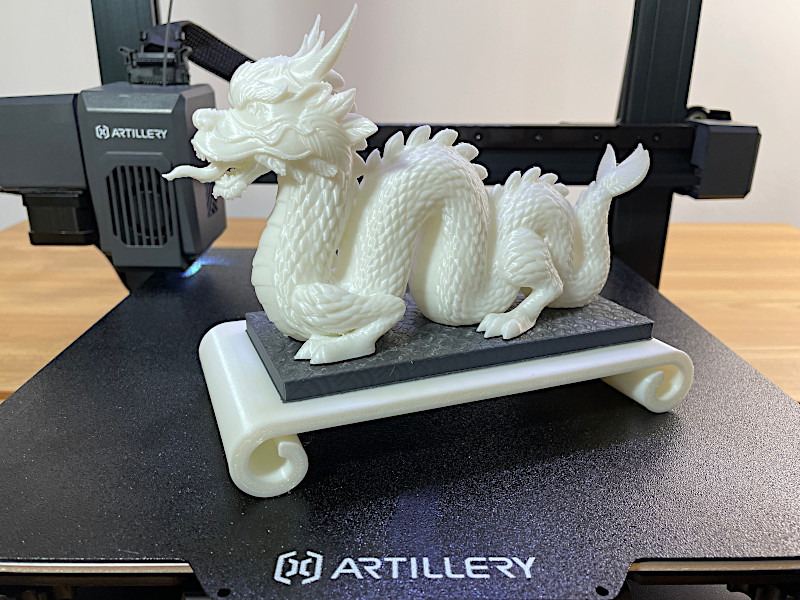
An experienced 3D print designer, ChelsCCT, has provided us with another masterpiece. The dragon, together with the included bases, looks gorgeous.
Another model I tried to print using organic supports was my ‘Dog the Gardener’ model. Previously, I had printed this model only with the help of Simplify3D, as it allows for minimal custom support structures. I was greatly impressed with the organic support structures and the ‘Automatic and Manual Painting’ features on this slicer.
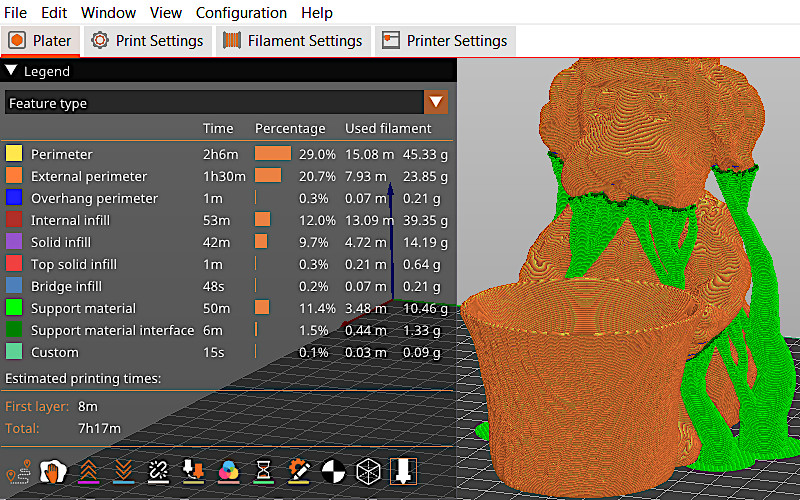
3D Model on Cults
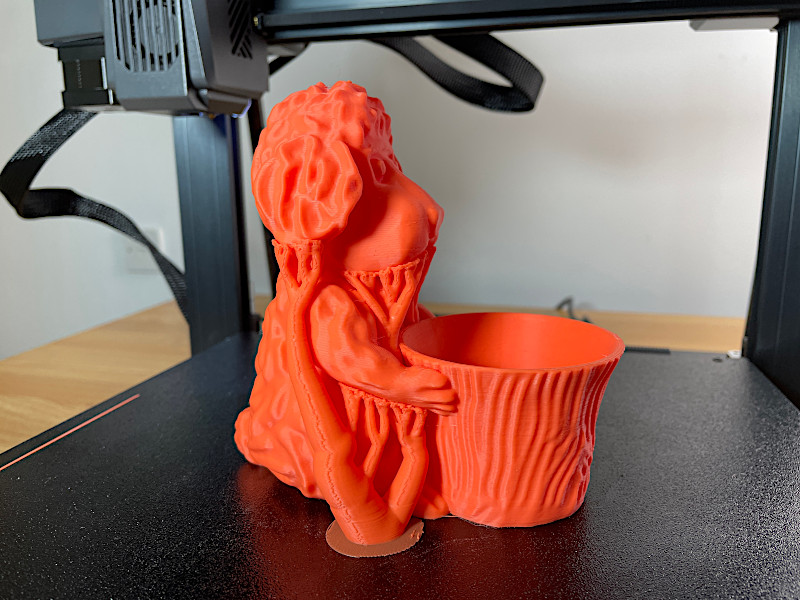
©3DWithUs – Print and Photo: Max Funkner
It was slightly more difficult to remove the organic supports from the model in comparison with the supports created in Simplify3D, as their support structure is much smaller. However, I was very impressed with the result after the supports were removed. The dog’s chin, ears, and underarm areas are very clean.
©3DWithUs – Print and Photo: Max Funkner
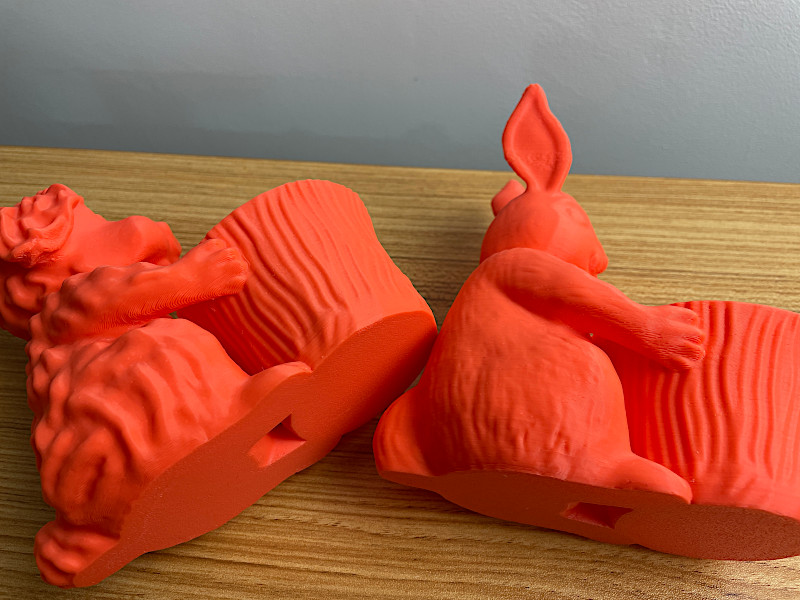
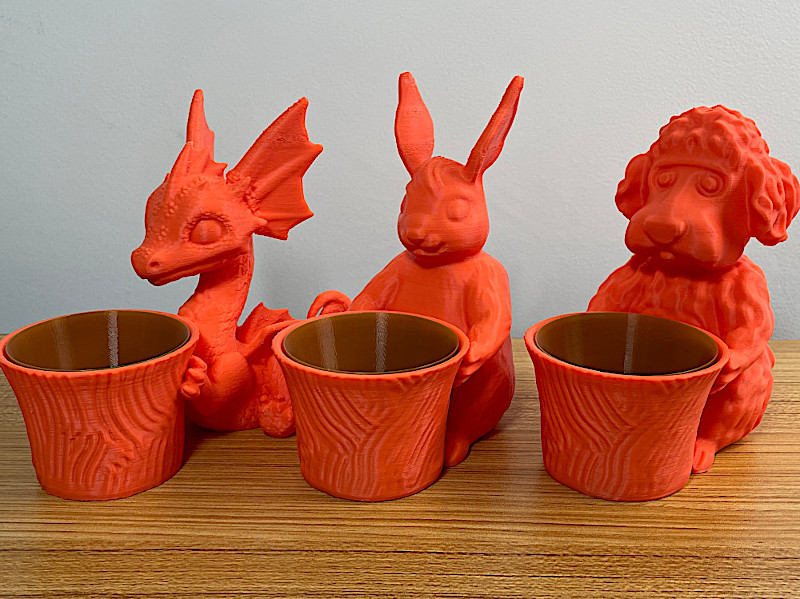
For the comparison, I printed the Dog with supports and the Bunny without. I was impressed with the Bunny’s print result as well, as I mentioned before. The Sidewinder X4 Plus doesn’t have an extra fan, and the main fan’s Gale option seems to do the job.
3D Model on Cults
©3DWithUs – Print and Photo: Max Funkner
A few weeks after the publication of the initial review, we launched another model to add to the collection: Dragon. Now we have three models to cover many events. Dragon, due to the complexity of the parts, can be seen as challenging to print. The only way to print it is using Organic Supports. The print came out very well on the Sidewinder X4 Plus.
©3DWithUs – Print and Photo: Max Funkner
Printing Large Model in Vase Mode
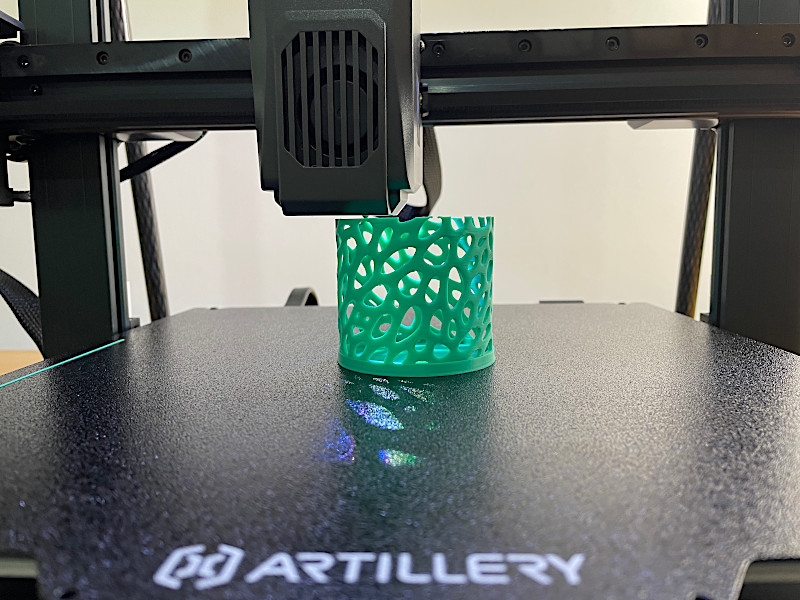
To feature the large build volume (300 x 300 x 400 mm³ / 11.8 x 11.8 x 15.7 inches³), I printed a Redwood Giant Tree Trunk Vase. Such vases are easy to print with both wood and flexible filaments. In the image below, vases of different sizes and materials are stacked together. Slicer setting: Print Setting – Vertical Shells – Spiral Vase.
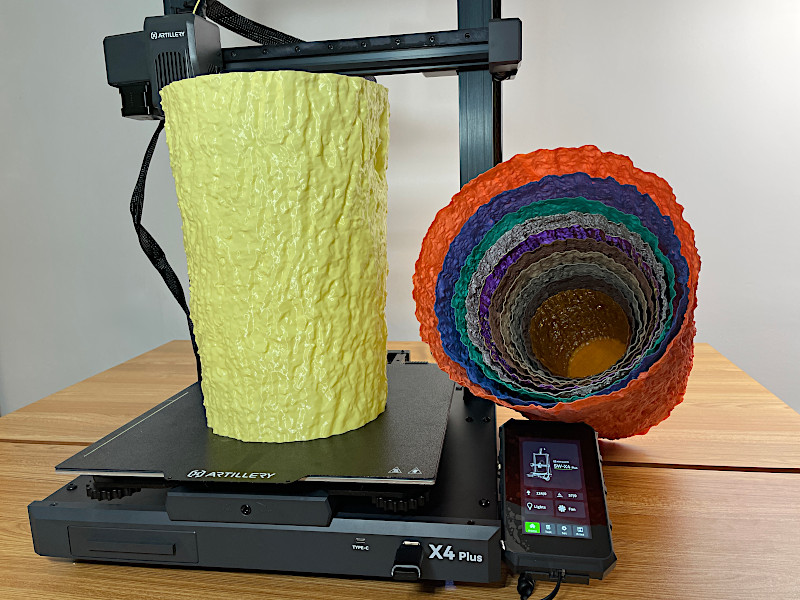
This model is Scanned Giant Redwood Tree Trunk Vase, a part of the Scanned Tree Trunk Models collection on Cults. A lot of items can be created from such precursor models and from the idea. On 3DWithUs, we have a 3D Scanned Tree Texture for 3D Printing Guide and a video on this subject. The Artillery Sidewinder prints such objects without any issues. I haven’t tried it, but I am pretty sure that 0.6mm and 0.8mm nozzles may benefit this machine for printing large prints faster.
Automatic Pause for the Filament Change on a Specific Layer
In various slicer software, it is possible to add an extra command that would automatically pause the printing process at a specific height or layer for a filament change. For printers with Marlin firmware, such commands were M600 or M0, but these commands don’t work on Klipper firmware, and various slicer software are not tuned for such tasks. Here’s a tip to work around it.
Preview: Fluidd
I did the following, and it worked for me.
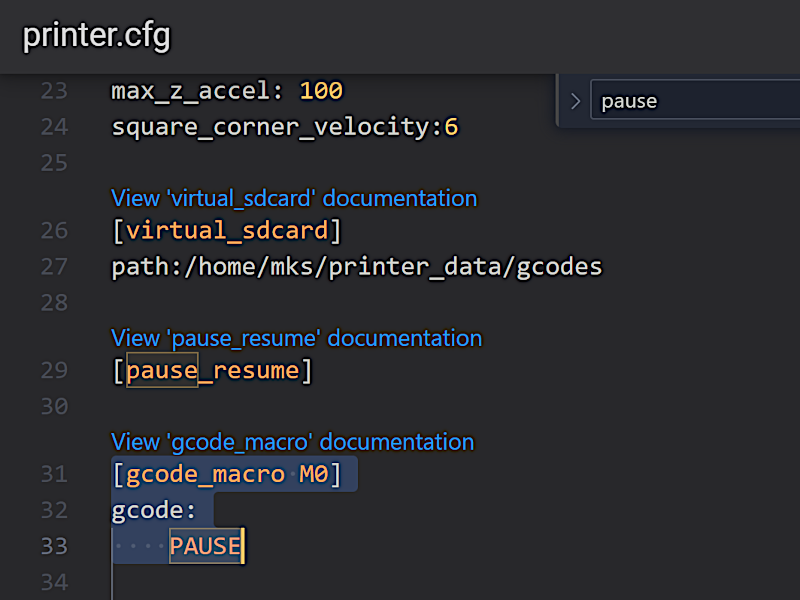
– Tip. Go to In Fluidd -> Configuration -> printer.cfg. Then, after pressing Ctrl+F, type ‘pause’ into the search. This will lead you to the [pause_resume] area.
Add the following code:
[gcode_macro M600]
gcode:
PAUSE
Click the Save & Restart button in the upper right corner.
Please note that such macros may change in due time. For updates or other macros, please go to the Klipper Official GitHub page.
In the slicer software’s preview area, assign pauses. It is also possible to assign a color in the preview — this allows you to check the result ahead of printing the model and helps in picking the right color.
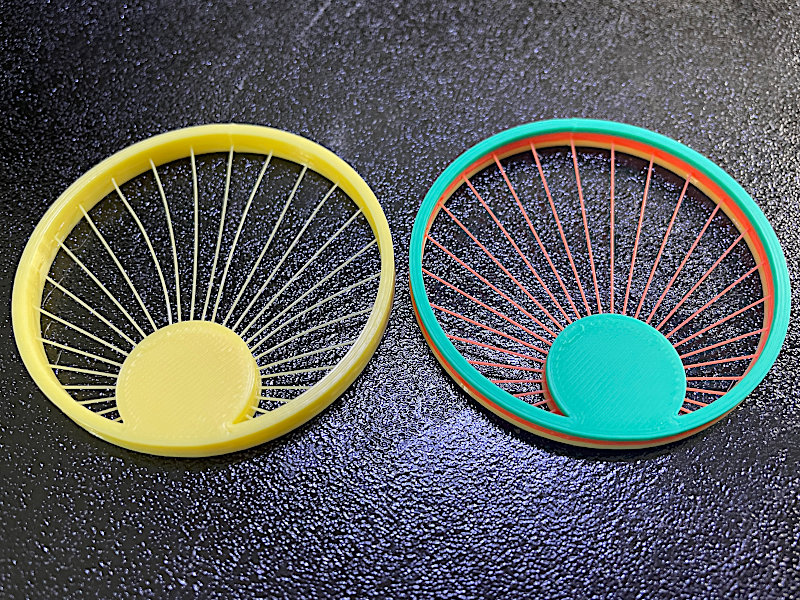
3D Model by 3DPrintBunny Thangs
©3DWithUs – Print and Photo: Max Funkner
These are quick string test prints that test both bridging/cooling and automatic color changes I applied in the slicer software.
3D Model on Cults
©3DWithUs – Print and Photo: Max Funkner
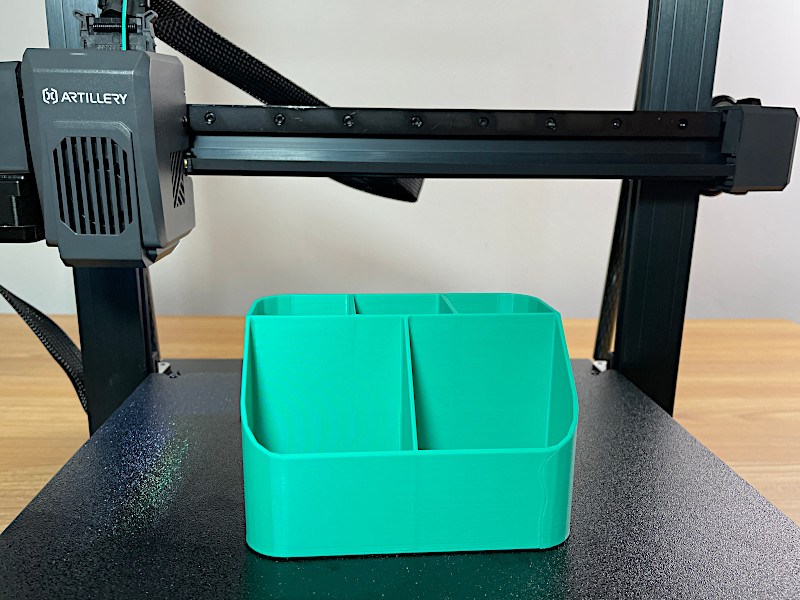
For models that have many independent starting points, like the Post-it Note Holder, for example, I used extra bed adhesion, namely, build plate glue Magigoo from Amazon. As I am still testing this machine, I may add more media and case examples in the future.
Compare to Other Artillery Printers
Sidewinder X4 Pro vs Sidewinder X4 Plus
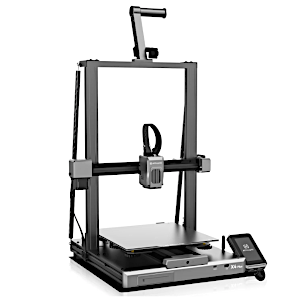
The Sidewinder X4 Pro and the Sidewinder X4 Plus are the latest additions to the Artillery3D family show a remarkable balance between simplicity and functionality, catering to the needs of both beginners and experienced users.
The Sidewinder X4 Plus and the Sidewinder X4 Pro both run on Fused Deposition Modelling (FDM) technology and share several similarities. However, the primary distinction lies in their respective sizes, with the Plus model boasting a larger build volume of 300 x 300 x 400 mm, while the Pro model offers a still impressive 240 x 240 x 260 mm build volume.
Artillery aims to impress users with high print speeds, asserting that both the Sidewinder X4 Plus and X4 Pro models can achieve speeds of up to 500 mm/s (Recommended 300 mm/s). Furthermore, these printers feature nozzles capable of printing at elevated temperatures of up to 300 °C. The incorporation of dual-gear direct drive extruders, all-metal linear rails, magnetic PEI build plates, and many point auto-levelling further emphasize Artillery’s commitment to top-notch performance.
Sidewinder X2 3D Printer, SW-X2
The Artillery previously made a large build volume Sidewinder X2 3D Printer, SW-X2, which also received good reviews and an overall rating on Amazon.
Sidewinder X4 Pro Series
The Artillery Sidewinder X4 Pro is the latest machine. As it runs on Klipper firmware, such features as Pressure Advance and Input Shaping are enabled. It is Artillery’s entry for the ‘race for speed’ competition, as this machine has a max printing speed of 500mm/s.
Read Artillery Sidewinder X3 Review by Richard Hirst (Hirsty3D) on 3DWithUs.
Read Artillery Sidewinder X4 Pro Review by Richard Hirst (Hirsty3D) on 3DWithUs.
On 3DWithUs, we have a comprehensive comparison guide covering FDM 3D printers. Artillery Sidewinder X4 series machines, both price and quality-wise, is highly comparable to other machines.
Conclusion and Pros & Cons
Artillery Sidewinder X4 Plus Review
Review Summary
The Artillery Sidewinder X4 Plus is the logical continuation of the Sidewinder series machines. All the new features that became widely available last year were implemented as expected. An affordable, plus-sized machine that can deliver prints quickly will be particularly appreciated by those looking to increase their productivity. I experienced a hiccup with a couple of prints halfway through the testing, which led me to reduce the overall rating to 4.2 stars. Overall, I am happy with the product, the launch offer that includes an extra 5 spools of filament is a bargain!
Pros:
– Price
– Large Volume
– Klipper Firmware
– Recovery Feature Works Well
Cons:
– May Need Tuning
– Had to Use Restart Firmware and Recovery Feature in the Middle of the Print