In this tutorial, you’ll learn how to import a 3D model into Blender, modify it by remeshing it into a Blocky version, and export it for 3D printing or sharing. You can also follow along with the video if you want to see the process in real-time.
Creating 3D models can be a fun process, but it can be difficult without experience or training in 3D modeling programs like OnShape or Fusion 360. Modifying existing models is an easy way to get comfortable with 3D modeling programs, and the 3D modeling program Blender provides many options for this style of mesh modification.
Choosing a model to modify
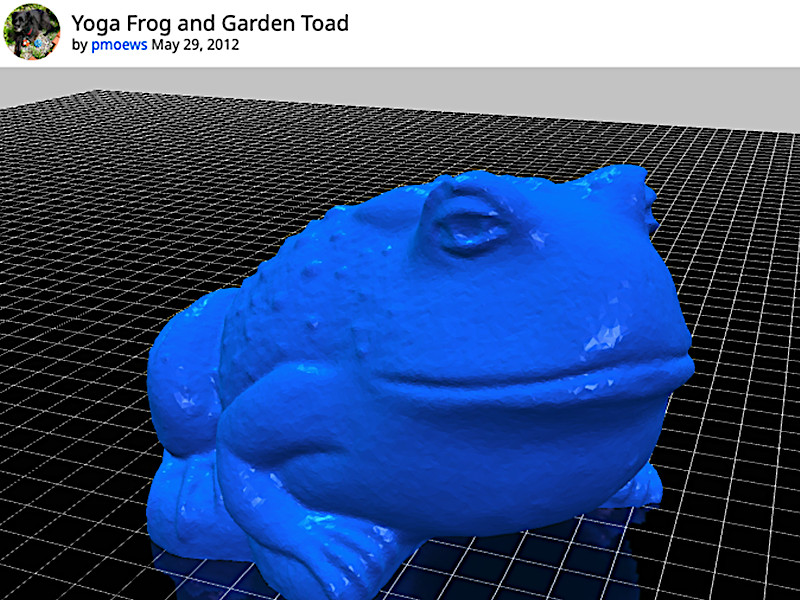
Creating blocky models is a simple process that only requires a few steps in Blender, but some models work better than others in this process. Monolithic models like the Garden Toad by pmoews are ideal for this process as they don’t generate any unprintable geometry and can be printed with minimal post-processing.
To help with printability on FDM 3D printers, the model can be rotated 45 degrees so the blocks have self-supporting surfaces and don’t require support material. You’ll need to cut the blocks off at the base to get a flat surface, but this is a quick and easy process with most slicers. If you want the blocks to be aligned parallel to the build platform, skip the “Rotate Model” and “Apply Plane Cut” sections below.
Import model into Blender
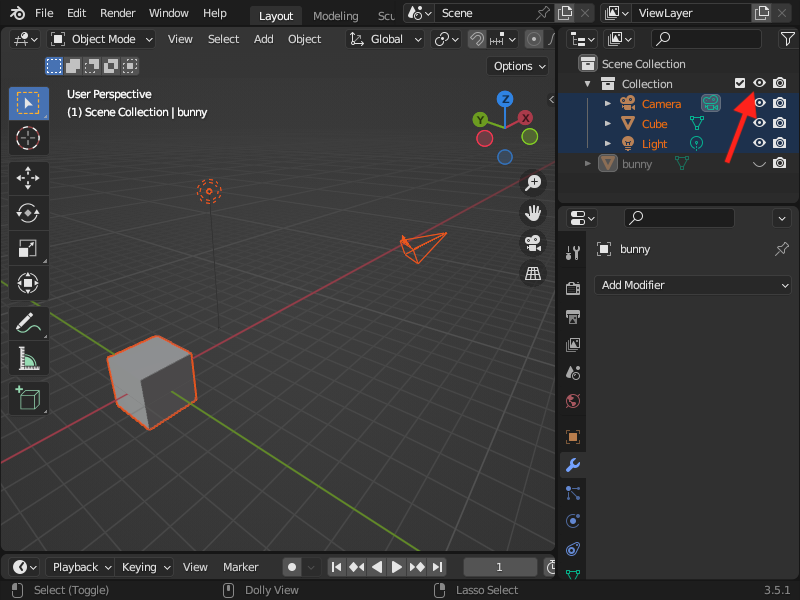
1. Clear the Scene. Open Blender and hide the default Cube, Light and Camera by clicking on the eye icon at the top right.
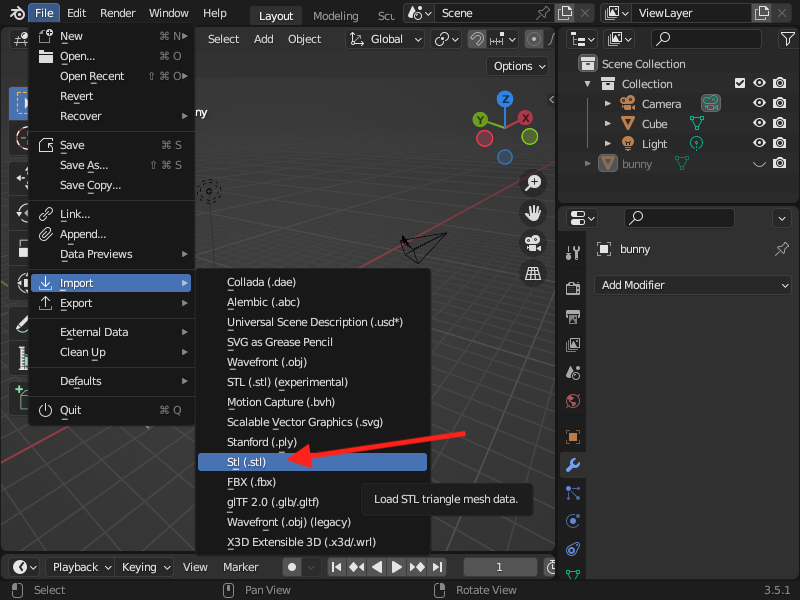
2. Import Model. With Blender open, go to “File/Import/.stl” to import your .stl file. Once imported, you should see your model in the workspace.
Rotate Model
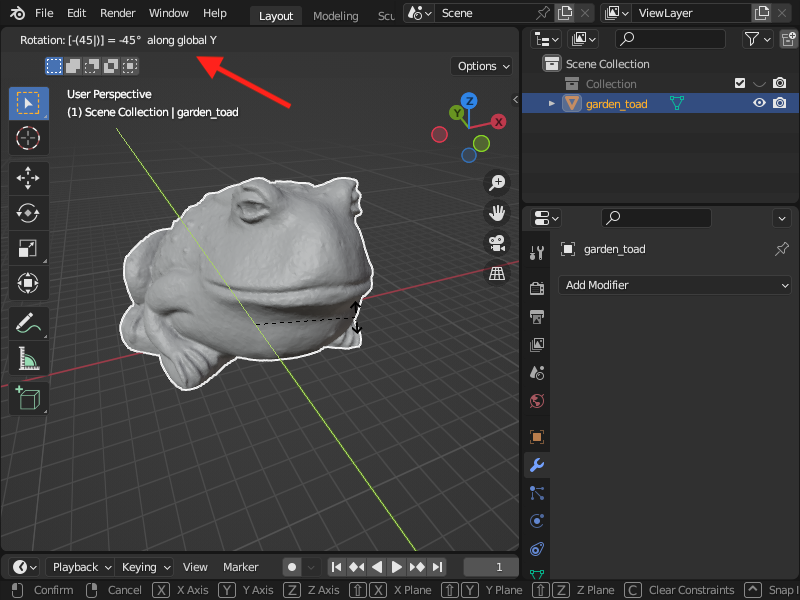
3. Rotate Model. Select the model and press “R” for rotate, “Y” for Y axis, and “45” for 45 degrees. This will rotate the model +45 degrees around the Y axis.

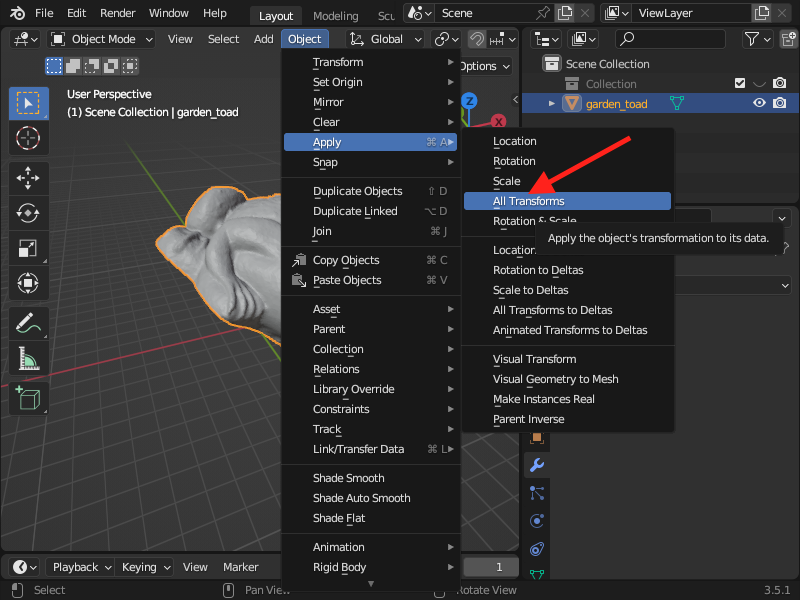
4. Apply Rotation. Once the model has been rotated, select “Object/Apply/All Transforms” to apply the rotation to the model.
5. Rotate Model. Once the rotation has been applied, you can rotate the model back to its original position by pressing “R” for rotate, “Y” for Y axis, and “-45” for -45 degrees. This will rotate the model -45 degrees around the Y axis.
Add Remesh Modifier
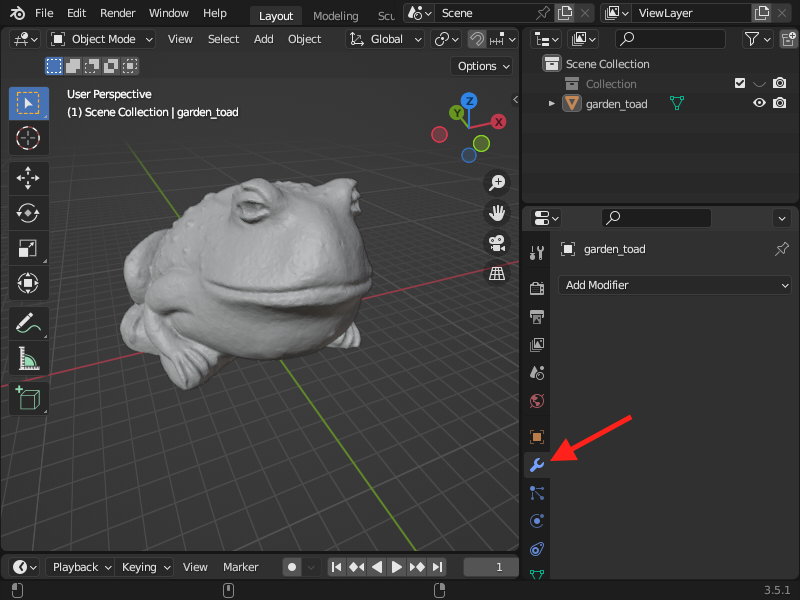
6. Open Modifier Properties Tab. Selecting the wrench icon on the right of the screen will open the modifier properties menu.
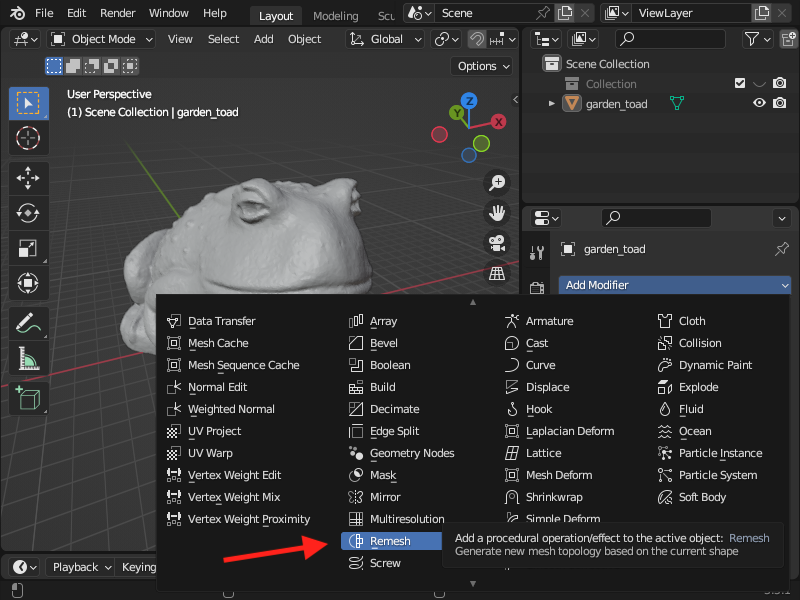
7. Select Remesh Modifier. Selecting “Add Modifier” will bring up a list of available modifiers. Under the “Generate” heading, select “Remesh”.
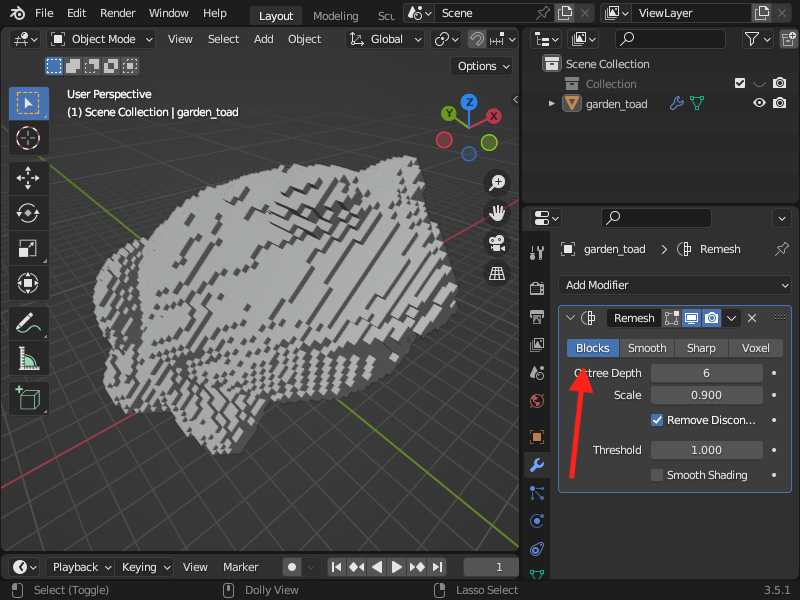
8. Edit Remesh Modifier Parameters. Select “Blocks” to remesh the model with blocks. The “Octree Depth” will determine the overall size of the blocks. It’s easy to crash Blender by setting this too high. Increment the value slowly in the range between 3 and 7 for best results.
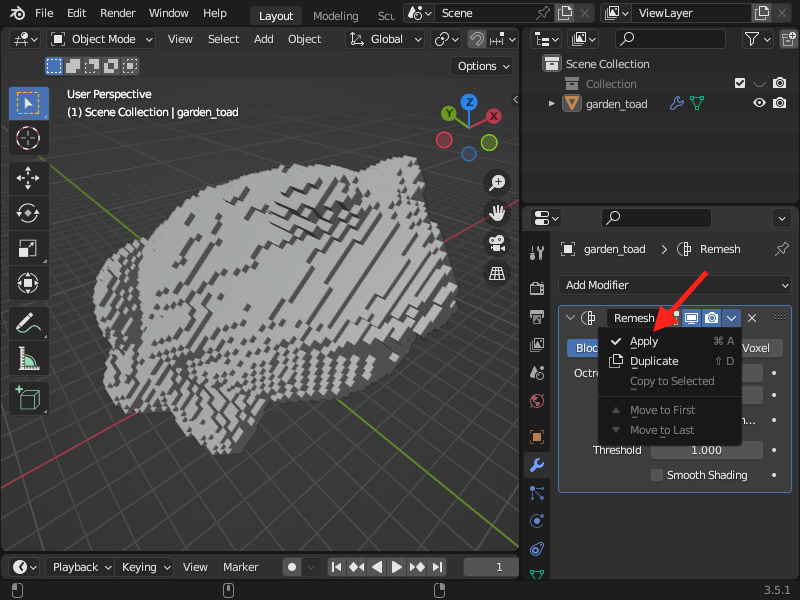
9. Apply Remesh Modifier. Once you’ve found a block size you like, click the downward facing caret next to the camera and select “Apply”. This will add the modifier to your mesh.
Apply Plane Cut / Bisect
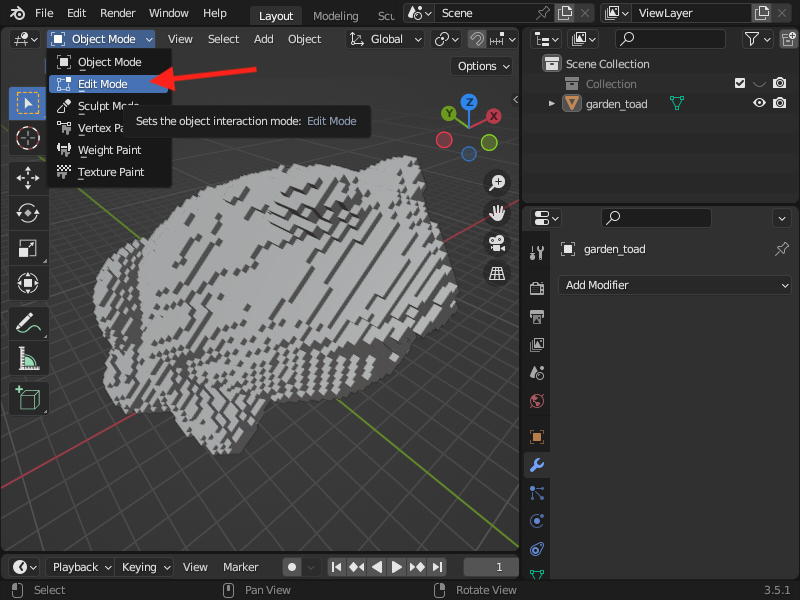
10. Switch to Edit Mode. Press “Tab” or select “Edit Mode” from the menu at the top left.
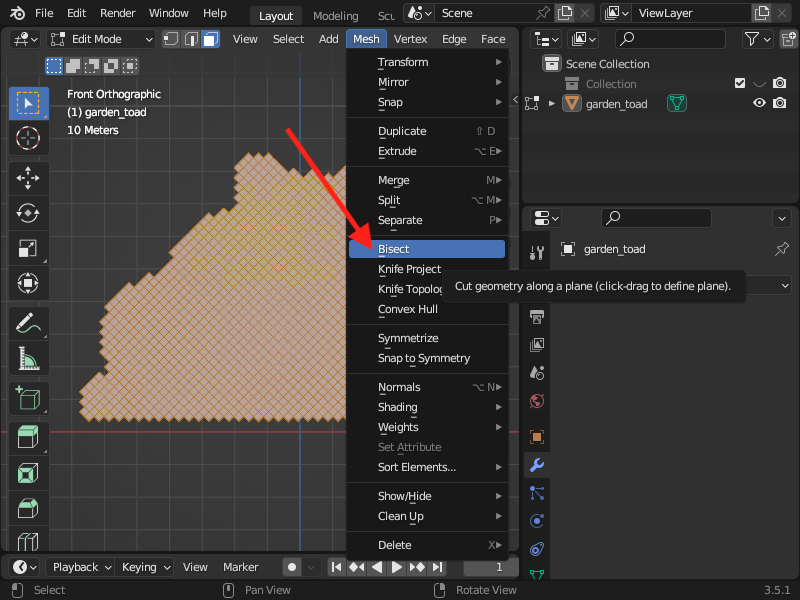
11. Activate the Bisect Tool. Press “A” to select the entire model and then press “3” to activate face selection. Select “Mesh/Bisect” the click near the bottom of the model and drag the line across the model. Holding down “Control” will lock the knife line flat relative to the bottom of the model to make it easier to select.
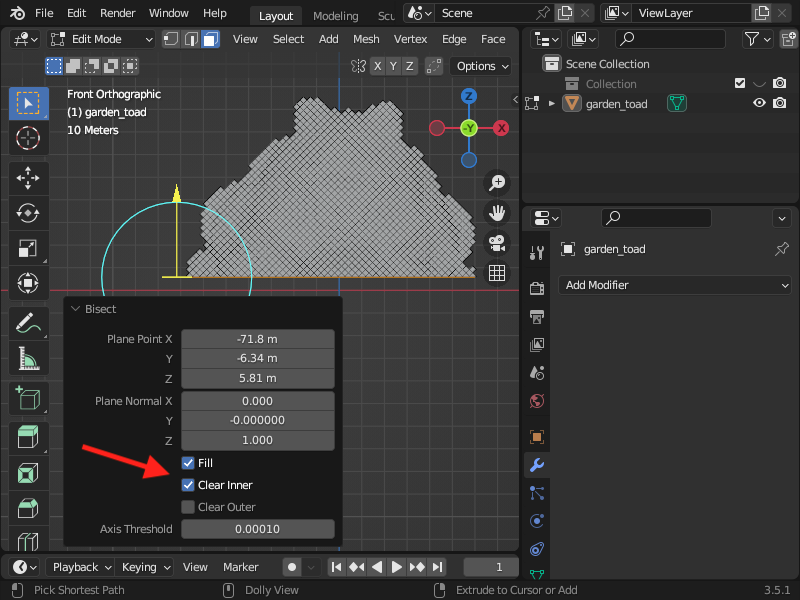
12. Activate the Bisect Tool. Once the line has been drawn, select “Fill” to remesh the model and fill the hole left by the Bisect tool and select “Clear Inner” to delete the lower portion.
Export Model and 3D Print (Optional)
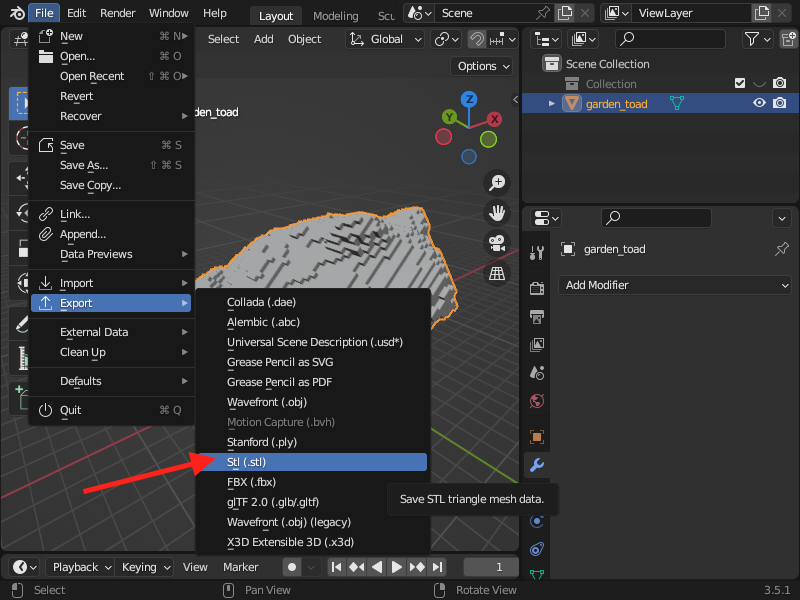
13. Export Model. With the model selected (model will be outlined when selected), go to “File/Export/.stl” to export your .stl file.
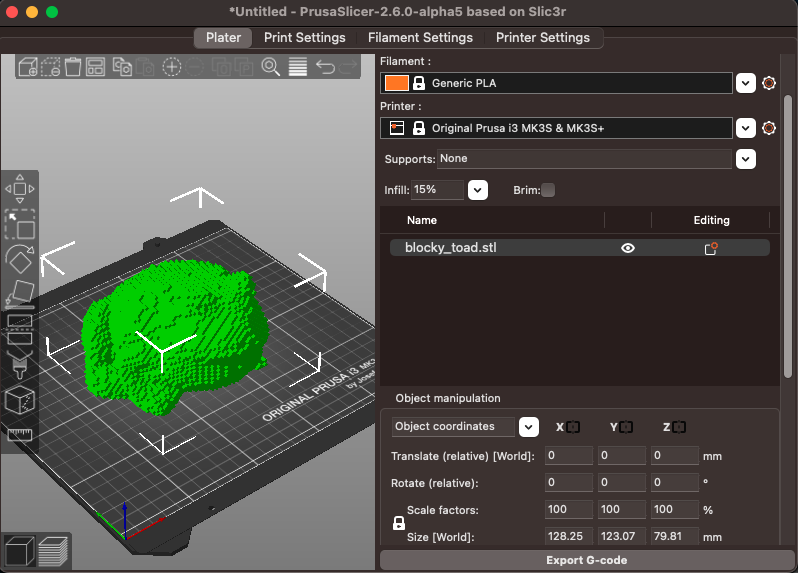
14. Import model into slicing software Import the .stl into your slicer of choosing and create a printable .gcode model.
15. Print model. Print the blocky model and admire the design that you created.
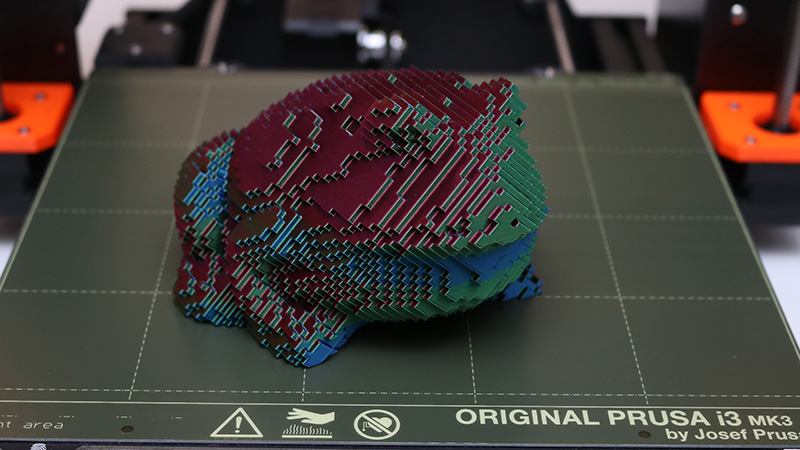
©3DWithUs – Print & Photo by Andrew Sink
Sharing your Blocky models
Once you’ve finished creating your model, you can share it on 3D model repository sites like Printables, Thingiverse, or others. Using a title with “Blocky” and adding a detailed description can help users find your model.
More Blocky Frogs
Here is another Bored Blocky Frog I published on Printables. This is an example remixed from the awesome model by Mustang Dave! Prints great without support. Have a look at other people’s 3D makes.
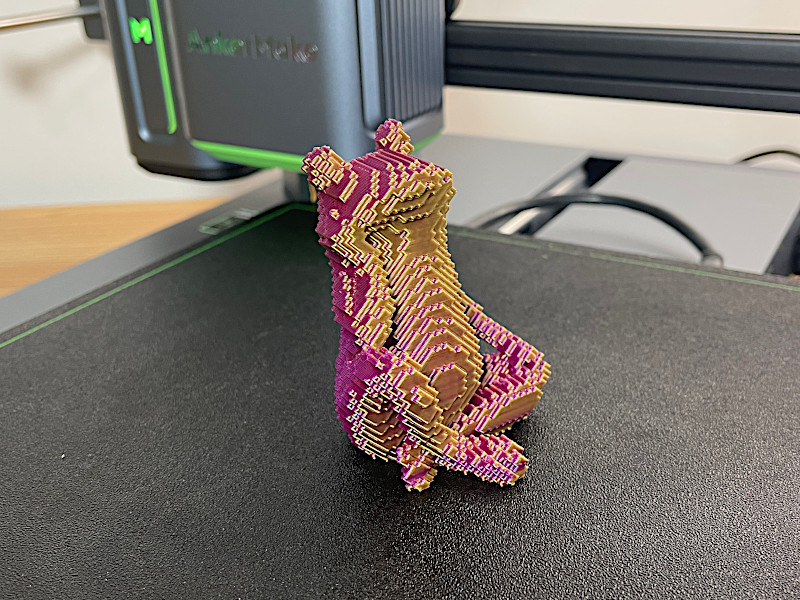
©3DWithUs – Print & Photo: Max Funkner
Dual and Tri-color PLA work well on Blocky models. It’s also spectacular to watch such models on the turntables. Look at his belly.