Have you already mastered the time-lapse recording while operating FDM or Resin 3D printers? If you are a creator in 3D printing, you will need to have one more skill under your belt – making awesome time-lapses. Here’s why: it will help to showcase the model, making it far more appealing from a marketing point of view. Saving valuable time and resources, a successful time-lapse will offer greater proof than a slicer preview that the design is viable for 3D printing. Let’s dive in and take a look at the best solutions currently available for time-lapses. We’ll also take a look at which format is best to showcase the result – GIF or MP4.
This Guide Covers
- Uses of 3D Printing Timelapses
- Recording Timelapse on FDM 3D Printers
- Recording Timelapse on Resin 3D Printers
- Footage Conversion Methods & Software
- GIF or MP4?
Uses of Time Lapse Recorded Videos
Entertainment & Marketing: Watching 3D printed objects appearing from the void seems like magic. Perhaps we can credit Disney fairy-tale movies from our childhood for that brain leap. Leading 3D printing influencers on social media realised this potential and jump-started their follower base and subsequent businesses using quality time lapses. But after watching one or two models arise from thin air, why do we continue watching time lapses?
Timelapse created with Beagleprint Camera on Anycubic Kobra Plus
6 Sec Video: MP4 361 KBkb / GIF 6MB
©3DWithUs – Print & MP4: Andrew Sink
Educational: Time-lapses are not just entertaining, they are also educational. There are so many settings to get right in the slicer software, and failures do happen. Time-lapse recordings give us a clearer picture of any issues, showing when and why problems may have arisen. Was it bad bed adhesion or an ignored Z-Hop setting? Of course, real-time recording with sound can offer a slightly clearer picture, but then there is much more involved: massive files, better equipment, etc.
Z-Hop Failure – Gayer-Andersen Cat. Delta Wasp 2040.
3 Sec Video: MP4 120kb / GIF 2MB
©3DWithUs – Print & MP4: Max Funkner
Check out the example above: we failed twice to 3D print the Gayer-Andersen Cat (Scan the World) on Delta Wasp 2040, blaming bed adhesion in both cases. Even after applying 20+ skirt outlines in Simplify3D to hold the cat’s feet, it still didn’t work. But thanks to time lapsing, we discovered that the issue was the Z-Hop setting in the slicer software.
Saving Resources: As mentioned earlier, a successful time-lapse offers greater proof than a slicer software preview that your design is suitable for 3D printing. For makers, that means saving valuable time and resources.
Vecna Bust by Hex3D. 3D Printed on Anycubic M3 Max
Captured using a ResinLapse cable.
©3DWithUs – Print & MP4: Will Zoobkoff
Recording Time Lapse on FDM 3D Printers
There are multiple ways to create 3D printing timelapse even when inexpensive FDM desktop 3D printers are in use. The quality of the produced videos is highly dependent on the method and the type of machine.
OctoPrint’s Software Plugin OctoLapse
At the time of writing this article, OctoLapse time lapses are the best choice for FDM 3D Printers. Video stability is one of the primary reasons for its success. The extruder retracts just before each frame (picture) is created.
Cons: Medium-to-hard to set it up properly. You need to install the OctoPrint software and OctoLapse plugin, and the video quality is highly dependent on focus and light. It also requires an investment of approximately $100-200 to purchase Raspberry Pi, camera, tripod and lights. Installation guides and YouTube videos are sufficiently helpful if you have some basic tech and coding skills.
3D Printed Bust Sculptures – Witcher, Black Cat & Flash – Fan Art by Rober Rollin
©3DWithUs – Print & MP4: Max Funkner
Professional set ups are even more expensive, involving buffed-up DSLR cameras with lenses. Subsequently, every frame (picture) will be 5312×2988, taking up 3-4MB of storage each. To set up the camera by uploading gphoto2 to Raspberry Pi and coding we would recommend the following YouTube video by FormerLurker creator of the OctoLapse plugin.

(Image:3DWithUs)
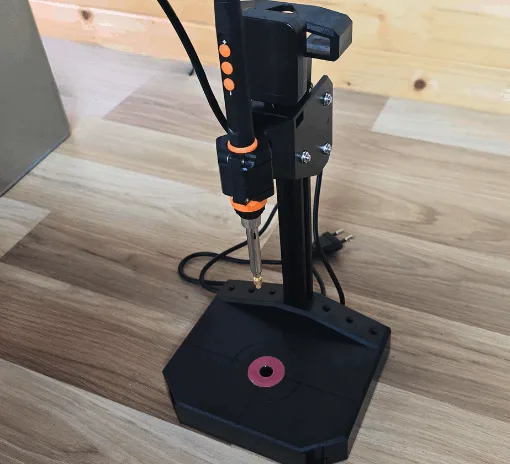
Another way to set up the DSLR camera is involving the installation of a physical trigger release system to the side of the 3D printer. Check the YouTube video by GreatScott to setup for Original Prusa i3 MK3.
Pros: The pioneers who first managed to get clear and focused videos are time-lapse kings. Check out the profile of WildRoseBuilds, a talented designer and maker with 100k+ subscribers on Instagram. Another remarkable 3D designer, Kiljaidesign, successfully showcases his works on Twitter and Instagram.
3D Print Bed Mounted Camera
There are many different mounting systems available on file repositories for any 3D printer. But truthfully, we were not impressed with the quality of recordings made by this type of timelapse. Chaotic extruder movements detract from the video, especially if the 3D printed model is wide in volume. Also, platforms like YouTube may request that you use their editor to edit your videos for stabilizing. In our opinion, it poses an unproven risk that YouTube may mark your video as possessing bad quality, reducing its chances to rank in related searches. Even if your video is in HD with clear focus.
But in some cases, you can still get a great result. Check out designer and maker 3DPrintDad’s mini videos on Instagram. Printed bed-mounted camera footage together with excellent video editing skills beautifully showcases 3D printed models.
Mobile App
All the methods we listed above require extra work to set up. Beginners may get scared off by all the hassle of finding a file and software and then setting up the whole system. In this case, using the mobile app is the easiest solution in the beginning stages.
10 Hours Print captured by Framelapse – Wine Hand by koukwst
(4 Sec / MP4 – 160kb / GIF – 3MB)
©3DWithUs – Print & MP4: Max Funkner
Using mobile apps, Delta 3D printers are more timelapse friendly than Cartesian with moving bed. All you need to do is set up your mobile and ensure it stays sufficiently charged in the process. Our first time lapses were done with mobile applications. It is possible to compress a 20-hour print into a 3-minute video. By the way, it is easy to adjust the lapse time on any movie editing software. We normally use Microsoft Movie Maker (old version) to shrink the timelapse further.
There are many timelapse application available on the market. One of such applications is Framelapse. Read more about FrameLapse in our article here.
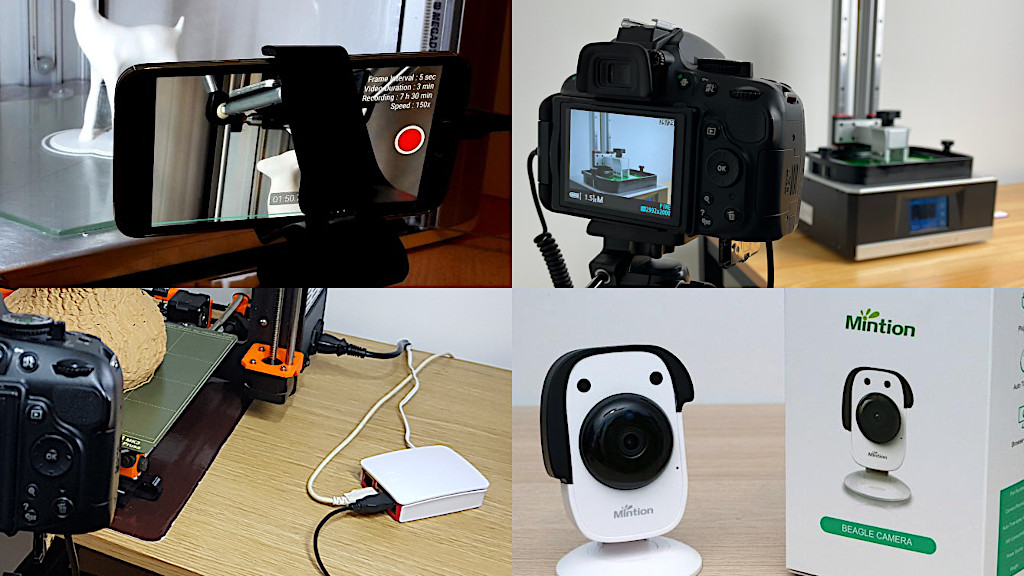
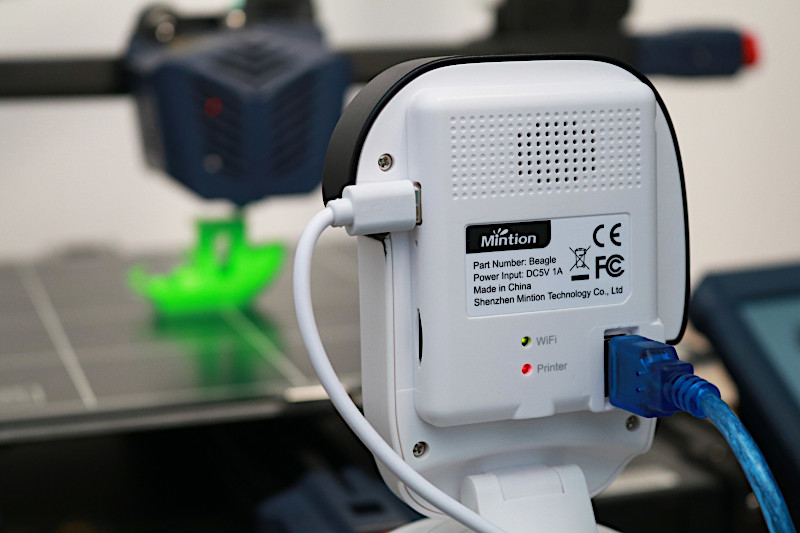
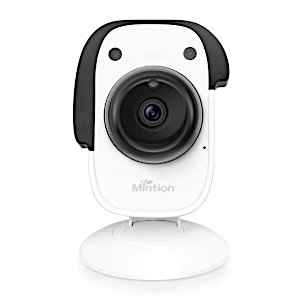
Mintion Beagleprint Timelapse Camera
The Mintion Beagleprint is a timelapse camera that is designed to make creating timelapse videos of FDM 3D prints fast, easy, and accessible. The camera is advertised as offering a 1080p resolution with up to 25FPS that records to an onboard SD card. Read the full review here …
©3DWithUs – Photo: Andrew Sink
Price: $69.99 – $94.99
Amazon
-5$ Discount Code: BeaglePrint
Official Store
-5$ Discount Code: BGCAMSAS
Mintion Beagle v2
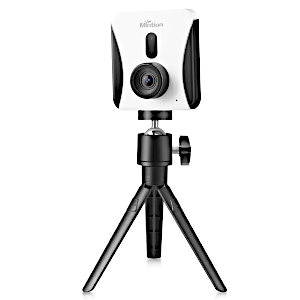
Official Store
Recording TimeLapse on Resin 3D Printers
Until recently, timelapse videos featuring resin 3D printing were a rare occurrence. This was partly due to the low popularity of resin printers in the 3D printing community, that could be linked to the messier printing and post-processing processes. But the influx of the great quality time-lapses by Uncle Jessy and Andrew Sink on social media got everyone’s attention.
Disclaimer: As the resin printing process is UV-sensitive, extra care should be taken when setting up the right lighting in the room.
ResinLapse by Uncle Jessy and Andrew Sink
ResinLapse is a cable that enables recording the time-lapse videos for resin 3D printing.
Vecna Bust by Hex3D. 3D Printed on Anycubic M3 Max
Captured using a ResinLapse cable.
©3DWithUs – Print & MP4: Will Zoobkoff
“It couldn’t be simpler to set up Resinlapse. Simply insert the end of the cable with the light sensor into the base of your MSLA printer. A DSLR camera will take a picture of each layer triggered by the light source of a 3D printer.” Read the full review by Will Zobkoff and check the valuable recommendations on DSLR camera settings and the necessary equipment.
GIF or MP4?
OK, finally you have your long-awaited recordings at hand – what’s next? Before doing anything else, plan in advance where you will publish your content. All social media sites have different requirements. Lightweight GIFs are tricky to make; to sustain focus and quality, a regular 10 sec timelapse GIF will be 10MB. Not many sites want you to upload a 10MB GIF. Reddit, for example, offers to turn your GIF into MP4 to automatically reduce the file size.
So MP4 is the better option then. Now how do you reduce the size of your video without losing quality? Use specialized websites to reduce video length and crop it to a smaller scale.
Footage Conversion Methods & Software
There are plenty of software that allow us to reduce, resize and enhance videos, and reduce file sizes.
– Images into Video. When we are dealing with hundreds of images, like after recording with ResinLapse or OctoLapse, we need to turn these into frames first. Wandershare Filmora and Movie Studio Platinum (Sony), and probably other movie editing software, can do the trick. Photos should be set to a 1 frame duration in Preferences.
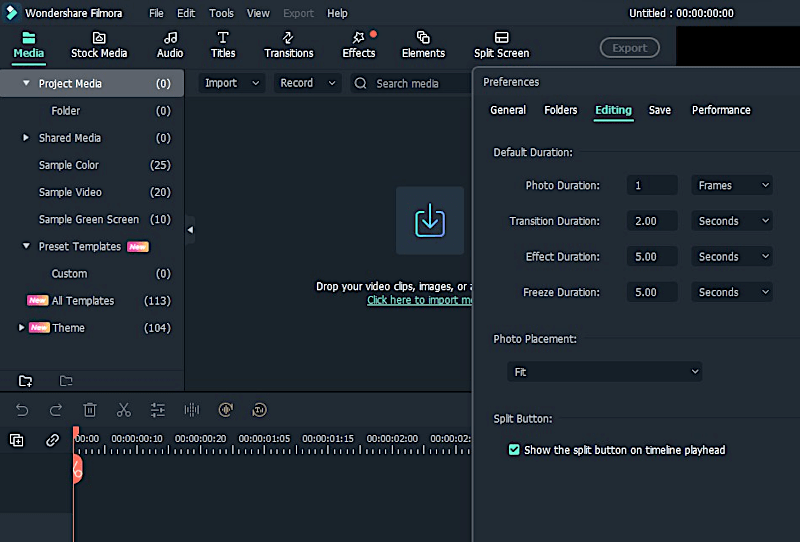
Screenshot: Filmora
– Quick Edits. Old, rusty, and unfortunately discontinued Microsoft Movie Maker (MS Essentials Edition) still can be used when a quick movie editing and reduction is required. There is a new Movie Maker available in the app store, but we haven’t tried it yet.
– GIF Making & Loops. After that, such mini videos (up to 100MB) can be placed into Ezgif for further editing, looping, reversing, reducing file size, etc.
We hope our guide helped you. Please let us know if there is anything new out there. Happy time-lapsing!
Octolapse – Time Lapse – 3D-Printer (2 Sec / MP4 – 98kb / GIF – 2MB)
Read more: Desktop 3D Printers – Guide and Reviews
Compare desktop 3D printers. Build volume, FDM or SLA, Kit or Plug-and-Play, well-known brand or a start-up – all to consider. The guide below helps to compare and make a comprehensive decision. It is regularly updated and maintained.

Hi, great Article. One thought, using Resinlapse cable will use around 18 thousand shutter count out of your 100 thousand life a usual DSLR camera have on a 10 hours print, this is really rough with your camera, isn’t there a better way?