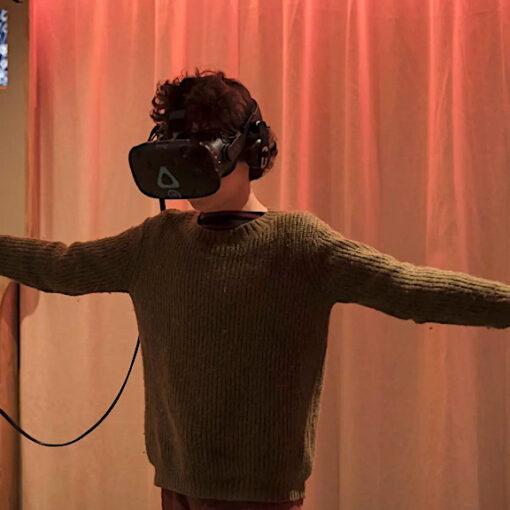
Creating a MetaHuman for Unreal Engine 5 is an exciting endeavor that boosts your creativity, technical skills, and understanding of the Unreal Engine 5 software. Epic Games defines their MetaHuman as a next-generation digital human creation tool. It is a cloud-streamed platform that allows users to create high-fidelity, realistic 3D digital human characters with a level of detail that was only possible through costly manual processes. This article will guide you through the process of creating a MetaHuman for Unreal Engine in 10 easy steps. Let’s go!
This Guide Covers
- Open the MetaHuman Creator
- Create a New MetaHuman
- Customize Your MetaHuman
- Finalize Your MetaHuman
- Save Your MetaHuman
- Setting up “MetaHuman Plugin” in Unreal Engine 5 Project
- Activate MetaHumans Plugin in Unreal Engine 5
- Download & Import Your MetaHuman into Unreal Engine
- Add MetaHuman into Your 3D World!
- Moving Your MetaHuman in Sequencer
The MetaHuman Creator tool uses advanced proprietary technology to generate a complete digital human, including the character’s body, face, hair, clothing, and animations. The tool enables you to modify and customize the generated characters using an intuitive interface, adjusting various parameters such as height, weight, age, and facial features.
Step 1: Open the MetaHuman Creator
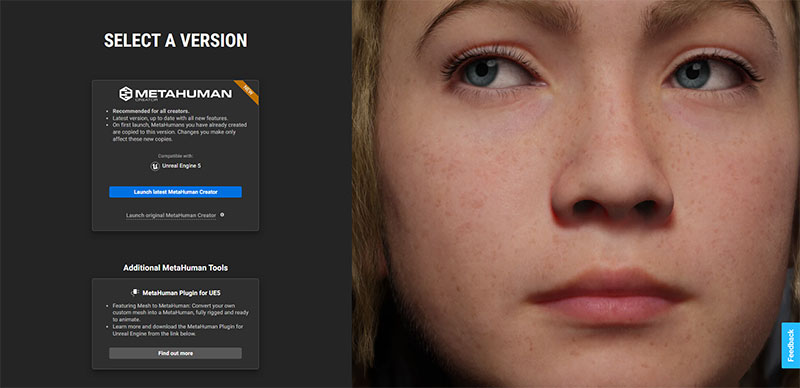
The first step is to open the MetaHuman Creator platform. The MetaHuman Creator is an in-browser application that allows you to create, customize, and export high-fidelity digital humans that can be imported into Unreal Engine 5.
Click here to access the MetaHuman Creator now for FREE. If you don’t already have an Epic Games account, you will need to set one up. This will make it easier for you to transition to Unreal Engine later.
Once you’ve logged in, you will be redirected to the welcome screen. Click the blue button labeled “Launch Latest MetaHuman Creator”, give it a few minutes to load, and the in-browser editor will open. (Please note that the MetaHuman Creator works best on desktop computers. Session last 1 hour.)
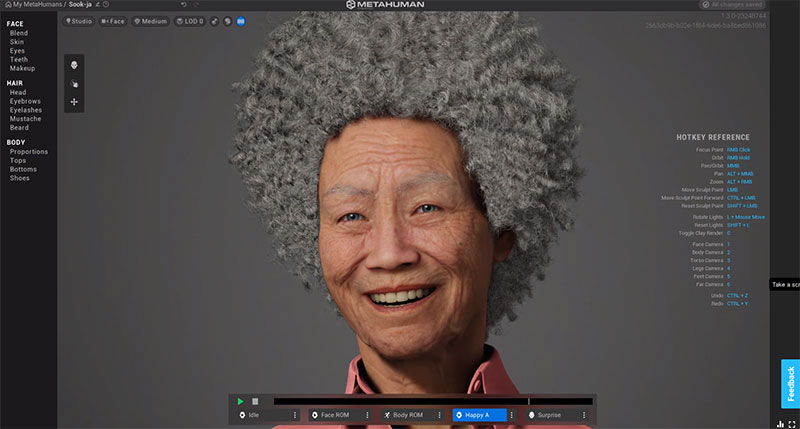
Step 2: Create a New MetaHuman

Screenshot taken by Jasyson Wall @PrintThatThing
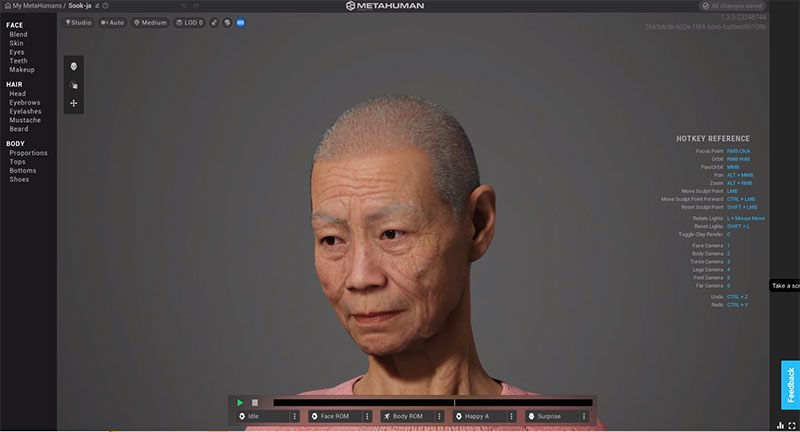
After launching the MetaHuman Creator, select a new MetaHuman to get started. To do this, click on one of the faces in the menu on the left. There are over 50 different MetaHumans to choose from, including male, female, young, old, and more.
For this walkthrough, we chose Sook-Ja, but you can select anyone you like. The person you choose will determine the basic starting features and characteristics of your MetaHuman.
Keep in mind that you can change anything about this default character once you’re inside the editor. So, pick someone who looks close to the character you have in mind.
Once you’ve selected your MetaHuman, click the blue “Create Selected” button at the bottom of the left-hand menu.
Step 3: Customize Your MetaHuman
Screenshot: MetaHuman
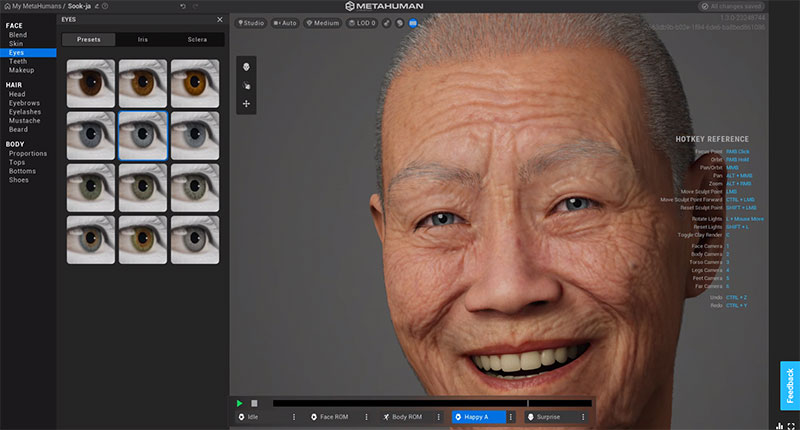
Once you’ve chosen your MetaHuman, you can begin customizing it to your liking.
The MetaHuman Creator offers a wide range of customization options, including facial features, body shape, hairstyle, and clothing.
You can adjust the lighting and camera settings to get a better view of your MetaHuman as you make changes. (Pro tip: Use your keyboard numbers 1-6 to quickly switch to different views while customizing.)
Step 4: Finalize Your MetaHuman
Screenshot: MetaHuman
After you’ve customized your MetaHuman to your liking, you can refine it further by adjusting the details by clicking through the parameters on the left-hand side of the UI. The MetaHuman Creator offers several options for refining your MetaHuman, including skin texture, eye shape, and facial hair. You can adjust the expressions of your MetaHuman to create a more realistic and emotive character too.
Step 5: Save Your MetaHuman
Screenshot: MetaHuman
When you’re finished making changes and are ready to move to Unreal Engine, click on the “My MetaHumans” text in the top-left corner of the screen.
You’ll then be taken to your “My MetaHumans” page. Here, you can ensure that your MetaHuman looks as intended before importing it into Unreal Engine 5.
If you create more MetaHumans in the future, they will also appear here, and you can always go back and edit them at any time.
Step 6: Setting up the “MetaHuman Plugin” in Unreal Engine 5 Project
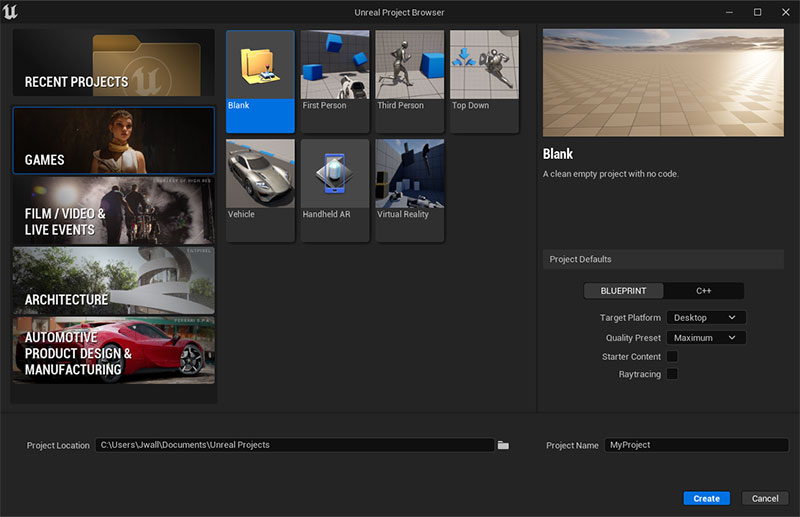
Screenshot: UE5
Let’s import your new MetaHuman so that we can use it to its full potential. To do this, download and open Unreal Engine 5 to create a new “Blank” project.
Once your new project loads, navigate to the plugins menu at the top of Unreal Engine, by going to Edit > Plugins.
In the Plugins search field, type “MetaHuman,” and you should see the MetaHuman Plugin (New/Experimental). Tick the check the box next to this plugin to activate it.
You may see a pop-up message telling you not to use this plugin in professional or client projects that you intend to ship. Click “Yes” to continue. (note: The reason for this message is because the plugin is experimental and may pose problems for shipped products later. But since we’re using this for animation it won’t be a problem.)
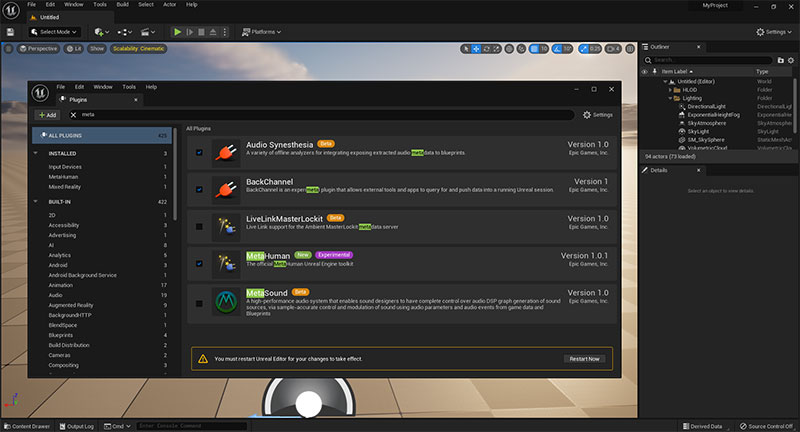
Screenshot: UE5
You will then see a warning at the bottom of the plugin screen that tells you to Restart Unreal Engine. Go ahead and restart so that the new MetaHuman plugin will be activated inside your UE5 project.
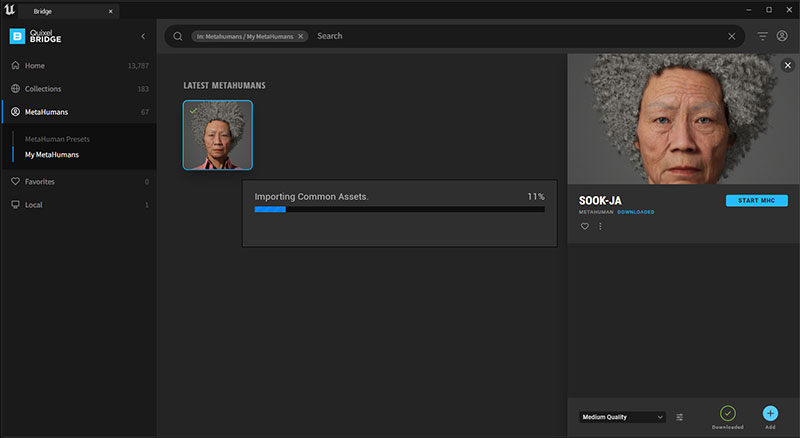
7. Activate MetaHumans Plugin in Unreal Engine 5

Screenshot: UE5
Now that you have restarted Unreal Engine 5 and installed your MetaHuman Plugin, you can bring in your new MetaHuman.
To find your MetaHuman, click on Window > Quixel Bridge at the top of Unreal Engine. A new Quixel Bridge window will appear, where you can click on your MetaHumans tab on the left-hand side.
To see your custom “My MetaHumans,” make sure you are logged in with your Epic Games username and password in the top right corner of the Quixel Bridge window.
You should now see the MetaHuman you created inside the browser app. (Make sure that you clicked the “My MetaHumans” tab on the left-hand side once you are logged in)
8. Download & Import Your MetaHuman into Unreal Engine
Screenshot: UE5
Click on your MetaHuman, and a panel will appear on the right.
Click the green down arrow icon to download the MetaHuman from the internet. After it’s done downloading, you will see a blue “Add” plus sign icon become clickable.
When you click the blue“Add” plus icon, Quixel Bridge will start to import your MetaHuman into your Unreal Engine project. This may take about 15-30 minutes for the entire process, but it’s well worth the wait!
(NOTE: Even if a MetaHuman has been downloaded, it still has to be “Added” into Unreal Engine. In other words, downloaded does not mean that your MetaHuman is inside Unreal Engine yet – you have to “add” it once the downloading is complete.)
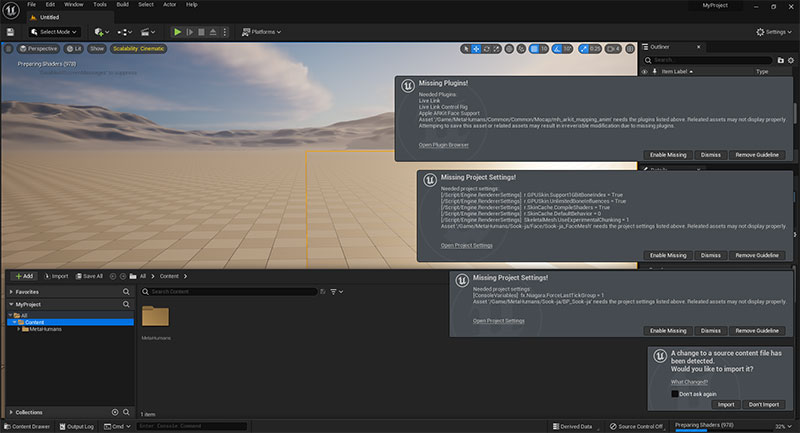
9. Add MetaHuman into Your 3D World!
Screenshot: UE5
Now that you have imported your MetaHuman in UE5, you will see a ton of warnings. Don’t worry; it’s fine. Simply click the “Enable Missing” buttons on all the pop-ups and let the shaders load in the background.
You will also see an “Import / Don’t Import” prompt at the bottom of the pop-ups. You can click “Don’t Import” and continue to let the shaders load.
Once your shaders have finished loading, you can click the “Restart Now” button in the bottom right pop-up prompt. If you don’t see this restart prompt, you can simply restart UE5 manually.
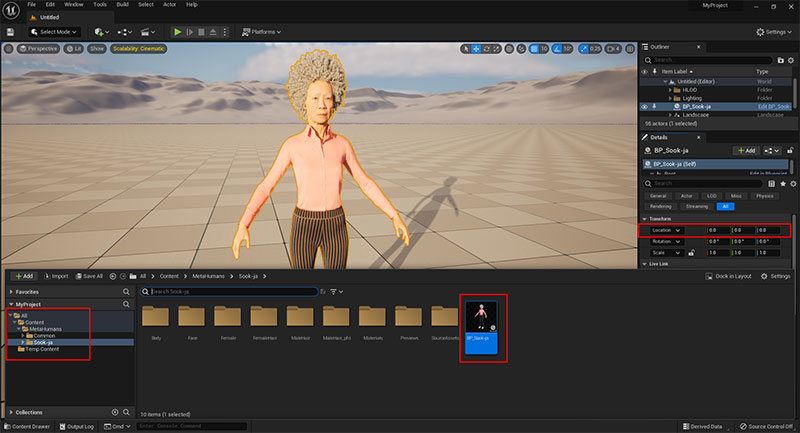
Image: Jayson Wall
Once you have restarted UE5, re-open your previous project and press Ctrl + Spacebar to see your Content Browser. You should now see a folder called “MetaHumans” that has been imported from Quixel Bridge.
Navigate to that folder and click on the folder with your MetaHuman’s name. Mine is titled “Sook-ja”. In that folder, you should see a blueprint file with your MetaHuman’s name. Mine is called “BP_Sook-ja”, yours will be your MetaHuman’s name with “BP_” in front of it. That file is your MetaHuman!
You can drag this blueprint file into your 3D viewport above. This may take a few minutes the first time, depending on the speed of your computer. Unreal will also load more shaders the first time you drop in your MetaHuman.
NOTE: If your MetaHuman looks far away or tiny, you can reset the location in the “Details” panel on the right side by putting 0,0,0 in the x, y, & z location coordinates – This will center your MetaHuman inside your 3D world.
After that, you can click on your MetaHuman in the 3D viewport and press “F” on the keyboard to frame your 3D view around your MetaHuman. Congrats! you have successfully imported a MetaHuman.
10. Moving Your MetaHuman in Sequencer
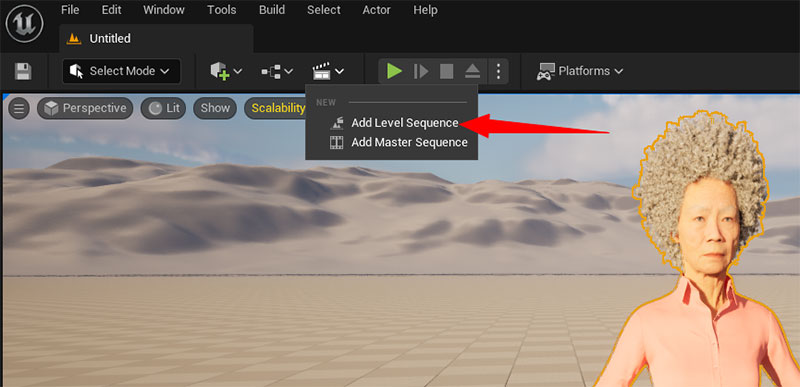
Image: Jayson Wall
Now for the fun part, animating your MetaHuman. To do this you can click on the Create Sequence icon that looks like a Hollywood film slate above your 3D viewport window.
On that dropdown choose “Add Level Sequence” to create a timeline for your 3D world.
A pop-up window will appear where you can name and save your sequence as anything you like. I called mine “NewLevelSequence”.
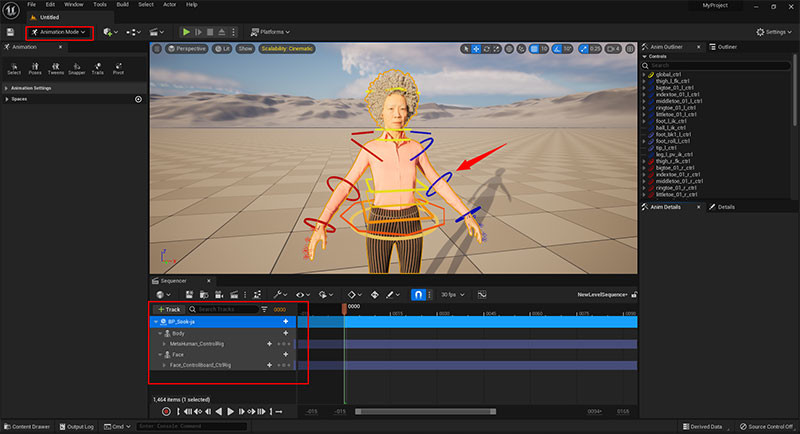
Image: Jayson Wall
You should now see a new timeline window appear with nothing in it. I clicked and dragged the new sequencer window to the bottom of my 3D viewport to dock it into my UI. If you have a second monitor you can put the sequencer window there instead.
Next, click and drag your MetaHuman object from your outliner into your sequencer. This will automatically load your MetaHuman into your sequencer and switch your viewport into animation mode.
You should now see colored outlines around your MetaHuman’s body. These can be used to animate the body.
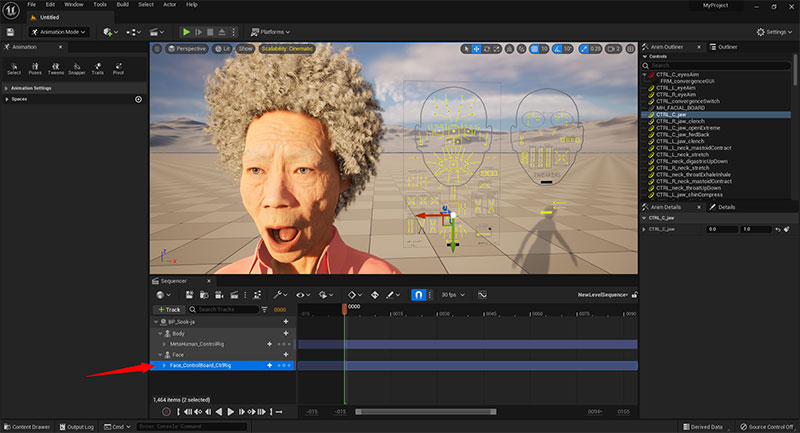
Image: Jayson Wall
If you don’t see the colored body controls, click on the Body’s “MetaHuman_ControlRig” or Face’s “Face_ControlBoard_CtrlRig” to see the animate controls for the body or the face.
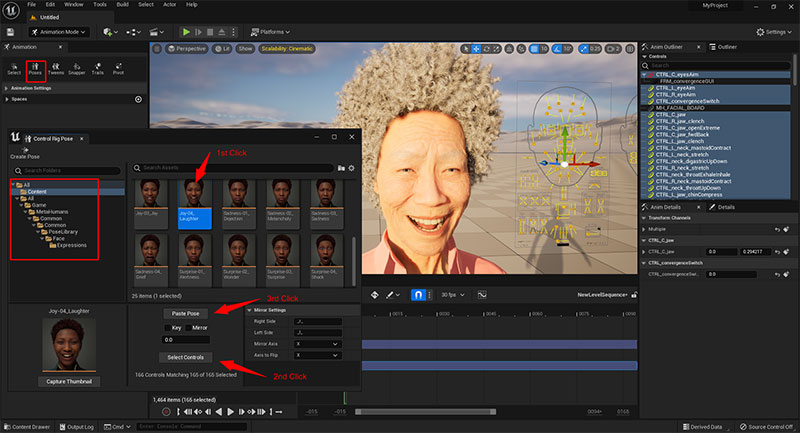
Image: Jayson Wall
You can also use the preset facial poses in the Poses tab. Make sure to navigate to the Poses icon in the top left then navigate to the facial presets in the following folder: MetaHumans>Common>Common>PoseLibrary>Face>Expressions.
Then in the sequencer select the Face’s “Face_ControlBoard_CtrlRig”, pick the facial expression you want to use, click the “Select Controls” button, then click “Paste Pose”.
You should see your MetaHuman’s face change to the selected pose instantly. You can also keyframe them to change over time in your sequencer.
By following the steps outlined in this article, you can get started on creating your own MetaHuman and bringing it into Unreal Engine 5 for animation.
Remember to experiment, test, and iterate as you go, and don’t be afraid to share your creation with others. Good luck and have fun!
Read More: 3D Character Design Workflow in Blender
In this article, we’ll be going over the full 3D character workflow as seen in games, illustration, & animation. These steps can be used to start your journey into character creation for 3D Printing with a few adjustments.