Laser engraving and cutting open up a world of creative possibilities. From multi-color effects on stainless steel to intricate inlays with wood veneer, the results can be nothing short of stunning. With a bit of preparation and the right tools, you can create professional-looking designs that elevate your projects. In this guide, we’ll focus on creating inlays, a technique that adds depth, contrast, and elegance to your laser projects. Even if you’re working with a lower-wattage laser, multiple passes can achieve the desired depth and detail.
Disclaimer: Laser cutting and engraving may be hazardous if improperly operated. Please follow safety guidelines, such as wearing eye-protective goggles and using the machine enclosure while operating.
This Guide Covers
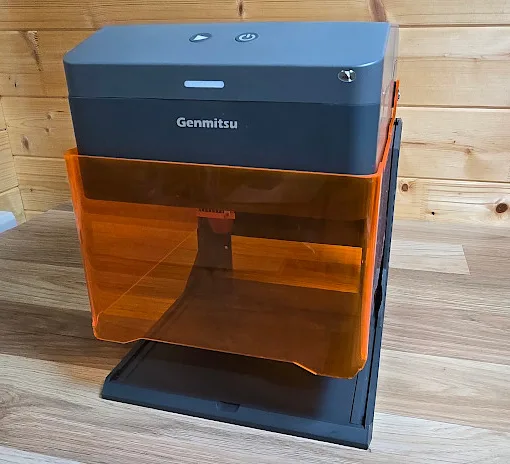
For this tutorial, I’ll be using the Creality Falcon 2 Pro with its 40W laser module. Its large work area, built-in camera, and pull-out drawer make it an ideal setup for these types of projects. It also has a top speed of 25,000 mm/m, which helps to complete projects faster. I’ll also use LightBurn software to prepare the project files.
Price: $799 – $1,699 (22W, 40W, 60W)
Product Affiliate Links: 3DWithUs is supported by its audience. Purchases via some links may earn us a small commission at no extra cost to you. This helps us to continue bringing you high-quality content. Our guides and reviews remain unbiased and independent.
About Inlays in Laser Engraving and Cutting Projects
Inlays in laser engraving involve embedding one material into another to create stunning, intricate designs with a flush, seamless finish. The process typically begins with a laser precisely engraving or cutting a cavity into the base material, such as wood or metal. A contrasting material, like another type of wood, resin, metal, or acrylic, is then cut to perfectly fit the cavity. The inlay is secured with adhesive and finished to create a smooth, polished surface. This technique is widely used in fine woodworking, jewellery, and decorative crafts, allowing for the creation of detailed and personalized designs with exceptional precision.
Step-by-Step Guide to Creating Inlays
Materials and Tools
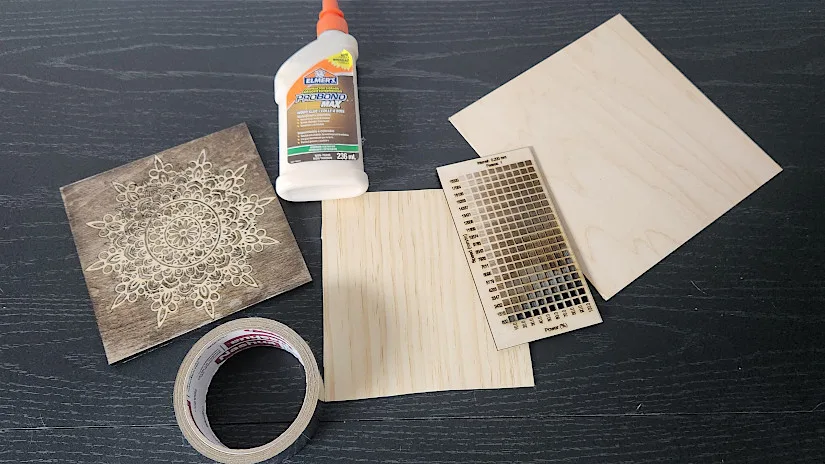
• Laser engraver (Creality Falcon 2 Pro) • Wood veneer sheets on Amazon • Various wood pieces • Calipers (to measure veneer thickness) • Aluminum tape (any width) • Wood glue • Stain • Clearcoat • Sandpaper (various grits) • Clamps

©3DWithUs – Photo: Will Zoobkoff
All the necessary materials for your laser engraving and inlay projects can be easily purchased on Amazon or at major home improvement stores. These retailers offer a wide variety of supplies, from wood veneer and adhesives to tools and finishing products, making it convenient to find everything you need in one place.
Perform an Engraving Test
Before starting your inlay, it’s essential to test the engraving depth. This ensures the depth accommodates the veneer and leaves enough space for glue. Here’s how:
1. Create a Material Test Grid: Use the built-in material test feature in LightBurn. Create a square, set it to “Fill,” and go to `Laser Tools > Material Test`.
2. Adjust Settings: Specify the starting and ending speeds and power levels. For example, with my Creality Falcon 2 Pro, My starting speed was 300 mm/m and 18000 mm/s for the ending speed, for starting power 10% and ending at 100%.

3. Test Results: Examine the engraved squares to find the ideal depth. Higher speeds often result in cleaner engravings by reducing edge-charring.

©3DWithUs – Laser Job and Photo: Will Zoobkoff
Engraving the Base Material
Once you’ve established the settings, engrave the base material where the inlay will sit. Use an image that can be inverted for the veneer. Mandala patterns, simple designs, or vector images work particularly well. Ensure the image has a background so the inverted design leaves the correct pieces for the inlay. Based on the design you may need to mirror the image prior to engraving to ensure a proper fit, this only applies to non symmetrical designs.

Screenshot – LightBurn


©3DWithUs – Laser Job and Photo: Will Zoobkoff

Preparing and Engraving the Veneer
1. Cut the Veneer: Trim the veneer to the required size.
2. Apply Aluminum Tape: Adhere aluminum tape to the back of the veneer. Use a roller to smooth the tape and ensure it’s firmly attached. Any bubbles can result in the scorching of the veneer.

3. Secure the Veneer: Since the veneer is thin, secure the edges to prevent curling during engraving. I cut a Square hole in a 3mm piece of board I had and then attached the veneer to the back with aluminum tape, this ensures there is no curling during the engraving process.

4. Engraving the Veneer:
– Settings: Use 7000 mm/min at 50% power, running two passes. The first pass removes most of the wood, while the second cleans up the edges and residual glue.
– Additional Passes: Run extra passes if necessary for a cleaner result.

©3DWithUs – Photo: Will Zoobkoff
Assembling the Inlay
1. Apply Glue: Spread wood glue evenly over the engraved area of the base material or the back of the inlay. Make sure that glue fills all the engraved areas where the veneer will sit. Use a damp cloth to remove any excess glue.

2. Position the Inlay: Align the inlay pieces with the engraved areas. They should “lock” into place. Press firmly and ensure all pieces are flush and smooth.

3. Clamp and Dry: Use clamps or weights to hold the pieces in place. The glue must dry fully for at least 24 hours.
Finishing Touches and Result
1. Remove Aluminum Tape: Carefully peel off the tape. Any glue residue can be removed during sanding.
2. Sand the Surface: Use fine-grit sandpaper to smooth the surface and remove residual glue. If there are any height differences, this will also ensure a smooth finish between the veneer and base.
3. Apply Stain and Clear Coat: Finish the piece with your chosen stain and a clear coat for a polished, professional look.

©3DWithUs – Photo: Will Zoobkoff

Other Inlay Projects
Coming soon… As usual, we will showcase some remarkable inlay projects made possible through laser cutting and engraving.
Conclusion
Following these steps will allow you to create striking inlays that will elevate your laser engraving projects to a new level of sophistication and elegance. This is an easy technique for creating unique items for your home, as a gift, or for any other artistic purpose. Inlaying adds depth and dimension to your pieces, enhancing them with precise detailing and striking contrasts. It transforms ordinary materials into professional-quality works of art.
Inlays can be used to create a wide range of designs, whether you are making a custom-engraved sign, a personalized keepsake box, or a decorative panel. The interplay between stains, clear coats, and the various wood colors allows you to adapt each project to any aesthetic you can imagine. Over time, you will learn to manipulate these elements to suit your style and creative goals.

©3DWithUs – Photo: Will Zoobkoff
In these situations, inlaying offers a broad scope for innovative imagination and opens up other methods that may have previously remained closed to you. This technique’s adaptability allows you to continuously push the boundaries of what’s possible, making each project a new opportunity to create something artistically rewarding.
Read more: Laser Engraving Stone, Ceramics, and Slate: Techniques and Examples
Curious about the possibilities of desktop laser cutters and engravers? These versatile tools can work on a variety of materials, including stone-like surfaces, opening up endless creative opportunities. Check out our detailed guide on laser engraving stone-like materials to learn techniques, tips, and project ideas for achieving stunning results.