I recently had the opportunity to review the Longer Nano Pro 12W, which came with a sliding motorized extension bed, rotary device, and carry case. Although the enclosure was not available at the time, it is expected to arrive soon, completing the package. During the testing, I will explore the different materials the Nano Pro 12W can handle, examining its engraving and cutting capabilities and the level of detail it can achieve to provide a thorough understanding of its potential. As usual, in the end, we will publish our conclusion and pros and cons.
Longer is a well-known brand in 3D printing. Over the past decade, they have been producing resin and FDM 3D printers. In 2022, they launched the Ray5 series laser cutters and engravers, followed by more powerful B1 series machines. This year, Longer introduced the Nano series of hand-held portable laser engravers and cutters. Currently, there are two versions: the 6W and the 12W Pro, which can be enhanced with various accessory packages.
Disclaimer: Laser cutting and engraving may be hazardous if improperly operated. Please make sure to follow the safety guidelines such as wearing eye-protective goggles and using the machine enclosure while operating.
Table Of Contents
- Specifications
- Unboxing and Setup
- Software
- Tested Materials
- Materials and Supplies
- Compare to Other 3D Printers
- Conclusion and Pros & Cons
Price: $799 – $1,199
Product affiliate links: 3DWithUs is supported by its audience. Purchases via some links may earn us a small commission at no extra cost to you. This helps us to continue bringing you high-quality content. Our guides and reviews remain unbiased and independent.

Longer Nano Pro 12W Specifications
Power: 12-Watt
Engraving speed: 5000mm/s
Support: Lightburn/LaserGRBL/Laserburn App
Precision: 0.01*0.01mm with precision field lens
Laser wavelength: 450nm
Laser source: Two diode lasers
Woking area: 100mm X 100 mm/slide
Extension table: 100mm X 300mm
Resolution: 3.3K
Material: Wood/Acrylic/Leather/Metal/Ceramics/others
Connection: WIFI/USB C/APP
Suport Format: G-Code/PG/PNG/BMP/SVG/DWC/DXF/Jpeg
Input Power: 12V 6A/110-240/ 50 – 60Hz
Life Span: 10000+ hours
Unboxing and Setup
The Longer Nano Pro came well packed in black foam and double-boxed, so it was well protected.
List of Contents: Laser Unit; Base plate; Top Extension Bracket; Electric Side Lifting arm; Protective Cover; Goggles; Tool Kit/Screws; Data Cables/USB Stick; Card Reader/TF card; Consumables; Sliding Extension Table; Rotary Device.

©3DWithUs – Photo: Richard Hirst
Setting up the Longer Nano Pro is straightforward. First, you attach the base plate to the side arm, fasten the laser unit to the top bracket, and place the protective screen on the laser unit.
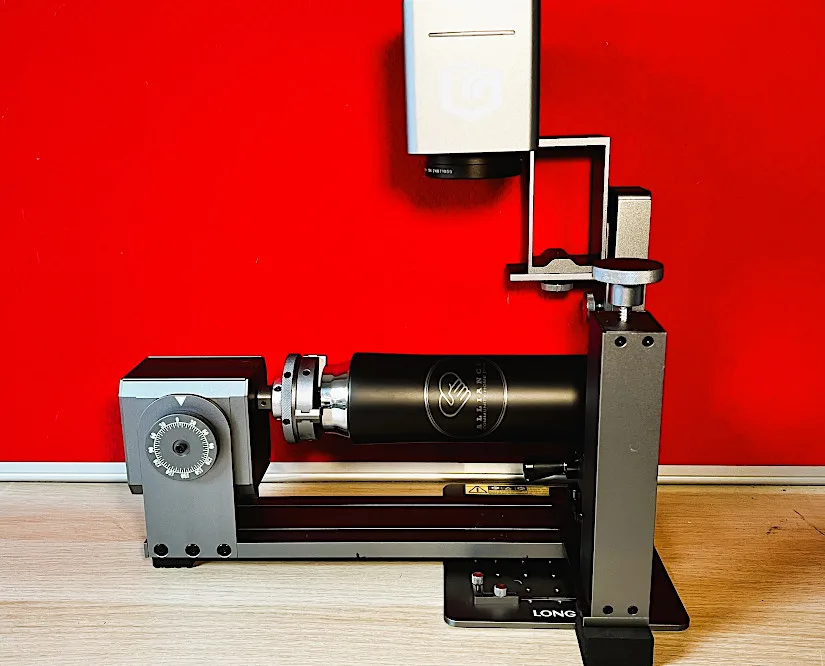
The Nano Pro sliding extension bed takes a bit longer to set up but follows a similar, easy procedure. The rotor device also involves a simple setup, requiring just a few screws to attach the base plate.
©3DWithUs – Photo: Richard Hirst
You need to install a top bracket extension to use the motorized sliding bed and the rotor device. This extension raises the laser by four inches, allowing it to focus on the material.
Software
After assembling all the components, the next step involves software installation. Depending on your preference, you load the software from the TF card, choosing between Lightburn, Laser GRBL, or both. The TF card includes files for setting up both programs, with Laser GRBL receiving additional access buttons specifically designed for use with the Longer Nano Pro.

Both programs work well with the Longer Nano Pro, but I use Lightburn as I am more used to the program and settings. Once this part is done, you’re ready to go. Turn on the laser unit, connect to your preferred program, and start your laser engraving experience.
In the next sections, we will try to show you what can be done with the extension bed and rotor device. On the Longer YouTube channel, there are some good videos from Longer on a more detailed setup of these, as well as instructions on how to set up all the parts of the Nano Pro and the software.
Testing Different Materials
In this section, we will demonstrate the range of materials that the Longer Nano Pro can work with and the results it can achieve. This includes showcasing its capabilities in engraving and cutting, as well as utilizing the rotor and extension table. We have experimented with various materials and techniques to provide a comprehensive overview of the Nano Pro capabilities, from cutting intricate designs like a box and a feather, to engraving on painted tiles, anodized metals, and natural materials.
Wood Cutting
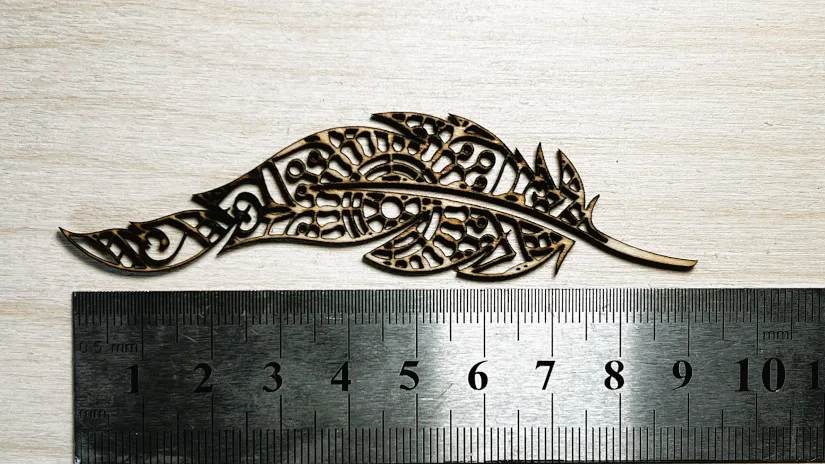
The Longer Nano Pro 12W demonstrates remarkable capability in cutting highly detailed patterns with great accuracy. We were very impressed with how finely the machine managed to cut, and the results are evident. Initially, I created a very detailed feather using AI, similar to most of the engravings and designs I will be testing. The feather features sections as thin as 0.5mm and was cut from 2mm basswood in a single pass. Although some scorching occurred (expected without air assist and with such close cuts), it was manageable.

©3DWithUs – Laser Job & Photo: Richard Hirst
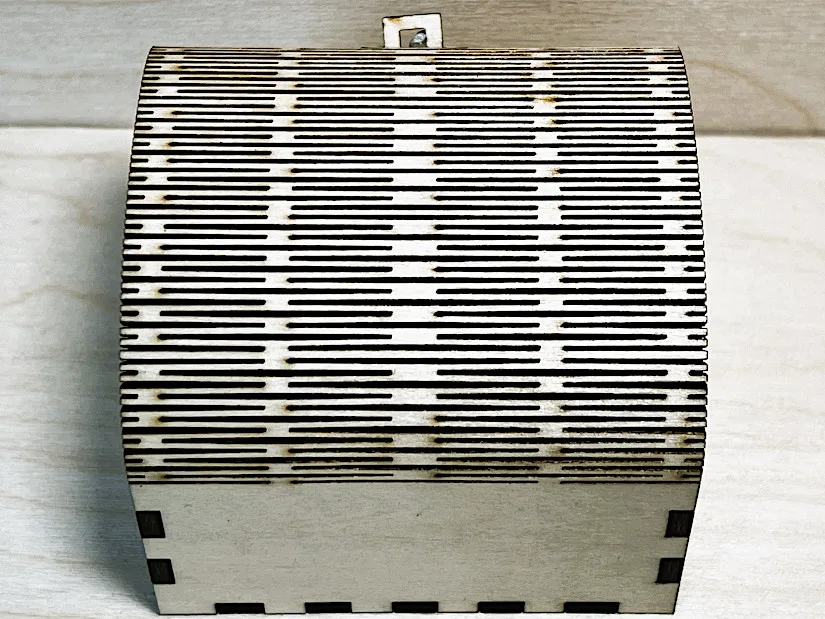
I also tested cutting a chest, requiring the sliding extension bed for parts exceeding 100mm. Despite the larger size, the Nano handled these parts well, expanding the scope for larger projects. Additionally, I made a quick and simple phone stand from 3mm plywood, which took a couple of passes to complete. Here are the results of these tests.

Model by lmm5247 on Thingiverse
©3DWithUs – Laser Job & Photo: Richard Hirst
– Slide Extension Table. Next, I used the sliding table to cut the box since some parts were too large for the standard base. The cuts were particularly clean, especially on the top section, which required multiple cuts to allow it to flex and bend to form the lid.

©3DWithUs – Laser Job & Photo: Richard Hirst
The box design was sourced from Vecty; I added the engraving details myself.

Design from Vecty
©3DWithUs – Laser Job & Photo: Richard Hirst

Wood Engraving
For wood engraving, I utilized the settings provided on the TF card along with a speed and power grid that I had compiled to determine the optimal look. Longer’s settings for the Nano Pro are nearly perfect, indicating they have conducted detailed testing themselves. This offers a good starting point, but as with most materials, variations can occur, so it’s best to perform your own tests.
In this section, I created some images with AI and then used a free online program called Imager to adjust the DPI and material algorithm for these specific engravings. My prompt was: Two Chinese Warriors from the past guarding the Great Wall of China.

©3DWithUs – Laser Job & Photo: Richard Hirst
When working with wood and other materials that produce significant fumes, the Nano Pro’s cover effectively expels them; it just requires an extension hose leading to a window for optimal air expulsion. Here are the results achieved on 2mm basswood at a speed of 6000 and 60% power, using the Imager algorithm to enhance detail.
Slate Engraving
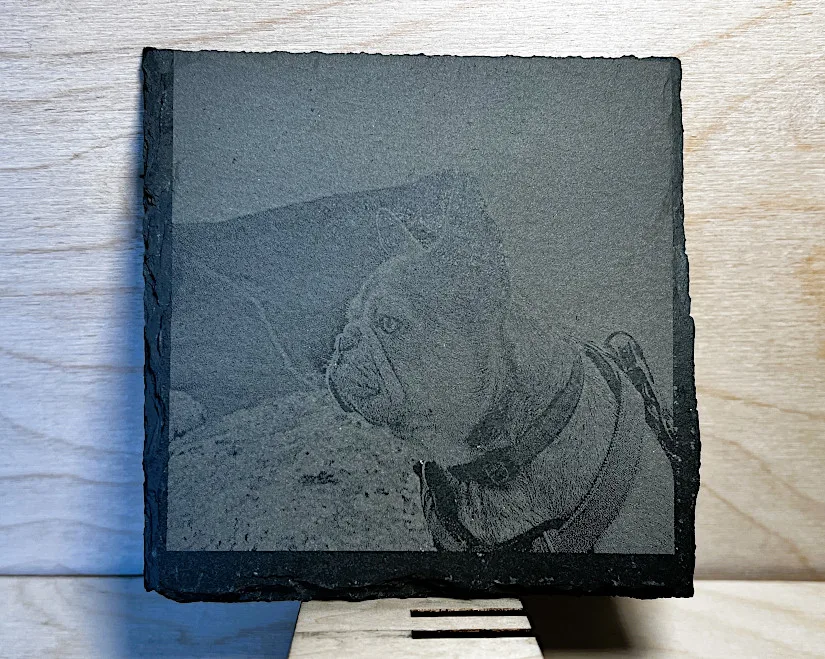
I enjoy using slate for laser engraving because it delivers impressive results and often becomes a conversation starter due to the quality of the work. Slate is also easily accessible and affordable, making it an excellent material for special occasions and personalized items. In this instance, the Nano Pro 12W performed admirably, as the coasters fit perfectly on the bed. Here are some examples of the images I engraved on them.
©3DWithUs – Laser Job & Photo: Richard Hirst
Using the photo, I engraved a friend’s French Bulldog in the image above.
I also engraved the Celtic knot in both positive and negative forms, which yielded different results, as you can see.

©3DWithUs – Laser Job & Photo: Richard Hirst
Engraving on White Ceramic Tiles
This was my first attempt to engrave on ceramic tiles, and I was pleasantly surprised by the results the Longer Nano Pro 12W delivered. The white ceramic tiles were prepared by painting them with a mixture of titanium dioxide powder, PVA, and water to create a surface that would bond well with the ceramic. I engraved several tiles, some of which I mounted in a frame as a wedding present. The recipients were amazed by the detail and personalized touch of the gift.

©3DWithUs – Laser Job & Photo: Richard Hirst
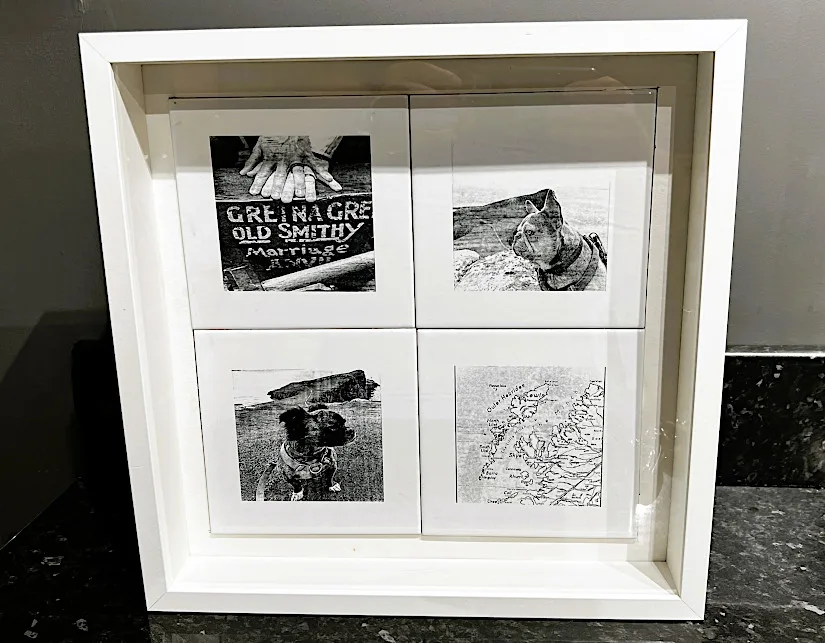
Wedding Gift Idea
©3DWithUs – Laser Job & Photo: Richard Hirst
As a wedding present idea, I created a set of four engraved tiles and framed them, which I thought turned out beautifully. Each tile featured a unique design that symbolized aspects of the couple’s journey together, making the gift both personal and memorable. The elegant framing added a sophisticated touch, perfect for displaying in their new home.
Engraving on Natural Pebbles
Pebbles are a natural material I’ve been eager to experiment with, especially since they are easy to find or can serve as keepsakes from the beach. Given the Nano Pro’s small engraving area, I thought they would be ideal for this purpose. Here are a couple of results on pebbles of different colors. The black pebble yielded the best outcome, featuring striking white engravings without the addition of any paint.
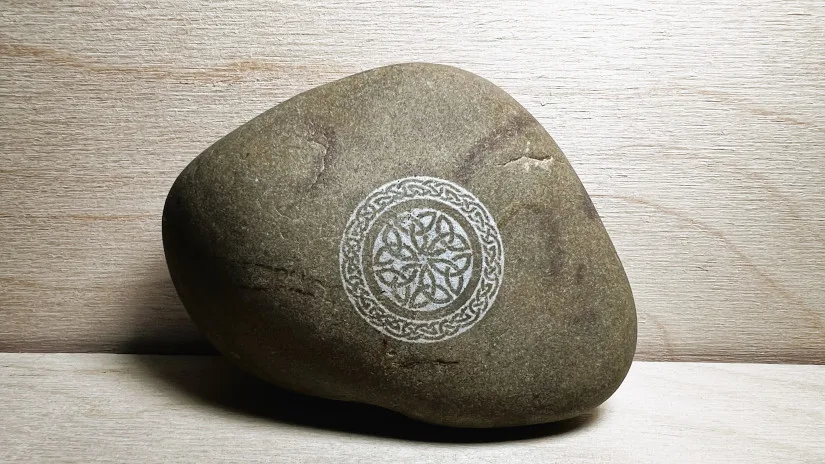
©3DWithUs – Laser Job & Photo: Richard Hirst

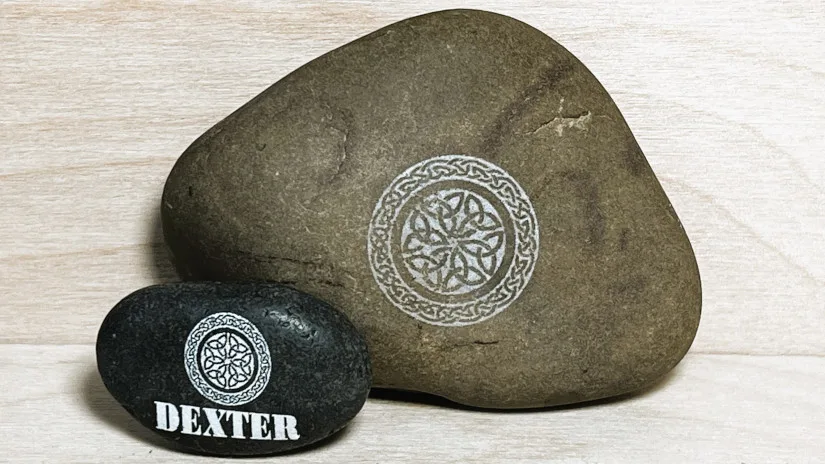
– Engraving on Stones. I am continuing to explore the potential of pebble engraving. It’s exciting to consider the variety of designs that can be achieved. Each pebble’s unique shape and texture offer a new canvas for creativity, whether you’re engraving names, dates, or intricate patterns. This method is not only a fantastic way to personalize a space or commemorate special occasions but also a gentle, eco-friendly craft that makes use of natural materials directly from the earth. Read more about Laser Engraving Stone, Ceramics, and Slate: Techniques and Examples in the guide on 3DWithUs.
Engraving on Anodized Metals
Aluminum is becoming a popular choice for business cards because these black cards are affordable and yield impressive results, adding a touch of class to your cards. The Longer Nano Pro does very well on these, capturing every detail with nice depth on the black versions. Here is an example featuring my logo.

Travel mugs are also easy to engrave with the Nano Pro, thanks to the rotating device it includes, which comes with multiple grips to accommodate various diameters and materials.

Similarly, for key rings or dog tags, anodised tags benefit from the same precise engraving capabilities.
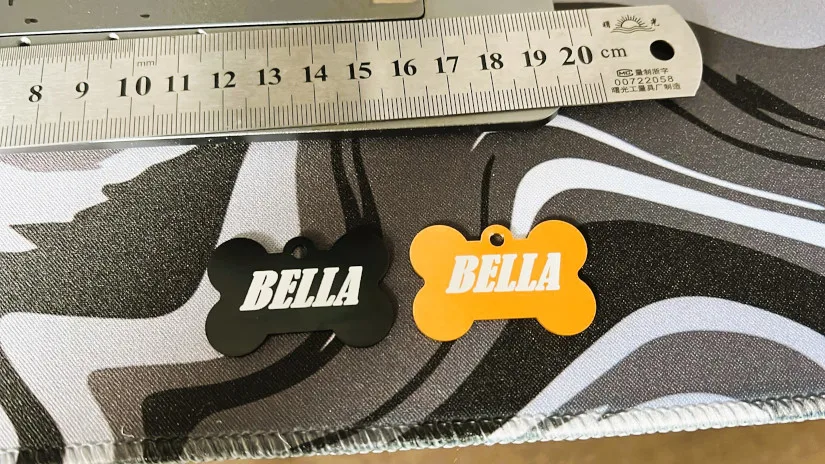
©3DWithUs – Laser Job & Photo: Richard Hirst
Valentine’s Day Projects
Recently, for the Valentine’s 3D Print Ideas Guide, I created several themed projects to demonstrate laser engraving and cutting capabilities to the DIY community.
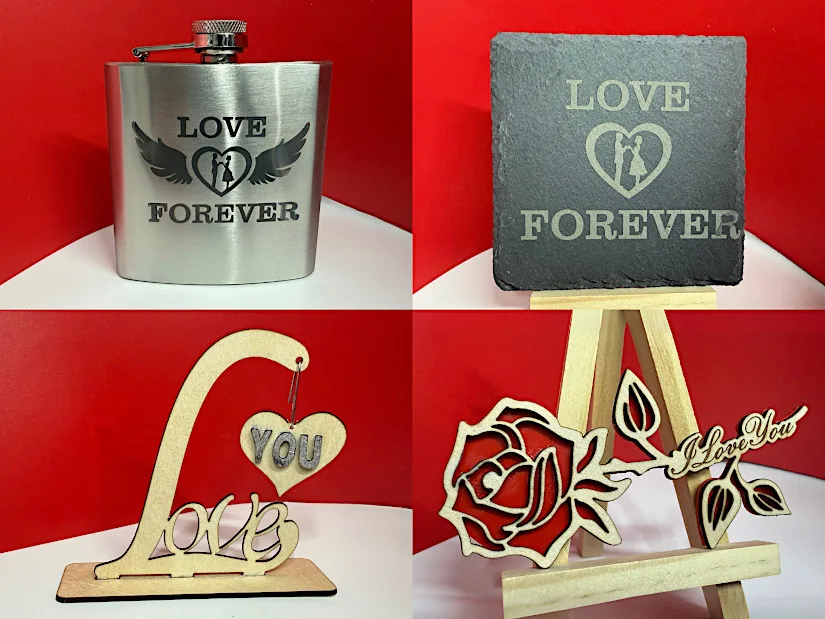
©3DWithUs – Print and Photo: Richard Hirst
Featured designs were sourced from vecti.co and 3axis.co, and all projects were completed on the Longer Nano Pro 12W I reviewed recently. These included a stainless steel flask, a slate piece, and a rose design crafted from both red acrylic and wood cut to shape. Additionally, a keyring was created using text designed with LightBurn.
Materials and Supplies
I was pleasantly surprised to find a vast collection of materials and supplies for laser engraving on the Longer website. I haven’t had a chance to try them, but I feel they are worth a look.

Image; Longer
Such sets are very handy to purchase with the laser machine, as they save a lot of time compared to searching for materials on Amazon. Such materials should also be of better quality in niche shops as particular machines got tested using them. The Longer 77 DIY Engraving Materials Set costs 39,99. Buying such materials in bulk may be cheaper, but it looks like a good option for the initial testing.
Compare Longer Laser Engravers and Cutters
On the Longer website, you can find a variety of laser cutting and engraving machines, including the Longer B1, Ray5, and Nano series. These machines vary in terms of build quality, power, and cost, catering to different needs and budgets. Each model offers unique features and specifications, making it important to compare them to find the one that best suits your requirements.

For a comparison with other laser cutters and engravers, please refer to the detailed Laser Cutters and Engravers Guide.
On our website, you can compare the prices, capabilities, and functionalities of laser engravers and cutters. What distinguishes the Longer Nano Pro 12W is its high-quality build and competitive pricing.
Conclusion and Pros & Cons

Longer Nano Pro 12W Review
Review Summary
Testing and reviewing the portable laser engraver and cutter, The Longer Nano Pro 12W was a delight due to its compact size, making it easy to transport and space-efficient on a desk. It proved very capable of engraving and cutting on most of the materials we tested. The machine feels high quality, with most parts made of aluminum and minimal plastic used, only for the laser cover and a few clamps. Thanks to its portability, lightweight, and easy setup, it is ideal for those who want to personalize gifts or products. While the engraving plate is small, the addition of an optional extension table and rotor device allows for engraving or cutting detailed designs on various materials and sizes.
PROS
Small size & weight
High-detail engraving and cutting
Good software compatibility
CONS
Small engraving size on the plate
No enclosure at the time of review


