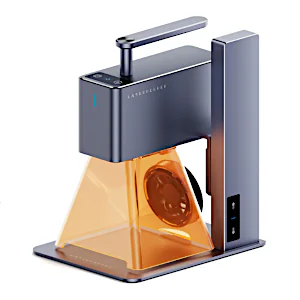
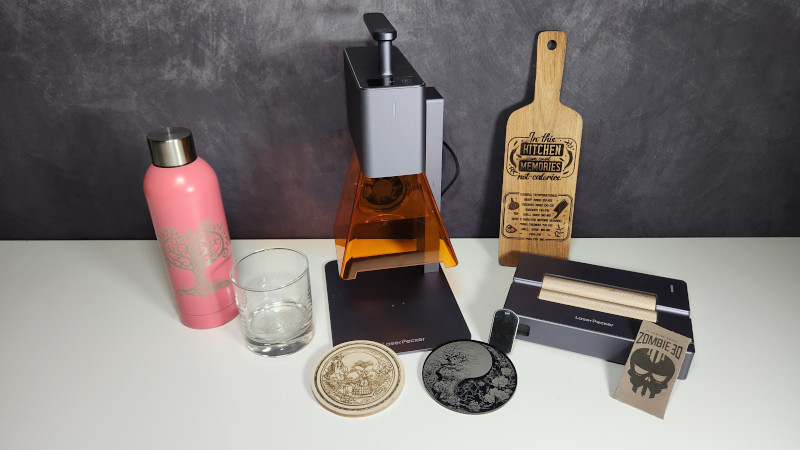
The LaserPecker LP2 is a compact laser engraver with a variety of interesting features. Equipped with a 5W laser, the LP2 has impressive engraving capabilities. Notably, the additional roller arrangement changes the game by permitting engraving on cylindrical objects like bottles and cups. But the versatility doesn’t stop there; it also functions as a slab conveyor and a helpful cart for moving the laser along the engravable object. Whether used as a handheld engraver or in one of its many modes, the LaserPecker LP2 can be a top choice for designers. In this detailed review, we will test laser cutting and engraving on materials such as wood, acrylic, glass, metal, and leather, featuring settings and tips. In conclusion, we will list the Pros and Cons.
Disclaimer: Laser cutting and engraving may be hazardous if improperly operated. Please make sure to follow the safety guidelines such as wearing eye-protective goggles and using the machine enclosure while operating.
Table Of Contents
- Specifications
- Unboxing and What’s Included
- Setup and Design
- LaserPecker Design Space
- Testing, Materials, Settings and Results
- Compare to other Laser Cutters and Engravers
- Conclusion and Pros & Cons
Price: $850 – $999
Product Affiliate Links: 3DWithUs is supported by its audience. Purchases via some links may earn us a small commission at no extra cost to you. This helps us to continue bringing you high-quality content. Our guides and reviews remain unbiased and independent.
Amazon
AliExpress
Official Website
LaserPecker LP2 Specifications:
Laser unit size: 162.5*60*122mm
Electric stand size: 194*153.5*236mm
Weight: 1748g
Laser source: 450nm NICHIA
Laser source output power: 5000mW
Appearance: Anodic oxidation of aluminum alloy
Document transmission: Bluetooth 5.0 / USB
Support document format: BMP/ JPG/ PNG/ SVG/ G-code
APP Connection Mode: Bluetooth connection, USB connection
APP operating system: Support iOS 9.0+,Android 6.0+,MacOS 10+,Windows 10+
Power input: DC(12V,5A),AC(100-240V,50-60Hz)
Operating temperature range: 0°C-65°C
Operating humidity range: 5%~80% (Non-zero frost)
Unboxing and What’s Included
• LP2 Laser unit
• Electric stand
• USB cable x2
• Ruler
• Power cord and adapter
• Protective shield
• Goggles
• Wrenches and screws
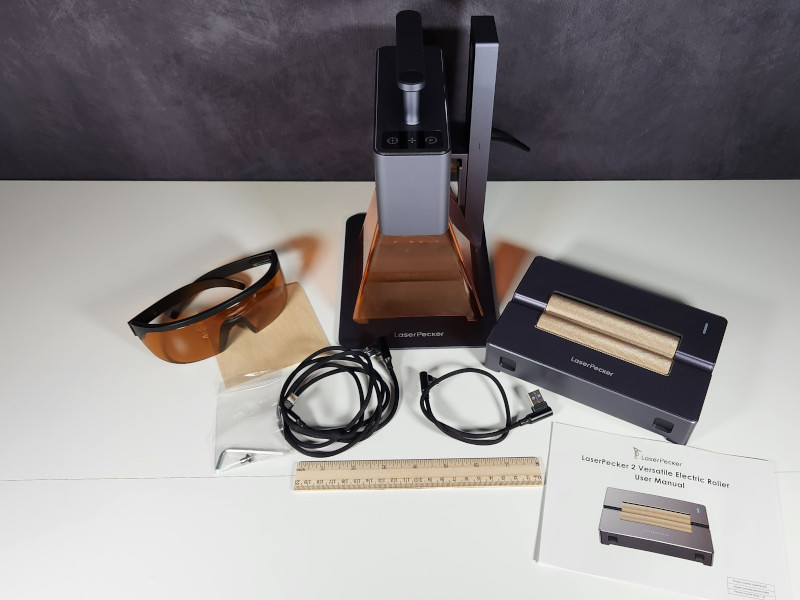
©3DWithUs – Photo: Will Zoobkoff
Setup and Design
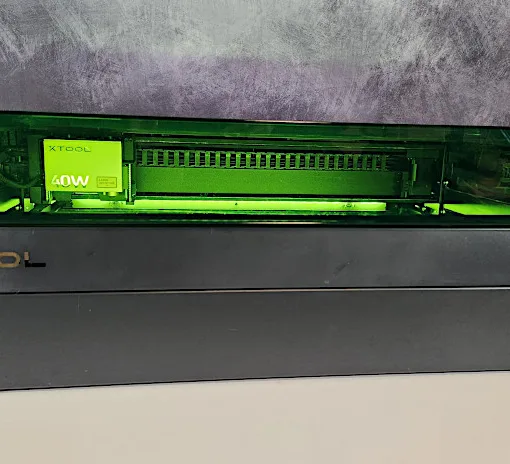
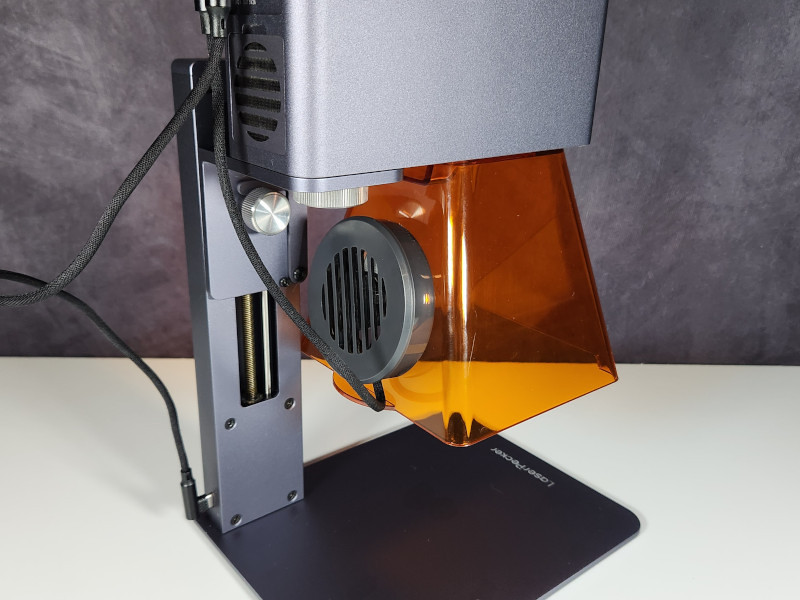
The LP2 requires a very minimal setup. Simply attach the laser unit to the electric base and secure it with the two supplied screws. Next, slip the laser shield and fan into place, and you’ll be ready to start engraving. If you want to utilize the roller to engrave a cylindrical object, simply place the roller base on the LP2’s base, plug the USB into the rear of the laser unit, and connect the electric stand’s USB to the roller. The roller comes as an optional accessory when purchasing LP2 Suit, LP2 Deluxe, and LP2 Super packages.
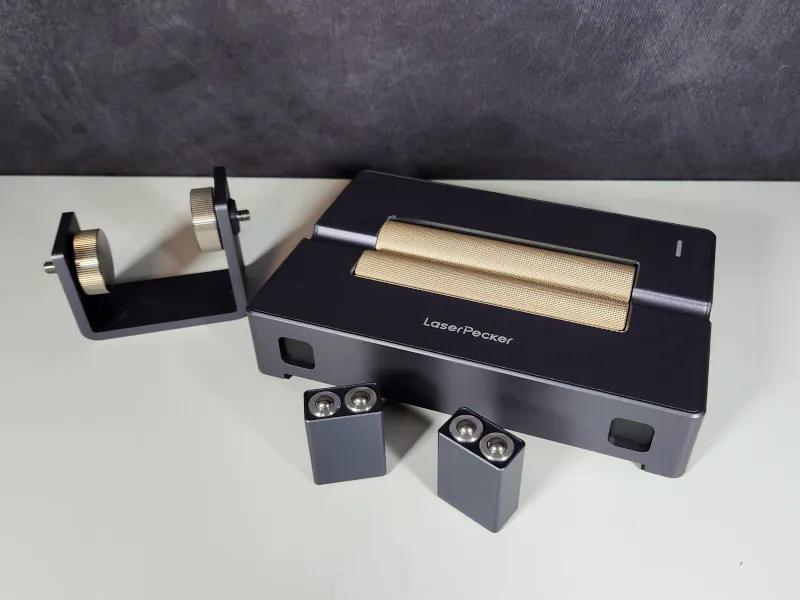
©3DWithUs – Photo: Will Zoobkoff
In trolley mode, remove the laser unit and attach the provided bracket to the bottom of the roller unit, connecting it to the laser unit. The roller also contains two tiny roller bases, which can be utilized in slab mode to support your material or as additional stabilizing wheels in trolley mode. In the latter mode, just insert the rollers into the gaps on the edge of the roller, which are kept in place by magnets.
©3DWithUs – Photo: Will Zoobkoff
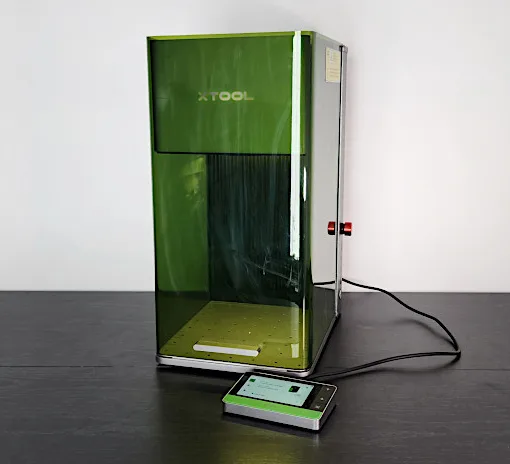
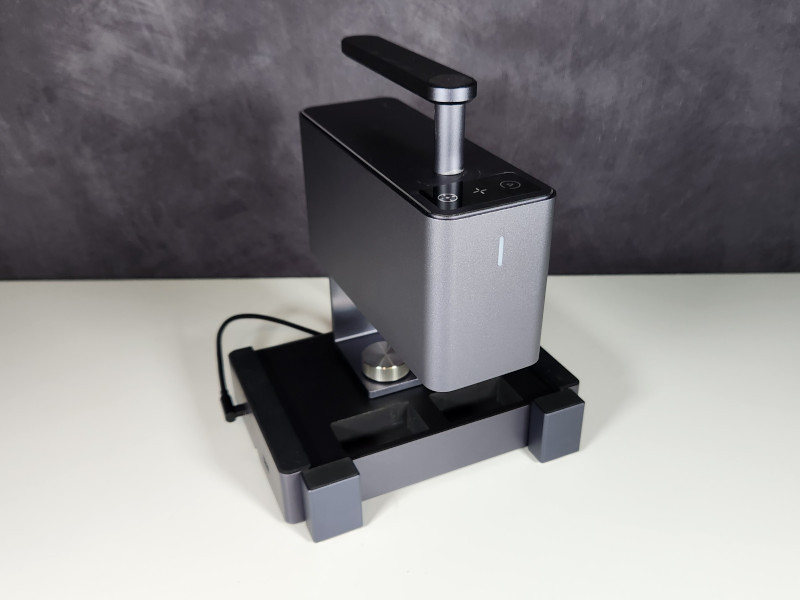
When it comes to design, the LaserPecker LP2 unit stands out with its sleek and polished look, courtesy of the aluminum oxide finish that seamlessly covers every part of the laser. The laser shield takes on a dual role, acting not only as a protective barrier against the laser but also as an effective mechanism for smoke removal through the integrated exhaust fan at the back. The roller component also contributes to the overall neat appearance, featuring separate rollers neatly stored at the bottom, cleverly secured in place magnetically.
©3DWithUs – Photo: Will Zoobkoff
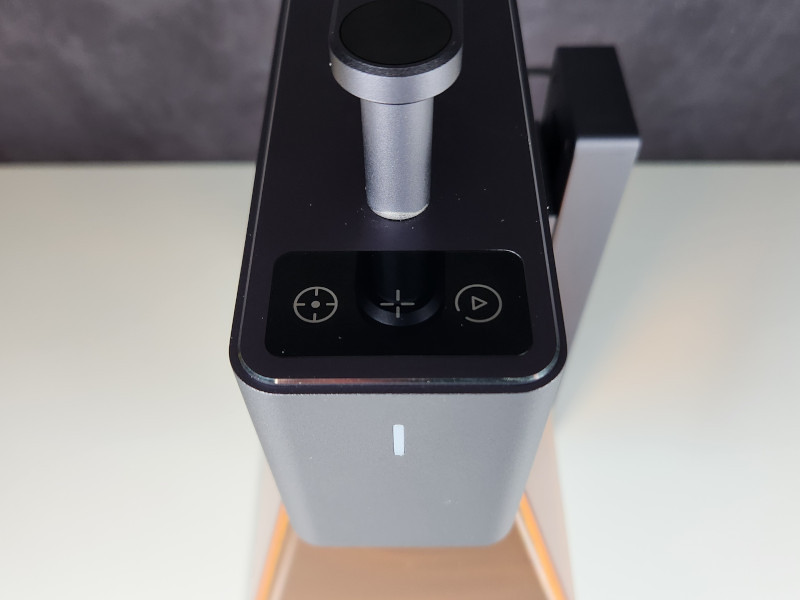
The machine as a whole presents a crisp and professional aesthetic, emphasizing attention to detail. The inclusion of three touch controls on the top and a prominent status LED on the front adds to its user-friendly design, making the LaserPecker LP2 a visually appealing and functional engraving solution.
Software – LaserPecker Design Space
LaserPecker offers dedicated software, LaserPecker Design Space, which is easily accessible on both PCs and mobile devices. This comprehensive software provides all of the necessary tools for easily loading and editing your engravings according to your unique needs. Furthermore, the application includes predetermined parameters for different materials, providing the best engraving results. During our tests, these proposed parameters proved to be very beneficial.
Screenshot
One remarkable feature of the LaserPecker Design Space is the ability to show a preview, which allows customers to ensure accurate alignment of their material before beginning the engraving process. The LP2 takes a new approach to adjustability. While most software allows you to change the speed and power, the LP2 stands out because you can adjust the power and depth as well.
Testing, Materials, Settings and Results
During our review, we decided to use the indicated settings for each test. LaserPecker further assists consumers by providing a separate website with recommended settings for various materials that apply to all of their laser engravers on the market. This is a useful feature, especially when working with unknown materials or materials not covered by the established parameters. It provides customers with more ease and versatility to achieve the best results across a wide range of materials.
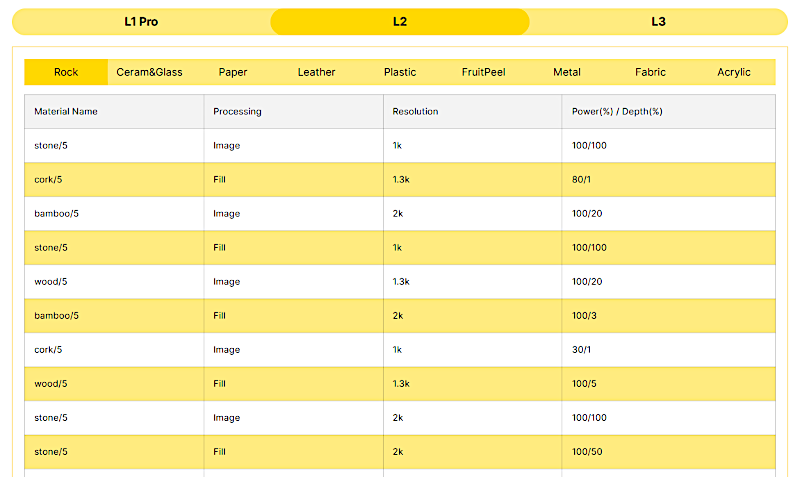
Please find the full table on the LaserPecker website
Image: LaserPecker
The LP2 is compatible with a wide range of materials. Certain materials, such as glass or plastics, may necessitate masking for the engraver to perform optimally. If consumers are unsure about a certain material, there are several online resources available to help them learn how to appropriately mask objects for engraving. Laser marking papers, aerosol sprays, and even temporary paint or markers are common choices, especially for materials like glass. These masking techniques are helpful at facilitating engraving on clear or reflective materials.
Engraving on Curved Glass
For our first test, we chose to check out the cylindrical mode of the roller by engraving an image of a curious kitty on a glass. This image is from a package purchased on Etsy.
To improve grip on the metal rollers, we used masking tape with the suggested settings of 100 for power and 5 for depth, as well as the resolution set to 2K. While our kit lacked the rubber O-rings provided by LaserPecker for this purpose, masking tape proved to be an adequate substitute. During roller setup, proper positioning of the roller ensured that the preview line was centered on the object intended for engraving.
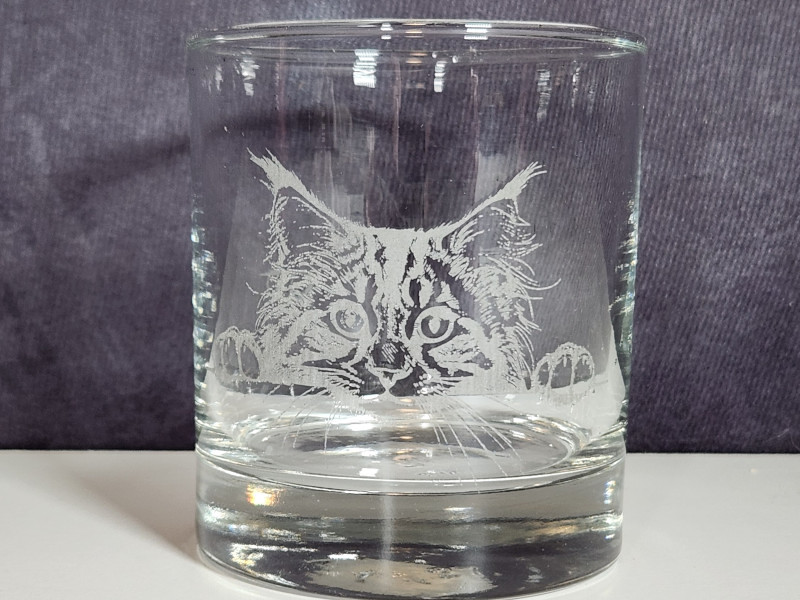
SVG Design by PixelMarketHub on Etsy
©3DWithUs – Laser Job & Photo: Will Zoobkoff

Before beginning the engraving process, we used acrylic paint to mask the glass. The results were nothing short of astonishing. Even with a lower 5W power, the LP2 demonstrated outstanding capabilities. At the 2K level, the engraving displayed detailed features like the small hairs on the kitten’s face, demonstrating the machine’s 0.05mm spot size.
Engraving on Curved Coated Stainless Steel
For our next test, we engraved a coated stainless steel water bottle and used masking tape to improve traction on the rollers. With the recommended settings of 100 for power and 30 for depth, and a resolution of 1.3K, the LP2 produced a flawless engraving on the bottle’s surface. It’s vital to note that when using the roller, the shield may not be necessary. In such cases, it is best to wear the accompanying safety glasses or use an enclosure if possible.
SVG Design by SkillfulVectors on Etsy
©3DWithUs – Laser Job & Photo: Will Zoobkoff
Despite its small size, the LaserPecker LP2 continues to demonstrate its impressive capabilities.
Engraving on Black Acrylic
Next, we removed the roller attachment and decided to try with a round black acrylic circle. Using the recommended parameters of 70 for power and 10 for depth and a 2K resolution, we experienced some misalignment during the alignment process. Nonetheless, the results are stunning, highlighting the detail on the acrylic.
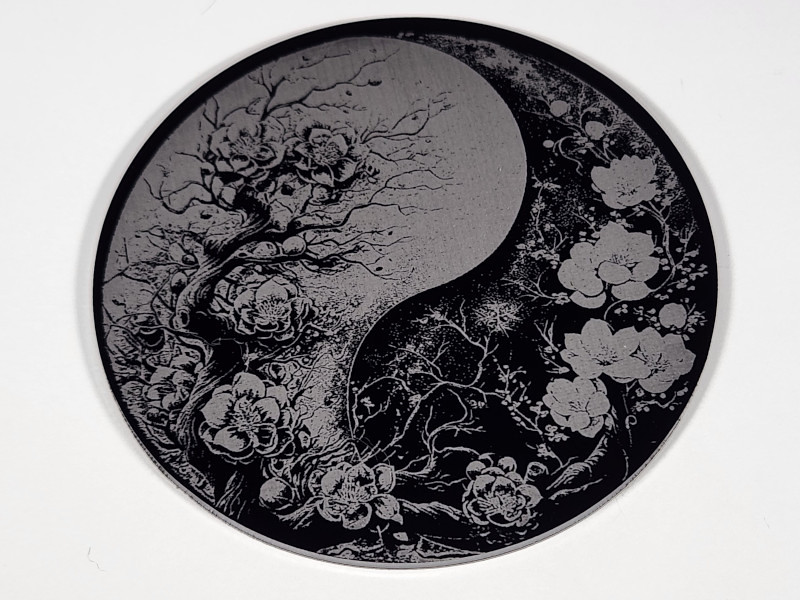
SVG Design by Jeremiah Wagner on LaserPics
©3DWithUs – Laser Job & Photo: Will Zoobkoff
It’s worth noting that when dealing with acrylic, sufficient ventilation is essential because the fumes can be harmful to your health. When engraving such materials, it is highly recommended to use a robust ventilation system or a vented enclosure.
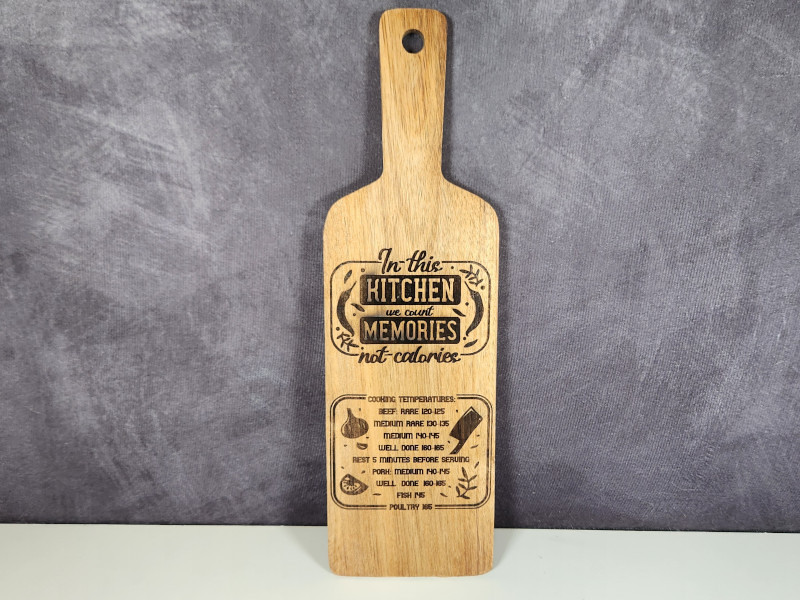
Engraving on 5mm Wood
Continuing our testing, we used a 5mm wood rounded coaster for the following experiment. We used the pencil sketch option in the LaserPecker Design Space to give the image a more sketched appearance and engraved it with 90 power and 4 depth. The resulting image is stunning, with each line appearing sharp and clear, particularly at 2K resolution.
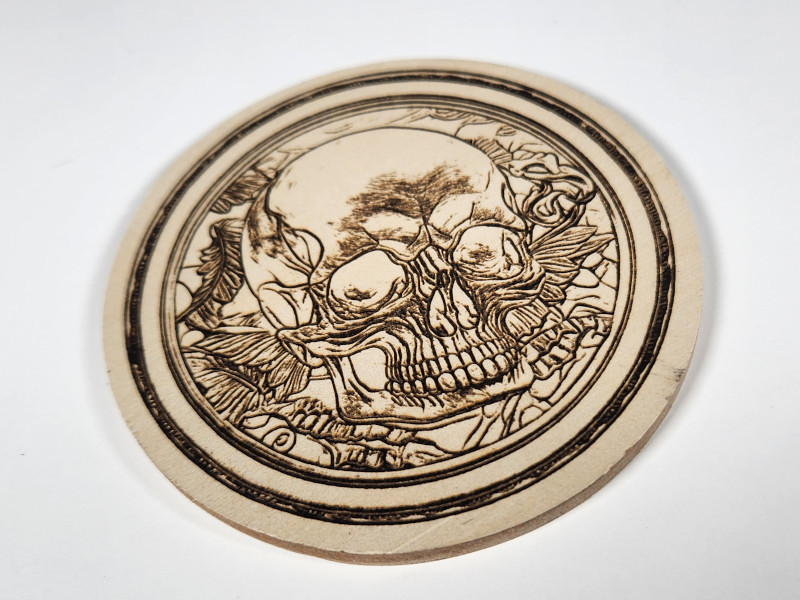
SVG Design by Luki Krew on LaserPics
©3DWithUs – Laser Job & Photo: Will Zoobkoff
SVG Design by Fly Design on DesignBundles
©3DWithUs – Laser Job & Photo: Will Zoobkoff

There was some smoke produced throughout the engraving process, but it was quickly ejected by the exhaust fan on the protective shroud. As previously mentioned, it is always recommended to have a dependable ventilation system to handle any smoke or fumes produced during the engraving process.
Engraving on Leather
In our next test, we chose to engrave on a piece of leather with the recommended settings of 30 for power and 5 for depth at 2K resolution. The etched image represented the StudioZombie3D logo. The leather developed a unique odor that is difficult to describe during the engraving process, but fortunately, the exhaust in the work area effectively dissipated it once the LP2 fan dispersed the smoke.
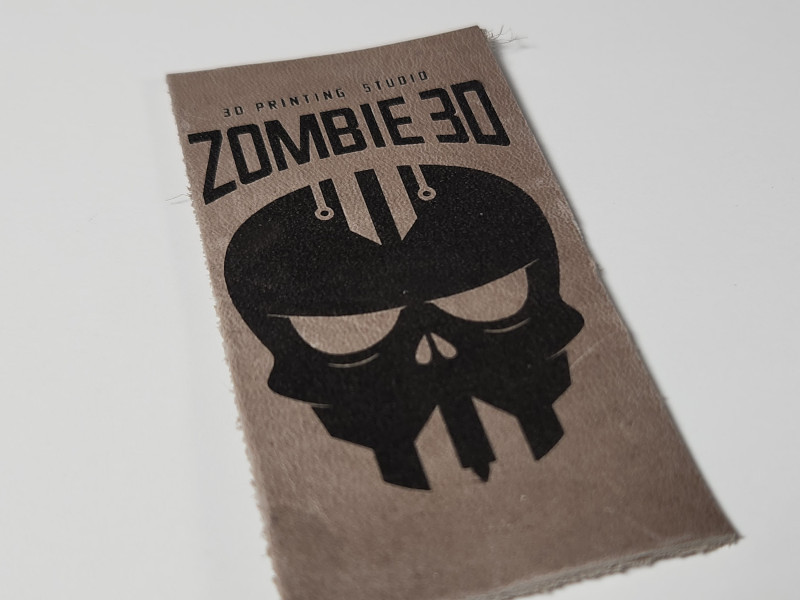
StudioZombie3D Logo
©3DWithUs – Laser Job & Photo: Will Zoobkoff
Once again, the results speak for themselves: the small lettering is sharp and clear, and all of the edges are clean and crisp. The LP2 can engrave a wide variety of materials, which is astonishing for such a compact machine.
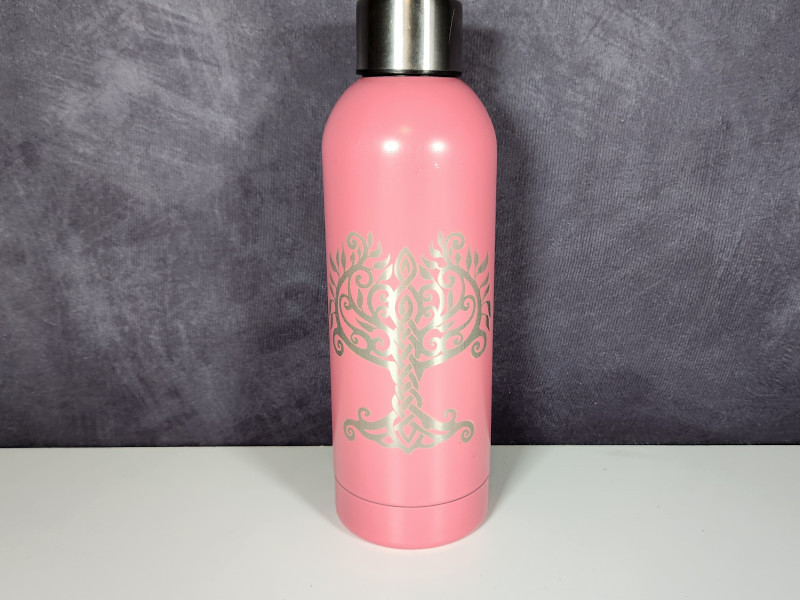
Engraving on Stainless Steel
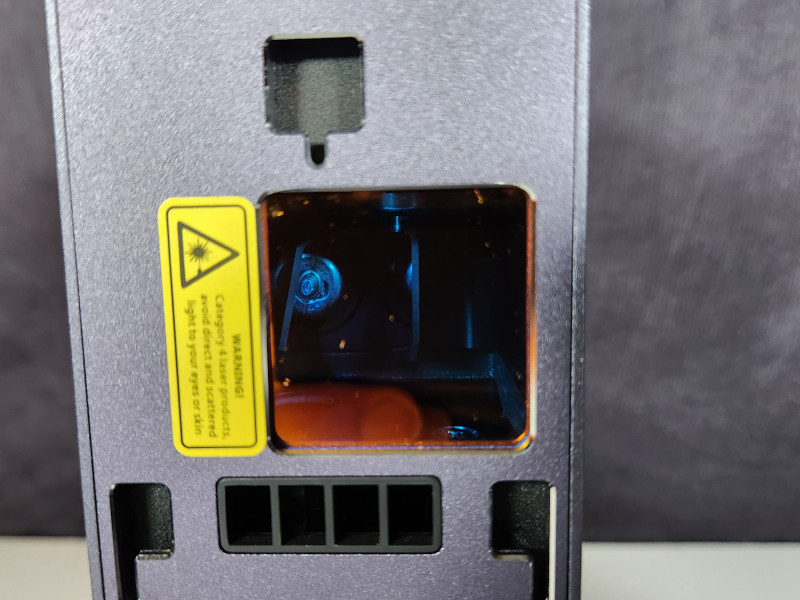
Finally, for our last piece during the testing period, we opted to test the LP2 on a stainless steel dog tag. We used the same tree of life image from earlier experiments, with the recommended power and depth values of 100 and 95, respectively. It is critical to use the protective cover when engraving stainless steel since the laser may reflect during the engraving process. It is also recommended that you wear the accompanying safety glasses to protect your safety, as any reflection of the laser could cause serious eye injury.
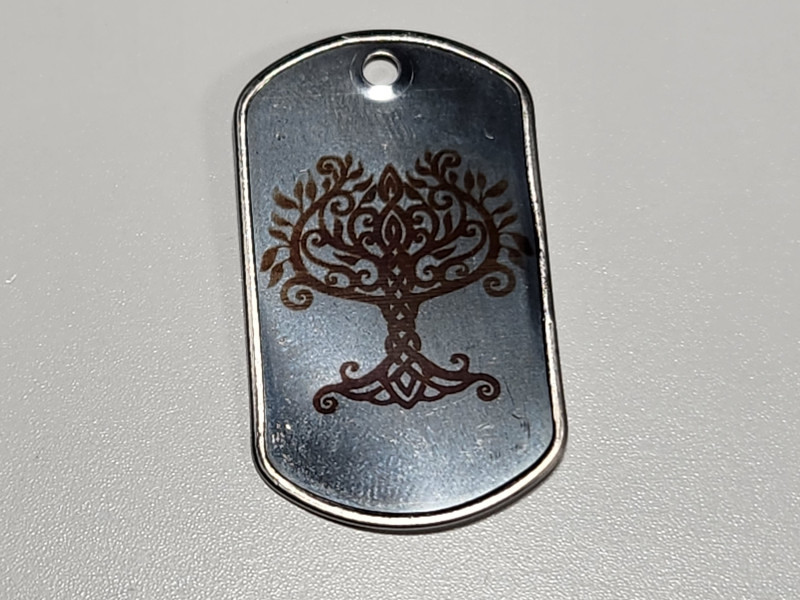
Dog Tag – Tree of Life
©3DWithUs – Laser Job & Photo: Will Zoobkoff
©3DWithUs – Laser Job & Photo: Will Zoobkoff
The engraving turned out extremely well. We set the resolution to 1K; if we had used 1.3K or even 2K, the image might have been clearer. That aside, the results were quite impressive for the 5W laser.
Compare to Other Laser Cutters and Engravers
Compare to Other LaserPecker Laser Cutting and Engraving Machines:
LaserPecker aims to meet all your needs. On their official website, you can find a range of products along with a comparison page.
For a comparison with other laser cutters and engravers, please refer to the detailed Best and Budget Laser Cutters and Engravers Guide.
Recently reviewed:
On 3DWithUs, we have featured a few laser cutters and engravers that operate with diode and CO2 lasers.
Conclusion and Pros & Cons
Amazon
AliExpress
Official Website
LaserPecker LP2 Review
Review Summary
During our testing, the LaserPecker LP2, a compact and powerful laser engraver, demonstrated remarkable performance and versatility. Despite its 5W laser, the LP2 has impressive capabilities. The addition of an extra roller attachment makes this machine even better, allowing for engraving on cylindrical objects such as bottles and cups while also acting as a slab conveyor and a convenient cart for smooth mobility throughout the engraving operation.
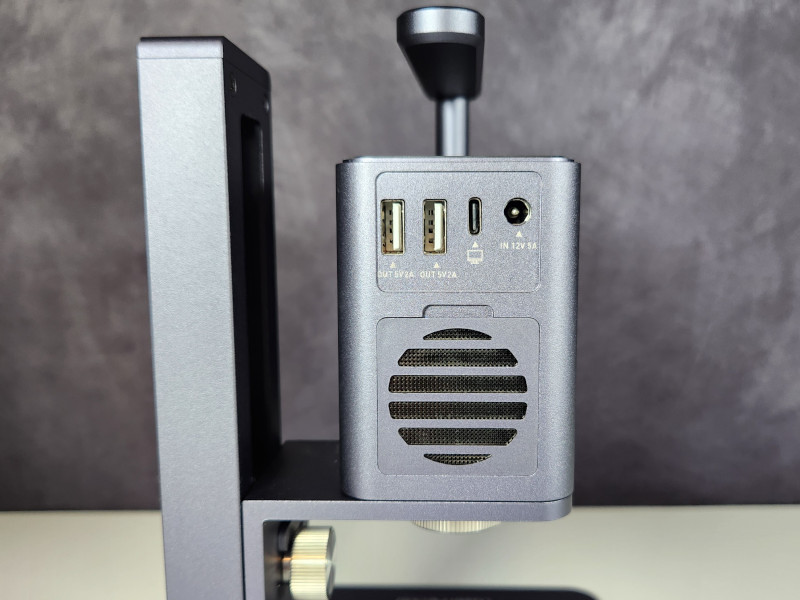
What actually distinguishes the LP2 is its versatility. Thanks to the optional portable battery pack, it can be used for quick remote projects. Whether used as a handheld engraver or in one of its many modes, the LP2 is an excellent solution for designers looking for versatility and performance.
During our testing, the LP2 exhibited its compatibility with a wide range of materials, achieving remarkable results on glass, stainless steel, wood, acrylic, and leather. The exquisite engravings, even with a 5W laser, demonstrate the LP2’s precision and efficiency. While the LP2 has a great rating of 4.6 out of 5, it is important to remember that its cutting capabilities may not be as impressive as its engraving abilities. However, this is a minor flaw when compared to its overall performance.
In conclusion, the LaserPecker LP2 emerges as an exceptional solution for artists and designers, providing a unique combination of portability, adaptability, and remarkable engraving capabilities. Its elegant design, user-friendly software, and compatibility with a variety of materials make it an excellent complement to any creative environment.
Pros
• Compact and portable
• Fast engraving speed
• Engraving resolution
• Easy to use software
Cons
• Not great for cutting