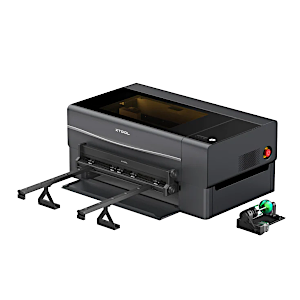
Thanks to its diverse range of laser systems, including diode, fiber, and infrared types, as well as the powerful P2 55W CO2 laser system, xTool has established a strong reputation in the field of laser cutting and engraving. The xTool P2 offers a comprehensive solution, covering everything required for cutting and engraving a wide variety of materials. It features an industry-first pass-through conveyor feeding system, enabling large-scale cuts and engravings of up to 2 feet by 9 feet, thereby making batch processing and large projects more efficient. Additionally, the P2 can be equipped with optional accessories such as a riser base for engraving larger items, a rotary and chuck attachment for 3D curved objects, and an air purifier, which facilitates the use of the machine in areas where venting air may be challenging.
In this article, we’ll thoroughly review the xTool P2 versatile bundle, analyzing its benefits while also taking into account any system limitations. We will test laser cutting and engraving on materials such as wood, acrylic, glass, metal, and others, featuring settings and tips. In conclusion, we will list the Pros and Cons.
Disclaimer: Laser cutting and engraving may be hazardous if improperly operated. Please make sure to follow the safety guidelines such as wearing eye-protective goggles and using the machine enclosure while operating.
Table Of Contents
- Specifications
- Unboxing and What’s Included
- Setup and Design
- Air Filtration
- Alignment and Calibration
- xTool Creative Space Software
- Testing, Settings and Results
- Compare to other Laser Cutters and Engravers
- Conclusion and Pros & Cons
Price: $3,699.00 – 6,955.00
Product Affiliate Links: 3DWithUs is supported by its audience. Purchases via some links may earn us a small commission at no extra cost to you. This helps us to continue bringing you high-quality content. Our guides and reviews remain unbiased and independent.

xTool P2 Specifications:
Rated Power:55W(CO₂ Glass Laser Tube)
Product Size:39.4″×25.1″×10.6″ (1000×639×268mm)
Product Weight:45KG
Max. Carving Speed:600mm/s
Processing Precision:0.01mm
Z-axis Movement:3″(75mm)
Bed Size: 26.7”×14.1”(680*360mm)
Working Space:23.6″×12″ (600×305mm)
Max. Workpiece Height: With tray 2.5″(64mm),
Without tray: 2.7″(71mm), With riser base 8.5″(215mm)
Rotary engraving diameter: With riser base 0-180mm, Without riser base 3-50mm
Camera: Panoramic camera + close-range camera
Number of Pixels (Effective): 16MP×2
Vision Precision: 0.3mm
Image Resolution: 1000DPI
Focus Mode: Auto focus
Operating Ambient Temperature: 10-30°C (10-86℉)
Storage Temperature: 10-45°C (50-113℉)
Water-cooling System Capacity: 1.4L(0.37gal)
Air Assist (adjustable): 15-150Kpa
Exhaust Fan: 145CFM
Operating Systems: Windows / macOS / iPadOS/ Android
Control Software: xTool Creative Space / LightBurn
Supported file types: SVG, DXF, JPG, JPEG, PNG, BMP
Connection: Wi-Fi, USB, Ethernet
Unboxing and What’s Included
xTool P2: What’s in the Box
• xTool P2 • Power cable • USB-C Cable • Antifreeze • Funnel • Smoke Exhaust hose • Exhaust clamp • Screwdriver • Hex key • Material Clamp x4 • 2x clear acrylic samples • 4x 3mm basswood samples • Corrugated paper 3.5mm x5 • Spare screws • Quick start guide • User manual
Rotary Pro: What’s in the Box
• Rotary attachment • Support module • Jaw chuck • Tail module • Double-step jaw components • Single-step jaw components • Assembly screws • Spare screws • Connection cable • Stud Components • Hex screwdriver 2mm • Hex screwdriver 2.5mm • Mini level • Tape measure • User manual
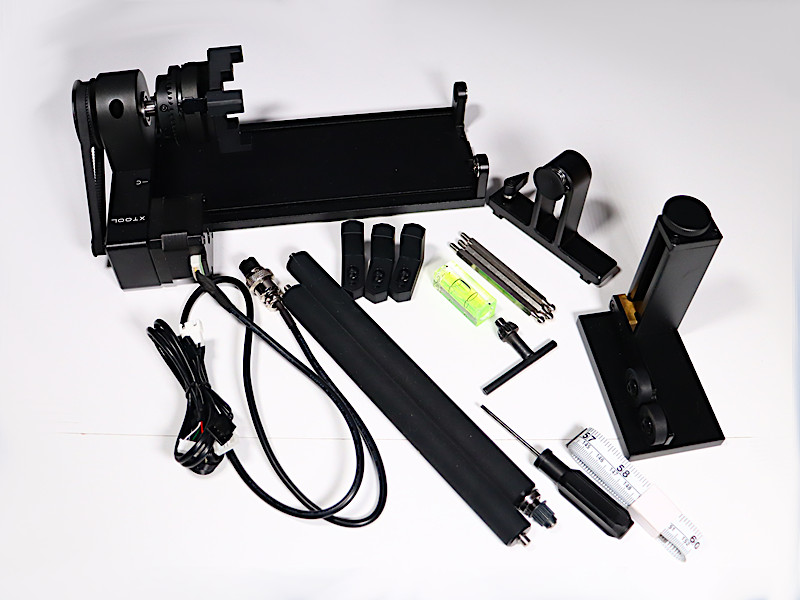
©3DWithUs – Photo: Will Zoobkoff
Conveyor: What’s in the Box
• Conveyor feeder • Conveyor rail risers x4 • Cable clamps • Material pressing rod • Cable holder x2 • Assembly screws • Conveyor rails x4 • Conveyor riser blocks x4 • Level adapter x2 • Cable ties • Hex key • User manual
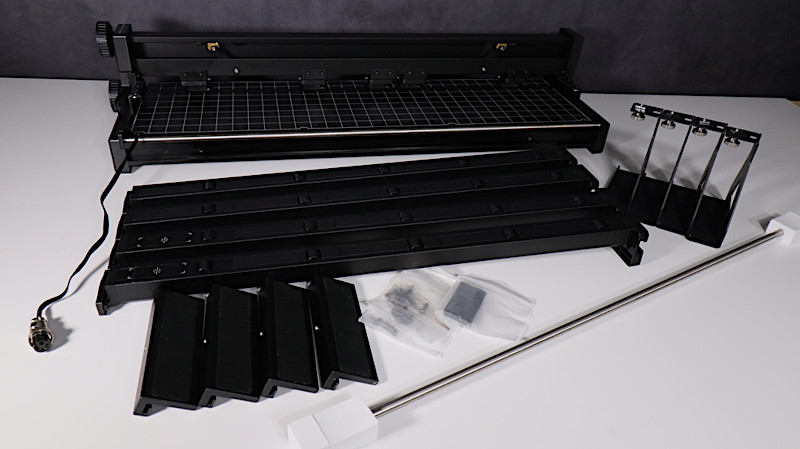
©3DWithUs – Photo: Will Zoobkoff
Riser Base: What’s in the Box
• Front door panel • Rear door panel • Left side panel • Right side panel • Rear cover panel • Left guide rail panel • Right rail guide panel • Left corner • Right corner • Support corner • Fixing plate A • Fixing plate B • Tape measure • assembly screws • Screwdriver • User manual
Setup and Design
The setup process for the xTool P2 machine is reasonably simple. Start by removing all the packaging foam from inside the machine. Then, take out the foam and accompanying sample acrylic sheets by loosening the central screw that fastens the removable base tray underneath the P2. After all packaging materials and attachments are removed, take off the sticker on the left front of the machine to access the item needed to adjust the laser’s focus mirror.
©3DWithUs – Photo: Will Zoobkoff
Check the movement of the laser head to confirm that it moves freely and without impediment. Remove the six inside screws that secure the back cover, providing access to the CO2 cooling tube’s coolant tank.
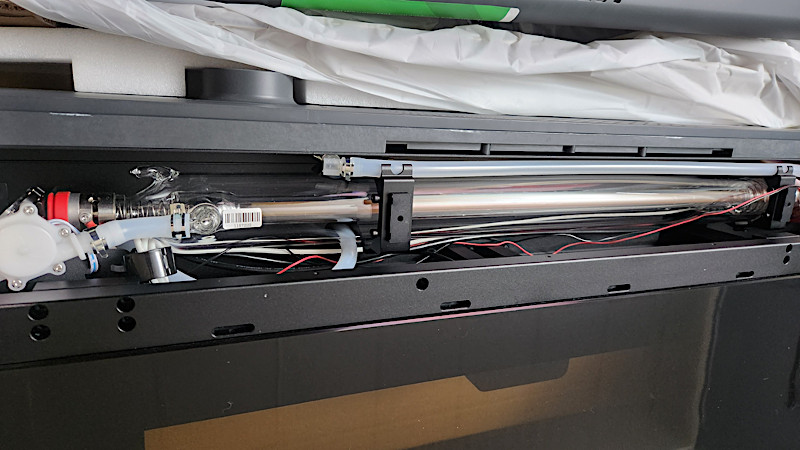
©3DWithUs – Photo: Will Zoobkoff
For simple identification, these screws are clearly marked with detachable stickers. Following that, unscrew the five screws located on the machine’s top rear to separate the cover.
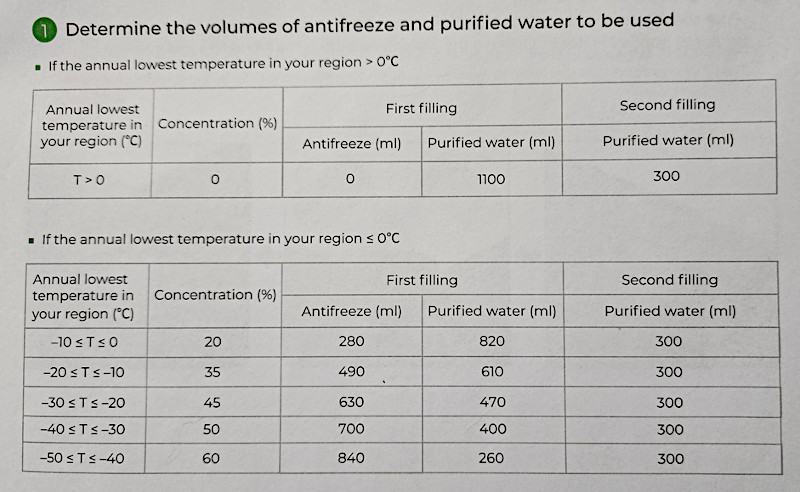
– Antifreeze and Purified Water. The next step is to use the setup guide’s chart to precisely mix the correct amount of coolant and water for the machine’s operation. This procedure is divided into two stages: filling the tank first, then turning on the machine to allow for circulation, followed by a second water top-up to achieve appropriate fluid levels. To avoid pollutants common in tap water during this step, xTool recommends using purified water.
Reattach the rear cover once finished, making sure no error sign appear on the P2’s top right display. Finally, connect the exhaust line that came with the setup to the back of the P2, either to your exhaust system or to the xTool smoke purifier for proper ventilation.
– Riser Base. Several components are required to assemble the Riser base, which allows the P2 to do greater engraving and cutting tasks. Fortunately, xTool includes thorough, easy-to-follow instructions, which reduces assembly time to 20 to 30 minutes. After assembling, gently place the P2 on top of the riser base. Given the P2’s size and weight, it’s best to obtain assistance for this stage.
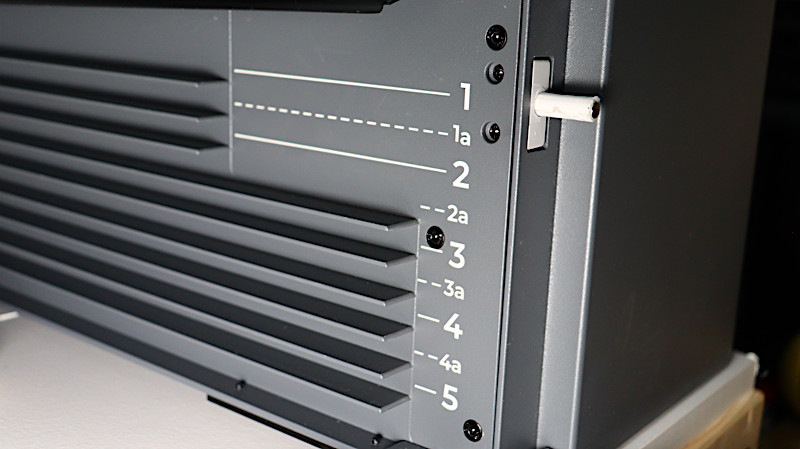
Open the front door and adjust the tray to the necessary level for your piece while the P2 is securely positioned on the riser base. xTool provides a useful tape measure with indicators that indicate the proper tray level for engraving.
– Storage Area. In addition, the riser base has a useful storage area on the machine’s right side. This compartment houses the rotary and chuck attachments, as well as the appropriate tools. Additionally, depending on the tray’s installation position, the riser base provides additional room beneath the machine for material storage.
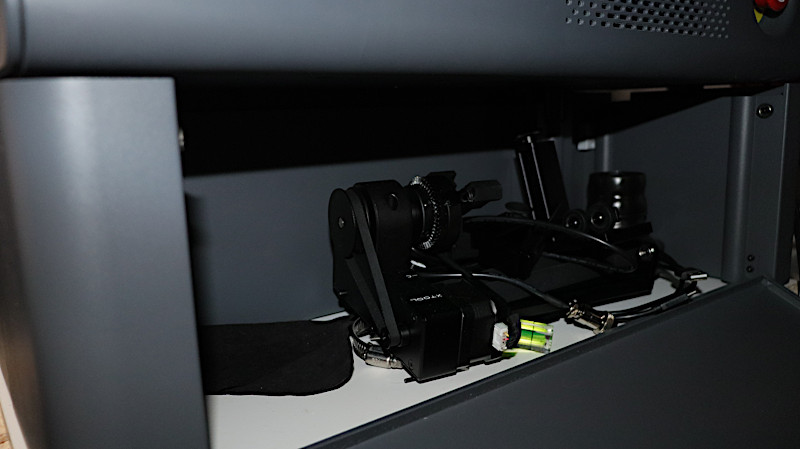
©3DWithUs – Photo: Will Zoobkoff
After properly installing the riser base, the following step is to install the conveyor system, which is dependent on the thickness of the materials you’ll be dealing with. If you intend to deal with material that is 8mm to 14mm thick, you will need to install spacers before installing the conveyor. Spacers are not required for materials with a thickness of 8mm or less.
– Conveyor installation. To begin installing the conveyor, position the base tray to the 2a mark on the riser base. Then, carefully put the conveyor unit into the front of the P2, fastening the assembly with the four screws provided. Allow for final alignment by leaving the inner screws slightly slack. Install the necessary number of rails to accommodate the material being used, following the clear and user-friendly instructions provided by xTool for conveyor system installation.
Before beginning engraving and cutting, consult the user manual’s pressure chart to establish the right amount of pressure needed to securely grip the material and ensure smooth feeding. A little gauge in the middle of the conveyor’s front indicates the amount of pressure exerted to the material, which aids in optimal results.
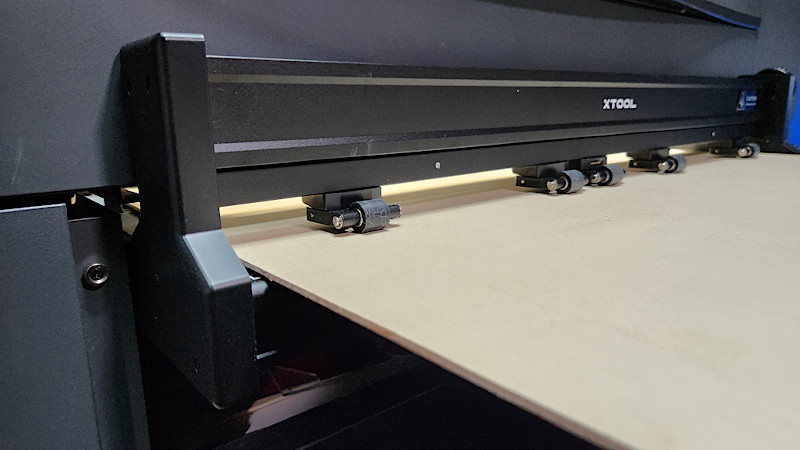
©3DWithUs – Photo: Will Zoobkoff
– RA2 Pro Rotary and Chuck. The final accessory we will cover in the setup is the RA2 Pro rotary and chuck attachment. This is a simple-to-use accessory that you place on the base plate and adjust to the correct height on the riser base to accommodate the object being engraved. The advantage of the RA2 Pro is the included chuck assembly, which greatly expands the types of objects you can engrave, such as glasses, rings, and even globes, using the tail stand accessory for support.
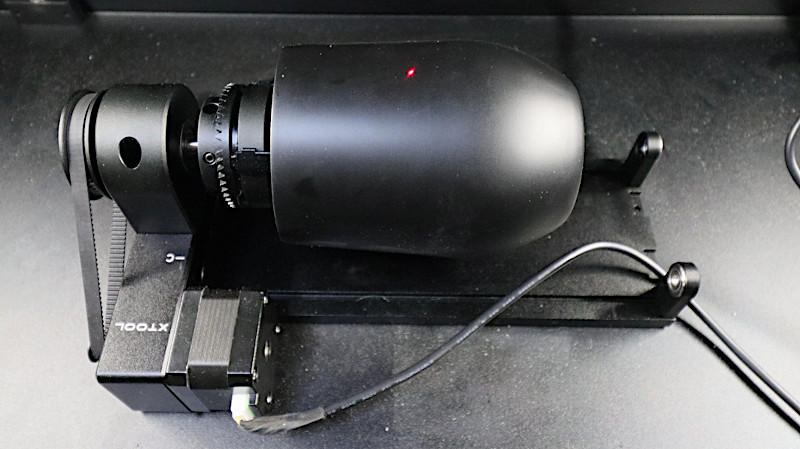
©3DWithUs – Photo: Will Zoobkoff
The main thing you want to keep in mind when using the RA2 Pro is to align the rotary and object with the red laser dot in the centre of the build platform to allow easy auto-measurement of the object.
Air Filtration
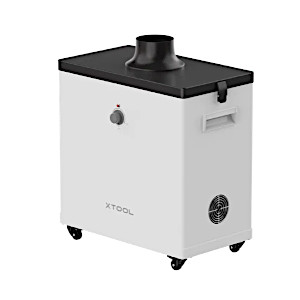
Optional Air Purifier
Official Website
xTool’s innovation extends to its remarkable air filtration technology, which allows for use in areas where expelling air may be difficult. Their 3-stage filter technology assures air purity and allows for venting through a window or an exhaust system.
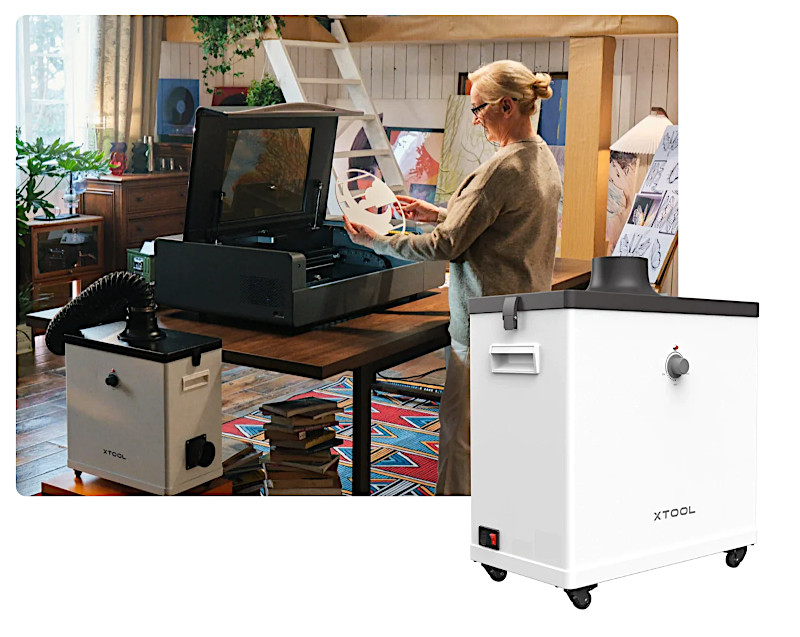
Image: xTool
Laser Alignment and Calibration
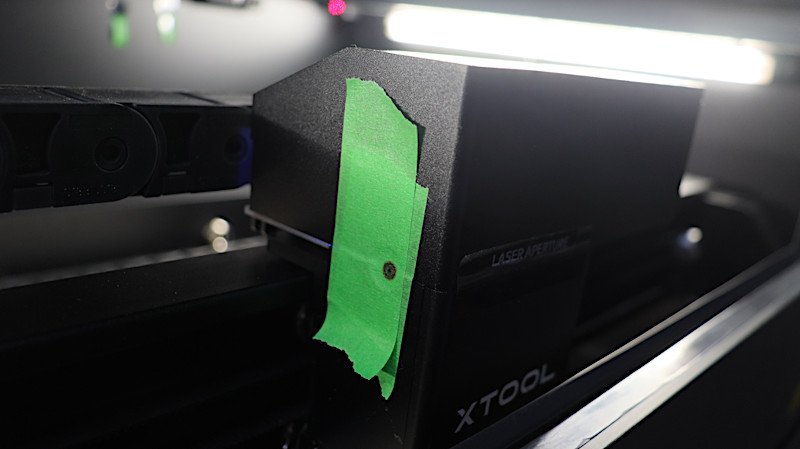
After you’ve installed and configured all of the essential accessories, it’s time to turn on the P2 and check the laser alignment. This simple procedure uses xTool Creative Space to maneuver the laser head to the far right front side of the head and cover the laser entry hole on the left side of the head with masking tape.
Send a laser pulse through the software to mark the masking tape. Adjustments may be required depending on the placement of the mark. Remove the front clip and place the mirror on the right side of the x-axis. Because the mirror is particularly sensitive to alterations, it is critical to make little modifications. After making any necessary corrections, repeat the laser pulse to ensure proper alignment. Continue until the laser is perfectly centred within the hole. To get the appropriate alignment, you may need to replace the tape many times.
©3DWithUs – Photo: Will Zoobkoff
Checking the alignment regularly ensures that there has been no displacement in the mirror due to regular use. If you notice that the lines aren’t as crisp as they used to be, it’s time to clean them and check the alignment to ensure optimal performance.
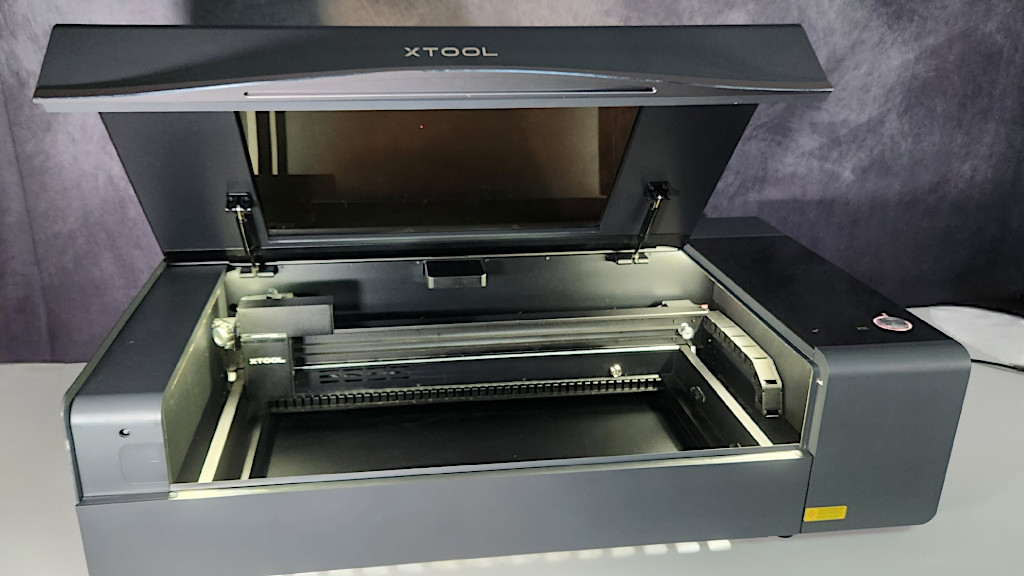
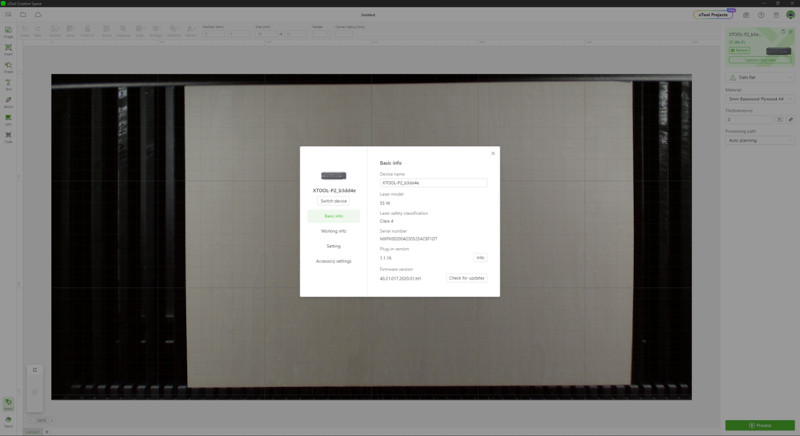
In terms of design, xTool has deliberately created the P2’s appearance to be elegant and clean. The machine has a big viewing window and a handy light that illuminates the entire workstation. The inclusion of a dual-camera arrangement is a noteworthy feature of the P2 system. One camera captures the entire workspace and modifies the image dynamically based on item distance and material thickness.

©3DWithUs – Photo: Will Zoobkoff
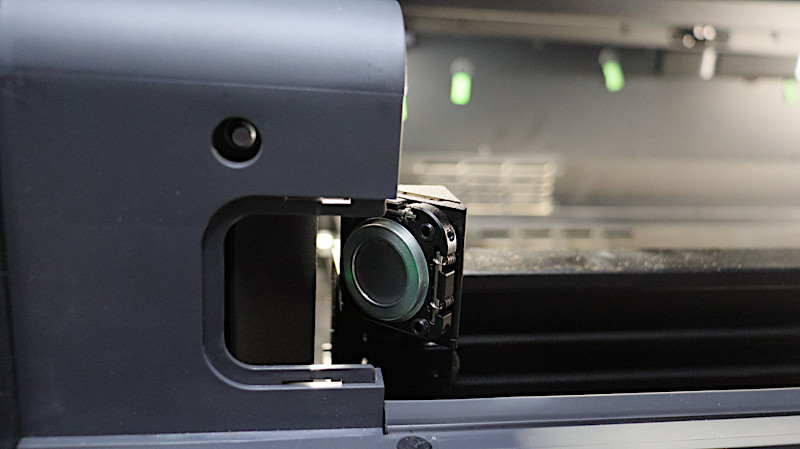
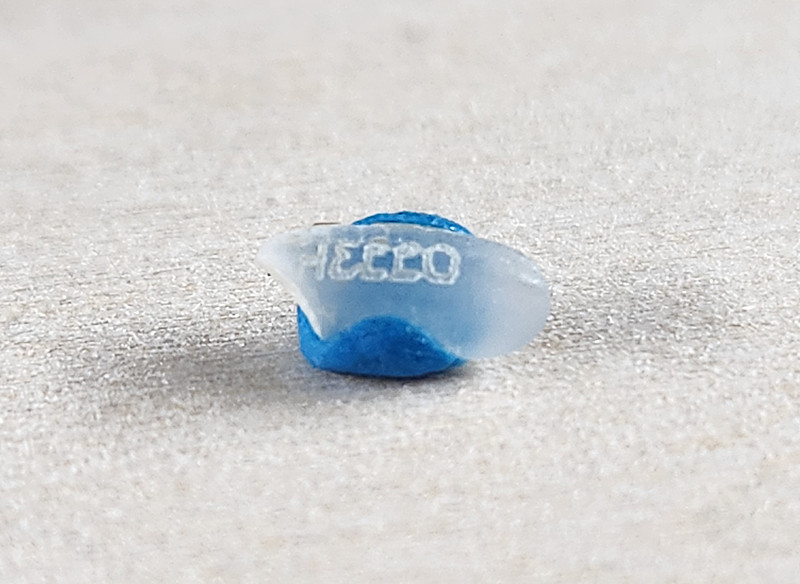
A second camera is also mounted on the laser head to aid with object alignment. The magnification capabilities of this camera allow for precise engraving on materials as small as a grain of rice.
©3DWithUs – Photo: Will Zoobkoff
The P2’s outstanding camera system outperforms other systems in terms of quality and zoom functionality.
All of the accessories have the same design appeal as the P2 base unit. It should be noted, however, that the conveyor system demands a lot of room. When working with the full 9-foot length, leave a clear 9-foot space in front and behind the P2 to allow for unrestricted material movement. Adequate rail support, such as a long folding table, is required for steady operation and can be simply folded when not in use.
xTool Creative Space Software
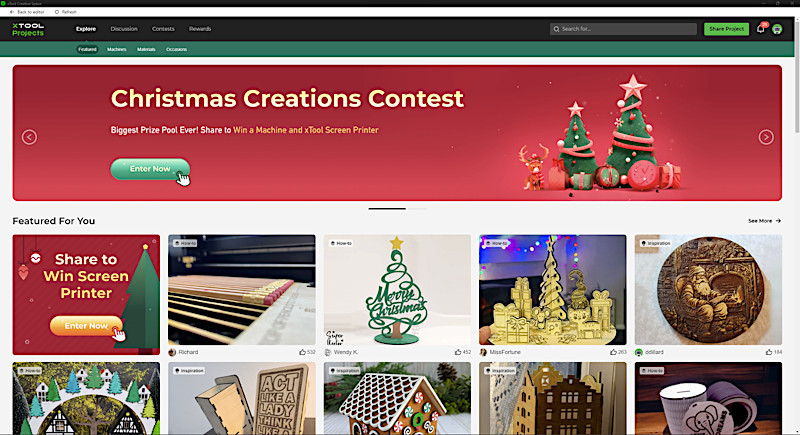
xTool’s software, xTool Creative Space, manages the operation of all their laser devices. The software is so thorough that it deserves its own article, but we’ll cover the basics here. xTool Creative Space comes with everything you need for engraving and cutting. It has a project centre where users may access a variety of projects that are compatible with the P2.
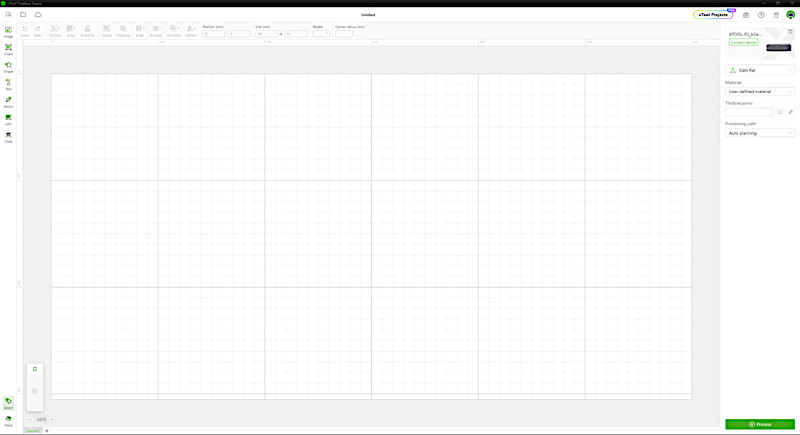
©3DWithUs – Image: Will Zoobkoff
Our testing indicated that the recommended settings performed wonderfully, but users can fine-tune power and speeds to reach the results they wish.
Screenshot: Creative Space
©3DWithUs – Photo: Will Zoobkoff
©3DWithUs – Photo: Will Zoobkoff
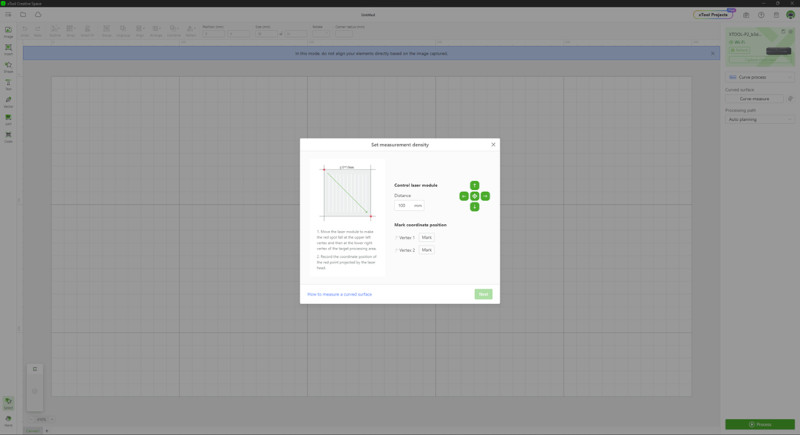
This software offers support for 3D curved engraving, which takes advantage of the P2’s auto-adjustable Z-axis. Users can specify the top and bottom corners of the space to be engraved, and the program will then execute a grid of points based on their selections. This grid registers the object in 3D, allowing for curved engraving—a characteristic that distinguishes the P2 from other machines, substantially expanding the range of tasks that may be completed.
Screenshot: Creative Space
Standard slat engraving, rotary engraving with the RA2 Pro, open plane engraving with the riser base for larger objects, conveyor mode, and the novel 3D curved engraving mode are all available in xTool Creative Space. Each setting adjusts the workspace to effectively coordinate engravings and cuts.
Furthermore, the program offers two auto-measurement options: the first uses the close-up camera for exact measurements, while the second uses the red centre laser for quick measurements that require material alignment underneath. To ensure precise and quick measuring of reflective materials, use a piece of tape or laser marking spray depending on the material.
Additionally, xTool Creative Space includes a variety of tools for altering and refining features for engraving or cutting, enabling maximum customization and precision.
Testing, Tips, Settings and Results
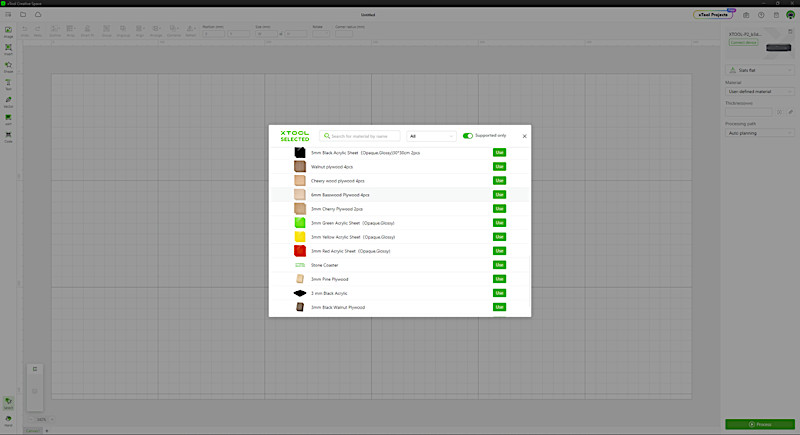
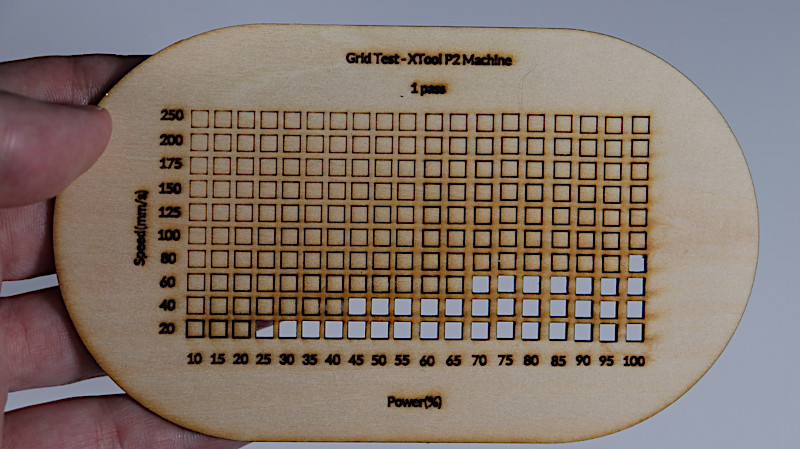
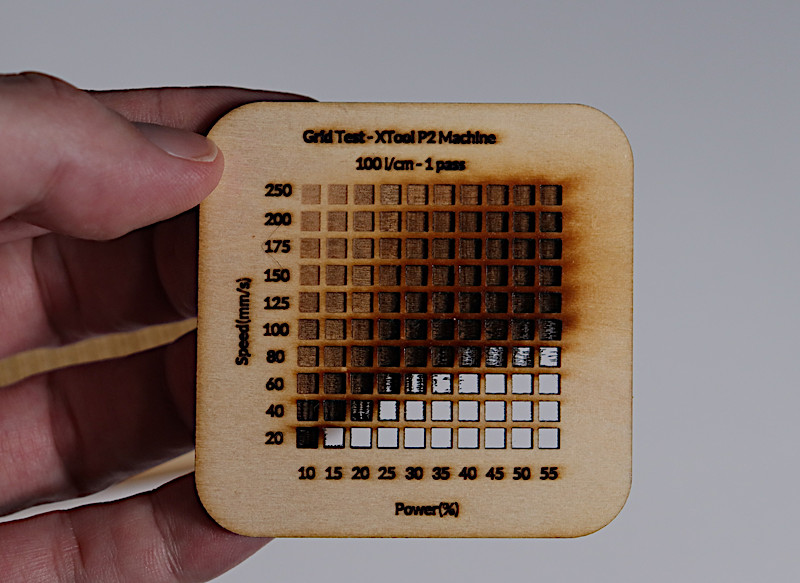
For each task, we chose to use the recommended material settings available in xTool Creative Space. Using these parameters guaranteed that all of our tests ran smoothly. We raised the power settings in a few engravings to attain the desired result. Furthermore, xTool provides an easily accessible web page with recommended settings for various materials, addressing both engraving and cutting requirements.
We finished our wood creations by adding stain and a clear coat for protection. To improve any job, several stains and clear coatings can be employed. Laser marking spray or laser marking paper, available in a range of colours, is ideal for non-stainless steel metal projects.

Model by EconstructorDigital on Etsy
©3DWithUs – Laser Job & Photo: Will Zoobkoff

For all the wood projects we used 3mm basswood and for the Haunted House we had some 3mm oak plywood we chose to use for it.
Model by ThursdayPrintsMY on Etsy
©3DWithUs – Laser Job & Photo: Will Zoobkoff
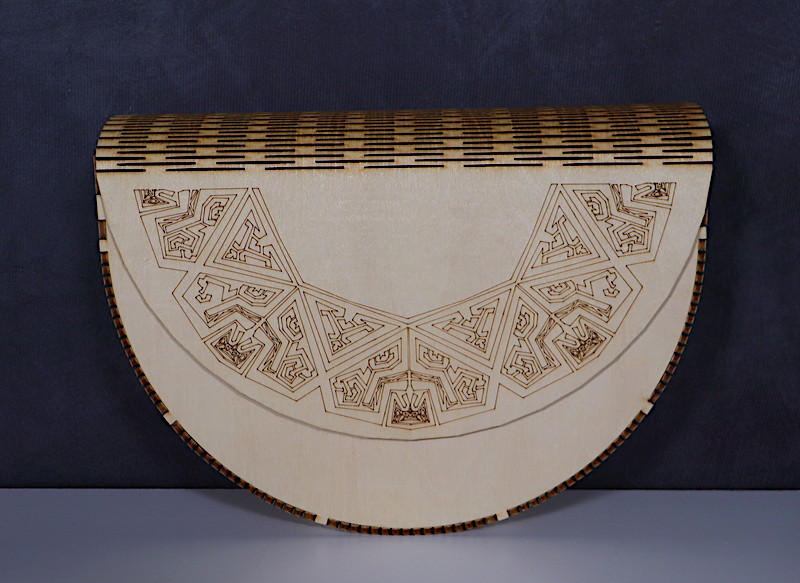
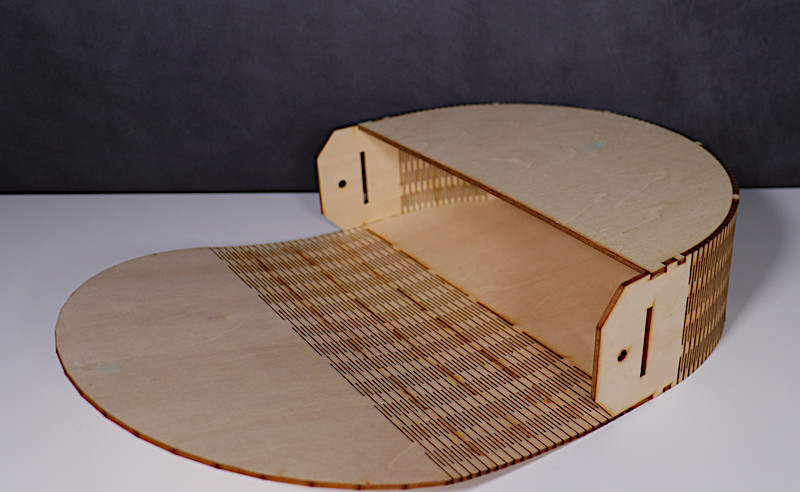
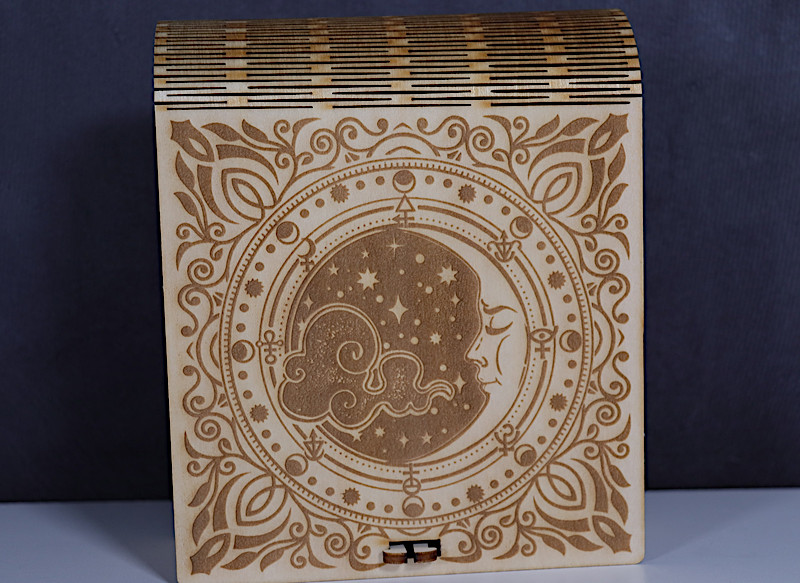
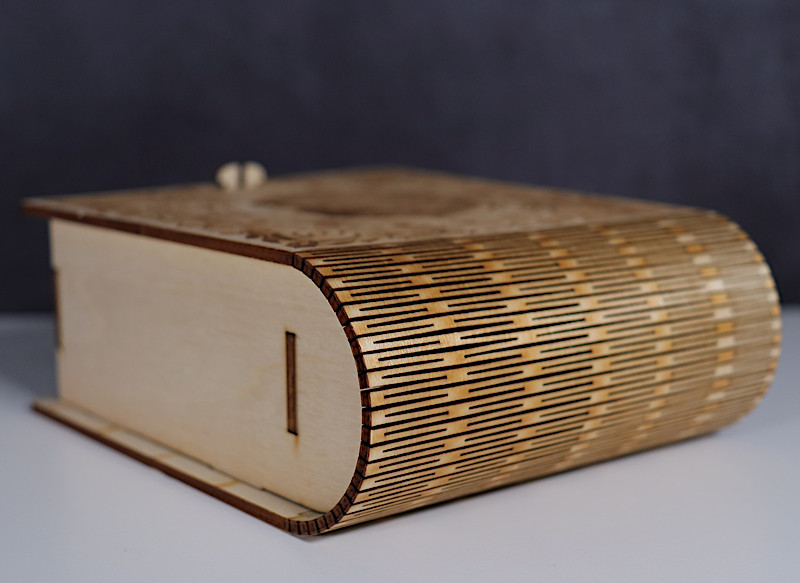
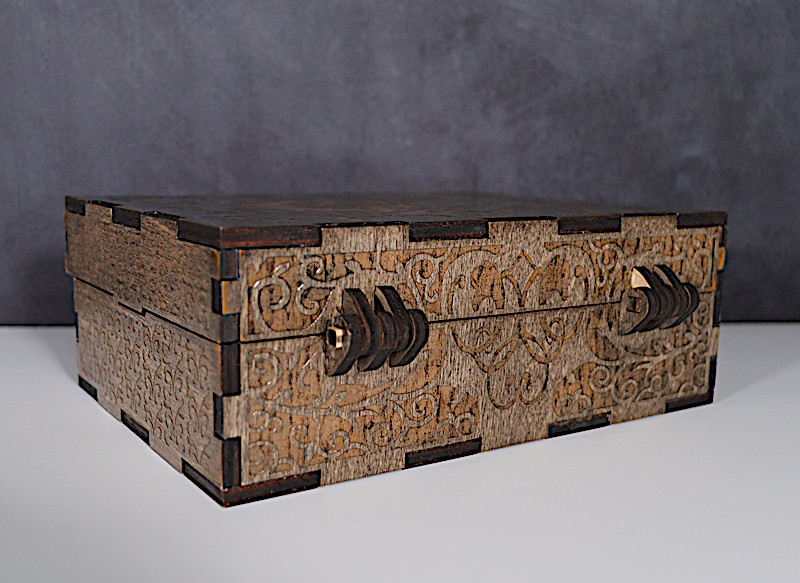
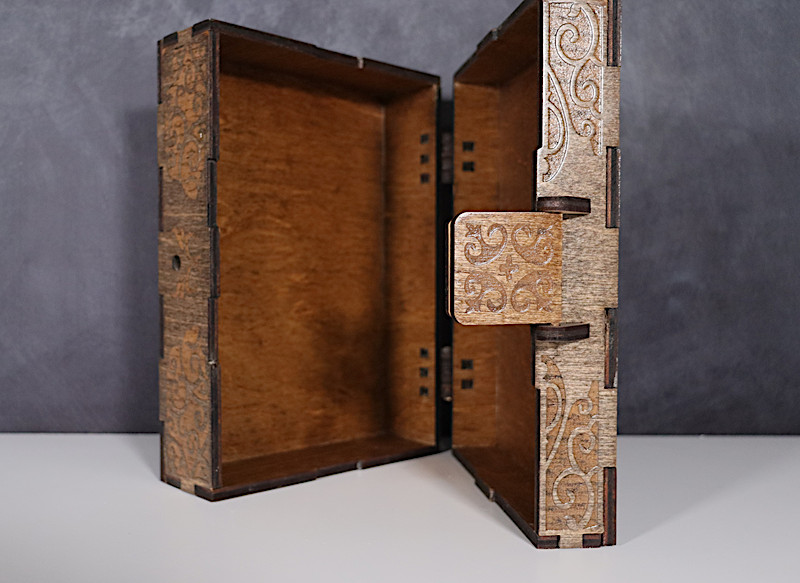
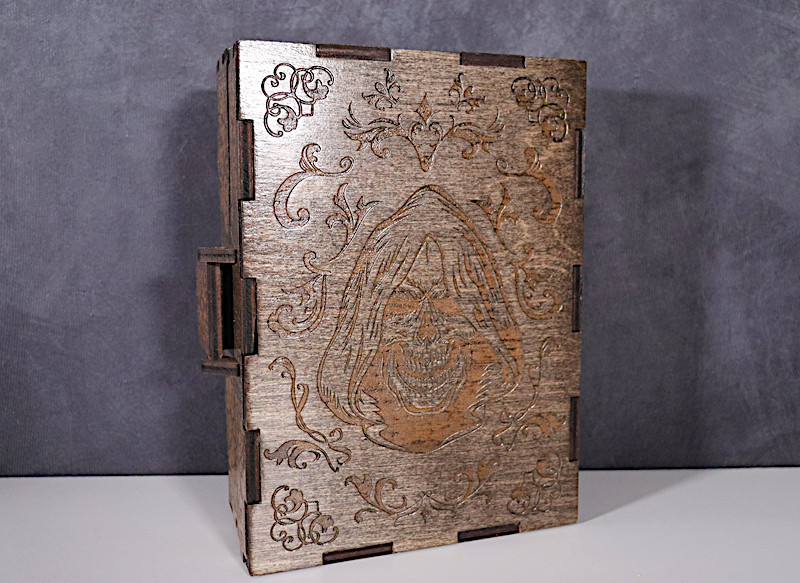
Model by LaserSvgTemplates on Etsy
©3DWithUs – Laser Job & Photo: Will Zoobkoff
Model by LaserLee on Etsy
©3DWithUs – Laser Job & Photo: Will Zoobkoff
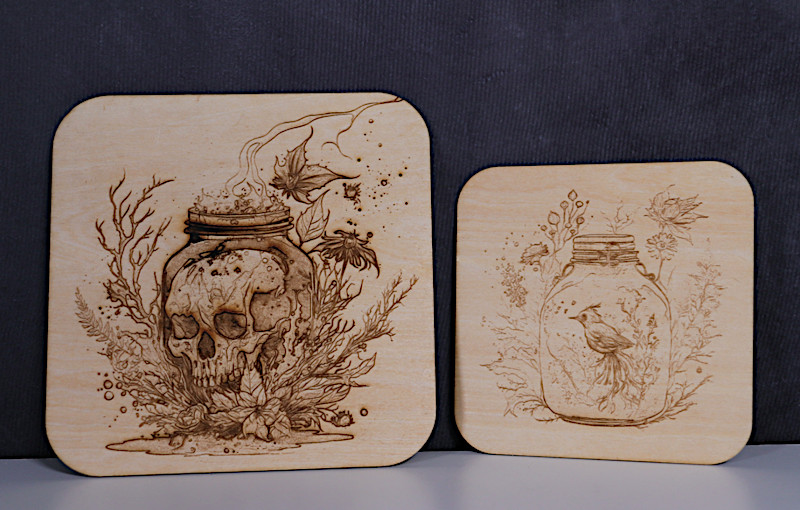
– Engraving Settings. All of our wood projects we engraved at a speed of 300 mm/s and a power of 15%. In some cases, we increased the power to 25% to get a deeper engraving.
Model by iMCreate Studios on Etsy
©3DWithUs – Laser Job & Photo: Will Zoobkoff
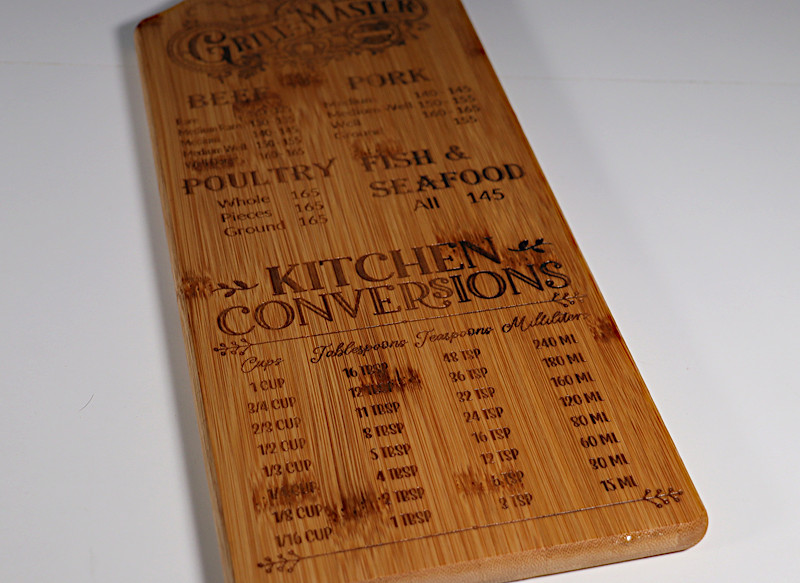
– Bamboo Engraving Settings. Because bamboo is more difficult to engrave, we modified the cutting board settings to 35% power at 160 mm/s for the engraving procedure.
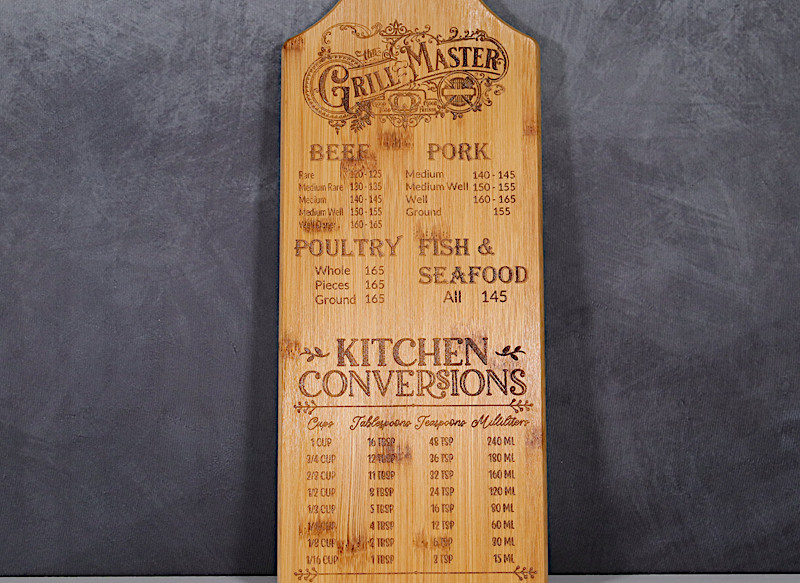
©3DWithUs – Laser Job & Photo: Will Zoobkoff
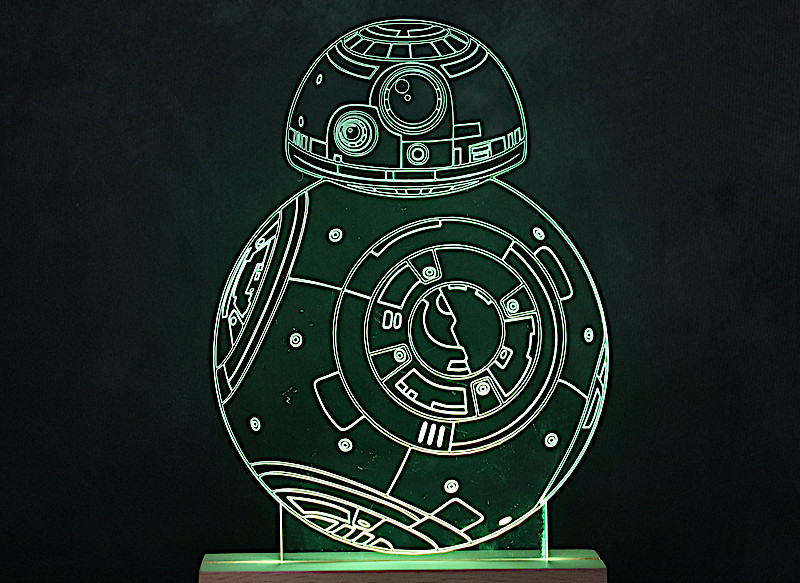
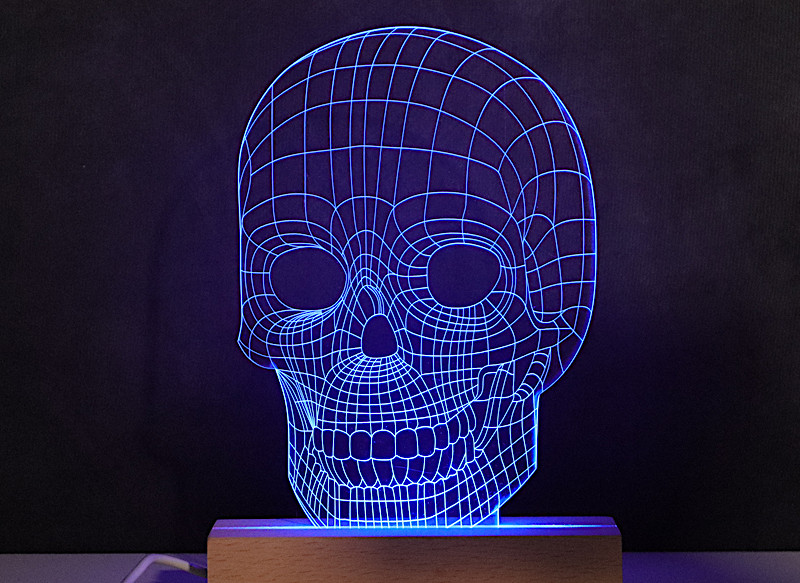
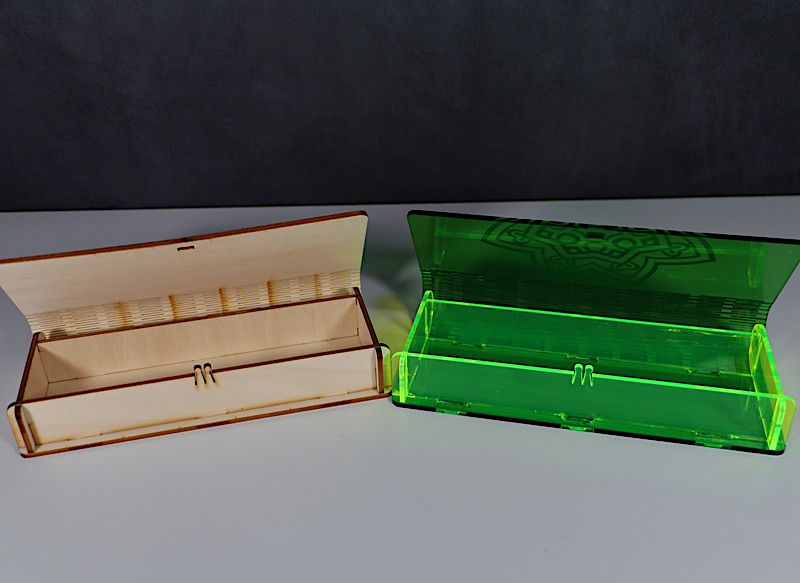
– Acrylic Engraving Settings. We used the suggested settings for acrylic pieces: 100% power at 25 mm/s for cutting, 15% power at 160 mm/s for vector engraving, and 15% power at 150 mm/s for bitmap engraving.
Model by StudioZombie3D
©3DWithUs – Laser Job & Photo: Will Zoobkoff
©3DWithUs – Laser Job & Photo: Will Zoobkoff
©3DWithUs – Laser Job & Photo: Will Zoobkoff
©3DWithUs – Laser Job & Photo: Will Zoobkoff

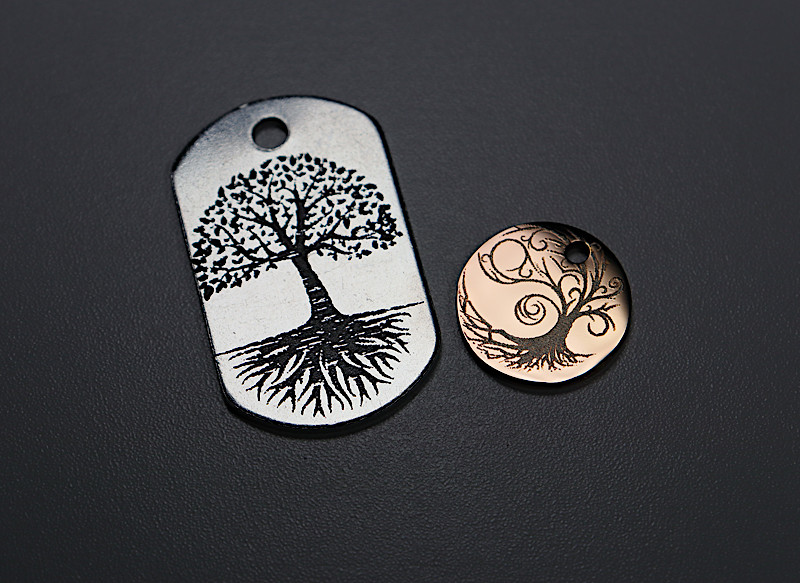
– Metal Engraving Settings. We used laser marking spray, engraving at 85% power at 150 mm/s for the small spherical pendant made of coated metal, and laser marking spray, engraving at 80% power at 160 mm/s for the dog tag.
©3DWithUs – Laser Job & Photo: Will Zoobkoff
Engraving on a Curved Surface
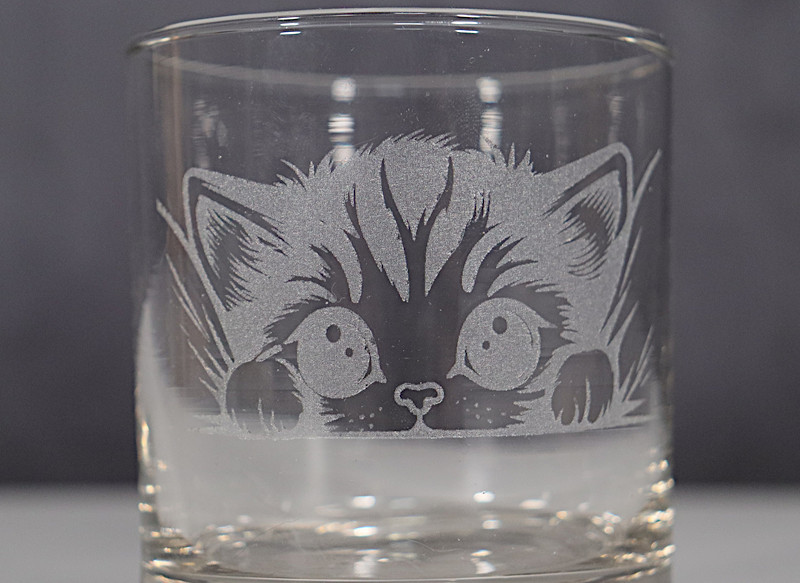
Here are a few laser jobs created with the help of the xTool RA2 Pro Rotary attachment. Aligning the rotary and object with the red laser dot at the centre of the build platform allows for easy auto-measurement of the objects. The rotary and chuck attachments greatly expand the types of objects you can engrave, such as glasses, rings, and even globes.
Model by StudioZombie3D
©3DWithUs – Laser Job & Photo: Will Zoobkoff
– Glass Engraving Settings. We utilized 15% power at 300 mm/s for engraving on glass. In our tests, using the recommended parameters from xTool produced successful outcomes. While you can experiment with power and speeds to achieve the ideal results, the pre-set profiles provided are more than adequate to ensure successful engraving and cutting from the start.
Model by PixelMarketHub on Etsy
©3DWithUs – Laser Job & Photo: Will Zoobkoff
©3DWithUs – Laser Job & Photo: Will Zoobkoff
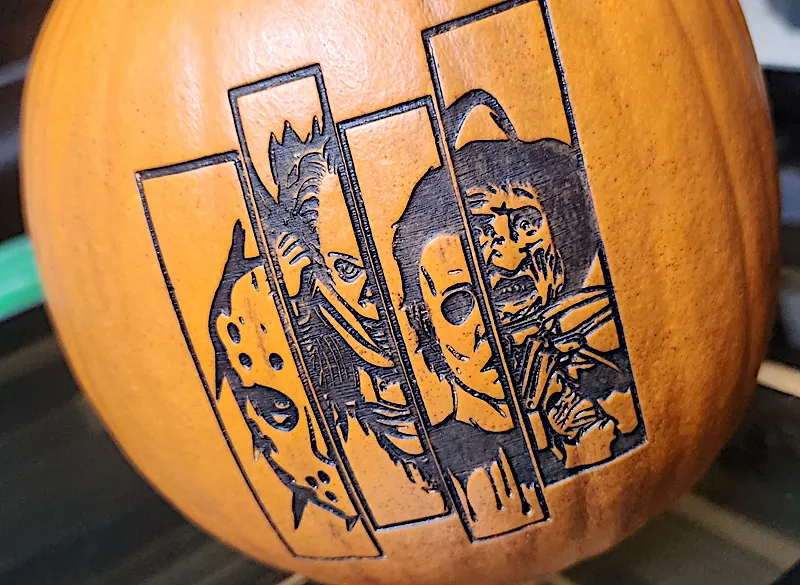
During the recent Halloween season, we decided to test the xTool P2 on a pumpkin for a unique and enjoyable experiment. It took some effort to keep the pumpkin stable during etching. After we had it secured, we used the curved mapping option to map the pumpkin’s front. After that, we loaded our image and engraved it at 20% power at 160 mm/s, and the results were incredible.
©3DWithUs – Laser Job & Photo: Will Zoobkoff
Compare to Other Laser Cutters and Engravers
Compare to Other xTool Laser Cutting and Engraving Machines:
xTool has a diverse range of laser systems to cover all needs. Here is a very helpful comparison page where it is possible to compare products and laser types.
On 3DWithUs, we have featured a few laser cutters and engravers that operate with diode lasers.
- Creality Falcon2 22W (Review)
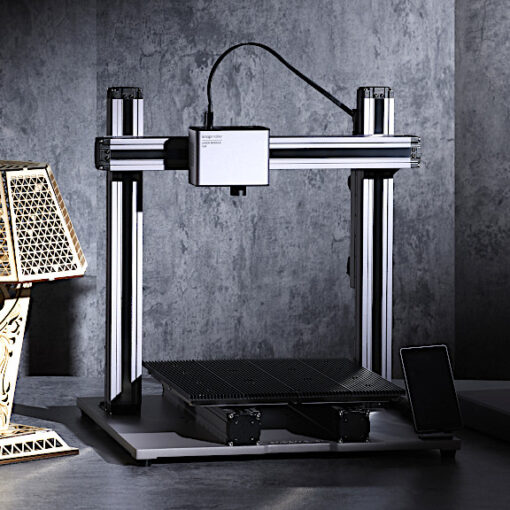
- Snapmaker 40W Laser Module (Review)
- LaserPecker LP2 Laser Engraver (Review)
For a comparison with other laser cutters and engravers, please refer to the detailed Best and Budget Laser Cutters and Engravers Guide.
xTool P2 system, with its laser type and capabilities, falls into a different category. In order to compare it to Creality and Snapmaker products, xTool S1 40W would be the best match instead.
Conclusion and Pros & Cons
xTool P2 Review - Desktop 55W CO2 Laser Cutter
Review Summary
xTool has established a reputation in the laser engraving industry by offering a wide range of laser systems, including the high-powered P2 55W CO2 laser system. The distinguishing feature of the P2 is its comprehensive solution, designed for cutting and engraving a wide variety of materials.
Remarkably, its revolutionary pass-through conveyor feeding mechanism allows for large-scale cuts and engravings of up to 2 feet by 9 feet, significantly optimizing batch operations and effortlessly accommodating massive projects. Additionally, the P2 comes equipped with a variety of attachments, the most notable being the riser base. This feature facilitates the engraving of larger items, such as luggage and guitars, for example, or large panels through the conveyor system.
The xTool Creative Space software ensures smooth operations by providing users with capabilities such as 3D curved engraving and precise measurements. The effectiveness of xTool’s presets has been confirmed through our testing, guaranteeing efficient engraving and cutting operations. While the default profiles allow for detailed customization, they consistently yield successful results, as demonstrated in various projects, including a remarkable pumpkin engraving during Halloween. For those in search of a laser engraving system capable of handling larger projects, the xTool P2 stands as an ideal choice.
Pros
– Large workspace
– 55W power
– Fast max speed 600 mm/s
– Accessories
– Pass-through with conveyor
– Dual camera
– 3D curve engraving
Cons
– Requires lots of space with conveyor
– Laserburn has no camera support

The P2 is one of my favrote lasers, the CO2 laser does an amazing job on so many materials. Glad the tips help have a great time with the P2