The Creality Falcon2 is a robust laser cutter and engraver, designed to be a top choice for hobbyists and enthusiasts seeking a reliable and powerful machine at a reasonable price point. While it may be more expensive than some other models on the market, its powerful 22W laser module, larger working area, high resolution, and built-in sensors make it a worthwhile investment for those who need a laser cutter for their projects. Let’s dive in to review this machine, test the 22W laser module, create some impressive projects using various materials, including colour engraving on metal, and finally outline the pros and cons.
Disclaimer: Laser cutting and engraving may be hazardous if improperly operated. Please make sure to follow the safety guidelines such as wearing eye-protective goggles and using the machine enclosure while operating.
Table Of Contents
- Specifications
- Unboxing and Setup
- 22-watt Laser
- Safety Features
- Optional Enclosure
- Air Supply System
- Calibration and Settings
- Laser Cutting and Engraving Software
- Honeycomb Laser Cutting Platform
- Testing, Settings and Results
- Optional Rotary Roller – Engraving on Glass
- Compare to other Laser Cutters and Engravers
- Conclusion and Pros & Cons
Specifications
Laser power: 22W
Cutting capacity: Cut 15mm wood one pass
Engraving speed: 25000 mm/min
Colourful engraving: Yes
Spot size: 0.1 mm
Working area: 400 x 415 mm
Laser wavelegnth: 455±5 nm
Resolution: 254 DPI
Laser source: Diode laser
Supported file formats: SVG, PNG, JPG, JPEG, BMP, DXF
Supported software: LaserGRBL, LightBurn
Supported materials: Cardboard, wood, bamboo, rubber, leather, fabric, acrylic, plastic, metal
Engraving file format: Gcode
Price: $611-$1,199
Amazon
AliExpress
Official Website
Creality Certified Store
Unboxing and Setup
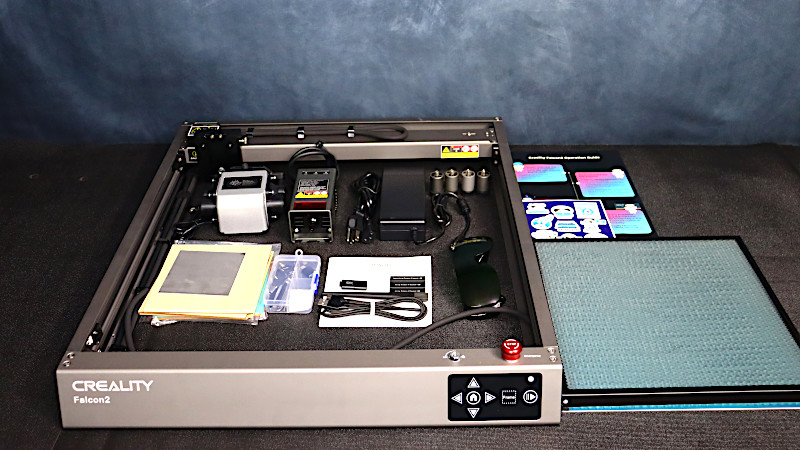
Upon unboxing the Creality Falcon2 22W Laser Engraver and Cutter, I was immediately impressed with its nearly complete assembly, which required only three simple steps to finish. These steps were attaching the laser module to the frame, connecting the Air Assist module, and adjusting the leg height. Thanks to the quick setup process, I was able to use the machine right away and save time.
The package includes all the essential materials for initial tests, such as cardboard, colored paper, felt, various wooden plates, and a stainless-steel plate. Alongside the pre-assembled laser frame, laser module, and air assist system, the package also includes important safety equipment such as laser safety goggles and a focusing aid. Additionally, there is an adapter for SD cards to USB, which is useful for transferring files, and tools for cleaning the laser module.
What’s in the box
• Falcon 2
• Laser module
• Air assist unit
• UV glasses
• Power supply
• USB cable
• Brush
• Keys
• Focus adjust block
• Tool kit
• USB C adapter
• USB adapter and micro SD cardboard
• Extra Lens
• Engraving plate
• Test Kit (Basswood, card stock, felt, stainless steel)
• Legs
• User manual
©3DWithUs – Photo: Will Zoobkoff
One notable inclusion is the honeycomb sheet that helps keep the undersides of lasered objects clean and prevent damage to the work surface. The honeycomb pattern distributes the laser beam evenly and provides better air flow during the engraving process, which helps prevent scorching or charring of the material.
Moreover, the package contains a microSD card that provides assembly instructions, sample project files with LaserGRBL and LightBurn, and the machine file required to operate the Creality Falcon2 22W Laser Engraver and Cutter with LightBurn. This card makes it easy to get started quickly and provides all the necessary information to operate the machine effectively.
Powerful 22-watt Laser
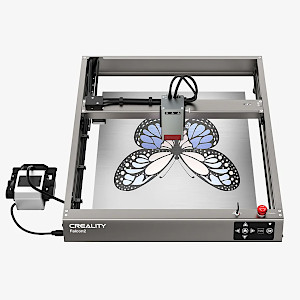
The CR-Laser Falcon2 is distinguished by its powerful 22-watt laser, which allows it to cut and engrave through a wide range of materials. One of its notable features, as seen in my projects, is its ability to color-engrave stainless steel. While I primarily use the laser with wood, the Falcon2’s power is significantly greater than that of the CR-Laser Falcon 10 Watt, and this increase is noticeable. Thanks to the Falcon2’s ability to move at faster speeds while still cutting through materials of the same thickness, I am able to complete projects much more quickly than I could with a 10 watt laser.
©3DWithUs – Photo: Will Zoobkoff

©3DWithUs – Photo: Will Zoobkoff
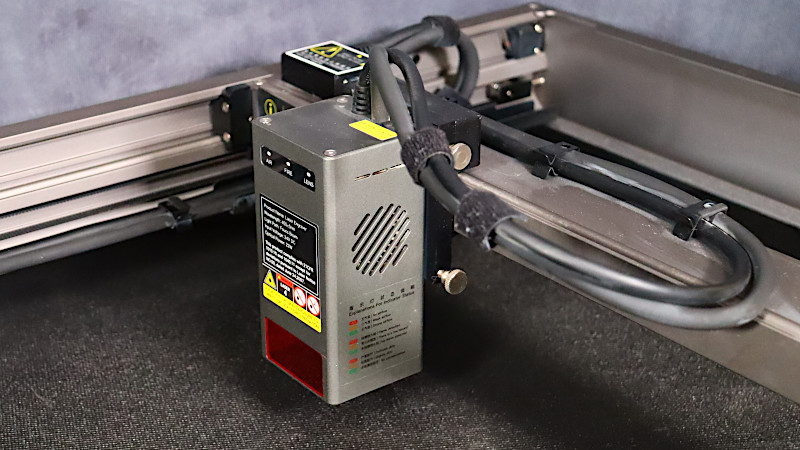
The laser module comes equipped with three warning lights, one for the air assist system, one for fire detection, and one for detecting lens contamination. Although there is no audible alarm when one of these lights turns red, you can still detect any issues during and after the process, and identify potential inaccuracies in the result.
©3DWithUs – Photo: Will Zoobkoff
Safety Features
However, it is important to be aware of the risks associated with such a powerful laser. Even with the use of laser safety goggles, the laser can cause serious skin and eye injuries. As such, it is crucial to take appropriate precautions and ensure that no one is in the same room without proper eye protection while the laser is in use. Reflected laser light can also cause harm to the eyes.
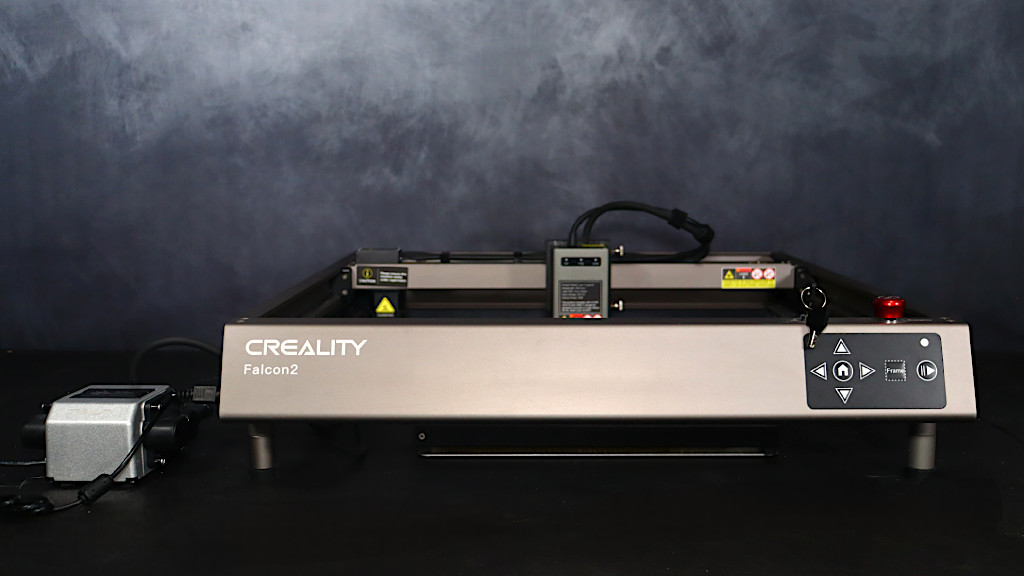
– Stop Button. The CR-Laser Falcon2 has several safety features, including a large stop button and a lock that can be secured with a key.
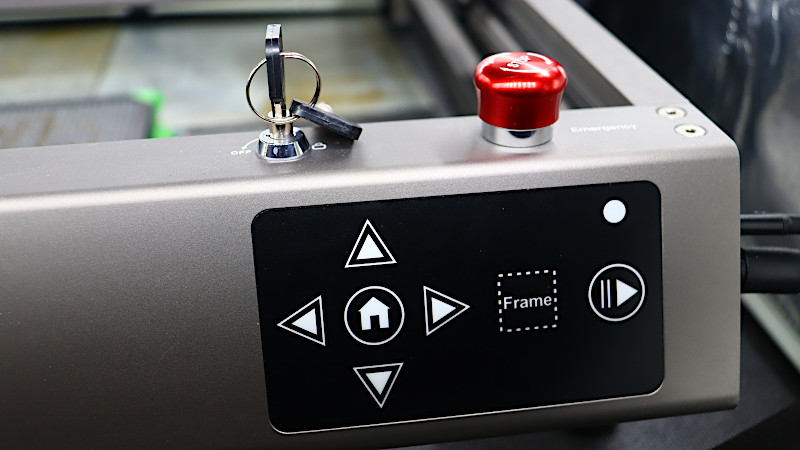
©3DWithUs – Photo: Will Zoobkoff
– Controls. Operating the device is relatively straightforward, with four arrow keys to move the laser module on the XY plane and a home button to move it to the zero point. The frame button allows for accurate positioning of the material by using the file’s shape as a guide.
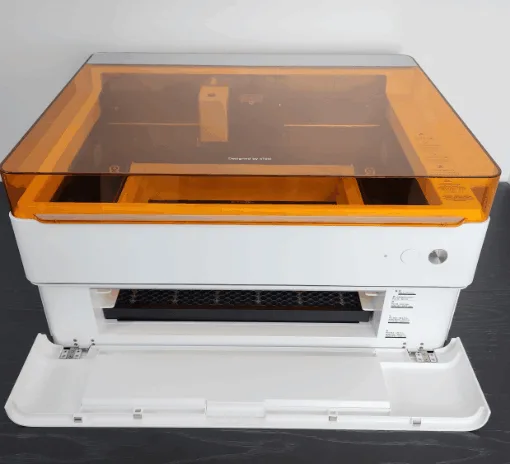
Optional Enclosure
I also used the optional Creality laser enclosure during our testing. Laser engravers can generate a lot of smoke, which can quickly fill your workspace and create an unpleasant environment. The enclosure is a simple frame and cover that is placed over the Falcon 2 and includes a UV-blocking cover, a 3000 rpm exhaust fan, and an extension hose to vent the smoke and fumes out of a window. This is highly recommended to ensure a safe and comfortable work environment.
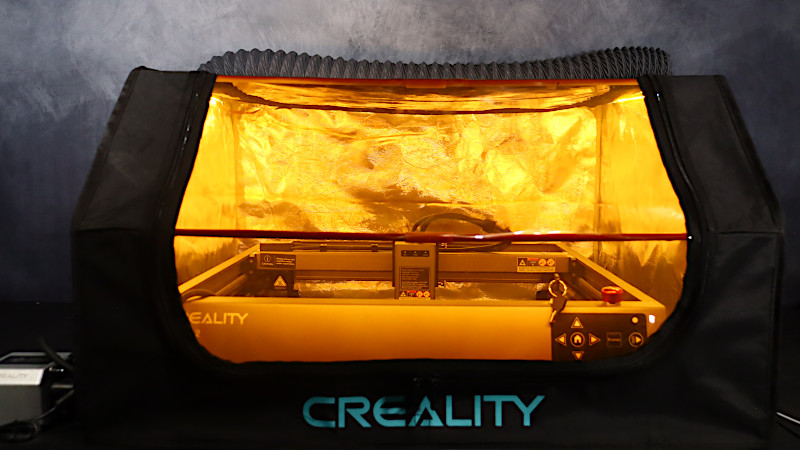
©3DWithUs – Photo: Will Zoobkoff
The use of the enclosure provides several benefits. The UV-blocking cover helps to protect the operator’s eyes from the laser beam and the reflected light, which can be harmful to the eyes. The exhaust fan and extension hose help to remove the smoke and fumes generated during the engraving process. This is important not only for operator safety but also to prevent damage to the laser engraver itself. Excessive smoke and fumes can build up inside the engraver and cause damage to its internal components.
Overall, the Creality laser enclosure is a great investment for anyone who plans to use the Falcon 2 for laser engraving. It provides a safe and comfortable work environment, protects the operator’s eyes from harmful UV rays, and helps to prevent damage to the engraver itself. With this enclosure, you can focus on your engraving project with peace of mind, knowing that you are working in a safe and controlled environment.
Air Supply System
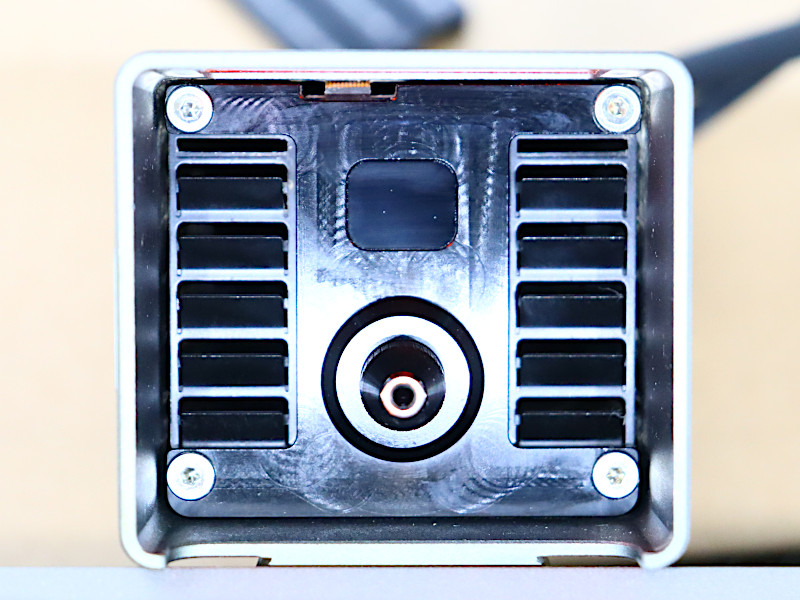
The output of the laser module and the air supply system, which includes a small compressor that feeds air through a flexible hose, are located at the bottom of the machine. The hose is cleverly routed inside the frame, ensuring that it never comes into contact with the material and resulting in cleaner results with fewer burn marks.

©3DWithUs – Photo: Will Zoobkoff
The air assist power can be adjusted on the side of the frame, with lower power recommended for engraving and higher power for cutting. During my tests, I kept the power at the highest setting.

©3DWithUs – Photo: Will Zoobkoff
Additionally, the included SD card provides recommended parameters for various materials. If the material you wish to use is not on the list, you can test different settings through the software and adjust a small part of your material accordingly. It may require some effort, but it is worthwhile.
Calibration and Settings
For any laser engraving project, it’s crucial to determine the right settings for the material you’re working with. That’s why, for our testing, I conducted multiple tests to determine the best settings for each material that could be used with the Falcon 2. To make this process easier, Creality includes a PDF with recommended settings for various materials.

PDF: Creality
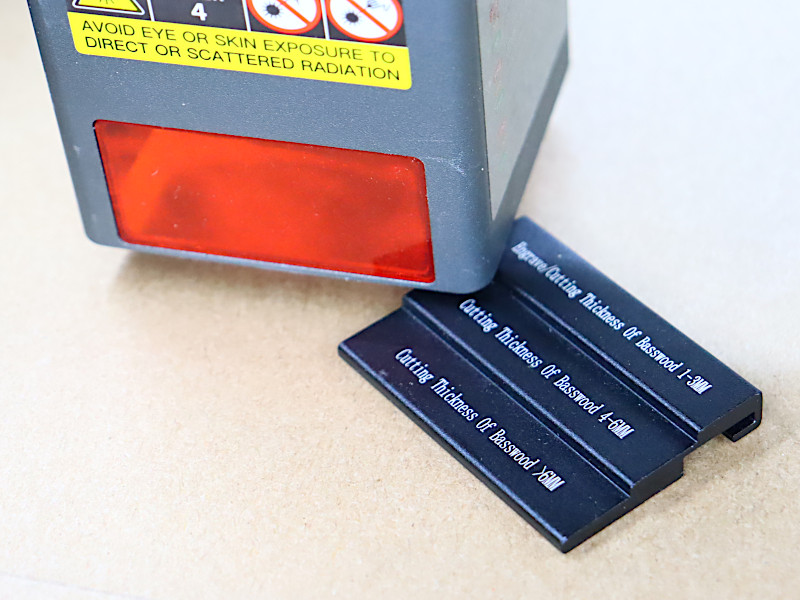
©3DWithUs – Photo: Will Zoobkoff
To conduct tests, I used a range of materials provided by Creality, including basswood squares that were 3 mm thick, cardstock, felt, and stainless steel. I used the small square of stainless steel to test the color engraving capabilities of the Falcon 2. By using these materials, I was able to determine the ideal settings for each one.
Laser Cutting and Engraving Software
My software of choice is LightBurn, which is one of the top laser engraving programs available, for all of our testing and engraving. This program has a wide range of features that can be useful for any laser engraving project, such as customizable settings, graphic design tools, and the ability to import images and vector files. LightBurn also offers a 30-day full trial version, which is great for anyone who wants to try it out before committing to the full version. After the trial period, the full version of LightBurn costs $60 USD.
While there are several free programs available on the internet, such as LaserGRBL, they may lack some of the advanced features that are included in LightBurn. For those who are serious about laser engraving and want to achieve the best results possible, investing in a quality program like LightBurn is definitely worth it.
Honeycomb Laser Cutting Platform
A honeycomb cutting platform is also an essential accessory for laser cutting with the Falcon 2, as it provides a stable base for holding the material in place and allows air to flow through. This design helps to minimize scorching and smoke buildup, which can cause damage to the laser engraver and create an unpleasant working environment. It’s important to choose a high-quality honeycomb bed that is specifically designed for laser cutting, as this ensures the best results and minimizes the risk of uneven cutting or warping. The Falcon 2 comes with a plate for engraving but does not include a honeycomb bed. Results on Amazon.
Testing, Settings and Results
One of the first test pieces I tried with the Falcon2 was the sample Falcon bird cutout that comes included on the SD card. This piece was cut at a speed of 600 mm/min and 100% power, with full air assist turned on. I used a piece of the included basswood material to test the cutting capabilities of the machine.
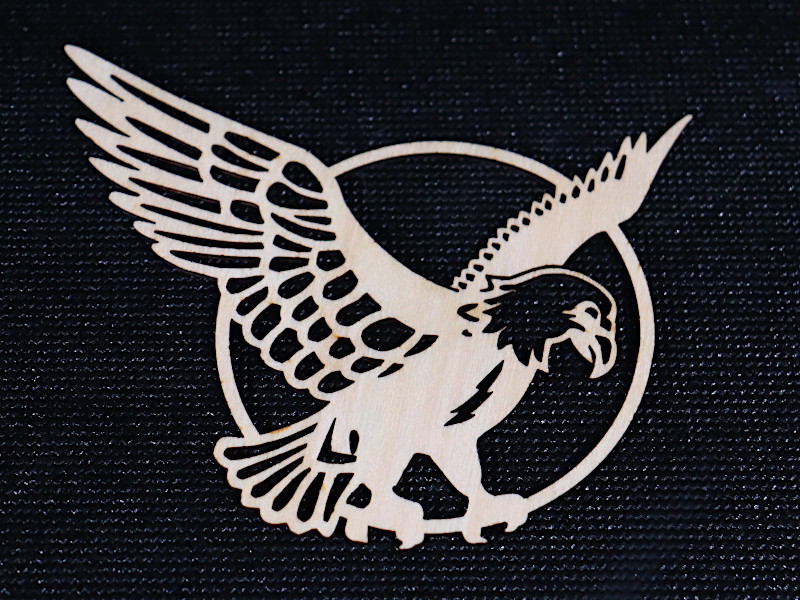
©3DWithUs – Photo: Will Zoobkoff
The results were impressive. The cuts came out perfectly clean, with no visible scorching or burning on the edges of the material. This was thanks to the air assist feature that is included with the Falcon 2. The air assist helps to blow away any smoke or debris that is produced during the cutting process, which helps to prevent scorching and keep the cutting area clean.
Project with Test File Settings
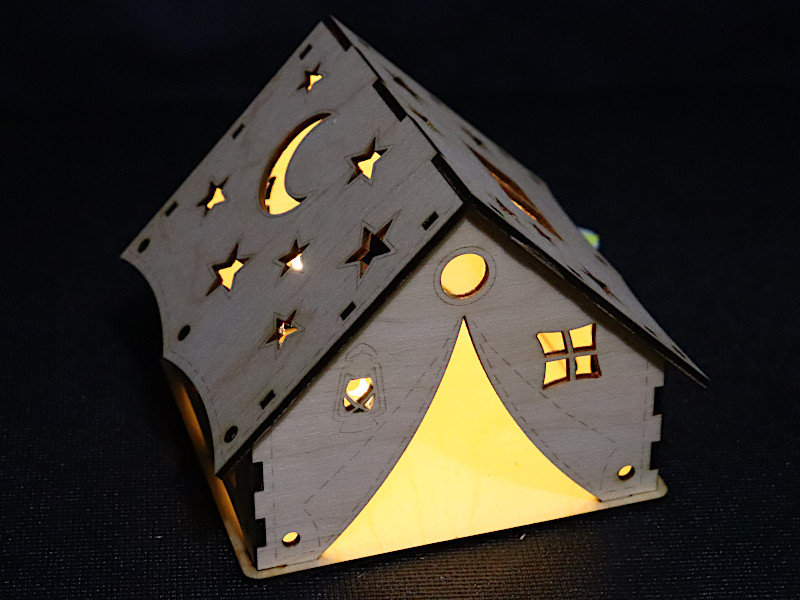
After the first test I decided to try a simple tent cut pattern using the same settings as the falcon cut the tent pieces came out great. And the final touch was to add a string of lights to make this little tent a nightlight.
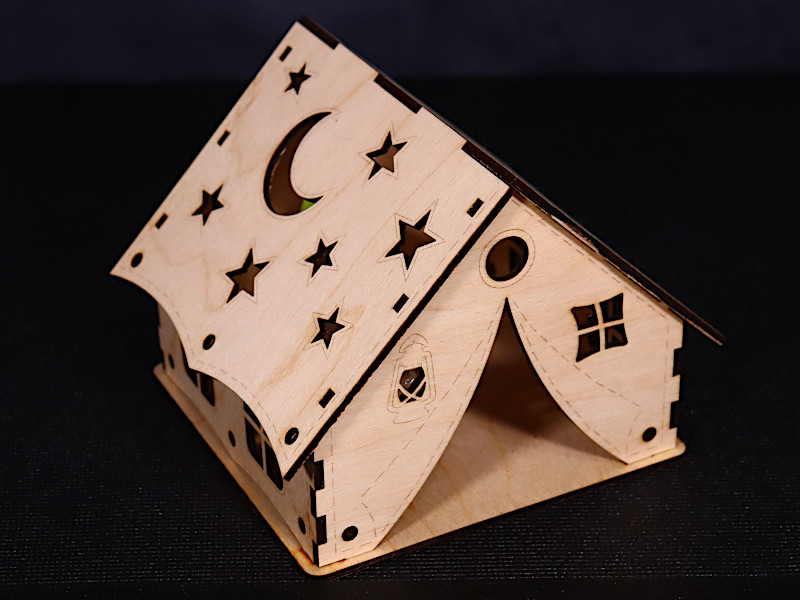
©3DWithUs – Photo: Will Zoobkoff
Color Laser Engraving on Metal
Next, I tried to engrave a simple test pattern on the included piece of stainless steel. This pattern helps to determine the best settings for achieving various colors on stainless steel, which is a handy option if you work with a lot of stainless steel, such as tumblers, plates, or cups. To achieve different colors, you need to vary the speed and power of the laser.
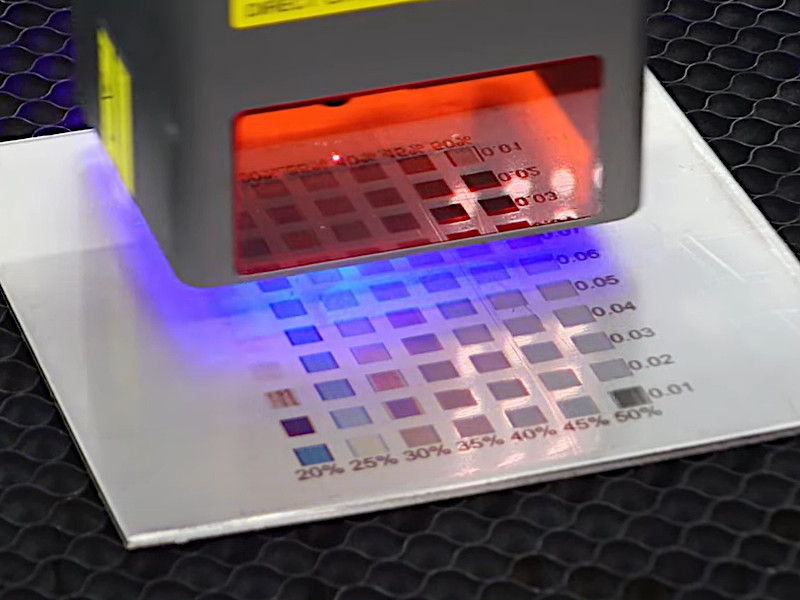
©3DWithUs – Photo: Will Zoobkoff
Finding the ideal settings for each color can take some time, but once you find the right range, you can create some amazing pieces with the Falcon 2. Experimenting with different settings can also help you achieve unique and interesting effects on the metal surface.
Overall, the stainless steel test pattern was a great way to explore the capabilities of the Falcon 2 and get a sense of the level of precision and control that the machine provides. I was impressed with the results and look forward to experimenting further with stainless steel engraving.
Engraving on Basswood – Settings
The next piece I worked on was a simple engraving on one of the included pieces of basswood. I used a speed of 3000 mm/min at 35% power to create the design. The engraving features a simple sugar girl design by Fortuna Draws, and the results were fantastic.
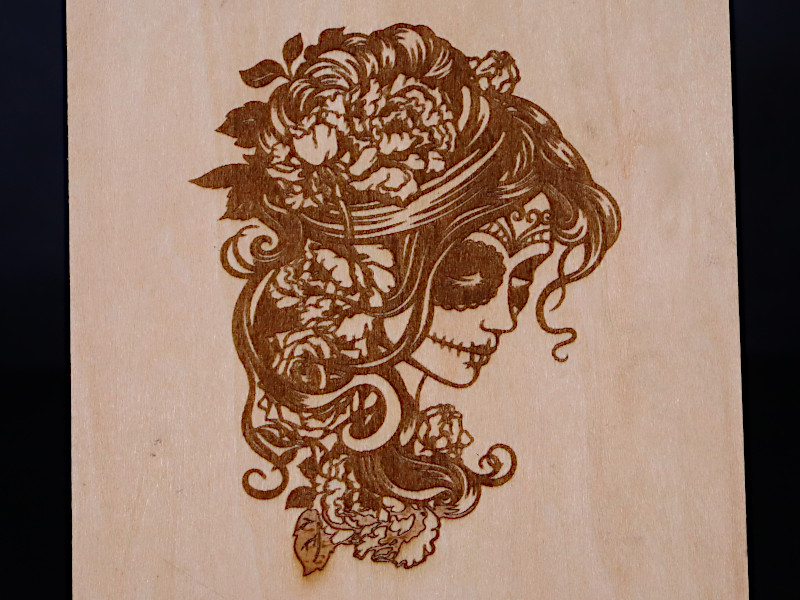
©3DWithUs – Photo: Will Zoobkoff
The engraving is clean, with even lines and sharp, clear details. The basswood material worked well with the laser, and I was impressed with how easily and accurately the Falcon 2 was able to engrave the design. The speed and power settings I used were ideal for this particular piece, but of course, the settings may need to be adjusted depending on the specific design and material.
Overall, the basswood engraving was a great example of the precision and versatility of the Falcon 2. It demonstrated how easily the machine can create intricate designs and how well it can work with a variety of materials.
Cutting and Engraving Leather – Settings
In this test, I did a simple cut and engrave on a piece of leather. I engraved the StudioZombie3D logo onto a piece of leather that was 3mm thick. The settings needed to be adjusted to 600 mm/min at 100% power for the cutting, and the engraving of the logo was done at 3000 mm/min at 30% power.
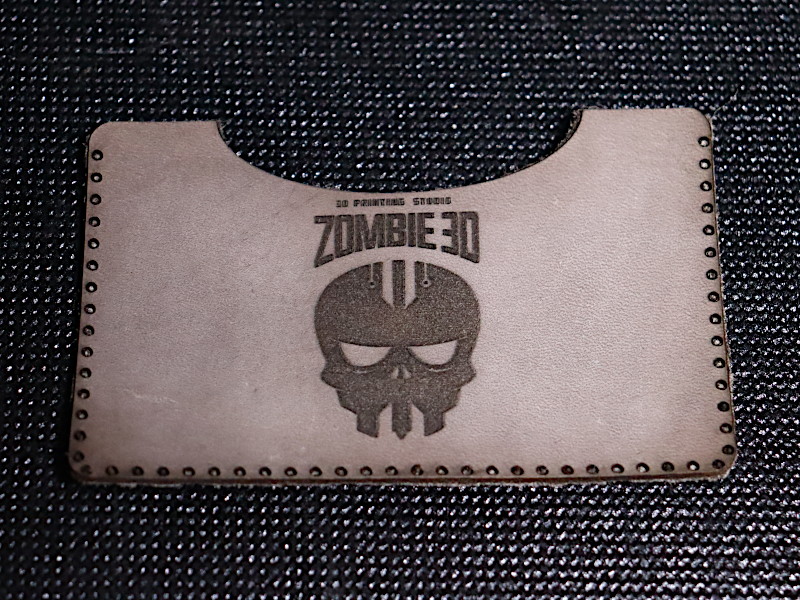
©3DWithUs – Photo: Will Zoobkoff
When cutting leather, it is important to have a laser enclosure and a good venting system as the smell and smoke can be very unpleasant. The results of the test were great, with clean cuts made in just one pass. However, there were some fibers left after the cut due to the rough nature of the back of the piece of leather used.
The engraving itself came out very sharp and clear. However, it is important to note that with leather engraving, you will need to clean the leather after the engraving process using leather cleaner and protector.
Overall, this test demonstrated the Falcon 2’s ability to work with a variety of materials and produce sharp, clear engravings even on a challenging material like leather.
Jewelry Box Project
The final piece I created for this review is a truly impressive jewelry box from Etsy made from six pieces of 3mm thick, 12×12 inch basswood. To cut out all the necessary pieces, I used a speed of 600 mm/min and 100% power, with the added benefit of full air assist. The engraved areas were done at a slightly slower speed of 3000 mm/min and 40% power. Once all the pieces were cut out, I stained them to create a beautiful range of wood grains, and once assembled, the entire box was covered with a protective clear coat.
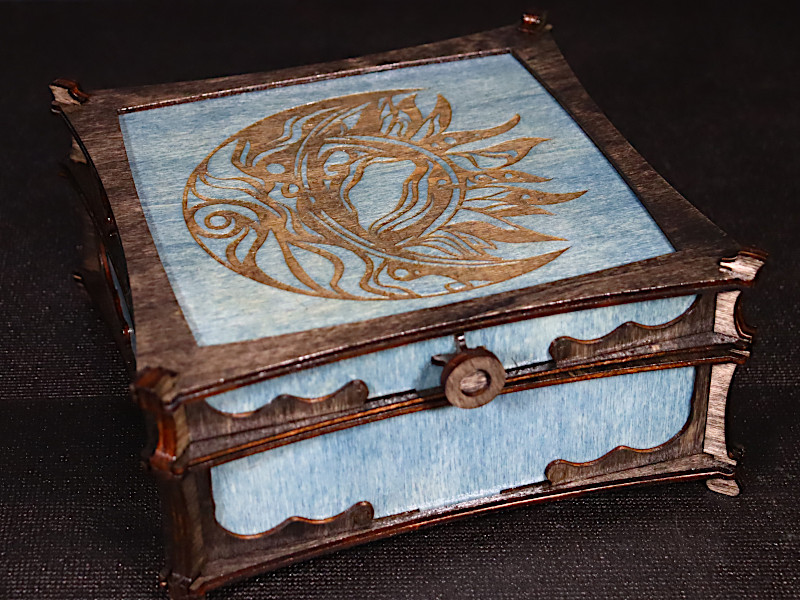
©3DWithUs – Photo: Will Zoobkoff
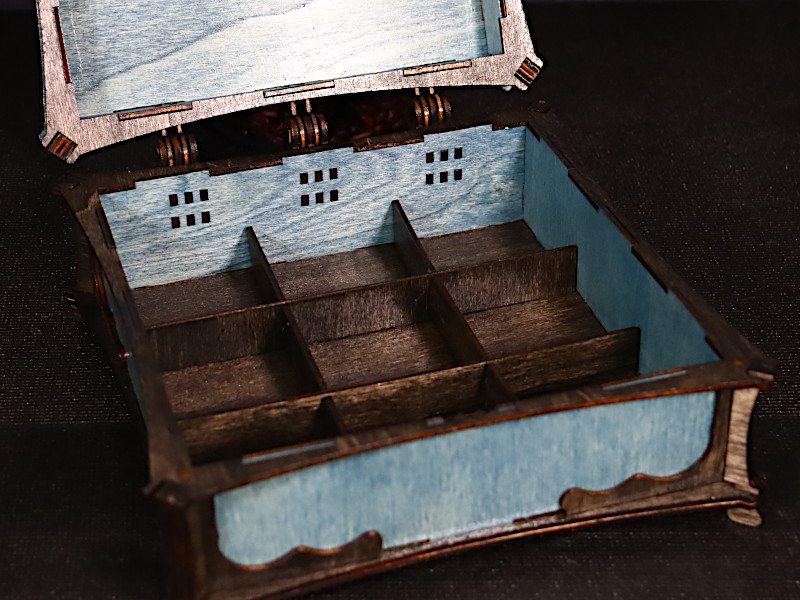
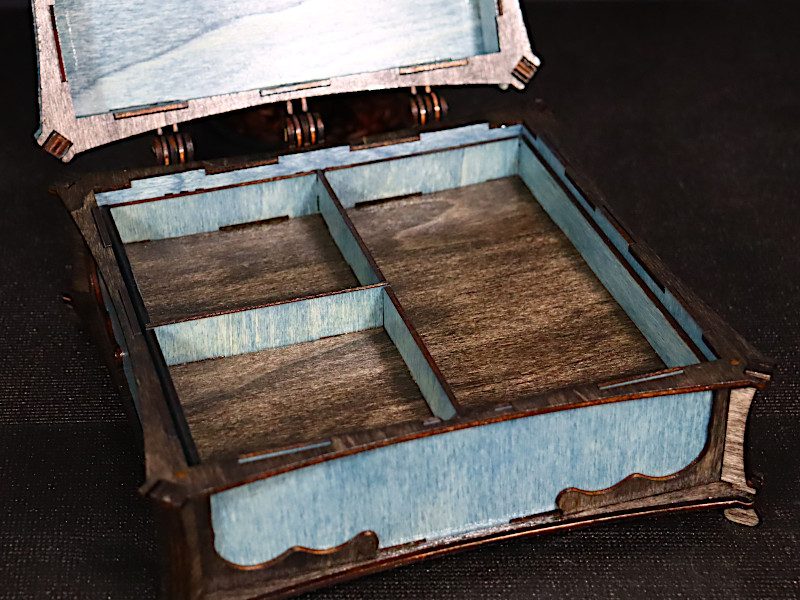
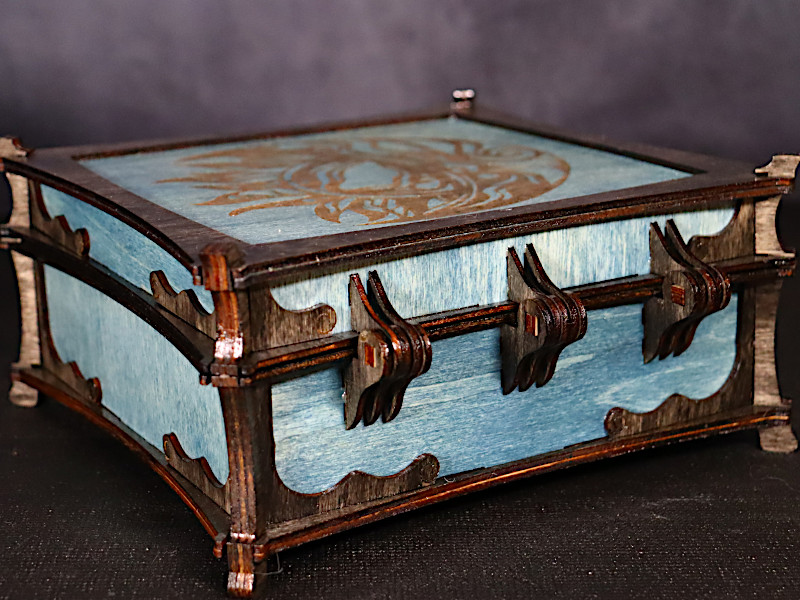
©3DWithUs – Photo: Will Zoobkoff
This project was certainly time-consuming, taking several hours to complete, but the results are absolutely stunning. The combination of navy blue and ebony stains on the basswood creates an eye-catching contrast, and the wood grain adds an element of natural beauty. This jewelry box is a prime example of the impressive capabilities of the Falcon 2 22W laser engraver.
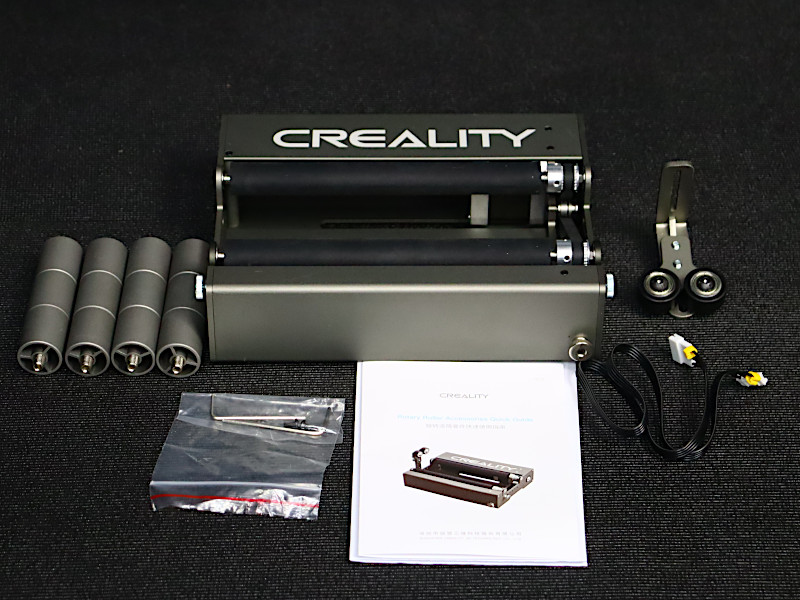
Optional Rotary Roller – Engraving on Glass
One of the optional accessories I received with the Falcon2 was the rotary attachment, which turned out to be incredibly useful. This accessory allows you to engrave on round objects such as bottles, glasses, tumblers, and even baseballs, as long as they fit within the machine’s size limitations. The first test I conducted was a simple logo engraving for a jar designed to hold whole coffee beans. I set the engraving speed to 6000 mm/min and the power to 40%.

When engraving on glass, it’s important to be careful with the power settings. Even a slight increase in power can cause the glass to crack or break. Unfortunately, I learned this the hard way during testing when I accidentally set the laser power too high and ended up cracking a glass. However, I did observe that the laser had cut halfway through the glass, which was an interesting result nonetheless.
Compare to Other Laser Cutters and Engravers
One of the main factors that differentiate laser cutters is their laser module. CO2 lasers are powerful but expensive, while solid-state lasers are more affordable but less powerful. The Creality Falcon2 uses a solid-state laser with a power output of 22W, which puts it in the mid-range of hobbyist laser cutters. This power is sufficient for most cutting and engraving tasks on a variety of materials.
The Falcon2’s working area of 400x415mm is larger than some other hobbyist laser cutters, which makes it a great choice for those who need to work on larger projects. Additionally, the laser point size of 0.1mm allows for precise and detailed cuts. Its high resolution of 254 DPI (Dots Per Inch) means that the laser can create very detailed and intricate designs.
Another important aspect of the Falcon2 is its built-in sensors, which can detect air flow from the air assist module, fires, and lens clarity. These sensors help ensure that the machine operates safely and efficiently. Additionally, the Falcon2 has a simple control panel that allows users to run g-code files from SD cards, which is a convenient feature for those who frequently use their laser cutter.
Compare to other the Laser Cutters and Engravers:
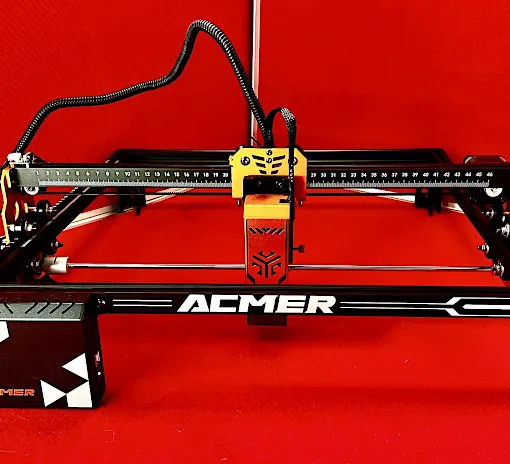
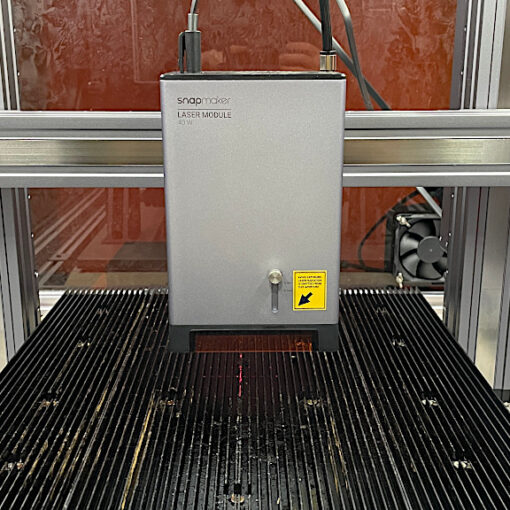
- Snapmaker 40W Laser Module (Review)
- xTool P2 55W CO2 Laser Cutter (Review)
- LaserPecker LP2 Laser Engraver (Review)
For a comparison with other laser cutters and engravers please refer to the
detailed best and budget laser cutters and engravers guide.
Compare to other Creality Laser Cutting and Engraving Machines:
Essentially, Creality offers four power settings for its Falcon2 laser machines: 5W, 10W, 22W, and 40W. The latter two can engrave color on specific metals.
Conclusion and Pros & Cons
Amazon
AliExpress
Official Website
Creality Certified Store
Creality Falcon2 Review
Review Summary
The Falcon2 22W laser engraver is a game-changer in terms of speed and power. It is perfect for anyone who wants to take their creations to the next level. The machine has a wide range of features, including a 22W laser, making it one of the most powerful on the market. With this upgrade, the Falcon2 22W can cut and engrave materials more quickly and precisely than its predecessor.
One of the most impressive features of the Falcon 2 22W is its optional rotary accessory. With this accessory, you can engrave round objects such as bottles, glasses, tumblers, and even baseballs. The engraving process is quick and easy, and the results are impressive. The rotary accessory opens up endless possibilities for creators to experiment with their designs and expand their creativity.
When using the Falcon 2 22W, it is highly recommended to purchase an enclosure for the laser engraver due to the amount of smoke generated by the laser. This enclosure will not only make your workspace cleaner but also make it safer for you to work with the laser.
Safety features on the Falcon 2 22W are also top-notch. The machine includes flame detection, an emergency stop button, a key lock safety system, and an anti-tip sensor. These safety features are crucial for anyone working with a laser engraver, and they make the Falcon 2 22W one of the safest systems available.
Pros
• Flame sensor
• Anti tip sensor
• Air assist included
• Mostly assembled
• Color engraving (Stainless steel)
• Saftey lock
• Emergency stop button
Cons
• Honeycomb bed not included
• Creality needs their own engraving programs

I’m glad the article was helpful,laser engraving is quite the addictive hobby, but also a great tool for building a business at home