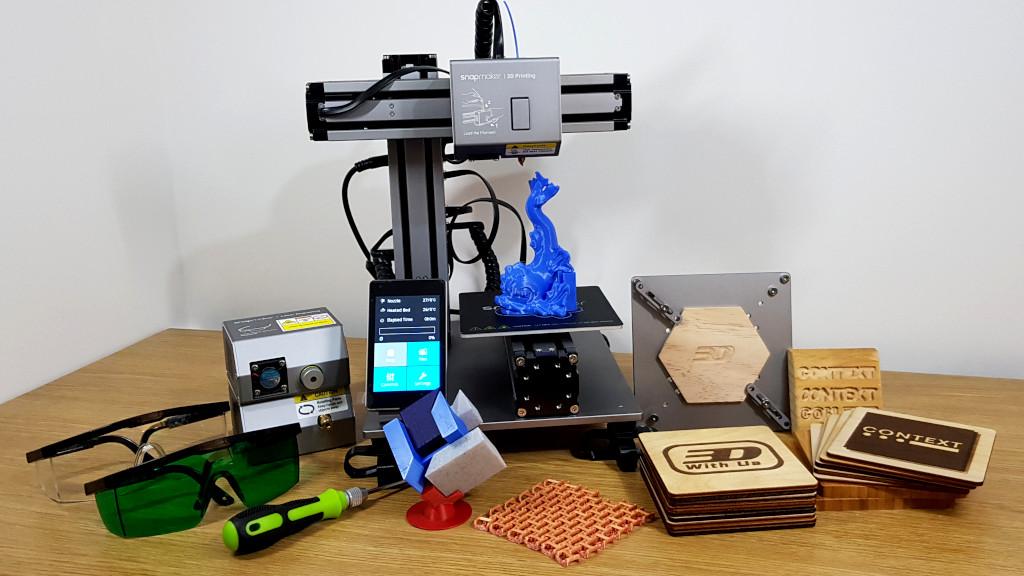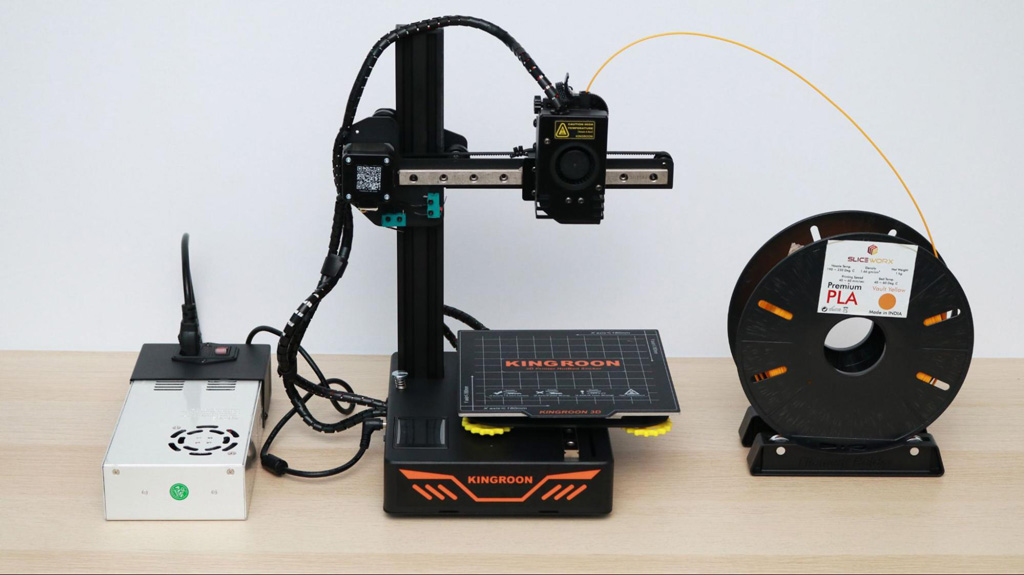
The Kingroon KP3S is one of the smallest desktop 3D printers I’ve ever used. Despite its small stature, it’s a printer that is clearly designed to take performance seriously. Linear rails on the X and Y axes, a direct drive extruder, and a color touchscreen LCD are all features you wouldn’t expect to find at sub-$200 price point and are welcome inclusions on the KP3S. Unfortunately, the external power supply feels like an unfinished DIY project, and also takes up some of the desk space saved by the small frame of the KP3S.
Table Of Contents
- Specifications
- Unboxing and Assembly
- Build Platform Material & Leveling
- Linear Rail System
- 3D Printing Test
- Slicer Software – Cura 5
- Testing with the Other Models
- Conclusion and Pros & Cons
Kingroon KP3S Specifications:
Build Volume: 180 x 180 x 180 mm
Extruder: Direct Drive Extruder
Bed Leveling: Manual
Material: PLA, PLA+
Build Platform: Removable Magnetic Flexible Mat
Connectivity: microSD Card, USB
Interface: 2.8” Color LCD
Price: $169-179
Affiliate Links:

Amazon
AliExpress
Official Website
©3DWithUs – Photo: Andrew Sink
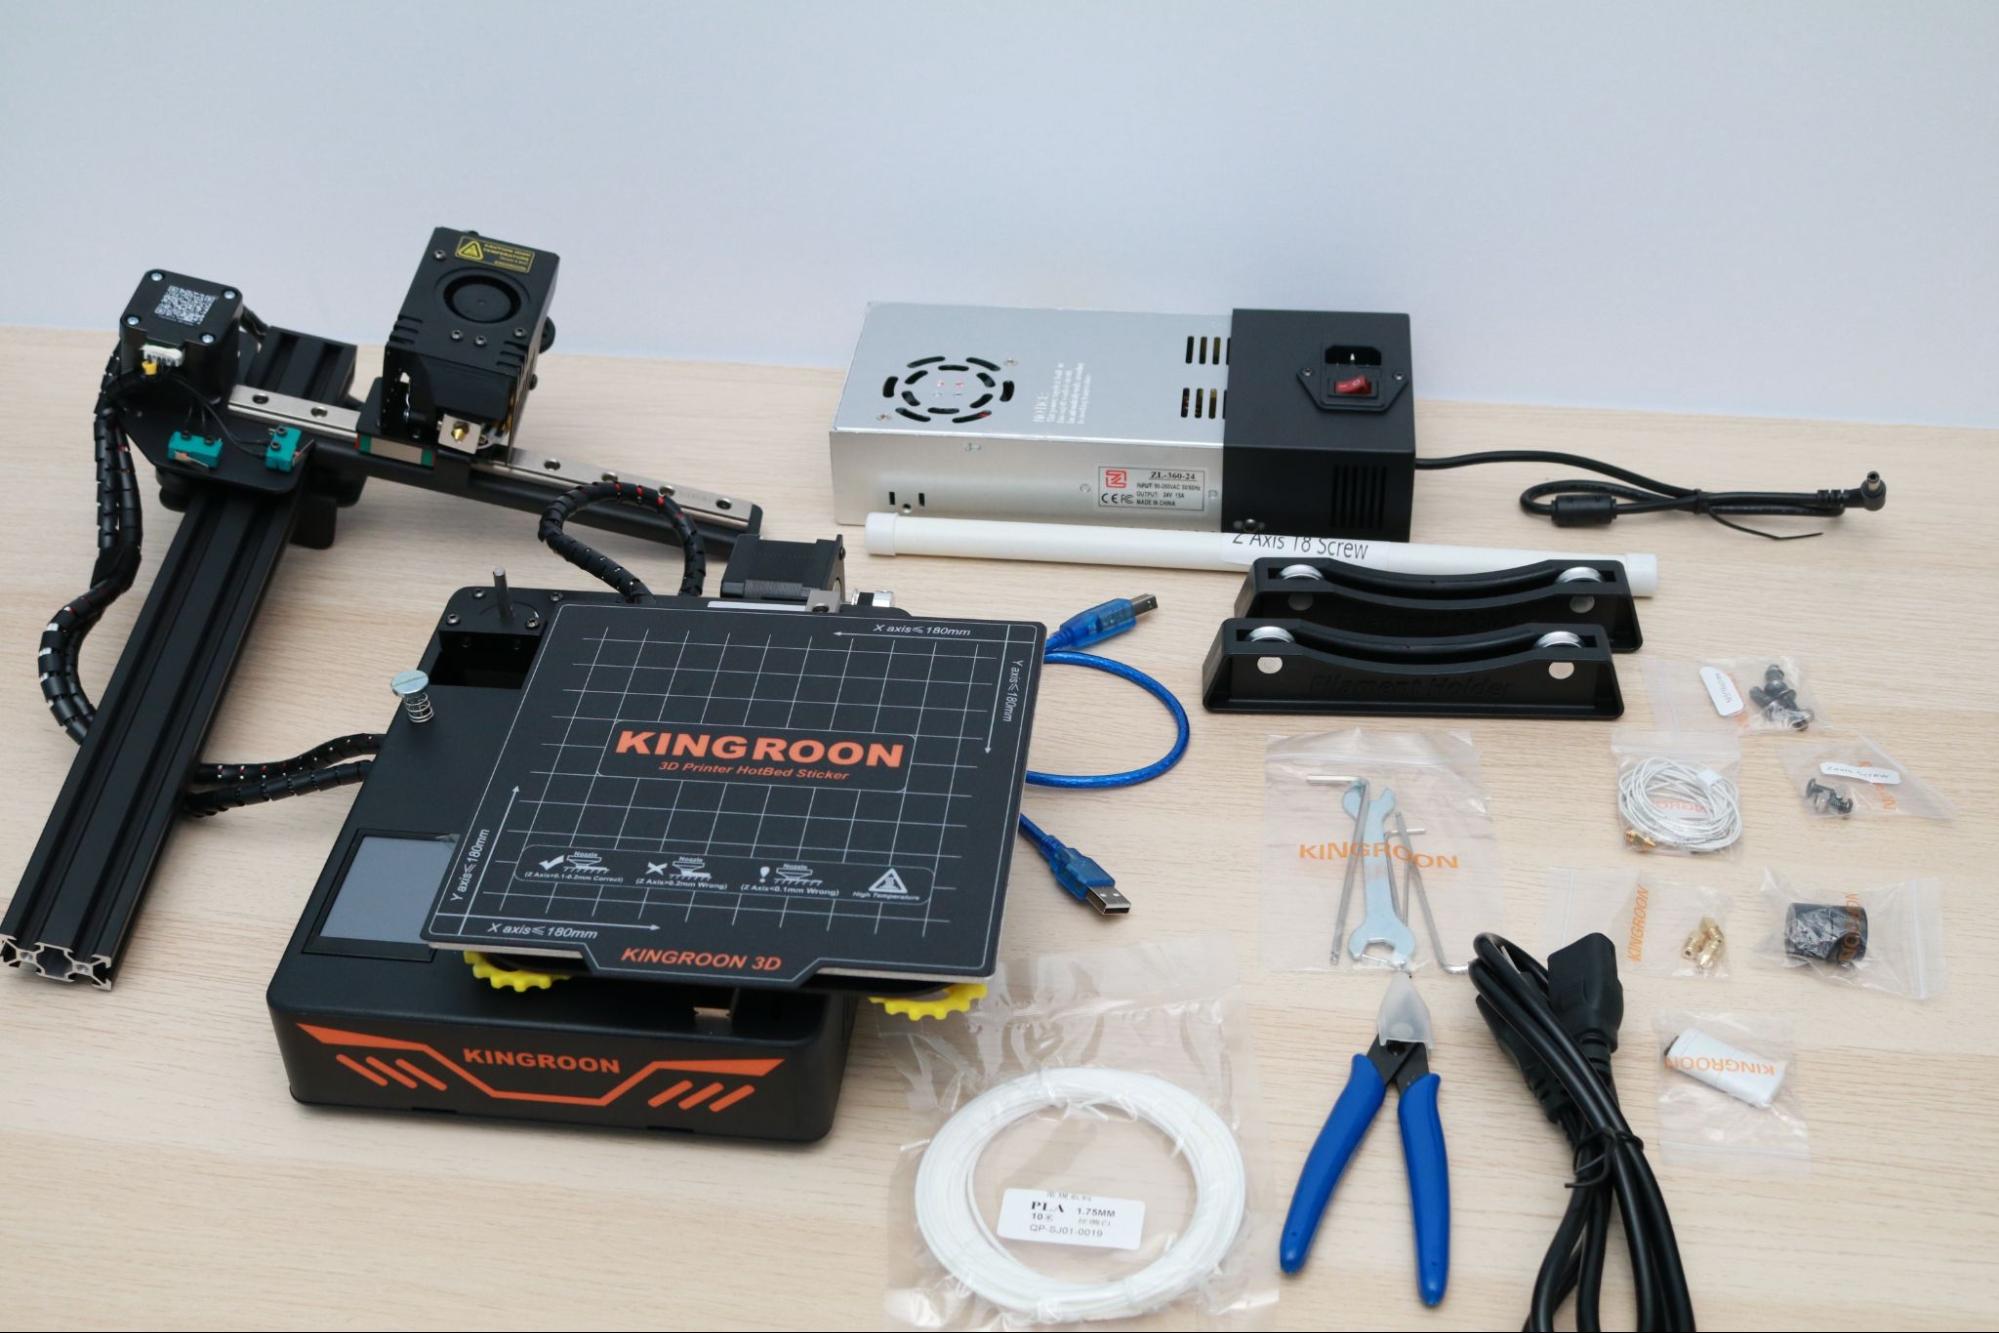
Assembly Process
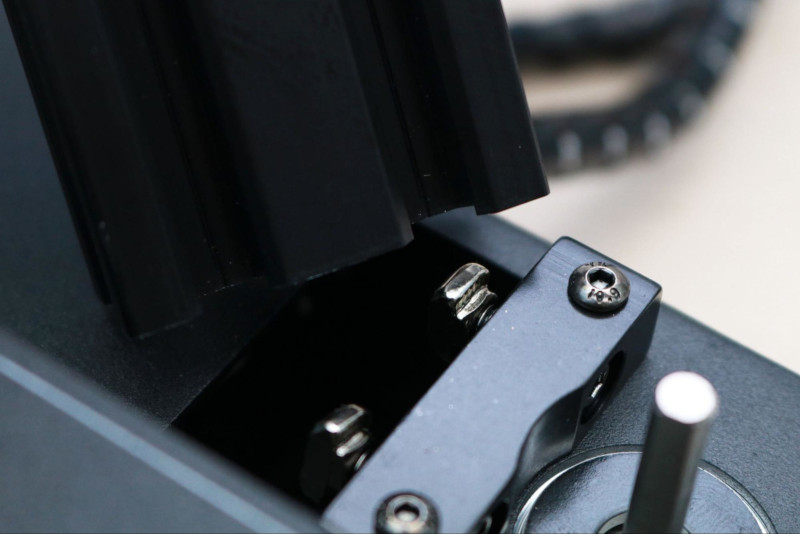
The Kingroon KP3S is a partially assembled 3D printer, with the Z stage and cantilevered Y gantry fully assembled as one piece and the build platform on the moving X axis assembled as a second piece. The assembly for this printer is lightning-fast, with no electrical connections needed on the printer itself. The KP3S includes an external spool holder that uses integrated bearings to allow the spool to rotate while remaining stationary. The V slot wheels on the Z axis arrived properly tensioned, with no adjustments needed.
©3DWithUs – Photo: Andrew Sink
The included instructions might be confusing for beginners or anyone who hasn’t used T-slot nuts (self-tightening nuts that are used with slotted aluminum extrusions) before. This part of the assembly can take some trial and error to get right, but the rest of the assembly is quick and easy.
©3DWithUs – Photo: Andrew Sink
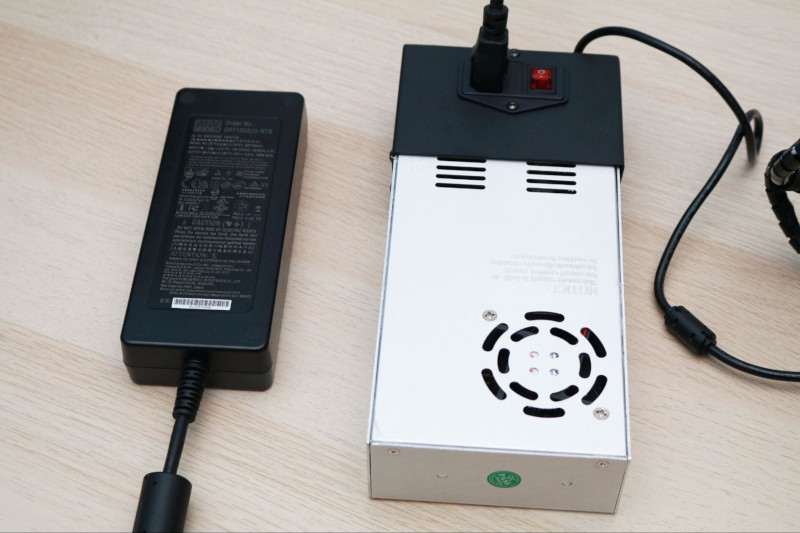
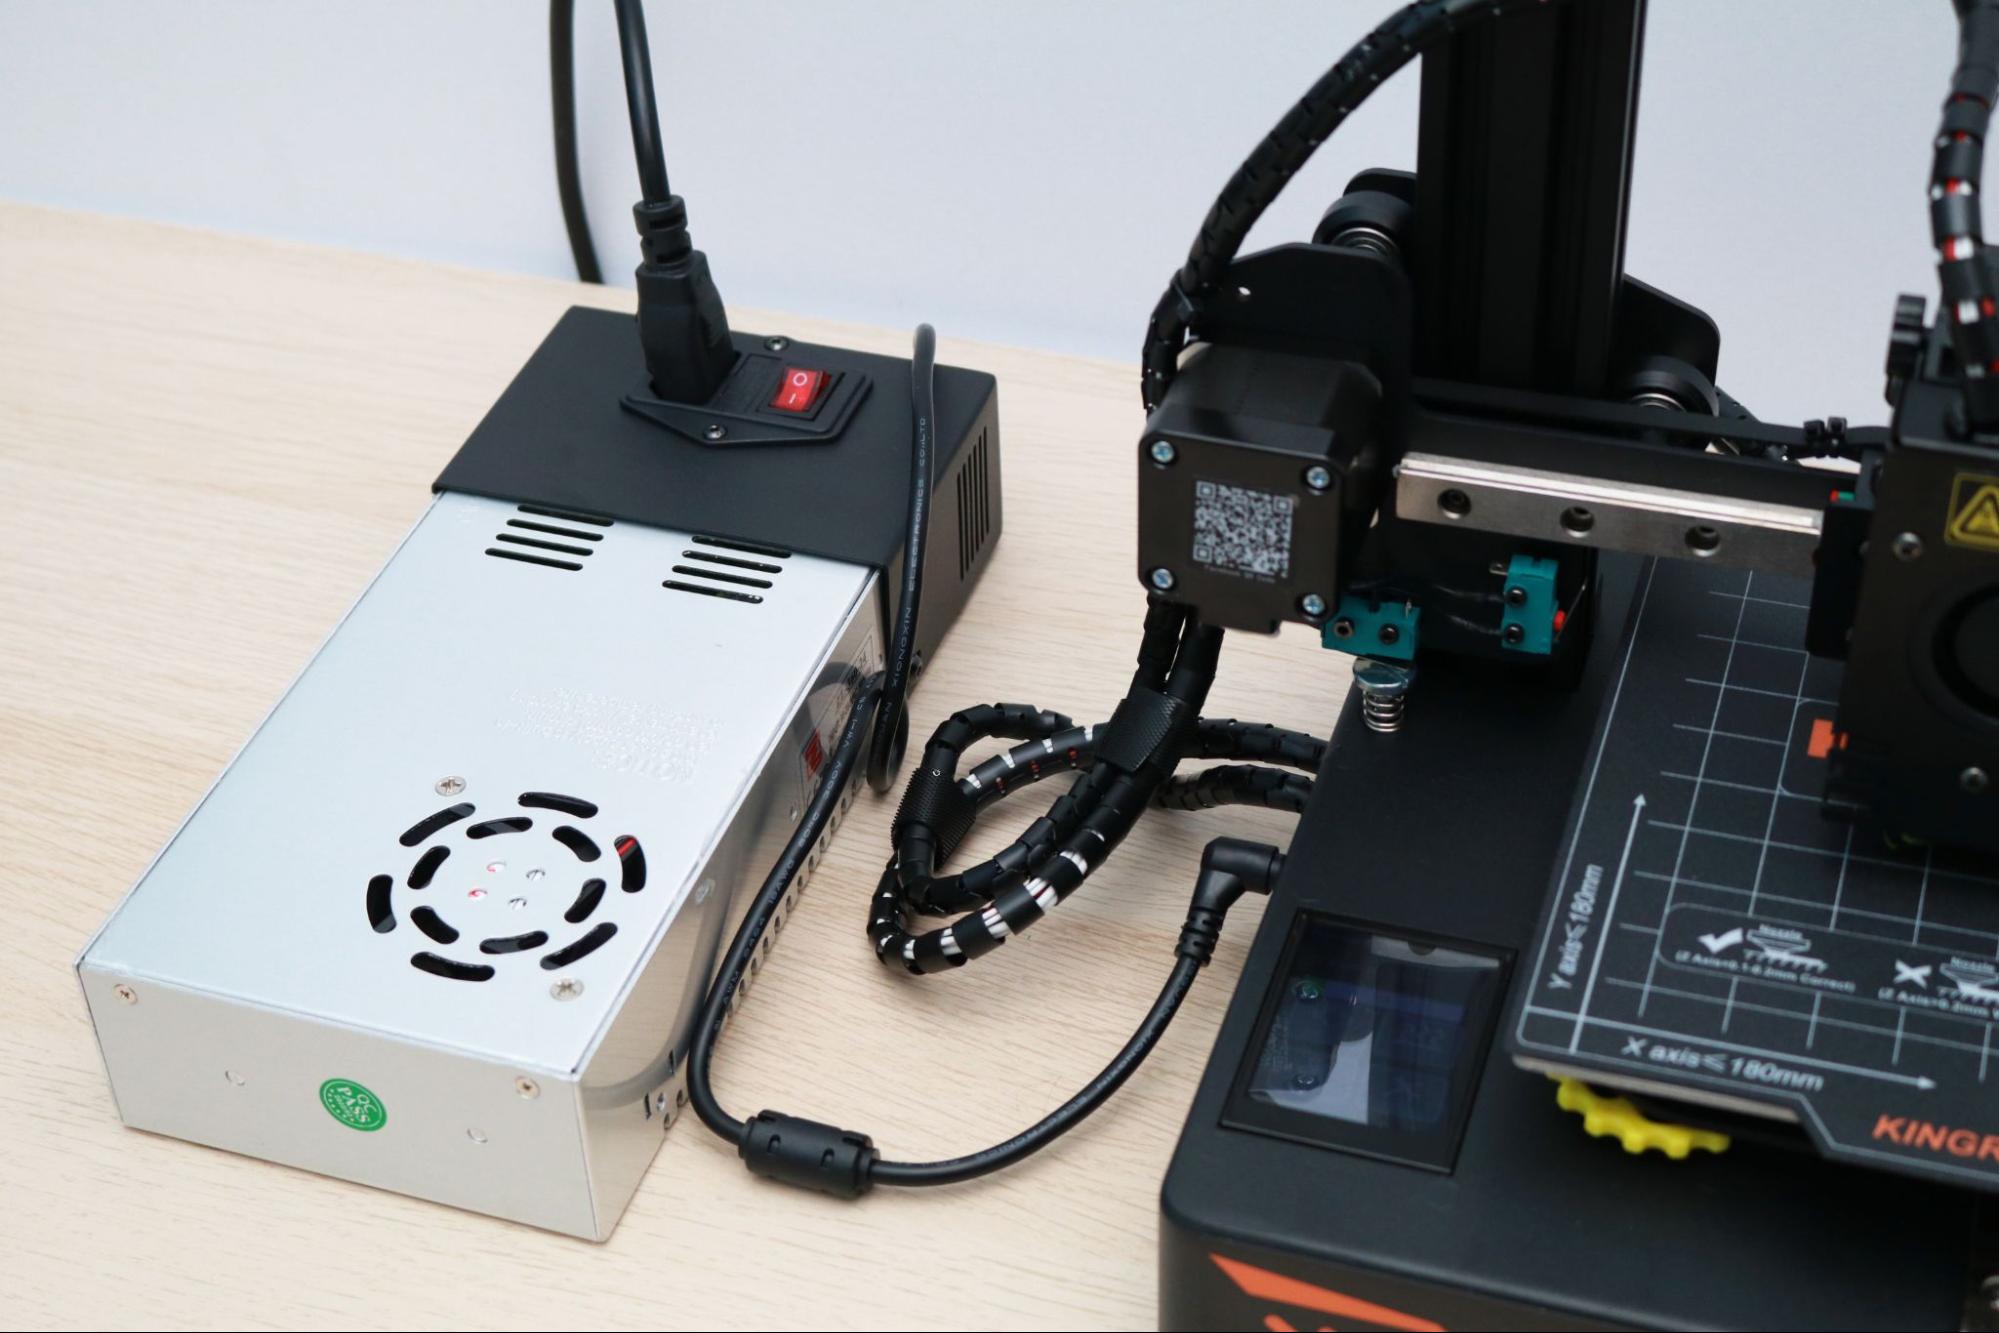
I had an issue with the power supply for this printer, which is a metal enclosed unit typically seen integrated into the frame of a printer. Typically, printers will ship with an external power brick like the one included with the Prusa SL1S, which provides a similar amount of power. This type of power supply is fully enclosed and easy to transport, while the metal frame of the KP3S power supply doesn’t look like something typically included with consumer electronics.
This 15A, 24V power supply connects with a simple barrel plug, so it’s not clear why Kingroon didn’t include an external power brick instead. Finally, the short cord attached to the KP3S power supply means the unit needs to be located directly next to the printer, almost doubling the amount of desk space the KP3S requires.
©3DWithUs – Photo: Andrew Sink
Build Platform Leveling
The Kingroon KP3S uses a thumbscrew leveling process typically seen on i3 style printers, with a thumbscrew under each corner of the bed used to set the offset between the build platform and the nozzle. The Z endstop trigger can be adjusted by moving the large thumbscrew on the base of the unit, which sets the global Z offset. The LCD interface also provides a 5 point semi-automated process, which makes moving the nozzle across the platform easy and repeatable during leveling.
©3DWithUs – Photo: Andrew Sink

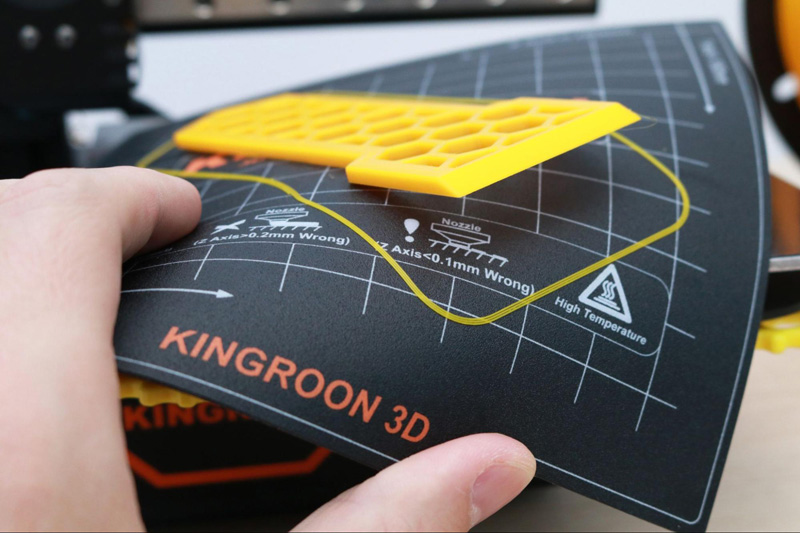
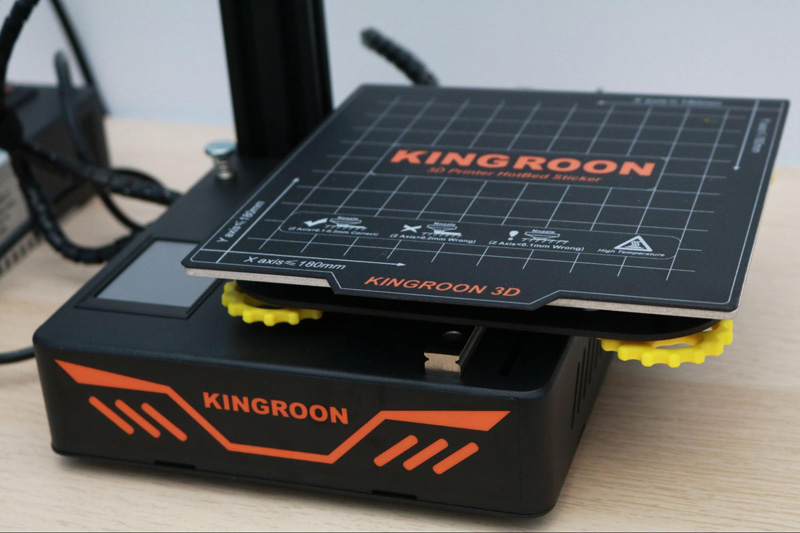
Build Platform Material
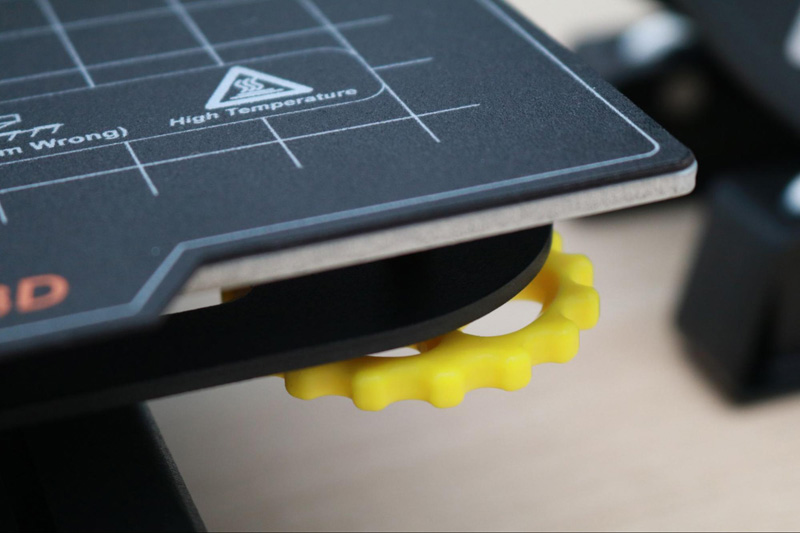
The KP3S uses a removable magnetic textured mat that makes removing parts after printing easy. This mat has a small tab on the front to make removing it from the build platform easy, and the mat is flexible enough to allow it to separate from parts without much effort. This style of build platform is ideal for printing large parts with a wide footprint, which can be difficult to remove from glass platforms like the one on the Longer LK5 Pro. Printing wide models like the Hex Scraper by visle can cause issues when removing them from the platform because there is no intuitive way to remove them. By simply bending the flexible mat, the parts pop off easily and reduce the risk of damage to the platform by using a metal scraper.
©3DWithUs – Photo: Andrew Sink
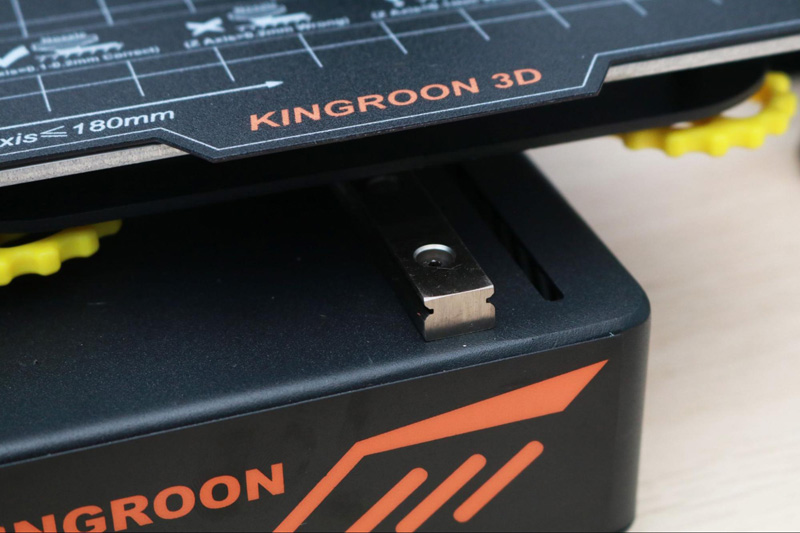
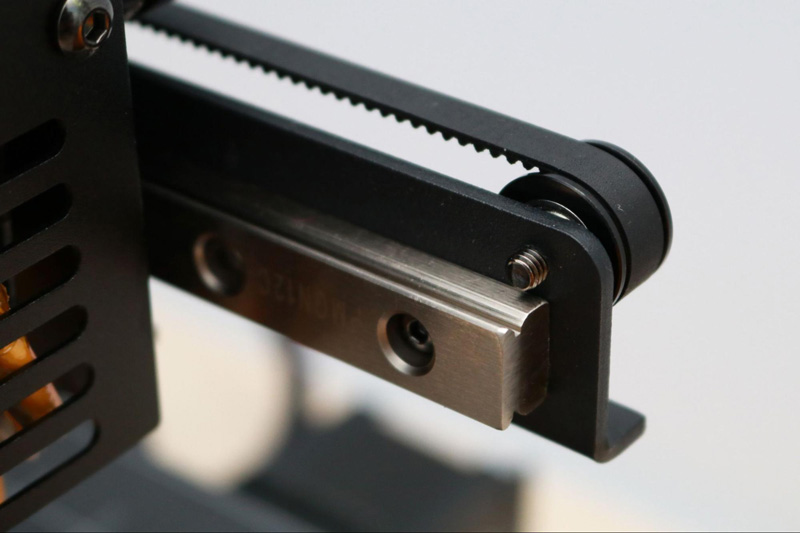
Linear Rail System
The Kingroon KP3S uses a linear rail system on the X and Y axes, which allows for more precise and repeatable movement when compared with a typical V slot wheel configuration. Linear rails are more expensive and less commonly seen on inexpensive printers, so seeing linear rails on the KP3S is a surprising but welcome addition at the sub-$200 price point.
The belts arrived pre-tensioned from the factory, so there was no calibration or adjustment required on the motion system.
©3DWithUs – Photo: Andrew Sink
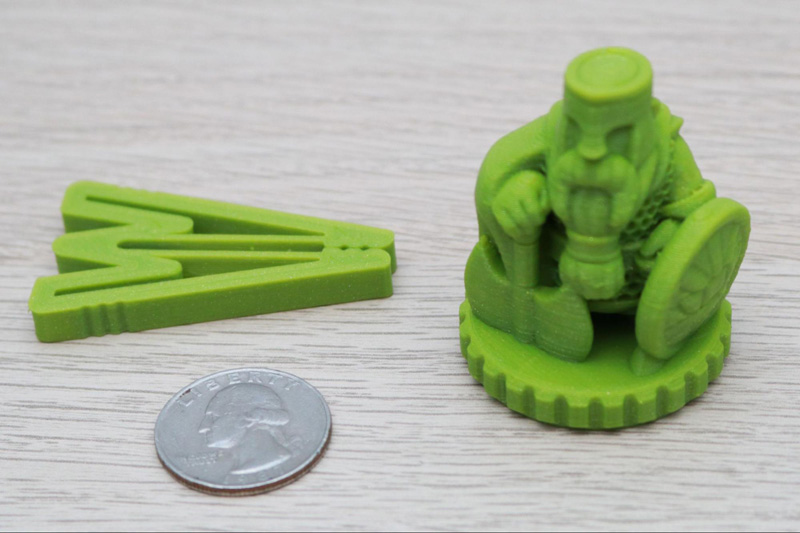
Printing the Included Test Models
The Kingroon KP3S includes two pre-sliced demo models as well as three .STL files for printing. The model called “Guardian-extruder.gcode” is a perfect example of everything a demo print should be; it’s fast, detailed, unique, and shows off the strengths of the KP3S. The miniature model has chainmail that prints in great detail, as well as a smooth surface on the cape and beard. The “Food_Clip_Fast.gcode” model prints in under 30 minutes and provides a useful and functional print, showing Kingroon has put thought into what models should be included with a 3D printer.
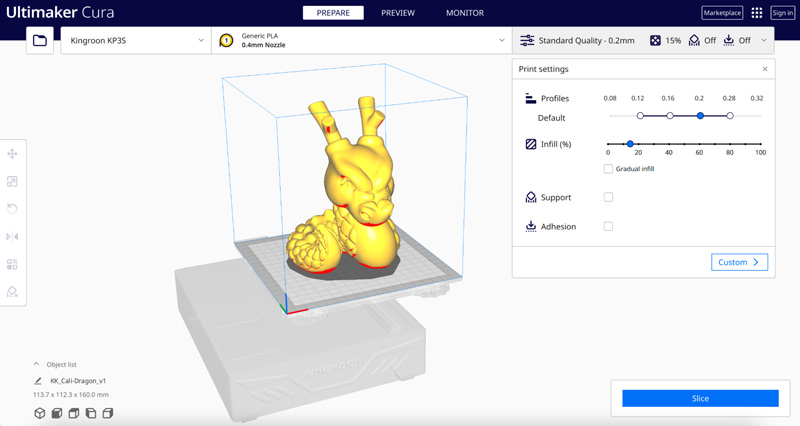
Screenshot: Cura 5
Printing with Ultimaker Cura 5
The Kingroon MP3S is compatible with Ultimaker Cura 5, and the latest version of the software includes built-in support for the printer with a native printer profile as well as several print profiles. These settings range from .12mm ‘Super Quality’ to the .28mm ‘Low Quality’, and all feature a print speed of 60mm/s. The printer profile includes a transparent outline of the Kingroon KP3S to give a sense of scale when preparing models. During this review, I used the ‘Standard Quality’ .2mm profile included with Cura 5, which has a print speed of 60mm/s, 3 perimeter shells, and four top/bottom layers.
Testing Kingroon KP3S with the Other Models
The TMC2225 silent stepper drivers make for a nearly silent printing experience, with the only noise coming from the power supply fan, the part cooling fan, and the board cooling fan in the base of the printer. These fans are a little on the noisy side, and I found them to be distractingly loud when the printer was running.
©3DWithUs – Photo: Andrew Sink
Despite the small stature of the KP3S, I was impressed with the ability of the KP3S to take full advantage of the 180mm3 build volume and print parts like the Low Poly Dinos by Joe Larson that filled the platform.
©3DWithUs – Photo: Andrew Sink

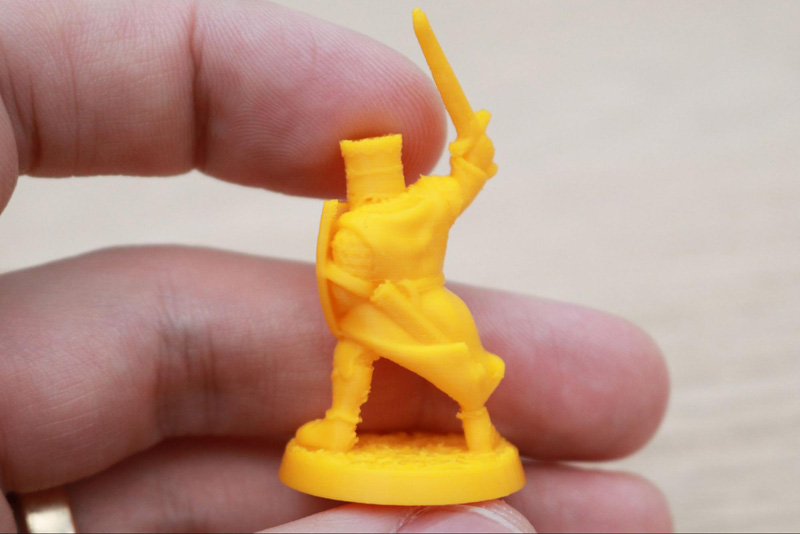
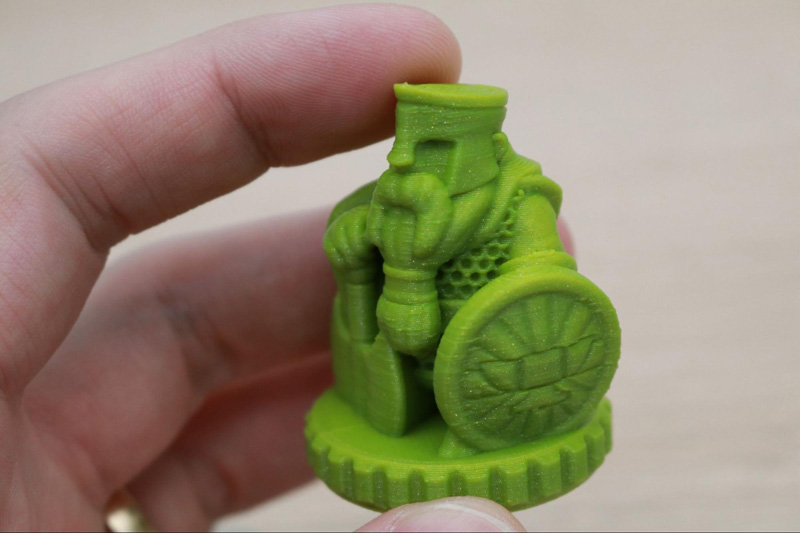
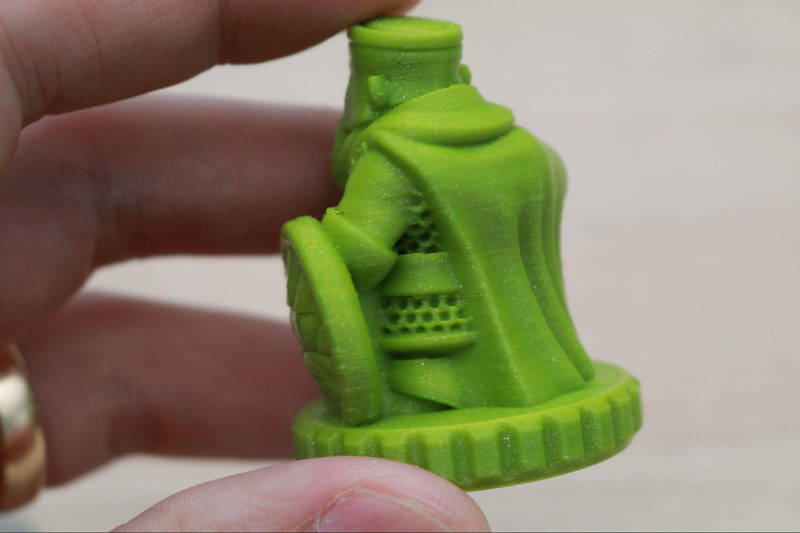
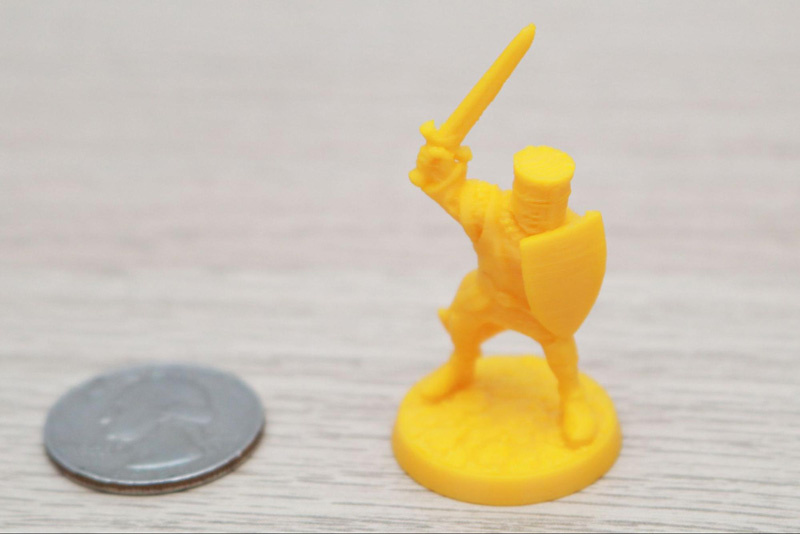
The Crusader Knight by Brite Minis is a 28mm miniature that has been designed for FDM printing, and printing it with SliceWorx Vault Yellow highlights subtle features and fine details. Printing finely detailed miniature figures like this can be challenging on most FDM 3D printers, but the small size of the KP3S and the accuracy enabled by the linear rail system made this print effortless. This model was printed using the .12mm ‘Super Quality’ layer height, which provides excellent detail without increasing the print time dramatically.
©3DWithUs – Photo: Andrew Sink
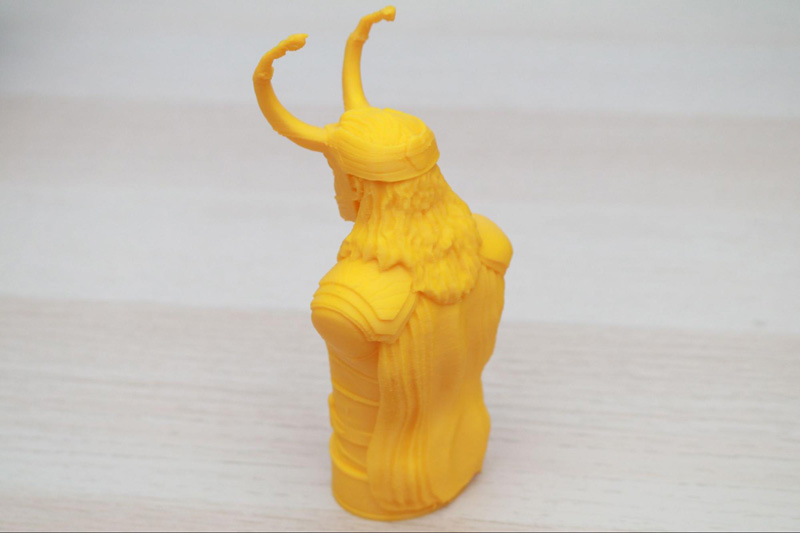
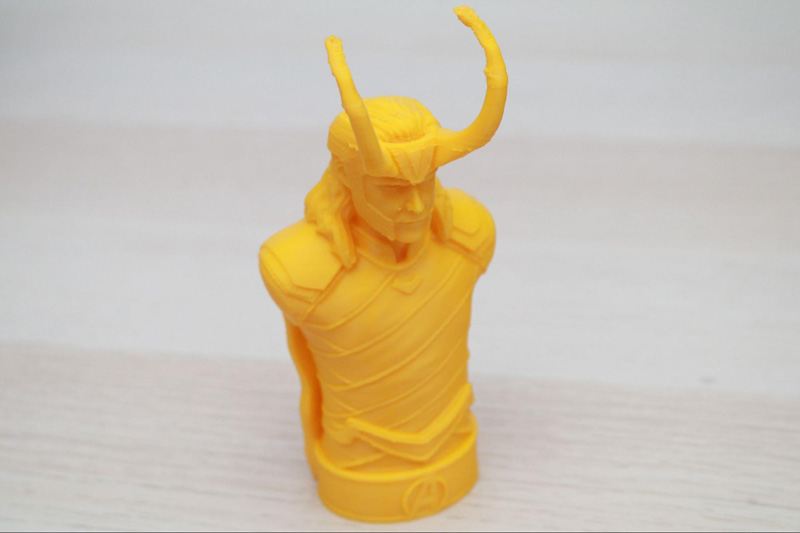
Larger, more detailed models like the Loki bust by Fotis Mint also showed a high level of surface detail. The texture on the cloth, the rough finish on the base, and the details on the face are all printed without any defects, and the quality of the part far exceeds what I would expect from a $179 printer. The steep overhangs on the helmet are a challenge for almost any printer, and there were some signs of inadequate cooling on the undersides of the horns.
©3DWithUs – Photo: Andrew Sink
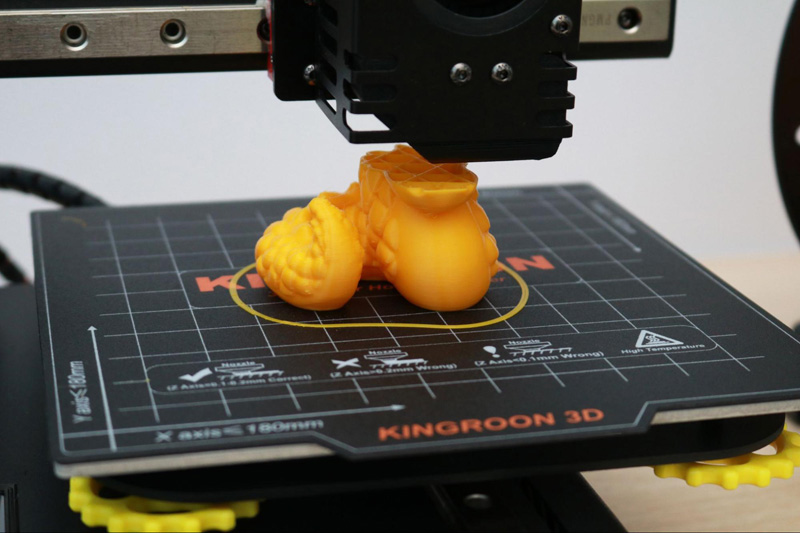
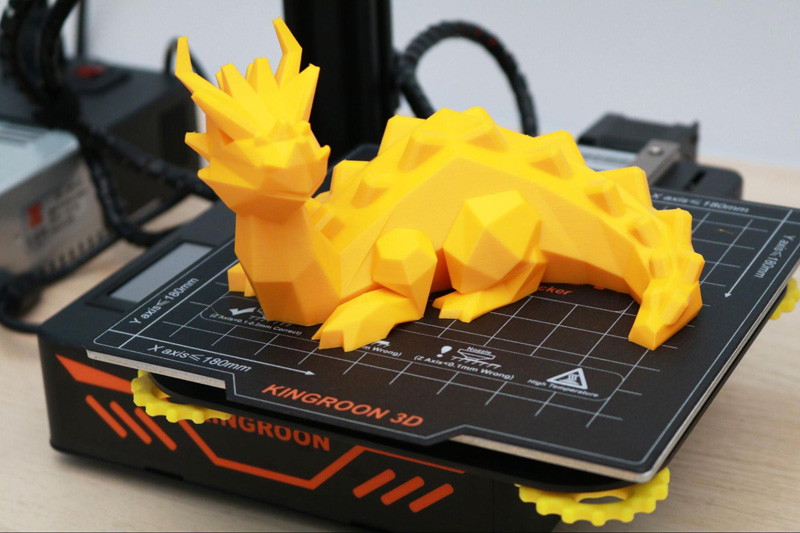
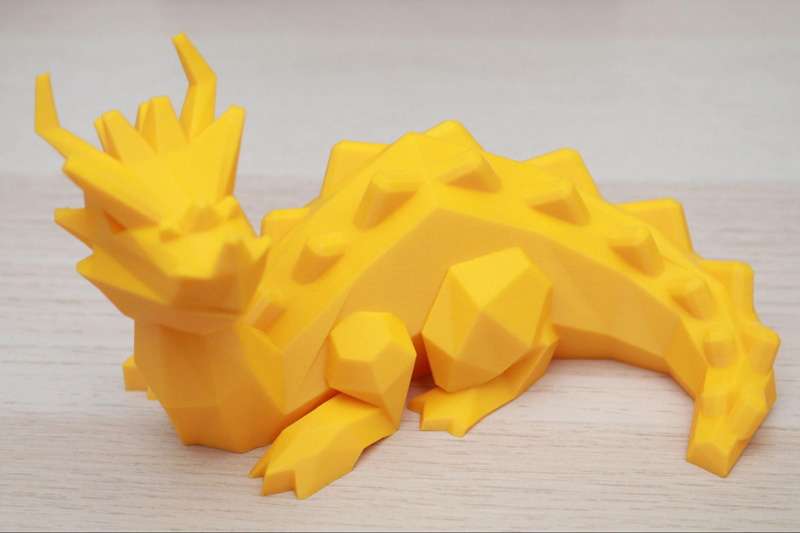
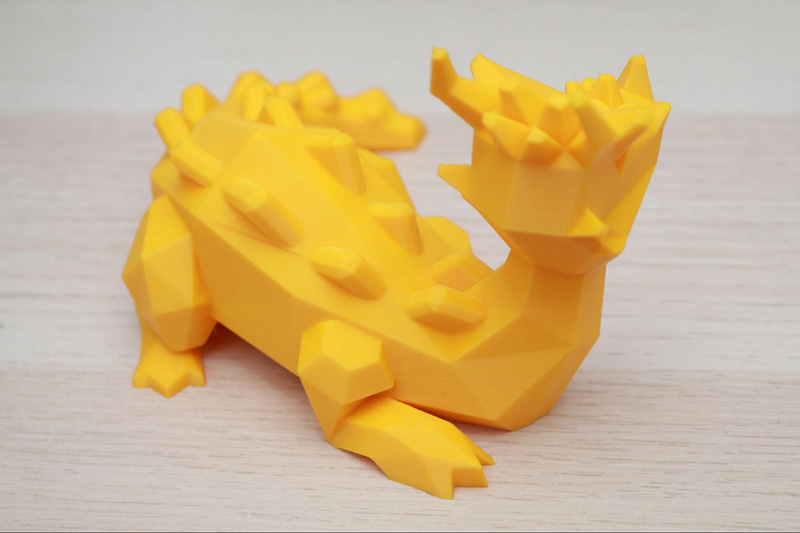
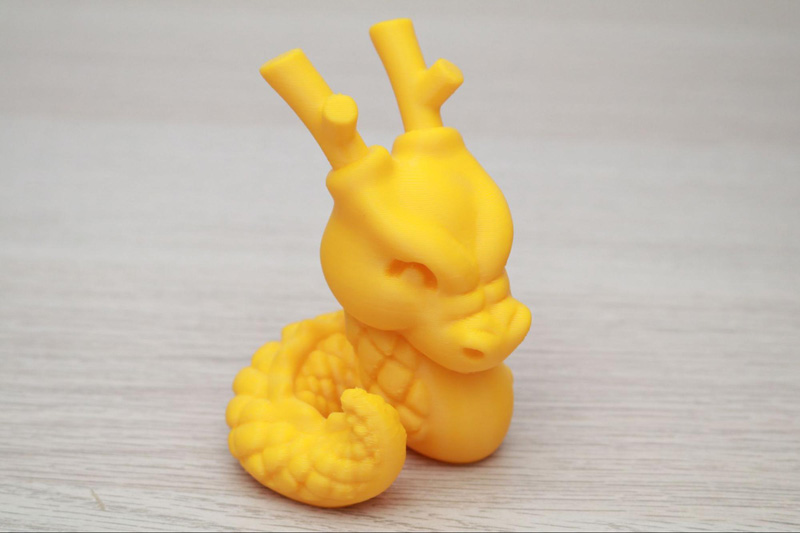
The Cali-Dragon by McGybeer showed a similar level of quality, and passed all of the tests you would expect from a calibration print: steep overhangs, smooth surfaces, and vertical walls all resolved nicely.
©3DWithUs – Photo: Andrew Sink
Conclusion and Pros & Cons
With a retail price of $179, the Kingroon punches way above its weight and performs much better than other printers in this price range. The silent stepper drivers, linear rails, and color touchscreen LCD are all nice features, but the external power supply is a major drawback that will likely set off alarms for users looking for a home printer. The footprint of the KP3S is small compared to most printers, but placing the power supply and filament spool holder next to it nearly triples the width the printer occupies.
The Kingroon KP3S is available for purchase on Amazon as well as the official Kingroon site and currently retails for $179.
Affiliate Links:
Amazon
AliExpress
Official Website
Kingroon KP3S Star Rating
Review Summary
The Kingroon KP3S is one of the smallest desktop 3D printers I’ve ever used. Despite its small stature, it’s a printer that is clearly designed to take performance seriously. Linear rails on the X and Y axes, a direct drive extruder, and a color touchscreen LCD are all features you wouldn’t expect to find at sub-$200 price point and are welcome inclusions on the KP3S. Unfortunately, the external power supply feels like an unfinished DIY project, and also takes up some of the desk space saved by the small frame of the KP3S.
PROS:
– Small footprint, small price
– Linear rails on the X and Y axes
– Silent stepper drivers
– Color LCD touchscreen
– Native integration with Ultimaker Cura 5
CONS:
– External power supply takes up desk space
– Assembly instructions lack detailed