Recently Uncle Jessy and Andrew Sink introduced ResinLapse – a cable that enables recording the time-lapse videos for resin 3D printing. On their social media, they show many time-lapse captures which are so smooth that it is no surprise such posts get attention from both 3D printing enthusiasts and designers. Let’s have a look at how it works, and create some awesome time-lapses.
ResinLapse Specifications
Cable for recording resin 3D printing timelapses
$20 for Canon
$25 for Nikon
BigCartel
Link.tree
Disclaimer: As the resin printing process is UV sensitive, extra care should be taken when setting up the right lighting in the room.
Captured using a ResinLapse cable. Edited in Filmora and Ezgif
©3DWithUs – Print & MP4: Will Zoobkoff
If FDM 3D printing time-lapses are not a novelty anymore, and we see them often, then the time-lapses created during resin 3D printing are a new thing that is affordable for the casual user.
Why Time Lapses are Important/Good to have in 3D Printing?
It is interesting to see 3D printing in action. It’s an amazing experience to watch something getting printed in front of your eyes. Here are a few pointers why timelapse videos play a big part in 3D printing.
– Mesmerising Magic. For example, a timelapse video clip can condense a multi-hour print into a breath-taking 30-second film or an 8-second reverse loop. A 3D printed object appears out of nowhere in the video. Remarkable original content. It is possible even go a step further and add an automatic picture slider arrangement to create a gorgeous moving time-lapse.
– 100% 3D Printable. The best proof of 3D printability of the object. You can create a cinematic-grade timelapse that will show off the nuances of your print in a short, smooth movie clip.
ResinLapse Installation and Other Equipment Setup
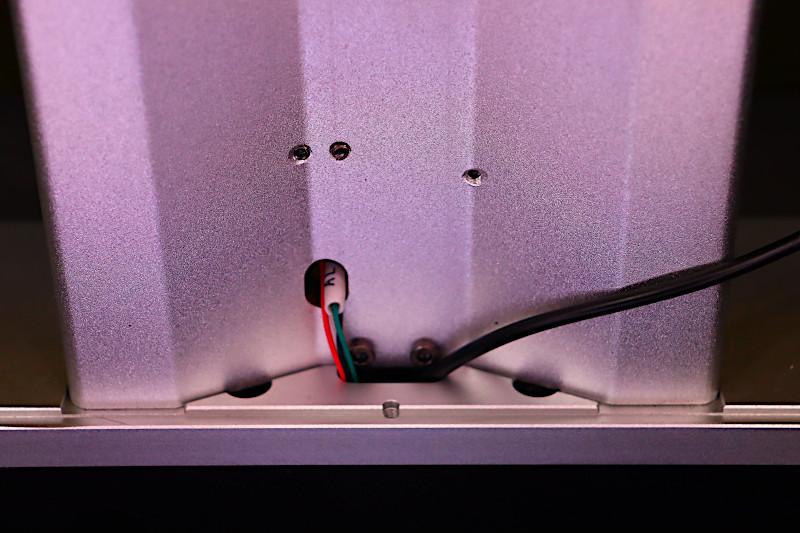
It couldn’t be simpler to set up Resinlapse. Simply insert the end of the cable with the light sensor into the base of your MSLA printer. A DSLR camera will take a picture of each layer triggered by the light source of a 3D printer.
©3DWithUs – Photo: Will Zoobkoff
There is a QR code on the package of the ResinLapse cable that connects to a user guide with the setup instructions for a number of printers. In this guide, I’ll be using my Anycubic Photon M3 Max, and the installation couldn’t be simpler. The only thing to do is to remove the back UV cover and insert the sensor end of the cable where the Z upright is attached. There is a little opening where the cable may be inserted. That’s it. Replace the back cover and route the cable to the auto refill access.
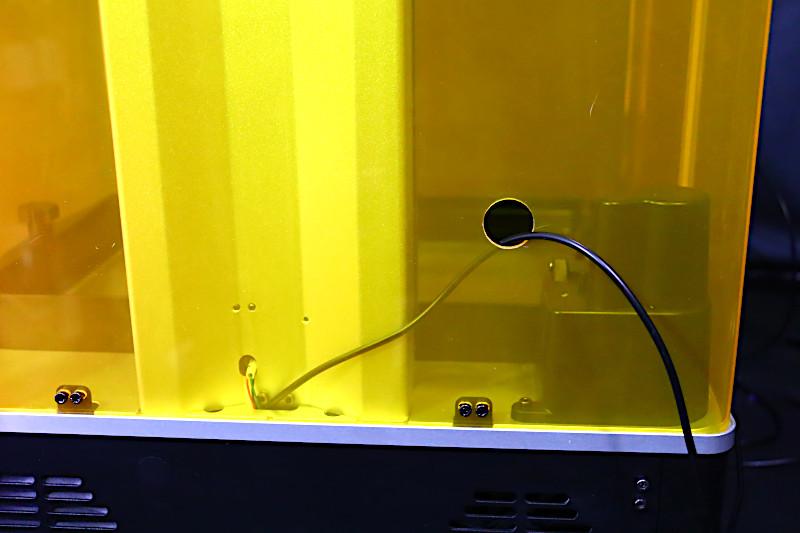
©3DWithUs – Photo: Will Zoobkoff
One thing to keep in mind: the yellow rear cover does reflect, and if there is any motion in the room, it’s best to remove the cover to eliminate reflections during the process.
Even if Anycubic M3 Max cover looks great in the video, it also captured some of the reflections.
Captured using ResinLapse cable. Edited in Filmora and Ezgif
©3DWithUs – Print & MP4: Will Zoobkoff
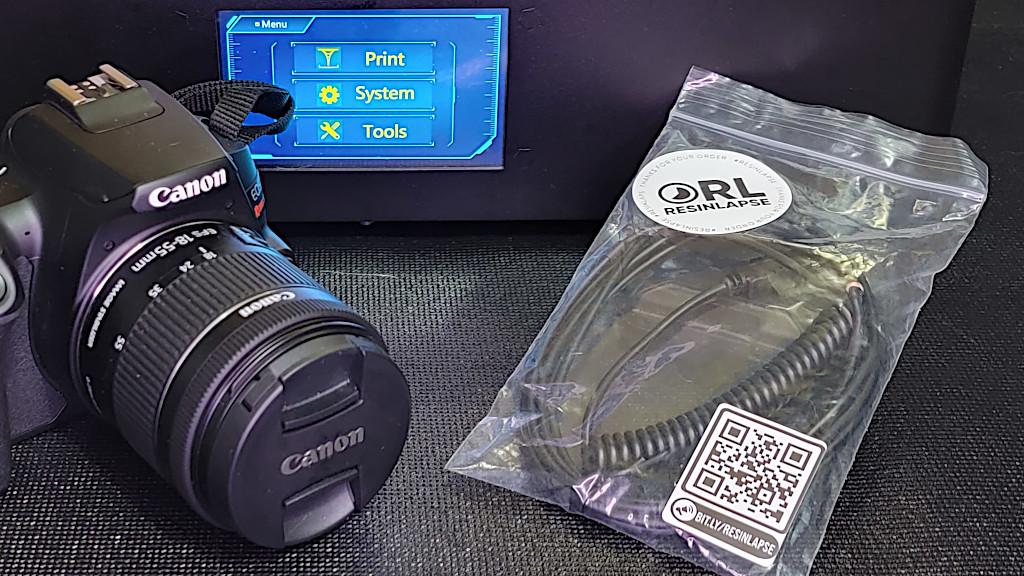
DSLR Camera Settings for ResinLapse Capturing
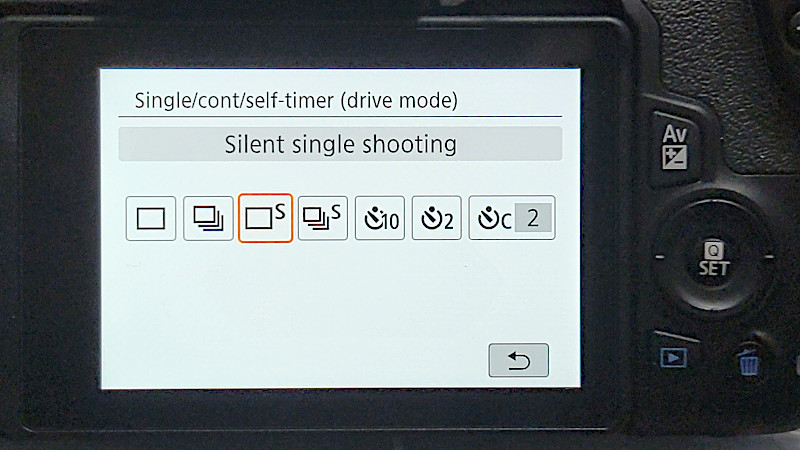
After the cable is connected, check that the camera is set up for ResinLapse. As a big number of photographs is needed to generate a timelapse, this can quickly wear down the mechanical shutter on DSLR cameras.
©3DWithUs – Photo: Will Zoobkoff
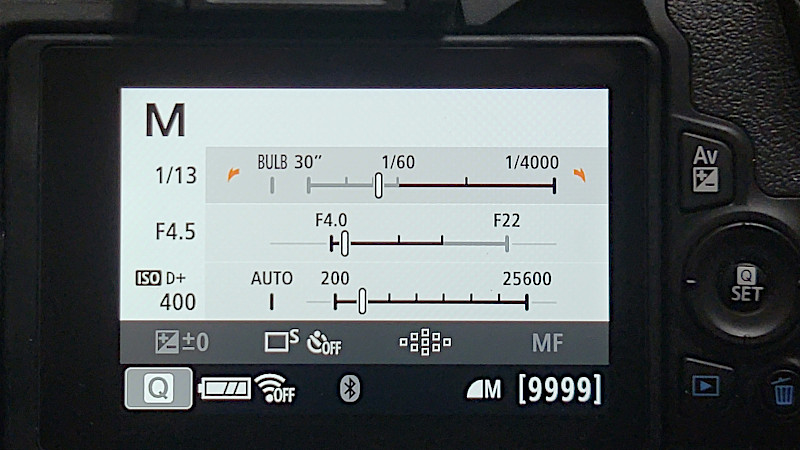
Most DSLR cameras include an electronic shutter option or in the case of my Canon EOS Rebel SL3, a setting called “Silent Shutter.” Because I can’t use the back of my camera’s live view LCD during shooting, I use a manual focus. Then I switch to the viewfinder to enable quiet shooting. It is also recommended to utilize manual mode and manual focus so that when the shutter is activated, the camera does not need to auto-adjust with auto focus and your photographs are consistent.

©3DWithUs – Photo: Will Zoobkoff

Plug-in Power Supply for Long Prints
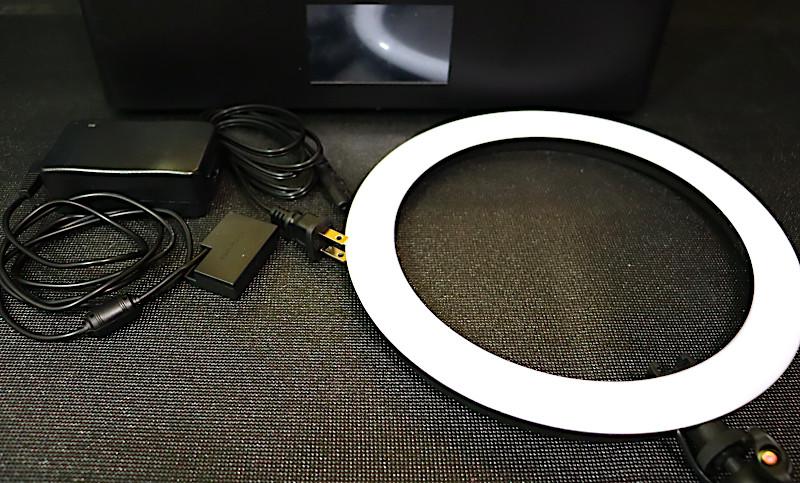
You will also want a plug-in power supply for your camera. I have a false battery hooked into a power brick for my camera. I also turned off any sleep options on the camera so that it would stay on for the length of the print.
Dummy Battery Power Supply on Amazon
Lighting Settings – IMPORTANT
As the recording is done without a UV protective cover, it is important to have NO other UV light source in the room, otherwise, the exposed resin will be cured on the top of the build platform and in the vat. To make sure the lighting is ideal, I personally like to use a light ring.
LED Light Ring on Amazon
©3DWithUs – Photo: Will Zoobkoff
Beginning of the Process
It is not important to start time lapse capture in the very beginning. On contrary, to minimize the number of the photos and to ensure that the printing process goes well, I usually wait until the initial burn-in layers are completed and the build plate is just beginning to rise up out of the resin before beginning my timelapse capturing process.
Photos into Video – Filmora Settings
Once the print is finished, you will need to convert the photos into the timelapse itself. I use Filmora 11 for editing, and to make things easier on my laptop, I have photos set to a 1 frame duration under Preferences.
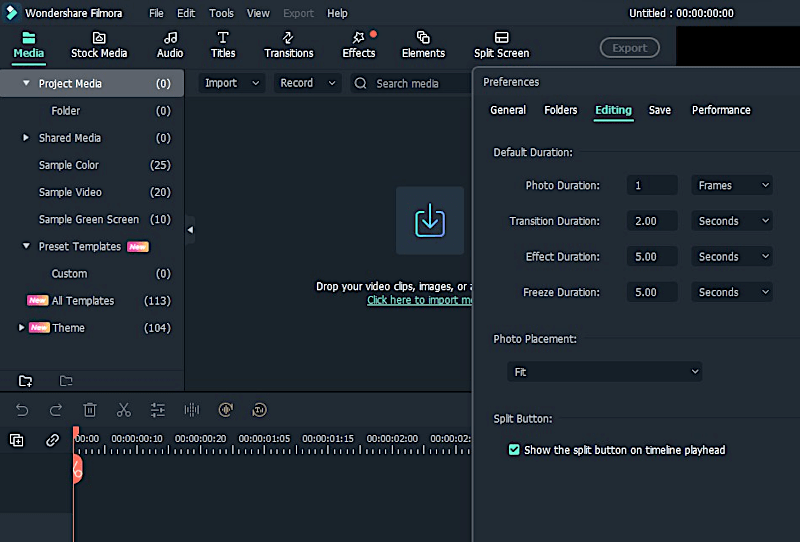
Screenshot: Filmora
Once Filmora has loaded, import the folder of images, which can take some time. Once complete, this can be exported as a video clip that can later edited for speed or effect adjustments.
Featured Models
For my ResinLapse review and testing, I chose the following models as my test models:
Poison Ivy from the B3dserk Patreon and the Vecna bust from the Hex3D Patreon. Poison Ivy took two prints to complete. All the parts were printed at 100%. The base pieces were too short to make a nice time-lapse, so I didn’t capture them.
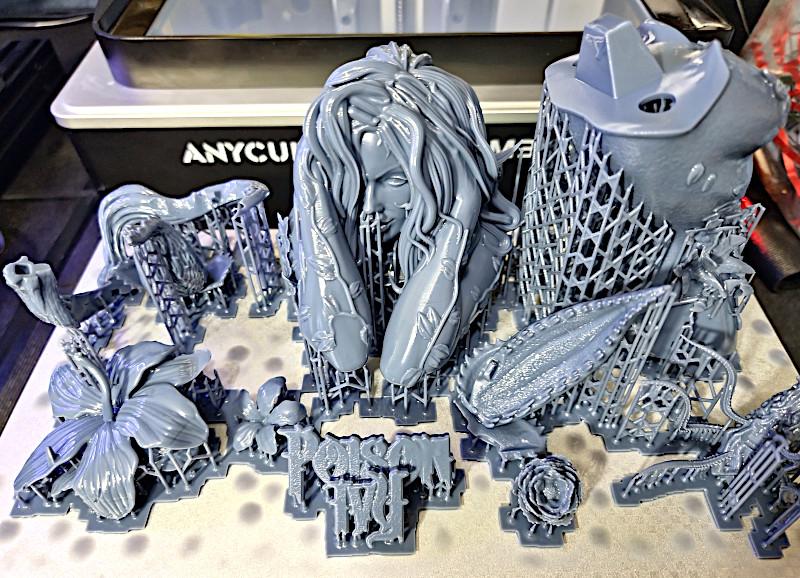
©3DWithUs – Print & Photo: Will Zoobkoff
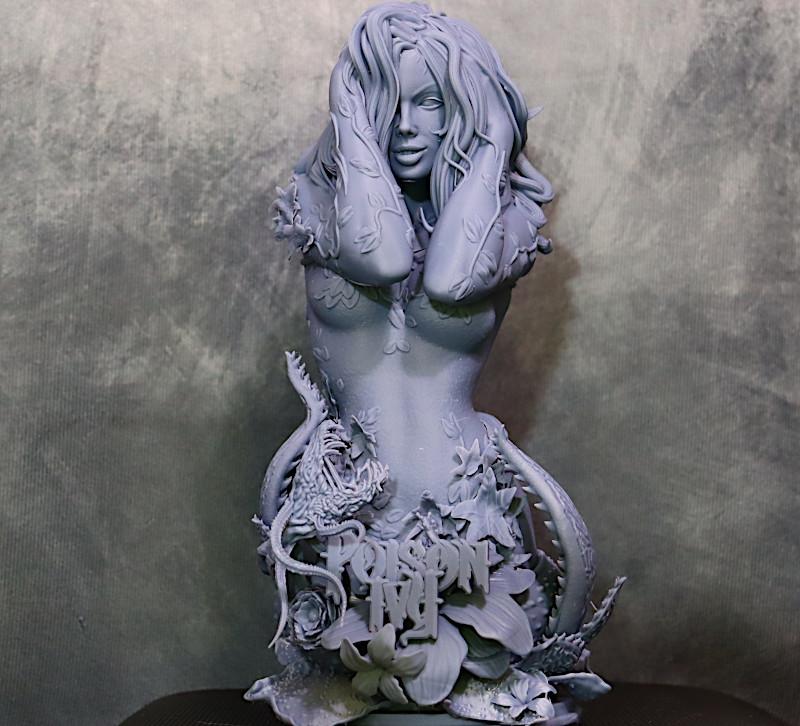
©3DWithUs – Print & Photo: Will Zoobkoff
One print was required to complete the Vecna Bust by Hex3D on Patreon.
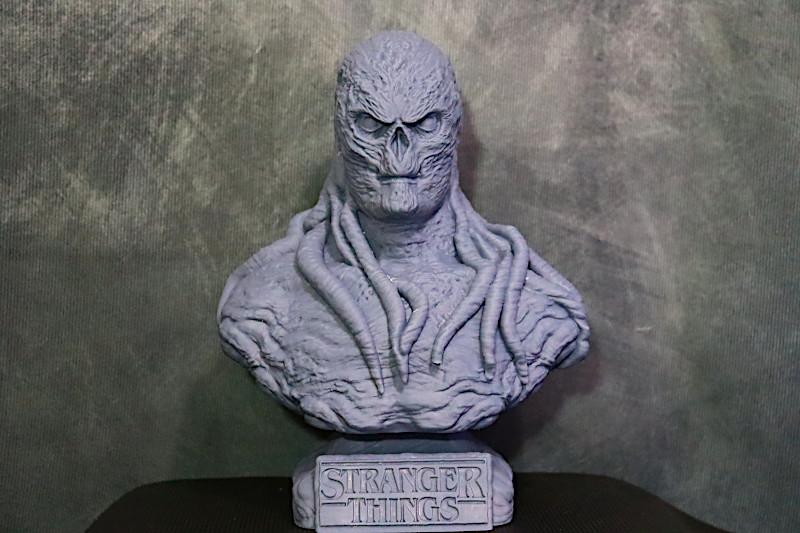
©3DWithUs – Print & Photo: Will Zoobkoff
Conclusion
I have been using FDM 3D printing for almost 6 years, and timelapse videos have always been a popular method of showcasing the printer and 3D prints. As SLA/resin printing is much messier and overall, more sensitive process, capturing time-lapses has been challenging. Thanks to ResinLapse, creating timelapses for resin 3D printing became much easier.
Seeing the print building up from the liquid resin in a short video is a fantastic experience. I’m excited to see what type of timelapse films the ResinLapse cable will enable me to create in the future.
ResinLapse is available from the following e-stores:
BigCartel
Link.tree
Related: The Best Time Lapse Setup for 3D Printer
Have you already mastered the timelapse recording using a mobile app, camera mount, or Octolapse? If you are designer or creator in 3D printing, you will need to have one more skill under your belt – time lapsing your 3D printing in action. Read more …