Thanks to Ember Prototypes’ services, it is possible to obtain custom textured flexible PEI build plates for nearly all sizes. This allows for printing the first layers with unique patterns on desktop and larger FDM 3D printers without involving 3D software. I was fortunate to receive and test such a plate on my Original Prusa printer. Since the build plate size was compatible, I also managed to use the same build plate on the Creality K1. Here are the results.
Table Of Contents
- Specifications
- Submitting the Logo
- Unpacking The Built Plate
- Test Printing on Original Prusa
- Test Printing on Creality K1
- Practical and Decorative Uses
- Conclusion
Ember Prototypes Custom Build Plates Specifications
PEI Textured Build Plate
Custom sizes: Up to 525×525
Available templates: Bambu Lab, Prusa, Creality, others.
Tested Materials: PLA, ABS, ASA, PETG, PACF, TPU
Thin Coating
Minimal imprinting – great for content creation, time lapses and cool factor.
Thick Coating
Visible imprinting – great for transferring patterns or logos to the first layer
Price: from $49.99 USD
Here is our experience in ordering such a build plate from Ember Prototypes.
Submitting the Logo – Example
Our 3DWithUs logo has a gradient 3D effect. To make it work well on build plates, Ember Prototypes had to edit it into a simpler form. After submitting our logo via the website, Philip from Ember Prototypes wrote to us, confirming that our logo would be modified for the best results.
Philip also included sketches of the modifications and added .SVG files featuring our logo on both sides of the build plate.

These .SVG files are also important if we ever want to bring the texture to the slicer for perfect alignment. How-to video tips are included on the product page.
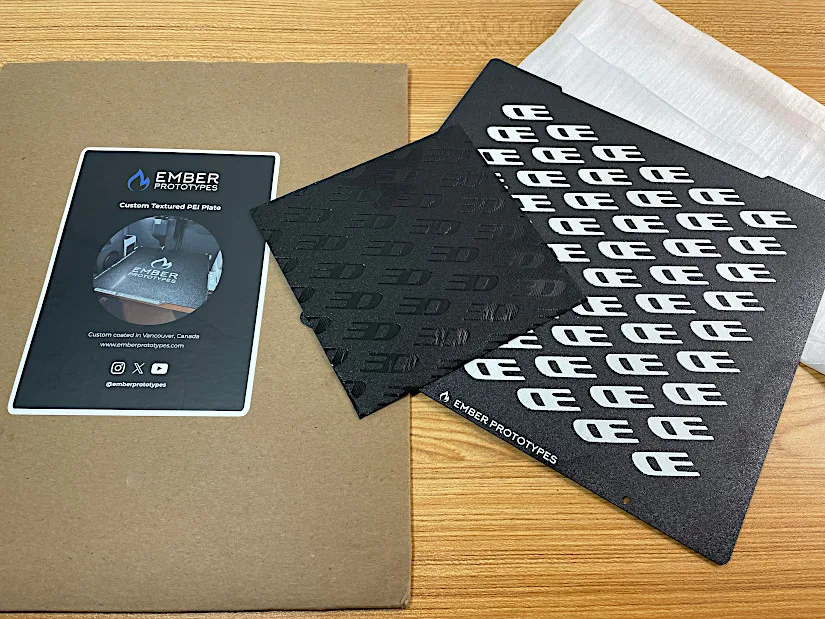
Unpacking The Build Plate
Our customized build plate arrived in a big envelope with the test print included. It was fascinating to see the pattern resembling our logo on the print. I could not wait to put the new plate on my printer and take some pictures.
©3DWithUs – Photo: Max Funkner
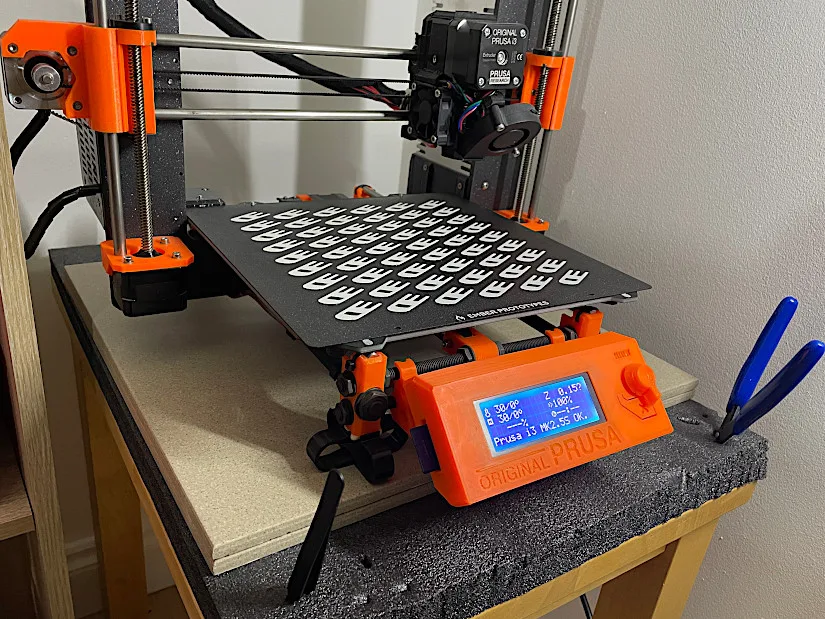
It looks really nice on the printer. The thick-coated pattern visually stands out very well. It felt like I treated my 8-year-old, upgraded Original Prusa i3 MK25S with a birthday present.
©3DWithUs – Photo: Max Funkner
©3DWithUs – Photo: Max Funkner
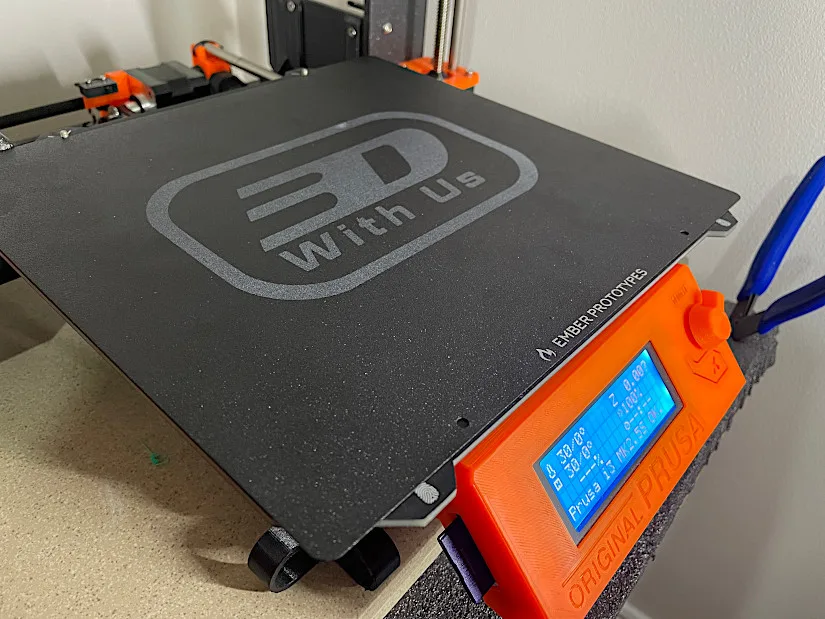
As mentioned in the specifications, printing on a thin-coated pattern will result in minimal imprinting. This is a good feature for content creators to showcase their channels when displaying their machines and the designs printed on them.
Test Printing on Orignal Prusa
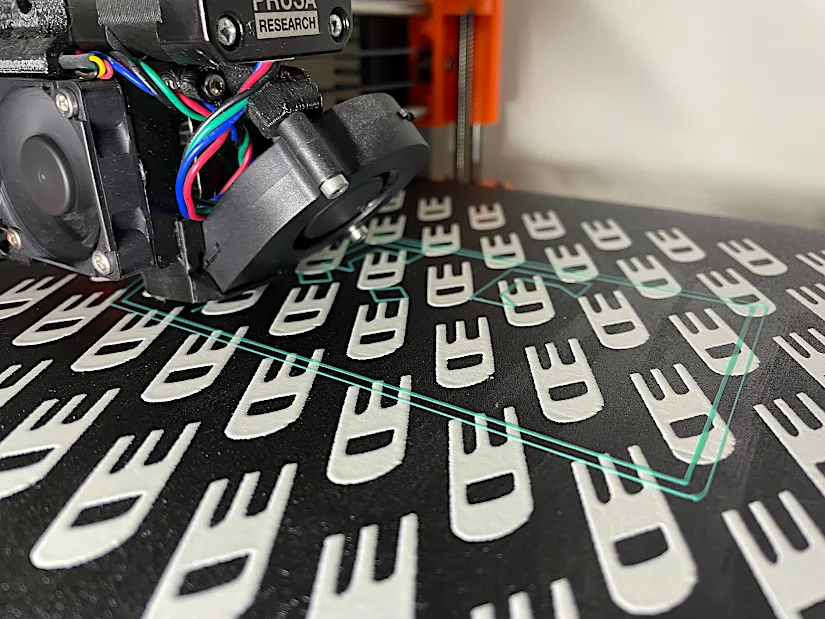
The build plate was originally ordered for the Original Prusa. It is fair to mention that I was very careful not to scratch the build plate and recalibrated my printer with the new build plate on. When adjusting the Z-axis, I was also very cautious and left as much space as possible. The first attempt resulted in failed bed adhesion. With a slight adjustment and a coat of Magigoo from Amazon, the first layer worked perfectly well on the second attempt.
©3DWithUs – Photo: Max Funkner
The design I chose to print can be challenging if the bed adhesion is not right, as it has many independent islands when printing the first layer. To my delight, the bed adhesion worked well, and the print came out awesome. As a few bits of Magigoo glue stuck to the print, I had to clean it briefly with alcohol wipes.
3D Model by 3DWithUs on Thangs
©3DWithUs – Print and Photo: Max Funkner
The first print instantly astonished me with its result and great potential. The usually dull-looking backside of our design now has an extra feature.

Test Printing on Creality K1
To my delight, the same build plate worked well on the Creality K1 machine as well. The build plate aligners that assist with build plate placement are situated at a narrow distance. This allowed placing my 255mm x 242mm custom build plate on the Creality K1. I bet printing on a custom build plate of 230mm x 250mm created for the Creality K1 will also work on the Original Prusa; it will just stick out more. This shows that we can use such custom build plates on various printers if size permits.

©3DWithUs – Photo: Max Funkner
3D Model by Guigro on Cults3D
©3DWithUs – Print and Photo: Max Funkner
And again, I recalibrated the Creality K1 with the new build plate. As the Creality K1 did an automatic bed leveling, I printed on it without extra Z adjustment. On a close look, it is possible to spot separate layers, but I am happy with the result.
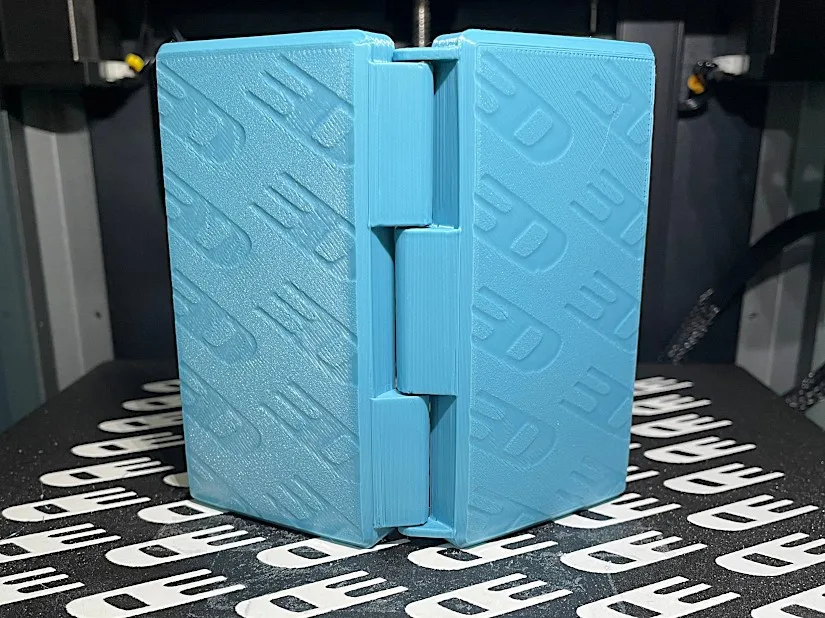
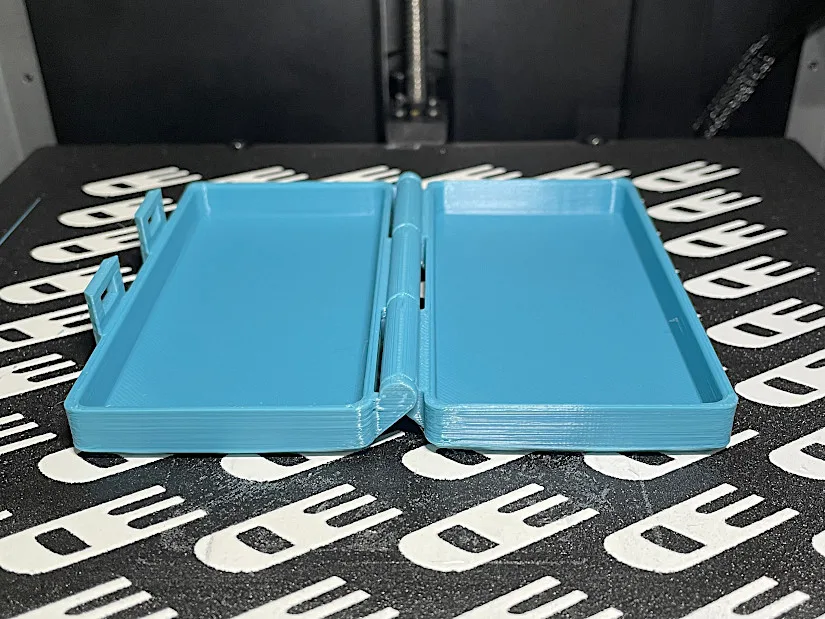
This time, I printed a print-in-place Game Boy Micro box case by Guigro on Cults. Such a design is perfect as both sides are perfectly flat on the bed. The texture landed very well. And again, a dull-looking object now has an extra feature.
Practical and Decorative Uses
Designers, when selling or gifting their models, can now add an extra ‘watermark’ to their prints. Printing services can also promote their services by leaving brand features on specific prints. Here is a list of practical and decorative uses of such build plates we came across.
Recycling Signage
So far, the most practical use of such custom textured build plates we saw on Twitter/X was featured by @joshuartaylor. A build plate featuring the Universal Recycling Symbol is a great idea. This plate not only reminds the creator of the plastic it is printed with but can also remind a regular consumer that the plastic is recyclable.

Apart from that, Joshua also printed in PET, rather than PLA, showing that the build plate coating can withstand other materials as well.
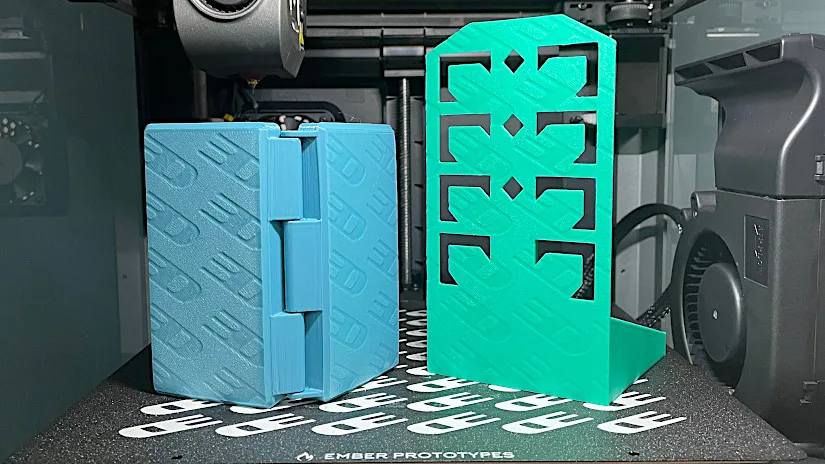
Boxes and Lids
In my practice, boxes and lids are the objects that benefit from such textures a lot. Such designs are good because the sides are perfectly flat on the bed, and a large volume of the object gets a texture. Imperfections such as visible layers are efficiently concealed. A game gadget protective case worked very well. Other boxes will work well too. For example, a fishing bait box may have a fish texture, etc.
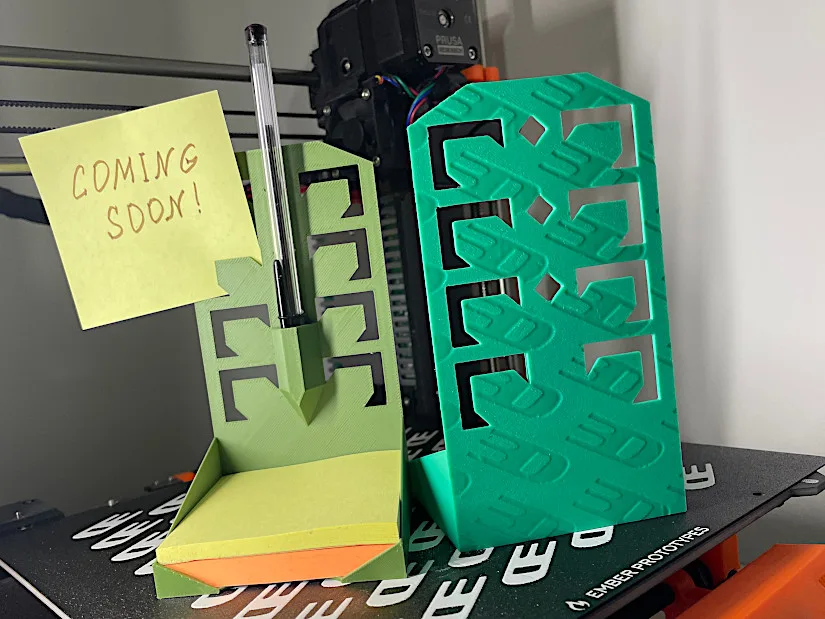
Other Objects
As in our case with the Post-it note holder, we concluded that many objects can benefit from such texture—the more flat volume area, the better. An extra feature on the object can help it stand out.
For more examples, please visit Ember Prototypes’ Twitter/X or Instagram pages, where more creations are showcased accurately on a regular basis.
Check out the limited edition creator plates as well
Conclusion
The ability to add an extra feature to objects is the biggest benefit of custom textured flexible PEI build plates offered by Ember Prototypes’ services. These textures can be purely decorative or practical, like important signs. During our testing, the same build plate was used on multiple printers, which came as a surprising bonus, making it logistically easier to utilize the build plate in practice. I see these build plates being widely used by professional 3D printing services as well as designers for adding extra features to their designs.
Where to buy:
Price: from $49.99 USD
Ember Prototypes Official Website.