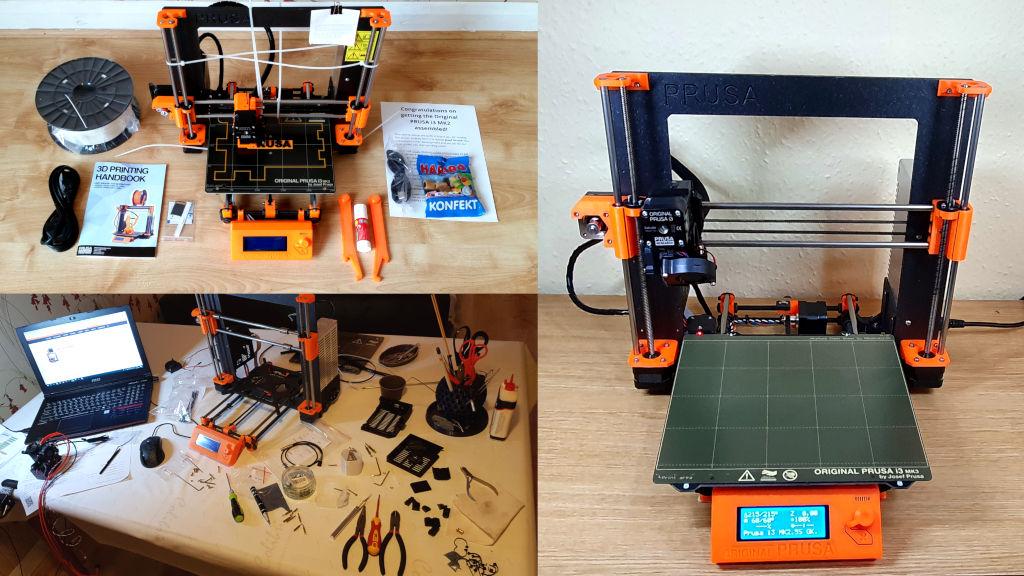
In this article, we will review the MK2.5S upgrade for the Original Prusa i3 MK2, feature add-ons, and briefly check 3rd party upgrades and innovations. I have always been happy with the old version of this preassembled 3D printer and used it heavily for a number of years. However, the introduction of the magnetic PEI sheets and later powder-coated spring steel sheets made me curious about the new features. After visiting the Prusa Research booth at TCT Show in Birmingham and actually holding and bending the magnetic sheet in my hands, it became obvious that I indeed needed this upgrade.
This Guide Covers
- Awards Winning 3D Printer
- Brief Review of MK2
- MK2 Upgrade to MK2.5S
- Upgrade for $200 – Was it worth it?
- MK2 Upgrade to MK3S+
- Noise Reduction DIY Tricks
- Original Prusa Enclosure
- 3rd Party Upgrades & Innovations
- Other Popular Prusa 3D Printers
- 6 Years On – Conclusion and Links
Awards Winning 3D Printer
When buying the Original Prusa i3 MK2 I had no idea that it would be named the best 3D printer of the year according to the Make magazine and to the 3D Hubs community. I first saw the machine in action at one of the 3D printing events. Even though a 4-feeder upgrade (MMU) was not available for sale at that time, it felt promising that the manufacturer was trying something new.
Price: $799-1229

NEW Original Prusa i3 MK4S
Official Website
Amazon
Original Prusa Upgrades
NEW Upgrade MK3 to MK4S
NEW Upgrade MK4 to MK4S
Official Website
MK4S to Prusa CORE One Conversion Kit
Price: €489

Official Website
Read more about
Prusa CORE One
Years later, the next version MK3S+ scooped even more awards. Prusa Research became one of the most reputable brands in the desktop 3D printer market with its own slicer software PrusaSlicer, and constantly growing file repository Printables.
In the beginning, I was considering buying one more 3D printer for a number of reasons. Firstly, I wanted to try something different. I’ve had a great experience with the DeltaWasp 2040, but wanted to go for a different process or a printer type.

Photo: Max Funkner
Another reason was that using only one machine was not enough for the workflow. By then, I seriously considered going for an SLA printer. However, after considering my options, I decided to buy the second FDM machine, a cartesian type. It could utilize the same materials and save money, space, and time.
Original Prusa i3 MK2 – A Brief Review
Fulfilment time for orders placed in autumn 2016 was a lengthy 6 weeks, plus there was a 2-week delay. Back then, Prusa Research didn’t have enough manufacturing capacity. We must admit that the online chat support staff did their job very well. We can only imagine the pressure they must’ve been under at that time of the year. Everyone wanted a new printer delivered in time for the Christmas break. In comparison, we received the new MK2.5S upgrade, as promised, within 3 days.
Our YouTube video above shows the unboxing, calibrating, changing filament, and the first prints on the Original Prusa i3 MK2. On the first day, I tested two G-code files that came with the manufacturer’s SD card. The results were of brilliant quality. Afterwards, I used files from the STL-sharing websites. By that time it was a pleasant surprise that Simplify3D supported Prusa i3 MK2 and had its default settings for slicing the objects.
Nowadays, Prusa Research has its own sophisticated slicing software PrusaSlicer, and I started using it much more often, especially for complicated projects.
MK2 Upgrade to MK2.5S
Price: $200
Check the availability on the Official Website.
")
©3DWithUs – Photo: Max Funkner
It took me a few days to 3D print all the necessary parts in Prusament PETG, disassemble the old MK2, and reassemble it with the new parts. It took longer than expected because I had some issues with printing new parts and had to wait for the replacement of the old thermistor that was worn out. Our family dining table was invaded for almost three days.

©3DWithUs – Photo: Max Funkner
Even though the instructions were clear, I found it challenging to 3D print all the necessary parts using the given G-codes. PETG filament that came with the upgrade didn’t stick well to the old printing bed. On top of this, existing G-codes were set to crowd the build plate with tiny objects, including marking text. The poor machine had a lot of retracting to do on the 1st layer at a high speed. Extra adhesion, slower speed, and several attempts got the job done in the end.
I would recommend that the Prusa Research team add an option to buy printed parts as well. In many cases, the printer is out of order, and the upgrade is the fix.

©3DWithUs – Photo: Max Funkner
Again, the instructions and step-by-step guidance were clear. What’s no-one mentioned was the scale of the screwing and unscrewing job. It is highly recommended to use an Allen key that has a proper handle.

(Screenshot: Prusa Research)
I would warn against using an automatic/electric screwdriver. Some of the items are very fragile, and overtightening is very likely to break them, like in one place in particular, during the new extruder assembly, which needed a ball driver Hex or Allen key.
I suggest to the Prusa Research team that they add a very thin screwdriver to this upgrade package as a freebie, especially for the stepper motor. In any case, if you have this type of 3D printer, I recommend investing in a set of such ball-driver Hex screwdrivers. See an example from Amazon. Basic hex keys usually come with the new 3D printer, but these are not comfortable enough for major assembly or upgrade jobs. Check the other essential recommended tools for FDM desktop 3D printers.

©3DWithUs – Photo: Max Funkner
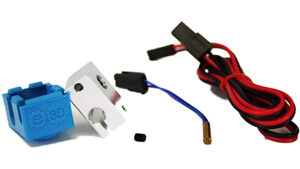
And the last issue I had was with the thermistor. I didn’t snap it during the initial disassembly-assembly procedure, it got a bit of damage within the past 3 years. Presumably, it mostly happened during changing the nozzle. Hotend E3D thermistors can be bought via the official website in the spare parts section. As I needed it urgently Amazon came to the rescue and delivered the replacement item in 2 days.
Prusa i3 MK2.5S Upgrade for $200 – Was it worth it?
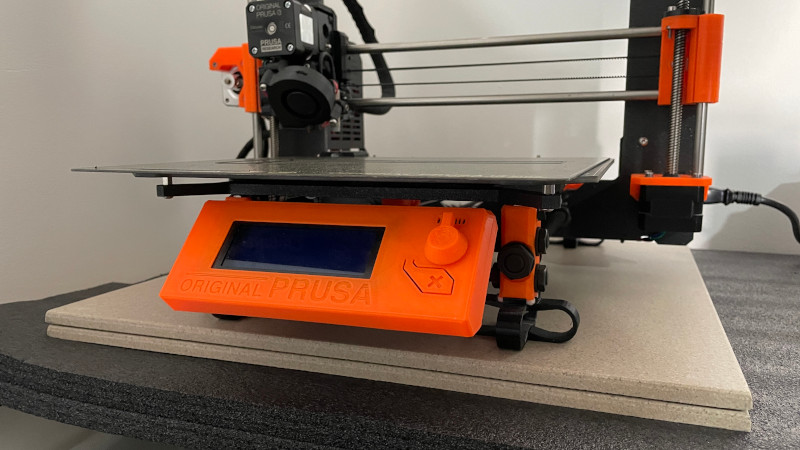
Yes, it was. Since upgrading to MK2.5S we 3D printed a lot of various items: with supports, lithophanes, bulky models, etc. Turning our old Prusa into the one with magnetic steel sheets was one step closer to plug-and-play. Can’t see any big difference when using the new extruder. Maybe this is just because the old extruder performed well, too. But the magnetic steel sheet is truly an addictive feature. In the end, for 3D designers and makers, it is important that 3D printing doesn’t eat much of precious time.

©3DWithUs – Photo: Max Funkner
Another interesting discovery was that it was possible to use GCodes originally prepared for MK3 printers and these worked well for my upgraded MK2.5S as well. You can find plenty of GCodes for MK3 on Printables, please use such files with caution! Below you can find Sanjay Mortimer’s Commemorative Hex Tile printed using Repkord’s GCode for MK3 printers.

©3DWithUs – Photo: Max Funkner
MK2 Upgrade to MK3S+
Check the availability on the Official Website.
Recently, I noticed that there are no upgrade packages for MK2 to MK3 available anymore, and I am not sure if they will be added anytime soon.
Noise Reduction DIY Tricks
If you don’t plan to buy an Official Prusa Enclosure we feature below, then these DIY tricks may help you with noise reduction. 3D printed Noise Dampers by Hofftari and stone slabs or just a few big heavy tiles.
©3DWithUs – Photo: Max Funkner
Original Prusa Enclosure
Price: $349-571
Official Website
The enclosure is much cheaper when bought as a bundle together with the new 3D printer. Overall, the Original Prusa Enclosure is an essential accessory for anyone who wants to get the most out of their Original Prusa i3 3D printer. Made from high-quality materials, it’s designed to keep printers safe. It has enough space for the MMU2S unit as well.
Image: Max Funkner
The enclosure helps to control the temperature, reducing the risk of warping, therefore improving the bed adhesion and print quality. This enclosure comes with a $349 price tag. It would cost more when the add-ons are added, like Advanced Filtration System, Mechanical Lock, PSU Cable Quick-release, White LED Strip, or others.
3rd Party Upgrades & Innovations
The ability to upgrade and customize Prusa Research machines, especially MK2/3 and MINI, is one of the main reasons why these are highly regarded in the maker communities. Please have a look and search for a needed build or a mod on Printables. Here is the list of the 3rd party upgrades and innovations that caught our eye.
Automate Your Original Prusa – Quinly for Prusa
The Quinly for Prusa package includes a tilt frame that angles the printer with the bed facing downwards, allowing 3D printed parts to be knocked off and fed into a container without requiring an operator to manually remove them. Unlike a belt-driven system that allows the print bed to also act as a conveyor belt to move parts away from the print area, the tilt frame creates a natural angle for the part to remove itself from the build plate.

(Image: 3DQue)
Jobox Automation Upgrade for MK3S+
Another automation system is offered by the Jobox team. Jobox launched a Kickstarter campaign, which generated, by the time of updating this post, $30k, and the goal was to create an automation upgrade for Prusa MK3S+. The upgrade was highly praised on social media and Jobox even managed to feature the system at Formnext.
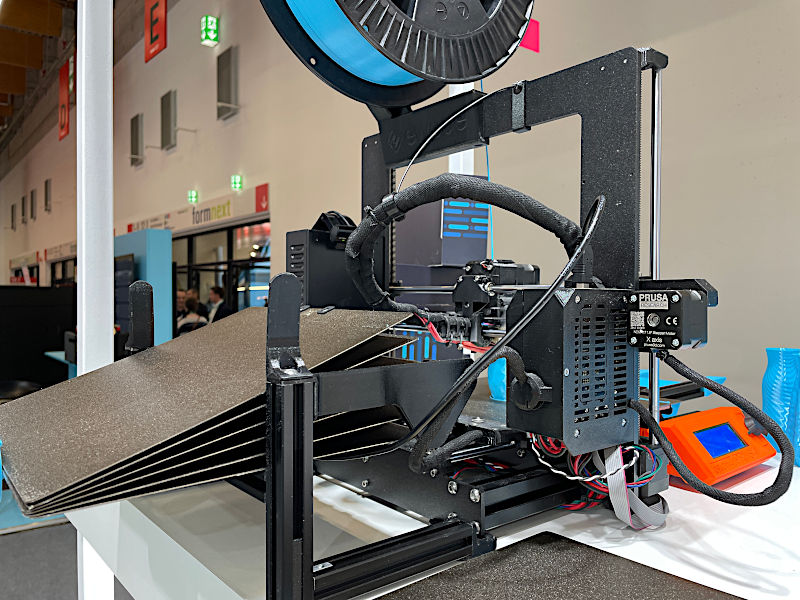
Photo: Max Funkner
Creative Mods by the Community
Entirely new ideas and remarkable custom mod builds keep popping up from time to time on social media with users publishing their builds on file-sharing repositories. Creative mods by @neil3dprints are the best examples. Check his Bulbasaur Mini, Tachikoma Mini, and Original Prusa Mate mods for Prusa Mini.
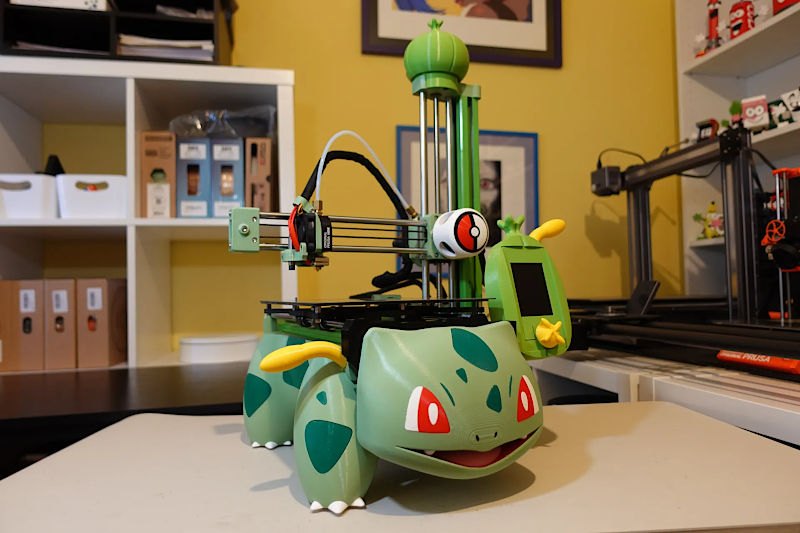
With the Permission – Photo: @neil3dprints
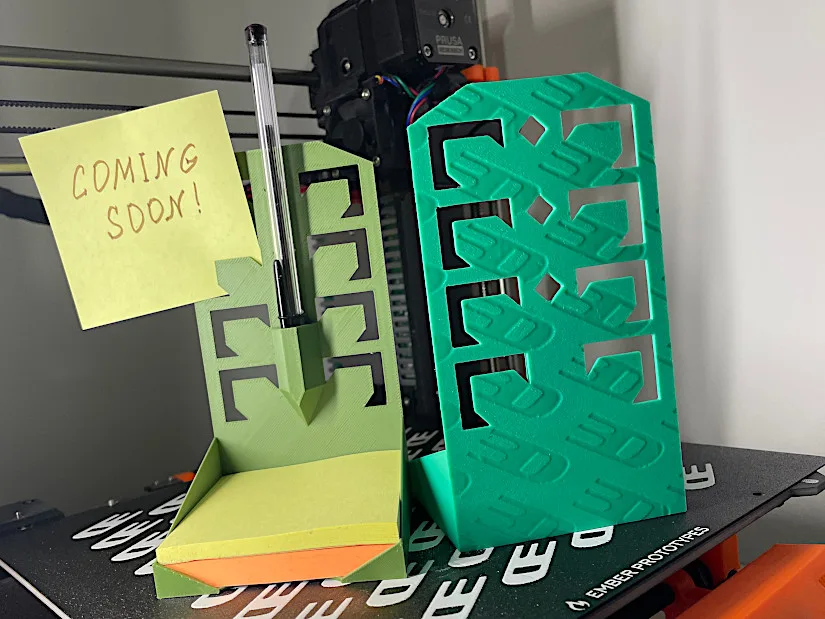
Custom Textured PEI Build Plates
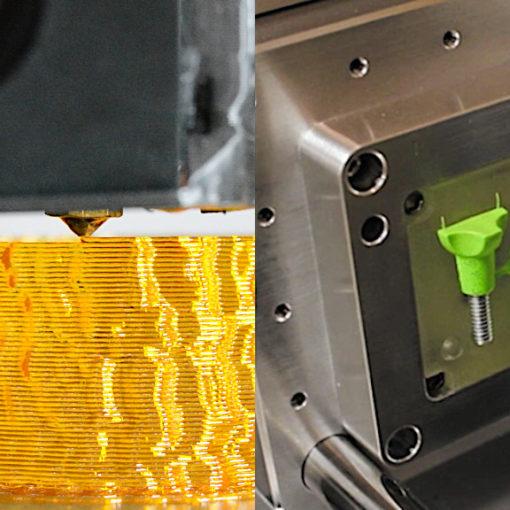
Thanks to Ember Prototypes’ services, it is possible to obtain custom textured flexible PEI build plates for nearly all sizes. This allows for printing the first layers with unique patterns on desktop and larger FDM 3D printers without involving 3D software. I was fortunate to receive and test such a plate on my Original Prusa printer.
The plate looks really nice on the printer. The thick-coated pattern visually stands out very well. It felt like I treated my 8-year-old, Original Prusa i3 MK25S with a birthday present.
3D Model by 3DWithUs on Thangs
©3DWithUs – Print and Photo: Max Funkner
The first print instantly astonished me with its result and great potential. The usually dull-looking backside of our design now has an extra feature. Read more and print examples here.
6 Years On – Conclusion and Links
Inspired by Thomas Sanladerer’s video about a 5-year old Original Prusa MK3, I decided to update an old article about the MK2 upgrade. As the result added a lot of interesting stuff.
This article was updated 3 years later and 6 years later, and the upgraded Original Prusa i3 MK2 still lives and performs. The most recent 3D print job was for the #yellowribbon3Dprint mental health campaign by Abby Brown, see the image below. Still good to use when color changing is involved and in many other cases.
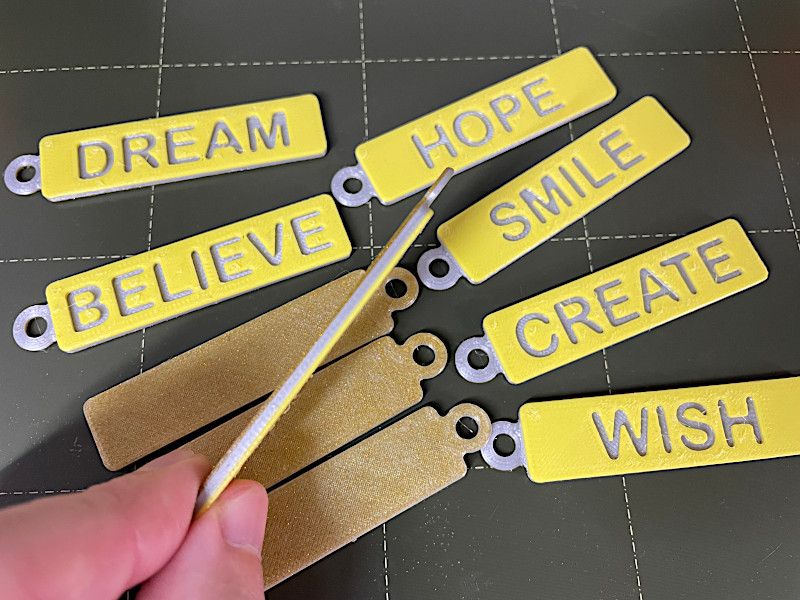
©3DWithUs – Photo: Max Funkner
Other Popular 3D Printers by Pursa Research:
ToolChanger – Prusa XL
Price: $2,323-4,799
Product Links:
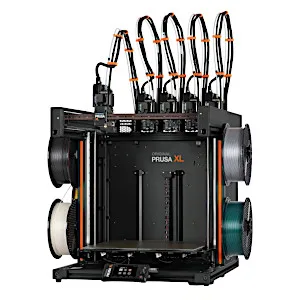

The Prusa XL is among the best-performing multi-color systems available on the consumer market. Prusa Research, the award-winning manufacturer, is highly regarded within the community. This machine has a strong community presence on Printables, powerful slicer software, and other perks.
The Prusa Research team is a prominent presence at various trade shows related to 3D printing and additive manufacturing. At these events, they showcase their latest products designed for hobbyists and professionals.
MINI – Prusa MINI
Price: $369-529
Product Links:
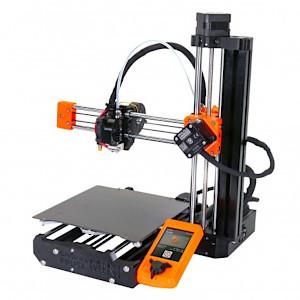
Official Website
The multiple award-winning Prusa Research is the only European company that continues to compete successfully with China-based manufacturers. Buying any of the original Prusa printers is like joining the club. Their community is loyal to the brand and keeps it in a strong position. Prusa Research has successfully launched Printables, an engaging, gamified file repository, which has added to securing their place on the market.
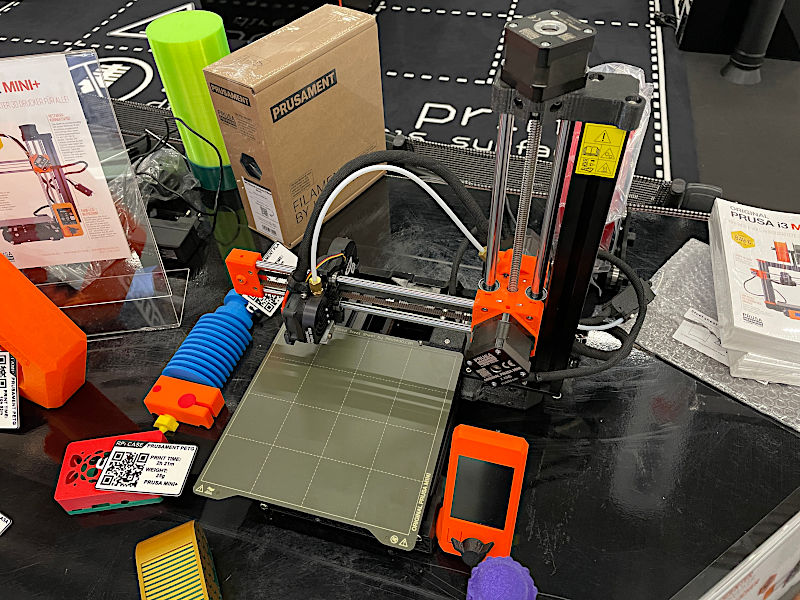
Photo: Max Funkner
The Original Prusa MINI has all the nice-to-have features, like a heated bed, flexible build plate, etc., for carefree printing. Prusa Research developed PrusaSlicer software, which is also highly respected in the community.
NEW Original Prusa i3 MK4S
Official Website
Amazon
Original Prusa Upgrades
NEW Upgrade MK3 to MK4S
NEW Upgrade MK4 to MK4S
Official Website
Read More and Compare: FDM 3D Printers
After testing and reviewing various FDM 3D printers over the years, we are compiling a detailed guide on the best budget FDM 3D printers in a few categories. In response to DIY market demands, these sophisticated technologies are continually improving. Let’s look at what’s on the market, highlight budget-friendly products and discuss innovative features and desirable attributes. As usual, we will keep adding more such devices for comparison and feature the newest solutions, aiming to meet the needs of hobbyists and professionals in this exciting area.

My 7 year old MK2 just broke ..my fault Inwas removing a blob and broke some wires then broke more trying to fix it !
For the price of an upgrade kit I can buy a new printer so I’ve decided to do both ! I’ve some parts to fix the MK2 play with my new Ender over Xmas then in the new year I’ll splash out on the upgrade kit. .
Great article it was this piece that inspires me to keep my old reliable going !