One of our first designs was a company logo. We didn’t have to push our creativity because the logo already existed in 2D format. Sounds easy, but making a 3D printed logo appeared to be quite challenging. Usually, when designing for 3D printing we have to keep in mind the angles to avoid printing with supports. It was not in our case. Our logo was very simple, well at least it looked simple on a 2D picture.
2D to 3D
![]()
3D Printed Logo Design
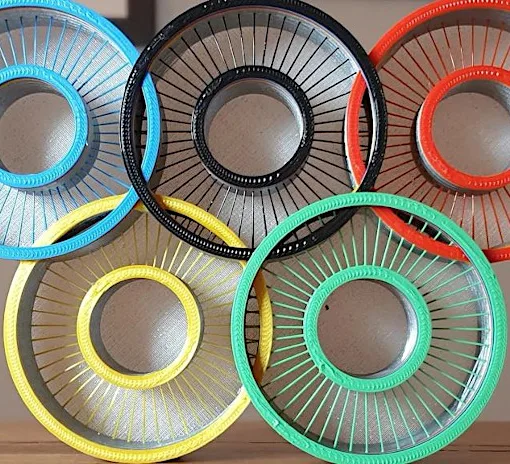
Colour. The first challenge was to find the right colours. PLA and ABS for FDM desktop 3D printers come in a wide variety of colours. But because we’ve limited ourselves to PLA as ABS was not fit for our purpose, it cut the choice significantly. Sometimes the colours advertised turned out to be different upon arrival. We never thought that finding 3 shades of blue could be that difficult.
![]()
Design. Our desktop 3d printer Delta Wasp 2040 has one extruder and one nozzle. Printing in multiple colours as one piece would involve pausing, changing filament, restarting. Therefore the design consisted of 4 pieces that would be put together as a puzzle. It actually was a fun item to play with in the end. Tinkercad offers different shapes and the whole alphabet of letters. In about 2 hours our design was completed, 4 files turned into STL.
It is possible to quickly generate a brand-new 3D printing logo for any company using a sophisticated online tool. And then proceed to a physical form.
![]()
Letters. Printing letters with FDM process requires getting the Extrusion Width and Extrusion Multiplier absolutely right in the slicer. The printer decides not to fill small gaps and leaves holes around the letters. If Multiplier is too high, the result is over-extrusion and visa versa (zoom picture below). We had to try a hundred times before we got the Extrusion Width right.
![]()
3D Printed Logo With Different Processes and Materials
Desktop FDM: During this printing process the filament melts and spreads. As the result the inner part did not fit inside. Scaling the letters of the inner part automatically did not work as the outline shapes moved. We had to adjust each letter individually in Tinkercad. Later this adjusted design was printed in different materials on professional/industrial 3D printers.
![]()
Sand Casting: Binder Jetting process produced a very good result. The texture was nice, it felt like a velvety fine sand paper. However, this material was not suitable for our puzzle design. Firstly, it was very fragile and the middle part broke. Secondly, it got stains and dirt from the hands. This is not good when the puzzle is meant to be handled a lot.
SLS: Alumide material printed by Sculpteo looked great. It had a course texture. Unfortunately, there were only 5 colours available.
![]()
Polyjet: The finished item produced by Stratasys J750 printer looked very nice. It was sleek and polished. Only on the back tiny layers could be detected, but it was overall a much better quality compared to Desktop FDM. The biggest drawback was the price. It was nearly twice more expensive than the logo in sand.
![]()
Conclusion: Design that was created for the desktop FDM printer did not work when printed on high quality professional/industrial machines. The reason is that with high precision, the parts were too loose and did not fit together well. The middle part kept falling out, so it did not work as a puzzle design.
CONTEXT – The largest IT analytics company with the head office in London. 3D printing blogs and market analytics: https://contextworld.wordpress.com/tag/3d-printing