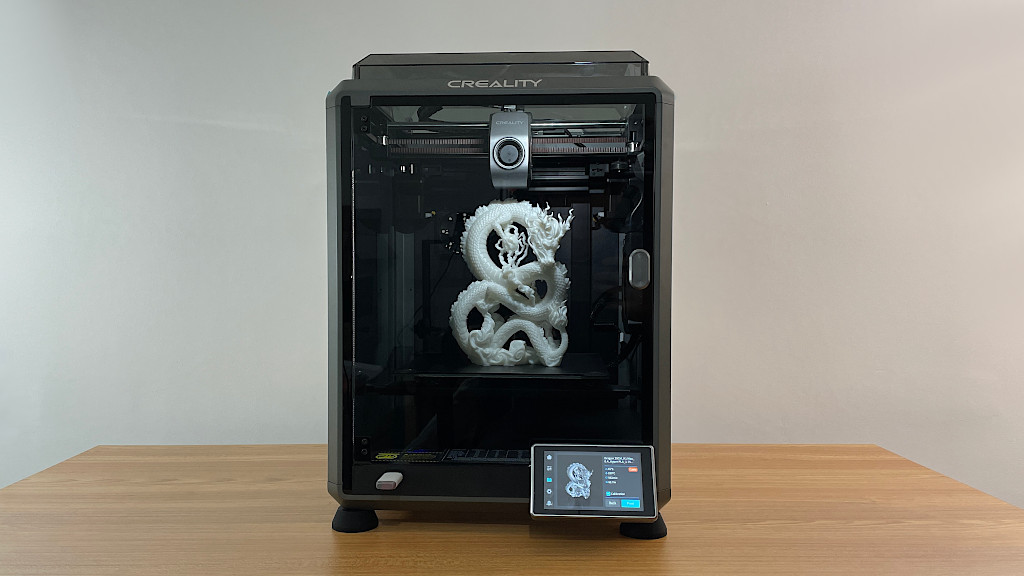
One of the biggest manufacturers of desktop FDM 3D printers, Creality, has launched a new flagship printer, Creality K1. The K1 features a stable CoreXY build, a high-speed and high-temperature direct-drive extruder, and is optimized to print at high speeds of up to 600mm/s. Let’s review the machine, print some awesome and challenging models, list some tips and tricks, and outline the pros and cons.
Table of Contents
- Specifications
- Unboxing and Assembly
- Optional AI Camera and Timelapse
- Included Test Files and Prints
- Slicer Software – Creality Print, Simplify3D
- Other Test Models
- Custom Textured PEI Build Plates NEW
- Compare to Other 3D Printers
- Rooting Creality K1 Series 3D Printers
- Conclusion and Pros & Cons
Price: $369-415
Product Affiliate Links: 3DWithUs is supported by its audience. Purchases via some links may earn us a small commission at no extra cost to you. This helps us to continue bringing you high-quality content. Our guides and reviews remain unbiased and independent.
Creality K1 Specifications:
Firmware: Modified Klipper
CoreXY 3D Stable Build
Build Volume: 220 x 220 x 250mm / 8.6” x 8.6” x 9.8”
Bed Leveling: Automatic
Input Shaping Calibration: Automatic
Print Speed: Max – 600 mm/s, (Default Speed in Slicer 300 mm/s)
Layer Height: 0.1-0.35mm
Max Temperature: 300°C
Dual-Gear Direct Drive Extruder
Three Cooling Fans
Material: PLA, ABS, PETG, TPU, Nylon, Other
Build Plate: Flexible PEI
Connectivity: USB, Wi-Fi
Software: Creality Print, Creality Cloud App
Interface: 4.3-inch Touch Screen
Unboxing and Assembly
It takes a few minutes to remove all the packaging, install the filament holder in the back, and assemble the screen. The only hex key I had to use was to attach the door handle and to remove the protective screws.
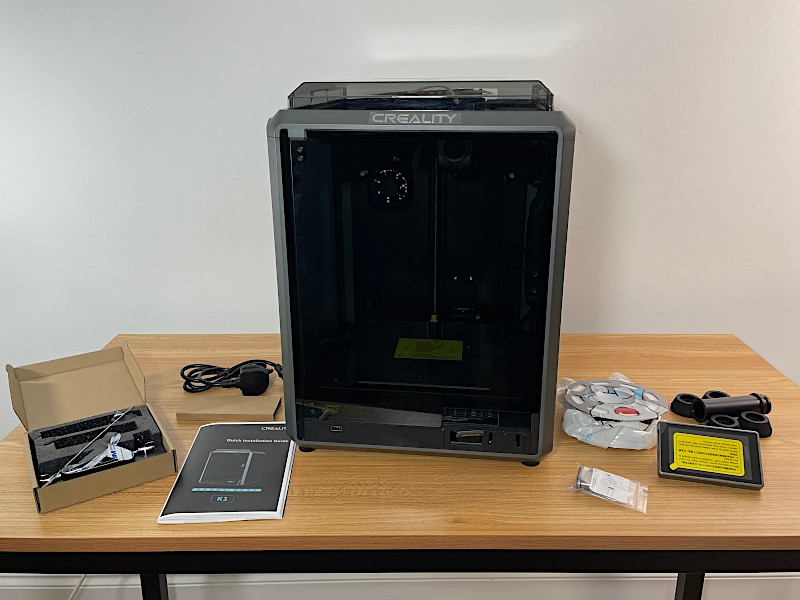
– Do not forget to unscrew. Three screws keep the printer’s bed well secured during transportation. Yellow labels indicate their location, as the screws themselves are quite small and easy to miss. There are enough messages; even when the 3D printer is ON, they will pop up before anything else.
©3DWithUs – Photo: Max Funkner
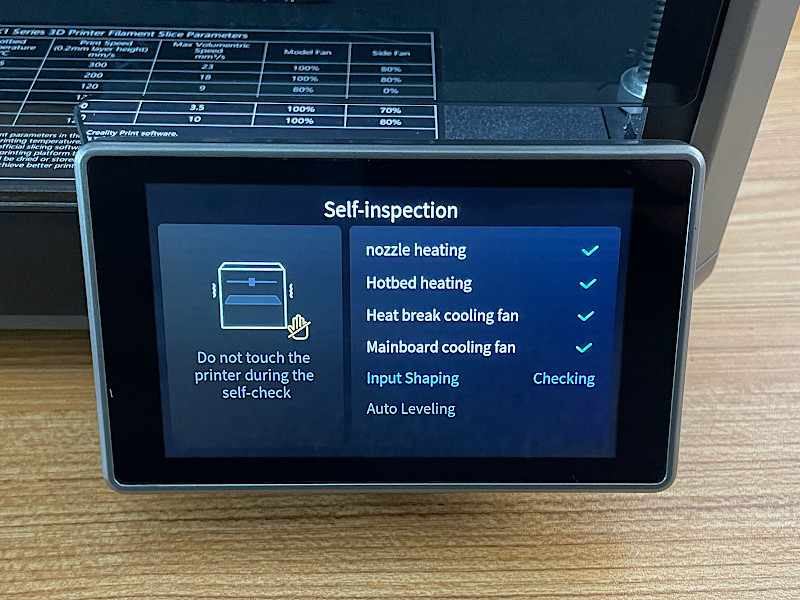
– Self-inspection. Before getting to the main screen, the machine goes through a self-inspection. I absolutely love this feature as it is very user-friendly; there’s no need to manually calibrate anything. Both Input Shaping Calibration and Automatic Bed Leveling take just a few minutes. On the Sovol SV07 Plus, for example, Input Shaping calibration involves attaching an extra device, and the process involves a few steps.
– Touch Screen. The 4.3-inch touchscreen is very well thought out, intuitive, and user-friendly. All models have preview icons, which makes it easy to find the models whether they are loaded on the machine or on a USB stick. The history of the printed models is also available. However, there aren’t many options to adjust settings live during the printing. For example, to increase print speed, users must do so via an app or the Creality Print software.

©3DWithUs – Photo: Max Funkner
Before every print, the machine offers to perform calibration. I unticked this option in all cases, as it saves time and the printer still performs a quick Z offset calibration anyway.
– Noise and Vibration. The machine is noisy, especially when printing at high speeds and with all fans ON. Apparently, this is the new normal for all machines that have entered the ‘print speed race,’ as the last four Klipperized machines I tested had the same issues. To maintain a speedy flow and high temperature, bigger fans are involved.
At high speeds, vibration is also significant. The table should be stable; mine was not so much. After a few hours of printing, I found some light items on the floor as vibrations slowly moved them off the table. Please bear in mind that this vibration didn’t affect the print quality; this is where Input Shaping does its job.
AI Camera and Timelapse
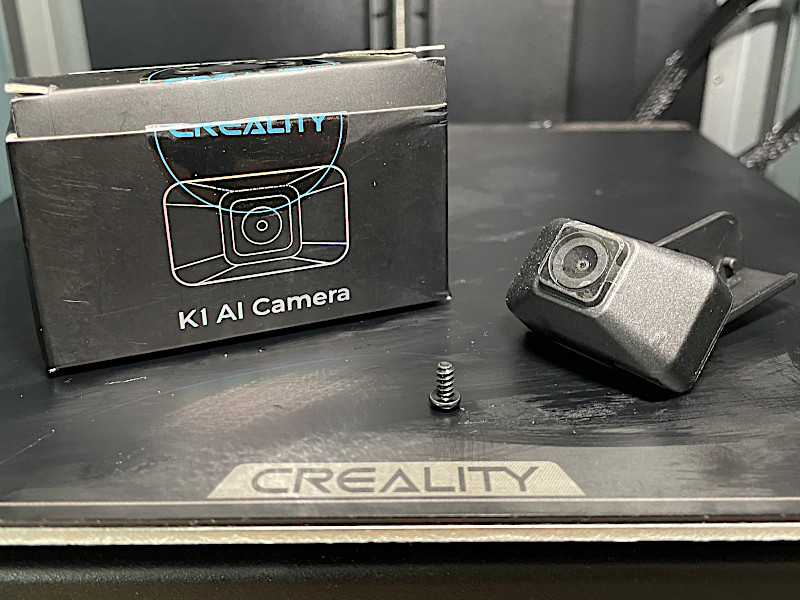
An AI Camera for the K1 is available as an optional, inexpensive add-on and it is included when purchasing Creality K1 Max.
I had a good experience with such a camera on my AnkerMake M5, which I reviewed recently. Not only does such a camera allow us to monitor the print process whenever we want, but it also captures decent timelapses. The Creality AI Camera can be purchased via the Official Website or on Amazon. It’s very easy to assemble with just one screw.
©3DWithUs – Photo: Max Funkner
The only con here is the timelapse file format. Despite managing to retrieve the file from Creality Print – Device – Timelapse Video, I could not open it on any player apart from using the Creality Cloud App. If there are changes, I will leave instructions here.

– Sleek Design. A special note about design: LED lights and a dark transparent enclosure make it look futuristic and cool, especially in a dark room. By the way, it is a rare case when LED lights do work well, and I prefer it more than other light sources in my workshop. Overall, with the spool hidden behind, this machine looks genuinely well.
Included Test Files and Prints
Initially, there were three pre-sliced test files included. The Speedy 3DBenchy was printed, as promised, very quickly in approximately 20 minutes. The included Creality Hyper PLA performed very well, leaving barely noticeable amounts of cobwebbing. For such speed, it is a very impressive Benchy.
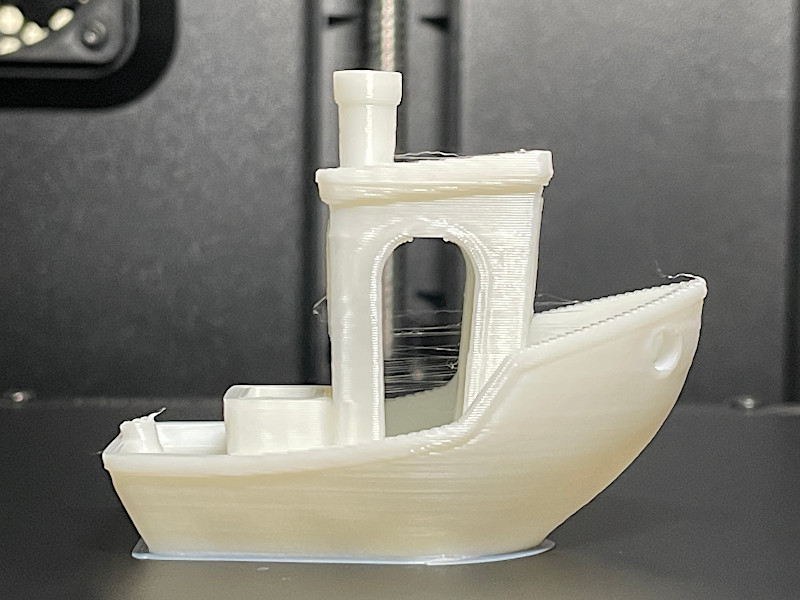
©3DWithUs – Photo: Max Funkner
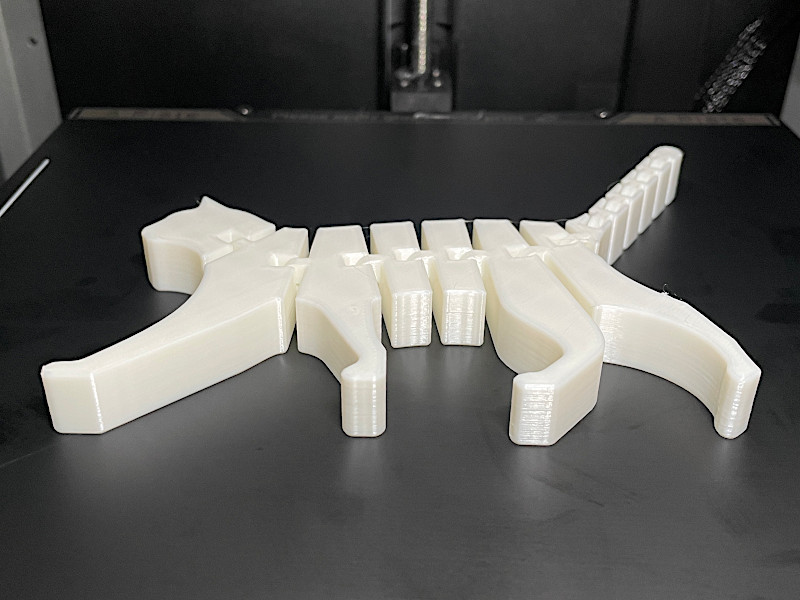
Without looking properly, I started the next print, which was the Flexible Cat. Usually, for prints that start with many multiple independent parts, I apply extra glue such as Magigoo for additional bed adhesion. To my delight, this print was completed well without glue and without issues.
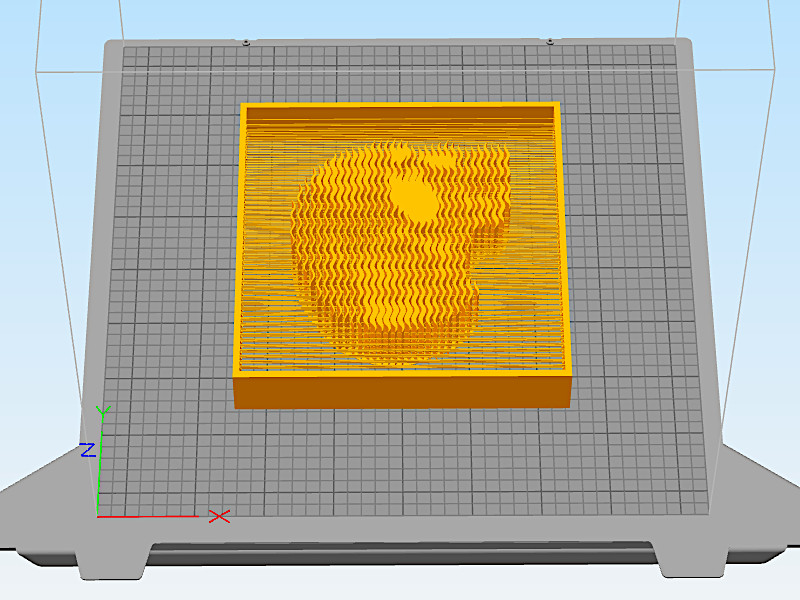
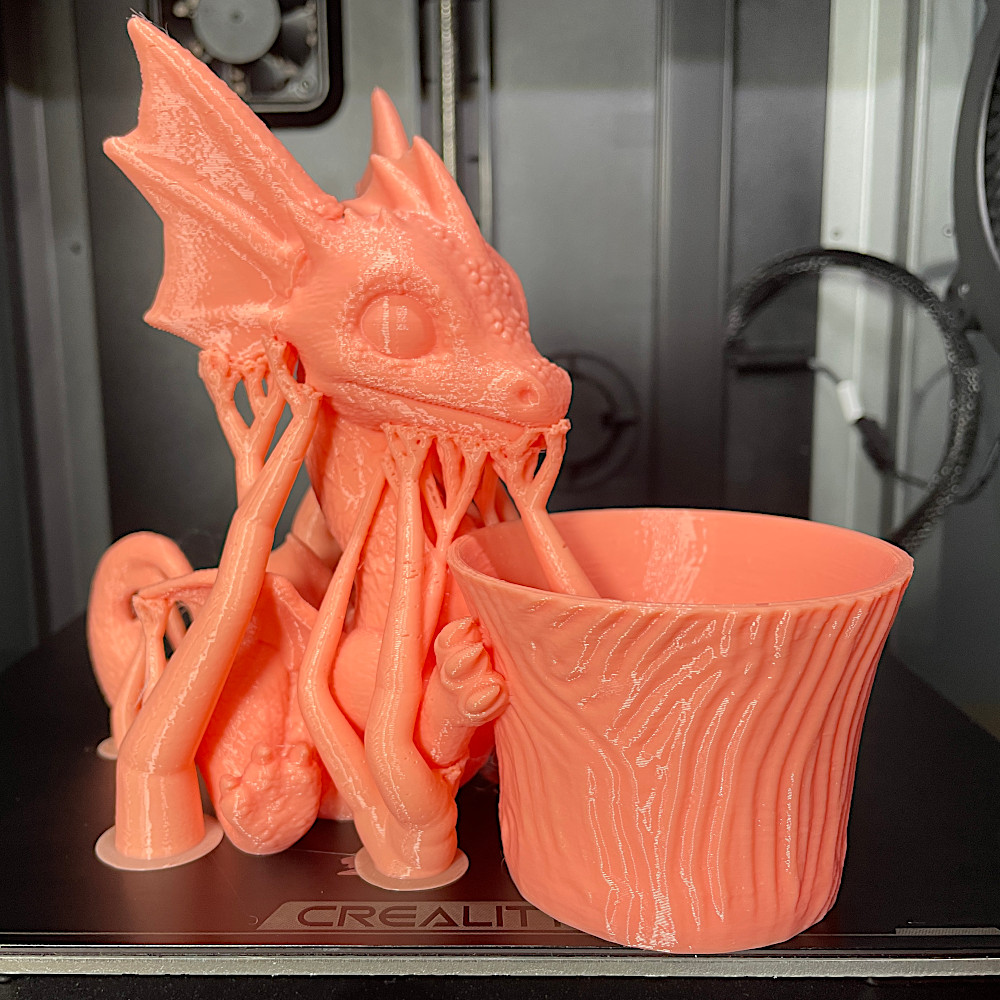
To test the maximum 600mm/s speed, there was a model in vase mode. Nothing special in design, just an object printed quickly in vase mode that had a good clean result upon completion.
3D Model by KIJAI on Cults
©3DWithUs – Photo: Max Funkner
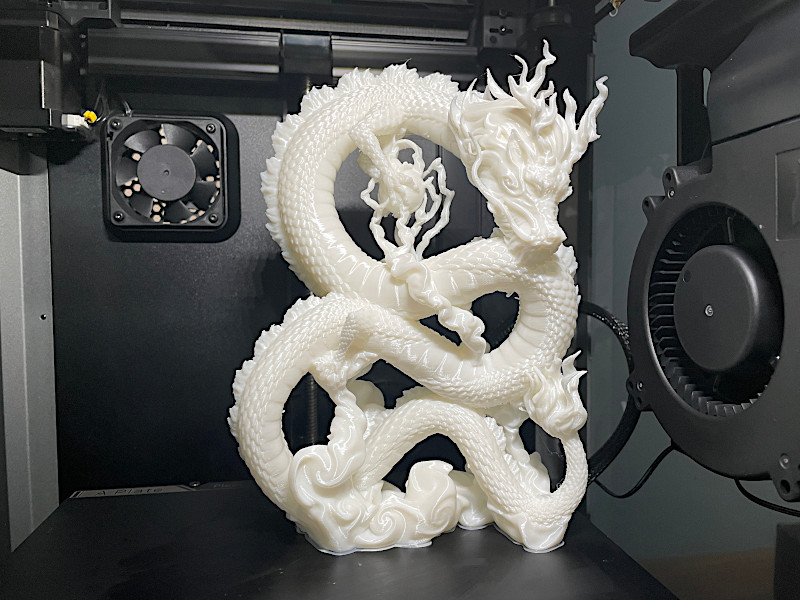
This dragon is not included but was sent to me by Creality representative along with a bunch of other pre-sliced G-codes. I’m still looking for the original creator of this model so I could leave credits here. The 20cm model is gorgeous and printed very well in approximately 11 hours. This model showcases the K1’s capabilities very well.
Slicer Software – Creality Print, Simplify3D
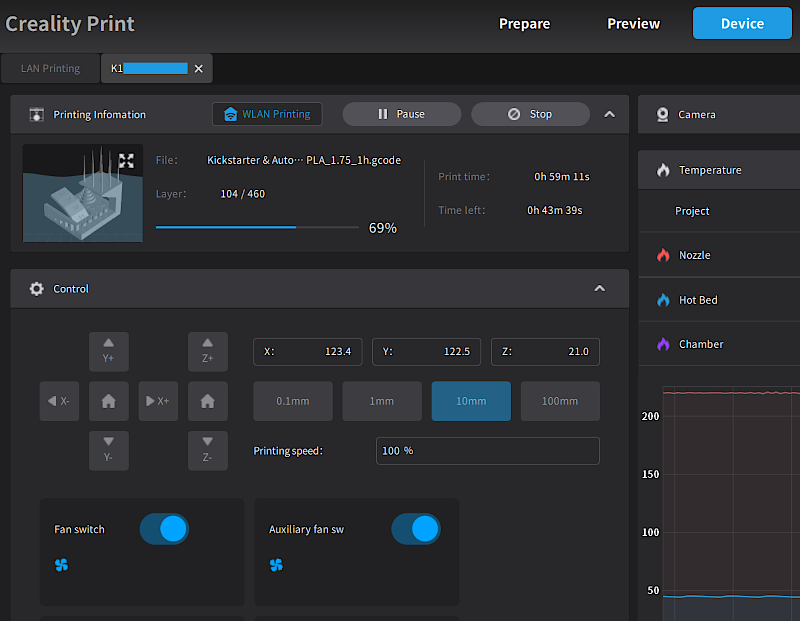
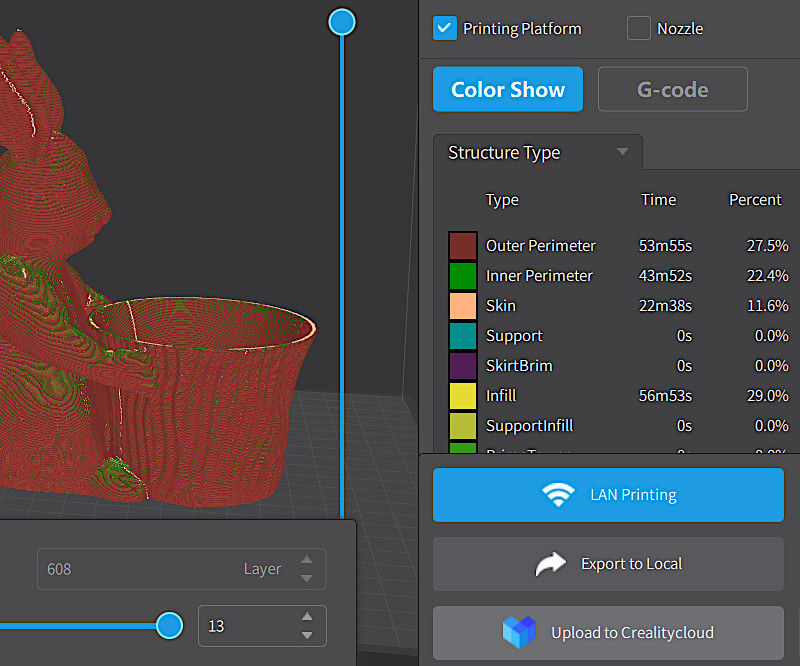
Generally, I am happy to see Creality finally has their own slicer. I sliced a lot of models using default and slightly tuned settings, and it worked well for me. If you go to Creality Print – Device – Details, it is possible to see the screen that very much resembles Klipper’s Fluidd interface. There, you can tune settings live, such as extruder temperature and printing speed. Via this screen, it is possible to start the print without the need to use a USB stick.
On one occasion, I could not slice the file and had to turn to Simplify3D. Simplify3D already has a Creality K1 slicer profile, and after tweaking a little bit more, I finally printed very challenging models that have a lot of retraction and very long bridges.
Apart from this, another case where Simplify3D and ideaMaker can help is when custom support placements are involved from the model itself in order to reduce post-processing.
Firmware – Modified Klipper
– No access to config. This prevented me from applying an automatic pause at a specific layer height. I was able to achieve an automatic pause for a filament change on such Klipperized printers as the Elegoo Neptune 4 Pro and Sovol SV07 Plus. If I find a way around, I will update this post accordingly.
WiFi, App and Creality Cloud
It took no more than a few seconds to connect to the internet, and again, I find it very addictive to send the files to the machine remotely. Freedom from a USB stick.
– 3D Model Library. Creality Cloud’s 3D Model Library is a feature-rich platform with 400,000+ 3D models. With ease I downloaded and printed my own Easter Bunny model.
Other Test Prints
Kickstarter Autodesk
This test model is challenging. It tests bridges, cooling, tolerances, and more, all at a very high speed. I printed the same file twice with Creality Hyper White PLA and SUNLU Green Antistring PLA. Both filaments are different, and I achieved slightly different results. There was some sagging on both of the prints; nevertheless, I believe it is an astounding result considering the print was completed in just two hours.
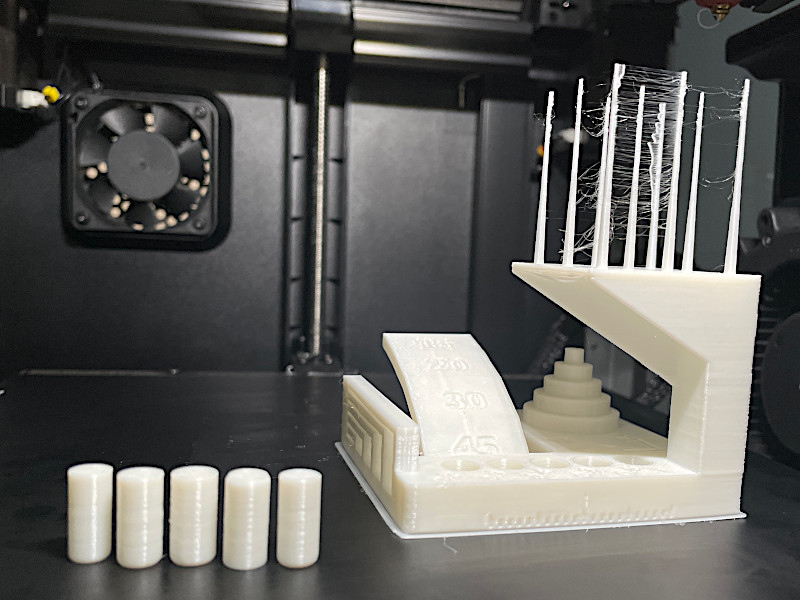
3D Model on Printables
©3DWithUs – Print and Photo: Max Funkner
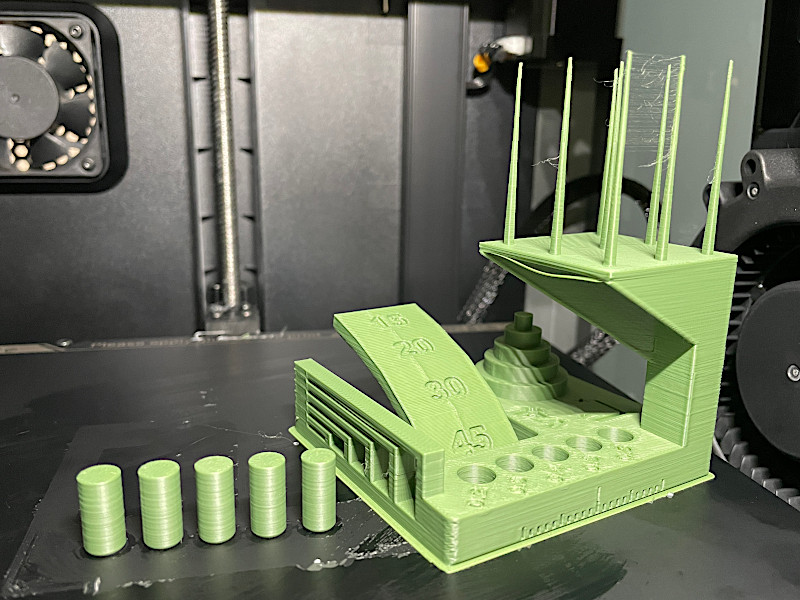
Together with ‘high-speed printing,’ there is a new range of filaments appearing on the market. While Speed/Hyper PLA has been around for a while, Antistring PLA is a new thing. I must admit that SUNLU Antistring PLA, which can be found on Amazon, performed very well, and indeed there was much less stringing on various retraction-rich prints.
Flexible Articulated Model with Many Parts
Coincidentally, I reviewed the Creality K1 during the Halloween season – the most popular season in the 3D printing community. Obviously, I printed zombies and skulls. One of the remarkable models this year that caught my eye is the Flexy Zombie Dragon by Toonz Factory. In SUNLU Green Antistring PLA, it looks stunning as it is, without painting.
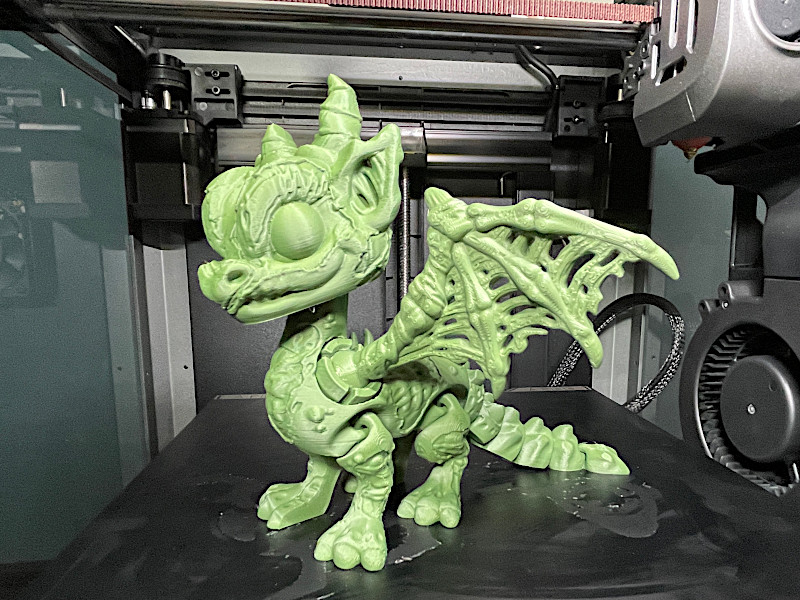
3D Model by ToonzFactory on Cults
©3DWithUs – Print and Photo: Max Funkner
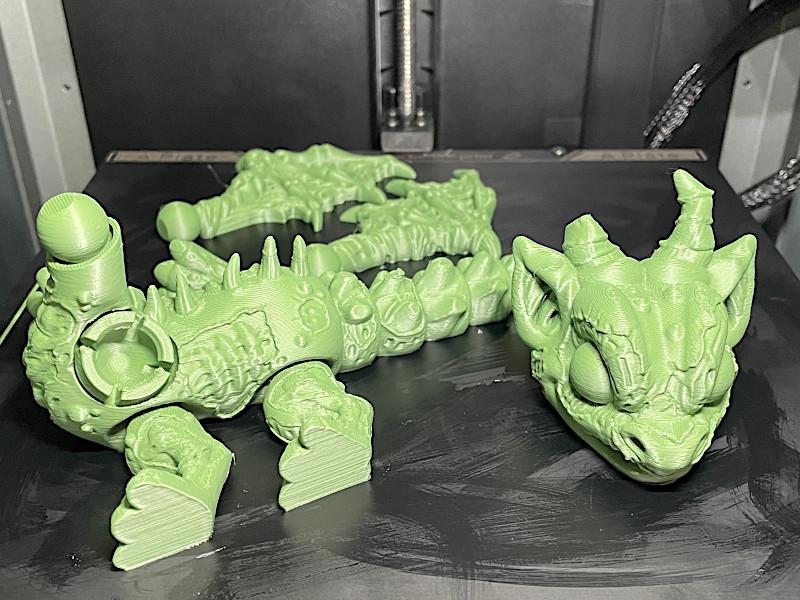
I used default settings in Creality Print software without adhesion settings to avoid excessive cleaning. The 70% scaled model took only 4-5 hours to print. As usual, Magigoo helped with bed adhesion. It was very easily removed from the bed and assembled, namely attaching wings and head to the body. The model is not just wiggly but can also take various positions. This model is definitely one of the favorite models in the Halloween 3D Print Ideas collection.
Bed Adhesion Glue for K1
Here is the Post-it Note holder together with Magigoo from Amazon. As the model is printed on the back, the first layer involves a lot of independent isles. Extra bed adhesion with Magigoo always makes sure there are no hiccups.
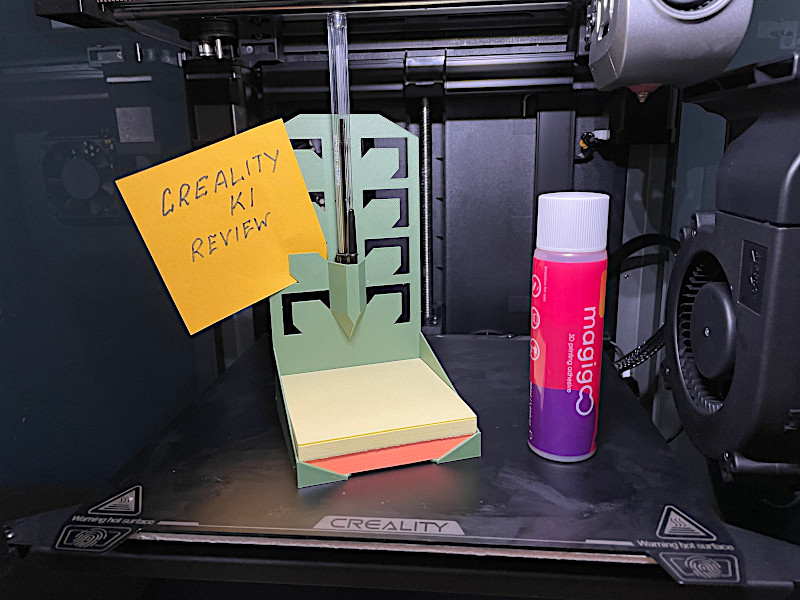
3D Model on Cults
©3DWithUs – Print and Photo: Max Funkner
In order to print this model without supports and avoid sagging in the pen holder area, it is important to switch to Wall Ordering to Outside To Inside in the Advanced slicer settings.
3D Printing in ABS – Fail and Success
ABS filament is very sensitive to adhesion, even with Magigoo and enclosure. The thing is, after I moved my printer from table to table, the bed became uneven. And even if PLA prints worked without problems, my ABS print failed at 90% of completion. The part was crooked due to warping forces, and I had to clear a lot of mess.
3D Model by Joel Telling YouTube
©3DWithUs – Print and Photo: Max Funkner
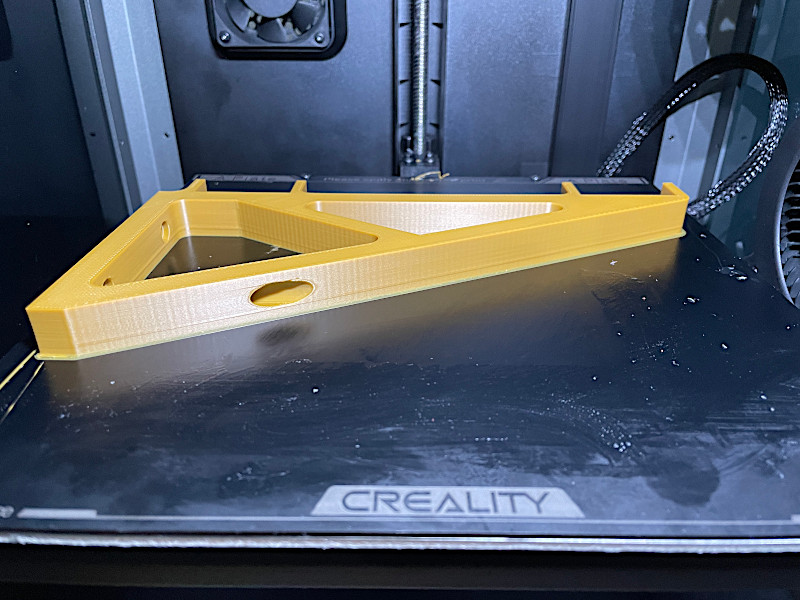
To fix that, I had to recalibrate the bed again by going to System -> Self Check -> Auto Leveling (and Input Shaping) on the K1 screen. After recalibration, I printed my brackets in ABS filament flawlessly.
It is an ongoing trend in the 3D printing community to print such brackets to build customized filament-holding shelves. To see such shelves in action and view other functional print ideas, have a look at this guide.
Bunny and Filament Dryer
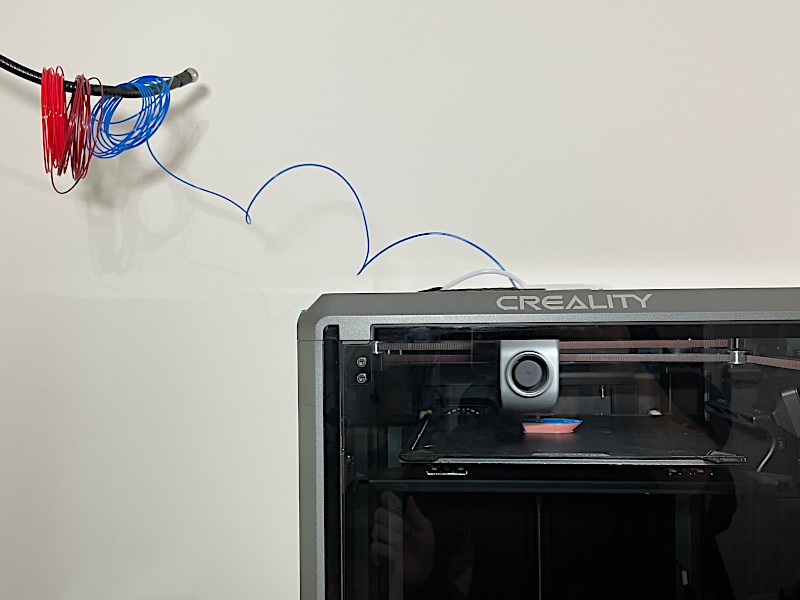
Also, I printed my Bunny in pink SUNLU PLA to test cooling and to check if the filament dryer can co-work with Creality K1. The model’s paws are at a very steep angle; sagging may be seen if there is not enough cooling. The model got completed in about 3 hours with the default settings, and cooling did an excellent job!
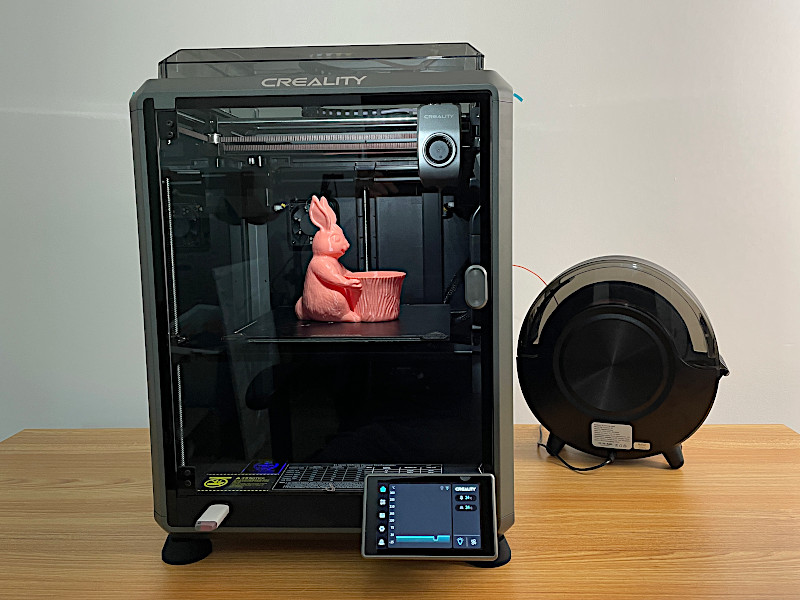
The K1 filament sensor was positioned back at the right height, which allowed me to use the filament dryer simultaneously. Whether during printing or prior to printing, such filament dryers can be good companions to keep the filament in the best condition. Read more about filament dryers and how they work on our website.
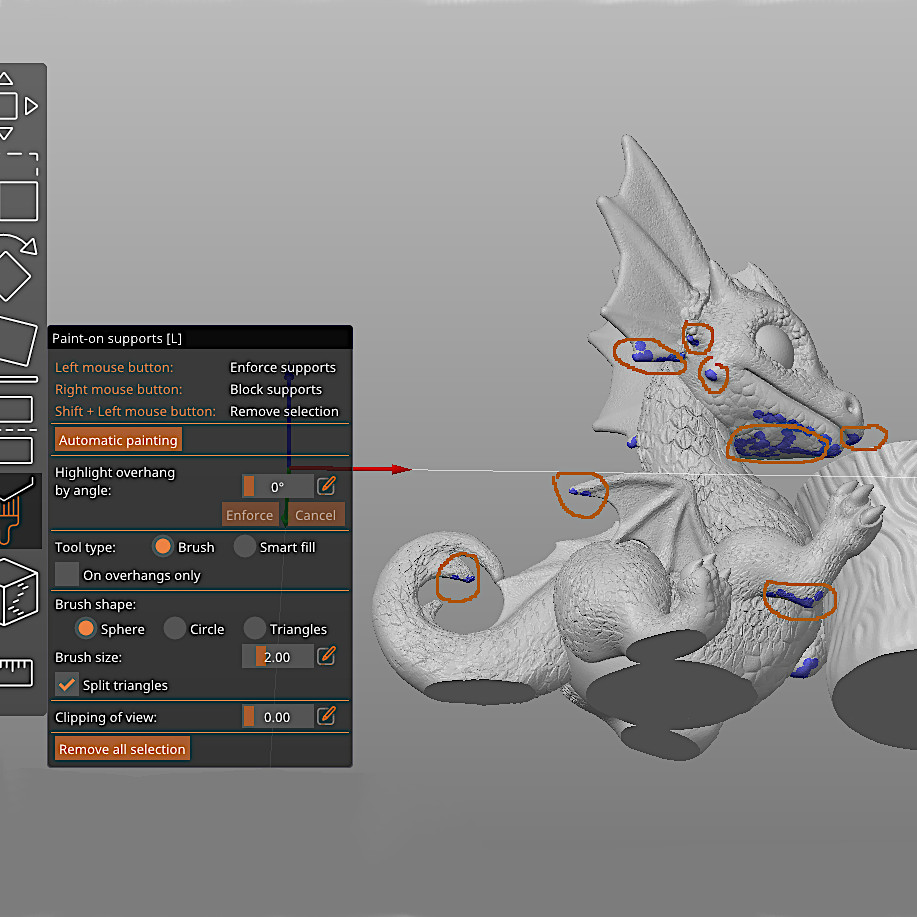
Organic Supports in Orca and Prusa Slicers
To apply organic supports in order to print some challenging models, Creality K1 range 3D printer users can use either an existing 3D printer profile in Orca slicer or build a custom profile in PrusaSlicer. I managed to fill all needed parameters in PrusaSlicer in order to print our new model from the Toy Pot Planter collection. It came out very well.
PrusaSlicer Preview
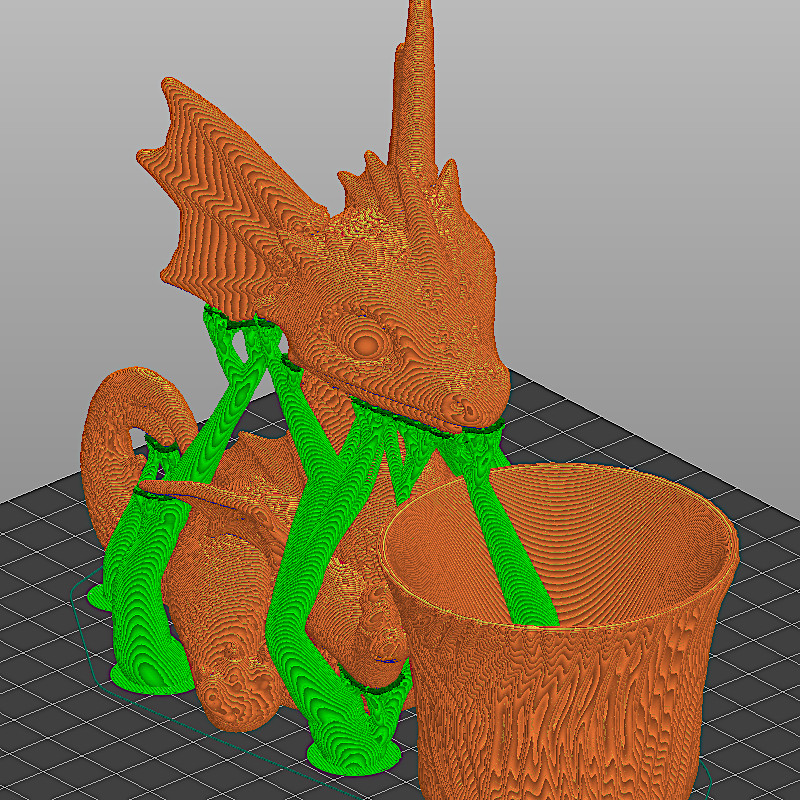
PrusaSlicer Preview
3D Model on Cults
©3DWithUs – Print and Photo: Max Funkner
Challenging model was printed in less than 7 hours. There are a few guides available to those who want to create a custom profile for K1 on PrusaSlicer. You can also download my .3mf file and retrieve the settings from there via our premium model on Cults.
Long Bridges
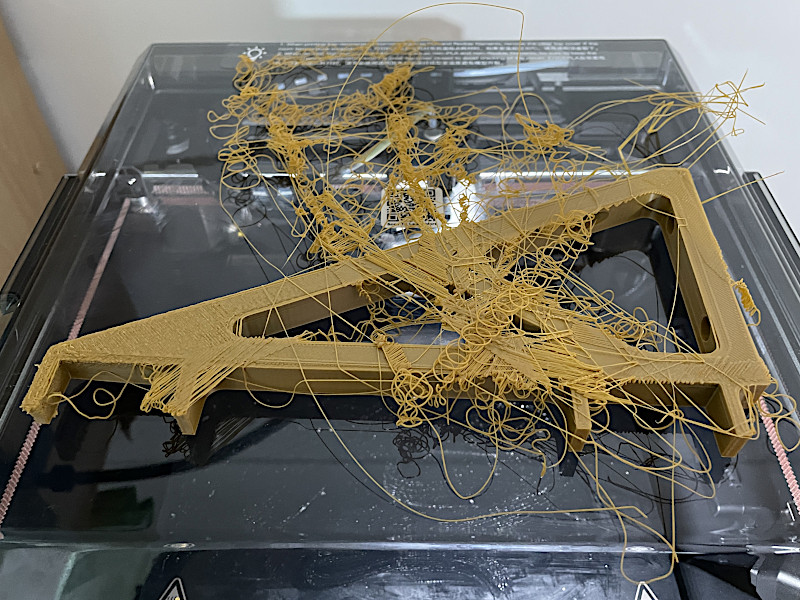
Fragmented Skull String Art by 3DPrintBunny is a very good seasonal torture test model for any machine. It has very long bridges and a lot of retractions. Bear in mind that, according to Natalie, it is a simplified version with a solid base. To make the most of her artwork, I printed the first layers in transparent PLA and the rest in Creality Hyper White PLA. This model challenges both the machine and the filament.
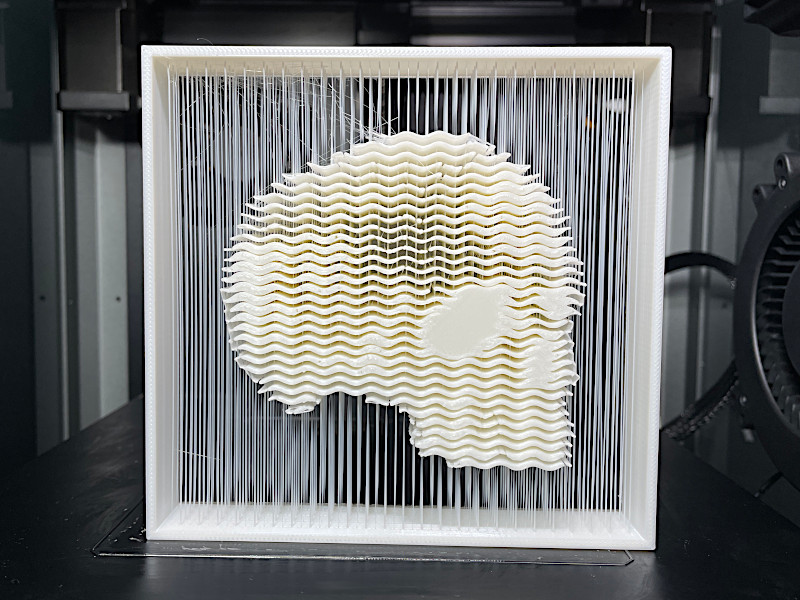
3D Model by 3DPrintBunny on Printables
©3DWithUs – Print and Photo: Max Funkner
On a second attempt, I achieved a better result. I turned the model 90 degrees so the fans don’t stretch the strings and also reduced the Bridging Speed Modifier to 80%. While my strings are not perfect, being very thin on one side, some tuning still needs to be done. Nonetheless, the ability to print such a complicated model in just 4 hours still amazes me.
Manual Filament Changes Mid Print
– Filament Sensor. There is no option to disable the filament sensor via the screen. For quick print jobs, I love to feed the filament directly into the extruder, which greatly speeds up the process. To fool the system, I just kept a bit of filament in and used a manual pause to switch the filament. As a result of the test, I have a Speedy Benchy with 2 color changes.
©3DWithUs – Photo: Max Funkner
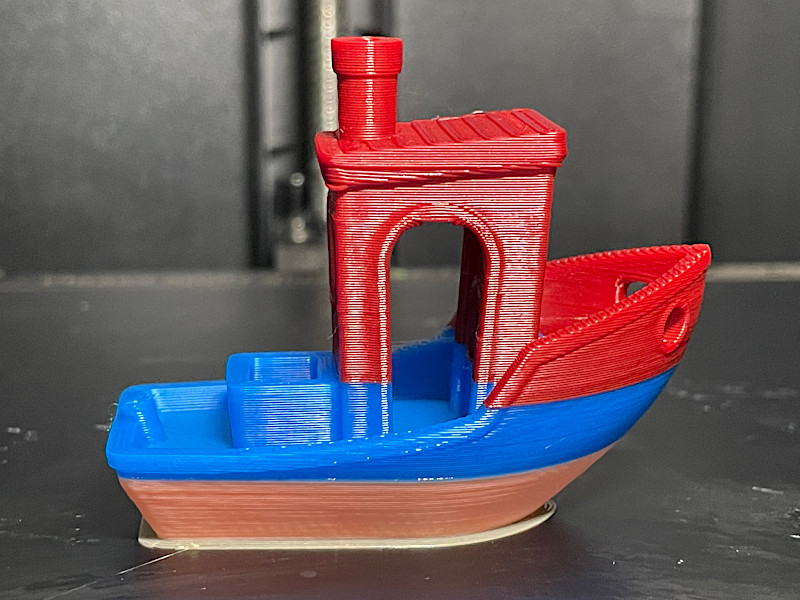
Featured above is the mid-print filament change performed by manually pausing the machine. It is a relatively easy, but not precise, process. A quick swap is needed if there is a desire to play with colors when 3D printing logos, for example. If I had access to the machine’s firmware config. file via the Klipper/Creality Print interface, I could set up this filament change at a specific layer/height to be automatic and more precise.
Custom Textured PEI Build Plates
Thanks to Ember Prototypes’ services, it is possible to obtain custom textured flexible PEI build plates for nearly all sizes. This allows for printing the first layers with unique patterns on desktop and larger FDM 3D printers without involving 3D software. I was fortunate to receive and test such a plate on my Creality K1 printer.
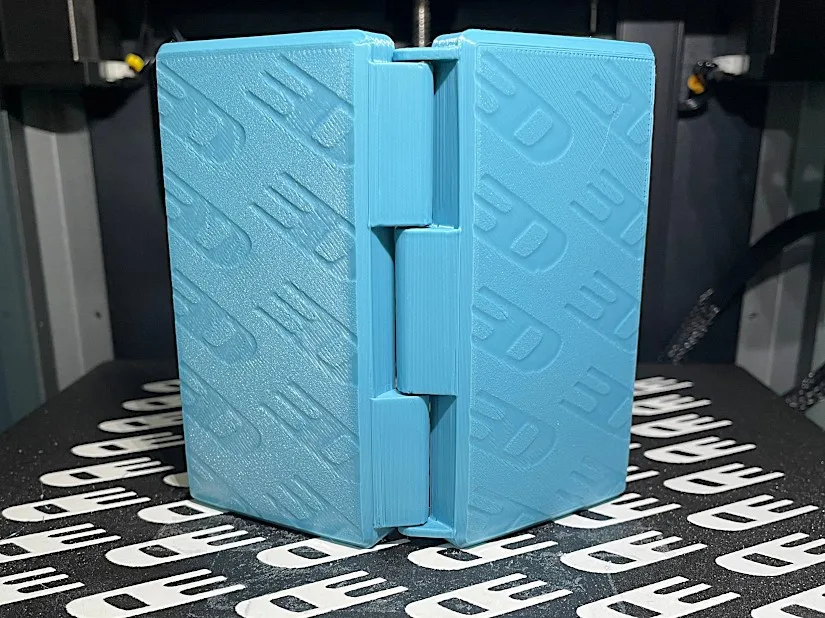
©3DWithUs – Photo: Max Funkner
The first prints instantly astonished me with the results and great potential. The usually dull-looking backside of the designs now has an extra feature. Read more and print examples here.
Compare to Other FDM 3D Printers
On 3DWithUs, we have a comprehensive comparison guide covering the best budget FDM 3D printers. This printer is in a slightly different category, both price and quality-wise and therefore a new comparison guide is coming soon. Compare to the similar build, volume, and the price range FDM 3D printers:
– Speed. There is fierce competition for speed in the consumer 3D printer market. First, AnkerMake was followed by Bambu Lab, and now Creality came in the form of the Speedy Creality K1 and K1 Max 3D printers.
– Price. AnkerMake M5, Bambu Lab P1P, Creality K1 and Prusa i3 MK4 Kit are in the same price range of $600-1000 depending on campaigns.
– Build. Build-wise, both the Creality K1 and BambuLab P1P are on the same level, featuring a stable CoreXY with an enclosed chamber.
– Multi Culor Option. With Bambu Lab X1 AMS and Prusa MMU already on the market, AnkerMake plans to bring their V6 version as well. Creality still has to offer their version of a multi-color option.
In the comparison conclusion, I would say that the four machines mentioned above are in competition at the moment for the same price range.
Compare to Other Creality Printers
The most recent Creality K1 Max should be a good contender. Even if the price is higher, this machine has a bigger print volume, and if it can maintain the K1’s speed and print quality, it is in a good position. Read the full Creality K1 Max Review by Will Zoobkoff here.
Creality is very well known for its previous CR and Ender series machines. Over the years, various models have been named as the best 3D printers in budget and other categories. With a new flagship, Creality keeps developing their other series of 3D printers as well.
Rooting Creality K1 Series 3D Printers
By following these steps to root and modify your K1 series 3D printers, you’ll open up a new world of possibilities for your device. Not only will these changes improve the machine’s performance and usability, but they will also enable a more tailored and efficient 3D printing process. Whether you want to fine-tune your printer’s settings, apply quality upgrades, or simply discover your device’s full potential, rooting the K1 with the enhancements indicated in this article will get you started.
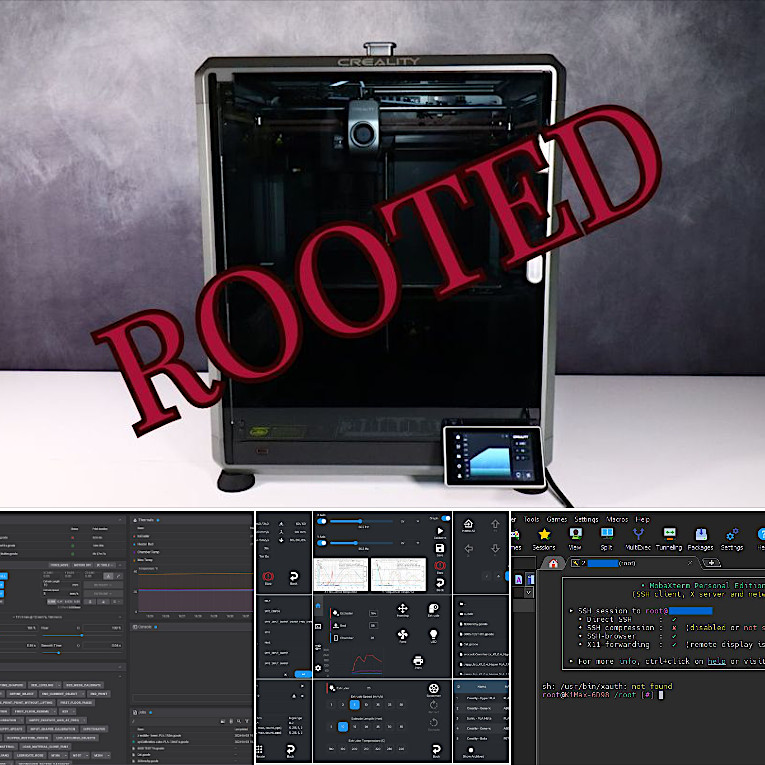
©3DWithUs – Images: WIll Zoobkoff
Conclusion and Pros & Cons
Amazon
AliExpress
Official Website
Creality Certified Store
Creality K1 Review
Review Summary
I am impressed with the Creality K1 and believe that it serves as a compelling response to other machines on the market that offer similar features within the same price range. With its stable CoreXY build, powerful extruder, and enclosed chamber, along with other standard features, this machine stands out as a top choice for many users. The automatic bed leveling and Input Shaping calibration enhance the user experience, ensuring successful and high-quality prints right from the start, just a few minutes after opening the box.
Pros.
Design – looks nice
Speedy – on defaul settings
WiFi, App, Software – all works well
Cons.
Noisy on high speeds
No access to config.