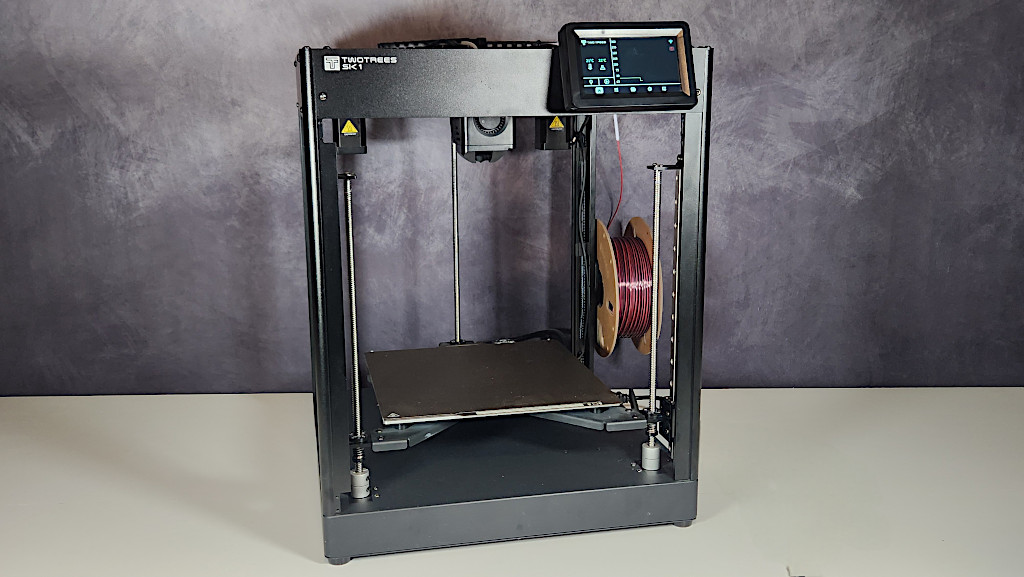
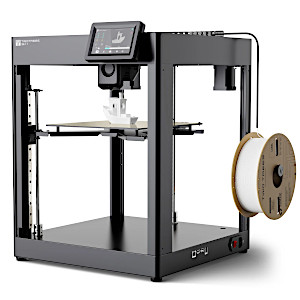
The newest Core XY printer from Two Trees, the SK1, differs slightly from the majority of Core XY printers available on the market. With its Klipper firmware, it provides high-speed printing at a maximum speed of 700 mm/s. It also has a number of auto-calibration capabilities, such as auto-leveling, flow calibration, and vibration correction thanks to the input shaper. The addition of Z-Tilt auto-leveling, which enables the SK1 to level the bed using the three Z-axis motors in addition to the 36-point ABL auto-level, is what distinguishes it from other models. High-precision linear rails on the X and Y axes are another feature of the SK1. In this comprehensive review, we examine the SK1’s build quality and test a few challenging prints to see how it performs. We will also list the pros and cons.
Table Of Contents
- Specifications
- Unboxing – What’s Included
- Setup and Design
- Testing and Results
- Compare to Other 3D Printers
- Conclusion and Pros & Cons
Two Trees SK1 Specifications
Build Volume 256 x 256 x 256 mm (10 x 10 x 10 inches)
Material PLA/PETG/TPU (up to 300 degrees)
Extruder Type Direct Drive
Print Speed up to Max 700m/s (Recommended 300m/s)
Nozzle .4mm hardened steel Bambu Clone
Build Platform PEI spring steel sheet, heated
Bed Leveling Automatic
Filament Runout Sensor Yes
Connectivity USB, Ethernet, Wi-Fi
Interface 4.3” touch screen
Machine Footprint 400 x 400x 530mm (15.7 x 15.7 x 20.8 in)
Machine Weight 13.3 KG (29.3 lbs)
Price: $499-$599
Product affiliate links: 3DWithUs is supported by its audience. Purchases via some links may earn us a small commission at no extra cost to you. This helps us to continue bringing you high-quality content. Our guides and reviews remain unbiased and independent.
Amazon
AliExpress
Official Website
Unboxing and What’s Included
• SK1 Printer
• 4.3” Touch screen
• Spool holder
• side cutters
• assembly tools
• wifi antenna
• USB drive
• USB EMMC reader/writer
• Spare nozzle
• Filament sample
• Power cable
• Assembly screws
• Cleaning brush
• Tweezers
• USB card
• User manual
• Power cable

©3DWithUs – Photo: Will Zoobkoff
Setup and Design
The Two Trees SK1 is one of the easiest printers to set up, with only a few steps needed to begin printing. The only elements that require installation are the touch screen, spool holder, and Wi-Fi antenna. Once these components are mounted, simply remove all of the shipping blocks and Z-axis shipping screws from the two linear rails. Before turning on the power, check that the voltage switch on the power supply is set to the appropriate voltage for your country. For example, in Canada, set the voltage to 115 volts.
©3DWithUs – Photo: Will Zoobkoff
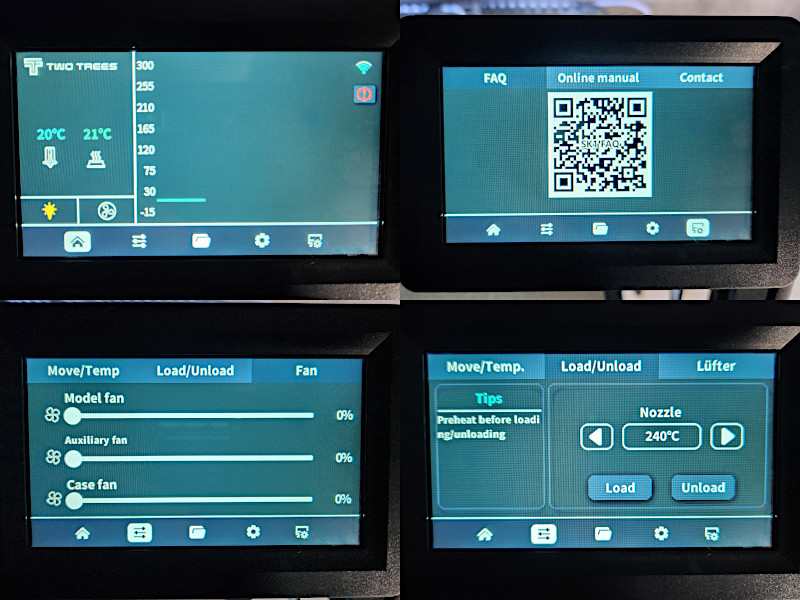
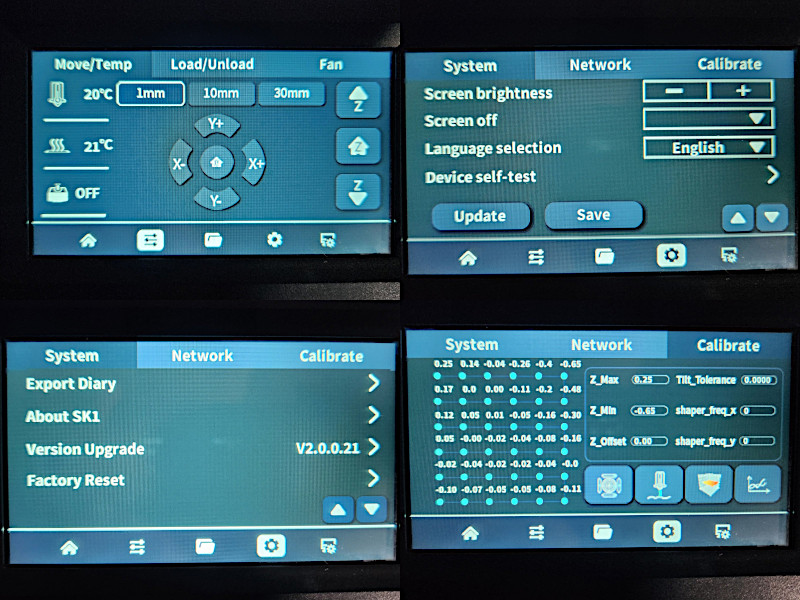
To access the settings menu, select the gear symbol at the bottom of the touch screen. From there, select “calibrate.” Calibration options are available for Z-axis tilt, Z offset, auto level, and input shaper. It is advised that you do the Z-axis tilt calibration first. After that, perform the Z offset calibration on a piece of normal letter-sized printer paper. Once you’ve set and saved your offset, use the auto level to probe a 36-point grid and save the levelling mesh. Finally, run the input shaper calibration, which vibrates the hot end along the X and Y axes and stores the results.
©3DWithUs – Photo: Will Zoobkoff
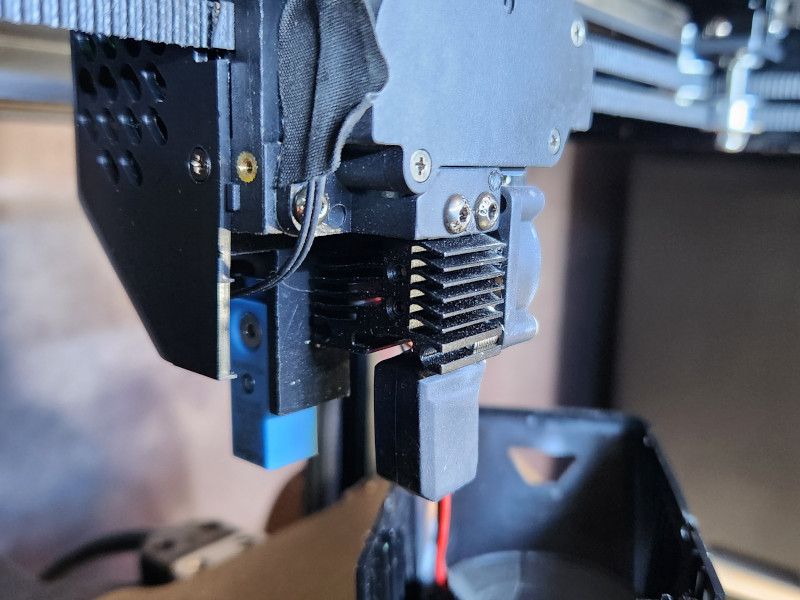
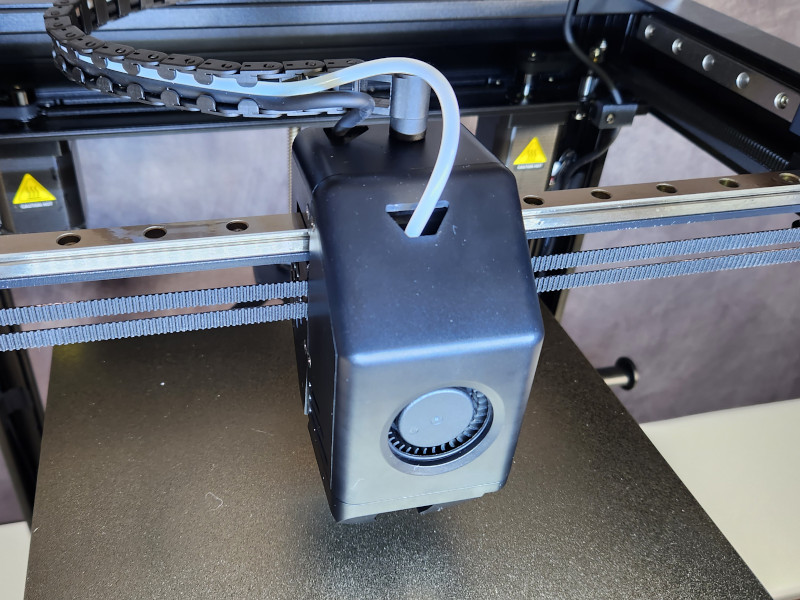
It has three independently driven Z screws, similar to Voron’s Trident design, however, it has a Bambu Labs hotend clone instead.

©3DWithUs – Photo: Will Zoobkoff
The printer came with a tiny spare nozzle that initially confused me until I realized someone had imitated Bambu’s hotend design but made the nozzle independent. All metal, the hotend can withstand temperatures up to 300°C. The nozzle itself, which looks to be long-lasting hardened steel based on its colour.
©3DWithUs – Photo: Will Zoobkoff
With all the features required to calibrate, initiate, and track prints, the Menu system is user-friendly and straightforward.
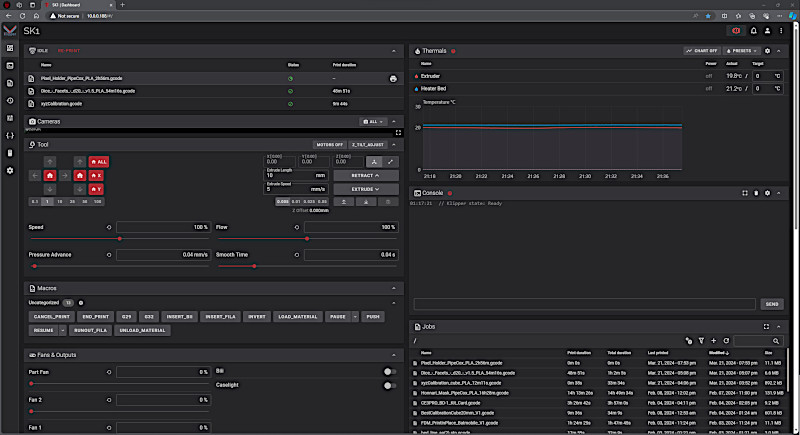
Additionally, you may access the online user interface (UI), which on the SK1 employs Fluidd, a well-liked Klipper interface.
– Auto-leveling. One of the SK1’s most prominent features is its Z-Tilt auto-leveling, an upgrade that uses the three Z-axis motors for bed levelling in conjunction with the 36-point ABL auto-level. This, paired with the accuracy of high-quality linear rails on the X and Y axes, ensures the best print quality and consistency.
The SK1’s user-friendly interface and full calibration options make it incredibly simple to set up and operate. The addition of Fluidd, a Klipper interface, improves the user experience by enabling easy access to online controls and monitoring.
Testing and Results
We decided to use Orca Slicer, a well-liked slicer with regular updates and new features introduced, for all of the slicing during our testing.
We utilized the Orca Slicer profile that comes with the Two Trees SK1 USB drive for the evaluation, making a few minor adjustments to fit our printing requirements.
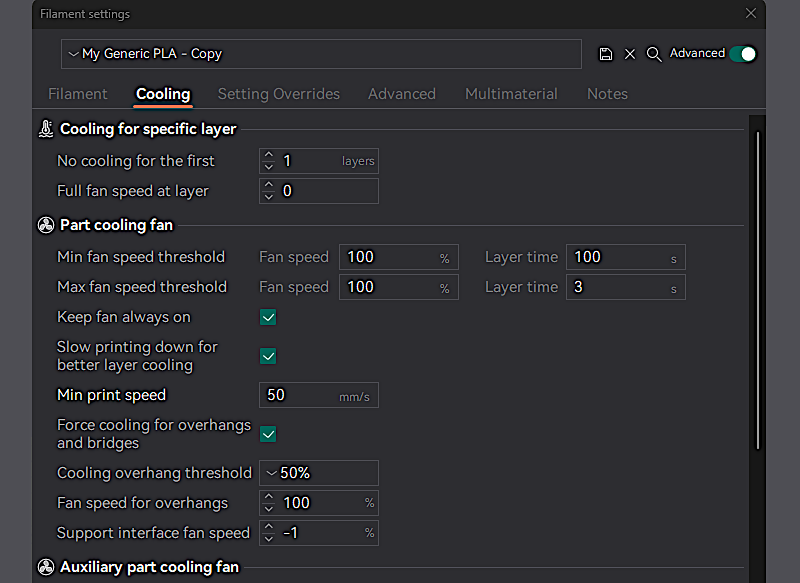
During testing, all of the models were sliced at 300mm/s with a layer height of 0.2mm, which is a good trade-off between print quality and speed. For our prints, we employed 10% gyroid infill. In order to guarantee that we print at the fastest possible speeds, we have modified the minimum layer time to 3 seconds. The filament setting tab is where you’ll find the cooling settings.
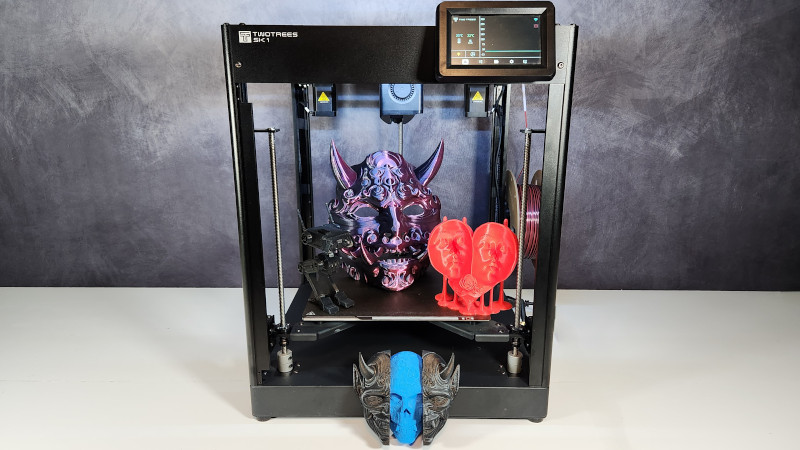
– Masks. We began our testing lineup with a model that really stands out: the Honnari mask, which is made by one of our favourite digital artists Pipe Cox and is accessible on Patreon.
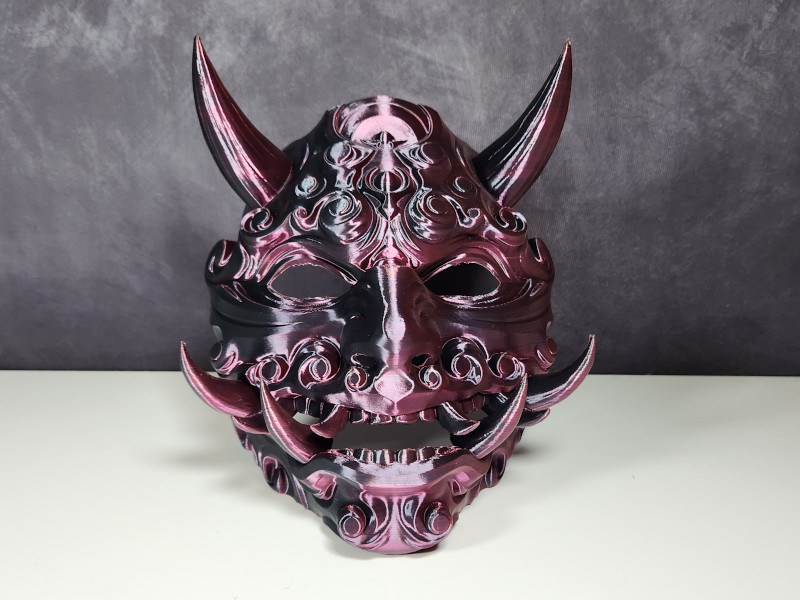
3D Model by Pipe Cox on Patreon
©3DWithUs – Print and Photo: Will Zoobkoff
Using Eryone dual-color Black and Rose Red Silk PLA filament, this amazing print was produced. The SK1 handled the print flawlessly, even with the fine detailing and complicated design. It took the printer a little under fifteen hours to finish, demonstrating its sturdiness and dependability all along the way.
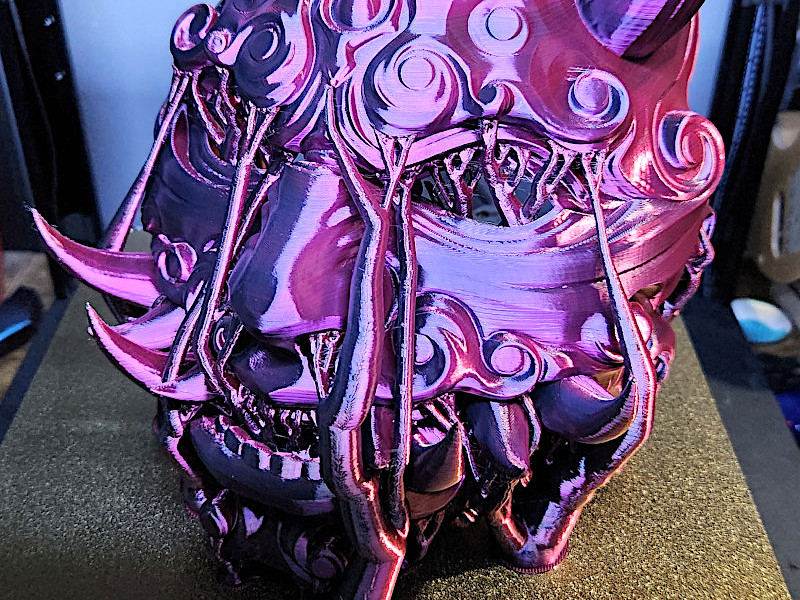
The complicated mask required a lot of supports to make printing possible, but the SK1 handled the situation flawlessly.
©3DWithUs – Print and Photo: Will Zoobkoff
It is impressive that not a single failure interfered with the printing process; every tooth came out clean and intact. The printer performed admirably, especially when it came to handling difficult elements like overhangs and delicate floating points that needed support. Ultimately, the SK1 produced an immaculate print that demonstrated its skills and deft craftsmanship.
We chose to remain with Pipe Cox’s engaging designs for our next printing experiment and went with his most recent creation, the endearing Loud Love model, which was made especially for Valentine’s Day. Red Sunlu PLA filament was used to create this charming sculpture because of its vivid colour and dependable printing capabilities. This model is especially interesting because of its clever design, which allows it to be printed without the need for extra support structures.
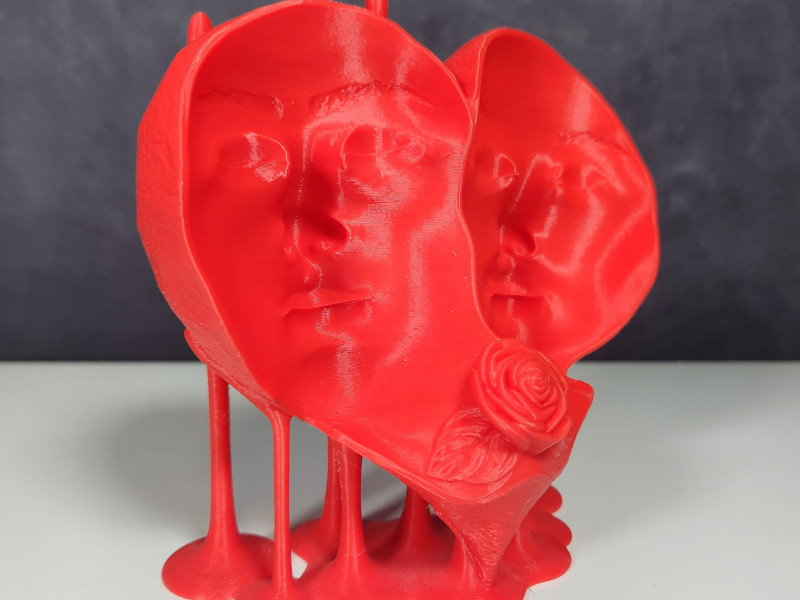
©3DWithUs – Print and Photo: Will Zoobkoff
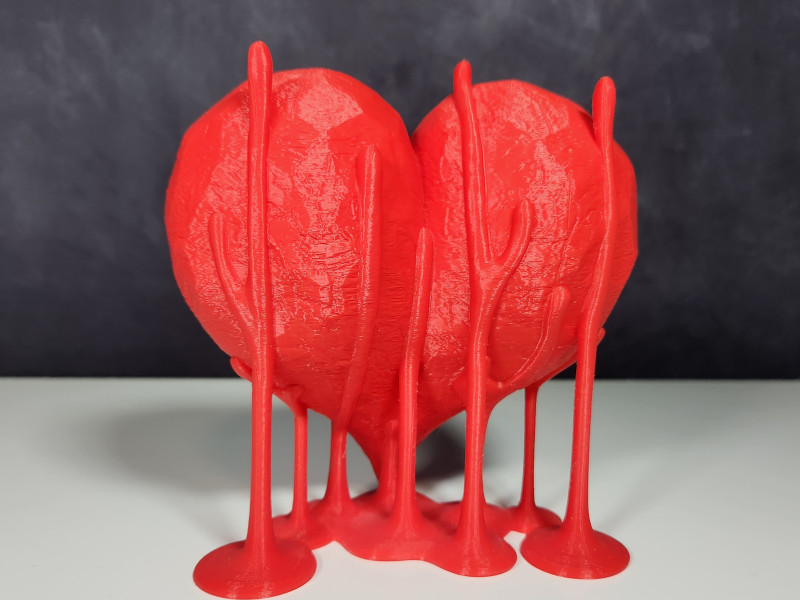
Loud Love was printed in less than five hours, which is a rather quick turnaround time. With each layer coming up one after the other, the SK1 painstakingly worked out every little detail with ease and accuracy. The outcomes were astounding when they were finished.

The print’s most striking feature was the rose, a representation of love and affection, that was gracing the model’s front. The SK1 captured the detailed beauty of the rose with remarkable clarity and detail, even at a layer height of 0.2mm. The printer’s exceptional accuracy and superior quality of output were evident as the petals unfurled with grace, capturing every little curve and shape with accuracy.
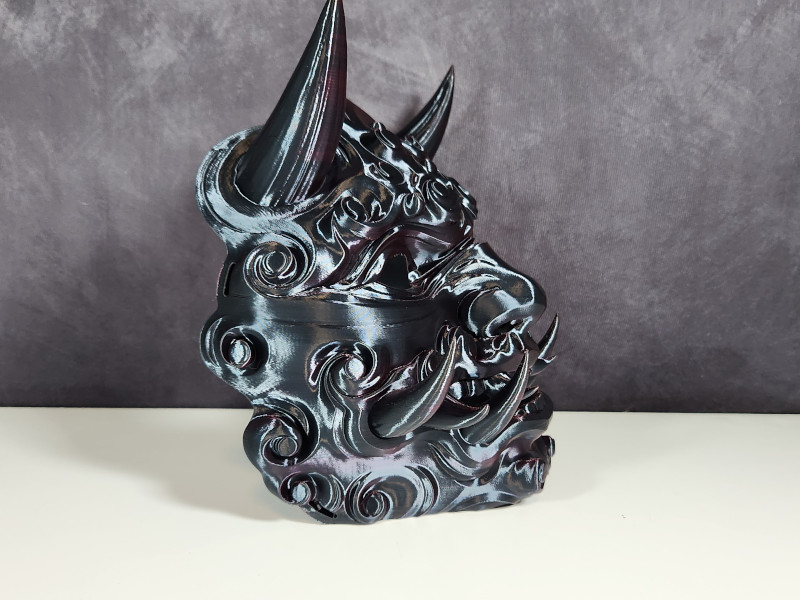
We chose the unique Behind Oni wall mask from Pipe Cox, another outstanding model, for our subsequent test print. This version is an improvement on one of his previous designs that had moving pieces. This updated version of the mask consists of three solid pieces that, when put together, smoothly interlock to form an eye-catching wall display.

3D Model by Pipe Cox on Patreon
©3DWithUs – Print and Photo: Will Zoobkoff
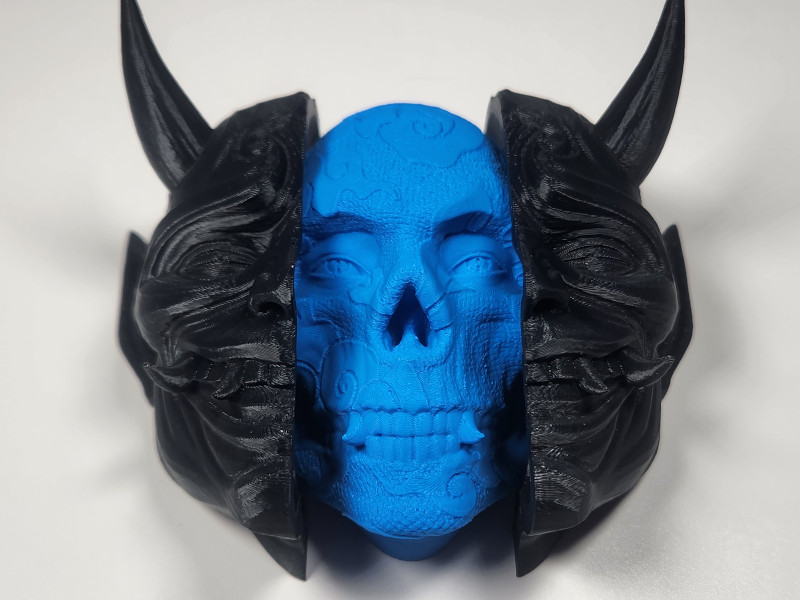
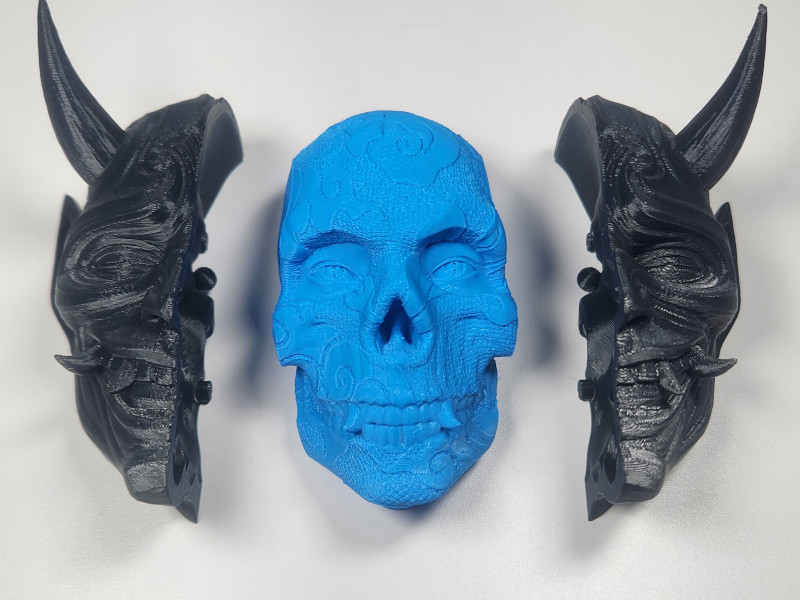
We used Two Trees Black PLA for the mask’s two side pieces and Creality Blue Hyper PLA for the skull component to print this complicated design. The printing procedure was split into two stages: the blue PLA skull took slightly more than three hours to finish, and the black PLA mask components took slightly more than four hours to complete.
The mask was easy to put together, each component fitting the skull tightly to produce a unified and eye-catching ensemble. The SK1 produced the print beautifully, traversing the mask’s delicate elements and numerous overhangs despite the design’s intricacies. The textural detail on the mask impressed us the most since it contrasted well with the flat surface of the mask components. This attention to detail improved the finished product’s overall aesthetic appeal by giving it more depth and character.
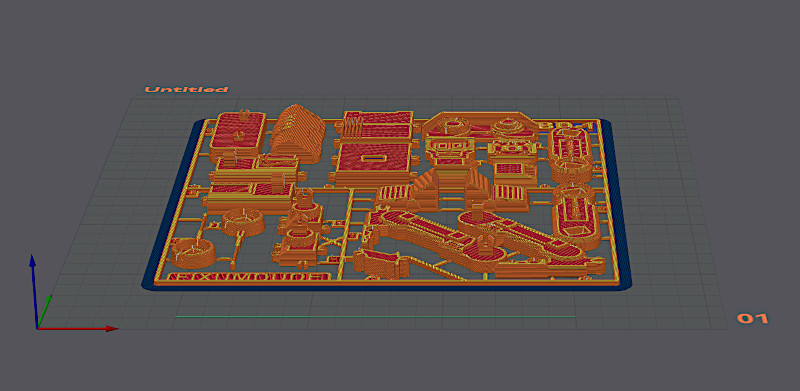
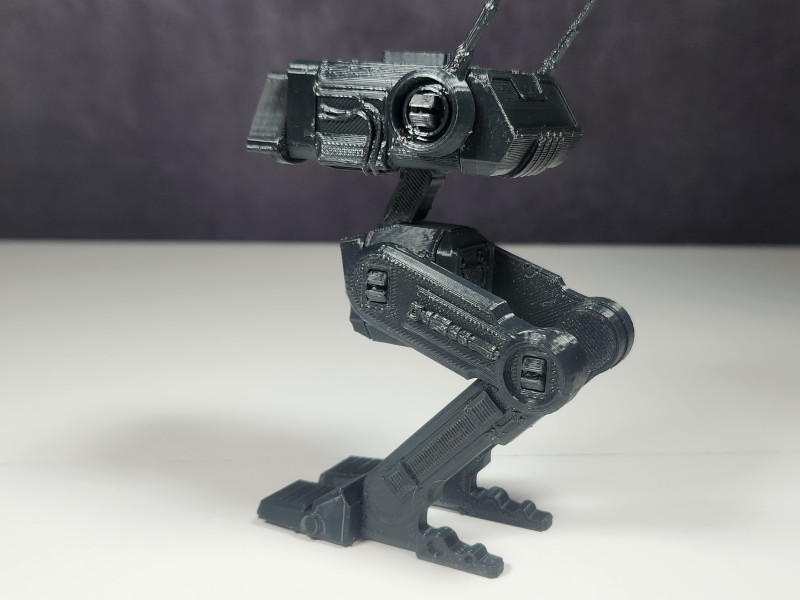
– Kit Card Models. Last but not least, we chose a charming Kit card as the final print in our testing, which is an excellent option for kids and the young at heart. We chose to print Fixumdude’s BD-1 Droid card from Printables since it was one of many models that were available. With the trusted Two Trees Black PLA once more, this model was finished in less than 4 hours.
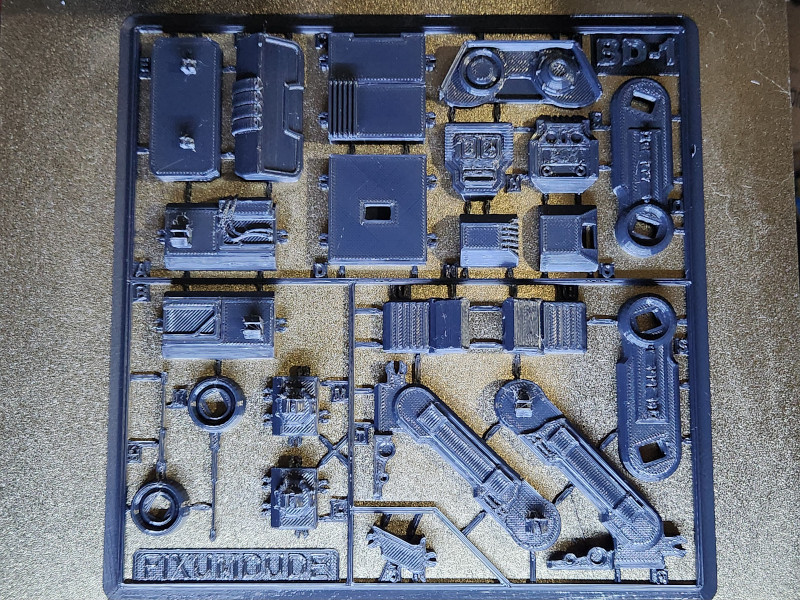
3D Model by Fixumdude on Printables
©3DWithUs – Print and Photo: Will Zoobkoff
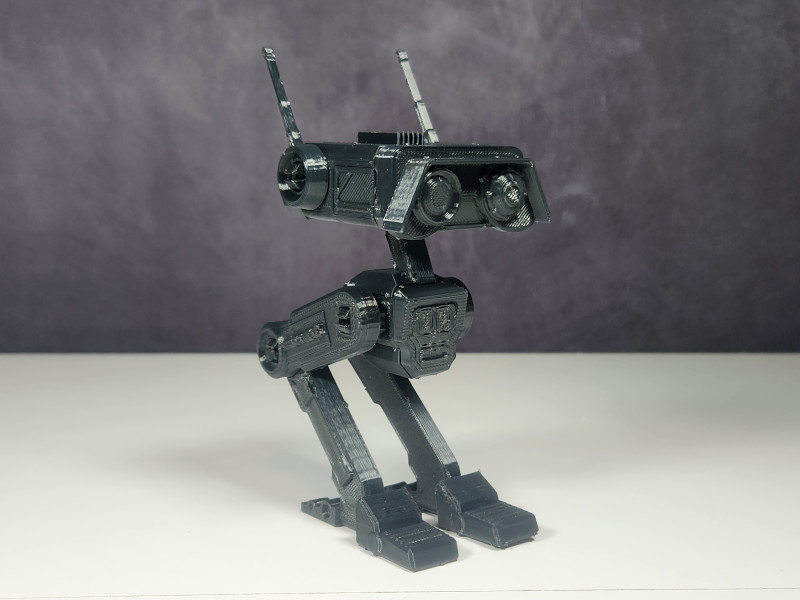
After taking the parts off of the printer, side cutters were necessary to separate them from the card outline. We discovered that the side cutters performed a fantastic job of reducing any tabs or bumps remaining from the support material. It was easy to assemble the parts as they all fit together snuggly and firmly. There was some movement possible as the legs easily clicked into position. Check out Kit Card models for another enjoyable 3D printing idea on desktop FDM printers. Find more details on our website.
©3DWithUs – Print and Photo: Will Zoobkoff
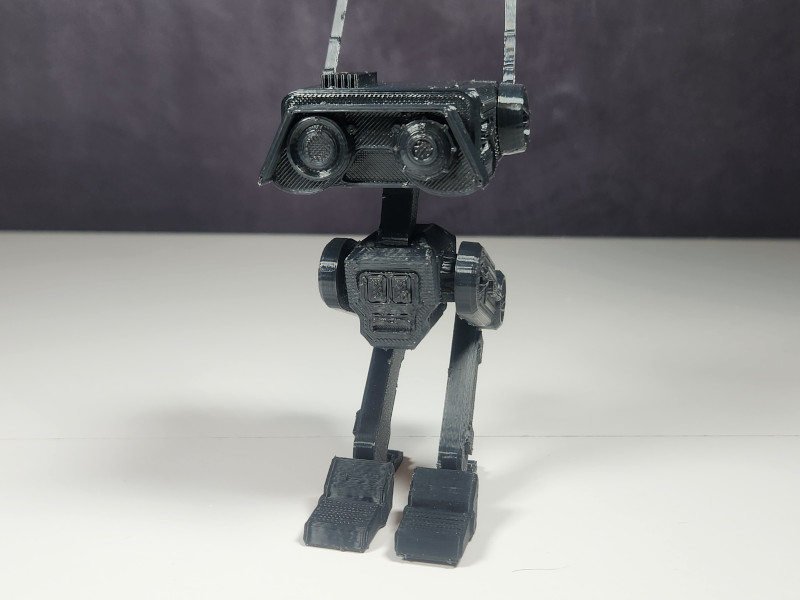
Once again, the SK1 excelled in producing flawless prints, with all components coming out clean and precise. The joining parts, such as tabs and slots, fit together tightly, resulting in a sturdy and well-crafted final product.
Compare to Other TwoTrees Printers
On the official website, apart from the Core XY 3D Printer TwoTrees SP-5 V3, it is possible to find spare parts and a filament dryer. For comparison, please find the SP-5 V3 specifications at the bottom of the page. The SP-5 V3 comes with Marlin firmware, and we see that its printing speeds are half of what the SK1 can achieve.
Compare TwoTrees SK1 to Other 3D Printers
On 3DWithUs, we have a comprehensive comparison guide covering the budget FDM 3D printers. To compare similar builds and price ranges, the closest would be the following machines:
©3DWithUs – Print and Photo: Will Zoobkoff
Conclusion and Pros & Cons
Amazon
AliExpress
Official Website
TwoTrees SK1 Review
Review Summary
The Two Trees SK1 stands out among Core XY printers, delivering a unique set of features and capabilities. The SK1 distinguishes itself from its competition by using Klipper software to drive high-speed printing at up to 700 mm/s, as well as a suite of auto-calibration offerings such as Z-Tilt auto-leveling, flow calibration, and vibration correction.
During our testing, the SK1 demonstrated its capabilities by readily handling a variety of difficult prints with remarkable precision and detail. From elaborate masks to humorous sculptures, each print exemplified the printer’s dependability and efficiency. The addition of Orca Slicer with a pre-configured profile simplifies the printing process by enabling for quick and easy setup.
In terms of specifications, the SK1 has a large construction volume and can support a variety of materials, making it appropriate for a wide range of applications. While it has some minor flaws, such as noisy fans and a lack of enclosure, these are outweighed by its excellent performance and ease of use.
Overall, we give the Two Trees SK1 4.6 stars for its remarkable features, excellent print quality, and user-friendly design. Whether you’re a rookie or an experienced user, the SK1 delivers a rewarding 3D printing experience, making it an appealing option for both amateurs and professionals.
Pros
• High speed 700 mm/s (300 mm/s avarage)
• Z-Tilt Calibration
• High print quality
• High temp nozzle 300
• Ease of use
Cons
• Loud fans
• Not enclosed