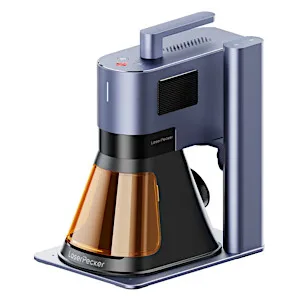
Known for its line of portable engraving lasers, LaserPecker has just released the LaserPecker LP5, its newest dual-laser combination. The LP5 is designed for artists and enthusiasts who require accuracy in metal cutting, engraving, and grayscale embossing – all in one device – and features a smoothly integrated 20W diode laser and 20W fiber laser. In this article, we’ll thoroughly review the LaserPecker LP5 and the optional additions. We will test laser cutting and engraving on various materials, including metal, brass, stone, and jewelry, providing settings and tips for each. In conclusion, we will list the Pros and Cons.
Update: We recently tested new accessories/addons for the LP5, including the safety enclosure and air purifier. Scroll down to see our updated impressions and test results.
Disclaimer: Laser cutting and engraving may be hazardous if improperly operated. Please make sure to follow the safety guidelines such as wearing eye-protective goggles and using the machine enclosure while operating.
Table Of Contents (Jump to a Section)
- Specifications
- Unboxing and What’s Included
- Setup and Design
- LaserPecker Design Space
- Testing, Materials, Settings and Results
- Materials, Settings and Supplies
- Safety Enclosure and Air Purifier NEW
- Compare to other Laser Cutters and Engravers
- Conclusion and Pros & Cons
Where to Buy the LaserPecker LP5
Price: $2,639 – $3,499
Compare the Prices & Bundles:
Official Store | Amazon | AliExpress
LaserPecker LP5 Specifications:
Dimensions:
Laser Unit: 255 x 98 x 183mm
Electric Stand: 198 x 286 x 323mm
Conical Protective Cover: 167 x 231 x 160mm
Net Weight:
Laser Unit: 3.36 kg
Electric Stand: 2.28 kg
Conical Protective Cover: 0.38 kg
Total Weight: 6.02 kg
Laser Power 20W 450nm
Laser Source: Blue Diode Laser, 20W 1064nm Fiber Laser
Working Area: 120 x 160mm (Ellipse), 100 x 100mm (Square),
160 x 300mm (With the Slide Extension)
Laser Spot Size: 0.08 x 0.1 mm(20W Diode Laser), 0.06 x 0.06 mm(20W Fiber Laser)
Max Working Speed: 10,000mm/s
Engraving Precision: 0.0027mm
Preview Mode: Rectangle Preview/Outline Preview/Center Point Preview
Supported File Formats:
PC Software: G-code/JPG/PNG/BMP/SVG/DXF
Mobile App: G-code/JPG/PNG/SVG
Connectivity: USB, Wi-Fi
Materials: 300 different materials
Unboxing and What’s Included
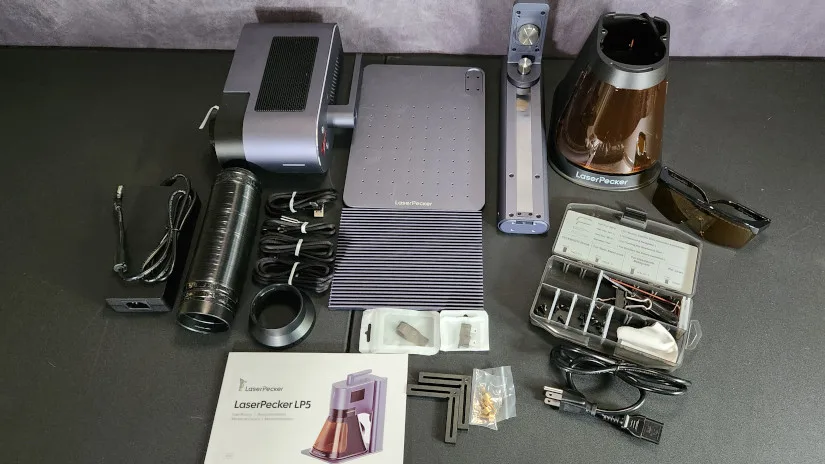
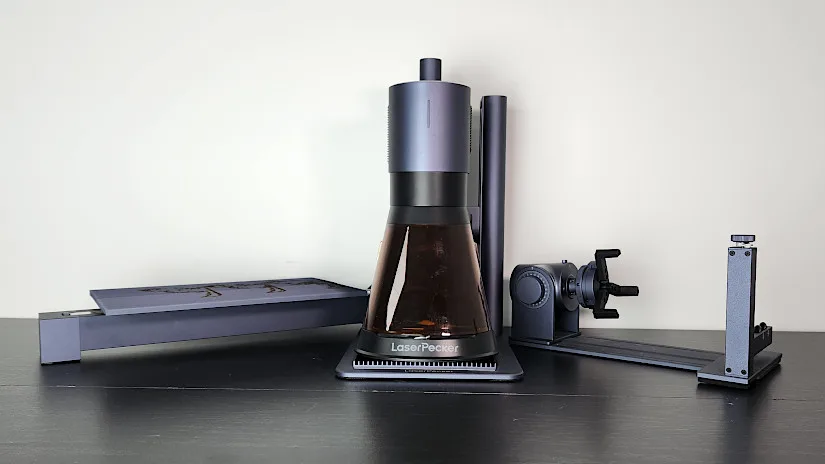
LP5 Deluxe: • LP5 Laser unit • Electric stand • Base plate • Cutting plate • Conical protective cover • Power cable • Power adaptor • 1.5m USB cable • 0.6m USB cable • Pipe w/ adaptor • USB flash drive • Tool kit • 2 x security keys • 2 x L-shaped positioner • Safety goggles • Sample material pack • User Manual
©3DWithUs – Photo: Will Zoobkoff
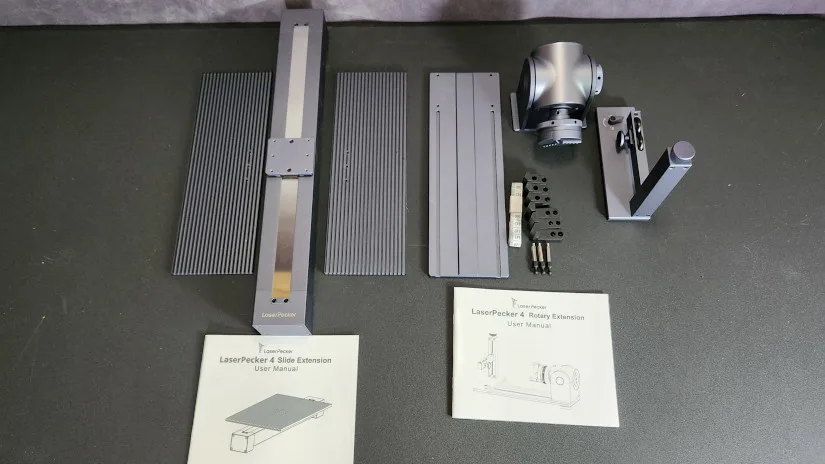
Rotary Extension: • 3 x double-step jaws • 3 x single-step jaws • Stud component • Rotary headstock • Base plate • Tailstock • Elevation pad • 1.0m USB cable • Measuring tape • Tool kit
©3DWithUs – Photo: Will Zoobkoff
Slide Extension: • Slide axis • 2 x cutting plate • 1.0m USB cable • 2 x binder clips • Tool kit • Desktop Air Purifier • Air purifier • Filter set • Power adaptor • 2 x cotton pre-filters • Fan adaptor • Air inlet duct • Air outlet duct • User Manual
Setup and Design
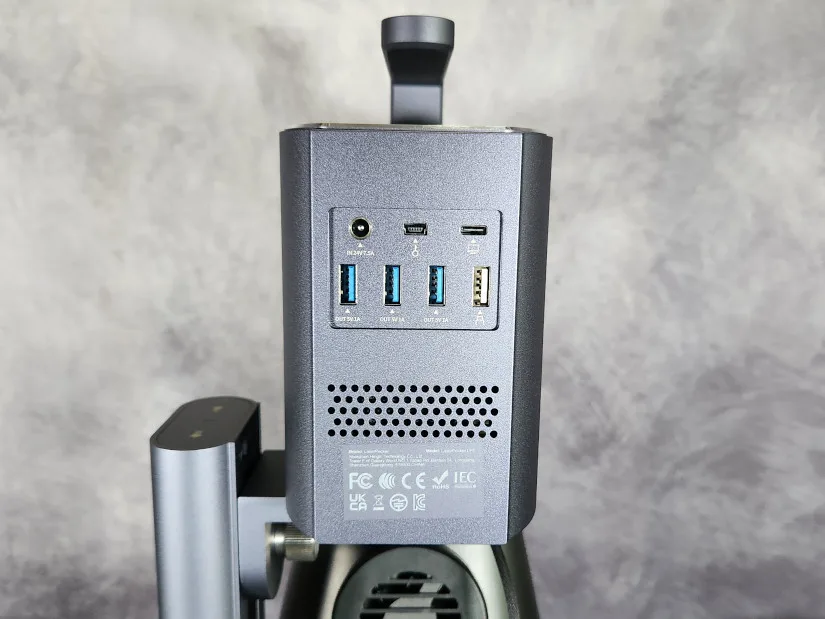
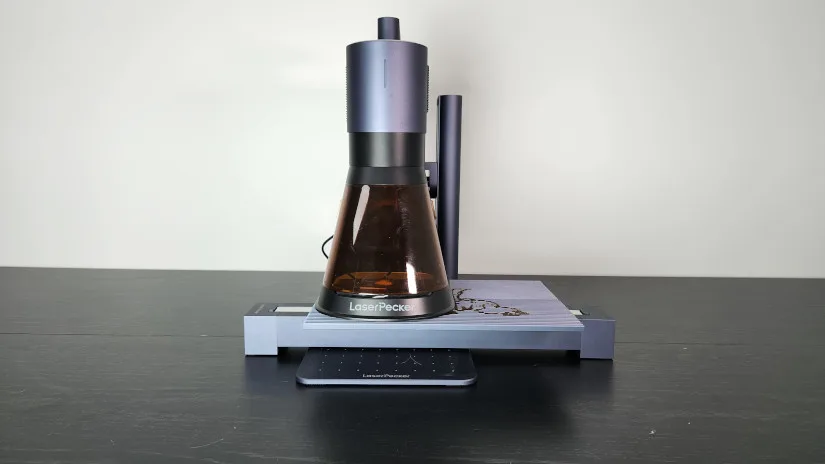
Setting up the LP5 is relatively straightforward. Begin by attaching the electric stand to the base plate using the supplied screws. Next, attach the LP5 unit itself to the stand. You’ll then need to attach the protective cover; in some cases, you may need to power on the laser and raise it to make room. Once the setup is complete, connect the fan cable to the back of the laser using one of the supplied cables to attach the laser to the electric stand.
– Safety Key. Finally, insert one of the USB safety keys to enable the laser. LaserPecker includes two keys with the unit in case one is lost, so be sure to keep them in a safe place.
©3DWithUs – Photo: Will Zoobkoff
– Slide Extension. For the slide extension, attach the two cutting pads to the base unit. When ready, position the extension and connect it to the back of the laser using the supplied USB cable. For the rotary extension, secure the rotary unit to the base plate using the provided screws. Attach either the jaw pieces or the stud pieces, depending on your project, then slide the tailstock support into the track, and you’re ready to go.
©3DWithUs – Photo: Will Zoobkoff
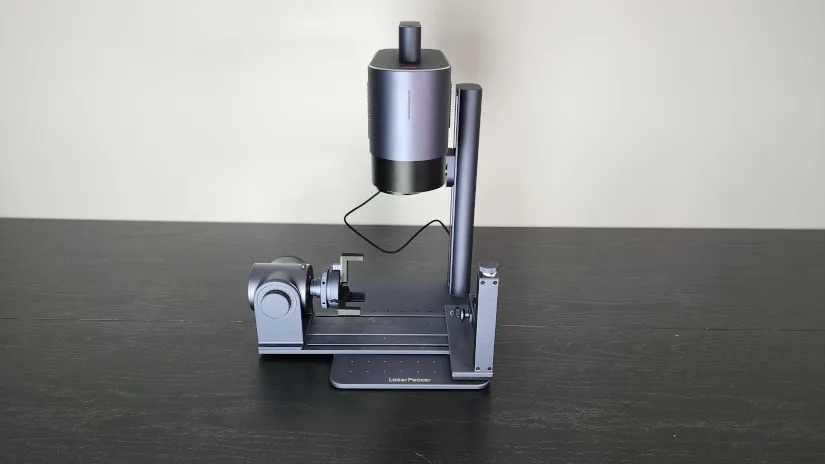
– Connectivity. Overall, the LP5 setup is really easy and quick. You can use the USB cable to connect the device to your PC or configure the WiFi using the mobile app. You can link your LP5 wirelessly to the device if you have a WiFi connection.
One key thing to remember is that the laser must be physically connected to the PC via cable in order to enable USB laser engraving. This is a limitation that might possibly be addressed in a future update. Also, with embossing projects, it is preferred to use USB mode because the size of the file is large which makes it hard to transfer over WiFi and can cause issues during the process.
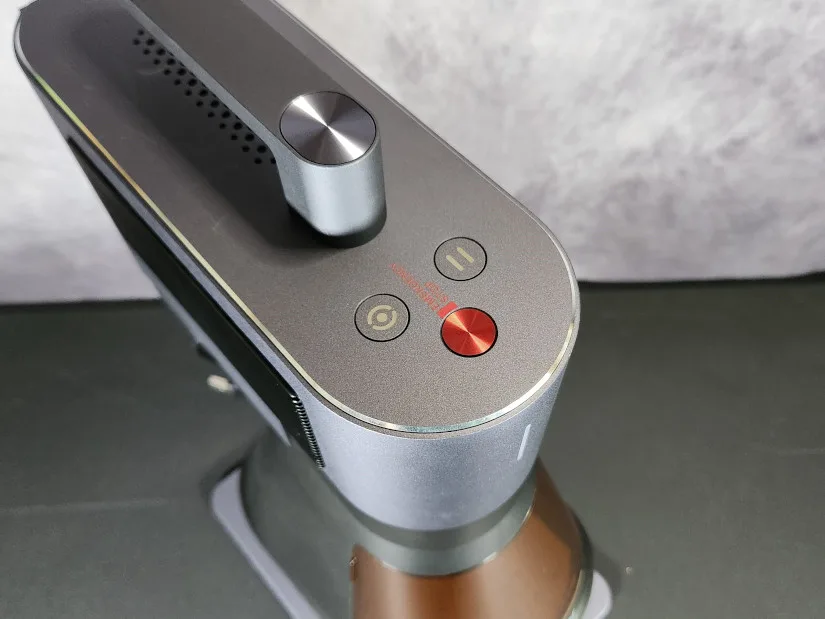
– Design. Following the sleek style of previous LaserPecker designs, the LP5 maintains the aesthetic but in a larger form factor. Although slightly heavier, the LP5 remains portable and stands out with its inclusion of both a 20W diode laser and a fiber laser.
©3DWithUs – Photo: Will Zoobkoff
– Deluxe Package. The Deluxe Package comes with several useful accessories, including a slide extension for working on larger pieces and a rotary extension with tilting capability, making it easier to engrave hard-to-reach areas. A base plate is also included for cutting projects, which is recommended to prevent marking or damaging the LP5’s base.
©3DWithUs – Photo: Will Zoobkoff
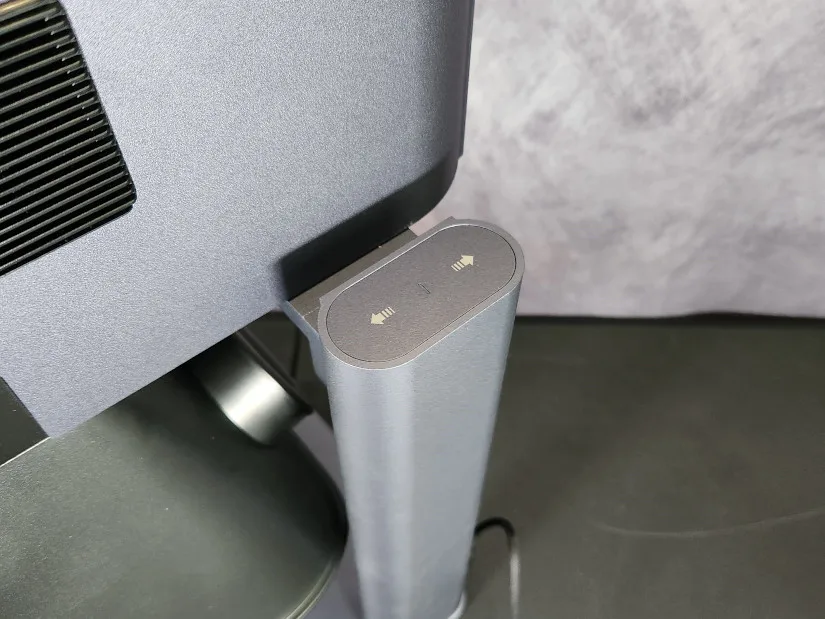
– Cover and Fan. The LP5 features a protective cover and a powerful exhaust fan, which includes an extendable hose. You can connect it to an external ventilation system or vent it out a window. The fan effectively removes dust generated by the embossing or engraving process.
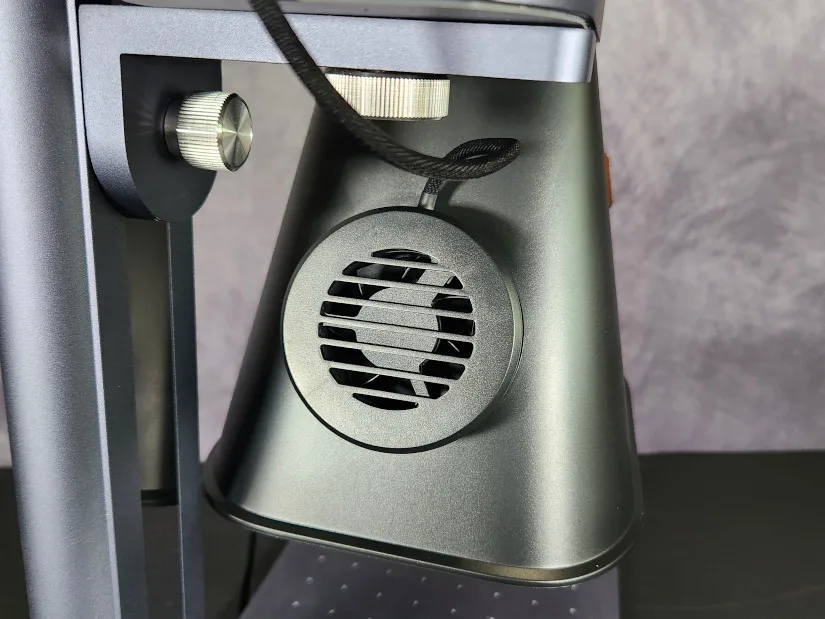
©3DWithUs – Photo: Will Zoobkoff
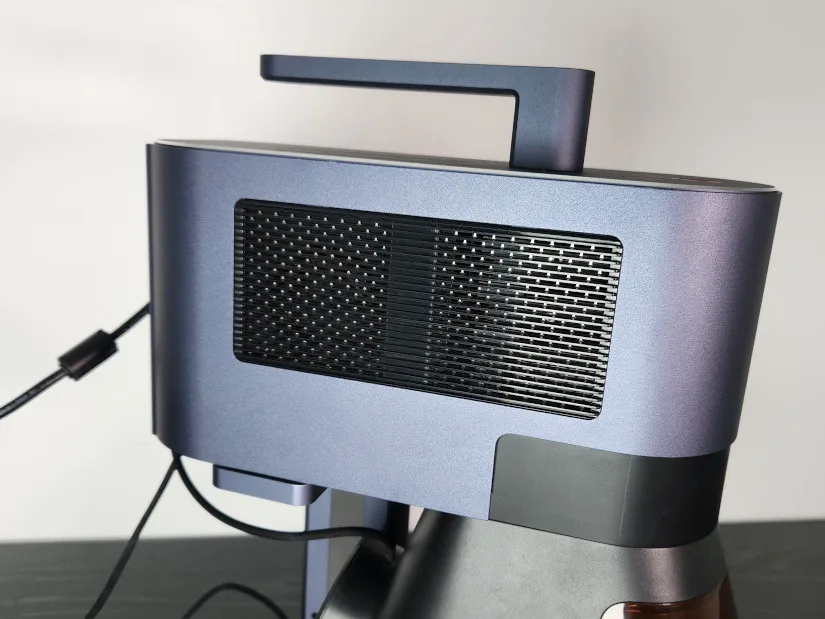
©3DWithUs – Photo: Will Zoobkoff
– Cooling. The LP5 machine is relatively loud due to the serious cooling required for fiber lasers. While many companies opt for liquid cooling systems, LaserPecker has cleverly engineered a more stable, portable design featuring a large heatsink cooled by a powerful fan. Although somewhat noisy during operation, this cooling is highly beneficial for the laser, maintaining its temperature during extended periods of engraving or embossing.
Software – LaserPecker Design Space
LaserPecker provides its own software, LaserPecker Design Space (LDS), available for PC, Android, iOS, and macOS. Personally, I prefer using the PC version of programs whenever possible, as I find it easier to work with and more feature-rich compared to some mobile apps, which can occasionally lack certain functionalities.
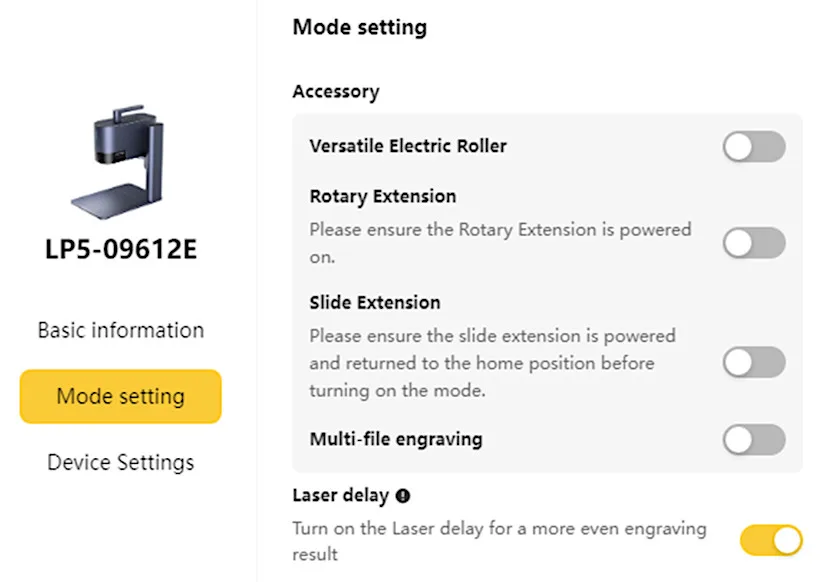
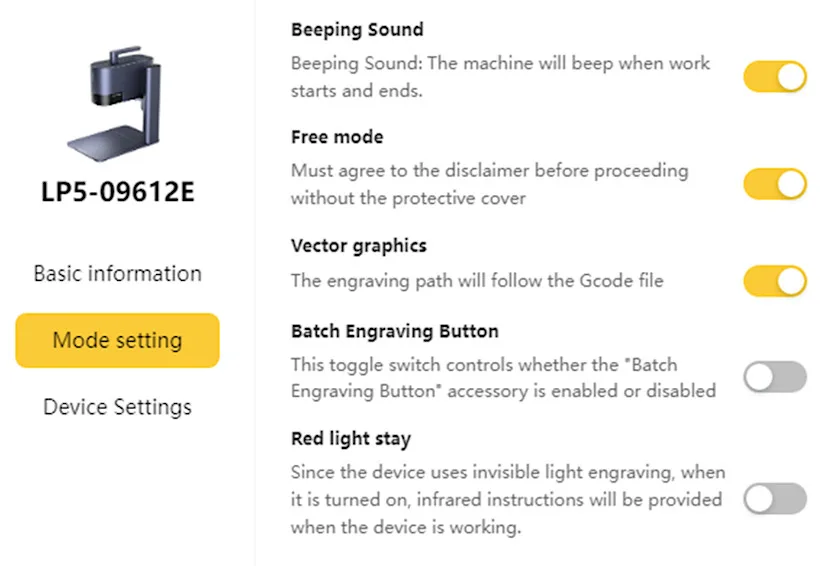
If you’re using the LaserPecker LP5 for the first time, you’ll need to connect it via USB and click “Connect.” Once connected, navigate to the device settings to configure the WiFi, enabling wireless operation.
LDS includes everything you need for cutting, engraving, and embossing, with a simple layout that places all your settings on the right side of the screen and provides a large workspace.
– Embossing. For embossing mode, you’ll need to load a depth map image. After loading, click the image icon at the top left of the workspace, then select Grayscale to enable embossing mode. While there are preconfigured settings for scoring and cutting, there aren’t any predefined options for images, so some experimentation may be needed to achieve the desired results.
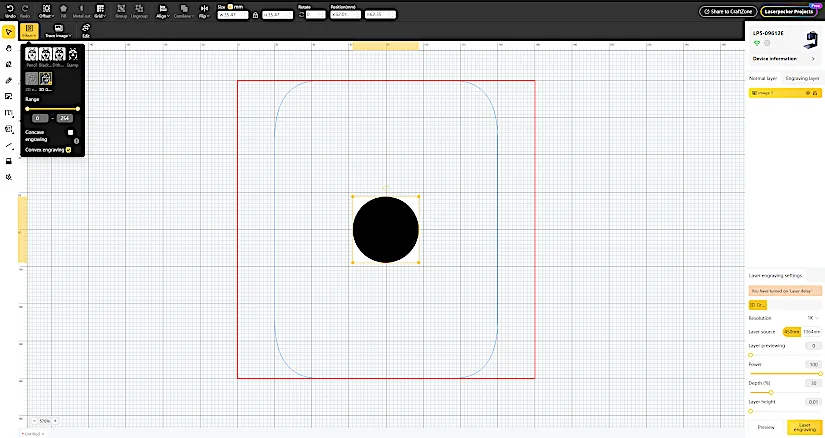
Preview in LaserPecker Design Space Software
– Settings. The LP5 uses slightly different settings compared to most lasers on the market. For the diode laser, the key settings include Power, Passes, and Depth. Increasing the depth slows the operation while reducing it speeds things up. For the fiber laser, you’ll need to adjust settings such as Laser Frequency, Passes, Power, and Depth. Depending on the material you’re engraving, there might also be a Duration setting, which determines how long the laser remains on each spot, measured in milliseconds. Higher duration values typically correspond to slower engraving speeds.
One drawback of the software is the lack of an estimated time display—only a percentage is shown. This can make planning challenging, especially for projects that require several hours to emboss, depending on the material. I spoke with LaserPecker, and they confirmed that a timer feature will be added in a future software update.
Testing, Materials, Settings and Results
For all of our tests, no reference settings were provided, so we had to experiment to determine the optimal configurations. Smaller engraving projects are lightning-fast on the LP5, while embossing can take several hours – some projects require 5 to 6 hours, depending on the settings used. We hope that a future software update will include more reference settings for users to select directly in LDS, making the setup process much easier. Until then, please find the materials settings for all LaserPecker machines on their website. It’s worth investigating materials and settings before planning a project.
All images used for testing can be found at the laser-pics.com site; there are a ton of free images that are great for laser engraving.
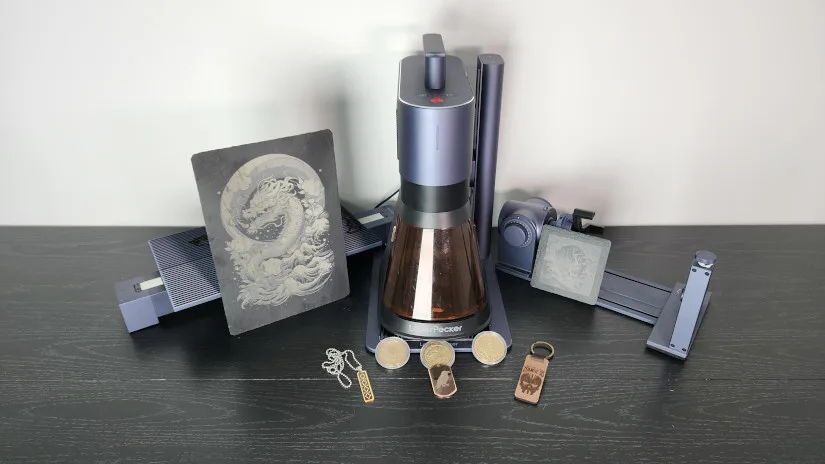
– Embossing Brass Coins. For our first test, we chose to create a few challenge coins. Being a fiber laser, the LP5 is ideal for making these coins, as well as embossing wood, slate, and some types of stone. For the two coins, we used the following settings: Power at 100%, Depth at 30%, Frequency at 26%, and a Layer Height of 0.01mm. Each coin took just under 5 hours to complete.
– Post-processing. After embossing, we ran a cleaning pass with the settings adjusted to 50% power and 4% depth. This helped remove some of the residue. We used a wire brush attachment on a Dremel to complete the polishing, which cleaned the coins nicely. Any discoloration was easily removed with brass polish. The finished coins looked fantastic, with details that truly stood out.
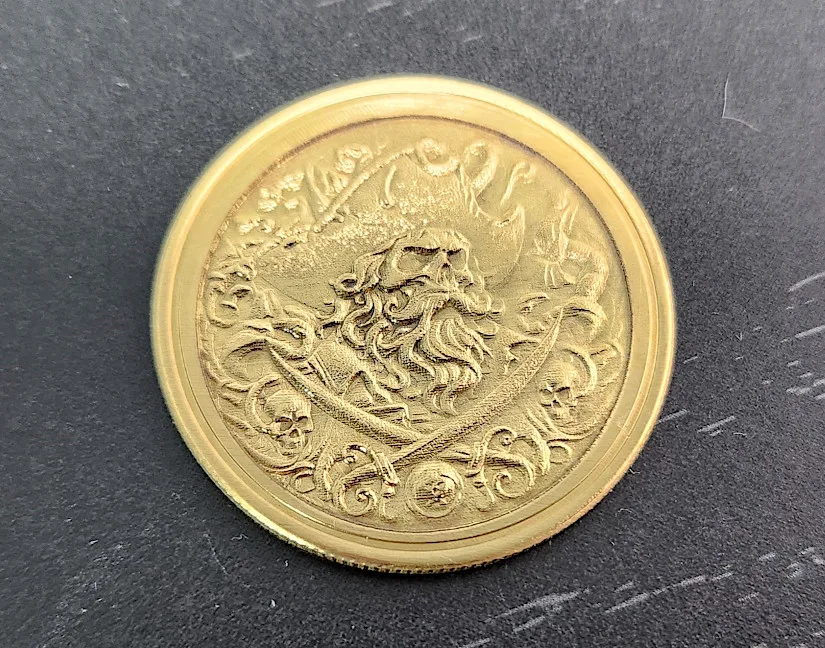
©3DWithUs – Laser Job & Photo: Will Zoobkoff
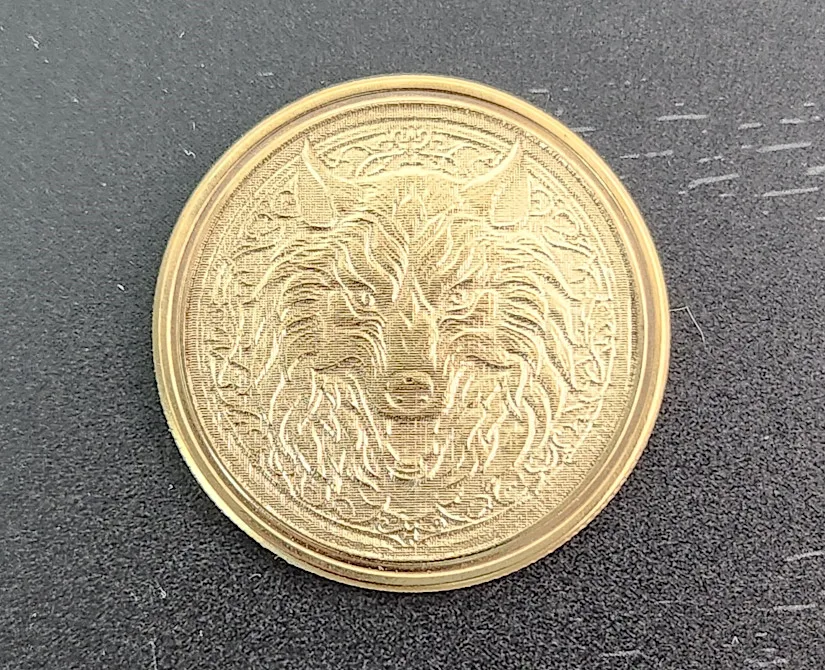
We also tested a coin included with the LP5, featuring a wolf head design. While we didn’t know the specific settings used, the engraving process took about 4 hours to complete. The test file also turned out exceptionally well, showcasing great detail and depth.
– Slate Stone Engraving. Next, we tested a pair of slate coasters: a smaller piece and a larger serving tray-sized piece of slate. For both designs, we used the same settings: Laser Frequency at 26, Power at 40%, Depth at 30%, and a resolution of 8K, using the fiber laser.
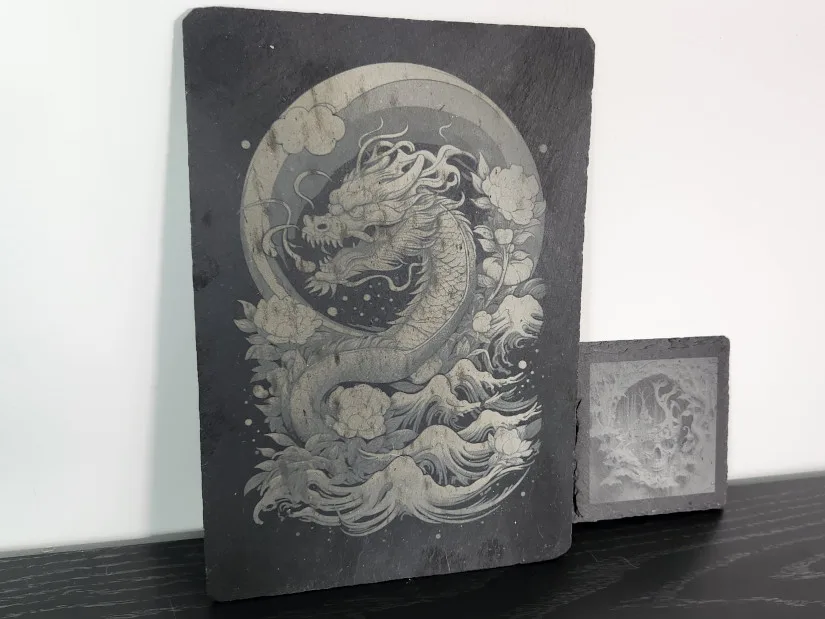
©3DWithUs – Laser Job & Photo: Will Zoobkoff
The smaller slate coaster took approximately 40 minutes to complete, while the larger piece required just over 5 hours. However, the results were worth the wait. The image detail on the slate is stunning, with remarkably clean and precise engraving.
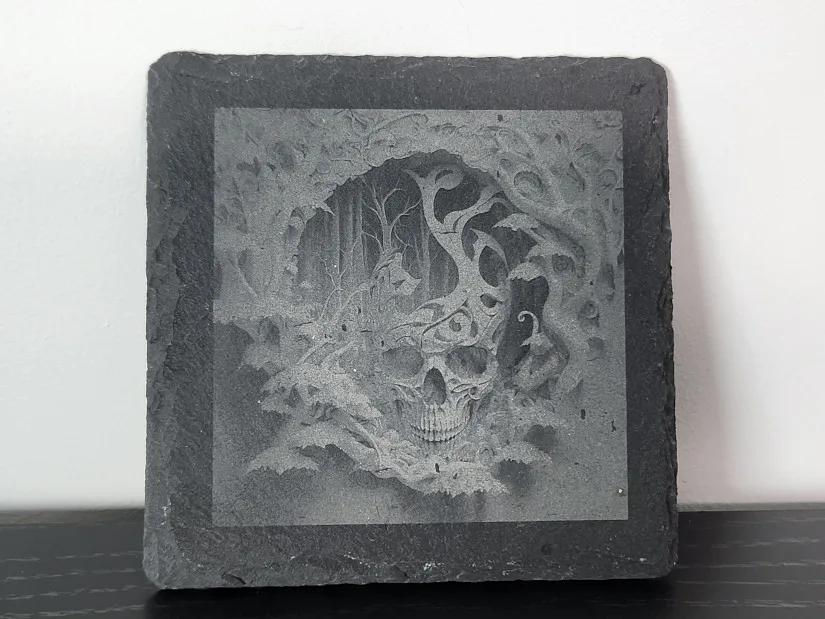
©3DWithUs – Laser Job & Photo: Will Zoobkoff
It’s also possible to emboss slate in the same way as the coins, but this process can take several hours, depending on the complexity of the design. On 3DWithUs, we offer a detailed guide on laser engraving on stone-like materials. Embossing on slate stone takes it to a whole new level.
– Engraving on Brass Pendants. Next, we engraved a gold dog tag using an image of a raven that I generated with an AI image tool on Creative Fabrica’s Flow platform. This tool allows you to create various styles of images using prompts. AI tools like these can be incredibly useful if you’re unable to find the right design to engrave. While it may take some trial and error, they are excellent for generating unique images when you’re stuck for ideas.
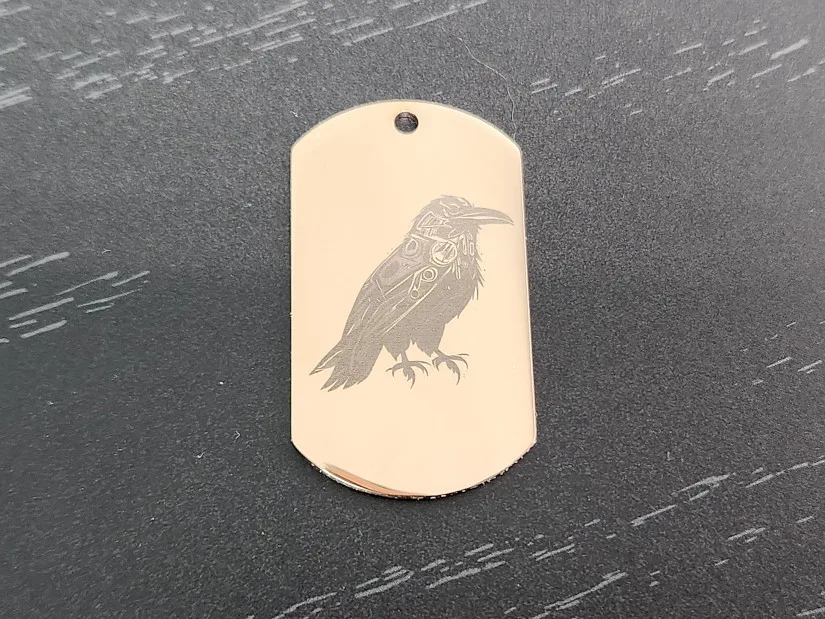
©3DWithUs – Laser Job & Photo: Will Zoobkoff
Using the fibre laser, we engraved the raven image with the following parameters: resolution of 8K, frequency at 26, power at 50%, and depth at 35%. The end result demonstrates that even though increased resolution takes longer, the image quality is exceptional. Less than five minutes were needed for the engraving process, and the result was a stunning piece with a distinct and noticeable design.
– Engraving on Jewelry. Next, we have a small brass pendant on a chain. These are great for gifts or for products you may sell. The simple design was found on the Creative Fabrica website as a pair of earrings. Settings: Using a fiber laser with a frequency of 55, 60% power, and 40% depth produces a dark, prominent engraving on the brass pendant. The process took less than three minutes, and the results were fantastic.
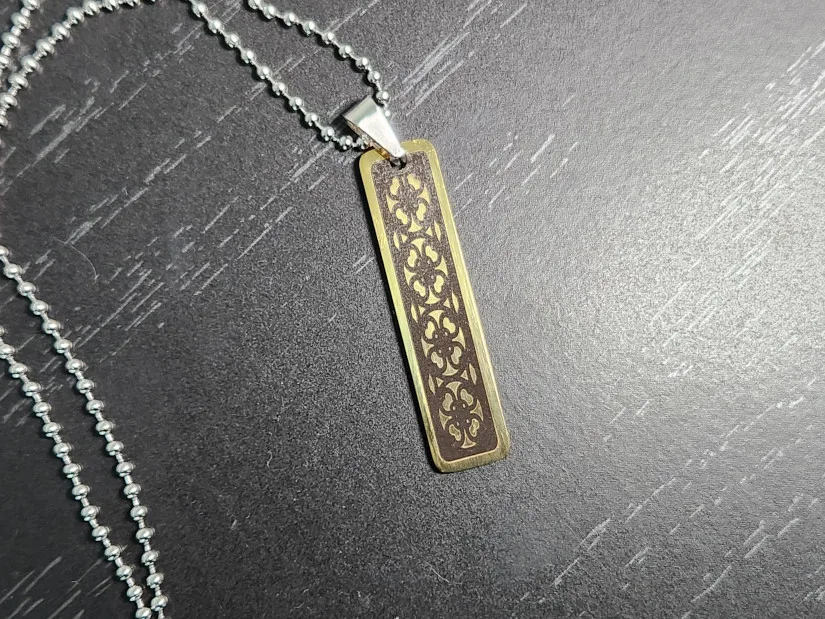
©3DWithUs – Laser Job & Photo: Will Zoobkoff
– Engraving on Basswood. As a last fast test, we used the diode laser set to 50% power and 25% depth to engrave the StudioZombie3D logo on a wooden keychain. The logo took roughly 4 minutes to engrave at 1K, and the finished product was excellent – clear and sharp.
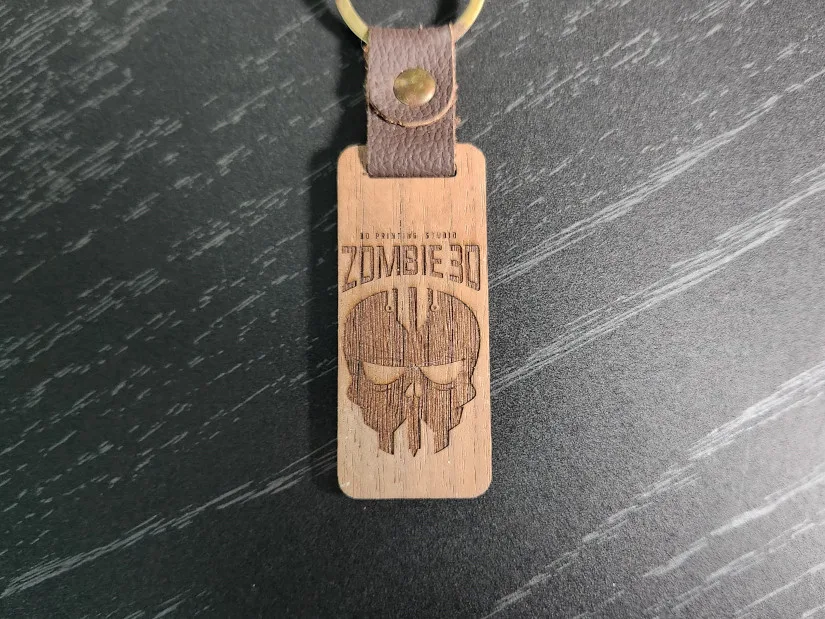
©3DWithUs – Laser Job & Photo: Will Zoobkoff
Materials, Settings and Supplies
Laser engraver and cutter manufacturers now commonly offer materials and supplies for laser engraving and cutting directly on their websites. Here is the collection from the LaserPecker website.
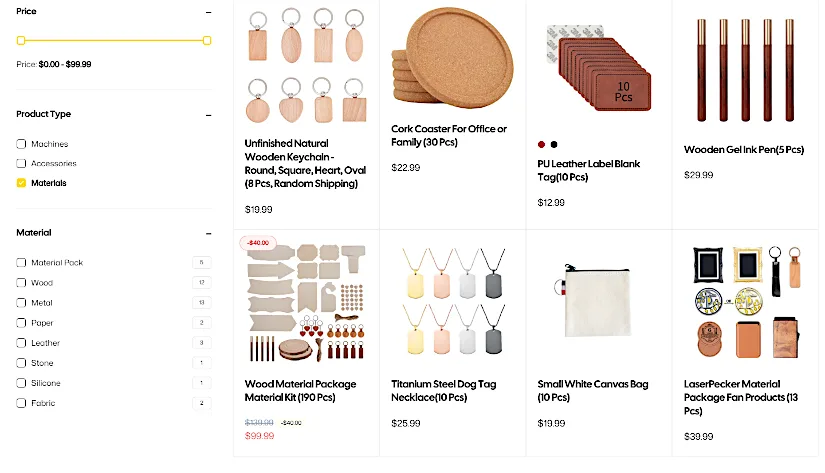
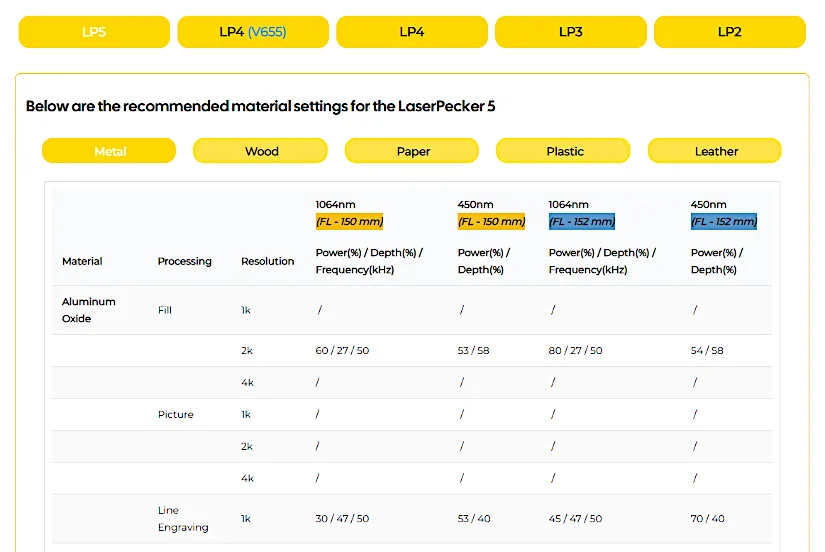
Another quite helpful section on their website is the materials settings for all LaserPecker machines. It’s worth investigating materials and settings before planning a project.
Boasting the most compact design in its class for a 20W diode and fiber laser, the LP5 shines in versatility. We tested it on a variety of materials, including its grayscale embossing mode. The LP5 is particularly suited for batch engraving, with optional rotary and slide extensions that enable seamless adaptation for projects of various sizes.
Its work area ranges from 160 × 300 mm with the slide extension to 100 × 100 mm for square shapes and 120 × 160 mm for elliptical patterns. Additionally, the LP5 can cut metal up to 1 mm thick and engrave a wide range of materials. With a maximum speed of 10,000 mm/s, engraving tasks are completed faster than ever before.
LaserPecker LP5 Safety Enclosure and Air Purifier
©3DWithUs – Photo: Will Zoobkoff
Smart Enclosure
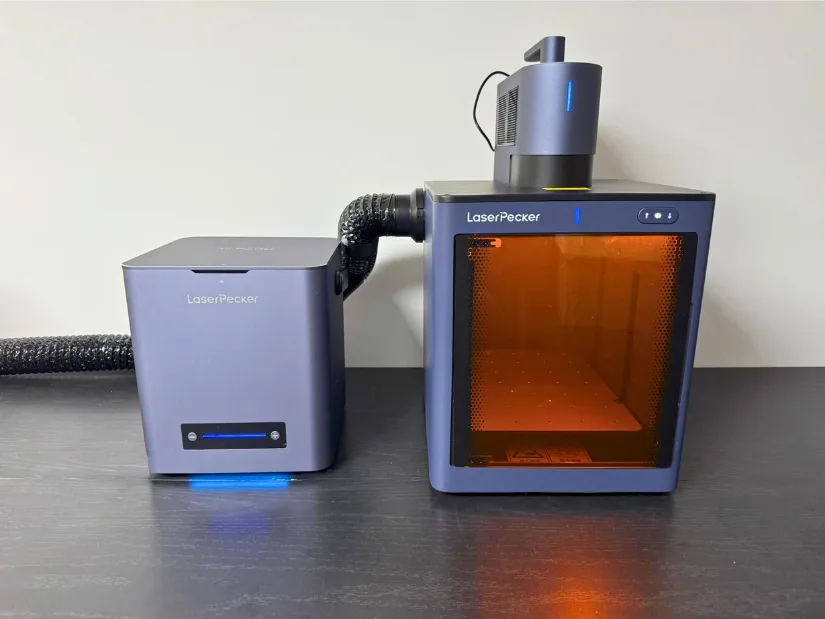
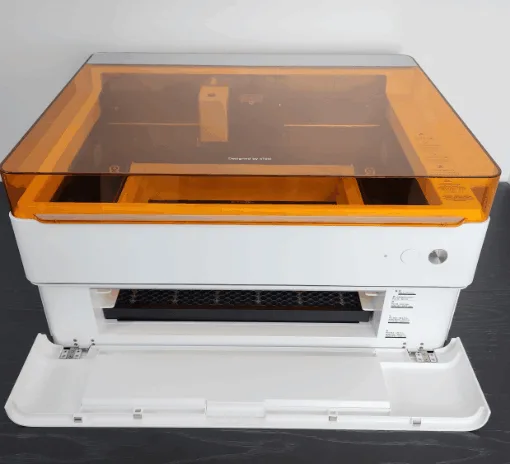
LaserPecker also offers an optional safety enclosure for the LP5. This enclosure adds several important safety features, including an automatic door sensor that will halt operation if the door is opened during engraving. An optional fire suppressant system, sold separately, can quickly and safely extinguish any fires that may flare up during use.
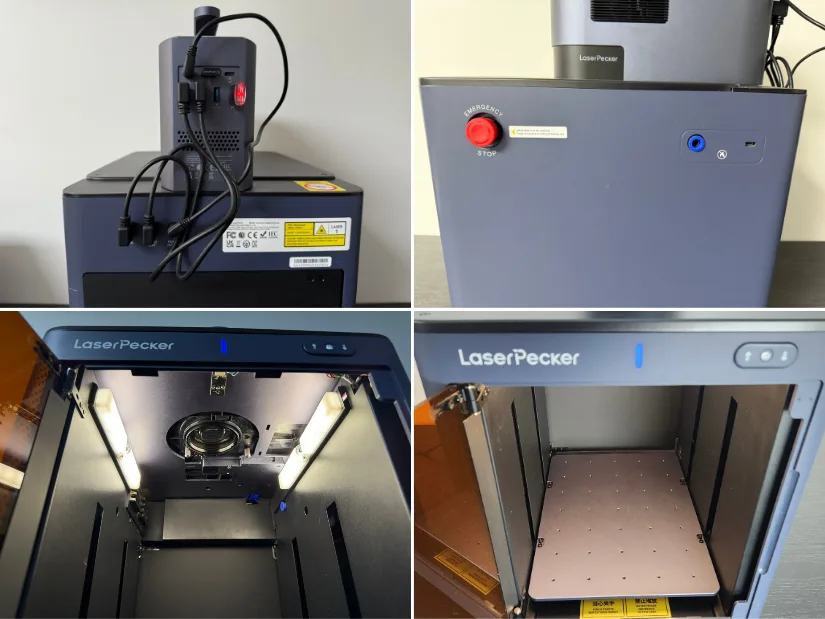
Rear Connections; Emergency Stop and Fire Suppression Connection; Engraving Platform; Laser Lens and Camera
©3DWithUs – Photo: Will Zoobkoff
The enclosure also includes a dual exhaust fan that effectively removes smoke and dust generated during operation. Another upgrade included with the enclosure is the new smart camera. You’ll need to use the mobile app to set up the camera before it can be used with the PC software. LaserPecker provides a detailed guide accessible via the software near the camera controls. While the setup process is a small inconvenience, it may be streamlined in future software updates.
It’s also recommended to calibrate the camera before use, as alignment may be slightly off. The easiest method is to engrave a small shape – such as a circle or square – onto a piece of scrap wood. Then refresh the camera image to check if it lines up with the engraving. If it doesn’t, click the gear icon in the camera settings and manually adjust the overlay until it matches the engraved result. Once you’re satisfied, save the configuration under a custom name like “Tuned Camera.”
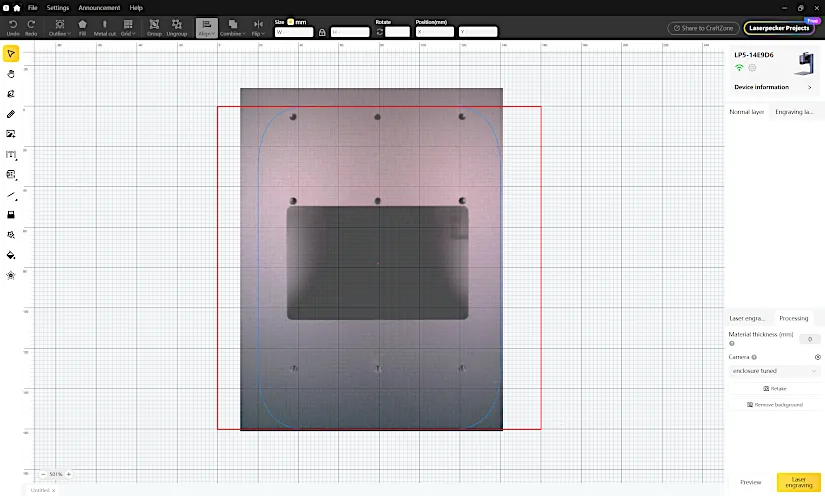
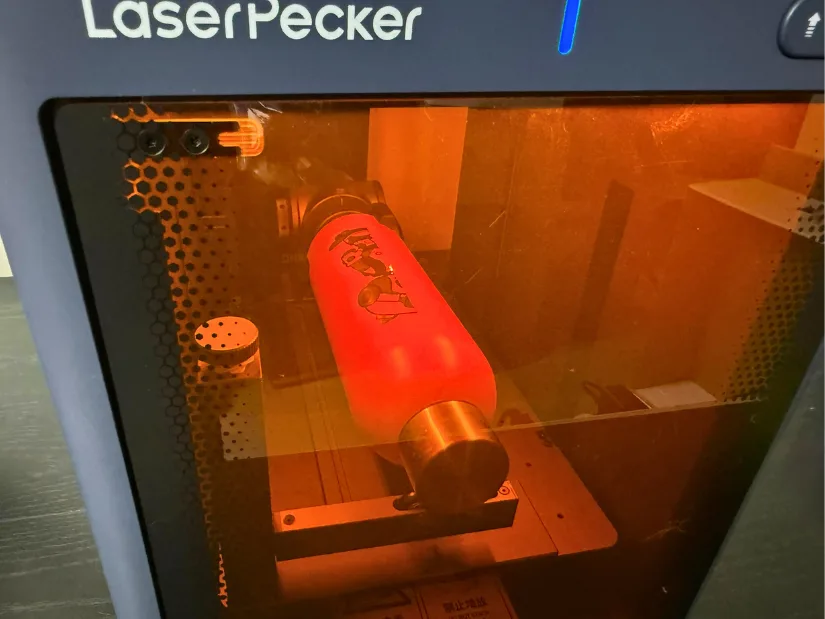
You can also use the rotary attachment or the Smart Roller attachments with the enclosure. There is a USB port for connecting them on the inside rear bottom of the enclosure. When you’re ready to engrave or cut, you can still use the red dot alignment method. However, thanks to the enclosure’s features, you can also enter the object’s thickness, and the platform will automatically adjust its height to bring the object into focus. After that, refresh the image, align your design or text, and begin engraving. A quick note: even though there is a camera, it’s always a good idea to double-check alignment using the preview option to ensure everything is perfectly positioned.
©3DWithUs – Photo: Will Zoobkoff
Desktop Air Purifier
The desktop air purifier system further enhances the safety enclosure by increasing the exhaust capacity to remove smoke and dust faster than the built-in fans alone. With its 4-stage HEPA filtration system, it can remove up to 99.97% of smoke, fumes, and airborne particles produced during engraving or cutting.
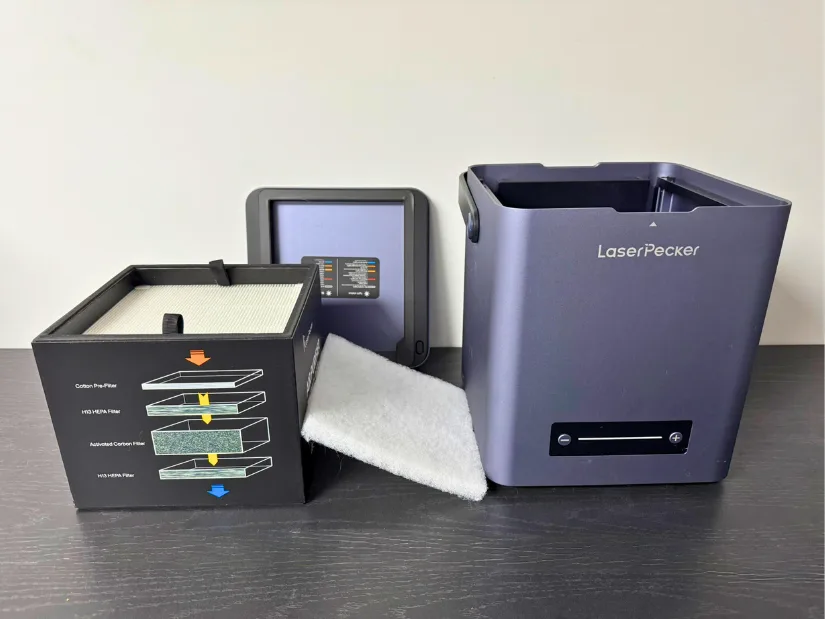
The purifier also features a convenient handle for easy transport, and four adjustable speed settings depending on whether you’re engraving metal at low intensity or cutting wood and acrylic at full power. The replaceable filters have a 600-hour lifespan, typically lasting 3 to 6 months depending on usage, and replacements can be purchased directly from LaserPecker’s website.
Compare to Other Laser Cutters and Engravers
Compare to Other LaserPecker Laser Cutting and Engraving Machines:
LaserPecker aims to meet all your needs. On their official website, you can find a range of products along with a comparison page.
For a comparison with other laser cutters and engravers, please refer to the detailed Best and Budget Laser Cutters and Engravers Guide.
Recently reviewed:
At 3DWithUs, we have featured several laser cutters and engravers that utilize diode and CO2 lasers. As a portable device, the LaserPecker LP5 competes with products like the xTool F1 Ultra and the Longer Nano Pro. Each machine has its strengths, so it’s worth researching to find one that fits your budget and project requirements.
©3DWithUs – Laser Job & Photo: Will Zoobkoff
Have questions? Feel free to ask in the comment section below.
For a wider discussion or to share your own LP5 projects, join us in the forum:
Conclusion and Pros & Cons

Compare the Prices & Bundles:
Official Store | Amazon | AliExpress
LaserPecker LP5 Review
Review Summary
The LaserPecker LP5 is a truly multi-functional device that is convenient for hobbyists to use and is also the go-to choice for professionals when portability and precision are of primary importance. This device, which consists of a 20W diode and a 20W fiber laser, allows you to perform both metal cutting and accurate engraving on a variety of materials. In addition, its compact and lightweight design, along with its high-speed and high resolution, make it an ideal choice for people on the go who need both speed and power.
Despite the LP5’s capacity for precise and clear laser engraving, its software lacks reference engraving or cutting settings and does not display time estimates yet. Hopefully, these features will be added to the operating software. The need for a USB connection and the absence of a built-in camera may be drawbacks for some users. However, an optional enclosure available from LaserPecker adds camera functionality, enhancing the user experience.
Overall, the LP5’s dual laser technology and sophisticated accessories earn it high marks among portable engravers. It is an ergonomic and fully functional device packed with features that enable you to create any gift, business product, or artistic design you can envision. It’s a reliable and efficient tool for all your engraving needs.
Pros
• Fiber for metal
• Top speed of 10,000 mm/s
• Compact
• Accessories
Cons
• No camera
• Apps missing features
• Needs to be connected for USB engraving



Great Article. would love to see how you setup the images in LDS for the slate, original (watermark this) as well as the effect and settings. this is the closest thing to the book of spells I have seen for this machine. They should be sponsoring you