Artists and enthusiasts of all ages, who create beautiful but short-lived seasonal sandcastles, sculptures, and other forms of sand art, could use 3D scanning and 3D printing to capture their work, either to create a miniature or an asset for virtual worlds. In this guide, I will briefly explain how to 3D scan objects of considerable size, which software to use for a quick cleanup, how to edit the object if needed, and what to consider when 3D printing such objects.
This Guide Covers
- Sand Art, Sculptures and Sandcastles
- How to Build a Sandcastle
- How to 3D Scan
- Sand Art Collections
- Clean up: 3D Design Software of Choice
- Print Results on Resin and FDM 3D Printers
- 3D Print Ideas
- 3D Assets for Virtual Worlds
- Conclusion
Shortlived Castles, Sculptures, and Sand Art
On popular sandy beaches, gorgeous sand artworks emerge from time to time. Enthusiasts of all ages, and sometimes professional artists, construct these temporary pieces of art under the open sky, only for a tide or rain to eventually wash them away. In some places, these creations are often crafted by local artists to entertain holidaymakers strolling along the beach, with a small tip box affixed to collect coins. Regrettably, even these are typically destroyed by the rain and storms when the season ends.
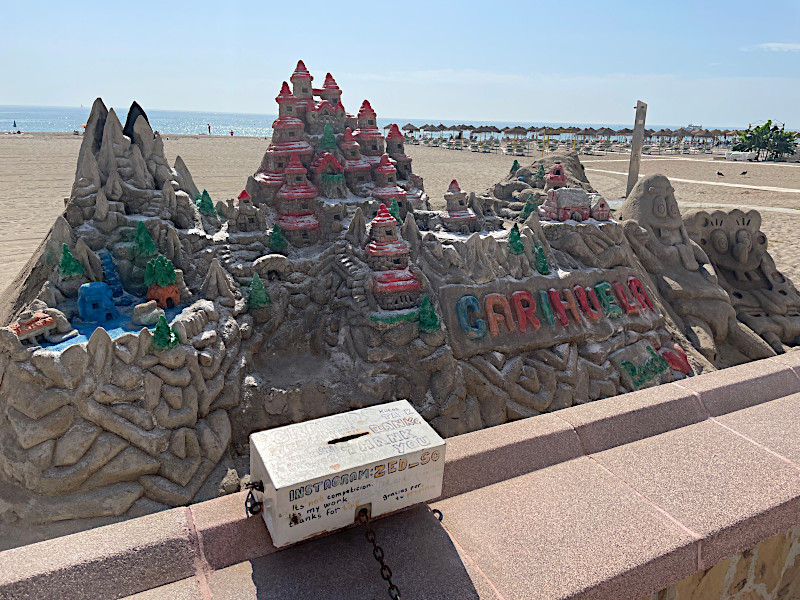
Artist: ZED_SC on Instagram
©3DWithUs – Photo by Max Funkner
Sandcastles are the most popular of these creations. They range from simple ‘drip castles’, requiring no tools, to elaborate team-built castles adorned with various decorations like candles and miniature train sets or model railways.
Sand Sculptures: These can range from animals to representations of famous people. Often crafted by talented sculptors, some of these works are even transported from one location to another for different events or museum exhibits.
Other Sand Art: Often, these take the form of beach murals. Large areas of dry/wet sand are raked to create murals with intriguing patterns or even environmental messages.
Events and Competitions: Apart from existing Sand Art Museums, if you have a popular sandy beach near you, it’s highly likely that sand art events occur there occasionally.
How to Build a Sandcastle
By searching online, I found a straightforward tutorial on how to build a sandcastle. Jamie Wardley from Sand In Your Eye, a group of sandcastle experts, provides eight tips explaining the basics. He covers everything from how to reinforce the base, build walls and towers, to constructing a bridge and adding smaller details, all using basic wooden tools.
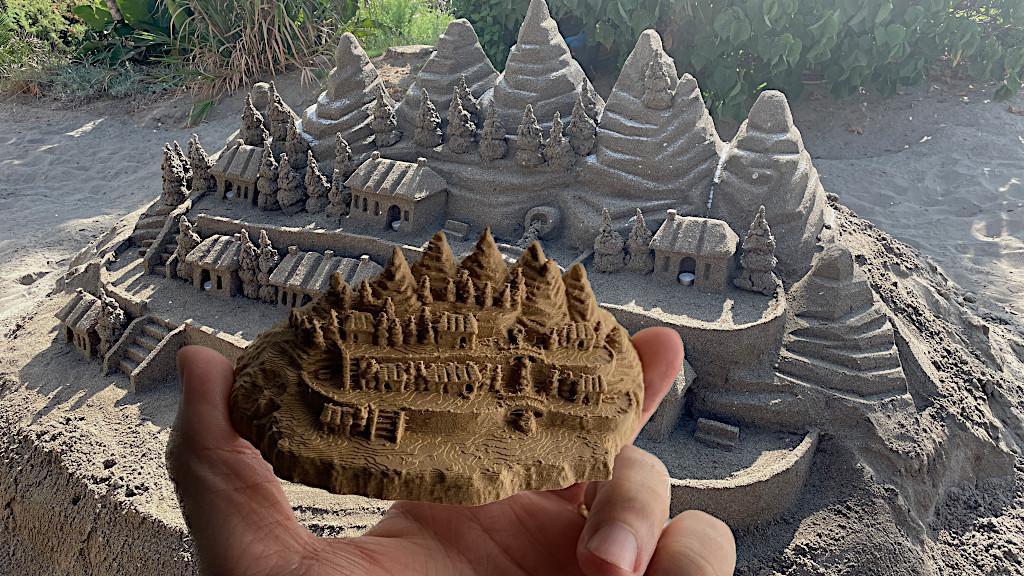
When the desired object has been found or built, it’s time to 3D scan it. The sandcastle shown in the image below was discovered on the long promenade from Carihuela to Torremolinos, where such sculptures can be spotted along the beach. The scanning process took me about five minutes and involved taking 200 photos in auto photo mode.
©3DWithUs – Photo by Max Funkner
How to 3D Scan
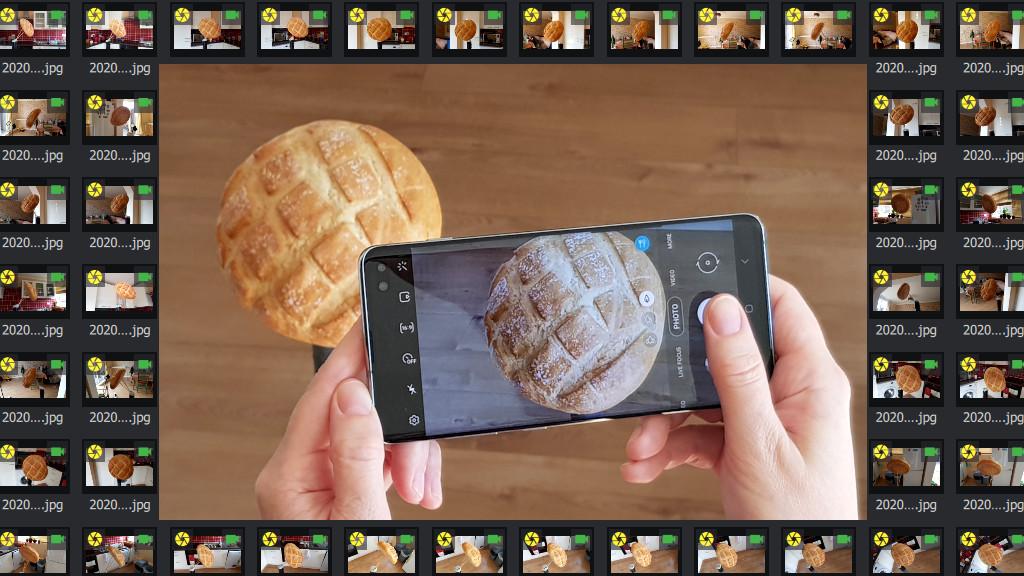
3D scanning technology is becoming more sophisticated and affordable each year. The most convenient method for such a task is to use a handheld scanner or a 3D scanning application on iOS or Android devices.
To scan the featured castle, I used the Polycam app and Auto Photo Mode. This is a very convenient and quick method. Photo Mode is powered by the Object Capture 3D reconstruction software, and the process is similar to photogrammetry. Depending on the scale of the object, up to 250 images need to be taken. Auto Photo Mode takes all images automatically, saving a lot of time and clicking. Then, the photo set should be uploaded to the cloud for further processing. Read the full review of the application on 3DWithUs.
– Photogrammetry. Take pictures now to process later. If 3D scanning applications and software sound intimidating or for some reason are unreachable, I recommend taking up to 250 images around the object anyway. Then, keep these images in a separate folder until the software or app becomes accessible. I have successfully transferred 3-year-old photo sessions into 3D models using various photogrammetry apps.
– General Tips. It is recommended to take between 20 and 250 images before uploading them to the cloud. I suggest following the basic photogrammetry rules, such as avoiding shiny objects, restarting the capture if an object moves, and so forth.
– Uploading. If you’re using a mobile device, uploading will consume a lot of data and battery power. I suggest focusing on capturing images instead of processing the photo sets. Begin uploading the photo sets when you’re at home with a stable internet connection and a fully charged battery.
– Processing. For miniature printing on an FDM 3D printer, high resolution isn’t really necessary. However, if this model will be scaled to a larger version or printed on a Resin 3D Printer, then I would suggest processing it in the highest resolution.
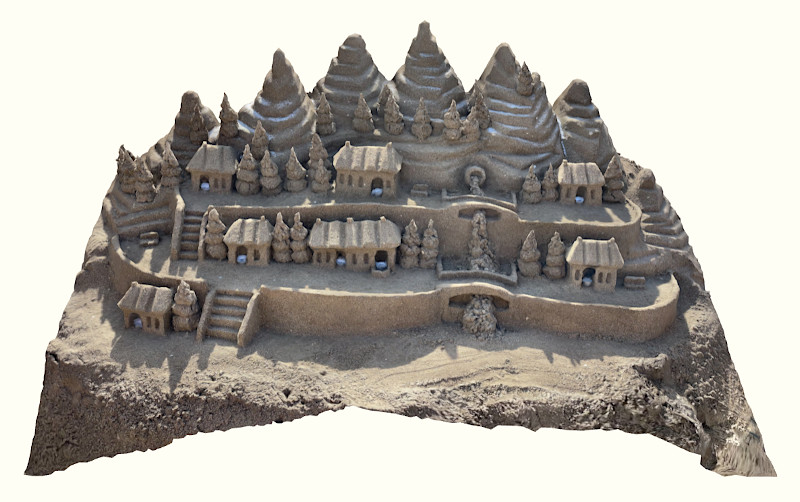
– Cropping. A successful result will look like this. It’s possible to perform initial cleanup in the app, which will make the model lighter to download.

Scan and Textures on Polycam
©3DWithUs – Photo by Max Funkner
Sand Art Collections
Whether you’re scanning or building your own sandcastle, sculpture, or other sand art, it is highly recommended to visit file repositories such as Polycam Explore or Sketchfab and search for similar models there. By rotating the models, you can get a better view of the details and gather inspiration. Additionally, by examining other scans, you can determine if the object is suitable for scanning. Fortunately, as mentioned before, sand objects are generally scan-friendly.
3D Design Software
In my Polycam review, there are links to six different software video tutorials. My preferred software is Blender. By following the tutorial, I was able to effortlessly complete most of the tasks, from moving the file to basic cleanup. After cleanup, it’s important to check whether the model is solid. Use the “3D Print -> Check All” function to see if the model is manifold.
To improve the base, I pulled it lower (Right Click + G, Z) and used the Bisect tool (with ‘Fill’ and ‘Cleaner Inner’ ON) as needed. This approach made the base of the sandcastle more even, ensuring the castle didn’t have sharp and thin corners.
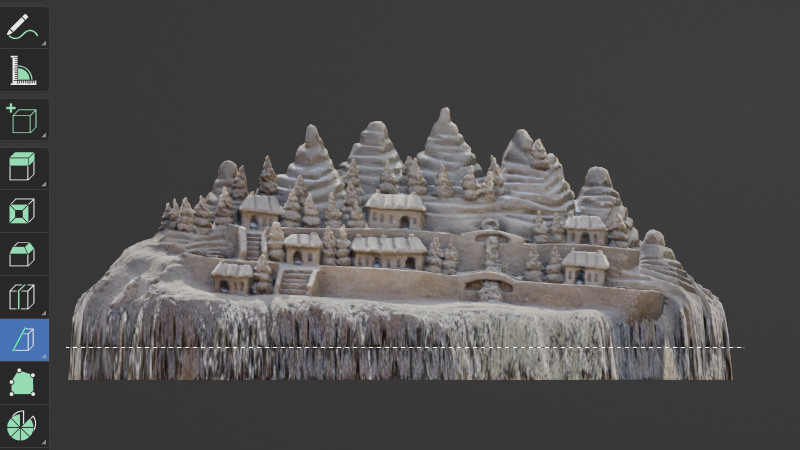
Screenshot: Blender
Blender is like a sandbox; it has everything you need. It’s open source and free, but it can be medium-to-hard to master properly. Sometimes, models from Blender need to be repaired before 3D printing. Software like Microsoft Builder or other STL repair programs may be helpful in these instances.
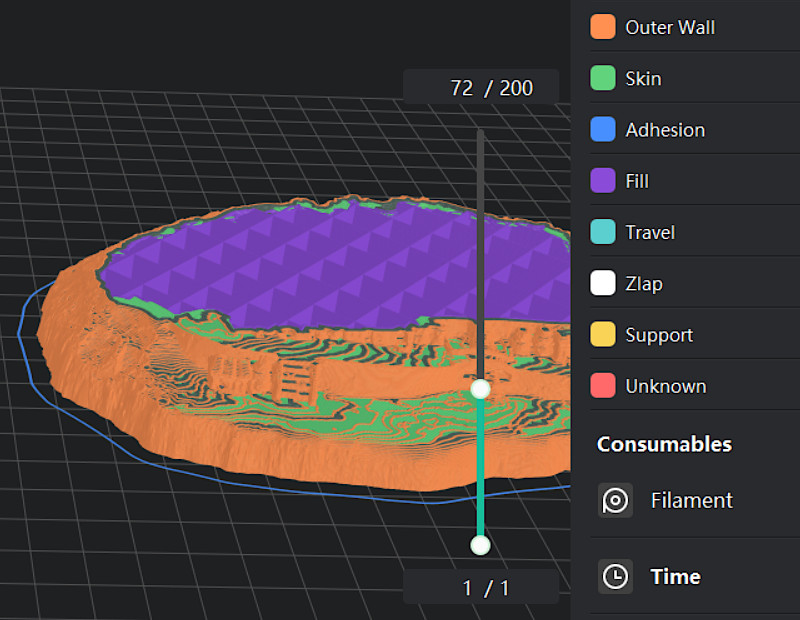
How to 3D Print
Since the model has an even, single-item base, it doesn’t require extra attention for bed adhesion. I successfully printed this model on a budget 3D printer such as the Ender 3 V2 Neo, as well as more sophisticated and faster printers like AnkerMake M5. Both the Ultimaker Cura and AnkerMake slicer software settings were basic. For such a model, the infill percentage can be reduced to 5-10%, which would decrease plastic consumption and increase printing speed.
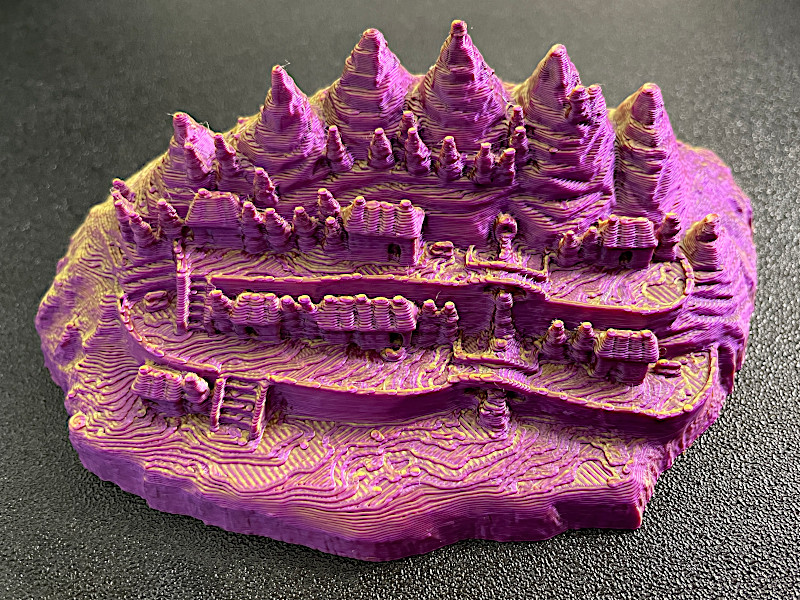
On AnkerMake M5 (review), it only took me 2 hours to print a 40mm tall model using the basic AnkerMake software settings. The model, printed with Eryone Dual Color Silk PLA from Amazon, looks awesome. The colors turned out great, with a shade appearing on the back of the model as if it were affected by sunlight.
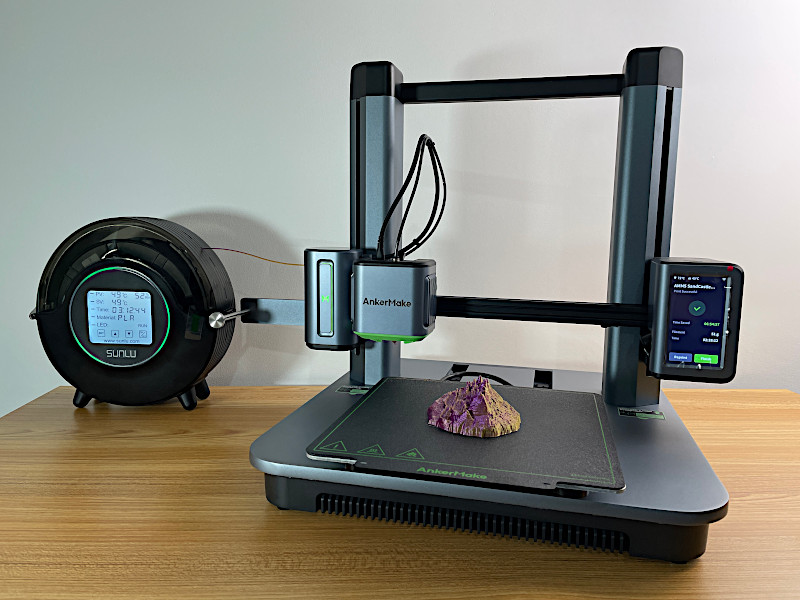
©3DWithUs – Photo by Max Funkner
The second device next to the 3D printer is a filament dryer. If the filament is relatively new, such a device is not really necessary. However, if the filament has been opened for a while and exposed to humidity, I would recommend storing it in the filament box overnight. This will improve the print quality and reduce excessive stringing.
Sandcastle model on Cults
©3DWithUs – Print & Photo by Max Funkner
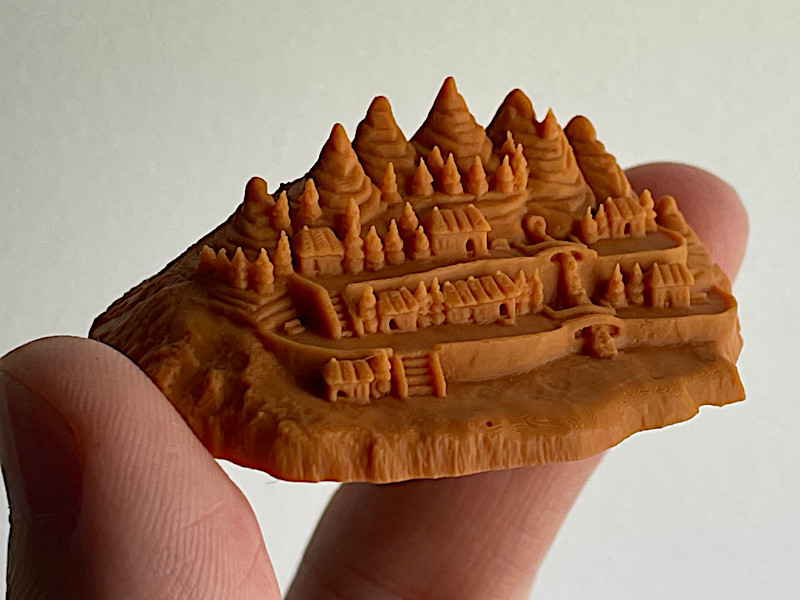
– Wood Filament. Of course, the faux wood filament PolyWood™ by Polymaker, featured in the main image, gives the feeling that the miniature was mini-sculpted using sand. When I look at the model on my table, it still confuses me. The model was printed on an Ender 5 S1. As is typical with wood filament, there were some stringing issues that needed to be cleaned with a heat gun. You can find more information and 3D prints in wood filament in our comprehensive guide.
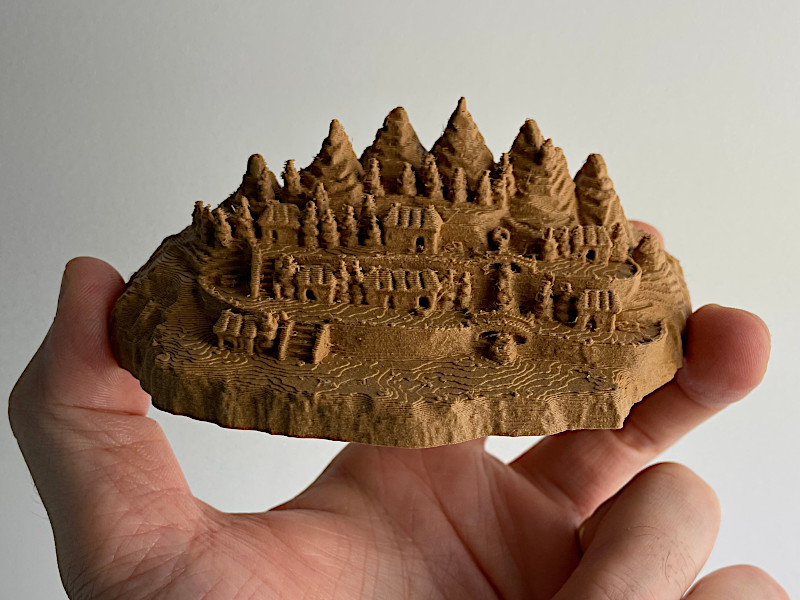
©3DWithUs – Print & Photo by Max Funkner
And the last print was done using Amolen Silk Rainbow PLA from Amazon. However, the small transition in the model didn’t work out the way I wanted. I expected a better and more pronounced transition, where the tips of the mountains would have a different color. To achieve this, I think I would need to scale up the model. Nonetheless, the Ender 3 V2 Neo did a good job printing the model. Learn more about Rainbow PLA in our guide.
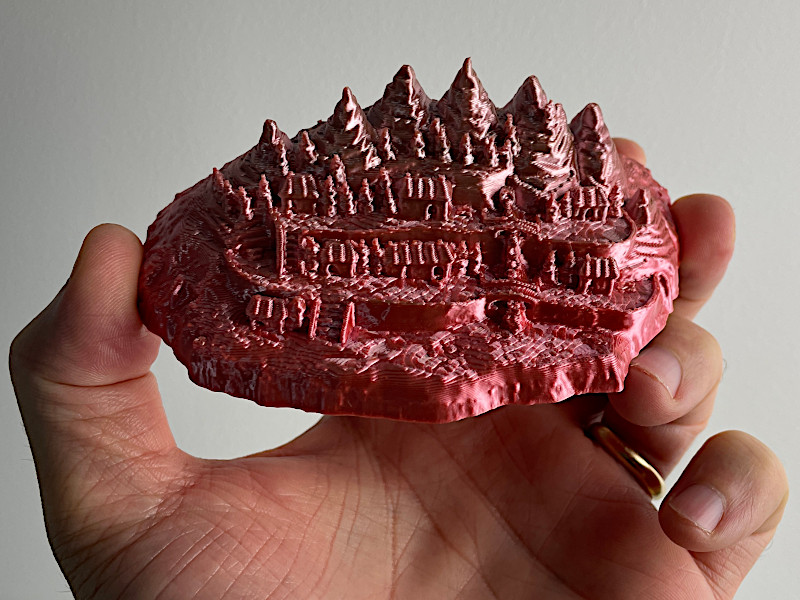
©3DWithUs – Print & Photo by Max Funkner
– Resin. I had an awesome result when I printed a sandcastle in resin on my Elegoo Saturn 3 12K. SUNLU Red Wax resin has a more clay-like shade rather than red and it perfectly worked as a shade for a sandcastle.
©3DWithUs – Print & Photo by Max Funkner
It is possible to scale down but retain the details, and such an object can be mass-produced even on a budget resin printer. For example, 8-10 sandcastle miniatures can be printed in one go in less than 1-2 hours on a Saturn 3-size printer.
3D Print Ideas
If, at first thought, such objects can be printed for decorative purposes only, then there are ways in which these objects can be turned into functional items as well. From pencil holders to customized functional items, let’s list a few ideas of what can be done using sandcastles, sand sculptures, and sand mural art.
– Aquariums and terrariums. Such objects, depending on their scale, can serve as additional decorations for fish, lizard, and insect enclosures. For ant enthusiasts, it is even possible to further modify such designs by adding more passages and expanding tunnels while maintaining the same style and texture.
– Holders. By incorporating custom holes, such models can be transformed into holders for pencils, SD cards, and other small items.
– Bowls. Sandcastles built in the shape of a bowl from the beginning can be modified into functional bowls and even tea cups.
– Fridge Magnets. With an extra hole for the magnet or magnet sticker, resin 3D printed sand art miniatures are small and light enough; they can be fridge magnets.
Basically, the style and texture that originated from sand art can be expanded and built upon to create numerous decorative and functional prints. Take a look at this ever-expanding list of functional prints that can be created at home.
3D Assets for Virtual Worlds
When I initially shared the idea on Twitter, it received a very positive response. Rupert Rawnsley uploaded the model as a scene to Mozilla Hubs. Following the link to the virtual world, I found myself fully immersed in a recently scanned sandcastle. It felt like exploring a video game, complete with the soothing sound of the nearby sea. I became a gnome within the virtual world of the sandcastle.
3D Scanned Sandcastle Scene in Mozilla Hubs
©3DWithUs MP4: Max Funkner
The idea of a 3D scanned sandcastle brings forth numerous possibilities. Would you like a virtual world that resembles a sandcastle you created yourself? It’s achievable, and it all begins with an actual sandcastle!
Conclusion
Such objects are undoubtedly a great source of inspiration, showcasing the successful integration of scanning and 3D printing to achieve remarkable results. While I have included links to the models, I highly recommend trying to build your own sandcastle or sand sculpture and printing it out. The concept of scanning and printing objects around us is not new, and as technology advances, the process becomes increasingly easier. Take a look on our website for information on how to scan flowers and tree trunks for decorative and functional items.