
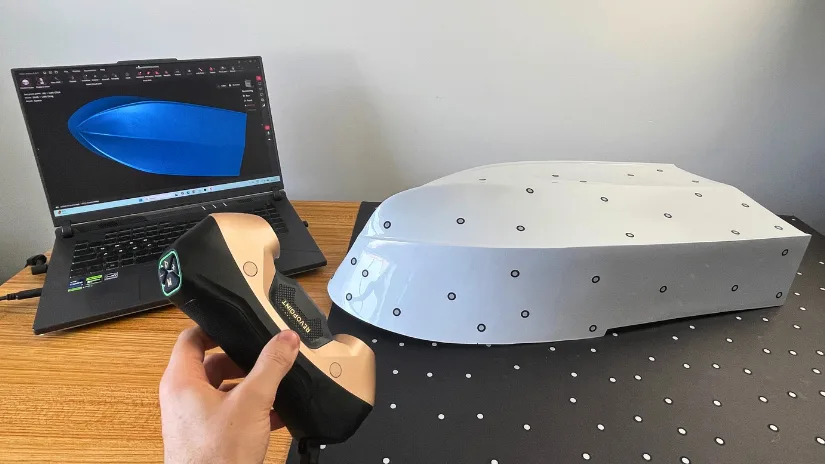
Over the past few years, I have had the opportunity to test a wide range of Revopoint 3D scanners, from the compact INSPIRE 2 and versatile POP 4 to the MetroX, and industrial Trackit. This time, I wanted to see how the Revopoint MetroY Ultra would perform on reverse engineering projects rather than standard demo objects. Instead of scanning statues and figurines, I challenged it with damaged RC boat parts that needed to be repaired, recreated, and 3D printed for practical use.
Throughout this hands-on review, I tested the MetroY Ultra’s scanning modes, Revo Metro software and automatic dual-axis turntable while developing workflows that combined accurate scanning with Blender and 3D printing. The result was a series of functional replacement parts, giving me a good understanding of where the MetroY Ultra is perfect and who this professional blue laser 3D scanner is really designed for. As usual, the article ends with a review summary and a short Pros and Cons section.
Table Of Contents (Jump to a Section)
Where to Buy
Price: $1,614 – $2,499
Compare the Prices & Bundles:
Official Website | Amazon
What’s Included – Accessories
©3DWithUs – Photo: Max Funkner
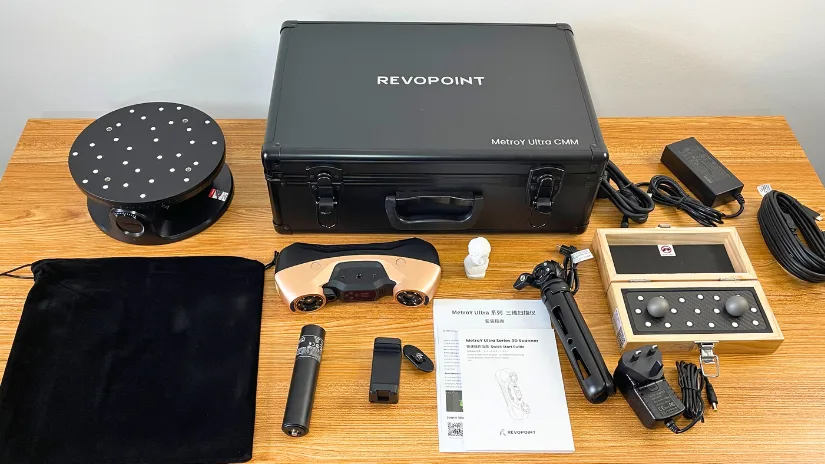
The Revopoint MetroY Ultra arrived well protected in a sturdy carrying case. The standard package includes the MetroY Ultra scanner, a dual-axis turntable, tripod, USB Type-C cable, power adapter, sample bust, a sheet of 500 marker dots, a calibration board, battery handle, phone holder, and the usual documentation. My review unit was the CMM Edition, which also included the precision Ball Plate for high-accuracy calibration and a one-year license for Revo Measure metrology software. For most maker projects, the standard kit will be sufficient, while the CMM Edition is aimed at users who need measurement-grade workflows and professional inspection capabilities.
Specifications
- Product: Revopoint MetroY Ultra 3D Scanner
- Technology: Multi-line blue laser scanning and full-field structured light scanning
- Scanning modes: 34-cross blue laser lines, 15 parallel blue laser lines, single blue laser line, and full-field structured light
- Single-frame accuracy: Up to 0.01 mm
- Volumetric accuracy: Up to 0.015 mm + 0.04 mm × L(m)
- Fused point distance: Up to 0.05 mm
- Scanning speed: Up to 90 fps (GPU), 60 fps (CPU), up to 7 million points per second in structured light mode
- Working distance: 200–400 mm
- Capture area: 152 × 138 mm (minimum) to 332 × 276 mm (maximum)
- Tracking methods: Marker, Global Marker, and Feature tracking
- Colour scanning: Supported in Auto Turntable Mode
- Connectivity: USB-C, Wi-Fi 6
- Output formats: PLY, OBJ, STL, ASC, 3MF, GLTF, and FBX
- Use cases: Reverse engineering, quality inspection, metrology, product design, manufacturing, and high-accuracy 3D printing workflows
For the full list of specifications, please visit the official product page.
- Minimum PC requirements:
- macOS: CPU: M2 Pro; RAM ≥ 16GB
- Windows: CPU: Intel i7 13th Gen or AMD Ryzen 7 5800; RAM ≥ 32GB GPU: NVIDIA GeForce RTX 3060 (8GB)
Setup, Design and Features
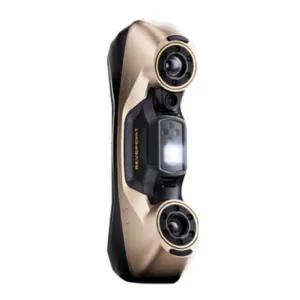
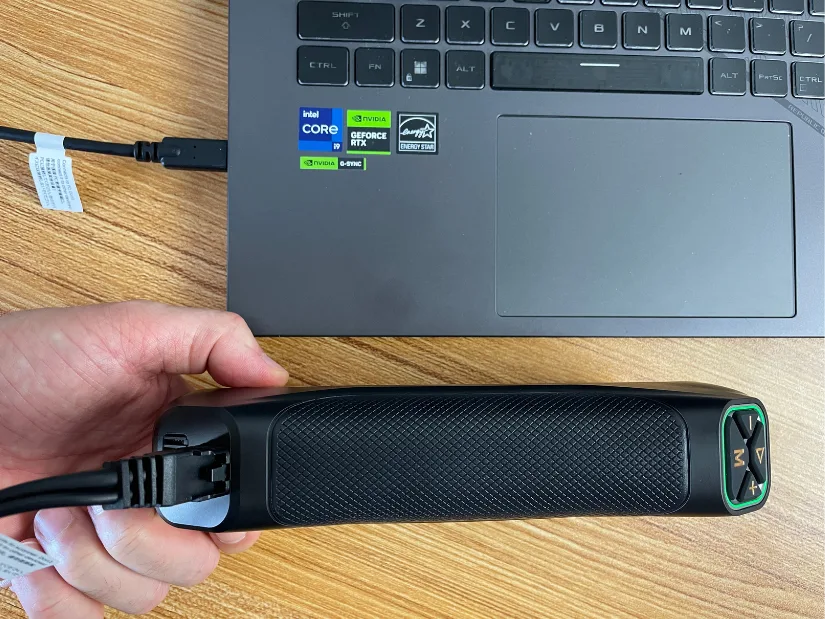
The Revopoint MetroY Ultra is noticeably bigger and heavier than the POP 4, and even more so than the lightweight INSPIRE 2 that I reviewed previously. All three are hybrid scanners, but each targets a different type of workflow. If portability and hand-held scanning sessions are your priority, the smaller models may be a better fit. For reverse engineering and larger, high-accuracy projects, however, I didn’t mind the MetroY Ultra’s extra size and weight. The rubberised, non-slip grip makes it comfortable to hold and provides a secure feel while scanning.
©3DWithUs – Photo: Max Funkner
As usual, before trying the wireless features I started with a wired connection. In my workshop, cable management isn’t an issue, so I simply connected the scanner directly to my laptop using the supplied USB Type-C cable. The connection felt secure on both ends, and I was ready to start scanning within minutes. For longer scanning sessions, I generally prefer a wired setup, as it provides both power and a stable data connection without worrying about battery life.
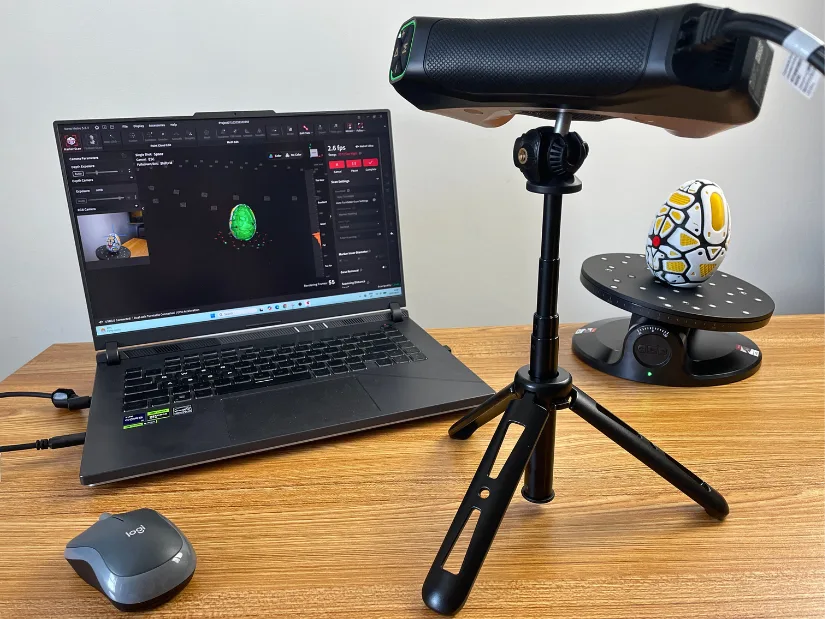
Automatic Dual-Axis Turntable
The automatic dual-axis turntable is one of the features, and one of the included accessories, that helps the MetroY Ultra stand out from the POP 4 and INSPIRE 2. Unlike a standard rotating platform, this turntable can also tilt the object to selected angles automatically, allowing the scanner to capture more surfaces without requiring constant manual repositioning.
©3DWithUs – Photo: Max Funkner
I had already tested this turntable thoroughly during my Revopoint MetroX hands-on review. It proved especially useful for smaller objects with complex geometry, where a single horizontal rotation may not be enough to capture recessed areas, angled surfaces, or the underside of a part.
CMM Edition and Ball Plate
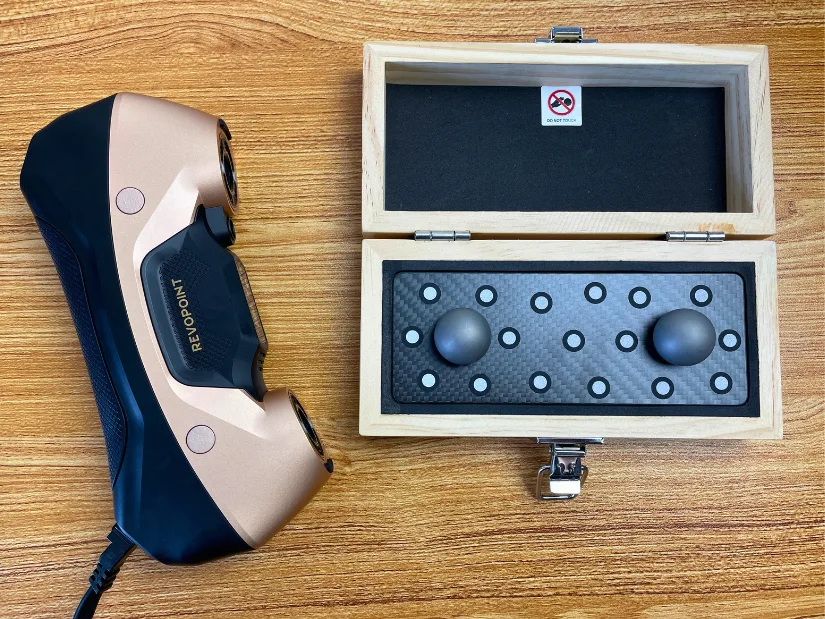
My review unit was the MetroY Ultra CMM Edition. CMM stands for Coordinate Measuring Machine, a type of industrial inspection equipment used to verify the dimensions of manufactured parts with very high precision. While the MetroY Ultra is still a portable handheld scanner, the CMM Edition adds accessories aimed at users who need greater measurement accuracy and repeatability for engineering, inspection, and reverse engineering workflows.
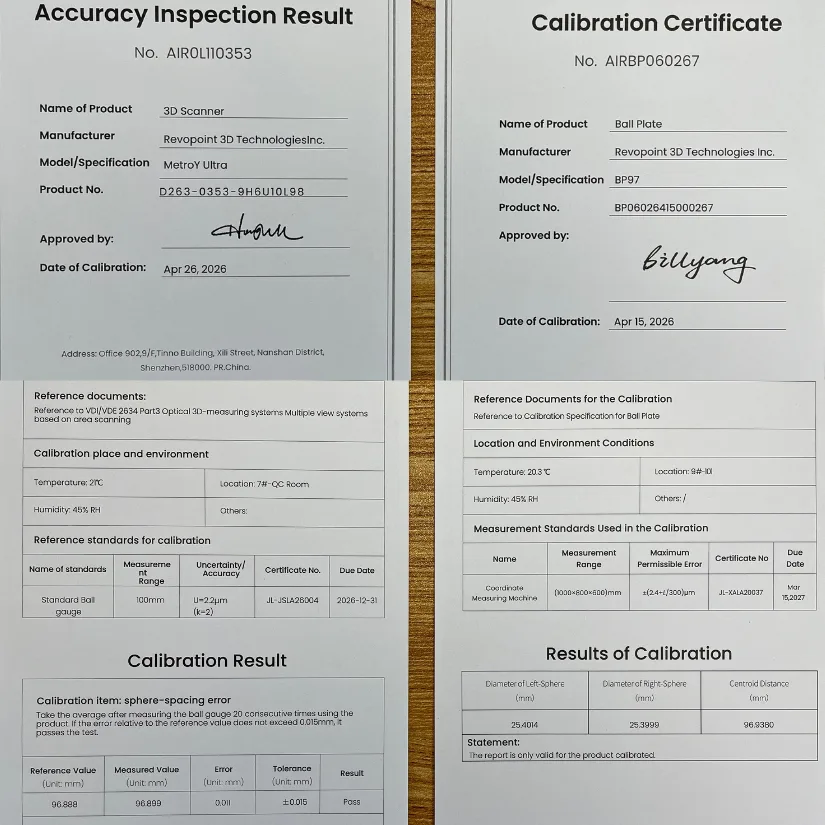
One detail I appreciated was that both the scanner and the Ball Plate arrived with individual calibration certificates. These documents record the factory calibration and inspection results, giving confidence that the equipment has been tested before leaving the factory. For hobby projects this may not be essential, but for professional inspection and metrology work it is reassuring to have this level of documentation.
©3DWithUs – Photo: Max Funkner
The most noticeable addition in the CMM Edition is the Ball Plate. This precision-machined reference plate contains accurately positioned spheres whose dimensions are known to a very tight tolerance. During calibration, the scanner measures these spheres and automatically compensates for tiny deviations, helping maintain the MetroY Ultra’s high measurement accuracy. Most makers won’t need this level of precision every day, but for reverse engineering, quality inspection, or manufacturing workflows, it is a valuable addition.
WiFi and Mobile Mode. Wireless version. When powerbank attached it works as a handle I briely tryied to scan. It is working. Comfotable grip. Can be good for remote scanning, let say feature on the bigger object. Bracket for the phone is also included. Unfortunately I could not connect my phone via Revo Scan app. will update this section if there will be a progress.
Wi-Fi and Mobile Mode
The MetroY Ultra also supports wireless operation. By attaching the supplied battery handle, the scanner becomes completely portable, with the battery doubling as a comfortable hand grip. I briefly tested this setup and found it well balanced, making it suitable for scanning larger objects where moving around the subject is more practical than bringing the object to the scanner. A phone holder is also included, allowing a compatible smartphone to be mounted directly to the scanner.
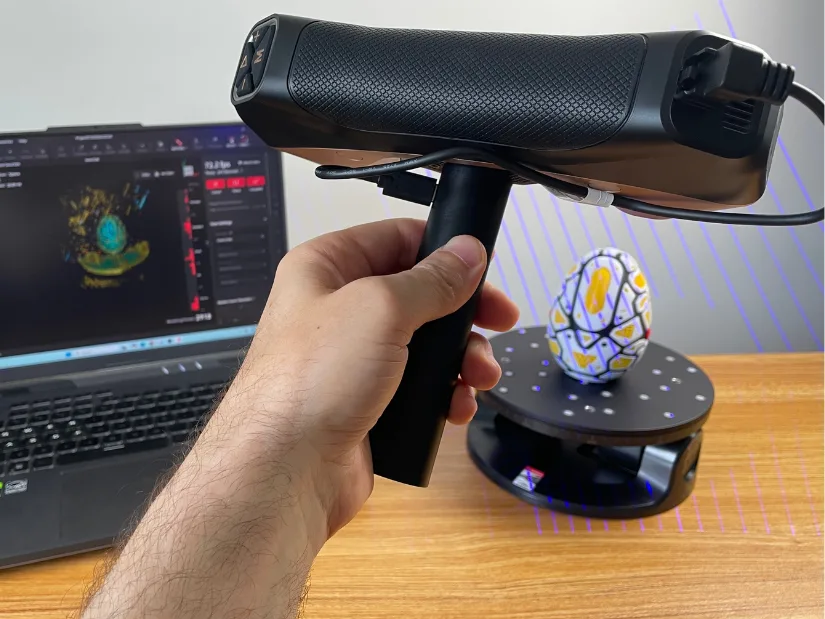
Unfortunately, I wasn’t able to complete a full wireless workflow during this review. Although I could connect my iPhone to the scanner’s Wi-Fi network, I couldn’t establish a connection through the mobile app. This appears to be either an app compatibility issue or something specific to my setup, and I’m still investigating it. I’ll update this section once I have more information or a working solution.
Scanning Speed and File Size
Because I had tested the POP 4 shortly beforehand, the first thing that struck me about the MetroY Ultra was its speed. This is another area where the MetroY Ultra has a clear advantage. It can capture data very quickly, although the performance of the connected computer also becomes important. Reaching 10,000 frames is surprisingly easy, and large projects can quickly become heavy to process, fuse, and edit.
For some smaller or more detailed parts, I deliberately switched to single-line laser mode. Scanning was noticeably slower, but it gave me greater control and produced much lighter project files. Depending on the object, this slower and more focused approach can be preferable to collecting the maximum amount of data as quickly as possible.
Software and Workflow: Revo Metro
Revopoint’s software ecosystem can be a little confusing at first, as different scanners use different applications. For example, the POP 4 works with Revo Scan 6, while the Metro series and INSIRE 2 use Revo Metro. Since I have been testing several Revopoint scanners, my Revo Metro home screen contains projects created with both the MetroY Ultra and the INSPIRE 2, making it easy to access previous scans from a single interface.
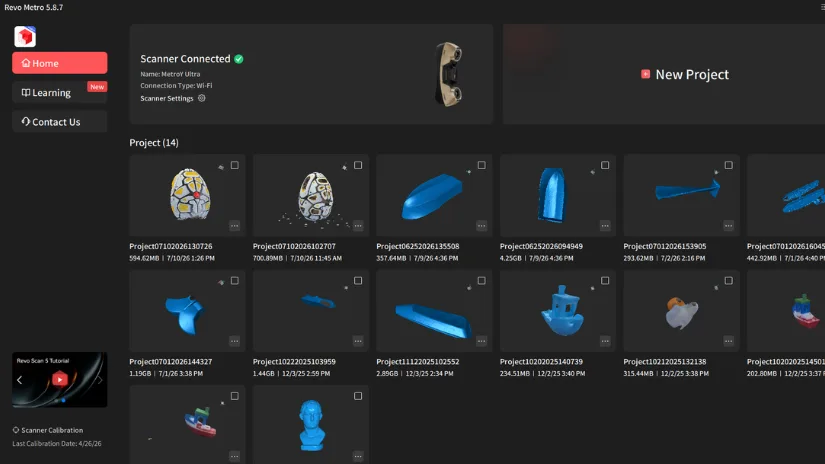
The home screen also gives quick access to scanner management. From here you can start a new project, browse previous scans, launch the calibration interface, and check when the scanner was last calibrated. I found this particularly useful, as it is reassuring to know the calibration date before starting a high-accuracy scanning project.
Testing and Results
RC Boat Hull Scan
The first interesting large object I scanned was an RC boat hull, originally made from fiberglass by Ray from our local Southend Model Boat Club. The hull turned out to be a very suitable size for the MetroY Ultra: large enough to test the scanner, but still manageable on a desktop setup.
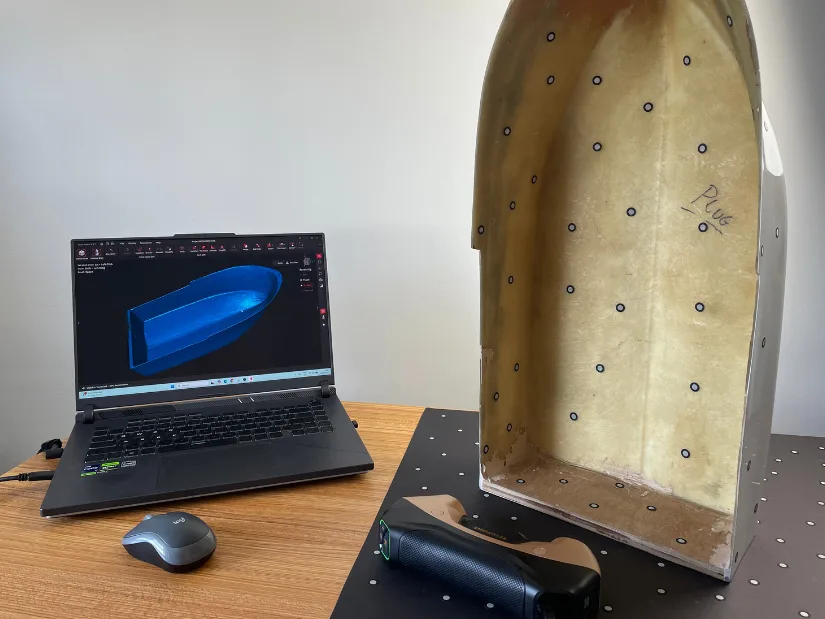
Initially, I tried to scan the hull all the way around and export it as one solid mesh ready for 3D printing. The result was probably good enough for that task, although the scan still had some debris to clean up and a few holes to patch. As I wanted a cleaner and more scalable model with the even walls, I decided to try a different workflow instead: using the scan as a base surface and then rebuilding the printable body in Blender with the Solidify modifier.
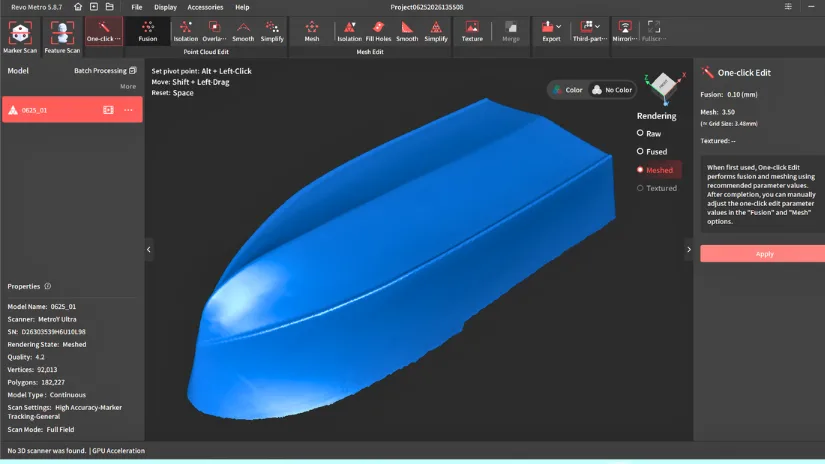
Scanning just the exterior surface of the hull proved to be a quick and straightforward task. Focusing on a single surface also kept the project file much smaller and easier to process. The screenshot above shows the mesh after removing the marker points, filling the remaining holes, and applying a little smoothing where needed. Rather than creating a fully closed mesh in Revo Metro, I exported this “shell” and continued the workflow in the free, open-source software Blender, where I used the Solidify modifier to create a printable model.
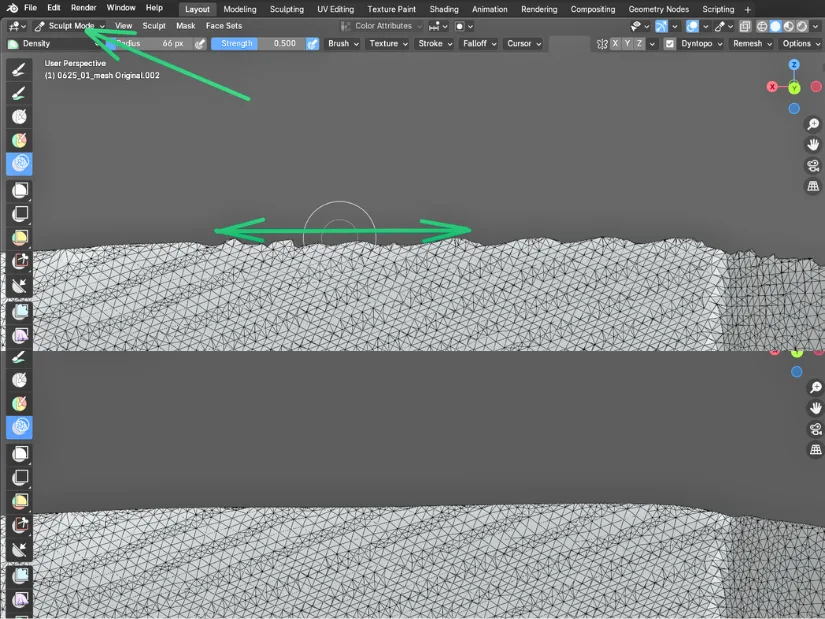
After exporting the scan as an .OBJ file, the first thing I did in Blender was straighten the rough edges of the scanned shell. This turned out to be surprisingly easy and has completely changed my workflow for similar projects. Simply select the imported object, switch to Sculpt Mode, and use the Smooth brush (Shift+Left Click) along the edges, as shown above. Within a few minutes, the uneven scan boundaries become much cleaner, making the model far better suited for the next step. Once I was happy with the outline, I applied Blender’s Solidify modifier to turn the thin scan into a printable object with consistent wall thickness.
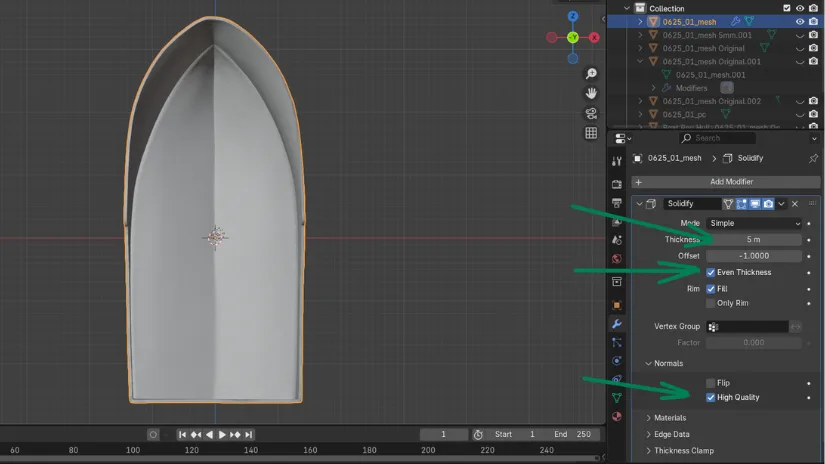
Blender can be intimidating, even for experienced users, but with AI tools such as ChatGPT, these small workflow tasks can become much smoother. If I get stuck, I often ask for help, and it has been especially useful for Blender workflows. In this case, the Solidify modifier turned the cleaned scan shell into a solid and, most importantly, accurate model. Initially, I used a 5 mm thickness; it is a solid thickness if the model is printed in full size. As my printer build volume allowed me to print only 50% scaled.
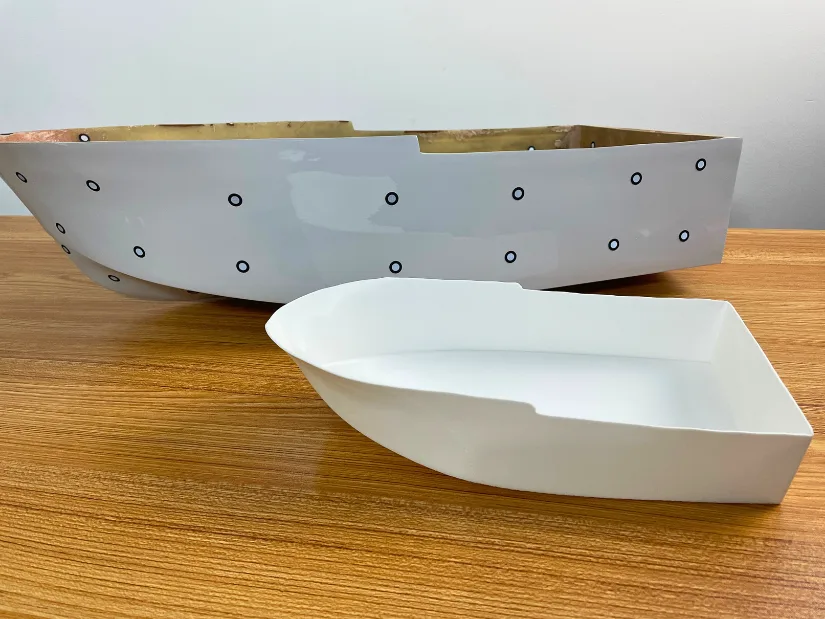
©3DWithUs – Print and Photo: Max Funkner
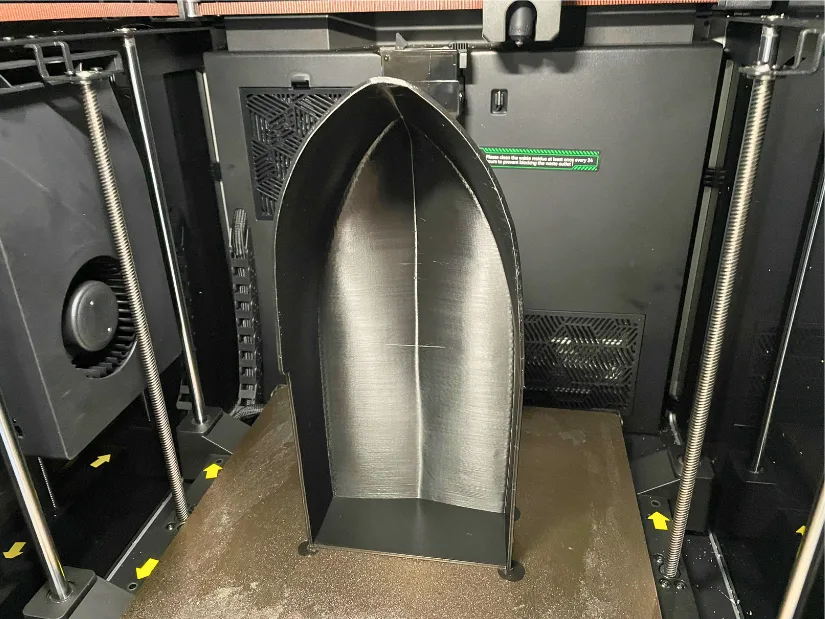
I actually had to print this hull twice on my Creality K2 Pro before I was happy with the result. My first attempt used walls (2-wall loops) that were simply too thin, and they cracked almost immediately under pressure. Fortunately, increasing the wall thickness in Blender using the Solidify modifier to 8mm was quick. After re-exporting the model, I printed it again with 4-wall loops, resulting in a much stronger, more durable replica. This project was a great example of how combining accurate 3D scanning with a simple Blender workflow can quickly turn an existing object into a functional, printable model.
Scanning and Fixing Broken Parts
The same workflow of scanning a single clean surface and adding thickness later with Blender’s Solidify modifier also worked perfectly for another repair project: an RC boat reverse bucket. This small injection-moulded part belonged to Colin from Southend Model Boat Club. It had broken where it attaches to the boat, making it unusable. Rather than designing a replacement from scratch, I scanned the original part, repaired the model where necessary, and produced a printable replacement.
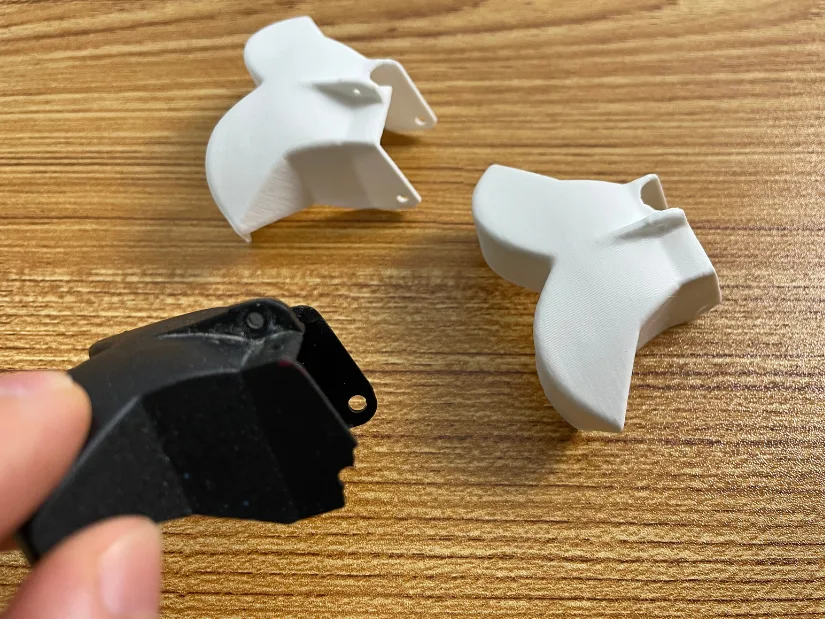
©3DWithUs – Print and Photo: Max Funkner
Because the reverse bucket contains several small features and mounting details, I combined different laser modes during the scan. Most of the object was captured using the faster cross-line laser mode, while finer details were rescanned with single-line laser mode for maximum precision. Switching between cross-line, parallel-line, and single-line modes in Revo Metro is quick and straightforward, so there is no need to stick with just one mode throughout the project. This hybrid approach not only preserves fine details where they matter most but also keeps the overall project size smaller and easier to process.
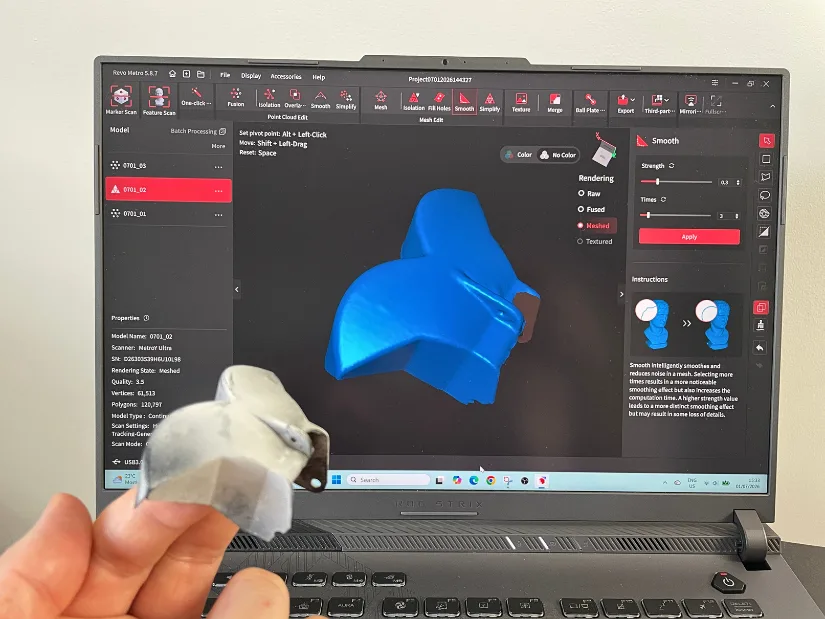
Revopoint states that the MetroY Ultra can capture black objects, and I did test it on the original reverse bucket. However, I still found that applying 3D scanning spray produced a smoother and more reliable scanning process. For dark or slightly reflective parts like this one, I would still prefer using scanning spray rather than relying on the scanner alone.
I also found that placing the object on a sheet already covered with marker targets worked very well in marker mode. The scanner tracked the part reliably, and I did not need to add any extra markers directly to the object.
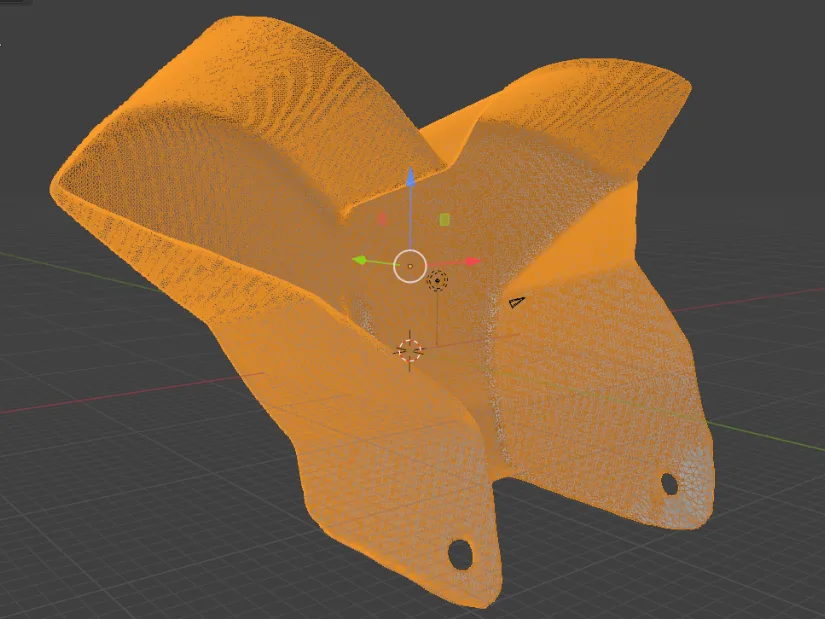
In Blender, I manually recreated the broken section by moving and connecting vertices to rebuild the missing geometry. This process can become as detailed as you want, but for functional 3D printing it doesn’t need to be absolutely perfect. The goal was simply to restore the overall shape while keeping the model printable.
Just like with the RC boat hull described earlier, the Solidify modifier completed the workflow by turning the repaired shell into a solid model. In this case, I used a wall thickness of 2 mm, which produced a lightweight yet strong replacement part ready for printing.
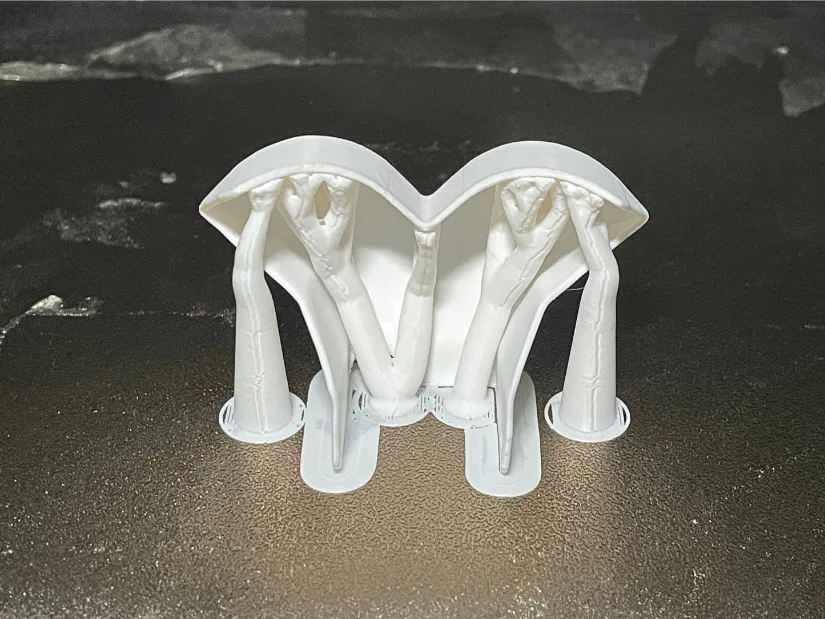
Creality Print automatically generated tree supports for this model, and they worked very well on the Creality K2 Pro. I printed the replacement part in Inslogic PC ABS, an engineering-grade filament that offers greater strength and heat resistance than standard PLA. It is a more demanding material to print, requiring an enclosed printer with a heated chamber, but it should produce a much more durable functional part.
The replacement reverse bucket is with Colin now, who will fit it to his RC boat at some point. Fingers crossed it performs as expected! If not, that’s the beauty of working from a digital model. I can simply increase the wall thickness in Blender, print another version, and continue refining the design until we get it just right.
Propeller Scanning and Reverse Engineering
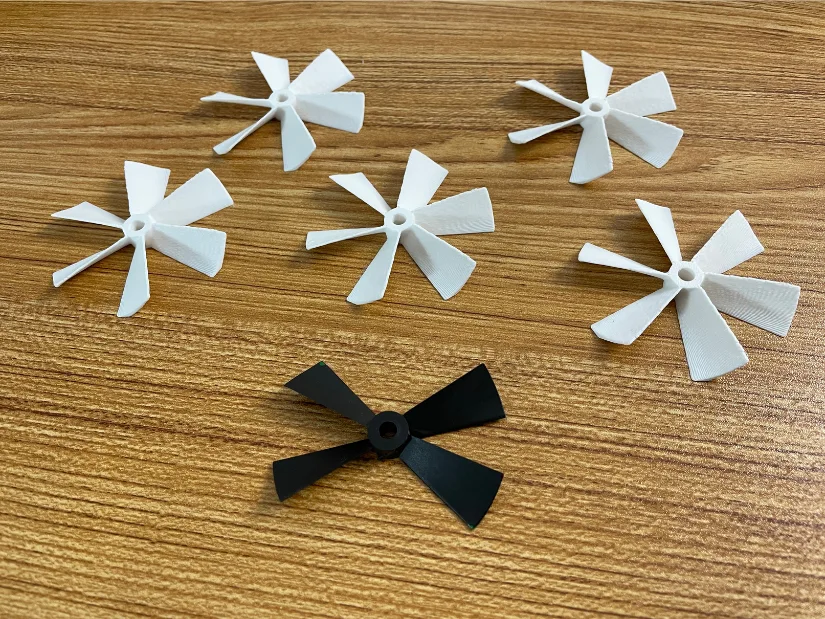
Another RC boat repair project that I’m particularly proud of involved a small propeller. According to Clive from Southend Model Boat Club, the original propeller had lost two blades after an impact. I accepted the challenge of scanning, repairing, and reproducing the part as accurately as possible. Unlike the previous projects, this one required a little more manual modelling in Blender.
©3DWithUs – Print and Photo: Max Funkner
After several attempts to merge two scans of the same broken propeller, I decided that rebuilding the model more cleanly would be the better approach. The central hub and inner cylinder were straightforward to recreate from scratch in Blender, while the blade geometry was far more difficult to reproduce accurately by hand. For that reason, I used the original scan only as a source for a single intact blade.
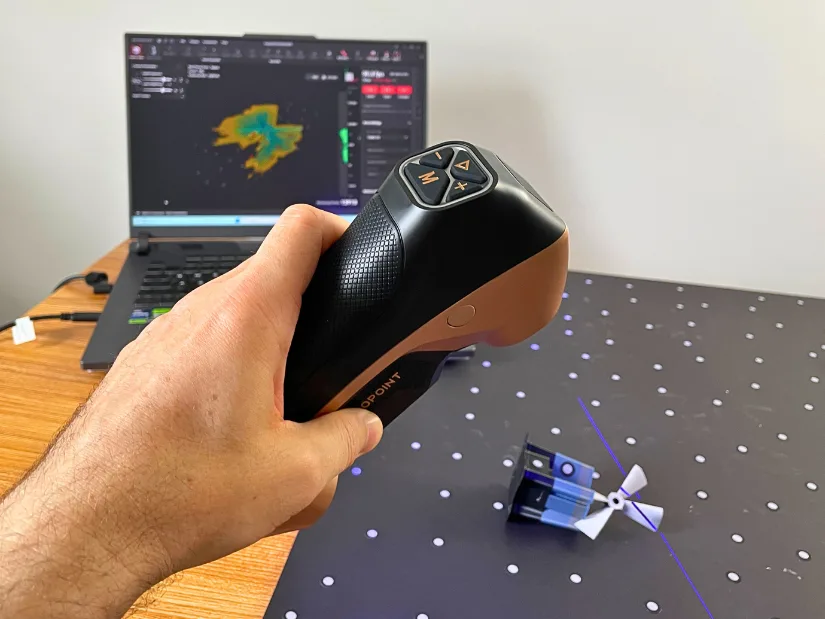
Because the propeller is relatively small, my main goal was to capture one intact blade as cleanly and accurately as possible. Single-line laser mode produced the cleanest result while also keeping the scan file relatively light. Once imported into Blender, the scanned blade could be cleaned up, duplicated, and arranged evenly around the newly modelled hub.
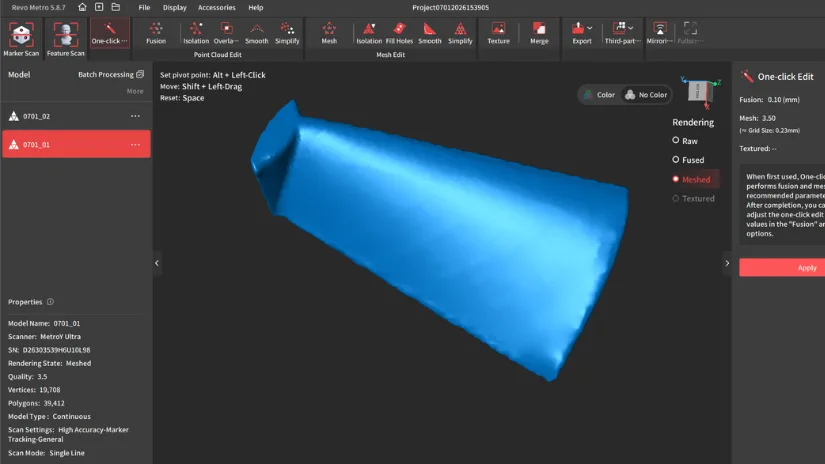
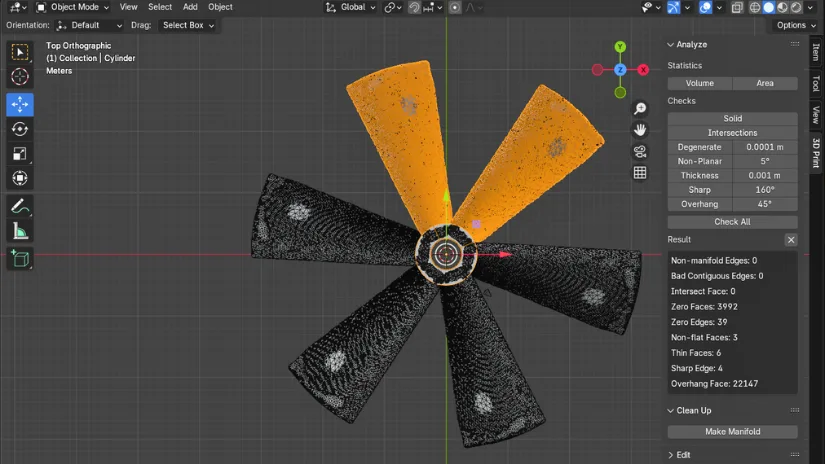
The first thing I did in Blender was make sure the imported blade was manifold and as clean as possible. Its thinnest edge was slightly uneven, but for a small 3D printed part, this level of imperfection would be practically unnoticeable. I then recreated the propeller hub using two cylinders, with one used for the Boolean cut, before duplicating and positioning the blade six times around the centre.
Once again, ChatGPT proved useful for quickly finding the right shortcuts for rotating, arranging, and positioning the blades. Blender can become frustrating when a simple command is difficult to find, so my usual approach is straightforward: if I get stuck, I take a screenshot and ask AI for guidance.
Color Scanning in Auto Turntable Mode
The last feature I tested was Color Scanning in Auto Turntable Mode. As mentioned earlier, the automatic dual-axis turntable is one of the key advantages of the Metro series over scanners such as the POP 4 and INSPIRE 2. Unlike a standard turntable, it can not only rotate the object but also tilt it automatically between scanning passes. This allows the scanner to capture more surfaces with minimal manual intervention, making the workflow much more convenient for smaller objects.
Unlike laser scanning modes, color scanning is only available in Auto Turntable Mode. This mode is particularly useful for creating colored 3D models for digital archiving, product visualisation, or sharing online, where preserving the object’s appearance is just as important as capturing its geometry.
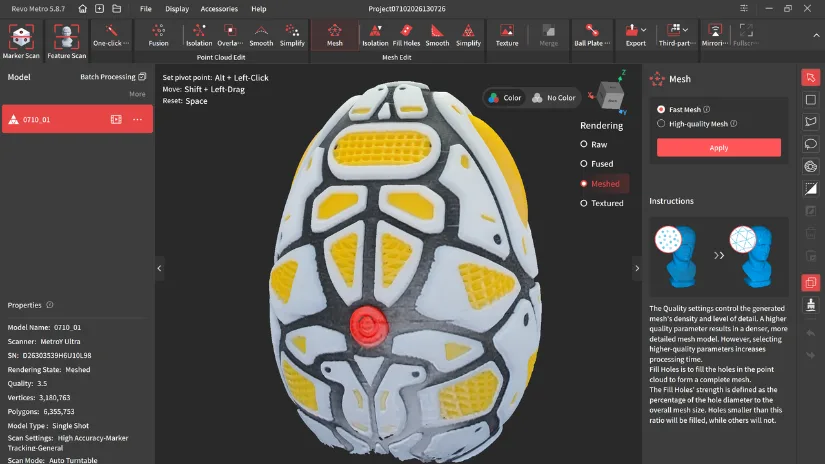
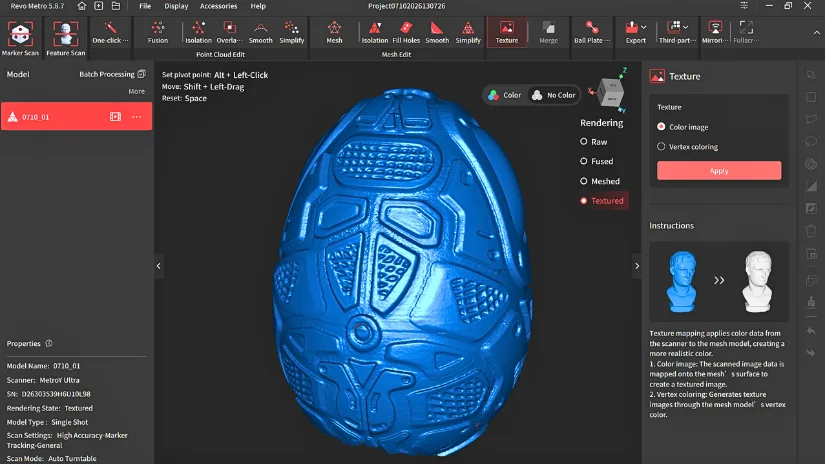
Once again, I found that applying 3D scanning spray helped the scanner capture the coloured details more consistently. Spraying an object evenly can be a little tricky. Nevertheless, the underlying mesh looked very accurate with the fine surface details and overall geometry reproduced clearly.
Compare to Other 3D Scanners
Having tested several Revopoint scanners over the past few years, I found that each model serves a different purpose. The POP 4 remains an excellent all-round scanner for makers, hobbyists, and general 3D printing projects, while the lightweight INSPIRE 2 is particularly appealing for portable everyday scanning. The MetroY Ultra, however, takes a noticeable step forward in terms of speed, accuracy, and reverse engineering capabilities. Throughout my testing, it consistently produced cleaner scans with less effort, especially when working with mechanical parts and functional models.
The MetroY Ultra builds on many of the technologies introduced with the Revopoint MetroX, including the laser scanning workflow and the automatic dual-axis turntable. During my testing, the MetroY Ultra felt like a natural evolution of that platform, offering even higher precision for engineering-focused applications. For users requiring measurement-grade inspection, Revopoint also offers the optical tracking-based Revopoint Trackit, which is designed for industrial metrology and large-scale inspection. Together, these scanners form a broad ecosystem, ranging from portable everyday scanners to professional reverse engineering and industrial measurement solutions.
One more scanner worth mentioning is the Revopoint MIRACO. Unlike the MetroY Ultra, the MIRACO is a completely standalone scanner with a built-in touchscreen and battery, allowing you to scan and perform basic editing without carrying a laptop into the field. If portability and on-site scanning are your main priorities, the MIRACO remains a very attractive option. However, for my reverse engineering projects, the MetroY Ultra’s blue laser technology, higher accuracy, and metrology-focused workflow gave me cleaner scans and more confidence when reproducing functional parts.
Compared to Other Blue Laser Scanners
One of the closest alternatives we have tested is the EINSTAR Rockit. Like the MetroY Ultra, it is a hybrid handheld scanner that combines blue-laser scanning for smaller, detailed parts with a faster mode for larger objects. The Rockit is lighter and has a particularly convenient wireless setup with a removable battery, making it attractive for portable and longer handheld scanning sessions. The MetroY Ultra, however, offers a more metrology-focused workflow, additional laser modes, the automatic dual-axis turntable, and the optional CMM Edition with the precision Ball Plate.
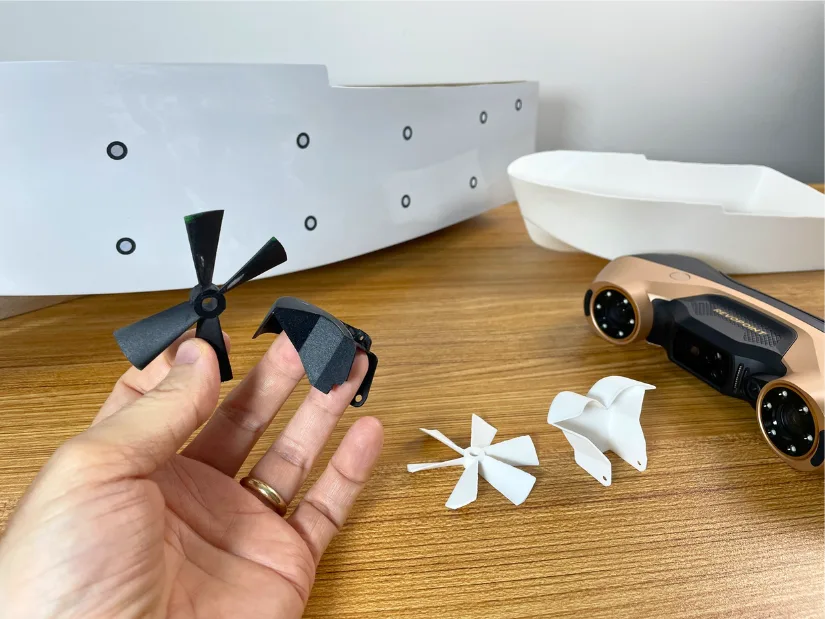
Another potential competitor is the Creality RaptorX. It also combines blue-laser and structured-light scanning and is aimed at reverse engineering, mechanical parts, and other accuracy-focused projects. As I have not tested the RaptorX myself, I cannot make a direct hands-on comparison, but it appears to target a similar type of user and workflow.
Find more 3D scanners via our major 3D scanners guide.
Have questions? Feel free to ask in the comment section below.
For a wider discussion or to share your own Revopoint MetroY scans, join us in the forum:
Conclusion and Pros & Cons
Compare the Prices & Bundles:
Official Website | Amazon
Revopoint MetroY Ultra Review
Review Summary
The Revopoint MetroY Ultra proved to be a highly capable blue laser 3D scanner for reverse engineering and recreating functional parts. During my testing, I scanned and repaired several RC boat components, including a fiberglass hull, a broken reverse bucket, and a damaged propeller. Combined with Blender and a 3D printer, the MetroY Ultra enabled me to reproduce discontinued and broken parts with a level of accuracy that would have been difficult to achieve through manual modeling alone.
What impressed me most was the scanner’s speed and flexibility. Switching between cross-line, parallel-line, and single-line laser modes allowed me to optimize each project, balancing scanning speed, accuracy, and file size. The Revo Metro software was straightforward to use.
Perhaps the biggest lesson from this review was that a clean workflow is just as important as the scanner itself. Rather than trying to create perfect watertight meshes directly in the scanning software, I achieved better results by scanning a clean surface, making small adjustments in Blender, and using the Solidify modifier to create printable models. This approach significantly reduced cleanup time and has already become my preferred workflow for similar reverse engineering projects.
The MetroY Ultra is not the scanner I would recommend to everyone. For casual hobby scanning, models such as the POP 4 or INSPIRE 2 remain excellent choices, while the standalone MIRACO offers greater portability. However, if your focus is reverse engineering, functional part reproduction, product development, or metrology-oriented workflows, the MetroY Ultra stands out as one of the most capable scanners I have tested. It is a professional tool that rewards careful scanning and, when paired with Blender and a capable 3D printer, opens up exciting possibilities for repairing, recreating, and manufacturing components.
Pros and Cons
Pros
- Excellent blue laser scanning accuracy for reverse engineering and functional parts.
- Fast scanning with multiple laser modes (cross-line, parallel-line, and single-line) to suit different projects.
- Automatic dual-axis turntable significantly improves small-object scanning.
- Revo Metro software is intuitive and makes switching scanning modes straightforward.
- CMM Edition with Ball Plate enables high-accuracy calibration for metrology workflows.
- Excellent companion to Blender for reverse engineering and 3D printing workflows.
Cons
- More expensive and less beginner-friendly than entry-level handheld scanners.
- Larger and heavier than scanners such as the POP 4 and INSPIRE 2.
- Large, high-resolution scans can generate very heavy project files, requiring a capable PC.
- Dark objects still benefit from 3D scanning spray for the smoothest scanning experience.
- I was unable to complete a successful wireless workflow with the iPhone app during my testing.
- Getting the best results still requires some post-processing in software such as Blender.




Great article!
I don’t think the scanner actually uses the ball plate to calibrate anything. My understanding (which could be wrong) is that it is more of a check tool. You can scan it before scanning something and it gives you a quick measurment and error (based off the actual CMM measurement) so you have an idea of how accurate the scanner currently is and if it needs to be calibrated using the calibration board. Its more validation, not correction. That being said, its still a great tool and feature to have to verify the scanner is giving you a very accurate scan.