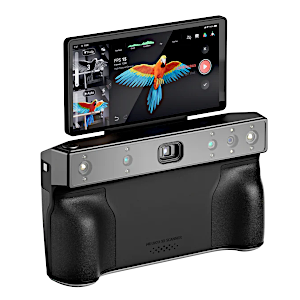
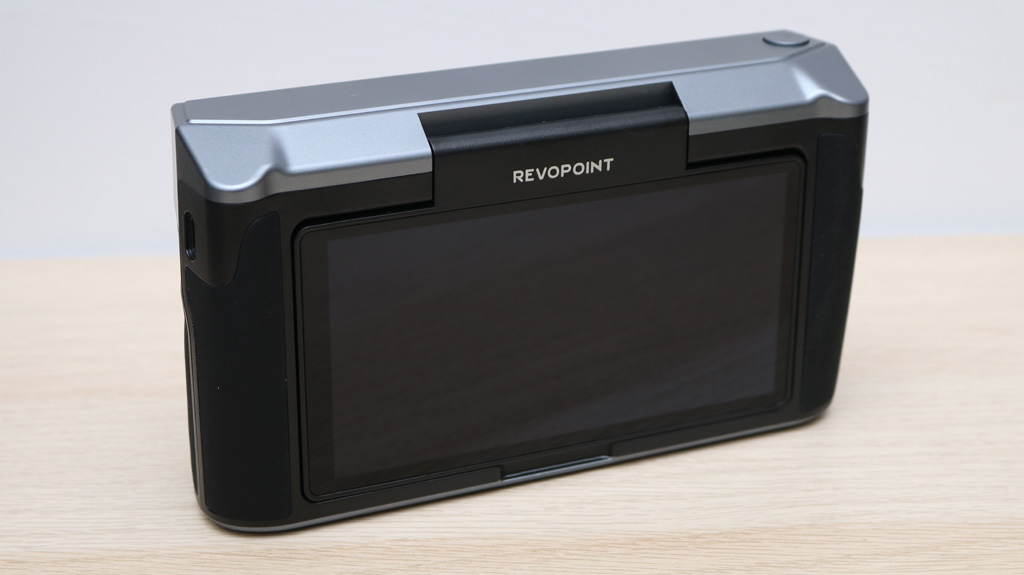
The Revopoint MIRACO is a standalone 3D scanner with an integrated LCD touchscreen designed for portable operation without being tethered to a power bank or a computer. This structured light 3D scanner has an integrated battery that offers up to two hours of continuous scanning, and the 6-inch 2K LCD touchscreen can be used for monitoring as well as editing. The MIRACO is a complete solution for prosumers looking for a portable 3D scanner with integrated editing capabilities. Not just limited to on-device editing, the MIRACO can also sync with the Revo Scan 5 app via USB or Wi-Fi, so detailed scans can be processed with more precision or at a faster speed on a more powerful computer.
Table Of Contents:
- Specifications
- Included Accessories
- Turntable Scanning
- Far Mode Scanning
- Creating Textured Models
- Compare to Other 3D Scanners
- Conclusion and Pros & Cons
Price: $1,300 – $1,919
Product affiliate links: 3DWithUs is supported by its audience. Purchases via some links may earn us a small commission at no extra cost to you. This helps us to continue bringing you high-quality content. Our guides and reviews remain unbiased and independent.

Revopoint MIRACO Specifications:
Technology: Quad-camera Infrared Structured Light
Fused Point Distance: 0.05mm
Single-frame Accuracy: Up to 0.05mm
Scan Speed: Up to 15fps
Minimum Scan Volume: 10mm x 10mm x 10mm
Maximum Scan Volume: 4000mm x 4000mm x 4000mm
Connectivity: USB, WiFi
Output Format: STL, PLY, OBJ
Dimensions: 200mm x 50mm x 110mm
©3DWithUs – Photo: Andrew Sink
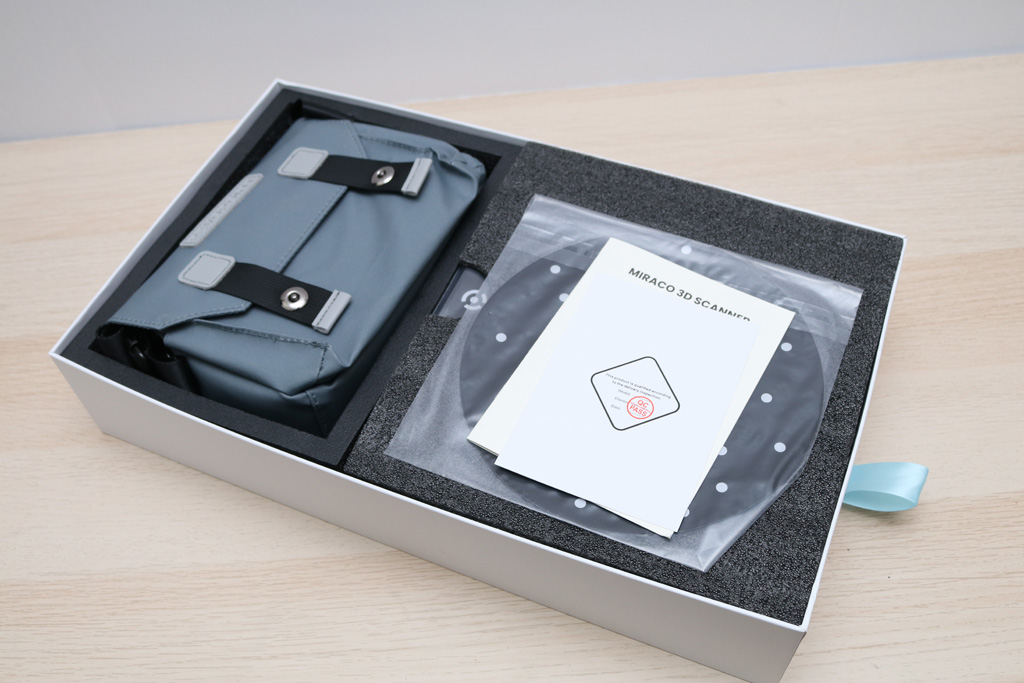
Included Accessories
Revopoint offers two packages for the MIRACO: the base package and the Pro package. The base package (reviewed here) includes the MIRACO scanner with 16 GB of RAM, a carrying case, a USB-C cable for data transfer / charging, a 65W power adapter, a turntable, a calibration board, a Quick Start guide, and various markers and Magic Mats for scanning objects with markers. The Pro version includes all of this as well as 32 GB of RAM on the MIRACO, a USB-C-to-HDMI adapter, and additional calibration tools.
©3DWithUs – Photo: Andrew Sink
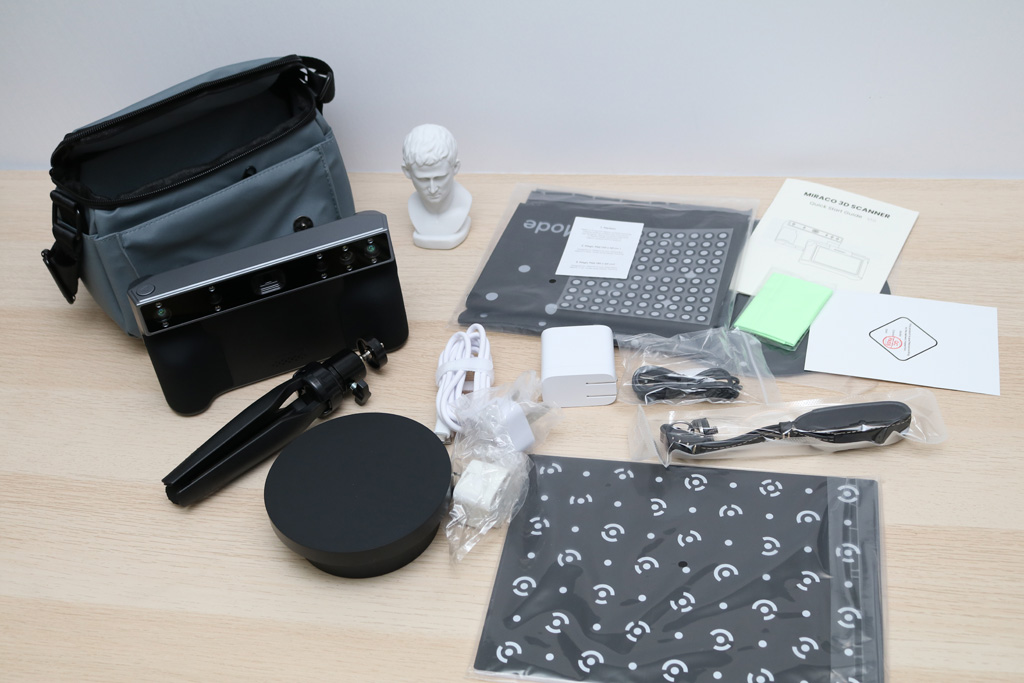
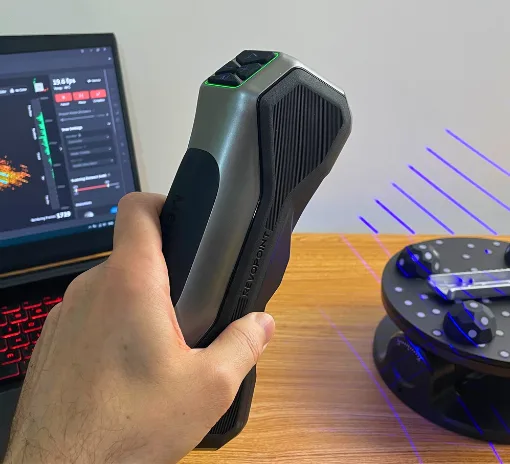
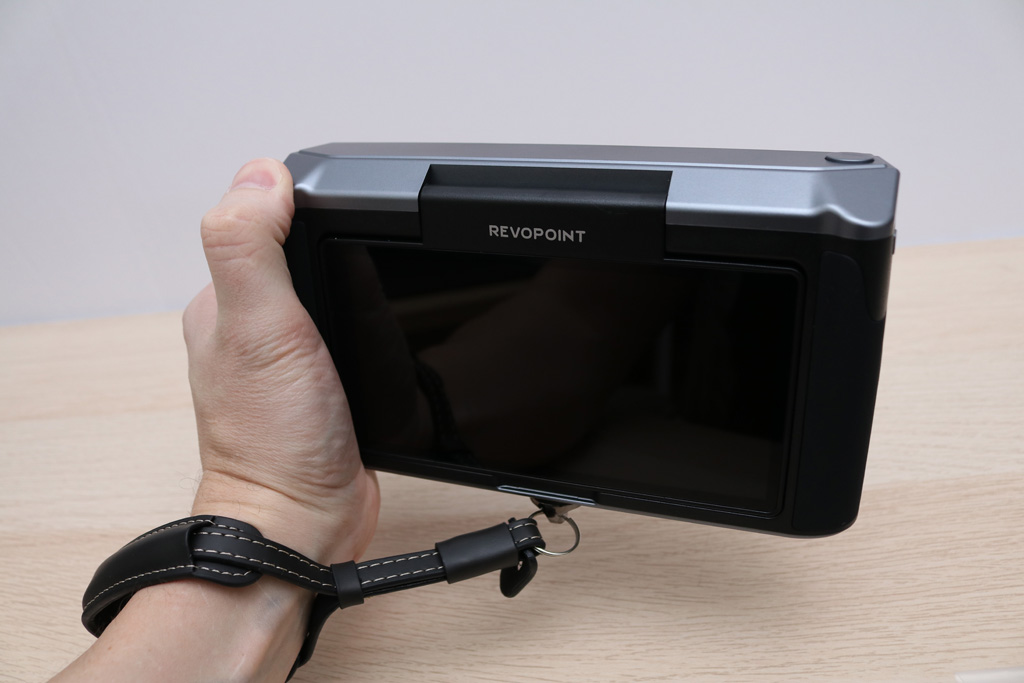
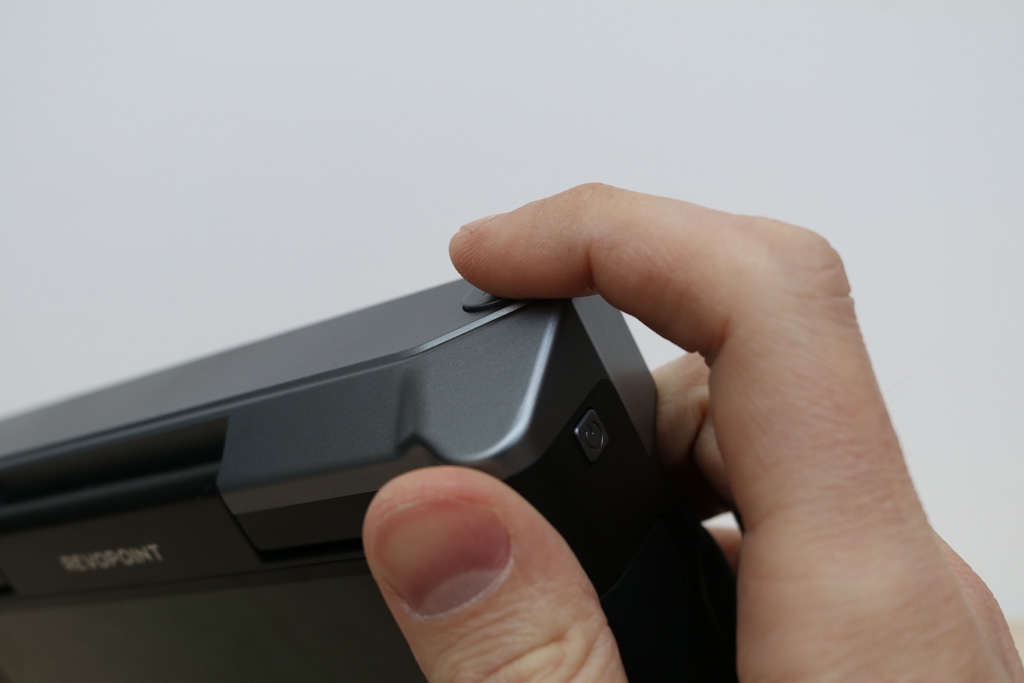
The overall quality of the MIRACO and the included accessories is high. The overmolded grip on the MIRACO made it feel like I was holding a high-end DSLR camera. In addition, the magnetic buttons on the carrying case allow for one-handed opening and there is an included pouch for the charger. The turntable also includes an extension mat with markers pre-applied for scanning objects too large or too featureless to scan on the included turntable.
©3DWithUs – Photo: Andrew Sink
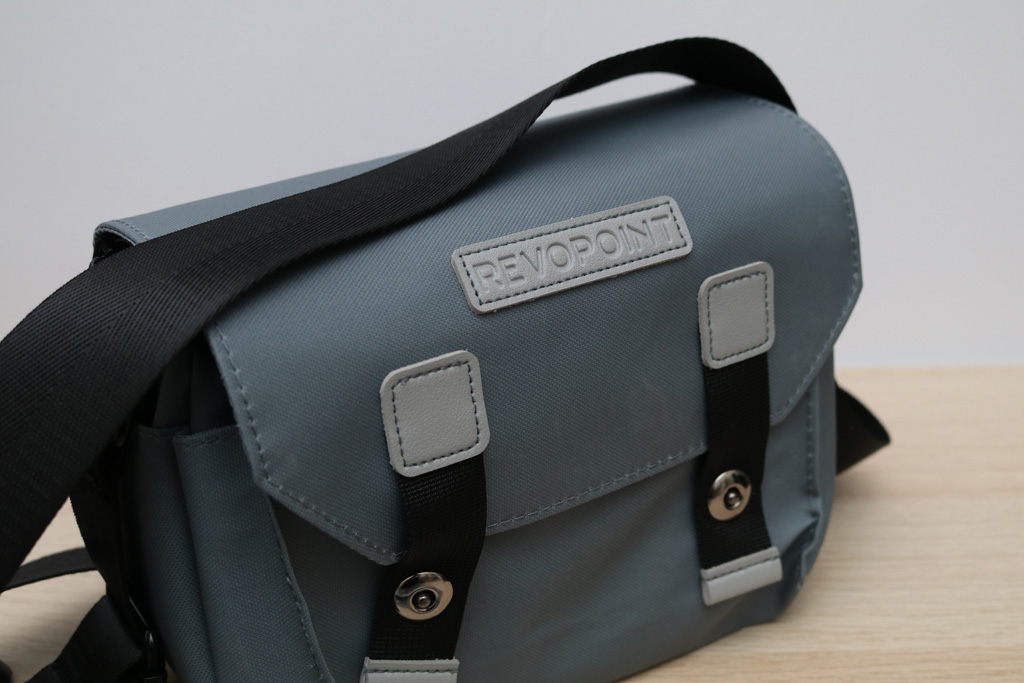
The MIRACO is designed to be used as a portable scanner, and the included carrying case and wrist strap make it easy to transport. I was impressed with the amount of thought that was put into the accessories, as the MIRACO can easily be carried to a site for scanning with no additional battery pack, wires, or constant phone or computer connection required. The Revopoint Range (a scanner also designed for large object scanning) requires a mobile app that is running during scanning as well as connections for power and data transfer, all of which can be cumbersome to manage.
Turntable Scanning with the Revopoint MIRACO
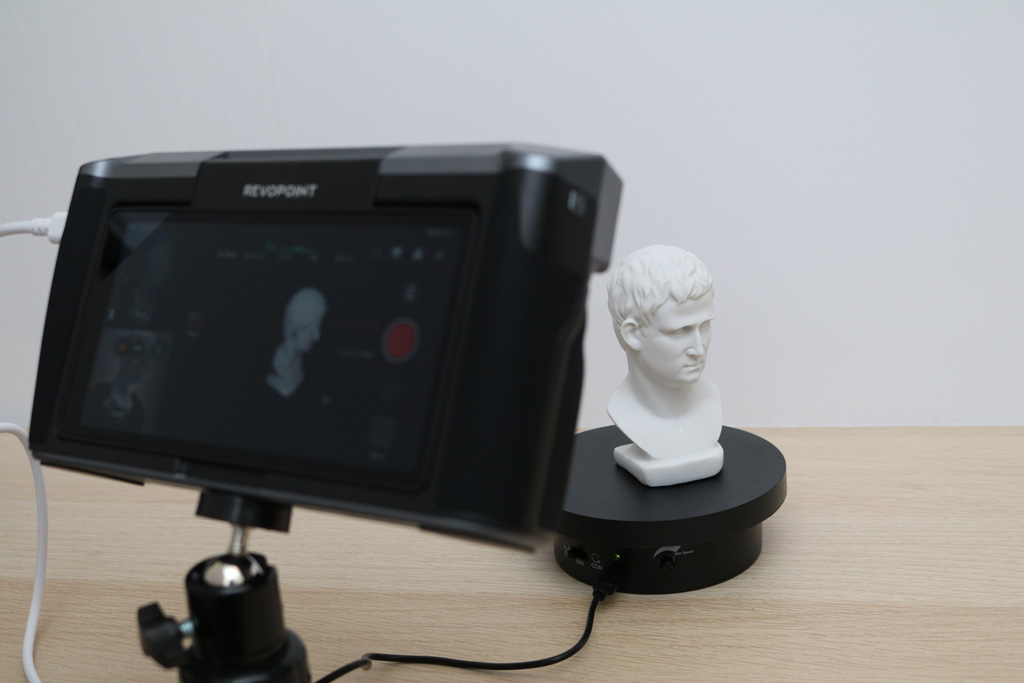
Like other Revopoint 3D scanners, the MIRACO includes a small bust that can be used as a demo model in order to get comfortable with the interface of the scanner as well as the post-processing workflow. The integrated LCD interface means that the scanner doesn’t need to be tethered to a computer or mobile device during scanning.
©3DWithUs – Photo: Andrew Sink
The entire scanning and editing process can be completed on the scanner using an interface that is very similar to the Revopoint mobile app. This is a refreshing change, and makes the portability of the MIRACO a huge selling point over less-expensive scanners that require a tethered power and/or data connection.
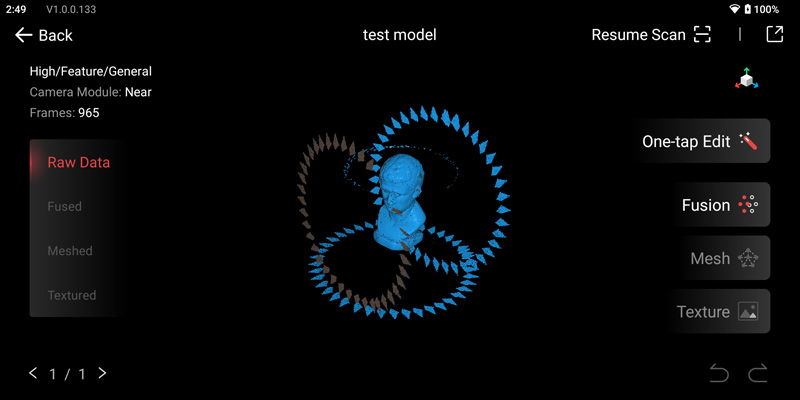
Scanned with High Accuracy mode, Feature tracking, and Mesh only (no color), the scan was completed in a total of three passes. The MIRACO had no trouble picking up the tracking when the model was repositioned on the turntable, and automatically snapped the existing point cloud to the new one. The three rings in the picture are small pieces of the table that were picked up by the scanner and included in the point cloud. After completing three full revolutions, I marked the scan as complete and moved to the editing stage
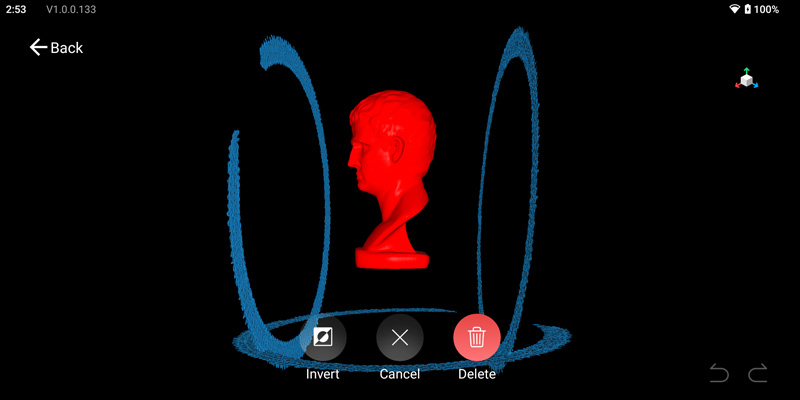
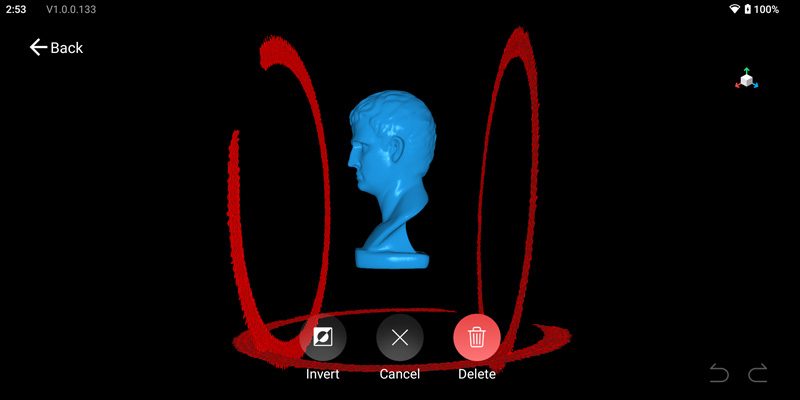
The 6-inch LCD on the MIRACO is large enough to be usable as a touchscreen interface during the editing process. Using the LCD screen, I was able to easily select the points I wanted to keep, invert the selection, and delete all the floating points. I was surprised by how well the interface worked, and found it can act as a substitute for a computer-based process when working with simple scans that require minimal post-processing.
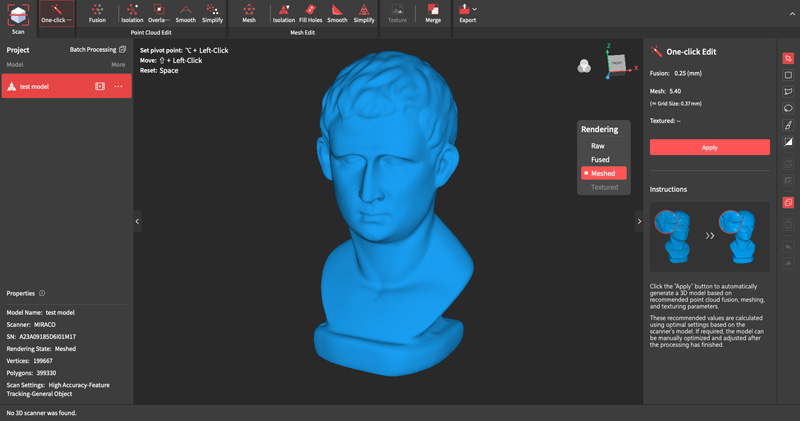
Once complete, I transferred the project to my computer to check the quality of the scan. The resulting mesh was clean and didn’t contain any floating points or extra data. There is no additional work required using the Revo Scan 5 app, just exporting the mesh as a print-ready mesh .stl file. Revo Scan 5 can also export .ply and .obj formats as well as full-color texture when enabled.
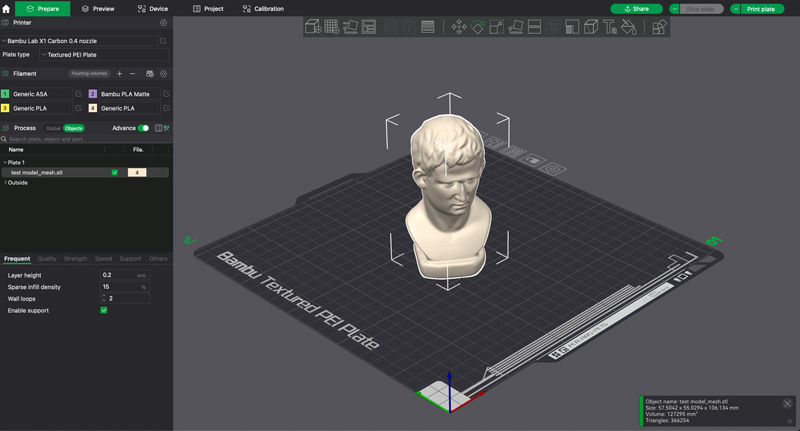
The exported .stl file is a 20 MB manifold mesh with a high level of surface detail. The bottom of the original bust isn’t completely flat, and will rock back and forth if moved. Importing the mesh into Bambu Studio, I used a planar cut to create a flat surface on the bottom of the model, making it easier to print on the Bambu Lab X1-Carbon.
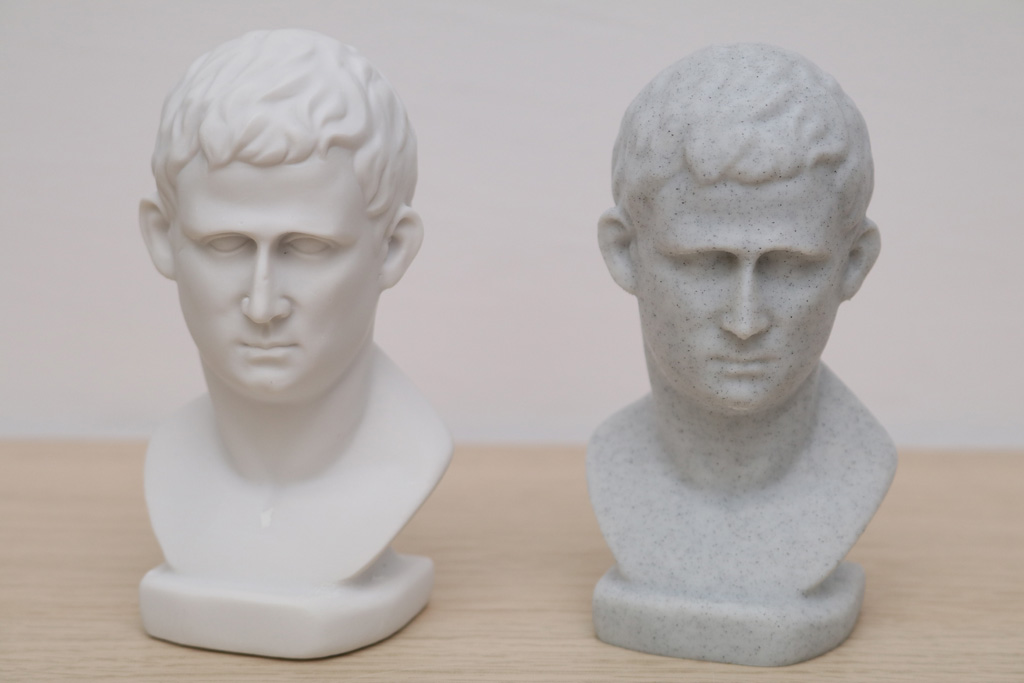
©3DWithUs – Print and Photo: Andrew Sink
Compared with the original model, the printed version is a faithful reproduction with the sharp details around the nose and mouth resolving well. The original model has sharp creases around the eyes, and these are visible in the 3D scan of the model. Printed at a layer height of 0.2mm, some of the finer details are a little soft, which could be improved by printing at a higher resolution or at a different orientation.
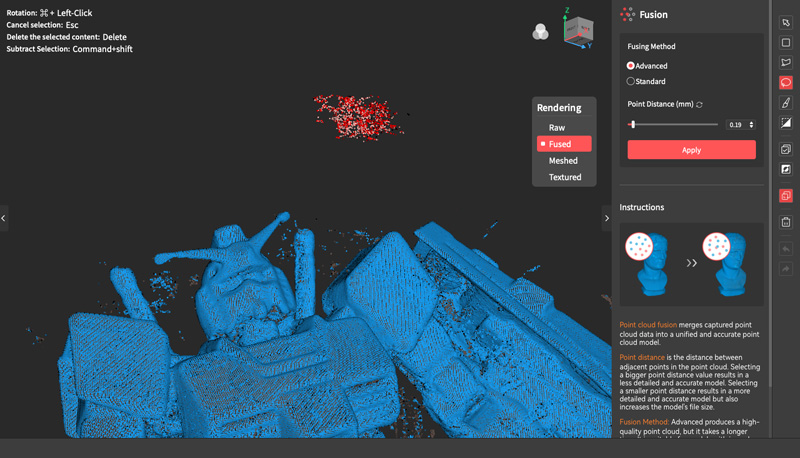
Revopoint has also published a desktop 3D scan processing app called Revo Scan 5, which can edit point clouds, create meshed 3D models, apply color textures, and more. The workflow on the app is essentially the same as the workflow on the handheld MIRACO, making the transition an easy one for users who aren’t familiar with Revo Scan 5. Scans can be transferred via Wi-Fi or USB by directly plugging the MIRACO into a computer, where the point cloud data and any processed models are transferred. Just like the selection tools available on the scanner, isolated points can be selected automatically or manually for deletion, overlapping points can be deleted, and other similar operations are available.
I found that complex processing steps like Fusion were faster on my computer (a 2021 M1 Max MacBook Pro with 64 GB of RAM), but still only took a few minutes when done on the MIRACO scanner. Given the battery drain of these steps, it’s an appealing option to capture point cloud data in the field and have a way to review it for coverage before processing. Either way, it’s entirely possible to use the MIRACO and exclusively perform edits and processing on the scanner itself.
©3DWithUs – Photo: Andrew Sink
The default scanning mode of the MIRACO is Continuous Mode, which operates by continuously capturing frames and adding points to a point cloud. In addition to this process, the MIRACO also offers a Single Shot mode which operates more like a digital camera being used for photogrammetry. In this mode, clicking on the shoulder button will capture a single frame, allowing the user to move around large models and capture frames individually. I also used Continuous Mode in Near Mode to scan small and detailed models, and the process felt more like a photogrammetry scan instead of a structured light scan.
Far Mode Scanning with the Revopoint MIRACO
The Revopoint MIRACO has two modes when scanning: Far Mode and Near Mode. As the names indicate, the modes can be used depending on what you’re scanning. Near mode requires the camera to be only a few inches from the model, while Far Mode allows you to stand a bit farther back, ideal for walking around a larger object like a statue, car, or chair.
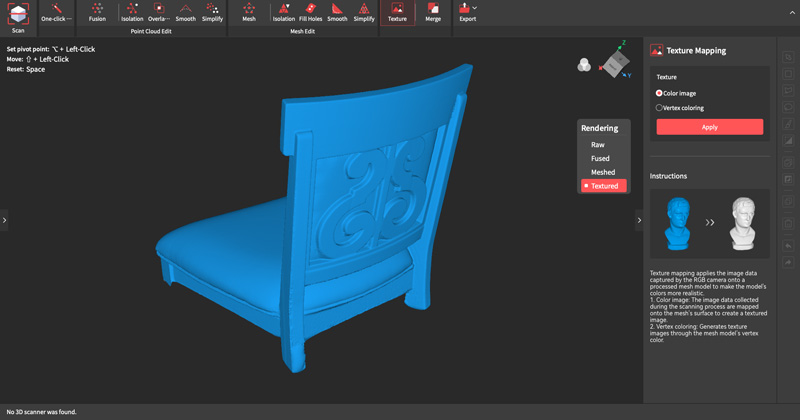
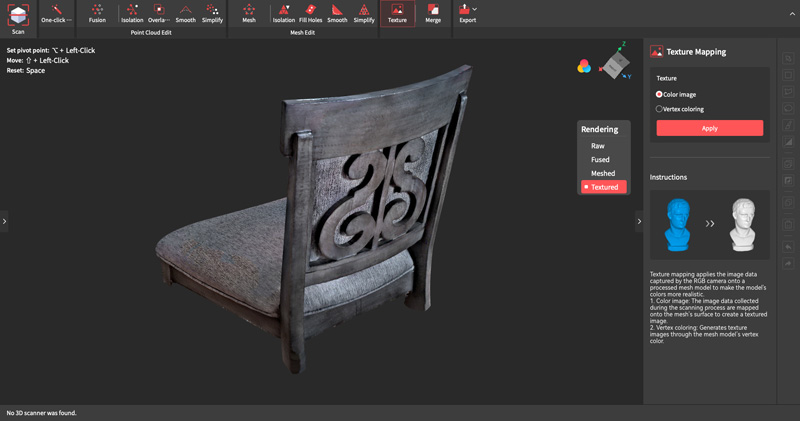
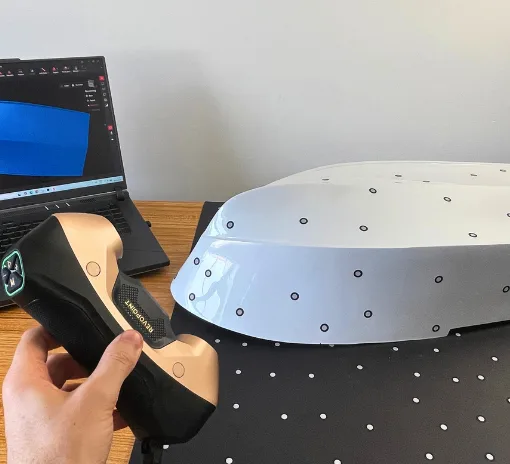
I used the Far Mode to scan a chair, and was impressed with how well the detail of the wooden frame was captured. In addition, the color texture of the padding seat and back clearly shows the stitching while the underlying mesh has a gentle geometric texture applied to it.
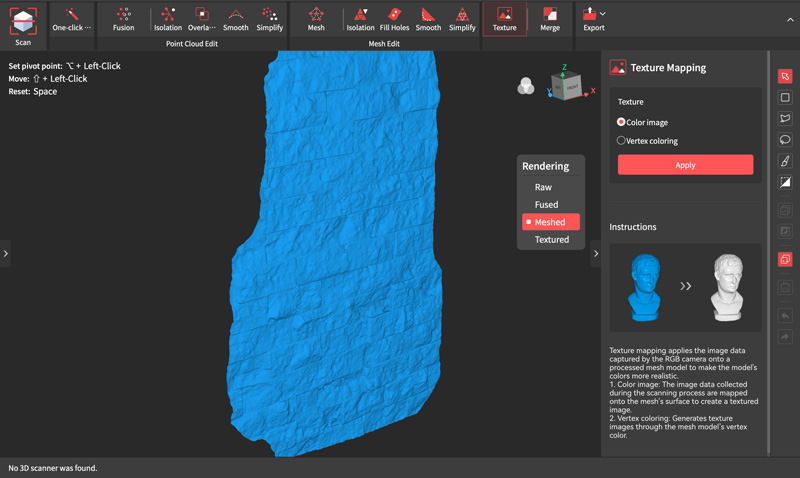

When using Far Mode, the MIRACO still offers High, Standard, and High-Speed modes for accuracy as well as alignment and object type control. Using the High accuracy setting in Far Mode, larger objects like a stone wall can be scanned to quickly capture the color texture as well as the underlying geometry. For users looking to create assets from scans, this is a quick way to capture large objects and prepare them for export.
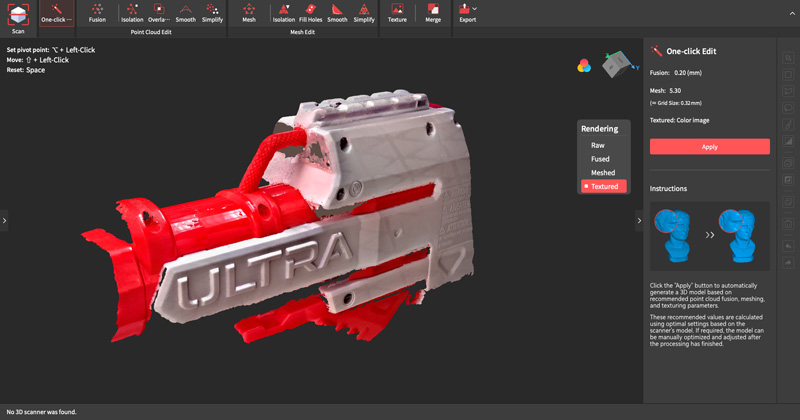
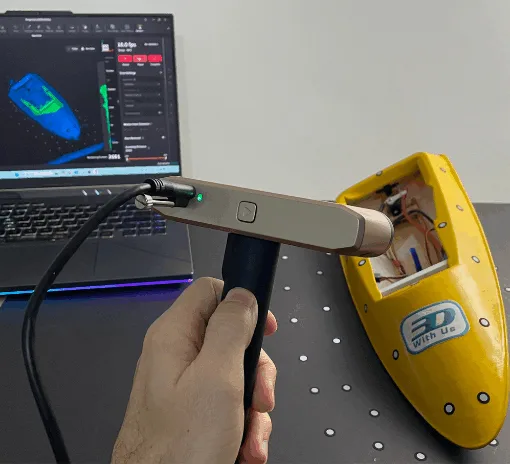
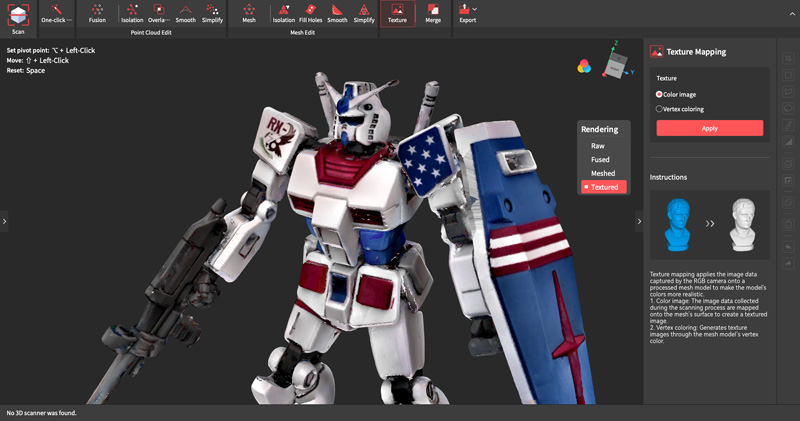
Using Near Mode, geometry can also be captured for reverse engineering. Using the MIRACO as a handheld scanner, larger models like a NERF blaster can be partially scanned to capture critical areas where precision is required. The MIRACO is advertised as having a single frame accuracy of 0.05 mm, but I found that some of the sharper features on models tended to soften during the Mesh operation, which reduced the overall accuracy of the model.
Creating textured models with the Revopoint MIRACO
The Revopoint MIRACO can also capture color texture and apply a texture map to mesh 3D models. Previously on other Revopoint scanners, I had issues with color texture not applying appropriately or looking smudged around transition and inflection points.

To test out the color, I scanned a felt model of two avocados holding hands, which has a matte finish and distinct transitions between colors.
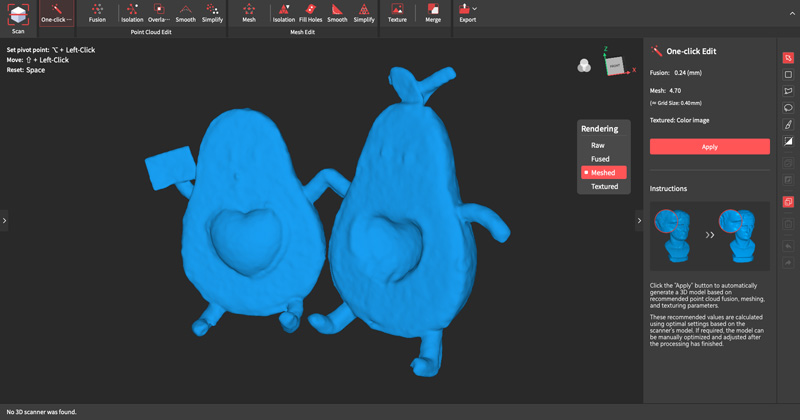
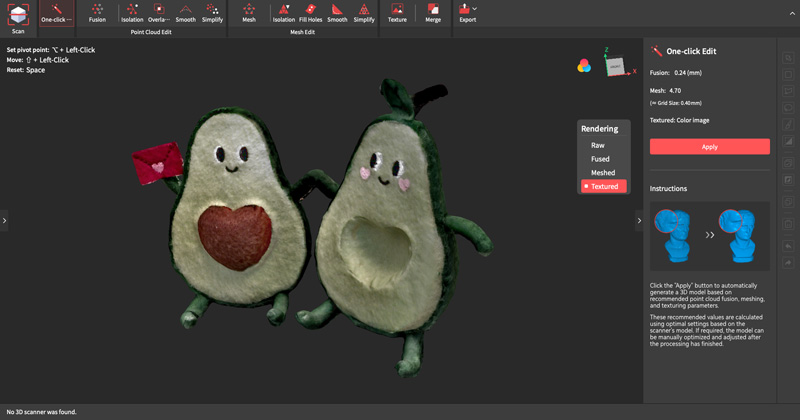
Scanned using the included turntable in Near Mode at high accuracy and color texture enabled, the models were captured well as could be expected. The point cloud created by scanning the felt resolved into a rough surface that nicely approximated the surface of the model, and the colors were applied evenly and as expected. It’s worth noting here that Revo Scan 5 no longer uses a glossy material when rendering the solid mesh, so it’s easier to spot defects than previous versions of the software that added a high gloss to scanned models.
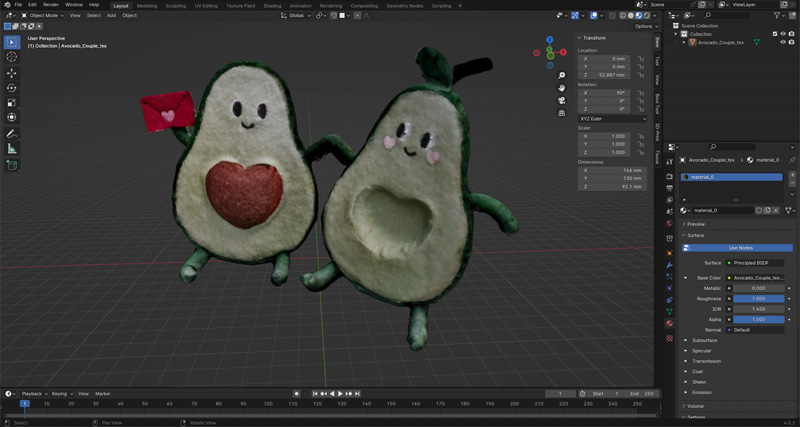
Exported as an .obj, the Revo Scan 5 desktop app will automatically generate the .mtl and .jpg for the texture of the model as well as the geometry in the 3D mesh. Importing the model into Blender reveals that the color texture looks clean and well-defined. Unfortunately, I found that other models (anything remotely reflective) had issues with the color not interpolating between scans evenly, leaving a visible seam or tear in the color. Overall, I think the color texture is a nice bonus of the MIRACO, but not a primary selling point.
Compare to Other 3D Scanners
Compare to the Revopoint other 3D scanners series:
With a base price of $1,299 and $1,599 for the MIRACO Pro, the MIRACO is not an inexpensive 3D scanner in the prosumer 3D printer space. With an appearance and feature set more closely resembling an Artec Leo (a professional 3D scanner that sells for $34,800), the Revopoint MIRACO is clearly designed for prosumers and technical experts looking for a portable 3D scanner.
Revopoint has effectively created an all-in-one solution with the MIRACO, which will likely be a popular selection among consumers looking for a turnkey portable scanner that doesn’t require additional hardware or software to operate. Less expensive scanners like the Revopoint POP 3 or Revopoint Mini are still a popular choice but require a computer or phone to operate and may be less intuitive.
The Revopoint MIRACO is a comparable product to the EINSTAR VEGA currently available on the market. Products from the Revopoint series, including the Range, Mini, and POP models, are in tight competition with offerings from brands like 3DMakerPro and Creality. Read more about other 3D scanners on our website.
Conclusion and Pros & Cons
Revopoint MIRACO Review
Review Summary
The Revopoint MIRACO offers a polished user experience, and I was impressed with not only the results of the scanner but also at the ease-of-use when editing scans on the integrated touchscreen. After using the mobile version of the Revo Scan app with the Revopoint Range, I was left wanting a scanner that could be used in the field without an additional device for feedback, a handheld grip, a USB battery, and a pair of cables connecting everything. The MIRACO provides exactly this and offers both Near Mode and Far Mode scanning in addition to color textures. During testing, the MIRACO was capable of capturing everything from small models all the way up to furniture and many objects in between.
The 16 GB of base RAM is advertised as being able to capture up to 4000 frames in a single scan, plenty for most objects scanned in turntable or handheld mode. For larger models, the Single Shot mode will allow for more targeted frames during capture. Unfortunately, like previous Revopoint scanners, the color texture isn’t quite at a professional level, and there tends to be a visible seam where the lighting has changed.
The large 6-inch 2K LCD touchscreen integrated into the MIRACO provides not only feedback during scanning but also an interface to edit and process 3D scans, making it ideal for portable scanning in the field. The ability to plug directly into an external monitor with USB for monitoring is helpful for real time feedback in a studio setting as well. Overall, I was very impressed with the ease-of-use of the MIRACO during testing. This is the scanner the market has been waiting for: simple, intuitive, and powerful.
PROS:
– Standalone operation for scanning in the field
– One-click editing for fast meshing of simple models
– Single Shot mode offers improved scanning ability for large models
– Near and Far Modes can be combined for large scans with detailed areas
CONS:
– Expensive
– Color texture is subpar