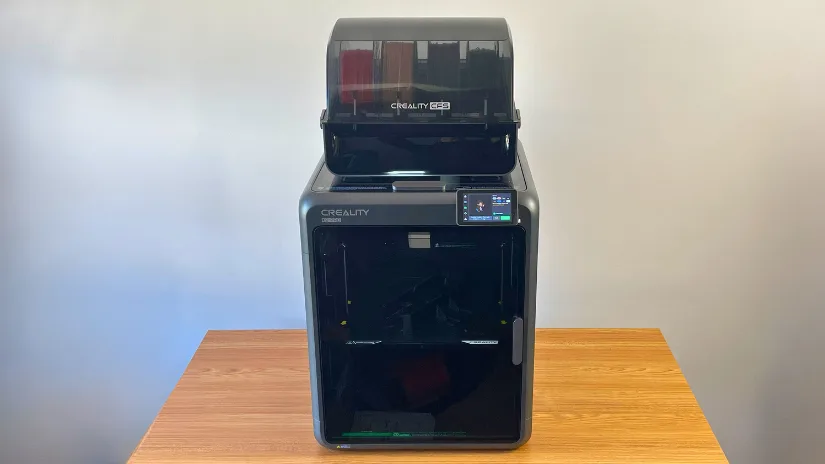
I was delighted to get hands-on with the new Creality K2 Pro Combo. Having tested the K2 Plus Combo earlier this year, it’s exciting to now explore the upgrades and added features of this flagship series. With two CFS units available, I was also able to push the machine further into 8-color 3D printing. In this article, I’ll share key highlights, print examples, and practical insights from my testing. As usual, we’ll wrap up with final thoughts and a list of key strengths and areas for improvement.
Table Of Contents (Jump to a Section)
- Specifications
- Unboxing – What’s Included
- Setup, Design and Features
- Two CFSs Setup – 8 Colors
- Optional: Creality SpicePi X4 Filament Dryer
- Software – CrealityPrint
- CrealityCloud App
- Testing and Results
- Compare to Other 3D Printers
- Conclusion and Pros & Cons
Where to Buy the Creality K2 Pro Combo
Price: $1,049.00 – $1,249.00
Compare the Prices & Bundles:
Official Website | Amazon
Creality K2 Pro Combo Specifications
K2 Pro
Build Volume: 300 × 300 × 300 mm
Machine Dimensions: 445 × 505 × 850 mm
Net Weight: 23.7 kg
Printing Speed: ≤ 600 mm/s
Acceleration: ≤ 20,000 mm/s²
Layer Height: 0.05 – 0.3 mm
Extruder Type: Dual-gear direct drive
Filament/Nozzle Diameter: 1.75 mm / 0.4 mm
Supported Filaments: PLA, PETG, PET, ABS, ASA, PLA-CF, PA-CF, PPA-CF
Max Nozzle Temperature: ≤ 300 ℃
Max Heatbed Temperature: ≤ 110 ℃
Max Chamber Temperature: ≤ 60 ℃
Build Plate: Flexible PEI
Leveling: Full-auto leveling
AI Camera: Monitoring & calibration
RFID Sensor: Included (supports RFID-tagged filaments)
Active Chamber Heater: Yes
CFS – Creality Filament System
CFS Extensions: Up to 4 CFS units
Compatible: PLA/PETG/ABS/ASA/PET/PLA-CF
Not compatible: flexible TPU, damp BVOH/PVA, or warped cardboard spools.
Read full specifications at the end of the product page.
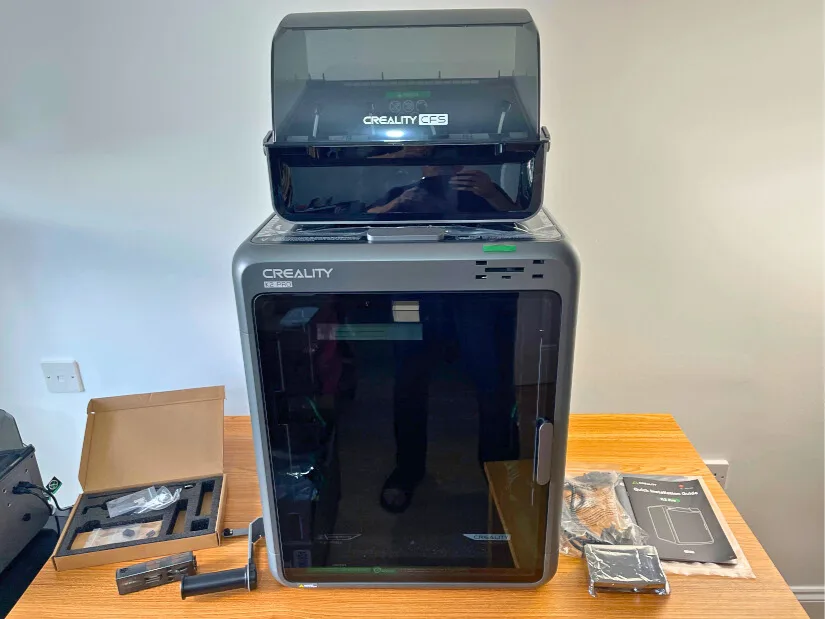
What’s in the Box
The machine, CFS, 4 spools, and parts arrived in one big box. The box is heavy, and it is a rare case when the deliveryman actually called me to make sure I could meet him and help bring the delivery inside. The net weight of the machine is 23.7 kg (36 kg is K2 Plus for comparison).
©3DWithUs – Photo: Max Funkner
Creality K2 Pro • CFS 4 color unit • Power cable • Box of Accessories • 4 Filament Spools • Spool holder • Spare parts • Spare Bowden Tubes • Assembly screws • Allen wrenches • User manual • Quick start guide
Setup, Design and Features
As the CFS is shipped inside the machine, there are several protective brackets and supports that need to be removed during unboxing. The printed instructions on the box are clear, but I also found the accompanying video guide very helpful.
During testing, I had to unblock the extruder once. TPU jammed inside the extruder when the chamber temperature rose too high. (Tip: keep the lid open when printing with low-temperature filaments.) Disassembling the extruder was straightforward thanks to the clear step-by-step instructions printed directly on the unit.
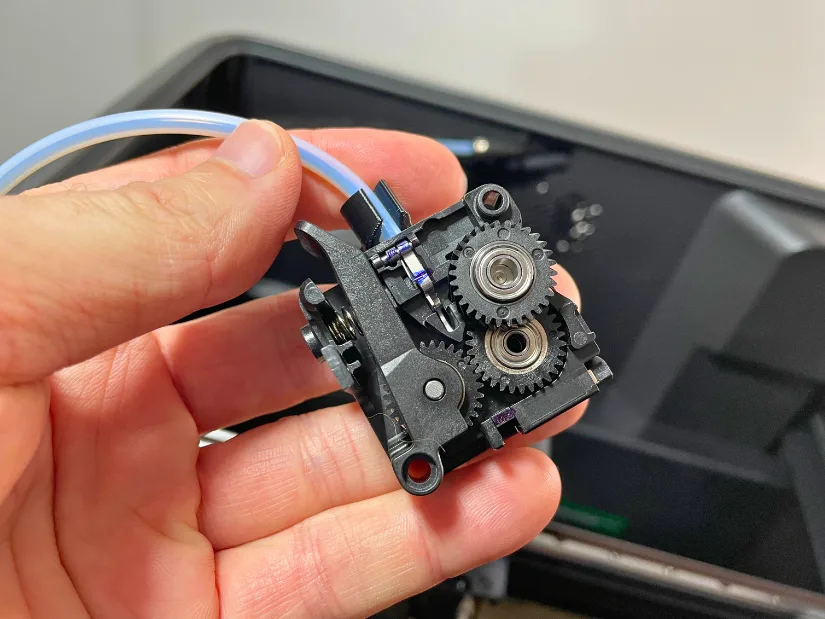
After removing the two drive gears, I gained access to the jammed filament. This same procedure also applies when replacing the cutting blade, making maintenance relatively simple.
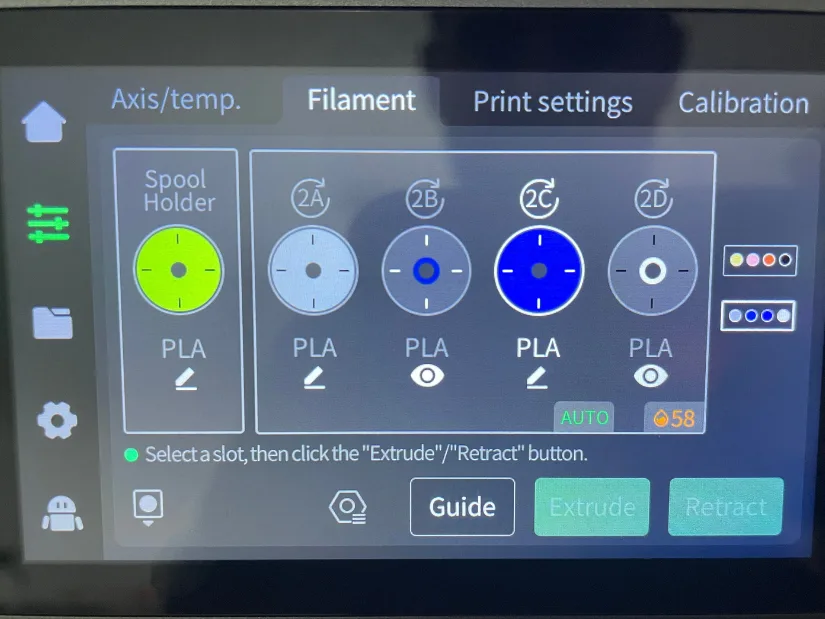
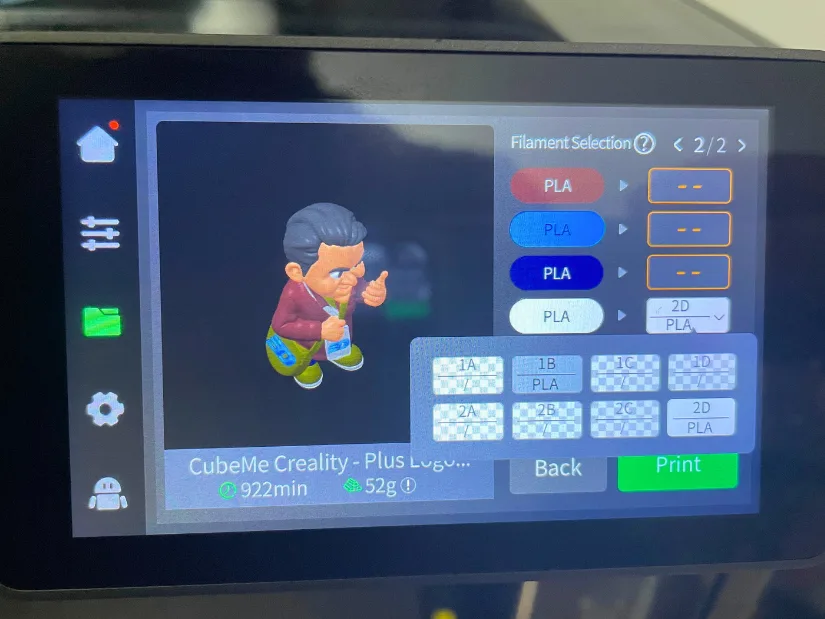
– Screen. I really like this touchscreen — compact, colorful, and responsive. Since it’s the same as on the K2 Plus, I’ve already had plenty of time to get used to it. What was interesting with the K2 Pro and two CFS units was the addition of an extra color assignment bar. In some project cases, when the G-code is already on the machine, there’s no need to open the slicer software again — a new color set can be applied directly from the screen.
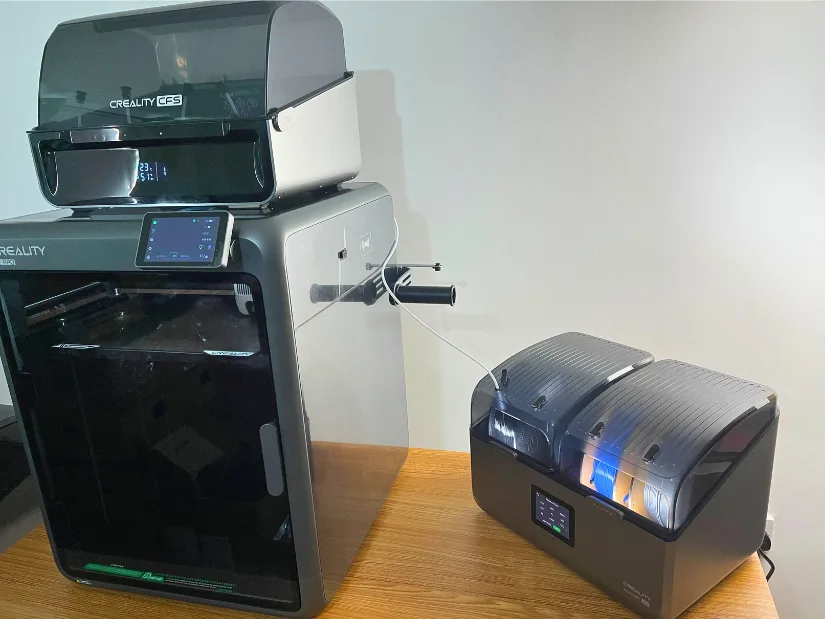
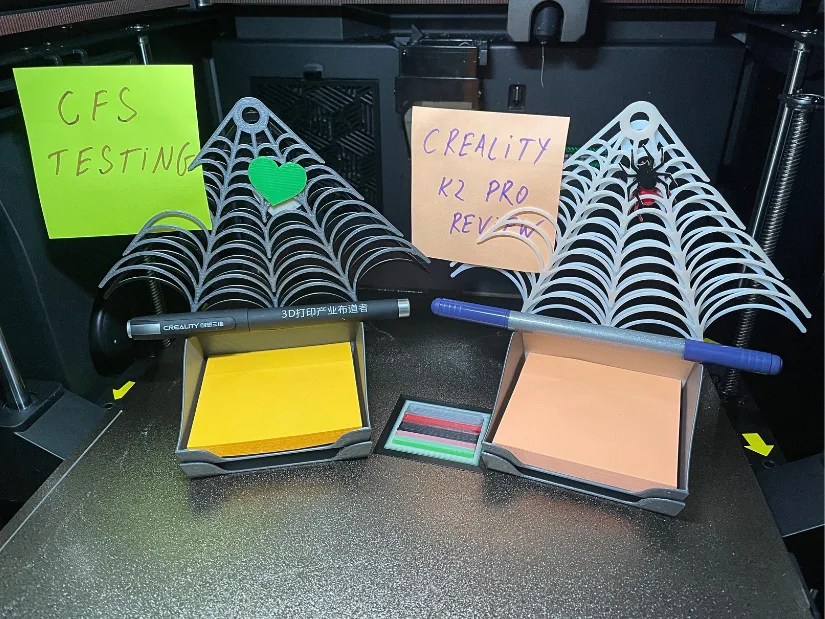
Two CFSs Setup – 8 Colors
If filament tubing were straightforward, then finding the right sockets for the plugs were less so. The multiple CFSs setup was missing from the quick start guide. After a bit of searching, I figured out the correct configuration. Essentially, the CFS units connect in a chain — each consecutive CFS acts as an additional cell in that chain.
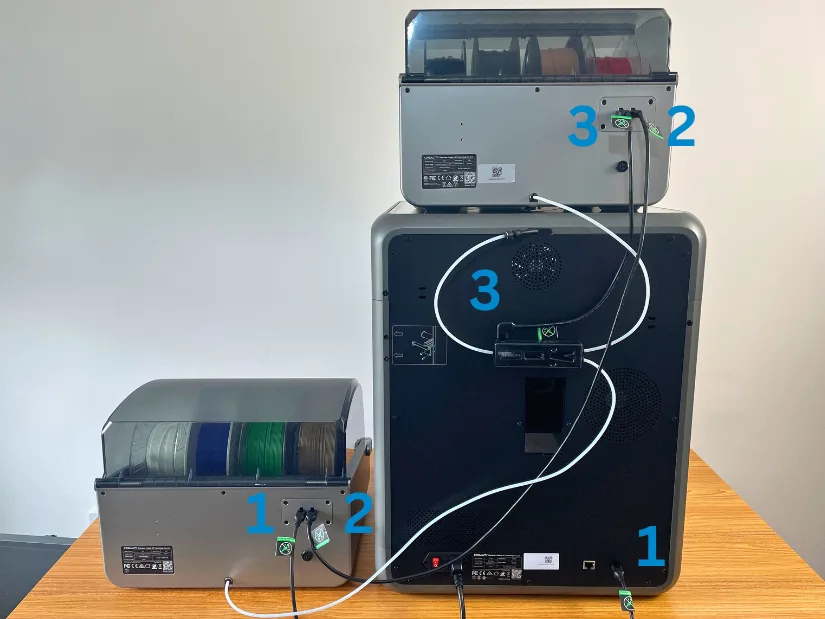
Once connected, the two CFS units were recognized immediately by the printer. This setup allowed me to work with 8 different filaments at the same time, making it possible to print in more varied color combinations. The chain connection system works well, and with support for up to four CFS units, the Creality K2 Pro can handle up to 16 colours or materials in a single project.
Optional: Creality SpicePi X4 Filament Dryer
Another optional device I would recommend considering with the Creality K2 Pro is the SpicePi X4. This is a well-thought-through filament dryer that can feed the 3D printer directly from the side or instead of CFS when needed. Some highly hygroscopic filaments require drying even after opening a brand-new package, and the SpicePi X4 provides an effective solution.
©3DWithUs – Print and Photo: Max Funkner
I especially appreciated the airtight separate chambers. As shown in the image, one chamber can dry PLA at 50 °C while another handles TPU at 60 °C, each tailored to the material’s needs. What’s more, the system allows you to leave filaments inside and check the humidity levels the next time before starting a new print. This adds both reliability and convenience for anyone working with sensitive engineering-grade filaments.
Software – CrealityPrint
CrealityPrint is based on the Orca slicer, which in turn draws from other slicers. Thanks to the open-source movement, slicer software has improved drastically in recent years. As a result, we can find many sophisticated features in the latest CrealityPrint slicer software.
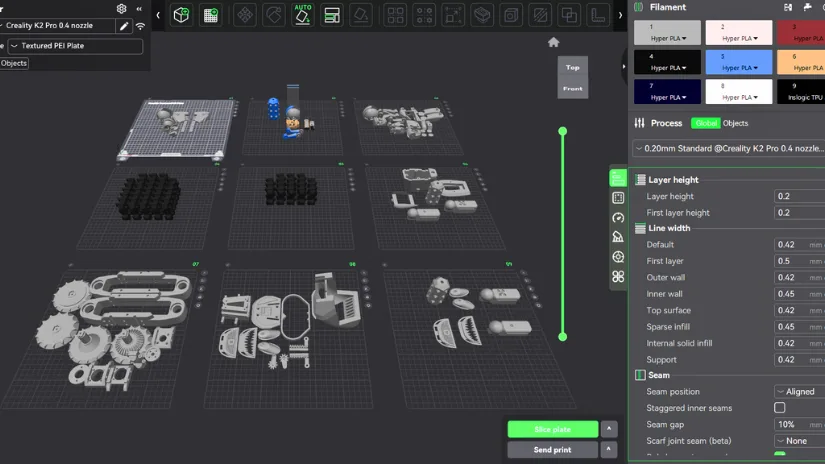
– Add Plate. With a large project like the DeathRacer robot tank, I found it very convenient to save multiple build plate setups within a single project. Jumping from plate to plate is easy, allowing me to arrange parts by type, color, or even material. This workflow is far less confusing than managing a collection of separate saves and keeps everything organized under one project file.
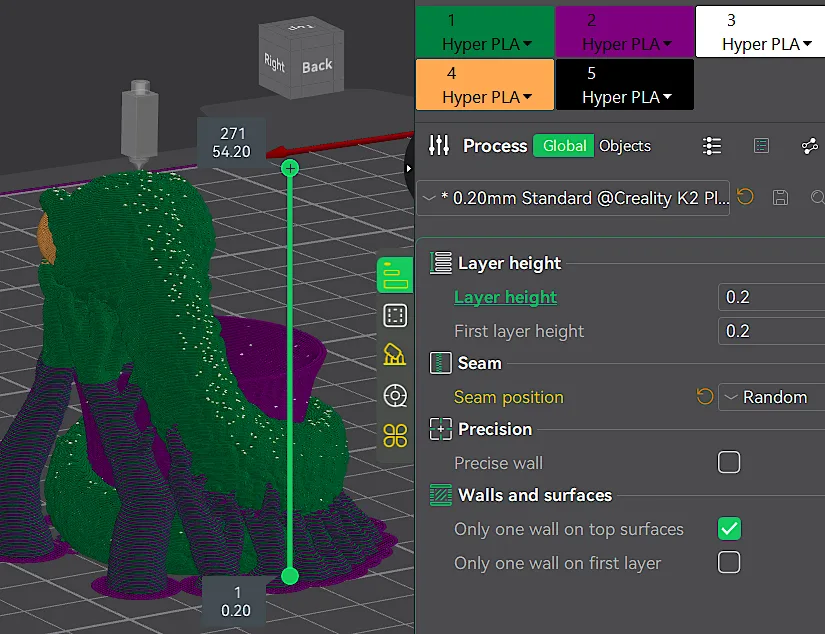
– Color Panting. A few projects involving color painting and multicolor printing provided a clearer understanding of how the system functions. This included fine-tuning settings such as recalculating the Flush Multiplier to reduce color bleed, along with other adjustments. Featured above is a 3D avatar getting ready for an 8-color print.
– Custom Supports and Seams. All these features are easily accessible via CrealityCloud. As the Orca slicer is very popular in the community, finding tips or tutorials on a particular feature is easy by searching on Google or asking AI.
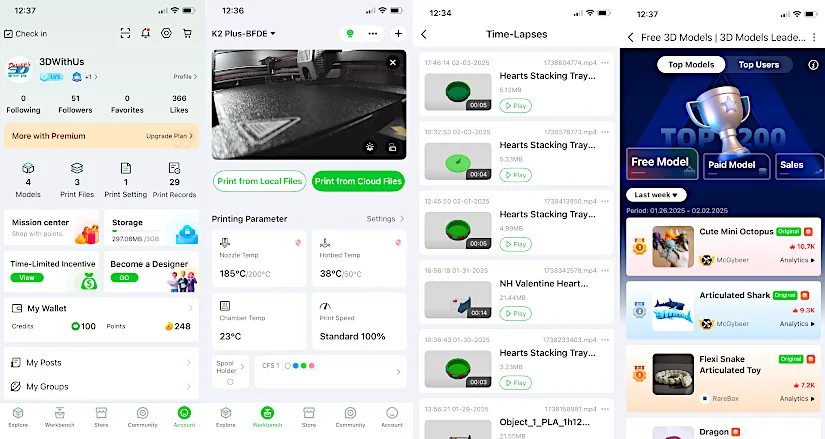
Creality Cloud App
The more I use the Creality Cloud App, the more I appreciate it. Checking the live stream of long prints has quickly become a regular habit, giving peace of mind during extended runs. My only struggle has been locating and downloading the completed time-lapse videos. The confusion came from trying to retrieve clips when the machine was powered off, it needs to be ON.
– Live Camera. A great feature for monitoring 3D printing live and recording timelapse. After the print is successful or unsuccessful, there is an option to watch and download the video. Nice feature, worked well on K1 and K2 Plus as well.
Account, Workbench, and Community Tabs
– AI Detection. The Creality K2 Plus features AI Detection, an intriguing new capability.
– CrealityCloud. It’s noticeable that the CrealityCloud website is improving and expanding. The Creality community is growing, and we’re seeing popular designers like McGyBeer and others join with their vast, high-quality model collections. After a few attempts, I managed to get one of the 3DWithUs models submitted and approved as a paid model. I anticipate that the community will continue to grow, especially as Creality’s multicolor printers become more widely available. There is a clear demand for existing, flawlessly working GCode files.
Testing and Results
8 Colors Print Result – CubeMe Avatar
To push the K2 Pro’s multicolour capabilities, I used one of the AI MakeNow Generators on Creality Cloud. I turned my existing 2D image, taken while visiting a tradeshow, into a model — and to my delight, it worked very well.
©3DWithUs – Print & Photo: Max Funkner
– 8 Colors: 1) Black – hair, eyebrows, eyes; 2) Light pink/peach – skin; 3) White – eyeballs, teeth; 4) Grey – main jumper; 5) Beige – badge, belt, thick shoe sole; 6) Brown – bag, underneath T-shirt, shoe soles; 7) Blue – 3DWithUs logo; 8) Dark blue – trousers.
– Blender. After my initial run in signle color, grey PLA, I realized that the bag’s belt needed some intervention. Using Blender, I thickened the belt and also added 3DWithUs logos to both the bag and the tradeshow badge for extra detail.
– Tips. Definitely print any model in a single colour first. Even then, there can be challenges with ultra-small details. For example, tiny features like teeth may not come out well if the model is scaled down too much.
This 20-hour print genuinely pushed the K2 Pro’s multicolour capabilities. With 541 filament changes, it was a demanding test — yet the printer handled it impressively, delivering desirable end result. It’s the kind of stress test that shows the machine is not only capable on paper but also in real-world scenarios.
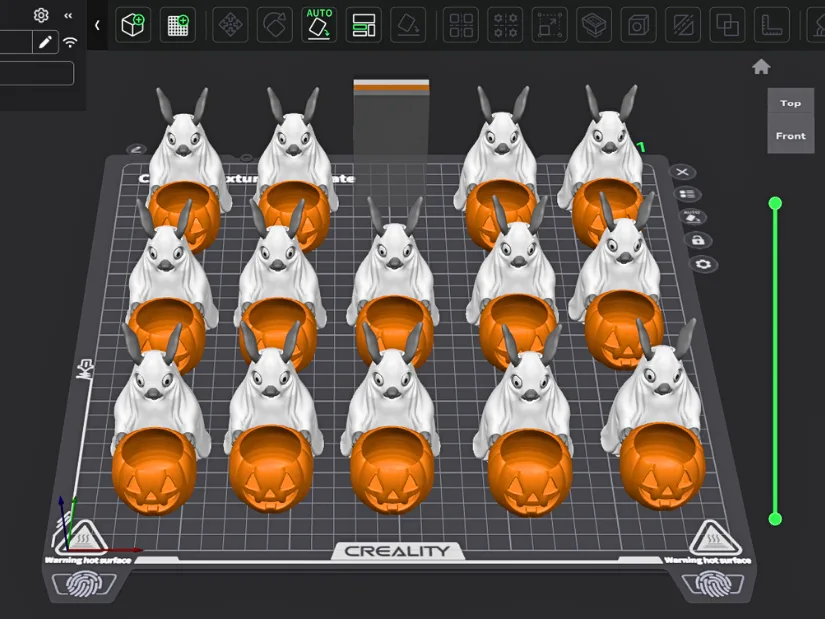
6 Colors Print – Convenience Example
The next print was much less challenging, yet it also made good use of the multi-CFS setup. As mentioned earlier, having the ability to print with multiple colours — up to 16 when using four CFS units — can be very convenient in specific scenarios. One such case is when an existing tuned model only needs a quick adjustment in colour shades without altering the geometry.
©3DWithUs – Print & Photo: Max Funkner
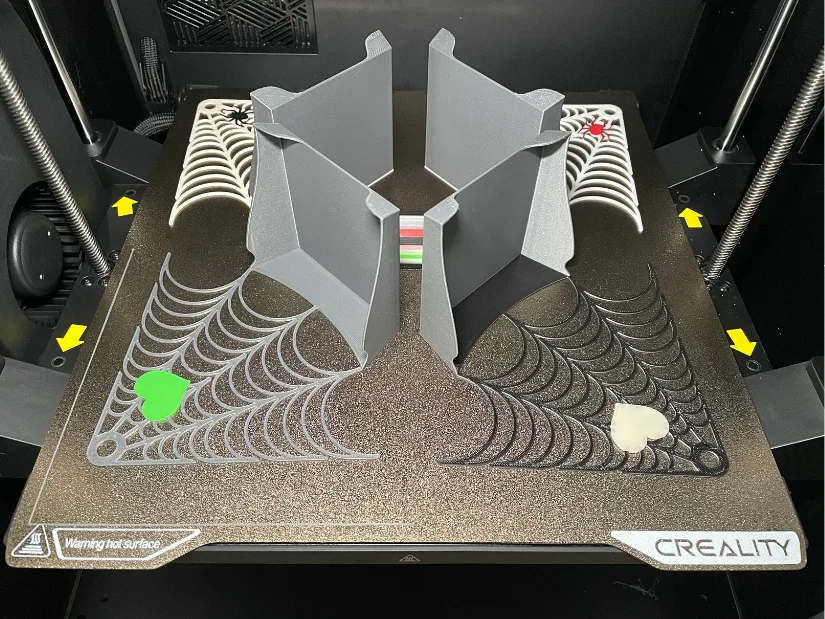
As an example, I prepared four Halloween-themed note holders and assigned different colour combinations. This particular run used six colours, but expanding it to eight or more would have been just as straightforward. CrealityPrint’s colour painting feature made it easy to assign specific shades to each section of the models.
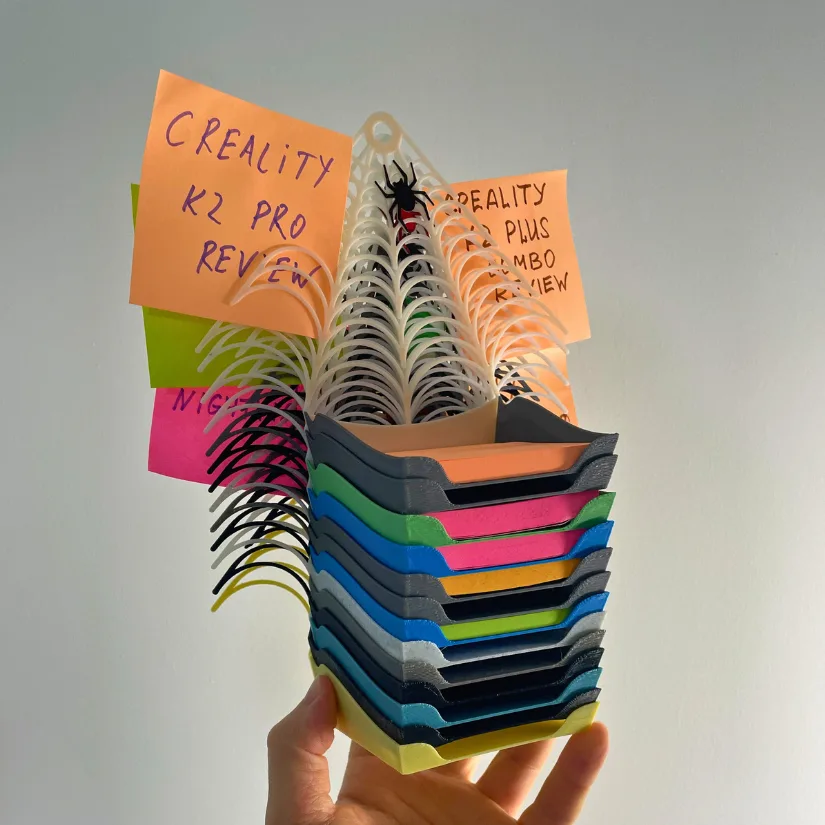
I may even consider selling these to a prop shop at some point. As you can see, testing printers often results in quite a collection of samples, and in this case, the stackable design makes them both practical and functional objects.
Filament Waste and Batch Printing
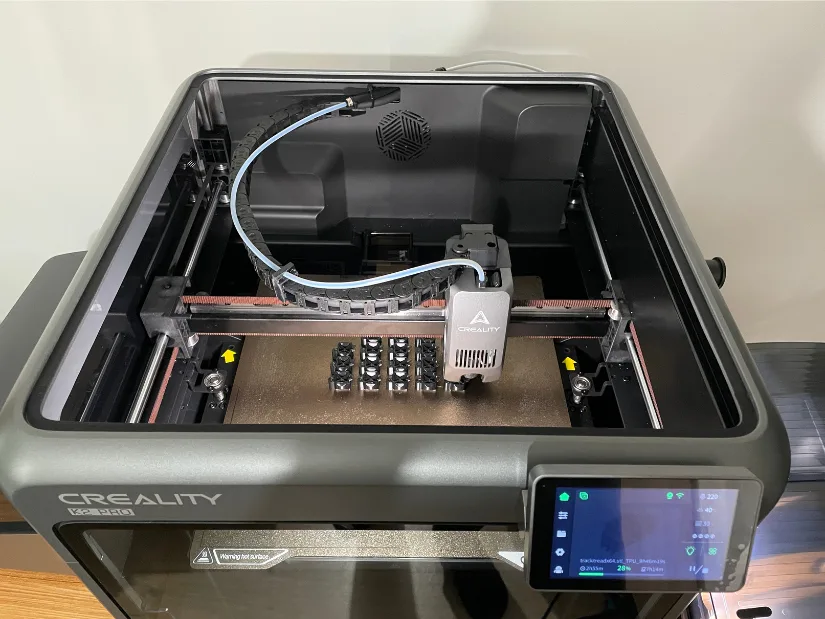
As part of testing, I printed a few more miniature models using a single CFS (up to 4 colors). One of them was the Snake Toy/Pot/Planter — a fun, compact print that took around 8 hours to complete.

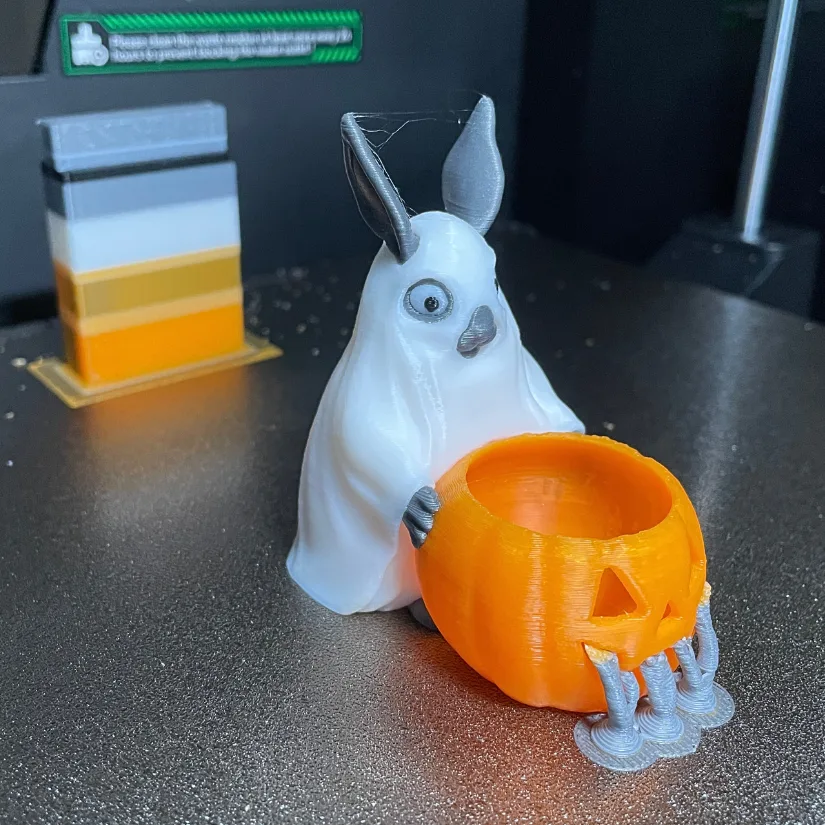
Another example was a remix of our popular Easter Bunny Toy/Pot/Planter, adapted into a Halloween-themed version. This more color changes design required 12 hours of print time.
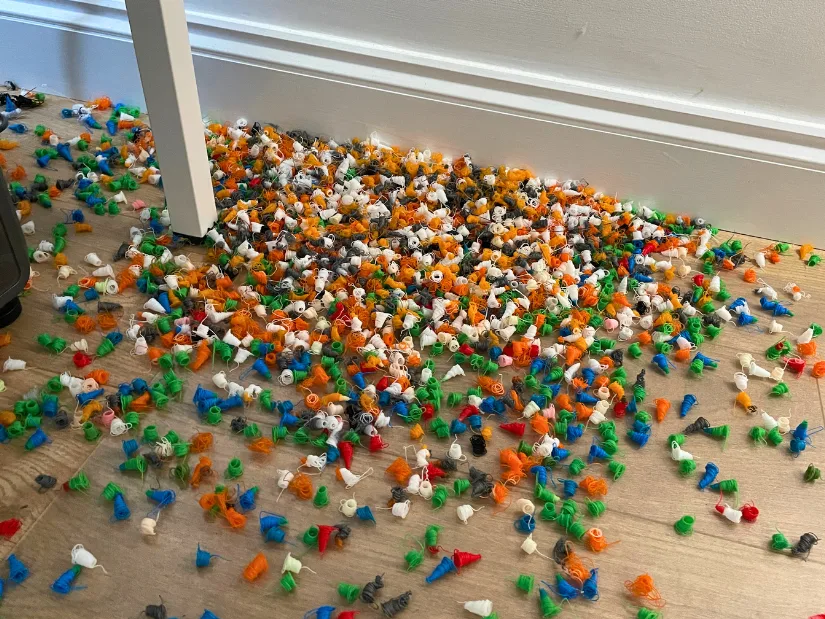
The color changes naturally produced a lot of waste purges, and in some cases similar shades could be combined to reduce this. Another way to justify the material use is by filling the entire build plate with multiple models at once. For example, printing a whole family of 3D avatars in one go could make efficient use of the process, especially if creating custom characters for board games or collectible figurines.
©3DWithUs – Photo: Max Funkner
Another advantage of batch printing is that the time penalty is relatively small. If one figurine takes around 12 hours to print, adding a second one to the same build plate may add only about an hour, depending on the model size. In practice, when I placed ten bunnies on the print bed, the total print time increased by only about ten hours. This makes full-plate printing a much more efficient approach when producing sets of customized models.
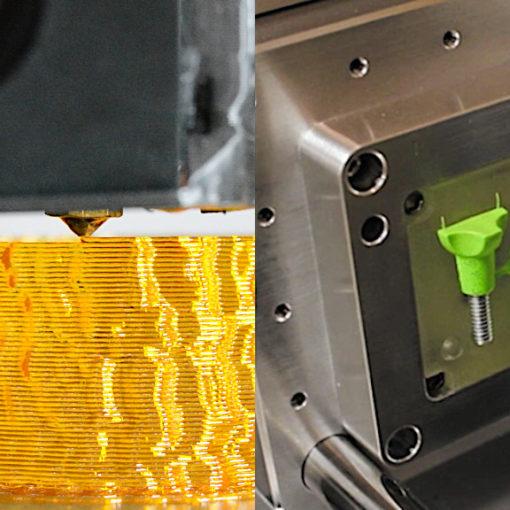
Treads for DeathRacer Robot in TPU
To challenge the K2 Pro further, I decided to print 64 track treads in Inslogic black TPU 95A for the much-loved community project, the DeathRacer Robot. In order to take part in DeathRacer competitions, the robot’s tank parts should be entirely 3D printed. You can follow the progress of my build on the forum, with the complete article coming soon.
When setting up the treads, I was astonished but grateful that a slightly modified Creality HP-TPU preset worked slowly yet very reliably. Compared to PLA presets, a batch like this would have printed roughly twice as fast, but with flexible TPU it’s better to take things slowly for consistent results.
As recommended, I dried the TPU in the SpicePi X4 while printing simultaneously. The Creality filament dryer performs very well, and its airtight containers preserve humidity level overnight. This meant the second batch could start immediately the next day without any delay.
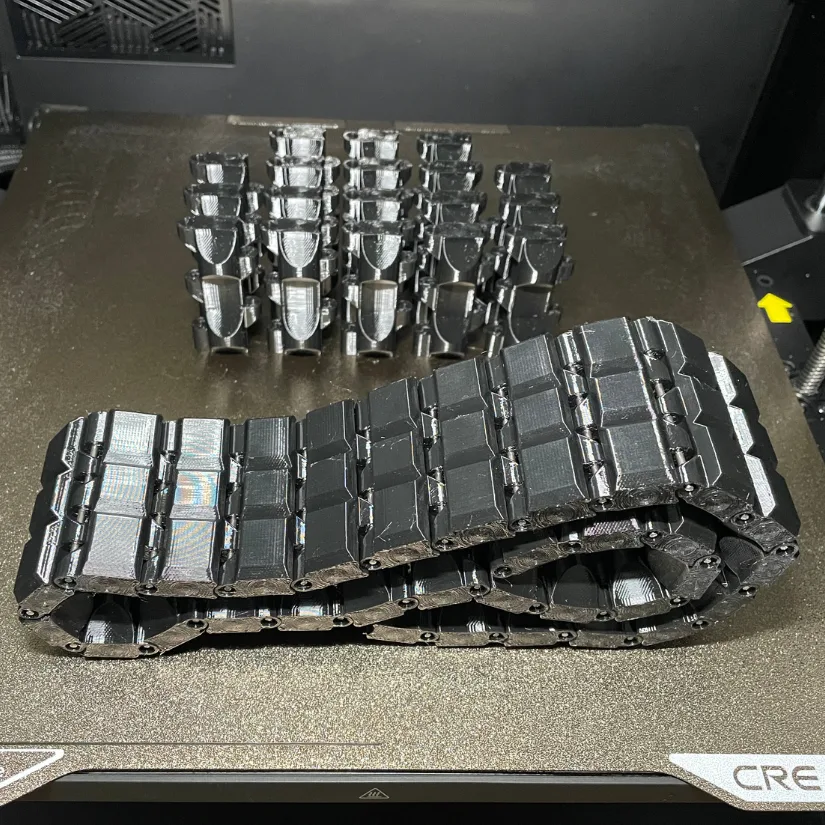
©3DWithUs – Print and Photo: Max Funkner
The performance of these treads will be tested later during functional trials and ultimately at the DeathRacer competition in March 2026 at the SMRRF trade show. For now, I’m definitely pleased with how cleanly this multi-part project printed — no stringing or other issues across all batches.
Brackets in PC-ABS
To test how the Creality K2 Pro handles engineering-grade materials, I printed a set of shelf brackets in PC-ABS. Thanks to the heated chamber, high-temperature nozzle, and textured PEI build plate, the printer coped very well with this demanding filament, delivering strong parts with minimal warping. You can read more about PC-ABS and similar materials in our engineering-grade filaments guide.
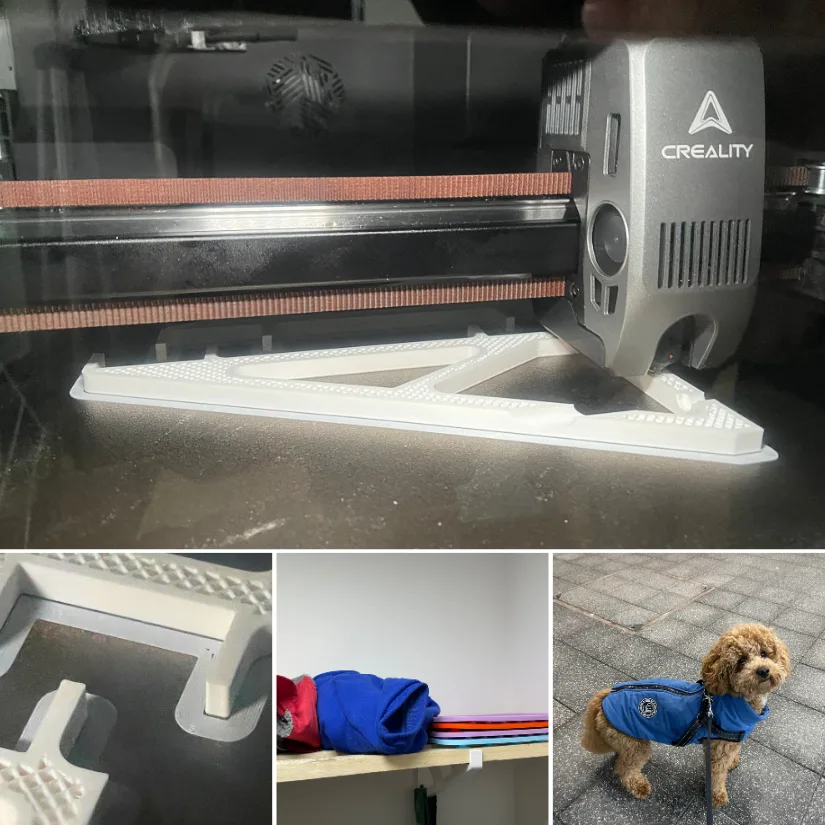
©3DWithUs – Print and Photo: Max Funkner
These brackets are based on Joel Telling’s shelf bracket design, which then modified to fit the specific wooden planks used for Teddy’s clothes shelf. The PC-ABS prints feel reassuringly solid in hand and are a good real-world example of what the K2 Pro can do with engineering-grade materials.
Vase Mode in PA12-CF
Another engineering-grade material tested on the Creality K2 Pro is PA12-CF by Inslogic. It looks nice, and the finish resembles popular galaxy composite filaments. I’m not sure if such material properties will greatly reinforce such a model, but it was interesting to see the result. With the default 0.4 mm nozzle, this vase is still very fragile.
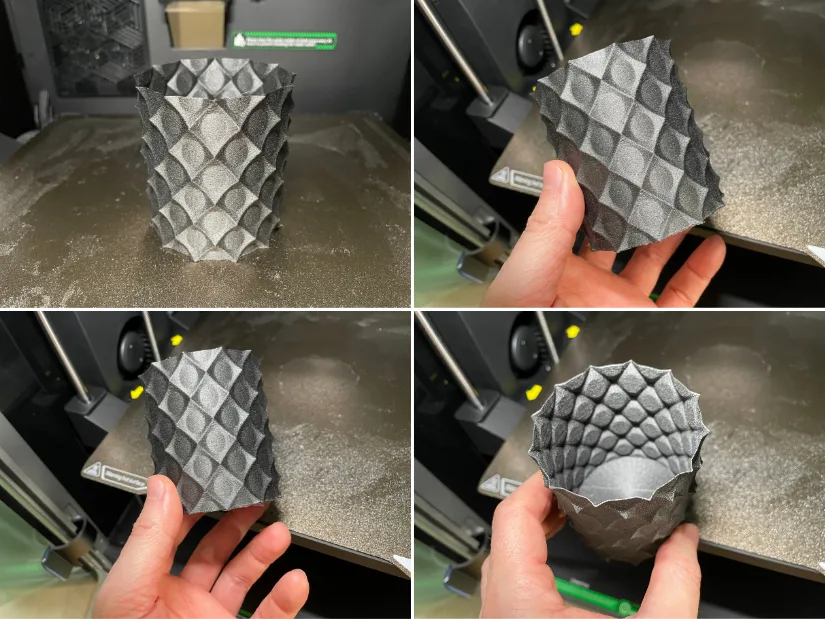
©3DWithUs – Print and Photo: Max Funkner
There is a big collection of anti-sphere vases available on Printables. Marcidi shared this collection on our forum. This is the default size. For functionality, such as a rubbish bin or a vase for dry flowers, I would print it bigger and with a larger nozzle.
Compare Creality K2 Pro Combo to Other 3D Printers
On 3DWithUs we have already tested machines such as the Creality K2 Plus Combo (CoreXY with a larger build volume) and the Creality Hi Combo bedslinger with competitive pricing.
We recommend checking these articles, especially the print examples, to help make a comprehensive decision.
You can also compare the K2 Pro to similar builds, volumes, and price ranges in our guide to FDM 3D printers on 3DWithUs.
In terms of price, build, and features, the Creality K2 Pro Combo competes directly with products like the Bambu Lab H2D Combo and the Anycubic Kobra S1 Combo. Against the H2D, the K2 Pro comes in at a lower price point. Compared with the Kobra S1 Combo, the K2 Pro offers more advanced features such as a heated chamber and support for engineering-grade materials. QIDI Plus4 also includes a heated chamber, but their multicolor system is still in development. Finally, the emerging tool-changer Snapmaker U1 is a serious competitor, but when it comes to printing in more than four colors — up to 16 with the CFSs — along with the benefits of enclosure and chamber heating, the K2 Pro can hold a strong advantage in decision making.
©3DWithUs – Print and Photo: Max Funkner
Have questions? Feel free to ask in the comment section below.
For a wider discussion or to share your own K2 Plus prints, join us in the forum:
Conclusion and Pros & Cons
Compare the Prices & Bundles:
Official Website | Amazon
Creality K2 Pro Review
Review Summary
The Creality K2 Pro is a solid step forward in the K2 series. I was pleased to see several thoughtful improvements, including the expanding of the waste filament “poop” chute, which makes multi-color printing far more manageable. The overall design and usability show that Creality is listening to feedback and refining the machine in meaningful ways.
Having tested an 8-color, 20-hour CubeMe print, I’m confident the system can scale up to all 16 colors when needed. The multicolor performance was reliable, and the CubeMe avatar result was nothing short of mind-blowing — a real demonstration of how far consumer multicolor 3D printing has come.
After 40+ hours printing in TPU for functional parts I am also confident K2 Pro can handle tricky materials. The next stage will be testing with engineering-grade materials, following the positive experience I had with the K2 Plus. This article will be updated with those results, ensuring a complete view of the printer’s full potential.
Pros
– Reliable multicolor system (up to 16 colors with optional CFS units)
– High print quality across materials and projects
– CrealityPrint slicer with useful project management and color painting tools
– Creality Cloud app with live monitoring and time-lapse features
Cons
– Filament waste with certain multicolor projects
– Higher price point, reflecting the build quality of K2 machines


Any early indications about capability with engineering grade materials?
Do the slightly lower temperatures than the plus present any concerns?